Lập trình Wrox Professional Xcode 3 cho Mac OS part 20 pps
Bạn đang xem bản rút gọn của tài liệu. Xem và tải ngay bản đầy đủ của tài liệu tại đây (3.07 MB, 10 trang )
8
Searching
WHAT'S IN THIS CHAPTER?
Searching and replacing text in a single fi le
Searching and replacing text across multiple fi les
Using advanced search patterns
Using search history to repeat searches and revisit results
Learning search shortcuts and tricks
A lot of development is spent just looking for things: fi nding all occurrences of a particular
constant, looking for a message in a string, fi nding where a family of symbols is defi ned, and
so on. Learning to use Xcode ’ s fi nd and replace features can save you a lot of tedious work.
Xcode provides fi ve basic facilities for fi nding, and potentially replacing, text and code
defi nitions in your project:
Single fi le search
Multi - fi le search
Defi nition search
Syntax - aware refactoring
Edit All in Scope
Taking the last two fi rst, the Edit All in Scope feature was described in the “ Editing Symbol
Names ” section of Chapter 7. Refactoring, which can change (aka fi nd and replace) symbol names
intelligently, is described in Chapter 10. All of the remaining tools are described in this chapter.
Single and multi - fi le search tools search the text fi les in your project for text patterns or regular
expressions, and optionally replace them, either individually or en masse . You can also search
your project ’ s symbol defi nitions (Code Sense index) intelligently to locate the code that defi nes
a symbol.
➤
➤
➤
➤
➤
➤
➤
➤
➤
➤
c08.indd 151c08.indd 151 1/22/10 12:27:47 PM1/22/10 12:27:47 PM
Download at getcoolebook.com
152
❘
CHAPTER 8 SEARCHING
Xcode keeps a history of your searches and their results, making it easy to repeat a search or revisit
the result of a former one. Finally, a lot of shortcuts and tricks exist for performing all kinds of fi nd
and replace actions swiftly and effortlessly.
SEARCHING AND REPLACING TEXT IN A SINGLE FILE
The single fi le search bar appears at the top of the active editor pane whenever you choose either the
Edit ➪ Find ➪ Find (Command+F) or the Edit ➪ Find ➪ Find and Replace (Control+Command+F)
command, as shown in Figure 8 - 1.
FIGURE 8-1
The search bar has two modes: the fi nd mode appears when you choose the Find command. The
replace mode appears when you choose the Find and Replace command. You can change between
modes using the pop - up menu on the left, or by choosing one of the alternate search commands.
Dismiss the search bar by clicking the Done button or pressing the Esc key.
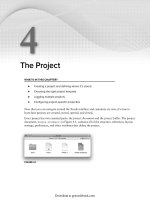
Setting Search Options
The search bar contains a search pattern fi eld, previous and next match buttons, a search options
menu, and clear button, all shown in Figure 8 - 2.
c08.indd 152c08.indd 152 1/22/10 12:27:50 PM1/22/10 12:27:50 PM
Download at getcoolebook.com
Type the text pattern you want to fi nd in the search fi eld and use the next or previous button to
jump to the next (or previous) occurrence of that pattern in the fi le. The commands Edit ➪ Find ➪
Next (Command+G) and Edit ➪ Find ➪ Previous (Shift+Command+G) are synonymous with the
next and previous buttons, respectively.
The search menu, also shown in Figure 8 - 2, has a number of options that control the search
behavior and how the search pattern is interpreted, as shown in the following table.
SEARCH OPTION EFFECT
String Matching Search pattern is a literal string.
Regular Expression Search pattern is a regular expression.
Ignore Case Letters in the search pattern match both upper - and lowercase text.
Wrap Around If there are no more occurrences of the search pattern in the fi le, the
next and previous commands continue searching from the beginning or
end of the fi le, respectively.
Contains Search string matches any sequence of text in the fi le.
Starts With Search string only matches text that starts at a word boundary.
Whole Words Search string only matches text that starts and ends at word
boundaries.
Ends With Search string only matches text that ends at a word boundary.
Recent Searches A menu of recent search patterns.
Clear Recent Searches Clears the Recent Searches menu.
FIGURE 8-2
Searching and Replacing Text in a Single File
❘
153
c08.indd 153c08.indd 153 1/22/10 12:27:51 PM1/22/10 12:27:51 PM
Download at getcoolebook.com
154
❘
CHAPTER 8 SEARCHING
The String Matching and Regular Expression options are mutually exclusive. The word
boundary options (Contains, Starts With, Whole Word, and Ends With) apply only to String
Matching. Regular Expression searches can also be restricted to word boundaries, but you ’ ll
have to include that as part of the regular expression. Read more about regular expressions in
the “ Regular Expression Search ” section later in this chapter.
Replacing Text
Switching the search bar to replace mode adds a replacement text fi eld and three new
buttons: Replace All, Replace, and Replace & Find. These buttons are equivalent to the
commands Edit ➪ Find ➪ Replace All, Edit ➪ Find ➪ Replace, and Edit ➪ Find ➪ Replace
and Find Next. Holding down the Shift key reverses the direction of both the Replace
and Find Next command and button. The commands and their effect are listed in the
following table.
COMMAND EFFECT
Replace All Replaces all occurrences of the pattern with the contents
of the replacement text fi eld. The current text selection is
ignored.
Replace Replaces the current text selection with the replacement
text fi eld. The current selection, or insertion point, doesn ’ t
have to match the search pattern; it ’ s unconditionally
replaced.
Replace and Find Next/Previous Perform a Replace, and then fi nd the next (or previous)
occurrence of the search pattern.
All replacements performed by Replace All occupy a single step in the fi le ’ s undo history.
Performing an Edit ➪ Undo immediately afterwards restores all replaced text with
the original pattern. Replace and Replace and Find Next/Previous replace one occurrence at
a time.
If you searched for text using a regular expression, you may want to read the section “ Replacing
Text Using Regular Expressions ” later in this chapter.
SEARCHING AND REPLACING TEXT IN MULTIPLE FILES
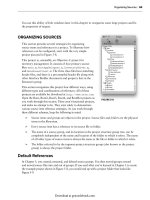
Every open project has a single Project Find window. Choose the Edit ➪ Find ➪ Find In Project
(Shift+Command+F) command to open the Project Find window for the active project. The Project
Find window, shown in Figure 8 - 3, consists of three principal parts.
c08.indd 154c08.indd 154 1/22/10 12:27:52 PM1/22/10 12:27:52 PM
Download at getcoolebook.com
At the top of the window are the search and replace options. The middle pane displays a summary
of search results. The bottom pane is an editor that jumps to a selected search result.
The fi nd and replace fi elds, search options, and buttons are functionally equivalent to those in the
editor ’ s search bar. In addition, there are controls to select the set of fi les to be searched along with
some special search options.
To the right of the Find and Replace fi elds are three pop - up menus. The top one selects the batch
fi nd options set to use, which essentially determines the set of fi les to search. Normally, this is set to
In Project, which searches all of the source items in the project. The Options button lets you alter
the batch fi nd options and defi ne your own sets. Batch fi nd options are described later in the section
“ Batch Find Options. ”
The middle pop - up menu selects how the Find fi eld is interpreted and can be set to one of:
Textual
Regular Expression
Defi nitions
Symbols
The fi rst two choices, Textual and Regular Expression, are the same as the String Matching and
Regular Expression search options described earlier for single fi le searches. In addition, you can
search your project ’ s Code Sense index for defi nitions or symbols. Those search types are described
later in the “ Symbol Search ” section.
The bottom pop - up selects between the four textual search modes: Contains, Starts With, Ends
With, and Whole Words. Like the single fi le search, word boundary options apply to all search
types except Regular Expression. The Ignore Case option works the same way it does in the editor ’ s
search bar.
➤
➤
➤
➤
FIGURE 8-3
Searching and Replacing Text in Multiple Files
❘
155
c08.indd 155c08.indd 155 1/22/10 12:27:52 PM1/22/10 12:27:52 PM
Download at getcoolebook.com
156
❘
CHAPTER 8 SEARCHING
Finding a Pattern in Multiple Files
Once you ’ ve entered a search pattern in the Find fi eld and selected the relevant options, the Find
button searches for every instance of the search pattern in every fi le of the fi le set. There is no
direction (for example, forward or backward); a project fi nd is a single, monolithic search that
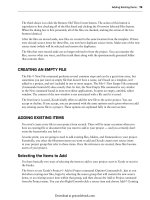
produces a list of matches. The results of the search are normally displayed in the middle pane of the
window, as shown in Figure 8 - 4. If they are not, make sure the Display Results in Find Smart Group
option is not checked. This option is described later in the “ Find Results Smart Group ” section.
FIGURE 8-4
Every fi le that contains the search pattern is listed in the results pane as a group. The individual
lines within each fi le that match the pattern are listed below each fi le. Use the disclosure triangle
next to the fi le to collapse or expand the group, temporarily hiding all of the “ hits ” in a specifi c fi le.
The text that matched the search pattern is displayed in bold text. A single line may appear more
than once if the search patterns occurred several times in that line.
Select any line in the search results list and the matching text is immediately displayed in the editor
pane at the bottom of the window. You can resize the divider between the list and the editor pane,
or collapse it by double - clicking it. This is a full - featured editor pane, supporting all of the built - in
editing features described in Chapter 6 — including its own single fi le search bar.
TIP TO REMEMBER
Y ou can “ peek ” at an excessively long line — one that extends beyond the right edge
of the window — in the search results list by hovering your cursor over the line.
Recalling an earlier search pattern from the search history also recalls the
search results for that pattern. See the section “ Search History ” for more about
recalling previous search patterns.
c08.indd 156c08.indd 156 1/22/10 12:27:53 PM1/22/10 12:27:53 PM
Download at getcoolebook.com
With the search results pane active, the up and down arrow keys move from one search result to the
next, allowing you to skip quickly to each found pattern, revealing its context in the editor pane.
Replacing Text in Multiple Files
The Replace button replaces some or all of the occurrences listed in the fi nd results with the text
in the Replace fi eld. Regular Expression searches can use replacement variables (see the section
“ Replacing Text Using Regular Expressions ” later in this chapter). The selected text lines in the
results list determine which occurrences are replaced. If no source lines are selected, all listed
occurrences are replaced. If one, or more, text lines is selected, only those occurrences are replaced.
Note that selecting a fi le group in the list has no effect and is not considered an occurrence. Use the
Edit ➪ Select All command to select all visible (not collapsed) lines in the results list. Select a subset
using the Shift and Command keys while clicking lines in the list.
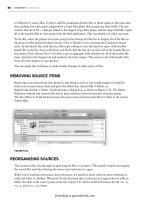
Clicking the Replace button presents a dialog box like the one in Figure 8 - 5. Make a habit of
reading the confi rmation dialog box before committing to the replace. It is very easy to accidentally
replace all occurrences when you just wanted to replace one, or a subset of the occurrences when
you wanted to replace them all. The latter usually happens when you perform a search, browse the
results (leaving text lines in the results list selected), and then perform the replace — mistakenly
thinking that Xcode will replace them all.
FIGURE 8-5
Batch Find Options
Which fi les the Find command in the Project Find window searches for is determined by the batch
fi nd options. Batch fi nd options are stored in sets. You select a set using the top pop - up menu
control in the Project Find window. By default, the set is In Project. This set searches all of the fi les
referred to by the project, excluding those in frameworks. Clicking the Options button presents the
Batch Find Options window, shown in Figure 8 - 6.
Searching and Replacing Text in Multiple Files
❘
157
c08.indd 157c08.indd 157 1/22/10 12:27:59 PM1/22/10 12:27:59 PM
Download at getcoolebook.com
158
❘
CHAPTER 8 SEARCHING
The batch fi nd options set you are modifying is controlled by the Find Sets pop - up menu at the top
of the window. Be careful: the Find Sets selection usually defaults to the set you have selected in the
fi nd window, but might not. After clicking the Options button, fi rst make sure you are editing the
correct set before changing anything.
Batch fi nd options sets are global; changing the settings for an existing set
changes its defi nition for all projects. The best advice is never to change any
of the settings in the predefi ned sets — changing the “ In Project ” set to search
frameworks really defeats the purpose of having a set named “ In Project. ” If you
want to defi ne a special set of options, create a custom set; it ’ s easy to do.
Create additional batch fi nd options sets using the Add button at the top of the window. Give the
new set a name and then edit its settings as you see fi t. Remember that editing a set doesn ’ t alter
the set selected in the Project Find window. After you ’ ve created a new set, remember to select that
set in the Project Find window in order to use it.
The Delete button deletes the current batch fi nd options set. There is no confi rmation; the set is
deleted immediately and permanently for all projects.
The four check boxes at the left enable one of four sets of fi les; the union of those sets defi nes the
complete set of fi les that will be searched — subject to some additional fi ltering. The possible sets are:
The Search in Open Documents option includes any fi le open in any editor pane.
The Search in Open Projects option includes fi les to which open projects refer. Which fi les,
and from which projects, is defi ned by the next two radio button groups.
➤
➤
FIGURE 8-6
c08.indd 158c08.indd 158 1/22/10 12:27:59 PM1/22/10 12:27:59 PM
Download at getcoolebook.com
The fi rst group determines which fi les are included, and can be set to Selected Files
in This Project, All Files in This Project, All Open Projects, or This Project and
Referenced Projects. Normally, it is set to All Files in This Project and only searches
the fi les in the current project. If you typically work with multiple projects that are
related, using All Open Projects or This Project and Referenced Projects lets you
search the fi les in all open or related projects. Selected Files in This Project requires
that you fi rst select the specifi c fi les you want to search in the project source group.
The second radio button group considers whether the project source fi le reference
is part of a framework. Project Files and Frameworks includes all source fi les to
which the project refers, including all of the source fi les in any frameworks. Project
Files Only excludes the headers and source fi les contained in frameworks.
Frameworks Only searches only the headers and source fi les in the frameworks,
ignoring the source fi les of the project itself.
The Search in Included Files option adds any fi les included by fi les to the set.
The Search in Files and Folders option adds the arbitrary list of fi les and folders immedi-
ately underneath the option to the set. Add a fi le or directory by clicking the plus (+) button
below the list, or simply drag fi les and folders into the list. Remove items from the list by
selecting them and clicking the minus ( – ) button or pressing the Delete key. Each batch fi nd
options set has its own list of additional fi les.
On the right are fi ltering options that refi ne the set of fi les to search:
The All Candidate Files option doesn ’ t exclude any fi les; it searches all of the text fi les
defi ned by the other options.
The Source Files Only option limits the search to candidate fi les that contain source code.
Text fi les such as documentation, RTF, XML, and HTML are skipped.
The Filter Files Using regex Patterns option allows you to fi lter the candidate set of fi les by
fi lename and extension using regular expressions.
When fi ltering using regular expressions, each enabled (checked) regular expression in the patterns
list is applied to each candidate fi lename. If the fi lename matches all of the checked expressions, it ’ s
included in the search. If not, it ’ s ignored. The key points to keep in mind when editing the regular
expression pattern list are:
The pattern list is global. Changing a pattern ’ s defi nition changes it for every batch fi nd
options set in every project.
A batch fi nd options set uses only those patterns that are enabled (checked) for that set.
Each set remembers which patterns it uses.
A candidate fi lename must match
all o
f the checked patterned. In other words, the set of
fi les to search is formed by the intersection (logical AND) of the fi le sets defi ned by each
regular expression.
The Include/Exclude option inverts the sense of the regular expression: when set to Include,
a fi le is a member if it matches the expression. When set to Exclude, a fi le is a member if it
does not match the expression.
➤
➤
➤
➤
➤
➤
➤
➤
➤
➤
➤
Searching and Replacing Text in Multiple Files
❘
159
c08.indd 159c08.indd 159 1/22/10 12:28:03 PM1/22/10 12:28:03 PM
Download at getcoolebook.com
160
❘
CHAPTER 8 SEARCHING
Add a pattern to the list using the + button below the list; remove patterns using the - button. Check
the pattern (to enable it), and then double - click the pattern to edit it, as shown in Figure 8 - 7.
FIGURE 8-7
Each batch fi nd options set remembers which patterns it uses, but the patterns
themselves are a global list, shared by all sets of every project. This allows you to
share patterns with other sets and projects easily, but also means that if you edit
a pattern you ’ re changing the rule for every batch fi nds options set everywhere.
When in doubt, create a new pattern.
To the left of each pattern is the Include/Exclude control that determines whether the pattern must
match (or not match) a fi lename to be included in the set.
For a fi le to be included in the search, its name must satisfy all of the checked regular expression
patterns in the list. If the list has the two patterns Include \.m$ and Include \.h$ both checked,
then no fi les will be searched; there is no fi lename that will match both \.m$ and \.h$ . In general,
use at most one Include pattern to defi ne the principle group of fi les to consider, and then use
additional Exclude terms to winnow out unwanted fi les.
SEARCH PATTERNS
The various Find commands all apply a search pattern to the text of your fi les in order to fi nd the
text that matches the pattern. Xcode gives you a lot of fl exibility in specifying the parameters of
your search, from a simple, unanchored literal text string to complex regular expressions. This
section describes some of the fi ner points of the three kinds of search that Xcode performs.
c08.indd 160c08.indd 160 1/22/10 12:28:03 PM1/22/10 12:28:03 PM
Download at getcoolebook.com