Tìm Hiểu về Wordpress - part 16 pps
Bạn đang xem bản rút gọn của tài liệu. Xem và tải ngay bản đầy đủ của tài liệu tại đây (860.68 KB, 10 trang )
137
9. Check the les. Once you have found that perfect plugin, check its files
carefully. Look for anything that seems out of place. Are there extraneous files?
Is documentation included? Examples?
10. Check the code. If you understand PHP, (X)HTML, CSS, and/or JavaScript,
take a good look at the code and do your best to see if everything is legit.
Keep an eye open for anything that cries foul, such as spam links, unreasonable
licenses, and so on.
While you may not need to perform all of these steps for every plugin you use,
keeping these things in mind will help you to choose a perfect collection of plugins
for your site. Again, the key to maximizing your experience with a plugin involves
taking the time to research and understand its purpose and functionality.
5.2.1 Plugin Usage and Maintenance
Contrary to popular belief, plugins are not simply set-it-and-forget fixes for
WordPress. As convenient and easy as many plugins happen to be, most still require
initial configuration, periodic maintenance, regular updates, and occasional
troubleshooting and tweaking. In this section, we examine some helpful tips for
optimizing plugin usage and maintenance.
5.2.2 Sequential Installation
One of the best pieces of advice that we can give as you begin adding new plugins
to your WordPress site is to do so sequentially, one at a time. Installing your plugins
one at a time gives you the opportunity to test your site for proper functionality.
This enables you to know immediately if the plugin is compatible with your site
or not. Installing 20 plugins all at once only to discover afterwards that your site
is broken requires you to go back through each plugin, one-by-one, to determine
the source of the issue. Thus, you will save time, stress, and a big headache by
meticulously installing your plugins in an organized, sequential fashion.
Shady plugins
From time to time reports
surface of plugins that contain
malicious code. Most plugins
are completely ne, but always
keep an eye out for suspicious-
looking code. If you are not
sufciently familiar with code
to know the bad stuff when
you see it, take some time to
research the plugin you are
about install. 99% of the
time you’re cool, but it’s better
safe than sorry.
138
5.2.3 Keep Plugins Up-To-Date
One of the best ways to ensure a smooth experience with your plugins is to
keep them up-to-date. The easiest way to stay current is to keep an eye on your
WordPress Admin area. Whenever an update for a plugin (or for WordPress itself)
is available, you will see a notice displayed on your various Admin pages. Once you
see that an update is available, there are essentially two ways to go
about upgrading:
Automatic upgrades
For versions of WordPress greater than or equal to 2.5, site administrators may
upgrade their plugins automatically by clicking on the plugin’s upgrade link on
the Plugin Admin page. WordPress 3.0 and beyond even has bulk updating to do
everything at once. For users of WordPress versions less than 2.5, the WordPress
Automatic Upgrade Plugin provides this same automatic-upgrade functionality and
much more. In either case, the point is that with automatic upgrades, there is no
excuse for not upgrading your plugins.
Manual upgrades
Taking the time to manually upgrade your plugins provides a much greater
degree of control over the entire process than possible with automatic methods.
Maintaining control over the upgrade process is especially important for plugins
that you may have customized, and also for expedient diagnosis and resolution of
any issues that may arise.
New versions of plugins often include new files, options settings, or changes to
existing settings that may interfere with normal site performance. Further, plugin
updates sometimes require complete un-installation of previous versions or even
additional steps in order for proper installation to occur. Manually upgrading your
plugins eliminates potential problems by giving you full control.
Know thy files
If you are automatically
updating your plugins and/or
core les through the Admin (or
any other method), it is wise
to remember that the les on
the server will be newer than
the ones on your local machine.
This may sound obvious, but
much confusion and many
errors may be avoided by
not overwriting updated les
with older ones. A good way
to prevent this is to either use
some sort of a version control
system (such as Subversion),
or else play it safe and go with
the manual-update method.
Automatic upgrading is only
for plugins hosted in the ofcial
plugin repository. Another good
reason to list your plugin there.
139
5.2.4 Subscribe to Plugin Comment Threads
A great way to stay current with news relating to your plugins is to subscribe to
any relevant plugin feeds. Good candidates include comment and forum threads,
plugin-specific post feeds, and feeds from sites that primarily cover WordPress
plugins. You may want to create a folder in your feed aggregator called “My
WordPress Plugins” and review the results periodically.
5.2.5 Getting Help with Plugins
As you embark on the process of installing and configuring plugins, it is inevitable
that you will you encounter issues and conflicts that may be beyond your expertise
to resolve. Should this happen, the first place to go for help is to the plugin’s
developer or author. Most often, developers will leave a comment thread open
for their plugin pages, or else provide some sort of an official forum for handling
plugin-related issues.
If the problem is not resolved using these methods, don’t hesitate to contact the
plugin author directly. They created the plugin and thus should be more than
happy to help people with its implementation and use.
Other places to go for help include the WordPress.org site, where you may register
and ask WordPress-related questions in the forum. If you take this route, make
darn sure you have searched the Web and the WordPress forum as carefully as
possible. Many of the forum moderators have little patience for users who don’t
bother doing their homework before posting a question.
5.2.6 Diagnosing Plugin Conflicts
Diagnosing plugin conflicts is often easier than it may seem. Assuming that you
are installing your plugins sequentially (see above), problems that arise upon
installing or updating a plugin are easily spotted. Once you know which plugin is
causing the issue, you are in a better position to seek and find a solution. Many
It’s free for a reason
It is important to remember
that free help is just that – free.
Many WP newbies make the
mistake of expecting immediate
and perfect solutions when
asking for help. This just isn’t
the way it works. WordPress
heads enjoy helping people
learn, but make sure you take
the time to research the issue to
the best of your ability before
asking for assistance. Be clear,
polite, and remember to show
appreciation to those who take
the time to help you. It’s all
about karma ;)
140
times, a plugin that fails to work or causes errors is incompatible with another
plugin. To determine if this is the case, leave the new/upgraded plugin activated
and sequentially disable each of your plugins. After each plugin has been disabled,
check for resolution of the issue in question and continue the process until it is
resolved. If, after disabling all other plugins, your new/upgraded plugin still is
associated with issues, it may be incompatible with WordPress itself.
5.2.7 Disabling and Uninstalling Plugins
As you work with plugins, keep in mind that there is a difference between
disabling a plugin and uninstalling it. In general, disabling a plugin means that the
plugin is inactive yet still present in the plugins directory. More importantly, any
settings for disabled plugins are still present in the database. On the other hand,
when a plugin is uninstalled, it is no longer present in the plugins directory and any
related database settings have likely been deleted.
It is important to keep in mind that many plugins add information to your
WordPress database. Upon initial activation, plugins may modify or add
information to various tables, most typically the “options” table. New database
tables may be added and populated with data as well. Thus, as you go about
trying out new plugins, it is important to be aware of any changes made to your
database. A well-designed plugin will provide an uninstall feature that will clean-
up after itself and remove all traces of its settings from the database.
There may also be situations where you need to quickly disable one or more of
your plugins due to a conflict, troubleshooting, and so forth. While disabling
plugins is usually handled from within the Admin area, there may be situations
where this is not possible. There are several ways to disable plugins, but the
quickest and easiest method is simply to rename either the plugin (to disable
individual plugins) or the entire wp-content/plugins directory (to disable all
plugins). Renaming the plugin folder to, say, “plugins_inactive”, will effectively
disable (not uninstall) all of your plugins. Once you are ready to reactivate any
or all of your plugins, simply rename the directory back to “plugins” and you are
good to go. All of the options will be preserved, but you will need to reactivate
each plugin manually.
141
If you enjoy access to a database interface application such as the excellent
phpMyAdmin, there are many ways to interact with and modify the database
directly by simply executing various SQL commands. For example, after making a
backup of your database, execution of the following SQL command will enable you
to easily disable any or all of your plugins:
SELECT * FROM wp_options WHERE option_name = 'active_plugins';
Note that you may need to edit the default WordPress table prefix, “wp_”, if you
are using something different.
Once the active_plugins column appears, click to edit it. You will see something
similar to the following, depending on the number and type of plugins you have
installed:
a:31:{i:0;s:13:"AddMySite.php";i:1;s:19:"akismet/akismet.php";i:2;s:23:"all_in_
one_seo_pack.php";i:3;s:16:"authenticate.php";i:4;s:28:"breadcrumb-navigation-xt.
php";i:5;s:18:"codeautoescape.php";i:6;s:37:"contact-coldform/contact_coldform.
php";i:7;s:32:"custom-query-string-reloaded.php";i:8;s:30:"customizable-post-
listings.php";i:9;s:33:"dd-sitemap-gen/dd-sitemap-gen.php";i:10;s:20:"download-
counter.php";i:11;s:13:"feedcount.php";i:12;s:13:"full_feed.php";i:13;s:15:"get-
weather.php";i:14;s:36:"google-sitemap-generator/sitemap.php";i:15;s:13:"gravatars.
php";i:16;s:19:"kill-admin-nags.php";i:17;s:18:"landingsites13.php";i:18;s:30:"nofollow-
free/nofollowfree.php";i:19;s:17:"ol_feedburner.php";i:20;s:16:"plugins-used.
php";i:21;s:22:"popularity-contest.php";i:22;s:39:"search-everything/search_everything.
php";i:23;s:27:"simple-tags/simple-tags.php";i:24;s:26:"simple_recent_comments.
php";i:25;s:18:"simple_twitter.php";i:26;s:25:"subscribe-to-comments.php";i:27;s:24:"the-
excerpt-reloaded.php";i:28;s:18:"theme-switcher.php";i:29;s:9:"top10.php";i:30;s:16:"wp-db-
backup.php";}
That entire array of code represents every active plugin on your site. Thus, to
quickly disable all plugins without using the WP Admin area, highlight the entire
block of code, cut it out, and paste it into a safe, offline text file. After removing
the code, click the button to save your changes and that’s it. All WordPress plugins
are now deactivated (yet still installed, and with all plugin options intact). This
obviously is a huge time-saver that really comes in handy during those mission-
critical, time-sensitive situations where every second counts. Once you are ready to
re-activate your entire set of plugins, simply cut/copy & paste the preserved code
back into the “active_plugins” field. Click save and done. Again, don’t forget to
backup your database before editing it.
142
Or, instead of disabling the entire collection, you may selectively disable any of
your plugins by locating and removing its name from within the list. Here is the
general pattern once you format the code a bit:
a:31:{
i:0;s:13:"AddMySite.php";
i:1;s:19:"akismet/akismet.php";
i:2;s:23:"all_in_one_seo_pack.php";
i:3;s:16:"authenticate.php";
i:4;s:28:"breadcrumb-navigation-xt.php";
.
.
.
}
So, to deactivate any plugin, simply remove its respective line from the list.
Alternately, here is a simple SQL query to disable all active plugins:
UPDATE wp_options SET option_value = ''
WHERE option_name = 'active_plugins';
Upon execution, this query will clear the active_plugins field of all active plugins,
effectively disabling (without uninstalling or modifying) the entire set. This method
is great if you plan on re-enabling each plugin individually, say, after resolving
some heinous server error. Whereas the previous technique makes it easy to re-
enable all plugins en masse, this query is perfect for simply “nuking” all active
plugins with no remorse.
143
5.2.8 Share Your Experience with Others
Finally, as you become familiar with and begin using WordPress plugins, it is
important to share your experience – either positive or negative – with the
community. If the topic happens to fit in at your site, throw down a few posts
describing any significant discoveries that you may have encountered with
your plugins.
You should also share important information with the plugin authors themselves
and, if the issue is not security related, perhaps even post the information on a
relevant forum, such as the one provided at WordPress.org.
The idea here is to give back to the community by sharing your insights and
experience in order to help users and developers better understand the plugins
they are working with.
5.3.1 Extending WordPress with
Custom Functions
Just because you can, doesn’t mean you should. As discussed in the previous
sections, there are many ways to extend the functionality of WordPress, especially
if you are familiar with and comfortable working with a bit of code.
There are many situations where your development and design efforts are better
served with WordPress’ amazingly convenient theme-specific script functionality,
also referred to as the theme’s “functions.php” file.
The purpose of the functions.php file is to provide developers and designers a way
to expand the functionality of WordPress on a per-theme basis. Each theme may
use a functions.php file to include any number of PHP functions and scripts. This
additional code is then processed when the theme is active, thereby extending the
functionality of WordPress as it relates to that particular theme.
The plugin directory allows
you to see if the plugin
version and your WordPress
version are going to work
together, according to reports by
real users.
144
5.3.2 Plugins vs. Theme Functions (via functions.php)
While both plugins and theme functions (i.e., scripts contained within the
functions.php file) may be used to extend the functionality of WordPress, there are
some key differences between the two:
• Locality - Plugins usually operate on a sitewide basis. Theme functions operate
only when the theme is active
• Updates - Plugins are usually updated periodically. Most theme functions
typically are not updated (depending on the theme – some themes are updated
regularly and may include changes to the functions.php file).
• Admin - Plugins are always shown in the Admin Plugins page. Theme functions
may or may not appear in the Admin Plugins page, depending on the function
or script.
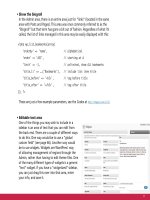
Stop Nagging! – How to Disable the Update Nag
In the Admin area, WordPress will remind you when plugin or core updates are available. The plugin reminders appear only on the
Plugins page, but the update-WordPress reminders appear on every page. In general, these alerts are helpful, but they are rather
annoying. To stop the nagging, create a plugin file called “kill-admin-nags.php” and add the following code, and activate:
<?php /*
Plugin Name: KillNag
Plugin URI: />Description: Kill those annoying WordPress update nags.
Version: 0.666
Author: Jeff Starr */
add_action('admin_menu', create_function('$a', "remove_action('load-plugins.php', 'wp_update_plugins');"));
add_lter('pre_option_update_plugins', create_function('$a', "return null;"));
add_action('init', create_function('$a', "remove_action('init', 'wp_version_check');"));
add_lter('pre_option_update_core', create_function('$a', "return null;")); ?>
145
So when should you use a functions.php file instead of a plugin? While the answer
depends on many factors, here are a few general guidelines:
• Theme-specic functions should be placed in a functions.php file
• Custom theme functionality should be placed in a functions.php file
• Smaller scripts and functions should be placed in a functions.php file
• Sitewide functions should be implemented as a plugin (especially when multiple
themes are used)
• Functionality requiring an Admin interface regardless of theme should be
implemented as a plugin
• Fundamental changes in functionality should be implemented as a plugin
5.3.3 Useful Examples of Theme Functions
Way back in the days of WordPress 1.5, many developers had no idea that theme-
specific functionality was even possible. Many functional moderations were made
to the core of WordPress itself – something that you should never do, unless you
positively, absolutely have no other choice.
These days, the use of functions.php has revolutionized the way designers and
developers make functional changes without plugins. Here are a few examples
demonstrating the types of functions that are commonly placed in the
functions.php file.
146
5.3.4 Example #1: Easy Admin Buttons for Comments
In addition to managing comments through the WordPress Comments Admin area,
it is also helpful to have some easy admin buttons located next to the comments as
they appear on your blog. Here is an example of what we’re talking about:
Here is an easy way to add “spam” and “delete” links next to each comment
whenever you are logged in as Administrator. Having access to spam and delete
buttons next to each comment makes it super-easy to clean up missed spam,
scummy trackbacks, and other garbage. It is a good idea to continually scour old
posts’ comments to weed out junk, which is always easier to see from the actual
post pages themselves. Having quick and easy access to spam and delete buttons
has made my life considerably easier.
To add this functionality, we take advantage of the functions.php file by adding
the following script:
<?php // spam & delete links for all versions of WordPress
function delete_comment_link($id) {
if (current_user_can('edit_post')) {
echo '| <a href="'.get_bloginfo('wpurl').'/wp-admin/comment.php?a
ction=cdc&c='.$id.'">Delete</a> ';
echo '| <a href="'.get_bloginfo('wpurl').'/wp-admin/comment.php?a
ction=cdc&dt=spam&c='.$id.'">Spam</a>';
}
} ?>
Place this function in your theme’s functions.php file, and then call the function by
adding the following code to the desired location in your comments.php file:
<?php delete_comment_link(get_comment_ID()); ?>