Tìm Hiểu về Wordpress - part 32 pps
Bạn đang xem bản rút gọn của tài liệu. Xem và tải ngay bản đầy đủ của tài liệu tại đây (1.33 MB, 10 trang )
297
Taken together, the previous two sets of robots.txt directives give us this:
Disallow: /wp-*
Disallow: *.php
Disallow: */feed*
Disallow: */trackback*
Disallow: /20*
See the pattern here? We use the “Disallow:” directive to restrict the crawling of
any URL matching the specified regular-expression (regex) pattern. But use caution:
regular expressions are powerful stuff, so be sure you know what you are doing
before experimenting on your own.
How to “Allow” Search Engine Access
The “Allow” robots directive is designed to explicitly allow search engine access to specific files. When using wildcards to disallow
entire directories, for example, the Allow directive may be used to override the setting for a specific directory or file. For example,
I use the following robots.txt directives to prevent compliant search engines from accessing anything contained within my Mint
statistics directory:
Disallow: */mint/*
This works great because it keeps Google et al from trespassing where they don’t belong. As it turns out, however, there is one
otherwise affected URL pattern that I want the search engines to access, namely, my downloadable files. Using the Download
Counter Pepper to monitor my site’s downloads, my download URLs are rewritten as follows:
/>With my robots.txt directive in place, search engines will never see my downloadable goodies. This is where the awesome Allow
directive comes into play. I now allow access to all of my downloads with a single robots directive:
Allow: */mint/pepper/orderedlist/downloads/*
Now, any download URL otherwise blocked via the previous Disallow directive is now explicitly allowed. Awesome.
298
The regular expressions used here have been tested to work properly via Google’s
Webmaster Tools and essentially inform compliant search
engines to do the following:
• Do not crawl or index any URL beginning with “ />• Do not crawl or index any URL ending with “.php”
• Do not crawl or index any URL containing the character string, “/feed”
• Do not crawl or index any URL containing the character string, “/trackback”
• Do not crawl or index any URL beginning with “ />Finally, there are a couple more things that we will need to add to our robots.txt
file in order to make it complete. First, we need to specify which search engines
should apply the directives, so we add this at the very beginning of the file, before
our disallow rules:
User-agent: *
The wildcard operator ( * ) is used to target all compliant search engines, however,
any specific user-agent may also be specified. For example, to apply our robots.txt
directives only to Google, we would use this instead:
User-agent: Googlebot
With the wildcard operator, however, everyone is included, even Google. In
addition to specifying the user-agent, we may also specify a sitemap to facilitate its
use. Assuming we place our sitemap in the root of our example site, we write:
Sitemap: />Express Yourself
For more help with regular
expressions, check out this
reference from zytrax.com:
/>XML Sitemap Plugin
Using a sitemap for your site
is an effective way to help the
search engines crawl and index
your content. For an easy way
to set up a sitemap for your
site, check out this
excellent plugin:
/>299
Combining our robots directives, we place the
following set of directives into our site’s
robots.txt file:
User-agent: *
Disallow: /wp-*
Disallow: *.php
Disallow: */feed*
Disallow: */trackback*
Disallow: /20*
Sitemap: />This is a complete, well-tested set of robots directives
that is optimized for WordPress-powered sites. Far
more simple and equally effective as some of the
other examples seen around the Web.
Just keep in mind that any robots.txt file will only
be obeyed by compliant search engines, which
fortunately includes the two largest, Google and
MSN/Bing.
8.2.5 Canonical Meta Tags
In 2009, the major search engines (Google, MSN/
Bing, Yahoo! and Ask) announced support for
“canonical meta tags.” Canonical meta tags are
designed to tell search engines which URL to count
as the actual, original address of a web page.
For example, if you are running an e-commerce site
that includes multiple URLs all pointing to the same
product, such as these:
Enhancing Permalink
Structure for Better
Performance
When it comes to planning the best permalink strategy for
your site, consider the following quote from the WordPress
Codex:
“For performance reasons, it is not a good idea to start
your permalink structure with the category, tag, author, or
postname fields. The reason is that these are text fields, and
using them at the beginning of your permalink structure
it takes more time for WordPress to distinguish your Post
URLs from Page URLs (which always use the text ‘page slug’
as the URL), and to compensate, WordPress stores a lot of
extra information in its database (so much that sites with
lots of Pages have experienced difficulties). So, it is best to
start your permalink structure with a numeric field, such as
the year or post ID.”
In summary, although it may not matter much for smaller,
low-traffic sites, it is best to keep the following in mind
when choosing the format of your permalinks:
Instead of using something like this:
/%postname%/%post_id%/
/%category%/%postname%/
Get some numbers in there with something like this instead:
/%post_id%/%postname%/
/%year%/%category%/%postname%/
Much better, especially for busy, high-traffic websites.
300
To control indexing and caching of non-(X)HTML content types,
using meta robots directives is not an option. An excellent example
of this involves directing Google to index and cache PDF documents.
The last time we checked, meta tags can’t be added to PDFs, Word
documents, Excel documents, text files, and other non-(X)HTML-
based content. The solution, of course, is to take advantage of the
relatively new HTTP header, X-Robots-Tag.
The X-Robots-Tag header takes the same parameters as used by
meta robots tags. For example:
• index — index the page
• noindex — don’t index the page
• follow — follow links from the page
• nosnippet — don’t display descriptions or cached links
• nofollow — don’t follow links from the page
• noarchive — don’t cache/archive the page
• none — do nothing, ignore the page
• all — do whatever you want, default behavior
…and so on. Within ordinary meta tags, these directives make it
possible to control exactly how search engines handle your (X)
HTML-based web pages. And now, setting these same directives
via the X-Robots-Tag header, it is possible to extend SEO-related
control over virtually every other type of content as well – PDFs,
Word documents, Flash, audio, and video files – you name it!
Implementing X-Robots-Tag functionality for your own files is easy.
For dynamically generated content, such as PHP files, place the
following code at the very top of your page:
// instruct supportive search engines to index and
cache the page
<?php header('X-Robots-Tag: index,archive'); ?>
Of course, the actual robots parameters will vary, depending on
whether or not the content should be indexed, archived, etc.
To implement X-Robots-Tag directives for non-PHP files, such as
PDF, Flash, and Word documents, it is possible to set the headers
via HTAccess. Customize the following HTAccess script according to
your indexing needs and add it to your site’s root HTAccess file or
Apache configuration file:
# index and archive specied le types
<IfModule mod_headers.c>
<FilesMatch "\.(doc|pdf|swf)$">
Header set X-Robots-Tag "index,archive"
</Files>
</IfModule>
There is of course much more that can be done with X-Robots-Tag.
For more information, see Taking Advantage of the X-Robots Tag at
Perishable Press: />X-Robots Meta Directives
301
/>Then placing the following canonical meta tag in the <head> section of each of the
duplicate content URLs will tell the search engines that the duplicates all refer to
the original URL:
<link rel="canonical" href=" />
With WordPress, canonical meta tags accomplish the same thing: they tell search
engines which version of your pages is the correct one to index. As you can
imagine, this is a powerful tool in the fight against duplicate content, and there
is an excellent plugin by Joost de Valk that makes implementing canonical tags
a snap: There are also manual techniques for setting up
canonical meta tags for WordPress, but the plugin really does a great job, and is
the recommended way to do it.
8.2.6 Use Excerpts for Posts
Another effective technique for preventing duplicate content is to simply use
excerpts instead of full content on all non-single page views. This way, all of those
pages that would otherwise include full copies of your post content will only show
an excerpt instead.
To implement excerpts, replace the_content template tag in your non-single theme
files with the_excerpt template tag. It’s as simple as that.
<?php the_content(); ?> =change to=> <?php the_excerpt(); ?>
Many sites use this technique with great results. Especially when used in
conjunction with a canonical plugin, using excerpts instead of content is perhaps
the easiest, most effective way of keeping duplicate content out of the search
engine results.
Important Note
Currently, canonical meta
tags only serve as a “hint” to
search engines as to which page
should be indexed. Chances are
high that they will obey your
specications, but they reserve
the right to take other factors
into account and make their
own decisions.
302
8.3.1 Optimizing Permalink Structure
One of the great things about WordPress is its “pretty” permalinks. Permalinks
refer to a particular formatting of the URL structure for a site’s web pages. By
default, WordPress generates dynamic page URLs of the format />index.php?p=123, but then makes it super-easy to transform these structures into
more user-friendly format, like Replacing the dynamic
query-string URL format with pretty permalinks is a great way to optimize your site
for the search engines. In this section, we examine some best practices and tips for
crafting the perfect set of permalinks.
8.3.2 Default URLs vs. “Pretty” Permalinks
An important factor to consider when optimizing your WordPress-powered site
involves configuring your URL permalinks. When optimizing WordPress for the
search engines, the first thing you want to do is set up permalinks for your site.
Here is the general structure of default WordPress URLs:
/>After a fresh install of WordPress, all of your site’s URLs are represented in this
“dynamic” query-string format. Every WordPress Page and Post is represented by
a sequential series of IDs. Even the URLs for feeds, category archives, tag archives,
and date archives are displayed in this dynamic format. But there are numerous
reasons why this format is not the best choice for your site’s URLs. Default URLs are
not very user-friendly and they do not take advantage of the value that Google
and other search engines place on URL keywords.
Fortunately, WordPress provides a built-in solution in the form of automatically
generated permalinks. Once enabled, permalinks – also referred to as “pretty”
permalinks – transform WordPress’ default URLs into a wide variety of formats,
depending on your configurational preferences (see Chapter 2.3.1). Here are
some examples:
More on Permalinks
To refresh your memory and
learn more about setting
up permalinks, ip back to
Chapter 2.3.1.
Permalink Optimization
Additional information
on optimizing permalinks
and URLs can be found at
DigWP.com and CSS-Tricks:
/>303
/> /> /> /> />See? No ugly query-string
parameter confusing the issue – just
straightforward, keyword-rich, “static”
URLs. With permalinks enabled, your
posts and page URLs may include
the perfect blend of keywords while
retaining their user-friendliness and
readability.
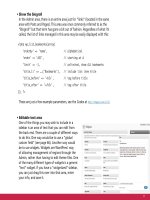
8.3.3 Keep Permalinks Short
After deciding to use permalinks on your site, it is
important to consider the best-possible format. In the
WordPress Admin, under “Settings > Permalinks”, you
will find several permalink configuration options, as
well as a place to specify any custom structure you wish
(see screenshot at right).
The general rule of thumb for establishing an
optimal permalink structure is to keep your URLs
as short as possible. This reasoning is based on
research that suggests that URLs based upon
“flat” directory structures fare better in the search
results than do those with deeply nested, overly-
convoluted architecture.
Even “Static” Pages are
Dynamically Generated
Posts and Pages are treated differently in WordPress. Posts are considered
to be part of a timeline that flows in chronological order, whereas Pages
contain content that is removed from the normal flow of posts. Perhaps
because of this difference, there is a common misconception that somehow
Pages are not dynamically generated from the database. But this couldn’t
be further from the truth. In fact, both Posts and Pages are stored in the
database and called dynamically to the web page by PHP and the Post or
Page template (which may also contain content). You can create static web
pages and then link to them like any other document, but Pages created via
WordPress store their content in the database.
304
Although there are free WordPress plugins available for changing
your permalinks, we prefer to handle URL redirection with Apache/
HTAccess rather than PHP because it requires fewer system
resources and is executed with greater speed. One final note
before we begin: the purpose of this tutorial involves removing
date information from all future permalinks and redirecting all
pre-existing permalinks to their restructured counterparts. Thus,
if you are setting up permalinks for a new blog (or one with only
a few posts), the second part of this tutorial may not be required
– a simple change of permalink structure via the WP Admin (as
explained below) may be all that is needed.
Part 1: Update WordPress Options
The first step in creating “post-name-only” permalinks is to update
your WordPress permalink structure in the Permalinks Options
page of the WordPress Admin. Using the Custom structure option,
customize your permalink structure as follows:
/%postname%/
After entering the post-name-only permalink structure, save the
changes and test your pages. Remember to check different types
of views – home, single, archive, page, search, etc. – to ensure that
your new permalinks are working as expected. Once this is done,
all future posts will feature the dateless permalink structure. In the
second part of our tutorial, we will redirect all requests for existing
versions of your URLs to their newly configured counterparts.
Part 2: Update .htaccess file
The second step in creating “post-name-only” permalinks involves
modifying your root or subdirectory htaccess file to ensure that old
permalinks are redirected to, and served as, your new permalinks.
Examine each of the scenarios described below, determine which
method applies to your specific setup, and implement the
required steps.
Option 1: Remove “year/month/day”
This method removes the “year/month/day” portion of permalinks
for blogs located within the domain's root directory. So, for
example, if your old permalinks looked like this:
…then the code in this section will transform them into this:
Locate your blog’s permalink htaccess rules. Then, place the
following code directly after the line containing the RewriteBase
directive:
# remove year-month-day from permalinks
RewriteRule ^([0-9]{4})/([0-9]{1,2})/([0-9]{1,2})/([^/]+)/?$
[R=301,L]
Option 2: Remove “year/month”
This method removes the “year/month” portion of permalinks for
blogs located within the domain's root directory. So, for example, if
your old permalinks looked like this:
…then the code in this section will transform them into this:
Locate your blog’s permalink htaccess rules. Then, place the
following code directly after the line containing the RewriteBase
directive:
# remove year and month from permalinks
RewriteRule ^([0-9]{4})/([0-9]{1,2})/([^/]+)/?$ http://domain.
tld/$3/ [R=301,L]
For either of these methods, remember to edit the “domain.tld” to
match that of your own. No other changes are necessary. Test like
crazy. After verifying that everything works as intended, sit back
and enjoy your new optimized permalinks.
Switching from Date-Based Permalinks to Post-Name-Only
305
Here is a visual comparison of a flat directory-structure vs. a deeply nested
directory structure:
Flat directory structure
Deeply nested directory structure
Thus, when it comes to your permalinks, the idea is similar: the shorter, the better.
Thus, unless you have good reason for choosing otherwise, your permalinks should
look more like this:
/>…and less like this:
/>super-awesome-post/
With this strategy in place, your URLs
will feature a more concentrated mix
of keywords while staying as “no-
nonsense” and user-friendly
as possible.
It's OK to Change the Title of
Posts and Pages
Once you publish a post, the permalink or URL of that web page is set. You
don't want to change it, and if you do, you should ensure that a proper
redirect is in place. One thing that you definitely can change after you
publish a Post or Page is the title. Many people mistakenly assume that
the URL and the title are somehow interconnected and therefore can’t be
changed without screwing everything up. So, for the record, the title and
URL of your pages are treated separately. That is why there are two different
fields for these values: one for the title and one for the page “slug” (which
serves as the permalink). So go ahead and feel free to change your post title
anytime you like – it’s totally fine.
306
8.3.4 Maximize Permalink Keywords
One of the best reasons to switch to permalinks involves
the ability to incorporate keywords into your URLs.
Keywords make the Web go ‘round, and it is especially
important to optimize your URLs accordingly. To
illustrate the point, consider the difference between the
following two URLs:
/> />All else being equal, which URL do you suppose
communicates more effectively the content of the
page? Of course, the second URL structure, which
utilizes WordPress’ permalink format and contains
three keywords that search engines may use to help
determine the meaning and purpose of the page.
Permalinks enable you to take advantage of keyword-
rich URLs that contribute to the overall SEO quality of
your site.
As you write and publish your posts and pages, keep
the keywords of your URLs in mind. An extremely useful feature of the WordPress
Write/Edit screen is the ability to quickly edit permalinks. Beneath the post title
there is a line that shows the current permalink for the post. To edit this, simply
click on the “Edit” button to the right and change the permalink as needed.
Finding Duplicate
Content
How much duplicate content has Google found on
your site? The easiest way to find out is to spend some
time searching around in Google. For example, do a
“site:yoursite.com” search and examine the results.
First of all, how many results are returned? Compare
that number with the total number of unique pages
that you have. Is there a discrepancy?
Secondly, skip around the results and look for similar
pages. Jump to the 10th results page and have a look.
Then jump ahead five more pages and take a look. Do
you see many similar titles and/or descriptions?
Lastly, check for duplicate content resulting from
similar query strings by searching for “site:yoursite.
com inurl:yourquerystring”. Again, examine the results.
Watch for duplicate titles and similar titles with the
same query string.