Microsoft Excel 2010 Visual potx
Bạn đang xem bản rút gọn của tài liệu. Xem và tải ngay bản đầy đủ của tài liệu tại đây (25.2 MB, 306 trang )
Excel
®
2010
Full Color
McFedries
Excel
®
2010
Microsoft
®
Microsoft
®
Paul McFedries
• Use Excel Formulas
more effectively
• Open workbooks
automatically at Startup
• Import data from XML files or Web pages
Would you like to discover what’s new in Excel 2010, find all the best ways to analyze and secure
your data, and start saving time by using macros? Then this Visual Quick Tips book is for you. This
book will increase your productivity by providing you with shortcuts, tricks, and tips to help you
work smarter and faster.
Learn
How To:
Straightforward
task descriptions
Succinct explanations
Full-color screen
shots
Numbered
steps
www.wiley.com/go/visual
Computers/Desktop Applications/Spreadsheets
$19.99 USA
$23.99 CAN
£15.99 UK
spine=.61"
01_577769-ffirs.indd iv01_577769-ffirs.indd iv 3/27/10 9:00 AM3/27/10 9:00 AM
Excel
®
2010
by Paul McFedries
01_577769-ffirs.indd i01_577769-ffirs.indd i 3/27/10 9:00 AM3/27/10 9:00 AM
Excel
®
2010 Visual™ Quick Tips
Published by
Wiley Publishing, Inc.
10475 Crosspoint Boulevard
Indianapolis, IN 46256
www.wiley.com
Published simultaneously in Canada
Copyright © 2010 by Wiley Publishing, Inc., Indianapolis, Indiana
Library of Congress Control Number: 2010923565
ISBN: 978-0-470-57776-9
Manufactured in the United States of America
10 9 8 7 6 5 4 3 2 1
No part of this publication may be reproduced, stored in a
retrieval system or transmitted in any form or by any means,
electronic, mechanical, photocopying, recording, scanning or
otherwise, except as permitted under Sections 107 or 108 of the
1976 United States Copyright Act, without either the prior written
permission of the Publisher, or authorization through payment of
the appropriate per-copy fee to the Copyright Clearance Center,
222 Rosewood Drive, Danvers, MA 01923, (978) 750-8400, fax
(978) 646-8600. Requests to the Publisher for permission should
be addressed to the Permissions Department, John Wiley & Sons,
Inc., 111 River Street, Hoboken, NJ 07030, 201-748-6011, fax 201-
748-6008, or online at www.wiley.com/go/permissions.
Trademarks Acknowledgments
Wiley, the Wiley Publishing logo, Visual, the Visual logo, Read
Less - Learn More, and related trade dress are registered
trademarks of Wiley Publishing, Inc., in the United States and
other countries, and may not be used without written permission.
Excel is a registered trademark of Microsoft Corporation in the
United States and/or other countries. All other trademarks are the
property of their respective owners. Wiley Publishing, Inc., is not
associated with any product or vendor mentioned in this book.
Contact Us
For general information on our other products and services or to
obtain technical support, please contact our Customer Care
Department within the U.S. at (877) 762-2974, outside the U.S. at
(317) 572-3993 or fax (317) 572-4002.
For technical support please visit www.wiley.com/techsupport.
LIMIT OF LIABILITY/DISCLAIMER OF WARRANTY: THE PUBLISHER
AND THE AUTHOR MAKE NO REPRESENTATIONS OR WARRANTIES
WITH RESPECT TO THE ACCURACY OR COMPLETENESS OF THE
CONTENTS OF THIS WORK AND SPECIFICALLY DISCLAIM ALL
WARRANTIES, INCLUDING WITHOUT LIMITATION WARRANTIES OF
FITNESS FOR A PARTICULAR PURPOSE. NO WARRANTY MAY BE
CREATED OR EXTENDED BY SALES OR PROMOTIONAL MATERIALS.
THE ADVICE AND STRATEGIES CONTAINED HEREIN MAY NOT BE
SUITABLE FOR EVERY SITUATION. THIS WORK IS SOLD WITH THE
UNDERSTANDING THAT THE PUBLISHER IS NOT ENGAGED IN
RENDERING LEGAL, ACCOUNTING, OR OTHER PROFESSIONAL
SERVICES. IF PROFESSIONAL ASSISTANCE IS REQUIRED, THE SERVICES
OF A COMPETENT PROFESSIONAL PERSON SHOULD BE SOUGHT.
NEITHER THE PUBLISHER NOR THE AUTHOR SHALL BE LIABLE FOR
DAMAGES ARISING HEREFROM. THE FACT THAT AN ORGANIZATION
OR WEBSITE IS REFERRED TO IN THIS WORK AS A CITATION AND/OR
A POTENTIAL SOURCE OF FURTHER INFORMATION DOES NOT MEAN
THAT THE AUTHOR OR THE PUBLISHER ENDORSES THE
INFORMATION THE ORGANIZATION OR WEBSITE MAY PROVIDE OR
RECOMMENDATIONS IT MAY MAKE. FURTHER, READERS SHOULD BE
AWARE THAT INTERNET WEBSITES LISTED IN THIS WORK MAY HAVE
CHANGED OR DISAPPEARED BETWEEN WHEN THIS WORK WAS
WRITTEN AND WHEN IT IS READ.
FOR PURPOSES OF ILLUSTRATING THE CONCEPTS AND TECHNIQUES
DESCRIBED IN THIS BOOK, THE AUTHOR HAS CREATED VARIOUS
NAMES, COMPANY NAMES, MAILING, E-MAIL, AND INTERNET
ADDRESSES, PHONE AND FAX NUMBERS, AND SIMILAR
INFORMATION, ALL OF WHICH ARE FICTITIOUS. ANY RESEMBLANCE
OF THE FICTITIOUS NAMES, ADDRESSES, PHONE AND FAX NUMBERS,
AND SIMILAR INFORMATION TO ANY ACTUAL PERSON, COMPANY
AND/OR ORGANIZATION IS UNINTENTIONAL AND PURELY
COINCIDENTAL.
Disclaimer
In order to get this information to you in a timely manner, this
book was based on a pre-release version of Microsoft Office 2010.
There may be some minor changes between the screenshots in
this book and what you see on your desktop. As always, Microsoft
has the final word on how programs look and function; if you have
any questions or see any discrepancies, consult the online help for
further information about the software.
Sales
Contact Wiley
at (877) 762-2974 or
fax (317) 572-4002.
01_577769-ffirs.indd ii01_577769-ffirs.indd ii 3/27/10 9:00 AM3/27/10 9:00 AM
Credits
Executive Editor
Jody Lefevere
Project Editor
Kristin DeMint
Technical Editor
Namir Shammas
Copy Editor
Marylouise Wiack
Editorial Director
Robyn Siesky
Business Manager
Amy Knies
Senior Marketing
Manager
Sandy Smith
Vice President and
Executive Group
Publisher
Richard Swadley
Vice President and
Executive Publisher
Barry Pruett
Project Coordinator
Lynsey Stanford
Graphics and
Production Specialists
Carrie A. Cesavice
Quality Control
Technician
Lauren Mandelbaum
Proofreading and
Indexing
Cindy Lee Ballew /
Precisely Write
Johnna VanHoose
Dinse
Screen Artist
Joyce Haughey
About the Author
Paul McFedries is a full-time technical writer. Paul has been authoring
computer books since 1991 and he has more than 70 books to his credit.
Paul’s books have sold more than three million copies worldwide. These
books include the Wiley titles Teach Yourself VISUALLY Excel 2010; Excel
PivotTables and PivotCharts Visual Blueprint, Second Edition; Teach Yourself
VISUALLY Windows 7; and Teach Yourself VISUALLY Office 2008 for Mac.
Paul is also the proprietor of Word Spy (www.wordspy.com and twitter.
com/wordspy), a Web site that tracks new words and phrases as they
enter the language. Paul invites you to drop by his personal Web site at
www.mcfedries.com or to follow him on Twitter at twitter.com/paulmcf.
Author’s Acknowledgments
It goes without saying that writers focus on text, and I certainly enjoyed
focusing on the text that you’ll read in this book. However, this book is more
than just the usual collection of words and phrases. A quick thumb-through of
the pages will show you that this book is also chock full of images, from sharp
screen shots to fun and informative illustrations. Those colorful images sure
make for a beautiful book, and that beauty comes from a lot of hard work by
Wiley’s immensely talented group of designers and layout artists. They are all
listed in the Credits section above, and I thank them for creating another gem.
Of course, what you read in this book must also be accurate, logically
presented, and free of errors. Ensuring all of this was an excellent group of
editors that included project editor Kristin DeMint, copy editor Marylouise
Wiack, and technical editor Namir Shammas. Thanks to all of you for your
exceptional competence and hard work. Thanks, as well, to acquisitions editor
Jody Lefevere for asking me to write this book.
01_577769-ffirs.indd iii01_577769-ffirs.indd iii 3/27/10 9:00 AM3/27/10 9:00 AM
01_577769-ffirs.indd iv01_577769-ffirs.indd iv 3/27/10 9:00 AM3/27/10 9:00 AM
Who This Book Is For
This book is for readers who know the
basics and want to expand their knowledge
of this particular technology or software
application.
The Conventions in This Book
1
Steps
This book uses a step-by-step format
to guide you easily through each task.
Numbered steps are actions you must
do; bulleted steps clarify a point, step, or
optional feature; and indented steps give
you the result.
2
Notes
Notes give additional information —
special conditions that may occur during
an operation, a situation that you want to
avoid, or a cross reference to a related
area of the boo k.
3
Icons and Buttons
Icons and buttons show you exactly what
you need to click to perform a step.
4
Tips
Tips offer additional information, including
warnings and shortcuts.
5
Bold
Bold type shows text or numbers you
must type.
6
Italics
Italic type introduces and defines a new
term.
How to Use This Book
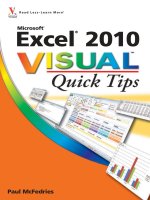
Chapter 5: Analyzing Excel Data
Remove It!
If you no longer require the data bars,
you can remove them. Follow steps 1 to
3 to select the range and display the
Conditional Formatting drop-down
menu, and then click Manage Rules.
Excel displays the Conditional Formatting
Rules Manager dialog box. Click the Data
Bar rule you want to remove and then
click Delete Rule.
Did You Know?
If your range includes right-aligned values,
the Gradient Fill data bars are a better
choice than the Solid Fill data bars. This is
because even the longest Gradient Fill bars
fade to white towards the right edge of the
cell, so your range values should mostly
appear on a white background, making
them easier to read.
55
22
11
33
44
● Excel applies the data
bars to each cell in the
range.
5 Click the fill type of data
bars you want to create.
● Gradient Fill data bars
begin with a solid color
and then gradually fade
to white.
● Solid Fill data bars are a
solid color.
2 Click the Home tab.
3 Click Conditional
Formatting.
4 Click Data Bars.
1 Select the range you
want to work with.
You can analyze how the values in a range
relate to one another by applying data bars to
each cell in the range.
In some data analysis scenarios, you might be
more interested in the relative values within a
range than the absolute values. For example, if
you have a table of products that includes a
column showing unit sales, how do you
compare the relative sales of all the products?
This sort of analysis is often easiest if you
visualize the relative values. You can do that by
using data bars. Data bars are a data
visualization feature that applies colored,
horizontal bars to each cell in a range of
values, and these bars appear “behind” the
values in the range. Their key feature is that
the length of the data bar that appears in each
cell depends on the value in that cell: the larger
the value, the longer the data bar. The cell
with the highest value has the longest data bar,
and the data bars that appear in the other cells
have lengths that reflect their values.
Analyze Cell Values
with Data Bars
4
1
6
01_577769-ffirs.indd v01_577769-ffirs.indd v 3/27/10 9:00 AM3/27/10 9:00 AM
Table of Contents
chapter
1
Making Excel MoreEfficient
Customize the Quick Access Toolbar . . . . . . . . . . . . . . . . . . . . . . . . . . . . . . . . . . . . . . . . . . . . . . 4
Customize the Ribbon . . . . . . . . . . . . . . . . . . . . . . . . . . . . . . . . . . . . . . . . . . . . . . . . . . . . . . . . . . 6
Export Ribbon Customizations to a File . . . . . . . . . . . . . . . . . . . . . . . . . . . . . . . . . . . . . . . . . . . 10
Configure Excel to Use the Mouse Wheel for Zooming . . . . . . . . . . . . . . . . . . . . . . . . . . . . . . 12
Move in a Different Direction When You Press Enter . . . . . . . . . . . . . . . . . . . . . . . . . . . . . . . . 14
Automatically Insert a Decimal Point . . . . . . . . . . . . . . . . . . . . . . . . . . . . . . . . . . . . . . . . . . . . . 16
Configure When Excel Warns You About Long Operations . . . . . . . . . . . . . . . . . . . . . . . . . . . 18
Pin Excel to the Windows 7 Taskbar. . . . . . . . . . . . . . . . . . . . . . . . . . . . . . . . . . . . . . . . . . . . . . 20
Make a Workbook Faster by Saving it as Binary . . . . . . . . . . . . . . . . . . . . . . . . . . . . . . . . . . . . 22
Open a New Window for a Workbook. . . . . . . . . . . . . . . . . . . . . . . . . . . . . . . . . . . . . . . . . . . . 24
Allow Only Certain Values in a Cell . . . . . . . . . . . . . . . . . . . . . . . . . . . . . . . . . . . . . . . . . . . . . . 26
Apply Text or Formatting to Multiple Worksheets. . . . . . . . . . . . . . . . . . . . . . . . . . . . . . . . . . . 28
Quickly Display the Office Clipboard . . . . . . . . . . . . . . . . . . . . . . . . . . . . . . . . . . . . . . . . . . . . . 30
Use Dialog Box Controls to Input Data . . . . . . . . . . . . . . . . . . . . . . . . . . . . . . . . . . . . . . . . . . . 32
Check for Accessibility Problems . . . . . . . . . . . . . . . . . . . . . . . . . . . . . . . . . . . . . . . . . . . . . . . .36
chapter
2
Making It Easier to Manage Workbooks
Increase the Number of Recent Documents . . . . . . . . . . . . . . . . . . . . . . . . . . . . . . . . . . . . . . . 40
Open Workbooks Automatically at Startup . . . . . . . . . . . . . . . . . . . . . . . . . . . . . . . . . . . . . . . . 42
Create a Workspace of Workbooks . . . . . . . . . . . . . . . . . . . . . . . . . . . . . . . . . . . . . . . . . . . . . . 44
Specify a New Default File Location . . . . . . . . . . . . . . . . . . . . . . . . . . . . . . . . . . . . . . . . . . . . . . 46
Set the Default Font and Font Size for New Workbooks . . . . . . . . . . . . . . . . . . . . . . . . . . . . . 48
Set the Default Number of Worksheets for New Workbooks . . . . . . . . . . . . . . . . . . . . . . . . . 50
Repair a Corrupted Workbook File . . . . . . . . . . . . . . . . . . . . . . . . . . . . . . . . . . . . . . . . . . . . . . . 52
Convert a Workbook to a PDF File . . . . . . . . . . . . . . . . . . . . . . . . . . . . . . . . . . . . . . . . . . . . . . . 54
Create a Workbook Template . . . . . . . . . . . . . . . . . . . . . . . . . . . . . . . . . . . . . . . . . . . . . . . . . . .56
Create a New Workbook from an Existing File . . . . . . . . . . . . . . . . . . . . . . . . . . . . . . . . . . . . . 58
Compare Two Workbooks Side by Side . . . . . . . . . . . . . . . . . . . . . . . . . . . . . . . . . . . . . . . . . . . 60
Check for Features Not Supported by Earlier Excel Versions . . . . . . . . . . . . . . . . . . . . . . . . . . 62
02_577769-ftoc.indd vi02_577769-ftoc.indd vi 3/27/10 9:00 AM3/27/10 9:00 AM
chapter
3
Customizing Worksheet Presentation
Create Custom Numeric Formats . . . . . . . . . . . . . . . . . . . . . . . . . . . . . . . . . . . . . . . . . . . . . . . . 66
Create Custom Date and Time Formats . . . . . . . . . . . . . . . . . . . . . . . . . . . . . . . . . . . . . . . . . . . 68
Set the Default Width for All Columns . . . . . . . . . . . . . . . . . . . . . . . . . . . . . . . . . . . . . . . . . . . . 70
Hide Columns and Rows . . . . . . . . . . . . . . . . . . . . . . . . . . . . . . . . . . . . . . . . . . . . . . . . . . . . . . . 72
Create a Custom Fill List . . . . . . . . . . . . . . . . . . . . . . . . . . . . . . . . . . . . . . . . . . . . . . . . . . . . . . . 74
Maximize Work Space by Turning Off Window Elements . . . . . . . . . . . . . . . . . . . . . . . . . . . . 76
Create a Custom Cell Style . . . . . . . . . . . . . . . . . . . . . . . . . . . . . . . . . . . . . . . . . . . . . . . . . . . . . 78
Build a Custom Table Style . . . . . . . . . . . . . . . . . . . . . . . . . . . . . . . . . . . . . . . . . . . . . . . . . . . . . 80
Create a Custom Color Scheme . . . . . . . . . . . . . . . . . . . . . . . . . . . . . . . . . . . . . . . . . . . . . . . . . 82
Create a Custom Font Scheme . . . . . . . . . . . . . . . . . . . . . . . . . . . . . . . . . . . . . . . . . . . . . . . . . . 84
Save a Custom Workbook Theme . . . . . . . . . . . . . . . . . . . . . . . . . . . . . . . . . . . . . . . . . . . . . . . 86
Build a Custom Header and Footer . . . . . . . . . . . . . . . . . . . . . . . . . . . . . . . . . . . . . . . . . . . . . . 88
Customize the Excel Status Bar . . . . . . . . . . . . . . . . . . . . . . . . . . . . . . . . . . . . . . . . . . . . . . . . . . 90
Minimize theRibbon . . . . . . . . . . . . . . . . . . . . . . . . . . . . . . . . . . . . . . . . . . . . . . . . . . . . . . . . . . 91
chapter
4
Getting More Out ofFormulas
Paste a Formula’s Result . . . . . . . . . . . . . . . . . . . . . . . . . . . . . . . . . . . . . . . . . . . . . . . . . . . . . . . 94
Show Formulas Instead of Results . . . . . . . . . . . . . . . . . . . . . . . . . . . . . . . . . . . . . . . . . . . . . . . 96
Use a Watch Window to Monitor a Cell Value . . . . . . . . . . . . . . . . . . . . . . . . . . . . . . . . . . . . . 98
Use Absolute Cell References in a Formula . . . . . . . . . . . . . . . . . . . . . . . . . . . . . . . . . . . . . . . 100
Create an Array Formula . . . . . . . . . . . . . . . . . . . . . . . . . . . . . . . . . . . . . . . . . . . . . . . . . . . . . . 102
Apply Range Names to Formulas . . . . . . . . . . . . . . . . . . . . . . . . . . . . . . . . . . . . . . . . . . . . . . . 104
Create a Link to Another Worksheet . . . . . . . . . . . . . . . . . . . . . . . . . . . . . . . . . . . . . . . . . . . . 106
Combine Two Ranges Arithmetically . . . . . . . . . . . . . . . . . . . . . . . . . . . . . . . . . . . . . . . . . . . . 108
Troubleshoot a Formula by Stepping Through Each Part . . . . . . . . . . . . . . . . . . . . . . . . . . . . 110
Skip Data Tables When Calculating Workbooks . . . . . . . . . . . . . . . . . . . . . . . . . . . . . . . . . . . 112
Turn On Iterative Calculations . . . . . . . . . . . . . . . . . . . . . . . . . . . . . . . . . . . . . . . . . . . . . . . . . 114
Display Text Rather than Error Values . . . . . . . . . . . . . . . . . . . . . . . . . . . . . . . . . . . . . . . . . . . 116
Check for Formula Errors in a Worksheet . . . . . . . . . . . . . . . . . . . . . . . . . . . . . . . . . . . . . . . . 118
Audit a Formula to Locate Errors . . . . . . . . . . . . . . . . . . . . . . . . . . . . . . . . . . . . . . . . . . . . . . . 120
02_577769-ftoc.indd vii02_577769-ftoc.indd vii 3/27/10 9:00 AM3/27/10 9:00 AM
Table of Contents
chapter
5
Analyzing Excel Data
Highlight Cells That Meet Some Criteria . . . . . . . . . . . . . . . . . . . . . . . . . . . . . . . . . . . . . . . . . 124
Highlight the Top or Bottom Values in a Range . . . . . . . . . . . . . . . . . . . . . . . . . . . . . . . . . . . 126
Analyze Cell Values with Data Bars . . . . . . . . . . . . . . . . . . . . . . . . . . . . . . . . . . . . . . . . . . . . .128
Analyze Cell Values with Color Scales . . . . . . . . . . . . . . . . . . . . . . . . . . . . . . . . . . . . . . . . . . . 130
Analyze Cell Values with Icon Sets . . . . . . . . . . . . . . . . . . . . . . . . . . . . . . . . . . . . . . . . . . . . . . 132
Create a Custom Conditional Formatting Rule . . . . . . . . . . . . . . . . . . . . . . . . . . . . . . . . . . . . 134
Calculate Multiple Solutions to a Formula . . . . . . . . . . . . . . . . . . . . . . . . . . . . . . . . . . . . . . . . 136
Plug Multiple Input Values into a Formula . . . . . . . . . . . . . . . . . . . . . . . . . . . . . . . . . . . . . . . 138
Calculate the Break-Even Point . . . . . . . . . . . . . . . . . . . . . . . . . . . . . . . . . . . . . . . . . . . . . . . . . 142
Consolidate Data from Multiple Worksheets . . . . . . . . . . . . . . . . . . . . . . . . . . . . . . . . . . . . . . 144
Filter Table Data . . . . . . . . . . . . . . . . . . . . . . . . . . . . . . . . . . . . . . . . . . . . . . . . . . . . . . . . . . . . . 148
Remove Duplicate Values from a Table . . . . . . . . . . . . . . . . . . . . . . . . . . . . . . . . . . . . . . . . . .150
Create an Outline Automatically . . . . . . . . . . . . . . . . . . . . . . . . . . . . . . . . . . . . . . . . . . . . . . . . 152
Enable the Analysis ToolPak Add-In . . . . . . . . . . . . . . . . . . . . . . . . . . . . . . . . . . . . . . . . . . . . . 154
chapter
6
Analyzing Data with PivotTables
Build a PivotTable from an Excel Table . . . . . . . . . . . . . . . . . . . . . . . . . . . . . . . . . . . . . . . . . . 158
Create a PivotTable from External Data . . . . . . . . . . . . . . . . . . . . . . . . . . . . . . . . . . . . . . . . . . 160
Refresh PivotTable Data. . . . . . . . . . . . . . . . . . . . . . . . . . . . . . . . . . . . . . . . . . . . . . . . . . . . . . . 164
Add Multiple Fields to the Row or Column Area . . . . . . . . . . . . . . . . . . . . . . . . . . . . . . . . . . . 166
Add Multiple Fields to the Data Area . . . . . . . . . . . . . . . . . . . . . . . . . . . . . . . . . . . . . . . . . . . .168
Move a Field to a Different Area . . . . . . . . . . . . . . . . . . . . . . . . . . . . . . . . . . . . . . . . . . . . . . . 170
Apply a Report Filter . . . . . . . . . . . . . . . . . . . . . . . . . . . . . . . . . . . . . . . . . . . . . . . . . . . . . . . . . 172
Apply a PivotTable Quick Style . . . . . . . . . . . . . . . . . . . . . . . . . . . . . . . . . . . . . . . . . . . . . . . . . 174
Change the PivotTable Summary Calculation . . . . . . . . . . . . . . . . . . . . . . . . . . . . . . . . . . . . . 176
Customize the PivotTable Field List . . . . . . . . . . . . . . . . . . . . . . . . . . . . . . . . . . . . . . . . . . . . . 178
Create a PivotChart from a PivotTable . . . . . . . . . . . . . . . . . . . . . . . . . . . . . . . . . . . . . . . . . . . 179
02_577769-ftoc.indd viii02_577769-ftoc.indd viii 3/27/10 9:00 AM3/27/10 9:00 AM
chapter
7
Importing Data into Excel
Understanding External Data . . . . . . . . . . . . . . . . . . . . . . . . . . . . . . . . . . . . . . . . . . . . . . . . . . 182
Import Data from a Data Source . . . . . . . . . . . . . . . . . . . . . . . . . . . . . . . . . . . . . . . . . . . . . . . 184
Import Data from an Access Table . . . . . . . . . . . . . . . . . . . . . . . . . . . . . . . . . . . . . . . . . . . . . . 186
Import Data from a Word Table . . . . . . . . . . . . . . . . . . . . . . . . . . . . . . . . . . . . . . . . . . . . . . . . 188
Import Data from a Text File . . . . . . . . . . . . . . . . . . . . . . . . . . . . . . . . . . . . . . . . . . . . . . . . . . . 190
Import Data from a Web Page . . . . . . . . . . . . . . . . . . . . . . . . . . . . . . . . . . . . . . . . . . . . . . . . . 194
Import Data from an XML File . . . . . . . . . . . . . . . . . . . . . . . . . . . . . . . . . . . . . . . . . . . . . . . . . 196
Refresh Imported Data . . . . . . . . . . . . . . . . . . . . . . . . . . . . . . . . . . . . . . . . . . . . . . . . . . . . . . . 198
Separate Cell Text into Columns . . . . . . . . . . . . . . . . . . . . . . . . . . . . . . . . . . . . . . . . . . . . . . . .200
chapter
8
Querying Data Sources
Understanding Microsoft Query . . . . . . . . . . . . . . . . . . . . . . . . . . . . . . . . . . . . . . . . . . . . . . . . 204
Define a Data Source . . . . . . . . . . . . . . . . . . . . . . . . . . . . . . . . . . . . . . . . . . . . . . . . . . . . . . . . . 206
Start Microsoft Query . . . . . . . . . . . . . . . . . . . . . . . . . . . . . . . . . . . . . . . . . . . . . . . . . . . . . . . . 210
Tour the Microsoft Query Window . . . . . . . . . . . . . . . . . . . . . . . . . . . . . . . . . . . . . . . . . . . . . . 211
Add a Table to the Query . . . . . . . . . . . . . . . . . . . . . . . . . . . . . . . . . . . . . . . . . . . . . . . . . . . . . 212
Add Fields to the Query . . . . . . . . . . . . . . . . . . . . . . . . . . . . . . . . . . . . . . . . . . . . . . . . . . . . . . 214
Filter the Records with Query Criteria . . . . . . . . . . . . . . . . . . . . . . . . . . . . . . . . . . . . . . . . . . . 216
Sort the Query Records . . . . . . . . . . . . . . . . . . . . . . . . . . . . . . . . . . . . . . . . . . . . . . . . . . . . . . . 218
Return the Query Results . . . . . . . . . . . . . . . . . . . . . . . . . . . . . . . . . . . . . . . . . . . . . . . . . . . . . 220
02_577769-ftoc.indd ix02_577769-ftoc.indd ix 3/27/10 9:00 AM3/27/10 9:00 AM
chapter
9
Protecting Excel Data
Open a Read-Only Version of a Workbook . . . . . . . . . . . . . . . . . . . . . . . . . . . . . . . . . . . . . . . 224
Mark a Workbook as Final to Avoid Accidental Editing . . . . . . . . . . . . . . . . . . . . . . . . . . . . . 226
Protect Workbooks by Shortening the AutoRecover Interval . . . . . . . . . . . . . . . . . . . . . . . . . 228
Specify the Cells that Users Can Edit . . . . . . . . . . . . . . . . . . . . . . . . . . . . . . . . . . . . . . . . . . . . 230
Hide a Formula . . . . . . . . . . . . . . . . . . . . . . . . . . . . . . . . . . . . . . . . . . . . . . . . . . . . . . . . . . . . . 232
Protect a Range with a Password . . . . . . . . . . . . . . . . . . . . . . . . . . . . . . . . . . . . . . . . . . . . . . . 234
Protect the Data in a Worksheet . . . . . . . . . . . . . . . . . . . . . . . . . . . . . . . . . . . . . . . . . . . . . . . . 236
Protect a Workbook’s Windows and Structure . . . . . . . . . . . . . . . . . . . . . . . . . . . . . . . . . . . . 238
Restore a Previous Version of a Workbook . . . . . . . . . . . . . . . . . . . . . . . . . . . . . . . . . . . . . . . 240
Hide a Worksheet . . . . . . . . . . . . . . . . . . . . . . . . . . . . . . . . . . . . . . . . . . . . . . . . . . . . . . . . . . . 242
Track Workbook Changes . . . . . . . . . . . . . . . . . . . . . . . . . . . . . . . . . . . . . . . . . . . . . . . . . . . . . 244
chapter
10
Maximizing Excel Security and Privacy
Open a Workbook in Protected View . . . . . . . . . . . . . . . . . . . . . . . . . . . . . . . . . . . . . . . . . . . . 248
Block Dangerous Excel File Types . . . . . . . . . . . . . . . . . . . . . . . . . . . . . . . . . . . . . . . . . . . . . . . 250
Set the Macro Security Level . . . . . . . . . . . . . . . . . . . . . . . . . . . . . . . . . . . . . . . . . . . . . . . . . . . 252
Digitally Sign Your Excel Macros . . . . . . . . . . . . . . . . . . . . . . . . . . . . . . . . . . . . . . . . . . . . . . . . 254
Create a Trusted Location for Opening Files . . . . . . . . . . . . . . . . . . . . . . . . . . . . . . . . . . . . . . 256
Inspect a Workbook for Private Data . . . . . . . . . . . . . . . . . . . . . . . . . . . . . . . . . . . . . . . . . . . . 258
Assign a Password to a Workbook . . . . . . . . . . . . . . . . . . . . . . . . . . . . . . . . . . . . . . . . . . . . . . 260
Turn On Parental Control in Excel . . . . . . . . . . . . . . . . . . . . . . . . . . . . . . . . . . . . . . . . . . . . . .262
Disable External Data Connections and Links . . . . . . . . . . . . . . . . . . . . . . . . . . . . . . . . . . . . . 264
Apply a Digital Signature to a Workbook. . . . . . . . . . . . . . . . . . . . . . . . . . . . . . . . . . . . . . . . . 266
Table of Contents
02_577769-ftoc.indd x02_577769-ftoc.indd x 3/27/10 9:00 AM3/27/10 9:00 AM
chapter
11
Learning VBA Basics
Record a Macro . . . . . . . . . . . . . . . . . . . . . . . . . . . . . . . . . . . . . . . . . . . . . . . . . . . . . . . . . . . . . 270
Open the VBA Editor . . . . . . . . . . . . . . . . . . . . . . . . . . . . . . . . . . . . . . . . . . . . . . . . . . . . . . . . . 272
Explore the Excel Object Model . . . . . . . . . . . . . . . . . . . . . . . . . . . . . . . . . . . . . . . . . . . . . . . . 274
Add a Macro to a Module . . . . . . . . . . . . . . . . . . . . . . . . . . . . . . . . . . . . . . . . . . . . . . . . . . . . . 276
Run a Macro . . . . . . . . . . . . . . . . . . . . . . . . . . . . . . . . . . . . . . . . . . . . . . . . . . . . . . . . . . . . . . . . 278
Assign a Shortcut Key to a Macro. . . . . . . . . . . . . . . . . . . . . . . . . . . . . . . . . . . . . . . . . . . . . . . 280
Assign a Macro to the Quick Access Toolbar . . . . . . . . . . . . . . . . . . . . . . . . . . . . . . . . . . . . . . 282
Assign a Macro to the Ribbon . . . . . . . . . . . . . . . . . . . . . . . . . . . . . . . . . . . . . . . . . . . . . . . . . . 284
Index . . . . . . . . . . . . . . . . . . . . . . . . . . . . . . . . . . . . . . . . . . . . . .286
02_577769-ftoc.indd 102_577769-ftoc.indd 1 3/27/10 9:00 AM3/27/10 9:00 AM
Making Excel
MoreEfficient
If you find yourself spending a major part
of your day working with Excel, you can
make those chores go faster — and so
make your overall work life more
productive — by making Excel as efficient
as possible.
For example, you can launch common
commands more quickly by placing them
on the Quick Access Toolbar, which requires
just a single click to launch a command.
Similarly, you can customize the Ribbon
with your own tabs and groups to reduce
the time it takes to perform certain tasks.
You can also make Excel more efficient
byusing the mouse wheel to zoom,
automatically inserting decimal points,
pinning Excel to the Windows 7 taskbar,
creating binary workbooks, applying
formatting across multiple worksheets,
andusing dialog box controls to input
worksheet data.
In this chapter, you will learn how to
perform these and many other tasks that
boost your Excel efficiency.
03_577769-ch01.indd 203_577769-ch01.indd 2 3/27/10 9:00 AM3/27/10 9:00 AM
Customize the Quick Access Toolbar 4
Customize the Ribbon 6
Export Ribbon Customizations to a File 10
Configure Excel to Use the Mouse Wheel for Zooming 12
Move in a Different Direction When You Press Enter 14
Automatically Insert a Decimal Point 16
Configure When Excel Warns You About Long Operations 18
Pin Excel to the Windows 7 Taskbar 20
Make a Workbook Faster by Saving it as Binary 22
Open a New Window for a Workbook 24
Allow Only Certain Values in a Cell 26
Apply Text or Formatting to Multiple Worksheets 28
Quickly Display the Office Clipboard 30
Use Dialog Box Controls to Input Data 32
Check for Accessibility Problems 36
03_577769-ch01.indd 303_577769-ch01.indd 3 3/27/10 9:00 AM3/27/10 9:00 AM
4
44
22
11
33
The Excel Options dialog
box appears.
● Excel automatically
displays the Quick Access
Toolbar tab.
3 Click the Choose
Commands From
drop-down arrow.
4 Click the command
category you want to use.
1 Click the Customize
Quick Access Toolbar
button.
● If you see the command
you want, you can click
it; Excel adds the button
for that command to the
Quick Access Toolbar,
and you can skip the rest
of the steps in this
section.
2 Click More Commands.
You can make Excel easier to use by
customizing the Quick Access Toolbar to
include the Excel commands you use most
often. Because you launch Quick Access
Toolbar buttons with a single click, adding
your favorite commands to the toolbar saves
you time.
By default, the Quick Access Toolbar contains
three buttons — Save, Undo, and Redo —
butyou can add any of hundreds of Excel
commands.
In a default Excel configuration, the Quick
Access Toolbar appears above the Ribbon as
part of the Excel title bar. However, this
position only allows you to add a few buttons,
as there is only so much space in the title bar.
To get much more space to add buttons, you
should move the Quick Access Toolbar below
the Ribbon.
You can also export your Quick Access
Toolbar customizations to a file so that other
people can import the same customizations.
For more information, see the section, “Export
Ribbon Customizations to a File.”
Customize the Quick
Access Toolbar
03_577769-ch01.indd 403_577769-ch01.indd 4 3/27/10 9:00 AM3/27/10 9:00 AM
5
Chapter 1: Making Excel More Efficient
55
66
77
● Excel adds a button for
the command to the
Quick Access Toolbar.
5 Click the command you
want to add.
6 Click Add.
● Excel adds the command.
● To remove a command,
you can click it and then
click Remove.
7 Click OK.
More Options!
You can increase the space available to
the Quick Access Toolbar by moving it
below the Ribbon. This gives the toolbar
the full width of the Excel window, so you
can add many more buttons. Click the
Customize Quick Access Toolbar button
and then click Show Below the Ribbon.
More Options!
If the command you want to add appears
on the Ribbon, you can add a button for
the command directly from the Ribbon.
Click the Ribbon tab that contains the
command, right-click the command, and
then click Add to Quick Access Toolbar.
Excel inserts a button for the command on
the Quick Access Toolbar.
03_577769-ch01.indd 503_577769-ch01.indd 5 3/27/10 9:00 AM3/27/10 9:00 AM
6
22
11
The Excel Options dialog
box appears.
● Excel automatically
displays the Customize
Ribbon tab.
● Use these lists to choose
the commands you want
to add.
● These lists show the
existing tabs and groups.
● To display a tab’s groups,
you can click the tab’s
plus sign (+).
Display the Customize
Ribbon Tab
1 Right-click any part of the
Ribbon.
2 Click Customize the
Ribbon.
You can improve your Excel productivity by
customizing the Ribbon with extra commands
that you use frequently.
Keep in mind that you cannot modify any of
the default tabs and groups in Excel, other
than hiding tabs you do not use. Instead, you
customize the Ribbon by adding a new group
to an existing tab, and then adding one or
more commands to the new group.
Alternatively, you can add a new tab to the
Ribbon, add your own groups to that tab, and
then add your commands.
Customize
the Ribbon
03_577769-ch01.indd 603_577769-ch01.indd 6 3/27/10 9:00 AM3/27/10 9:00 AM
7
Chapter 1: Making Excel More Efficient
44
11
22 33
55
The Rename dialog box
appears.
4 Type a name for the
group.
5 Click OK.
Excel adds the new group
to the tab.
Add a New Group
1 Click the tab you want to
customize.
2 Click New Group.
● Excel adds the group.
3 Click Rename.
More Options!
You can get more space on the Ribbon
and reduce clutter by removing any tabs
you do not use. For example, if you do
not use the Excel reviewing tools, then
you might prefer to hide the Review tab
to reduce the number of tabs you see
on-screen. In the list of tabs that appears
below the Customize the Ribbon drop-
down list, deselect the check box beside
any tab you want to hide.
Try This!
You can change the order in which the tabs
appear in the Ribbon. For example, if you
use the tools in the Data tab more often
than those in the Home tab, then you can
move the Data tab to be the first tab in the
Ribbon. Use the up and down arrow
buttons that appear to the right of the tab
list to modify the order. You can also use
these buttons to modify the order of the
groups within any tab.
➥
continued
03_577769-ch01.indd 703_577769-ch01.indd 7 3/27/10 9:00 AM3/27/10 9:00 AM
8
44
22
11
33
55
The Rename dialog box
appears.
4 Type the name you want
to use.
5 Click OK.
6 Repeat steps 3 to 5 to
rename the new group.
Add a New Tab
1 In the Customize Ribbon
tab of the Excel Options
dialog box, click New Tab.
● Excel adds the tab.
● Excel adds a new group
within the tab.
2 Click the new tab.
3 Click Rename.
Although you will mostly prefer to add one or
more custom groups to the default Excel tabs,
this is not always convenient because it reduces
the amount of space available to the other
groups in the tab. This can cause the buttons
to appear cluttered, making it harder to find
the button you need.
In such cases, a better customization method is
to create your own tabs and populate them
with custom groups and commands.
You can also export your Ribbon customizations
to a file so that other people can import the
same customizations. For more information, see
the section, “Export Ribbon Customizations to
a File.”
Customize the
Ribbon
(continued)
03_577769-ch01.indd 803_577769-ch01.indd 8 3/27/10 9:00 AM3/27/10 9:00 AM
9
Chapter 1: Making Excel More Efficient
44
22
55
66
33
11
Add a Command
1 Click the Choose
Commands From drop-
down arrow.
2 Click the command
category you want to use.
3 Click the command you
want to add.
4 Click the custom group
you want to use.
5 Click Add.
● Excel adds the command.
● To remove a custom
command, click it and
then click Remove.
6 Click OK.
● Excel adds the new tab or
group, as well as the new
command, to the Ribbon.
Try This!
You can also customize the tabs that appear
only when you select an Excel object. Excel calls
these tool tabs, and you can add custom groups
and commands to any tool tab. Right-click any
part of the Ribbon, and then click Customize
the Ribbon to display the Excel Options dialog
box with the Customize Ribbon tab displayed.
Click the Customize the Ribbon list and then
click Tool Tabs. Click the tab you want to add,
and then follow the steps in this section to
customize it.
Remove It!
Right-click any part of the Ribbon,
and then click Customize the Ribbon;
the Excel Options dialog box appears
with the Customize Ribbon tab
displayed. To restore a tab, click the
tab, click Restore Defaults, and then
click Restore Only Selected Ribbon
Tab. To remove all customizations,
click Restore Defaults and then click
Restore All Ribbon Tabs and Quick
Access Toolbar Customizations.
03_577769-ch01.indd 903_577769-ch01.indd 9 3/27/10 9:00 AM3/27/10 9:00 AM
10
33
22
44
11
The Excel Options dialog
box appears.
● Excel automatically
displays the Customize
Ribbon tab.
3 Click Import/Export.
4 Click Export All Ribbon
and Quick Access Toolbar
Customizations.
1 Right-click any part of the
Ribbon.
2 Click Customize the
Ribbon.
You can make it easy to apply Ribbon and
Quick Access Toolbar customizations on
another computer by exporting your own
customizations to a file.
Customizing the Ribbon or the Quick Access
Toolbar is not a difficult process, but it can be
time-consuming, particularly if you want to
make a substantial number of changes. If you
use Excel 2010 on another computer, it is
likely that you will want to have the same
customizations on the other computer so that
you are dealing with a consistent interface no
matter where you do your spreadsheet work.
Rather than wasting valuable time repeating
the same customization steps on the other
computer, you can export your customizations
to a file. You can then import that file on the
other computer, and Excel automatically
applies the customizations for you.
Export Ribbon
Customizations to a File
03_577769-ch01.indd 1003_577769-ch01.indd 10 3/27/10 9:00 AM3/27/10 9:00 AM
11
Chapter 1: Making Excel More Efficient
55
66
88
77
Apply It!
To apply the Ribbon and Quick Access Toolbar customizations on another computer
running Excel 2010, you need to import the customization file that you exported by
following the steps in this section. Note, however, that importing a customization file
replaces any existing customizations that you have created.
On the computer you are customizing, right-click any part of the Ribbon, and then click
Customize the Ribbon to open the Excel Options dialog box with the Customize Ribbon
tab displayed. Click the Import/Export drop-down arrow and then click Import
Customization File. In the File Open dialog box, locate and then click the customization
file, and then click Open. When Excel asks you to confirm that all of your existing
customizations will be replaced, click Yes and then click OK. Excel applies the Ribbon
and Quick Access Toolbar customizations.
Excel saves the
customizations to the file.
8 Click OK.
The File Save dialog box
appears.
5 Choose a location for the
customization file.
6 Type a name for the file.
7 Click Save.
03_577769-ch01.indd 1103_577769-ch01.indd 11 3/27/10 9:00 AM3/27/10 9:00 AM
12
22
11
33
The Excel Options dialog
box appears.
3 Click the Advanced tab.
1 Click the File tab button.
2 Click Options.
If you frequently zoom in or out of a
worksheet, you can save time by configuring
Excel to enable you to zoom using the wheel
on your mouse.
Zooming a worksheet is a useful technique.
For example, you might want to zoom out of a
large worksheet to get a sense of the overall
structure of the worksheet data. Similarly,
zooming in on a section of a worksheet enables
you to focus on just that section.
You normally zoom either by using the
controls in the View tab’s Zoom group, or by
using the Zoom slider that appears in the
bottom-right corner of the Excel window.
These techniques are fine if you only zoom
occasionally. However, if you use the zoom
feature frequently, it is a good idea to configure
Excel to zoom using the mouse wheel.
Configure Excel to Use the
Mouse Wheel for Zooming
03_577769-ch01.indd 1203_577769-ch01.indd 12 3/27/10 9:00 AM3/27/10 9:00 AM
13
Chapter 1: Making Excel More Efficient
55
44
5 Click OK.
You can now zoom in
and out of your Excel
spreadsheets by turning
the mouse wheel.
4 Click to select the Zoom
on Roll with IntelliMouse
option.
Note: Although the option name
specifies the Microsoft IntelliMouse,
this option works with any mouse
that comes with a standard scroll
wheel.
Try It!
When you activate the Zoom on Roll
with IntelliMouse check box, rolling
the mouse wheel forward causes
Excel to zoom in on the worksheet
by 15 percent with each scroll of the
wheel; rolling the mouse wheel
backward causes Excel to zoom out
of the worksheet by 15 percent with
each scroll.
Did You Know?
When the Zoom on Roll with IntelliMouse check
box is deactivated, rolling the mouse wheel
causes Excel to scroll the worksheet: roll the
wheel back to scroll down, and roll the wheel
forward to scroll up. This is a useful technique,
and you can still use it even when the Zoom on
Roll with IntelliMouse check box is activated. In
that case, hold down the Ctrl key and roll the
mouse wheel to scroll the worksheet.
03_577769-ch01.indd 1303_577769-ch01.indd 13 3/27/10 9:00 AM3/27/10 9:00 AM