ASP.NET 4 Unleased - p 125 docx
Bạn đang xem bản rút gọn của tài liệu. Xem và tải ngay bản đầy đủ của tài liệu tại đây (582.38 KB, 10 trang )
ptg
1214
CHAPTER 27 Using ASP.NET Membership
You can add a machineKey element with explicit keys to either the machine root web
configuration file or to particular application web configuration files. If you don’t want to
share the same keys across all the applications on a web server, you should add the
machineKey element only to the applications that you need to share.
Using Forms Authentication Across Domains
In the previous section, you learned how to share the same authentication cookie across
applications located on the same server or a different server. But how do you share the
same authentication cookie across domains?
A browser cookie is always domain relative. For example, the Amazon website cannot
read cookies set by the Barnes & Noble website, which is a good thing. However, you
might discover that you need to share authentication information across websites with
different domains.
You can work around this problem by passing an authentication ticket in a query string
parameter rather than in a cookie. There is nothing to prevent you from passing query
strings between domains.
To enable this scenario, you must configure your applications to accept authentication
tickets passed in a query string. The web configuration file in Listing 27.6 includes an
enableCrossAppRedirects attribute that enables sharing authentication tickets across
domains.
FIGURE 27.1 Generating cryptographically strong keys.
From the Library of Wow! eBook
ptg
1215
Configuring Authentication
LISTING 27.6 Web.config
<?xml version=”1.0”?>
<configuration>
<system.web>
<authentication mode=”Forms”>
<forms enableCrossAppRedirects=”true” />
</authentication>
<machineKey
decryption=”AES”
validation=”SHA1”
decryptionKey=”306C1FA852AB3B0115150DD8BA30821CDFD125538A0C606DACA5
➥
3DBB3C3E0AD2”
validationKey=”61A8E04A146AFFAB81B6AD19654F99EA7370807F18F5002725DAB98B8E
➥
FD19C711337E26948E26D1D174B159973EA0BE8CC9CAA6AAF513BF84E44B2247792265” />
</system.web>
</configuration>
If you add the web configuration file in Listing 27.6 to two applications located in different
domains, the two applications can share the same authentication ticket.
WARNING
Make sure that you change the validation and encryption keys in Listing 27.6. You can
use the GenerateKeys.aspx page discussed in the previous section to generate new
random keys.
When you link or redirect from one application to another, you must pass the authentica-
tion ticket in a query string parameter. The page in Listing 27.7 adds the necessary query
string parameter to a hyperlink.
LISTING 27.7 QueryStringAuthenticate.aspx
<%@ Page Language=”C#” %>
<!DOCTYPE html PUBLIC “-//W3C//DTD XHTML 1.0 Transitional//EN”
“
<script runat=”server”>
void Page_Load()
{
string cookieName = FormsAuthentication.FormsCookieName;
string cookieValue =
FormsAuthentication.GetAuthCookie(User.Identity.Name, false).Value;
27
From the Library of Wow! eBook
ptg
1216
lnkOtherDomain.NavigateUrl += String.Format(“?{0}={1}”, cookieName,
➥
cookieValue);
}
</script>
<html xmlns=” >
<head id=”Head1” runat=”server”>
<title>Query String Authenticate</title>
</head>
<body>
<form id=”form1” runat=”server”>
<div>
<asp:HyperLink
id=”lnkOtherDomain”
Text=”Link to Other Domain”
NavigateUrl=”
Runat=”server” />
</div>
</form>
</body>
</html>
</html>
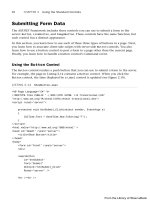
Using the FormsAuthentication Class
The main application programming interface for interacting with Forms authentication is
the FormsAuthentication class. This class supports the following properties:
. CookieDomain—Returns the domain associated with the authentication cookie.
. CookieMode—Returns the cookieless authentication mode. Possible values are
AutoDetect, UseCookies, UseDeviceProfile, and UseUri.
. CookiesSupported—Returns True when a browser supports cookies and Forms
authentication is configured to use cookies.
. DefaultUrl—Returns the URL of the page to which a user is redirected after being
authenticated.
. EnableCrossAppRedirects—Returns True when an authentication ticket can be
removed from a query string.
. FormsCookieName—Returns the name of the authentication cookie.
. FormsCookiePath—Returns the path associated with the authentication cookie.
. LoginUrl—Returns the URL of the page to which a user is redirected when being
authenticated.
CHAPTER 27 Using ASP.NET Membership
From the Library of Wow! eBook
ptg
1217
Configuring Authentication
27
. RequireSSL—Returns True when the authentication cookie must be transmitted with
SSL (the Secure Sockets Layer).
. SlidingExpiration—Returns True when the authentication cookie uses a sliding
expiration policy.
These properties return the configuration settings for Forms authentication from the web
configuration file.
The FormsAuthentication class supports the following methods:
. Authenticate—Enables you to validate a username and password against a list of user-
names and passwords stored in the web configuration file.
. Decrypt—Enables you to decrypt an authentication cookie.
. GetAuthCookie—Enables you to retrieve an authentication cookie.
. GetRedirectUrl—Enables you to retrieve the path to the original page that caused
the redirect to the Login page.
. HashPasswordForStoringInConfigFile—Enables you to hash a password so that it
can be stored in the web configuration file.
. RedirectFromLoginPage—Enables you to redirect a user back to the original page
requested before the user was redirected to the Login page.
. RedirectToLoginPage—Enables you to redirect the user to the Login page.
. RenewTicketIfOld—Enables you to update the expiration time of an authentication
cookie.
. SetAuthCookie—Enables you to create and issue an authentication cookie.
. SignOut—Enables you to remove an authentication cookie and log out a user.
You can use the methods and properties of the FormsAuthentication class to build a user
registration and authentication system without using ASP.NET Membership. For example,
the web configuration file in Listing 27.8 contains a list of usernames and passwords.
LISTING 27.8 Web.Config
<?xml version=”1.0”?>
<configuration>
<system.web>
<authentication mode=”Forms”>
<forms>
<credentials passwordFormat=”Clear”>
<user name=”Bill” password=”secret” />
<user name=”Jane” password=”secret” />
<user name=”Fred” password=”secret” />
</credentials>
From the Library of Wow! eBook
ptg
1218
FIGURE 27.2 Authenticating against web configuration credentials.
</forms>
</authentication>
</system.web>
</configuration>
The web configuration file in Listing 27.8 contains a forms element that contains a
credentials element. The credentials element includes a list of usernames and passwords.
Notice that the credentials element includes a passwordFormat attribute that is set to the
value Clear. If you prefer, rather than store passwords in clear text, you can store password
hash values. That way, anyone working on the web server can’t see everyone else’s pass-
words. The other two possible values for the passwordFormat attribute are MD5 and SHA1.
NOTE
If you need to hash a password so you can store it in the web configuration file, you
can use the (appropriately named) FormsAuthentication.HashPasswordForStoring
InConfigFile() method. This method accepts a clear text password and the name of
a hash algorithm, and it returns a hashed version of the password.
The Login page in Listing 27.9 contains a User Name and a Password text box (see
Figure 27.2).
CHAPTER 27 Using ASP.NET Membership
From the Library of Wow! eBook
ptg
1219
Configuring Authentication
27
LISTING 27.9 FormsLogin.aspx
<%@ Page Language=”C#” %>
<!DOCTYPE html PUBLIC “-//W3C//DTD XHTML 1.0 Transitional//EN”
“
<script runat=”server”>
protected void btnLogin_Click(object sender, EventArgs e)
{
if (FormsAuthentication.Authenticate(txtUserName.Text,txtPassword.Text))
FormsAuthentication.RedirectFromLoginPage(
txtUserName.Text, chkRememberMe.Checked);
else
lblError.Text = “Invalid user name/password”;
}
</script>
<html xmlns=” >
<head id=”Head1” runat=”server”>
<title>Forms Login</title>
</head>
<body>
<form id=”form1” runat=”server”>
<div>
<asp:Label
id=”lblError”
EnableViewState=”false”
ForeColor=”Red”
Runat=”server” />
<br /><br />
<asp:Label
id=”lblUserName”
Text=”User Name:”
AssociatedControlID=”txtUserName”
Runat=”server” />
<br />
<asp:TextBox
id=”txtUserName”
Runat=”server” />
<br /><br />
<asp:Label
id=”lblPassword”
Text=”Password:”
AssociatedControlID=”txtPassword”
Runat=”server” />
From the Library of Wow! eBook
ptg
1220
CHAPTER 27 Using ASP.NET Membership
<br />
<asp:TextBox
id=”txtPassword”
TextMode=”Password”
Runat=”server” />
<br /><br />
<asp:CheckBox
id=”chkRememberMe”
Text=”Remember Me”
Runat=”server” />
<br /><br />
<asp:Button
id=”btnLogin”
Text=”Login”
OnClick=”btnLogin_Click”
Runat=”server” />
</div>
</form>
</body>
</html>
When you click the Login button, the btnLogin_Click() handler executes and the
FormsAuthentication.Authenticate() method checks whether the username and
password entered into the TextBox controls match a username and password in
the web configuration file. If the user successfully authenticates, the
FormsAuthentication.RedirectFromLoginPage() method is called.
The RedirectFromLoginPage() method does two things. The method adds an authentica-
tion cookie to the user’s browser. The method also redirects the user back to whatever page
the user originally requested. If the user requests the Login page directly, the user is redi-
rected to the Default.aspx page.
The second parameter passed to the RedirectFromLoginPage() method indicates whether
you want to create a session or persistent cookie. If you create a persistent cookie, a user
does not need to log in when the user returns to the website in the future.
Using the User Class
You can use the Page.User or the HttpContext.User property to retrieve information
about the current user. The Page.User property exposes a Principal object that supports
the following method:
. IsInRole—Enables you to check whether a user is a member of a particular role.
From the Library of Wow! eBook
ptg
1221
Configuring Authorization
27
For example, when Windows authentication is enabled, you can use the IsInRole()
method to check whether a user is a member of a particular Microsoft Windows group
such as the BUILTIN\Administrators group:
if (User.IsInRole(“BUILTIN\Administrators”))
{
// Do some Administrator only operation
}
NOTE
If the Role Manager is enabled, you must configure the Role Manager to use the
WindowsTokenRoleProvider before you can use the User.IsInRole() method with
Windows groups.
The Principal object also includes an Identity property that enables you to get informa-
tion about the current user’s identity. The Identity object supports the following three
properties:
. AuthenticationType—Enables you to determine how the user was authenticated.
Examples of possible values are Forms, Basic, and NTLM.
. IsAuthenticated—Enables you to determine whether a user is authenticated.
. Name—Enables you to retrieve the user’s name.
If you want to get the name of the current user, you can use logic that looks like this:
Dim name As String = User.Identity.Name
If a user is not authenticated, the User.Identity.Name property returns an empty string.
Configuring Authorization
Authorization refers to the process of identifying the resources that you are allowed
to access. You control authorization by adding an authorization element to a web
configuration file.
Authorization works the same way regardless of the type of authentication that is enabled.
In other words, you configure authorization in the same way when using Forms,
Windows, and .NET Passport authentication.
Typically, you place all the pages that you want to password-protect in a separate folder. If
you add a web configuration file to the folder, the settings in the web configuration file
apply to all pages in the folder and all subfolders.
From the Library of Wow! eBook
ptg
1222
CHAPTER 27 Using ASP.NET Membership
For example, if you add the web configuration file in Listing 27.10 to a folder, then unau-
thenticated users are blocked from accessing pages in the folder.
LISTING 27.10 SecretFiles\Web.Config
<?xml version=”1.0”?>
<configuration>
<system.web>
<authorization>
<deny users=”?”/>
</authorization>
</system.web>
</configuration>
If you add the file in Listing 27.10 to a folder, unauthenticated users cannot access any
pages in the folder. When Forms authentication is enabled, unauthenticated users are
automatically redirected to the Login page.
The web configuration file in Listing 27.10 contains an authorization element that
contains a single authorization rule. The configuration file denies access to anonymous
users. The ? symbol represents anonymous (unauthenticated) users.
You can use the following two special symbols with the users attribute:
. ?—Represents unauthenticated users.
. *—Represents all users (unauthenticated or authenticated).
You also can assign a particular username, or comma-delimited list of usernames, to the
deny element. For example, the authorization element in Listing 27.11 enables access for a
user named Jane, but denies access to anyone else (even authenticated users).
LISTING 27.11 SecretFiles\Web.Config
<?xml version=”1.0”?>
<configuration>
<system.web>
<authorization>
<allow users=”Jane” />
<deny users=”*” />
</authorization>
</system.web>
</configuration>
From the Library of Wow! eBook
ptg
1223
Configuring Authorization
27
The order of the authorization rules is important. The ASP.NET Framework uses a first-
match algorithm. If you switched the allow and deny rules in Listing 27.11, no one, not
even Jane, would be allowed to access the pages in the folder.
NOTE
You c an prevent anonymou s user s from accessing any page in an application by adding
an authorization element to the application root web configuration file. In that case,
anonymous users are still allowed to access the Login page. (Otherwise, no one could
log in when using Forms authentication.)
VISUAL WEB DEVELOPER NOTE
If you prefer, you can configure authorization rules by using the Web Site Administration
Tool. This tool provi des you wi th a fo rm interface fo r configuring aut horizat ion r ules f or
different folders. You can open the Web Site Administration Tool by selecting Website,
ASP.NET Configuration.
Authorizing by Role
When creating authorization rules, you can authorize by user role. For example, the web
configuration file in Listing 27.12 prevents access to any pages in a folder by anyone
except members of the Administrators role.
LISTING 27.12 SecretFiles\Web.Config
<?xml version=”1.0”?>
<configuration>
<system.web>
<authorization>
<allow roles=”Administrator”/>
<deny users=”*”/>
</authorization>
</system.web>
</configuration>
When Forms authentication is enabled, the role refers to a custom role. In the final
section of this chapter, “Using the Role Manager,” you learn how to configure and create
custom roles. When Windows authentication is enabled, the role refers to a Microsoft
Windows group.
From the Library of Wow! eBook