Adobe Flash chuyên nghiệp - p 19 potx
Bạn đang xem bản rút gọn của tài liệu. Xem và tải ngay bản đầy đủ của tài liệu tại đây (5.39 MB, 10 trang )
ptg
Adobe fLAsh professionAL Cs5 CLAssrooM in A book 171
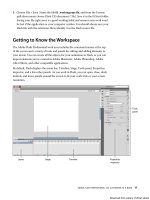
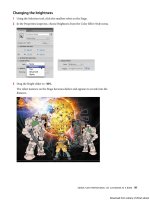
7 When the armature is complete, use the Selection tool to click and drag the
last bone to see how the deformation of the tentacle follows the bones of the
armature.
Editing the shape
You don’t need any special tools to edit the shape that contains bones. Many of the
same drawing and editing tools in the Tools panel, such as the Paint Bucket, the Ink
Bottle, and the Subselection tools, are available to you to edit the fill, the stroke, or
the contours.
1 Choose the Paint Bucket tool.
2 Choose a dark peach color for the Fill.
3 Click on the shape in the Pose layer.
e fill color of the tentacle changes.
Download from Library of Wow! ebook
ptg
172 LESSON 5 Articulated Motion and Morphing
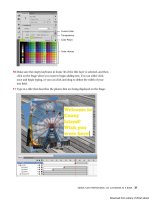
4 Choose the Ink Bottle tool.
5 Choose a dark red color for the stroke.
6 Click on the shape in the Pose layer.
e outline of the tentacle changes color.
7 Choose the Subselection tool.
8 Click on the contour of the shape.
e anchor points and the control handles appear around the contour of the
shape.
9 Drag the anchor points to new locations or click and drag the handles to make
edits to the tentacle shape.
Note: Add new points on the contour of the shape with the Add Anchor Point tool. Delete points
on the contour of the shape with the Delete Anchor Point tool. Both the Add Anchor Point and
Delete Anchor Point tools are located under the Pen tool.
Download from Library of Wow! ebook
ptg
Adobe fLAsh professionAL Cs5 CLAssrooM in A book 173
Editing the bones and armature
e Subselection tool can move the joints within a shape. However, the location of
the joints within the shape can only be edited when you have a single pose for your
armature. After your armature has been repositioned in later frames of the Pose
layer, changes to the bone structure cannot be made.
Use the Selection tool if you want to move the entire armature to a different loca-
tion but keep the bone structure unchanged.
1 Choose the Subselection tool.
2 Click on a joint.
3 Click and drag the joint within the shape to a new location.
4 Choose the Selection tool. Hold down the Alt/Option key and drag the entire
armature to a new location.
Note: You can easily remove bones or add more bones to your armature. Choose the Selection
tool and click on the bone you want to delete. Press the Delete key to remove the selected bone; all
the child bones will be removed as well. Add new bones by choosing the Bone tool and clicking on
the armature.
Download from Library of Wow! ebook
ptg
174 LESSON 5 Articulated Motion and Morphing
Refining the Shape Behavior
with the Bind Tool
The organic control of a shape by its
armature is a result of a mapping between
the anchor points along the shape and
its bones. The points along the tip of the
tentacle, for example, are mapped to the
very last bone, whereas the points farther
up the tentacle are mapped to the bones
farther up the tentacle. Hence, where the
bones rotate, the shape follows.
You can edit the connections between the
bones and their control points with the
Bind tool (
). The Bind tool is hidden
under the Bone tool. The Bind tool displays
which control points are connected to
which bones and lets you break those connections and make new ones.
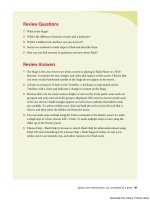
Choose the Bind tool and click on any bone in the shape. The selected bone is highlighted in red, and
all the connected control points on the shape are highlighted in yellow.
If you want to redefine which control points are connected to the selected bone, you can do the
following:
• Shift-click to add additional associations to control points.
• Ctrl-click/Command-click to remove associations to control points.
• Drag a connection line between the bone and the control point. In the following figure, a line is
being dragged from the selected bone to a point on the left to make the association.
Download from Library of Wow! ebook
ptg
Adobe fLAsh professionAL Cs5 CLAssrooM in A book 175
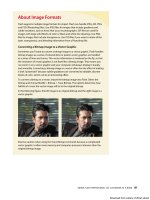
Click on any control point on the shape. The selected control point is highlighted in red, and all the
connected bones are highlighted in yellow. In this figure, the red highlighted point is associated with
the first bone.
If you want to redefine which bones are connected to the selected control point, you can do the
following:
• Shift-click to add additional associations to bones.
• Ctrl-click/Command-click to remove associations to bones.
• Drag a connection line between the control point and the bone. In the following figure, another
control point farther down the tentacle is being associated with the first bone.
Download from Library of Wow! ebook
ptg
176 LESSON 5 Articulated Motion and Morphing
Armature Options
Many settings are available through the Properties inspector that can help you
make your armature interactive or help you apply easing to your armature motion.
You can also choose different viewing options for your armature to suit your work-
ing style.
Authortime and runtime armatures
Authortime armatures are those that you pose along the Timeline and play as
straightforward animations. Runtime armatures refer to armatures that are
interactive and allow the user to move your armature. You can make any of your
armatures—whether they are made with a series of movie clips such as the crane or
made with a shape such as the octopus tentacle—into an authortime or a runtime
armature. Runtime armatures, however, are restricted to armatures that only have
a single pose.
1 Continue with the file 05ShapeIK_workingcopy.fla.
2 Select the layer containing the tentacle armature.
3 In the Properties inspector, select Runtime from the Type option.
e armature becomes a runtime armature, allowing the user to directly
manipulate the octopus tentacle. e first frame of the Pose layer displays the
armature icon to indicate that the runtime option is selected and no additional
poses can be added.
Download from Library of Wow! ebook
ptg
Adobe fLAsh professionAL Cs5 CLAssrooM in A book 177
4 Test your movie by choosing Control > Test Movie > in Flash Professional.
e user can click and drag the tentacle and interactively move it on the Stage.
controlling easing
e Motion Editor and its sophisticated controls for easing cannot be used with
armatures. However, there are a few standard eases available from the Properties
inspector that you can apply to your armatures. Easing can make your armature
move with a sense of gravity due to acceleration or deceleration of its motion.
1 Select the layer containing the tentacle armature.
2 In the Properties inspector, select Authortime for Type in the Options section.
e armature becomes an authortime armature again.
3 Select frame 40 for all the layers and choose Insert > Timeline > Frame.
Frames are inserted in all the layers, giving you room on the Timeline to create
additional poses for the tentacle.
4 Move the red playhead to frame 40.
Download from Library of Wow! ebook
ptg
178 LESSON 5 Articulated Motion and Morphing
5 With the Selection tool, grab the tip of the tentacle, curl it upward, and move it
to one side.
A new pose is inserted in frame 40 for the tentacle armature.
6 Select the first pose in frame 1 of the Armature layer.
7 In the Properties inspector, select Simple (Medium) for the Type under the Ease
section.
e variations of Simple eases (from Slow to Fastest) represent the severity of
the ease. ey represent the same curvatures provided in the Motion Editor for
motion tweens.
8 Set the Strength to 100.
e Strength represents the direction of the ease. A negative value is an ease-in
and a positive value is an ease-out.
Download from Library of Wow! ebook
ptg
Adobe fLAsh professionAL Cs5 CLAssrooM in A book 179
9 Choose Control > Test Movie > in Flash Professional to preview your animation.
e tentacle curls up, easing out of its motion gradually.
10 Close the Test Movie window.
11 Select the first pose in frame 1.
12 Change the Strength setting to -100 and test your movie again.
e tentacle curls up, but the motion now eases in, starting slowly and gradually
speeding up.
13 Close the Test Movie window.
14 Select the first pose in frame 1.
15 In the Properties inspector under the Ease
section, select Start and Stop (Medium)
for Type.
e variations of Stop and Start eases (from
Slow to Fastest) represent the severity of the
ease. e Stop and Start eases have curves on
both ends of the motion, so the easing values
affect the start of the motion and the end of
the motion.
16 Set the Strength to -100.
17 Choose Control > Test Movie > in Flash
Professional to preview your animation.
e tentacle curls up, easing into its motion gradually and also easing out of its
motion gradually.
Download from Library of Wow! ebook
ptg
180 LESSON 5 Articulated Motion and Morphing
Morphing with Shape Tweens
Shape tweening is a technique for interpolating amorphous changes between
shapes in different keyframes. Shape tweens make it possible to smoothly morph
one thing into another. Any kind of animation that requires that the contours of a
shape change—for example, animation of clouds, water, or fire—is a perfect candi-
date for shape tweening.
Both the fill and the stroke of a shape can be smoothly animated. Because shape
tweening only applies to shapes, you can’t use groups, symbol instances, or bitmap
images.
Establish keyframes containing different shapes
In the following steps, you’ll animate the gently undulating surface of the ocean
beneath the crane with a shape tween.
1 Continue with the file of the crane animation called 05_workingcopy.fla.
2 Lock and hide all the layers except for the water layer. e water layer contains
a transparent blue shape at the bottom of the Stage.
3 Move the red playhead to frame 50 in the water layer.
4 Right-click/Ctrl-click on frame 50 in the water layer and select Insert Keyframe.
Or, choose Insert > Timeline > Keyframe (F6).
A new keyframe is inserted at frame 50. e contents of the previous keyframe
are copied into the second keyframe.
5 Move the red playhead to frame 100.
Download from Library of Wow! ebook