Beginning Game Programming (phần 2) ppt
Bạn đang xem bản rút gọn của tài liệu. Xem và tải ngay bản đầy đủ của tài liệu tại đây (872.06 KB, 50 trang )
int WINAPI WinMain(HINSTANCE hInstance, HINSTANCE hPrevInstance,
LPSTR lpCmdLine, int nShowCmd)
{
MessageBox(NULL, "Motoko Kusanagi has hacked your system!",
"Public Security Section 9", MB_OK | MB_ICONEXCLAMATION);
}
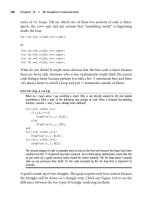
This program simply displays a dialog box on the screen, as shown in Figure 2.5.
What is the most important thing you should glean from this example? That
WinMain does not need to be a big, ugly, complex hodge-podge of app code. When
you compile a program with Visual C++, the executable file is located in a folder
called Debug (inside your project’s folder).
30 Chapter 2
n
Windows Programming Basics
Figure 2.4
A new source file has been added to the project, ready for your source code.
In the tradition of climbing the learning curve, I’ll expand this little example a bit
and show you how to create a standard program window and draw on it. This is
the next step before you actually learn to initialize and use Direct3D.
Now that you’ve seen what a very simple Windows program looks like, let’s delve
a little further into the magical realm of Windows programming and learn to
create a real window and draw stuff on it—using
MessageBox is a bit of a cheat!
What you really want is your very own window, which you’ll create in the next
chapter. Ironically, you won’t need a main program window when you start
writing DirectX code, because DirectX interfaces directly with the video card.
The one exception would be if you were to write DirectX programs that run in a
window. In my opinion, doing this defeats the purpose of DirectX, though,
because a game shouldn’t run in a window, it should always (without exception)
run fullscreen. Do you want players focusing on your game or on instant mes-
sages and e-mail?
Understanding WinMain
As you have just learned, every Windows program has a function called WinMain .
WinMain is the Windows equivalent of the main function in standard C programs,
and is the initial entry point for a
Windows program. The most important function in
your program will be
WinMain, but after you have set up the messaging calls you will
probably not come back to
WinMain while working on other parts of the program.
WinMain hasn’t changed since 16-bit Windows 3.x, in order to retain backward
compatibility.
WinMain is the boss, the foreman, and handles the top-level part of
the program. The job of
WinMain is to set up the program, and then to set up the
main message loop for the program. This loop processes all of the messages
received by the program. Windows sends these messages to every running pro-
gram. Most of the messages will not be used by your program, and so the O/S
doesn’t even send some messages to your program. Usually,
WinMain will send
The Basics of a Windows Program 31
Figure 2.5
Output from the ‘‘Hello World’’ program
messages over to another function called WinProc, which works closely with
WinMain to process user input and other messages. See Figure 2.6 for a com-
parison of
WinMain and WinProc.
The WinMain Function Call
The function call for WinMain looks like this:
int WINAPI WinMain( HINSTANCE hInstance,
HINSTANCE hPrevInstance,
LPTSTR lpCmdLine,
int nCmdShow )
Let’s go over these parameters:
n HINSTANCE hInstance. The first parameter identifies the instance of the
program being called, as a program may be run several times. The
Windows architecture is such that program code actually runs in a single
memory space to conserve memory, while program data and variables are
stored in individual memory spaces. The
hInstance parameter tells the
program which instance is trying to run. For the first instance, you will
want to initialize the program (covered later). But if the program is run
multiple times in Windows, the general practice is to just kill the new
instance (also covered later).
32 Chapter 2
n
Windows Programming Basics
Figure 2.6
WinMain and WinProc work hand-in-hand to handle application events (such as painting the screen
and responding to mouse clicks).
n HINSTANCE hPrevInstance. The second parameter identifies the previous
instance of the program and is related to the first parameter. If
hPrevInstance is NULL, then this is the first instance of the program.
You will want to check the value of
hPrevInstance before initializing
the current instance. This is absolutely critical to game programming!
You will never want to have two instances of your game running at the
same time.
n LPTSTR lpCmdLine. The third parameter is a string that contains the
command-line parameters passed to the program. This could be used
to tell the program to use certain options, such as ‘‘debug,’’ which might
be used to dump program execution to a text file. Usually a Windows
program will use a settings (INI) file for program parameters used for
runtime. But there are many cases where you would use program para-
meters; an image viewer, for instance, will often be passed the name of a
picture file to display.
n int nCmdShow. The last parameter specifies how the program window is to
be displayed.
You might have noticed that WinMain returns a value with the words int WINAPI in
front of the function call. This is also standard practice and goes back to
Windows 3.x. A return value of zero indicates that the program never made it to
the main loop and was terminated prematurely. Any non-zero value indicates
success.
The Complete WinMain
Listed below is more of a standard version of WinMain that you will often see in
app code. I will explain each part of the function following the code listing
presented here:
int WINAPI WinMain(HINSTANCE hInstance,
HINSTANCE hPrevInstance,
LPSTR lpCmdLine,
int nCmdShow)
{
// declare variables
MSG msg;
The Basics of a Windows Program 33
// register the class
MyRegisterClass(hInstance);
// initialize application
if (!InitInstance (hInstance, nCmdShow))
return FALSE;
// main message loop
while (GetMessage(&msg, NULL, 0, 0))
{
TranslateMessage(&msg);
DispatchMessage(&msg);
}
return msg.wParam;
}
WinMain couldn’t get much simpler than this, considering that the function pro-
cesses the Windows messages for your program (I’ll explain the new stuff shortly!).
Even the simplest of graphics programs will need to process messages. Believe it or
not, doing something as simple as printing ‘‘Hello World’’ on the screen requires
that you wait for a message to come along for painting the screen. Infuriating, isn’t
it? Message handling does take some getting used to if you are used to just calling a
function when you need something (like displaying text on the screen) done.
Fortunately, we won’t spend much time in the basics of Windows because soon I’ll
take you into the realm of DirectX. Once you have initialized Direct3D, there’s no
need to return to
WinMain (patience, Grasshopper!).
Now let me explain what is going on inside
WinMain in the following paragraphs.
You are already familiar with the function call, so let’s move along to the real
code. The first section declares the variables that will be used within
WinMain:
// declare variables
MSG msg;
The MSG variable is used by the GetMessage function later to retrieve the
details of each Windows message. Next, the program is initialized with the
following:
// register the class
MyRegisterClass(hInstance);
34 Chapter 2
n
Windows Programming Basics
// initialize application
if (!InitInstance (hInstance, nCmdShow))
return FALSE;
This code uses the hInstance variable passed to WinMain by Windows. The
variable is then passed on to the
InitInstance function. InitInstance is located
further down in the program, and basically checks to see if the program is already
running and then creates the main program window. I will go over the
MyRegisterClass function shortly.
Finally, let’s look at the main loop that handles all of the messages in the program:
// main message loop
while (GetMessage(&msg, NULL, 0, 0))
{
TranslateMessage(&msg);
DispatchMessage(&msg);
}
The while loop in this part of WinMain will continue to run forever unless a message
to kill the program comes along. The
GetMessage function call looks like this:
BOOL GetMessage(LPMSG lpMsg,
HWND hWnd,
UINT wMsgFilterMin,
UINT wMsgFilterMax)
Let’s decipher the parameters:
n LPMSG lpMsg. This parameter is a long pointer to a MSG structure which
handles the message information.
n HWND hWnd. The second parameter is a handle to a specific window’s
messages. If
NULL is passed, then GetMessage will return all of the messages
for the current instance of the program.
n UINT wMsgFilterMin and UINT wMsgFilterMax. These parameters tell Get-
Message
to return messages in a certain range. The GetMessage call is the
most crucial line of code in the entire Windows program! Without this
single line in
WinMain, your program will be sensory-deprived, unable to
respond to the world.
The two core lines of code within the GetMessage loop work to process the
message returned by
GetMessage. The Windows API Reference states that the
The Basics of a Windows Program 35
TranslateMessage function is used to translate virtual-key messages into char-
acter messages, and then sent back through the Windows messaging system with
DispatchMessage. These two functions will jointly set up the messages that you
will expect to receive in
WinProc (the window callback function) for your game
window, such as
WM_CREATE to create a window and WM_PAINT to draw the window.
I will cover
WinProc later in this chapter. If you feel confused about Windows
messaging, don’t worry about it, because this is just a precursor to working with
DirectX; once you have written a Windows message loop, you will not need to
deal with it again and can focus on your DirectX code.
What You Have Learned
In this chapter, you have learned how to write a simple Windows program and
have explored the purposes of
WinMain and WinProc. Here are the key points:
n You learned some basic Windows programming concepts.
n You learned about the importance of WinMain.
n You wrote a simple Windows program that displayed text in a message
box.
n You learned about Windows messaging and the WinProc callback
function.
36 Chapter 2
n
Windows Programming Basics
Review Questions
Here are some review questions that will help you to think outside the box and
retain some of the information covered in this chapter.
1. What does the
hWnd variable represent?
2. What does the hDC variable represent?
3. What is the main function in a Windows program called?
4. What is the name of the window event callback function?
5. What function is used to display a message inside a program window?
On Your Own
These exercises will challenge you to learn more about the subjects presented in
this chapter and will help you to push yourself to see what you are capable of
doing on your own.
On Your Own 37
Exercise 1. The HelloWorld program displays a simple message in a text box with
an exclamation point icon. Modify the program so that it will display a question
mark icon instead.
Exercise 2. Now modify the HelloWorld program so that it will display your
name in the message box.
38 Chapter 2
n
Windows Programming Basics
Windows Messaging
and Event Handling
The last chapter provided you with an overview of WinMain and WinProc, and you
wrote a simple Windows program. This chapter takes the ball and runs with it,
going over a complete windowed program that displays something on the screen,
thereby showing you how the window handle and device context work to pro-
duce output in a window. This will reinforce your grasp of the basic Windows
programming model; it will also give you a glimpse of the Windows GDI
(graphical device interface) and show you why it is better suited for applications
39
chapter 3
rather than games (for which we have DirectX!). By dividing the tutorial on
Windows programming into several chapters, my goal is to help you digest the
information in a way that helps improve. Rather than going into detail and
providing complete examples using the GDI (which is a waste of time), I’ll go
over the material quickly because I want to get into DirectX right away. If you feel
that you have a solid understanding of Windows programming already, you may
skip to the next chapter to learn how to write a real-time game loop. Otherwise,
read on!
Here is what you will learn in this chapter:
n How to create a window.
n How to draw text on the window.
n How to draw pixels on the window.
n How the WM_PAINT event works in the WinProc callback function.
Writing a Full-Blown Windows Program
Okay, let’s use the new information you learned in the last chapter to write a
slightly more complicated program that actually creates a standard window and
draws text and graphics on the window. Sounds pretty simple, right? Well, it is!
There’s a lot of startup code when you need to draw on a window, so let’s learn by
example.
Create another Win32 Application project (call it ‘‘WindowTest’’) using Visual
C++ and add a new main.cpp file to the project. I want to give you a complete
listing for a more fully functional Windows program, after which we will reverse-
engineer the program and explain each line of code in detail. See if you can figure
out what’s going on as you type in the program. If you would prefer to not type
in the program, you can open the project from the CD-ROM in \sources\
chapter03\WindowTest (and don’t worry, I won’t call you lazy).
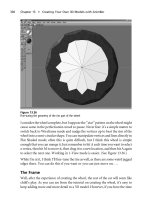
After you have compiled and run the program, you should see output like that
in Figure 3.1. Oops, not sure how to compile the program? No problem, let me
show you. The easiest way is to press Ctrl+F5 to build and run the program
(assuming there are no errors). If you want to just compile the code, press
Ctrl+Shift+B (for build). You can also perform these actions from the Build
menu (Build Solution) and the Debug menu (Start Without Debugging).
40 Chapter 3
n
Windows Messaging and Event Handling
// Beginning Game Programming
// Chapter 3
// WindowTest program
//header files to include
#include <windows.h>
#include <stdlib.h>
#include <time.h>
//application title
#define APPTITLE "Hello World"
//function prototypes (forward declarations)
BOOL InitInstance(HINSTANCE,int);
ATOM MyRegisterClass(HINSTANCE);
LRESULT CALLBACK WinProc(HWND,UINT,WPARAM,LPARAM);
//the window event callback function
LRESULT CALLBACK WinProc(HWND hWnd, UINT message, WPARAM wParam, LPARAM lParam)
{
PAINTSTRUCT ps;
HDC hdc;
char *szHello = "Hello World!";
RECT rt;
int x, y, n;
COLORREF c;
switch (message)
Writing a Full-Blown Windows Program 41
Figure 3.1
The WindowTest program
{
case WM_PAINT:
//get the dimensions of the window
GetClientRect(hWnd, &rt);
//start drawing on device context
hdc = BeginPaint(hWnd, &ps);
//draw some text
DrawText(hdc, szHello, strlen(szHello), &rt, DT_CENTER);
//draw 1000 random pixels
for (n=0; n<3000; n++)
{
x = rand() % (rt.right - rt.left);
y = rand() % (rt.bottom - rt.top);
c = RGB(rand()%256, rand()%256, rand()%256);
SetPixel(hdc, x, y, c);
}
//stop drawing
EndPaint(hWnd, &ps);
break;
case WM_DESTROY:
PostQuitMessage(0);
break;
}
return DefWindowProc(hWnd, message, wParam, lParam);
}
//helper function to set up the window properties
ATOM MyRegisterClass(HINSTANCE hInstance)
{
//create the window class structure
WNDCLASSEX wc;
wc.cbSize = sizeof(WNDCLASSEX);
//fill the struct with info
wc.style = CS_HREDRAW | CS_VREDRAW;
wc.lpfnWndProc = (WNDPROC)WinProc;
wc.cbClsExtra = 0;
wc.cbWndExtra = 0;
wc.hInstance = hInstance;
42 Chapter 3
n
Windows Messaging and Event Handling
wc.hIcon = NULL;
wc.hCursor = LoadCursor(NULL, IDC_ARROW);
wc.hbrBackground = (HBRUSH)GetStockObject(WHITE_BRUSH);
wc.lpszMenuName = NULL;
wc.lpszClassName = APPTITLE;
wc.hIconSm = NULL;
//set up the window with the class info
return RegisterClassEx(&wc);
}
//helper function to create the window and refresh it
BOOL InitInstance(HINSTANCE hInstance, int nCmdShow)
{
HWND hWnd;
//create a new window
hWnd = CreateWindow(
APPTITLE, //window class
APPTITLE, //title bar
WS_OVERLAPPEDWINDOW, //window style
CW_USEDEFAULT, //x position of window
CW_USEDEFAULT, //y position of window
500, //width of the window
400, //height of the window
NULL, //parent window
NULL, //menu
hInstance, //application instance
NULL); //window parameters
//was there an error creating the window?
if (!hWnd)
return FALSE;
//display the window
ShowWindow(hWnd, nCmdShow);
UpdateWindow(hWnd);
return TRUE;
}
//entry point for a Windows program
int WINAPI WinMain(HINSTANCE hInstance,
Writing a Full-Blown Windows Program 43
HINSTANCE hPrevInstance,
LPSTR lpCmdLine,
int nCmdShow)
{
// declare variables
MSG msg;
// register the class
MyRegisterClass(hInstance);
// initialize application
if (!InitInstance (hInstance, nCmdShow))
return FALSE;
//set random number seed
srand(time(NULL));
//main message loop
while (GetMessage(&msg, NULL, 0, 0))
{
TranslateMessage(&msg);
DispatchMessage(&msg);
}
return msg.wParam;
}
Okay, well that’s the complete listing for the WindowText program, your first
complete Windows program that features a standard program window. Now let’s
reverse-engineer it and see what makes a Windows program tick, shall we?
Understanding InitInstance
InitInstance is the first function called by WinMain to set up the program.
InitInstance basically just creates the program window. This code could be just
inserted into
WinMain, but it is more convenient to have it in a separate function
(this has something to do with dealing with multiple instances, when you run a
program more than once). Note that
InitInstance is not a primary Windows
function like
WinMain, but simply a ‘‘helper’’ function to which you could give
a different name if you wished. The instance handle is a global variable used
in the program to keep track of the main instance. I will show you what the
function call looks like and what a typical
InitInstance should do. You shouldn’t
treat this as the law, though, because it’s just a standard practice, not a
requirement.
44 Chapter 3
n
Windows Messaging and Event Handling
The InitInstance Function Call
The function call for InitInstance looks like this:
BOOL InitInstance( HINSTANCE hInstance,
int nCmdShow )
Let’s go over the parameters here:
n HINSTANCE hInstance. The first parameter is passed by WinMain with
the program instance that it receives from Windows.
InitInstance will
check this with the global instance to see if the new instance needs to be
killed (the usual procedure in Windows). When this happens, the main
instance of the program is set as the foreground window. To the user, it
will seem as if running the program again just brought the original in-
stance forward.
n int nCmdShow. The second parameter is passed to InitInstance by
WinMain, which receives the parameter from Windows. The most
common values for this parameter include
SW_HIDE and SW_SHOW, and
are often sent by Windows based on events in the operating system
(such as a power down).
The InitInstance function returns a BOOL value, which is either TRUE or FALSE,
and simply tells
WinMain whether startup succeeded or failed. Note that WinMain
does not send InitInstance any of the command-line parameters. If you want
to process the
lpCmdLine string, then you can either create a new function to
handle it or just process the parameters inside
WinMain, which is how it is usually
done.
The Structure of InitInstance
Quite often in application programming it is recommended that you use a
resource table for string handling. Resource strings are really a matter of pre-
ference (and I, for one, do not use them). There is the possibility that you will
want to port the text in your games to another language, and this is where storing
strings as resources will come in handy. In general practice, however, it’s not
commonly used. The code to display a simple message from a resource causes a
program to look up every string used, which slows down the program and adds a
lot of clutter to the code, especially from the point of view of a beginner.
Writing a Full-Blown Windows Program 45
The InitInstance function is pretty simple, as shown here. I will explain each
section of the function after the code listing that follows:
BOOL InitInstance(HINSTANCE hInstance, int nCmdShow)
{
HWND hWnd;
//create a new window
hWnd = CreateWindow(
APPTITLE, //window class
APPTITLE, //title bar
WS_OVERLAPPEDWINDOW, //window style
CW_USEDEFAULT, //x position of window
CW_USEDEFAULT, //y position of window
500, //width of the window
400, //height of the window
NULL, //parent window
NULL, //menu
hInstance, //application instance
NULL); //window parameters
//was there an error creating the window?
if (!hWnd)
return FALSE;
//display the window
ShowWindow(hWnd, nCmdShow);
UpdateWindow(hWnd);
return TRUE;
}
Note that until this section of code, there was actually no user interface for the
program at all! The main window that is created with the
CreateWindow function
becomes the window used by your program. The whole point of
InitInstance is
to create the new window needed by this application and display it. The list of
parameters for
CreateWindow includes comments that describe what each para-
meter does. After the window has been created (and verified), the last few lines of
code are used to actually display the newly created window:
ShowWindow(hWnd, nCmdShow);
UpdateWindow(hWnd);
46 Chapter 3
n
Windows Messaging and Event Handling
The hWnd value is passed to these functions by the CreateWindow function. At the
point of creation, the window existed in Windows but was not yet visible.
UpdateWindow tells the new window to draw itself by sending a WM_PAINT message
to the window handler. Oddly enough, the program talks to itself quite often in
this manner; this is common in Windows programming. The final line in
InitInstance returns a value of TRUE back to WinMain:
return TRUE;
If you recall, WinMain took this return value very seriously! If InitInstance
doesn’t like something that is going on, WinMain will end the program:
// initialize application
if (!InitInstance (hInstance, nCmdShow))
return FALSE;
Returning a value from within WinMai n, whether it is TRUE or FALSE, will terminate the
program immediately. If
InitInstance returns a value of TRUE,recallthatWinMain
will then go into the message handling while loop, and the program will start to run.
Understanding MyRegisterClass
MyRegisterClass is a very simple function that sets up the values for the main
window class used by your program. The code in
MyRegisterClass could have
easily been placed inside
WinMain, and MyRegisterClass could also have easily
been put inside
WinMain. In fact, all of this stuff could have been crammed into
WinMain and Windows would not have complained. But it makes the program a
whole lot easier to understand when the initialization code for a Windows
program is segregated into recognizable (and standard) helper functions.
WinMain calls InitInstance and sets up the program window by calling
MyRegisterClass. This is another optional helper function that is not required
(although you must insert the code somewhere, so why not just use it?). You may
rename the function if you wish, also.
The MyRegisterClass Function Call
MyRegisterClass is passed two parameters by InitInstance so that it can set up
the window class settings:
ATOM MyRegisterClass( HINSTANCE hInstance,
LPTSTR szWindowClass )
Writing a Full-Blown Windows Program 47
You are already familiar with both of these parameters. hInstance is the very
same instance passed to
InitInstance by WinMain. This variable gets around! As
you recall,
hInstance stores the current instance of the running program, and is
copied into a global variable in
InitInstance. The second parameter is easy
enough to follow, as it was set up in
InitInstance as a char * with an initial
window class name (in this case, ‘‘Hello World’’). Recall also that this can be a
Unicode string.
It is also possible to use a
LPTSTR or TCHAR and avoid the pointer symbol. Often a
LPTSTR is more clear, but many C programmers are used to the common char
*szVar
format, which is why I used char * originally. There really is no standard,
and it is primarily a matter of programmer preference (or perhaps part of a set of
coding standards set forth by an employer). I tend to use whatever seems to make
the most sense in a given situation. If
char * seems easier to understand in a code
listing, that is what I use (especially when communicating with a beginner on a
sticky programming issue like initializing a Windows program).
The Structure of MyRegisterClass
The MyRegisterClass() function is listed below. I will explain the function in
detail following the code listing:
ATOM MyRegisterClass(HINSTANCE hInstance)
{
//create the window class structure
WNDCLASSEX wc;
wc.cbSize = sizeof(WNDCLASSEX);
//fill the struct with info
wc.style = CS_HREDRAW | CS_VREDRAW;
wc.lpfnWndProc = (WNDPROC)WinProc;
wc.cbClsExtra = 0;
wc.cbWndExtra = 0;
wc.hInstance = hInstance;
wc.hIcon = NULL;
wc.hCursor = LoadCursor(NULL, IDC_ARROW);
wc.hbrBackground = (HBRUSH)GetStockObject(WHITE_BRUSH);
wc.lpszMenuName = NULL;
wc.lpszClassName = APPTITLE;
wc.hIconSm = NULL;
48 Chapter 3
n
Windows Messaging and Event Handling
//set up the window with the class info
return RegisterClassEx(&wc);
}
First, MyRegisterClass defines a new variable, wc, of type WNDCLASS. Each member
of the structure is defined in
MyRegisterClass in order, so there is no need to list
the struct.
The window style,
wc.style, is set to CS_HREDRAW | CS_VREDRAW. The pipe symbol
is a method for combining bits. The
CS_HREDRAW value causes the program
window to be completely redrawn if a movement or size adjustment changes the
width. Likewise,
CS_VREDRAW causes the window to be completely redrawn when
the height is adjusted.
The variable,
wc.lpfnWinProc, requires a little more explanation, as it is not
simply a variable, but a long pointer to a callback function. This is of great
importance, as without this value setting, messages will not be delivered to the
program window (
hWnd). The callback window procedure is automatic ally called
when a Windows message comes along with that
hWnd value. This applies to all
messages, including user input and window repaint. Any button presses, screen
updates, or other events will go through this callback procedure. You may give
this function any name you like, such as
BigBadGameWindowProc, as long as it has a
return value of
LRESULT CALLBACK and the appropriate parameters.
The struct variables
wc.cbClsExtra and wc.cbWndExtra should be set to zero most
of the time. These values just add extra bytes of memory to a window procedure,
and you really do not need to use them.
wc.hInstance is set to the hInstance parameter passed to MyRegisterClass. The
main window needs to know what instance it is using. If you really want to
confuse your program, set each new instance to point to the same program
window. Now that would be funny! This should never happen because new
instances of your game should be killed rather than being allowed to run.
wc.hIcon and wc.hCursor are pretty self-explanatory. The LoadIcon function is
normally used to load an icon image from a resource, and the
MAKEINTRESOURCE
macro returns a string value for the resource identifier. This macro is not something
that is commonly used for a game (unless the game needs to run in a window).
wc.hbrBackground is set to the handle for a brush used for drawing the back-
ground of the program window . The stock object,
WHITE_BRUSH, is used by
default. This may be a bitmap image, a custom brush, or any other color.
Writing a Full-Blown Windows Program 49
wc.lpszMenuName is set to the name of the program menu, also a resource. I will
not be using menus in the sample programs in this book.
wc.lpszClassName is set to the szWindowClass parameter passed to
MyRegisterClass. This gives the window a specific class name and is used for
message handling along with
hWnd.
Finally,
MyRegisterClass calls the RegisterClassEx function. This function is
passed the
WNDCLASS variable, wc, that was set up with the window details. A
return value of zero indicates failure. If the window is successfully registered with
Windows, the value will be passed back to
InitInstance.
Whew—how about that to rack your brain?! I don’t expect you to remember all
of this information right now, but it is always a good idea as a game programmer
to understand how everything works so you can get the most out of the hardware
you’re working on.
Understanding WinProc
WinProc is the window callback procedure that Windows uses to communicate
events to your program. Recall that
MyRegisterClass set up the WNDCLASS struct
that was passed to
RegisterClassEx. Once the class is registered, the window can
then be created and displayed on the screen. One of the fields in the struct,
lpfnWinProc, is set to the name of a window callback procedure, typically called
WinProc. This function will handle all of the messages sent to the main program
window. As a result,
WinProc will typically be the longest function in the main
program source code file. Figure 3.2 shows how
WinProc handles event messages.
The WinProc Function Call
The window callback function looks like this:
LRESULT CALLBACK WinProc( HWND hWnd,
UINT message,
WPARAM wParam,
LPARAM lParam )
You will want to get to know this function, because it is the key to initializing
Direct3D. The parameters are simple and straightforward, and represent the real
‘‘engine’’ of a windows program. Recall that this information was retrieved
earlier by the
GetMessage function in WinMain. Do not confuse InitInstance with
WinProc, though. InitInstance is only run once to set up the window callback
50 Chapter 3
n
Windows Messaging and Event Handling
procedure. After that, InitInstance is out of the picture and WinProc takes over,
receiving and handling all messages.
Let’s take a look at the parameters for
WinProc:
n HWND hWnd. The first parameter is the window handle. Typically in a
game, you will create a new handle to a device context, known as a hDC,
using the
hWnd as a parameter. Before DirectX came along, this was once
crucial in the development of Windows games. Now, after you receive the
window handle and pass it to DirectDraw/Direct3D, it is no longer needed.
n UINT message. The second parameter is the message that is being sent to the
window callback procedure. The message could be anything, and you might
not even need to use it. For this reason, there is a way to pass the message
along to the default message handler (discussed in the next section).
n WPARAM wParam and LPARAM lParam. The last two parameters are the
high and low bit value parameters passed along with certain command
messages. I’ll explain this in the next section.
The Structure of WinProc
The window callback procedure will get modified quite a bit during a game
development project, but it is the goal of the game library developed later in the
Writing a Full-Blown Windows Program 51
Figure 3.2
The WinProc callback function handles events related to the application.
book to help you avoid mucking around inside WinProc. The game library will
outsource, so to speak, the window messages to custom classes that will handle
each message individually. There are really only a handful of messages related to
game programming, and those are the only messages we want to see. The game
library will make it easy to work with these messages.
Here is a simple version of a window callback procedure, with an explanation
following:
LRESULT CALLBACK WinProc(HWND hWnd, UINT message, WPARAM wParam, LPARAM lParam)
{
PAINTSTRUCT ps;
HDC hdc;
char *szHello = "Hello World!";
RECT rt;
int x, y, n;
COLORREF c;
switch (message)
{
case WM_PAINT:
//get the dimensions of the window
GetClientRect(hWnd, &rt);
//start drawing on device context
hdc = BeginPaint(hWnd, &ps);
//draw some text
DrawText(hdc, szHello, strlen(szHello), &rt, DT_CENTER);
//draw 1000 random pixels
for (n=0; n<3000; n++)
{
x = rand() % (rt.right - rt.left);
y = rand() % (rt.bottom - rt.top);
c = RGB(rand()%256, rand()%256, rand()%256);
SetPixel(hdc, x, y, c);
}
//stop drawing
EndPaint(hWnd, &ps);
break;
52 Chapter 3
n
Windows Messaging and Event Handling
case WM_DESTROY:
PostQuitMessage(0);
break;
}
return DefWindowProc(hWnd, message, wParam, lParam);
}
As you are already familiar with the parameters, I’ll get right down to business.
This function can be broken down into two main parts, the declaration and the
switch statement, which is like a large nested if statement. Within the switch
statement, there are also two main parts, case statements for a command message
and for regular messages. A command will use the last two parameters of
WinProc,
wParam and lParam, while regular messages usually do not need the parameters.
There are several variables declared at the top:
PAINTSTRUCT ps;
HDC hdc;
char *szHello = "Hello World!";
RECT rt;
int x, y, n;
COLORREF c;
The PAINTSTRUCT variable, ps, is used in the WM_PAINT message handler to start and
stop a screen update, sort of like unlocking and then locking the device context
while making updates (so the screen is not garbled in the process). The variable,
hdc, is also used in the WM_PAINT message handler to retrieve the device context of
the program’s window. The other variables are used to display the message on the
screen (
szHello) and draw pixels on the window (x, y, n, and c).
Following the variable declarations is the switch (message) statement. This is
basically an easy way to handle multiple messages, and is far better than using
nested if statements.
switch is far better able to handle a large number of con-
ditional tests, which is why it is used in
WinProc to check the messages.
Let me explain
WM_DESTROY first. The WM_DESTROY message identifier tells the
window that it is time to shut down; your program should gracefully close down
by removing objects from memory and then call the
PostQuitMessage function to
end the program. When you take the next step and start writing Direct3D code,
this will be the only message of concern, as
WM_PAINT is not needed in a Direct3D
program.
Writing a Full-Blown Windows Program 53
Okay, now back to the first message identifier, WM_PAINT. This is definitely the
most interesting message for game programming because this is where the
window updates are handled. Take a look at the code for
WM_PAINT again:
//get the dimensions of the window
GetClientRect(hWnd, &rt);
//start drawing on device context
hdc = BeginPaint(hWnd, &ps);
//draw some text
DrawText(hdc, szHello, strlen(szHello), &rt, DT_CENTER);
//draw 1000 random pixels
for (n=0; n<3000; n++)
{
x = rand() % (rt.right - rt.left);
y = rand() % (rt.bottom - rt.top);
c = RGB(rand()%256, rand()%256, rand()%256);
SetPixel(hdc, x, y, c);
}
//stop drawing
EndPaint(hWnd, &ps);
break;
The first line calls BeginPaint to lock the device context for an update (using the
window handle and
PAINTSTRUCT variables). The next line calls GetClientRect to
copy the program window’s rectangular area into a temporary
RECT variable. This
is used by
DrawText to center the message in the window. Note that BeginPaint
returns the device context for the program window. This is necessary at every
refresh because, although it is uncommon, the device context is not guaranteed
to be constant while the program is running (for instance, imagine that memory
runs low and your program is filed away into virtual memory and then retrieved
again—such an event would almost certainly generate a new device context).
The only line that actually does something to the user interface is the third line,
which calls
DrawText. This function displays a message at the destination device
context. The
DT_CENTER parameter at the end tells DrawText to center the message
at the top center of the passed rectangle. Of course, there is also the section of
code that draws pixels on the screen. Did you know that if you resize the window,
all the pixels will be redrawn? Go ahead and try it! Pretty cool, huh? That
54 Chapter 3
n
Windows Messaging and Event Handling