Red Hat Linux Networking , System Administration (P7) pps
Bạn đang xem bản rút gọn của tài liệu. Xem và tải ngay bản đầy đủ của tài liệu tại đây (665.18 KB, 30 trang )
■■ media — This directory contains the mount points for removable
media such as floppy drives, CD-ROM drives, and USB devices such as
flash memory sticks, which are typically automounted by the system.
■■ mnt — This directory is the location of the mount point for temporary
file systems, such as those on floppies or CDs, which traditionally have
been manually mounted.
■■ opt — This directory and its subdirectories are often used to hold
applications installed on the system.
■■ proc — This directory is a mount point for virtual information about
currently running system processes. This directory is empty until the
proc file system is mounted.
■■ root — This is the home directory of the root user. Don’t confuse this
with the / directory, which has the same name.
■■ sbin — Contained in this directory are system binaries used by the
system administrator or the root user.
■■ selinux — This directory is similar to the /proc directory in that it
contains information about the selinux stored in the memory of the
running kernel.
■■ srv — This directory is intended to hold site-specific data for system
provided services.
■■ sys — This directory is the mount point for a virtual file system of type
sysfs that is used to hold information about the system and devices.
■■ tmp — This directory contains temporary files used by the system.
■■ usr — This directory is often mounted on its own partition. It contains
shareable, read-only data. Subdirectories can be used for applications,
typically under /usr/local.
■■ var — Subdirectories and files under var contain variable information,
such as system logs and print queues.
CAUTION Never remove the /initrd/ directory. The system will not boot,
and you will see a kernel panic error message.
Working with Linux-Supported File Systems
Linux is a very flexible operating system that has a long history of interoper-
ability with other systems on a number of different hardware platforms. A
144 Chapter 7
12_599496 ch07.qxd 8/30/05 6:45 PM Page 144
consequence of this friendliness to other operating systems is that Linux can
read and write to several different file systems that originated with other oper-
ating systems much different from Linux. This section details the different file
systems supported and where they originated.
One reason that Linux supports so many file systems is the design of its Vir-
tual File Systems (VFS) layer. The VFS layer is a data abstraction layer between
the kernel and the programs in userspace that issue file system commands.
NOTE Programs that run inside the kernel are in kernelspace. Programs that
don’t run inside the kernel are in userspace.
The VFS layer avoids duplication of common code between all file systems.
It provides a fairly universal backward compatible method for programs to
access all of the different forms of file support. Only one common, small API
set accesses each of the file system types, to simplify programming file system
support.
Support for these file systems comes standard in Red Hat Enterprise Linux.
They are compiled into the kernel by default. If for some reason your kernel
does not currently support these file systems, a kernel recompile with the
proper options turned on should enable you to access all these file systems.
ext3
The extended 3 file system is a new file system introduced in Red Hat 7.2.
ext3 provides all the features of ext2, and also features journaling and back-
ward compatibility with ext2. The backward compatibility enables you to
still run kernels that are only ext2-aware with ext3 partitions. You can also
use all of the ext2 file system tuning, repair, and recovery tools with ext3.
You can upgrade an ext2 file system to an ext3 file system without losing
any of your data. This upgrade can be done during an update to the operating
system.
ext3 support comes in kernels provided with the latest Fedora and Red Hat
distributions. If you download a kernel from somewhere else, you need to
patch the kernel to make it ext3 aware, with the kernel patches that come from
the Red Hat FTP site. It is much easier to just stick with kernels from Red Hat.
ext3’s journaling feature speeds up the amount of time it takes to bring the
file system back to a sane state if it’s not been cleanly unmounted (that is, in the
event of a power outage or a system crash).
Under ext2, when a file system is uncleanly mounted, the whole file system
must be checked. This takes a long time on large file systems. On an ext3 sys-
tem, the system keeps a record of uncommitted file transactions and applies
only those transactions when the system is brought back up. So, a complete file
system check is not required, and the system will come back up much faster.
The File System Explained 145
12_599496 ch07.qxd 8/30/05 6:45 PM Page 145
A cleanly unmounted ext3 file system can be mounted and used as an
ext2 file system. This capability can come in handy if you need to revert to an
older kernel that is not aware of ext3. The kernel sees the ext3 file system as
an ext2 file system.
ext3’s journaling feature involves a small performance hit to maintain the
file system transaction journal. Therefore, it’s recommended that you use
ext3 mostly for your larger file systems, where the ext3 journaling perfor-
mance hit is made up for in time saved by not having to run fsck on a huge
ext2 file system.
ext2
ext2 was the standard file system for Linux until the introduction of ext3.
The ext2 implementation has not changed much since it was introduced with
the 1.0 kernel back in 1993. Since then, a few new features have been added.
One of these was sparse super blocks, which increase file system performance.
ext2 was designed to make it easier for new features to be added, so that it
can constantly evolve into a better file system. Users can take advantage of
new features without reformatting their old ext2 file systems. ext2 has the
added bonus of being designed to be POSIX-compliant. New features that are
still in the development phase are access control lists, undelete, and on-the-fly
compression.
ext2 is flexible, can handle file systems up to 4 TB, and supports long file-
names up to 1012 characters. In case user processes fill up a file system, ext2
normally reserves about 5 percent of disk blocks for exclusive use by root so
that root can easily recover from that situation. Modern Red Hat boot and res-
cue diskettes now use ext2 instead of minix.
reiserfs
The Reiser file system is a journaling file system designed for fast server per-
formance, especially in directories containing thousands of files. It is more
space efficient than most other file systems, because it does not take up a min-
imum of one block per file. If you write a bunch of really small files to disk,
reiserfs squeezes them all into one block instead of writing one small file to one
block like other file systems do. reiserfs also does not have fixed space allo-
cation for inodes, which saves about 6 percent of your disk space.
146 Chapter 7
12_599496 ch07.qxd 8/30/05 6:45 PM Page 146
SystemV
Linux currently provides read support for SystemV partitions, and write sup-
port is experimental. The SystemV file system driver currently supports
AFS/EAFS/EFS, Coherent FS, SystemV/386 FS, Version 7 FS, and Xenix file
systems.
ufs
ufs is used in Solaris and early BSD operating systems. Linux provides read
support, and write support is experimental.
FAT
FAT is one of a few different file systems used with Windows over the years.
Almost every computer user has used FAT at one time or another, since it was
the sparse base operating system at the heart of all Windows operating systems.
FAT was originally created for QDOS and used on 360K (double density,
double-sided) floppy disks. Its address space has since been extended from 12
bit to 32 bit, so it can handle very large file systems. There have been four ver-
sions of FAT since its beginnings: FAT12, FAT16, VFAT, and FAT32. Nowadays,
it’s possible to create FAT32 file systems over a terabyte in size.
NOTE Do not confuse a FAT file system with a FAT32 file system. They are
named similarly but are two different beasts!
NTFS
NTFS is the next generation of HPFS. It comes with all versions of Microsoft
operating systems beginning with Windows NT. Unlike FAT, it is a b-tree file
system, meaning it has a performance and reliability advantage, including
journaling, and support for encryption and compression, over FAT.
IBM JFS
IBM JFS is an easy-to-use journaling file system created by IBM. It is designed
for high-throughput server environments. This is the same file system that will
be provided in AIX version 5.1. Linux support for JFS was written by IBM. IBM
has contributed quite a bit of code to the Linux cause and is a staunch sup-
porter of Linux. It has also decided to make Linux its main server file system
in the future.
The File System Explained 147
12_599496 ch07.qxd 8/30/05 6:45 PM Page 147
SGI XFS
SGI’s Extended File System (XFS) is SGI’s newest file system for all Silicon
Graphics systems, from workstations to its supercomputer line (before it sold
that line to Terra computers.) It has been available for use on Linux since
May 2001.
XFS is designed for high performance. It rapidly recovers from system
crashes and can support extremely large disk farms (it can handle files as large
as a million terabytes.) It is one of a few journaling file systems that have had
a proven track record in production environments for several years now.
NOTE Its other features include access control lists, volume management,
guaranteed rate I/O, and journaling for faster recovery. XFS can be backed up
while still in use, which comes in handy since it reduces system administration
time. This is a fast file system, and now you can read and write to and from it
with your Red Hat Linux machine.
Nonstandard Linux File Systems
Support for these file systems needs to be explicitly compiled into the Linux
kernel, since kernel support for them is not configured by default.
FREEVxFS
VxFS is the Veritas file system developed by the Veritas Corporation. It is used
in SCO UnixWare, HP-UX, Solaris, and other systems. Some of its features
include access control lists, journaling, online backup, and support for files up
to 2 TB.
Three different versions of VxFS are in use. Version 1 is the original VxFS,
which is not commonly used anymore. Version 2 includes support for filesets
and dynamic inode allocation. Version 4 is the latest version, and it supports
quotas and large files.
GNU utilities available for Linux called VxTools can read VxFS versions 2
and 4. The tools included in the VxTools package are vxmount, vxumount,
vxls, vxcat, vxidump, vxcd, and vxpwd. Currently there is only read sup-
port in Linux for VxFS file systems.
GFS
GFS is Sistina’s Global File System. It is a clustered journaling file system for
SANs that enables multiple servers to have read/write access to a single file
system on shared SAN devices.
148 Chapter 7
12_599496 ch07.qxd 8/30/05 6:45 PM Page 148
GFS is scalable, since storage devices and servers can be added without tak-
ing the system down or taking the disks offline. It also makes a single image of
all the data in the SAN, so that if a server fails it can be removed and replaced
while the load is rebalanced amongst the remaining servers.
In a proper cluster setup, all nodes in the cluster share the same storage
devices through a fiber channel, SCSI hookup, or network block device. Each
node sees the file system as being local to their machine, and GFS synchronizes
files across the cluster. GFS is fully symmetric, so no server is a bottleneck or
single point of failure. GFS uses regular UNIX-style file semantics.
Memory and Virtual File Systems
These file systems do not exist on disk in the same way that traditional file sys-
tems do. They either exist entirely in system memory or they are virtual,
because they are an interface to system devices, for example.
cramfs
cramfs is designed to cram a file system onto a small flash memory device, so
it is small, simple, and able to compress things well. The largest file size is 16
MB, and the largest file system size is 256 MB.
Since cramfs is so compressed, it isn’t instantly updateable. The mkcramfs
tool needs to be run to create or update a cramfs disk image. The image is cre-
ated by compressing files one page at a time, so this enables random page
access. The metadata is not compressed, but it has been optimized to take up
much less space than other file systems. For example, only the low 8 bits of the
GID are stored. This saves space but also presents a potential security issue.
tmpfs
tmpfs is structured around the idea that whatever is put in the /tmp file sys-
tem is accessed again shortly. tmpfs exists solely in memory, so what you put
in /tmp doesn’t persist between reboots.
Mounting a special-purpose file system on /tmp as an in-memory file sys-
tem is a performance boost but is rarely done in Linux because of the perfor-
mance available from the traditional Linux file system. But for those who feel
that they need the performance gains from storing /tmp in memory, this
option is now available in Linux.
The File System Explained 149
12_599496 ch07.qxd 8/30/05 6:45 PM Page 149
ramfs
ramfs is basically cramfs without the compression.
romfs
This is a read-only file system that is mostly used for the initial ramdisks of
installation disks. It was designed to take up very little space, so you could fit
a kernel and some useful code into a small boot disk, without having the file
system overhead taking up too much precious space in memory or on the disk.
The kernel on the disk has only this file system linked into it, and it can load
any modules it needs later, after bootup. After the kernel is loaded, it can call
other programs to help determine what SCSI drivers are needed, if any, or
what IDE or floppy drives should be accessed after bootup. This method is
perfect for rescue diskettes or installation diskettes, where only a very bare
minimum kernel needs to be loaded into memory, so after the initial boot it can
then load from a CD-ROM whatever ext2 modules or other drivers are nec-
essary to mount the system’s regular drives.
The romfs file system is created with a program called genromfs.
proc
proc is a virtual file system that acts as an interface to the kernel’s internal
data structures. proc can be used to get detailed information about a system’s
hardware and to change kernel parameters at runtime. Even the process listing
command, ps, gets its information from the proc file system. The kernel para-
meters can be changed with the sysctl command.
Proc Software Information
The /proc directory contains a great deal of information about your currently
running system software. If you look at the /proc directory on Linux, you see
one subdirectory for each process running on the system. The subdirectories
are named after the process’s ID (PID) number. Each of those subdirectories has
several standard files, and each of them gives you a different set of information.
The status file in those proc directories contains process status in human-
readable format. So, if you want to see the status of your ssh server, you first
need to know the ssh server’s PID number. You can find this number in a few
different ways. One easy way is to look at a process listing and grep for the
string ssh. The output should look like the lines shown in Listing 7-1.
150 Chapter 7
12_599496 ch07.qxd 8/30/05 6:45 PM Page 150
[terry@main terry]$ ps -elf | grep ssh
140 S root 933 1 0 69 0 - 664 do_sel Oct23 ? 00:00:01
/usr/sbin/sshd
140 S root 14807 933 0 69 0 - 882 do_sel 18:36 ? 00:00:00
/usr/sbin/sshd
000 S vnavrat 14883 14808 0 71 0 - 434 pipe_w 18:52 pts/10 00:00:00
grep ssh
Listing 7-1 Finding the process ID (PID) number.
The process table contains multiple hits for ssh, since there is a master sshd
process, and one sshd process is spawned for each ssh session currently open.
The first line is the master sshd server process. You can tell because its parent
process ID is 1, also known as the init process that spawns all processes at boot
time, and is responsible for respawning important server processes that die dur-
ing runtime. The second line is an ssh daemon handling an incoming ssh con-
nection, evident because it lists the previous ssh process as its parent. The final
line lists the grep process that you just ran, so you can disregard that line.
You should look at the status of the master ssh daemon, which, as you saw
previously, is running with a PID of 933. So, cd to the /proc/933 directory, and
take a look at the status file in that directory. The output appears in Listing 7-2.
[terry@main terry]$ less /proc/933/status
Name: sshd
State: S (sleeping)
Pid: 933
PPid: 1
TracerPid: 0
Uid: 0 0 0 0
Gid: 0 0 0 0
FDSize: 32
Groups:
VmSize: 2656 kB
VmLck: 0 kB
VmRSS: 1236 kB
VmData: 116 kB
VmStk: 16 kB
VmExe: 240 kB
VmLib: 2176 kB
SigPnd: 0000000000000000
SigBlk: 0000000000000000
SigIgn: 8000000000001000
SigCgt: 0000000000016005
CapInh: 0000000000000000
CapPrm: 00000000fffffeff
CapEff: 00000000fffffeff
Listing 7-2 Viewing the status information of a running process.
The File System Explained 151
12_599496 ch07.qxd 8/30/05 6:45 PM Page 151
Other useful files in the /proc/PID directory and their contents are:
■■ cmdline — Contains the process’s command line arguments
■■ cpu — Contains the current and last CPU on which the process was
executed
■■ cwd — Contains a link to the process’s current working directory
■■ environ — Contains values of the process’s environmental variables
■■ exe — Contains a link to the process’s executable
■■ fd — A directory that contains all the process’s file descriptors
■■ maps — Contains memory maps to the process’s executables and
library files
■■ mem — Contains the memory held by this process
■■ root — Contains a link to the root directory of the process
■■ stat — Contains the process status
■■ statm — Contains the process memory status information
■■ status — Contains the process status in human-readable format
Proc Hardware Information
As mentioned previously, the /proc directory also contains some useful hard-
ware information. This information comes in handy when you compile a new
kernel. If you’ve forgotten the specific details about your hardware, you can
look through the files in the /proc directory to get information about what’s
installed and running on your Linux machine.
If you suspect that you’re having hardware problems due to an interrupt
request (IRQ) conflict, you can also see your hardware’s interrupts by looking
at the /proc/interrupts file.
The interrupts file from my desktop machine at work is shown below. Each
number corresponds to an IRQ. The acronyms at the end of the IRQ listing are
NMI (Non-Maskable Interrupt), LOC (local interrupt counter of the internal
APIC of each CPU), and ERR. ERR is a counter that starts out at 0 at boot time
and is incremented each time there is an error in the IO-APIC bus. The IO-
APIC bus connects the CPUs in an SMP system. When an error happens, the
information is immediately retransmitted, so you shouldn’t worry too
much about a moderate number of errors in this field. Listing 7-3 shows the
/proc/interrupts information.
152 Chapter 7
12_599496 ch07.qxd 8/30/05 6:45 PM Page 152
[terry@main terry]$ less /proc/interrupts
CPU0
0: 9720704 XT-PIC timer
1: 30515 XT-PIC keyboard
2: 0 XT-PIC cascade
5: 9869566 XT-PIC Crystal audio controller
8: 1 XT-PIC rtc
11: 1233943 XT-PIC usb-uhci, eth0
12: 682220 XT-PIC PS/2 Mouse
14: 77739 XT-PIC ide0
15: 2694731 XT-PIC ide1
NMI: 0
LOC: 9720557
ERR: 0
MIS: 0
Listing 7-3 Viewing the /proc/interrupts information.
In the main /proc directory, quite a few files contain detailed information
on your system hardware. The kind of details listed are things such as what
hardware it is, the model, and the manufacturer.
Listing 7-4 shows the contents of the cpuinfo file in proc. This tells you
what kind of processor you have, and most importantly, how fast it is.
[terry@main terry]$ less /proc/cpuinfo
processor : 0
vendor_id : AuthenticAMD
cpu family : 6
model : 6
model name : AMD Athlon(tm) XP 1800+
stepping : 2
cpu MHz : 1535.822
cache size : 256 KB
fdiv_bug : no
hlt_bug : no
f00f_bug : no
coma_bug : no
fpu : yes
fpu_exception : yes
cpuid level : 1
wp : yes
flags : fpu vme de pse tsc msr pae mce cx8 apic sep mtrr pge
mca cmov
pat pse36 mmx fxsr sse
bogomips : 3022.84
Listing 7-4 Viewing the contents of the /proc/cpuinfo file.
The File System Explained 153
12_599496 ch07.qxd 8/30/05 6:45 PM Page 153
Some important /proc files are:
■■ /proc/cpuinfo — Contains info about the CPU
■■ /proc/interrupts — Tells you what interrupts are in use
■■ /proc/scsi — A directory that contains information about SCSI
devices
■■ /proc/parport — Contains info about the parallel ports on your
system
■■ /proc/tty — A directory that contains info about ttys that are avail-
able and in use
■■ /proc/acpi — Contains power management information
■■ /proc/bus — A directory that contains bus-specific information
■■ /proc/devices — Lists available character and block devices
■■ /proc/dma — Lists used DMS channels
■■ /proc/filesystems — Lists supported file systems
■■ /proc/fs — A directory that contains file system parameters
■■ /proc/ide — A directory that contains information about the IDE
subsystem
■■ /proc/ioports — Contains information about system I/O port usage
■■ /proc/modules — Contains a list of currently loaded modules
■■ /proc/net — Contains networking information
■■ /proc/uptime — Contains the system uptime
■■ /proc/version — Contains the system version
/dev/pts
/dev/pts is a lightweight version of devfs. Instead of having all the device
files supported in the virtual file system, it provides support for only virtual
pseudoterminal device files. /dev/pts was implemented before devfs.
devfs
The Device File System (devfs) is another way to access “real” character and
block special devices on your root file system. The old way used major and
minor numbers to register devices. devfs enables device drivers to register
devices by name instead. devfs is deprecated in the 2.6 kernel in favor of udev.
154 Chapter 7
12_599496 ch07.qxd 8/30/05 6:45 PM Page 154
sysfs
sysfs is a virtual file system that acts as an interface to the kernel’s internal
data structures. Information is stored in the /sys directory and can be used to
get details about a system’s hardware and to change kernel parameters at run-
time. Information in the /sys directory is similar to the information provided
in the /proc directory and can be accessed in a similar fashion.
Linux Disk Management
This section explains some basics about disk partitioning and disk manage-
ment under Linux. To see how your Linux disks are currently partitioned and
what file systems are on them, look at the /etc/fstab file.
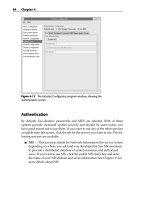
In Figure 7-2, you can see what a simple /etc/fstab file looks like.
TIP To see how your Linux disks are currently partitioned and what file
systems are on them, look at the /etc/fstab file. You could also use the
fdisk -l command to obtain partition information about your disks.
Figure 7-2 The contents of the /etc/fstab file.
The File System Explained 155
12_599496 ch07.qxd 8/30/05 6:45 PM Page 155
Disk Partitioning on an x86 Machine
When disk partitioning on an x86 PC, you need to be mindful of the limitations
present in the x86 architecture. You are allowed to create four primary parti-
tions. Primary partitions are the only partitions that are bootable. You can cre-
ate more partitions if you make extended partitions.
Extended partitions are set into a primary partition. So, if you choose to
make extended partitions, you are allowed to make only three primary parti-
tions for operating system use, and the fourth partition is dedicated to hosting
the extended partitions.
Mounting Other OS Partitions/Slices
Not only can Linux read other operating systems’ file systems; it can mount
disk drives from other systems and work with their partition tables. However,
it is necessary to compile two options into the kernel to do this. You must have
the file system support and the file partitioning support turned on in the ker-
nel. Usually file system support is compiled as a module by default, but disk
partition support usually has to be explicitly compiled.
Some common partitioning schemes that Linux supports are x86 partitions,
BSD disklabel, Solaris x86, Unixware, Alpha, OSF, SGI, and Sun.
Mounting other operating systems’ partitions is helpful if you need to put a
Sun hard disk into a Linux machine, for example. You may need to do this if
the original Sun system has gone bad, and you need to recover the information
that was on its disk, or if it’s the target of a forensic computer crime investiga-
tion, and you need to copy the disk contents to another machine to preserve
evidence. This method takes advantage of the fact that copying a large amount
of data is much faster across a SCSI connection than across a network.
If you need to copy a large amount of raw disk data across a network, you
can use the Network Block Device, which enables other machines to mount a
disk on your machine as if it were on their machine.
TIP When running the Network Block Device, make sure that you have the
appropriate partition support compiled into the kernel. For more information
about NBD refer to it.uc3m.es/~ptb/nbd.
Metadevices
Virtual block devices that are made up of other block devices are referred to in
this book as a metadevice. An example of a metadevice is a disk array that
makes many disks look like one large disk. When a disk that’s mounted as a
156 Chapter 7
12_599496 ch07.qxd 8/30/05 6:45 PM Page 156
regular block device dies, then the data on it becomes unavailable. If a disk
dies in a metadevice, the metadevice is still up. As long as the criteria are met
for the minimum number of working devices in the metadevice, the metade-
vice still functions.
Logical Volumes
Logical Volume Manager (LVM) enables you to be much more flexible with
your disk usage than you can be with conventional old-style file partitions.
Normally if you create a partition, you have to keep the partition at that size
indefinitely.
For example, if your system logs have grown immensely, and you’ve run
out of room on your /var partition, increasing a partition size without LVM is
a big pain. You would have to get another disk drive, create a /var mount
point on there too, and copy all your data from the old /var to the new /var
disk location. With LVM in place, you could add another disk, create a physi-
cal volume, and then add the physical volume to the volume group that con-
tains the /var partition. Then you’d use the LVM file system resizing tool to
increase the file system size to match the new partition size.
Normally, you might think of disk drives as independent entities, each con-
taining some data space. When you use LVMs, you need a new way of thinking
about disk space. First, you have to understand that space on any disk can be
used by any file system. A Volume Group is the term used to describe various
disk spaces (either whole disks or parts of disks) that have been grouped
together into one volume.
The way it works is like this. First you need to have a physical volume
which is then divided into Volume groups that are then combined to form log-
ical volumes. Logical volumes are akin to the historic idea of partitions. You
can then use a file system creation tool such as fdisk to create a file system on
the logical volume. The Linux kernel sees a logical volume in the same way it
sees a regular partition.
NOTE When the system is installed, LVM is enabled by default and you will
need to use the LVM tools described here to make changes to your logical
volumes. You can, if you desire, choose not to use logical volumes during the
system installation.
In Fedora Core and Enterprise Linux, LVM has been updated to LVM2. The
basic syntax for using the lvm command is:
lvm <command> file
The File System Explained 157
12_599496 ch07.qxd 8/30/05 6:45 PM Page 157
There are many commands available when using LVM. You can obtain a
complete listing of the commands by entering lvm help at a command
prompt. You will see the list shown in Listing 7-5.
dumpconfig Dump active configuration
formats List available metadata formats
help Display help for commands
lvchange Change the attributes of logical volume(s)
lvcreate Create a logical volume
lvdisplay Display information about a logical volume
lvextend Add space to a logical volume
lvmdiskscan List devices that may be used as physical volumes
lvmsadc Collect activity data
lvmsar Create activity report
lvreduce Reduce the size of a logical volume
lvremove Remove logical volume(s) from the system
lvrename Rename a logical volume
lvresize Resize a logical volume
lvs Display information about logical volumes
lvscan List all logical volumes in all volume groups
pvchange Change attributes of physical volume(s)
pvcreate Initialize physical volume(s) for use by LVM
pvdata Display the on-disk metadata for physical volume(s)
pvdisplay Display various attributes of physical volume(s)
pvmove Move extents from one physical volume to another
pvremove Remove LVM label(s) from physical volume(s)
pvresize Resize a physical volume in use by a volume group
pvs Display information about physical volumes
pvscan List all physical volumes
segtypes List available segment types
vgcfgbackup Backup volume group configuration(s)
vgcfgrestore Restore volume group configuration
vgchange Change volume group attributes
vgck Check the consistency of volume group(s)
vgconvert Change volume group metadata format
vgcreate Create a volume group
vgdisplay Display volume group information
vgexport Unregister volume group(s) from the system
vgextend Add physical volumes to a volume group
vgimport Register exported volume group with system
vgmerge Merge volume groups
vgmknodes Create special volume group file devices in /dev
vgreduce Remove physical volume(s) from a volume group
vgremove Remove volume group(s)
vgrename Rename a volume group
vgs Display information about volume groups
vgscan Search for all volume groups
vgsplit Move physical volumes into a new volume group
version Display software and driver version information
Listing 7-5 Output from the lvm help command.
158 Chapter 7
12_599496 ch07.qxd 8/30/05 6:45 PM Page 158
You can get more detailed help about each command by entering lvm help
and the name of the command for which you want help. For example, to find
out more about the pvcreate command enter lvm help pvcreate at a ter-
minal prompt to go to the pvcreate help page.
Let’s take a look at using a few of the commands. To get a listing of the phys-
ical volumes on the system enter lvm pvdisplay at a terminal prompt. You
will see output similar to Listing 7-6.
Physical volume
PV Name /dev/hda2
VG Name VolGroup00
PV Size 9.41 GB / not usable 0
Allocatable yes
PE Size (KByte) 32768
Total PE 301
Free PE 1
Allocated PE 300
PV UUID mwGHdm-M7no-X118-D8kE-i5YS-btzV-w8Og1f
Listing 7-6 Using the pvdisplay command to get a listing of system physical volumes.
To get a list of the logical volumes on your system, enter lvm lvdisplay at
a terminal prompt. You will see a listing similar to Listing 7-7.
Logical volume
LV Name /dev/VolGroup00/LogVol00
VG Name VolGroup00
LV UUID QAVcFn-Jrjy-7sAs-0zih-vyTk-SWqX-fVC1M6
LV Write Access read/write
LV Status available
# open 1
LV Size 9.00 GB
Current LE 288
Segments 1
Allocation inherit
Read ahead sectors 0
Block device 253:0
Listing 7-7 Using the lvm lvdisplay command to see the logical volumes on the system.
One last example: To get a listing of the volume groups on your system,
enter lvm vgdisplay at a terminal prompt. You will see a listing similar to
Listing 7-8.
The File System Explained 159
12_599496 ch07.qxd 8/30/05 6:45 PM Page 159
Volume group
VG Name VolGroup00
System ID
Format lvm2
Metadata Areas 1
Metadata Sequence No 3
VG Access read/write
VG Status resizable
MAX LV 0
Cur LV 2
Open LV 2
Max PV 0
Cur PV 1
Act PV 1
VG Size 9.41 GB
PE Size 32.00 MB
Total PE 301
Alloc PE / Size 300 / 9.38 GB
Free PE / Size 1 / 32.00 MB
VG UUID KKrG4a-HaUw-7Fpo-DyL5-sU8F-wFcq-nnGClQ
Listing 7-8 Using the vgdisplay command to see the volume groups on the system.
By now you should have a pretty good idea of the syntax to follow and how
to use some of the commands when working with logical volumes.
RAID
RAID is an acronym for Redundant Array of Inexpensive, or Independent
(depending on who you ask), Disks. There are two types of RAID that can be
used on computer systems. These types are hardware RAID and software
RAID. In addition, there are six different RAID levels commonly used regard-
less of whether hardware or software RAID is used. A brief explanation of
hardware and software RAID is in order. Following this explanation is a
description of the six RAID levels.
■■ Hardware Raid — In hardware RAID the disks have their own RAID
controller with built-in software that handles the RAID disk setup, and
I/O. The controller is typically a card in one of the system’s expansion
slots, or it may be built onto the system board. The hard RAID interface
is transparent to Linux, so the hardware RAID disk array looks like one
giant disk. The operating system does not control the RAID level used,
it is controlled by the hardware RAID controller. Most dedicated
servers use a hardware RAID controller.
160 Chapter 7
12_599496 ch07.qxd 8/30/05 6:45 PM Page 160
■■ Software RAID — In software RAID there is no RAID controller card.
The operating system is used to set up a logical array, and the operating
system controls the RAID level used by the system.
NOTE Software RAID must be configured during system installation. Refer to
Chapter 3 for more details about configuring RAID on your system.
As mentioned earlier, there are six RAID levels that can be used, but in actual
practice usually only three of them are used. And of these three one doesn’t pro-
vide redundancy even though it is identified as a RAID level. The three most
commonly used RAID levels are:
■■ RAID level 0 — This RAID level requires at least two disks and uses a
method called striping that writes data across both drives. There is no
redundancy provided by this level of RAID, since the loss of either
drive makes it impossible to recover the data. This level of RAID does
give a speed increase in writing to the disks.
■■ RAID level 1 — This RAID level requires at least two disks and uses a
method called mirroring. With mirroring, the data is written to both of
the drives. So, each drive is an exact mirror of the other one, and if one
fails the other still holds all the data. There are two variants to level 1
with one variant using a single disk controller that writes to both disks
as described above. The other variant uses two disk controllers, one for
each disk. This variant of RAID level 1 is known as duplexing.
■■ RAID level 5 — This RAID level, which is the most widely used,
requires at least three disks and uses striping to write the data across
the two disks similarly to RAID level 1. But unlike RAID level 1, this
level of RAID uses the third disk to hold parity information that can be
used to reconstruct the data from either, but not both, of the two disks
after a single disk failure.
There are some system files that you can use to get information about RAID
on your system. You can look in /etc/raidtab to get information about the
system’s RAID configuration. RAID devices are identified in Fedora Core and
Enterprise Linux as md devices. The /etc/raidtab file lists which block
devices are associated with the md device.
NOTE The commands discussed here are only useful when using software
RAID. Hardware RAID is invisible to the operating system.
You can also look at the contents of the /proc/mdstat file to get informa-
tion about the running status of your md devices.
The File System Explained 161
12_599496 ch07.qxd 8/30/05 6:45 PM Page 161
162 Chapter 7
Also available to you are several command-line tools. You can use lsraid
to list and query md devices as well. This command is similar to the ls com-
mand and more information is available by reading the lsraid man page.
You can also use the man command with the following RAID commands:
■■ raidstart — This command will start an existing RAID device.
■■ raidstop — This command will stop an existing RAID device.
■■ raidreconf — This command is used to add disks to an existing array or
to convert an array to a new type.
Summary
In this chapter you learned how Fedora Core and Enterprise Linux provide
support for many file systems. Linux supports those from other operating sys-
tems, remote file systems, memory file systems, CD-ROM file systems, virtual
file systems, and metadevice file systems. This makes Linux very good at man-
aging and accessing any file or file systems that you may ever come across in
a multiplatform environment.
12_599496 ch07.qxd 8/30/05 6:45 PM Page 162
163
Examining the System
Configuration Files
IN THIS CHAPTER
■■ Examining the System Configuration Files
■■ Examining the /etc/sysconfig/ Directory
■■ Examining the Network Configuration Files
■■ Managing the init Scripts
This chapter describes the file system and configuration files in a typical
Fedora Core and Red Hat Enterprise Linux server.
The system configuration files in the /etc directory are the first places a
system administrator goes after installing a system to set it up. The /etc
directory is probably the most often visited directory by a system administra-
tor after his or her own home directory and /var/log.
All of the systemwide important configuration files are found either in
/etc or in one of its many subdirectories. An advantage to keeping all system
configuration files under /etc is that it’s easier to restore configurations for
individual programs, as opposed to having all the system’s configurations
rolled up into a monstrous registry hive as some operating systems do.
CAUTION Be vigilant that your files in /etc are modifiable only by
appropriate users. Generally, this means being modifiable only by root.
Because these files are so important and their contents so sensitive (every-
thing from users’ hashed passwords to the host’s SSH key are stored in /etc), it
is important to keep the file permissions set properly on everything in /etc.
Almost all files should be owned by root, and nothing should be world-writable.
CHAPTER
8
13_599496 ch08.qxd 8/30/05 6:37 PM Page 163
Most files should have their file permissions set to user readable and writable,
and group and world readable, like this:
-rw-r r 1 root root 172 Aug 6 02:03 hosts
Some notable exceptions are files such as /etc/shadow, where users’
hashed passwords are stored, and /etc/wvdial.conf, which stores dial-up
account names and passwords. These files’ permissions should be set to
owned by root, and read by root only, like this:
-rw 1 root root 1227 Sep 2 13:52 /etc/shadow
The /etc/sysconfig directory contains configuration scripts written and
configured by Red Hat and Red Hat administration tools as well as files con-
taining variable settings used by system startup scripts. /etc/sysconfig
contains both system and networking configuration files. Putting these files in
/etc/sysconfig distinguishes them from other /etc configuration files not
designed by Red Hat. You should keep these files in a separate directory so that
the risk of other developers writing configuration files with the same names
and putting them in the same place as existing configuration files is reduced.
Examining the System Configuration Files
The Red Hat system configuration files can fall within a few different func-
tions. Some specify system duties, such as logging and automatically running
programs with cron. Some set default configurations for important programs
such as Sendmail and Bash. And many other system configuration files are
responsible for arranging the appearance of the system, such as setting the col-
ors that show up when a directory listing is shown and the banners that pop
up when someone logs in. This section discusses the more important system
configuration files on your Red Hat system.
Systemwide Shell Configuration Scripts
These files determine the default environment settings of system shells and
what functions are started every time a user launches a new shell.
The files discussed next are located in /etc. These configuration files affect
all shells used on the system. An individual user can also set up a default con-
figuration file in his or her home directory that affects only his or her shells.
This ability is useful in case the user wants to add some extra directories to his
or her path or some aliases that only he or she can use.
164 Chapter 8
13_599496 ch08.qxd 8/30/05 6:37 PM Page 164
When used in the home directory, the names are the same, except they have
a . in front of them. So /etc/bashrc affects bash shells systemwide, but
/home/kelly/.bashrc affects only the shells that the user kelly starts.
Shell Config Scripts: bashrc, csh.cshrc, zshrc
Bashrc is read by bash; csh.cshrc is read by tcsh; and zshrc is read by
zsh. These files are read every time a shell is launched, not just upon login,
and they determine the settings and behaviors of the shells on the system. The
following are places to put functions and aliases.
■■ profile This file is read by all shells except tcsh and csh upon
login. bash falls back to reading it if there is no bash_profile. Zsh
looks for zprofile, but if there is none, it reads profile as well. List-
ing 8-1 shows a typical /etc/profile file.
# /etc/profile
# System wide environment and startup programs, for login setup
# Functions and aliases go in /etc/bashrc
pathmunge () {
if ! echo $PATH | /bin/egrep -q “(^|:)$1($|:)” ; then
if [ “$2” = “after” ] ; then
PATH=$PATH:$1
else
PATH=$1:$PATH
fi
fi
}
# Path manipulation
if [ `id -u` = 0 ]; then
pathmunge /sbin
pathmunge /usr/sbin
pathmunge /usr/local/sbin
fi
pathmunge /usr/X11R6/bin after
# No core files by default
ulimit -S -c 0 > /dev/null 2>&1
USER=”`id -un`”
LOGNAME=$USER
MAIL=”/var/spool/mail/$USER”
Listing 8-1 A typical /etc/profile file. (continued)
Examining the System Configuration Files 165
13_599496 ch08.qxd 8/30/05 6:37 PM Page 165
HOSTNAME=`/bin/hostname`
HISTSIZE=1000
if [ -z “$INPUTRC” -a ! -f “$HOME/.inputrc” ]; then
INPUTRC=/etc/inputrc
fi
export PATH USER LOGNAME MAIL HOSTNAME HISTSIZE INPUTRC
for i in /etc/profile.d/*.sh ; do
if [ -r “$i” ]; then
. $i
fi
done
unset i
unset pathmunge
if [ $LD_LIBRARY_PATH ]
then
if ! set | grep LD_LIBRARY_PATH | grep /usr/X11R6/lib:/usr/X11R6/lib/modules >
/dev/null
then
LD_LIBRARY_PATH=$LD_LIBRARY_PATH:/usr/X11R6/lib:/usr/X11R6/lib/modules
export LD_LIBRARY_PATH
fi
else
LD_LIBRARY_PATH=/usr/X11R6/lib:/usr/X11R6/lib/modules
export LD_LIBRARY_PATH
fi
Listing 8-1 (continued)
/etc/profile is a good place to set paths because it is where you set envi-
ronmental variables that are passed to child processes in the shell. If you want
to change the default path of your shells in /etc/profile, you can add
another path statement in the path manipulation section of /etc/profile.
For example, suppose that you create a directory called /music on your sys-
tem and you want this directory to be in the system search path. You could add
the following line to the end of the other similar lines:
pathmunge /music
Do not add too many paths to this section because users can set their own
paths using a .profile in their home directories. Adding more default paths
than are necessary can pose a security risk. For example, a user named katie
may want to run her own version of pine, which she keeps in her home directory.
166 Chapter 8
13_599496 ch08.qxd 8/30/05 6:37 PM Page 166
In that case, she may want to have /home/$USER or /home/katie at the
beginning of her path so that when she types pine, the version in her home
directory is found by the shell first, before finding the copy of pine in
/usr/bin/pine. Generally, putting /home/$USER or any other directory
whose contents are not controlled by root in /etc/profile is not a good idea.
The reason for this warning is that a rogue user or cracker can compile a
backdoor, a way to enter the system unexpectedly, or corrupted version of a
program and somehow get it in a user’s home directory, perhaps even by mail-
ing it to the user. If users’ paths are set to check their home directories first,
they may think that they are running a system program but instead are
unknowingly running an alternate version.
On the other hand, if this path modification is set only in katie’s .profile,
only she runs this risk. She should also be aware of this risk since she has to per-
form the extra step of adding this path modification herself.
Another useful variable to change in the system profile is the number of
user commands saved in the .history file in the user’s directory. This com-
mand history is especially useful, since you can scroll through your previous
commands by using the up and down arrows. To change the number of com-
mands saved in the .history file, modify this line:
HISTSIZE=1000
bash, tcsh, zsh, and Their Config File Read Orders
The shells read a few configuration files when starting up. It is good to know
which files are read in what order, so that you know where to set variables that
will only apply to certain users.
■■ bash — bash reads the following files on startup: /etc/profile, all
the files in /etc/profile.d ~/.bash_profile, ~/.bash_login,
and ~/.profile. Upon logout, bash reads ~/.bash_logout.
■■ tcsh — tcsh reads the following files when starting up: /etc/csh
.cshrc, then /etc/csh.login. After these come the config files in
the user’s home directory: ~/.tcshrc (or if not present, ~/.cshrc),
~/.history, ~/.login, ~/.cshdirs.
■■ zsh — zsh reads the following when starting up: /etc/zshenv,
~/.zshenv, /etc/zprofile, ~/.zprofile, /etc/zshrc,
~/.zshrc, and /etc/zlogin. Nonlogin shells also read ~/.bashrc.
Upon logout, zsh reads the ~/.zlogout and /etc zlogout files.
Examining the System Configuration Files 167
13_599496 ch08.qxd 8/30/05 6:37 PM Page 167
System Environmental Settings
The files discussed in this section deal with system environmental settings.
/etc/motd
This file contains the message that users see every time they log in. It’s a good
place to communicate messages about system downtime and other things that
users should be aware of. On the other hand, you can put amusing quotes here
to entertain your users. Usually, the motd contains a message like:
Welcome to Generic University’s UNIX mail system.
This system is monitored. Unauthorized use prohibited.
System downtime scheduled this Sunday night from 10 pm to 1 am.
NOTE motd is a plain-text file, which you can edit with any text editor.You can
use it to display any message you want users to see when they login. If you
don’t have this file in your /etc directory you can easily create it.
issue
Whatever is in this file shows up as a prelogin banner on your console. By
default, this file tells which version of Red Hat is running on the system and
the kernel version.
The default file looks like this:
Red Hat Linux release 7.2 (Enigma)
Kernel \r on an \m
So when you log in, you see this message (or something similar, depending on
the kernel running on your system):
Fedora Core release 3 (Heidelberg)
Kernel 2.6.10-1.770_FC3 on an i686
issue.net
This file generally contains the same thing as /etc/issue. It shows up when
you attempt to telnet into the system. Because it shows up to people who are
connecting to your system over the Internet, you should change this message
to include a warning such as “Access is being monitored. Unauthorized access
168 Chapter 8
13_599496 ch08.qxd 8/30/05 6:37 PM Page 168