Red Hat Linux Networking , System Administration (P30) ppsx
Bạn đang xem bản rút gọn của tài liệu. Xem và tải ngay bản đầy đủ của tài liệu tại đây (721.45 KB, 30 trang )
41_599496 pt05.qxd 8/30/05 7:13 PM Page 834
835
This chapter is a primer on Security-Enhanced Linux, or SELinux. SELinux is
a new and much stronger security model for Fedora Core- and RHEL-based
systems. Although it is most appropriate for use in situations that demand
strict security, SELinux can also be used in server and desktop environments.
SELinux is also significantly different from traditional Linux and UNIX secu-
rity models, so it takes some time to change certain assumptions about system
access and to unlearn certain practices (mostly finger habits) that are incom-
patible with the security model that SELinux enforces. The material in this
chapter is introductory and intended to familiarize you with SELinux and the
mandatory access control model on which it is built, and to show you how you
can get started using SELinux features.
Understanding SELinux
SELinux is a set of patches to the Linux kernel and key supporting utilities that
implement mandatory access control and role-based access control. Created by
the United States National Security Agency (NSA) as part of ongoing research
into information security, mandatory access control and role-based access con-
trol make it possible to implement strict information separation at the kernel
level. The purpose is to maintain and enforce confidentiality and data integrity
Exploring
SELinux Security
IN THIS CHAPTER
■■ Understanding SELinux
■■ Using SELinux
■■ Finding More Information about SELinux
CHAPTER
33
42_599496 ch33.qxd 8/30/05 7:31 PM Page 835
on multiuser systems by giving the kernel the ability to enforce access control
based on policy. One common scenario in which mandatory access control and
role-based access control can be used occurs when you need to restrict root’s
omnipotence. Policy-based access control, enforced in the kernel, makes it pos-
sible to prevent root from accessing certain files, for example, while still main-
taining full ability to administer the system. Another common use for access
control is to limit the damage done by flawed or malicious code. A typical
exploit method is to create a buffer overflow in an application running with
root privileges that results in executing arbitrary code, such as command shell.
While SELinux cannot prevent the buffer overflow, it can limit the damage
caused by unauthorized access to a root shell.
Even though SELinux was created by the NSA, which is responsible for the
United States’ signal intelligence activities, it is freely available under the same
terms and conditions as Linux itself, the General Public License. Initially
released on 22 December 2000 for the 2.2.12 kernel, SELinux has constantly
been improved and kept up to date with developments in the mainstream ker-
nel. Surprisingly, SELinux has been accepted by the Linux community and
incorporated into most of the major Linux distributions, including Fedora
Core, RHEL, SUSE Linux (now known as Novell Enterprise Desktop), Debian,
and a version of Gentoo Linux known as Hardened Gentoo).
NOTE SELinux patches were not present in RHEL 3, only RHEL 4.
Mandatory and Role-Based Access Control
The standard Linux security model is referred to as discretionary access con-
trol, or DAC, because file access and other resource-related decisions are made
based on user identity and a relatively small set of object permissions (read,
write, and execute for a given user, a given group or groups, and/or other
users). In a DAC-based security model, therefore, programs executed by a spe-
cific user have extremely wide discretion to do (practically) anything to that
user’s resources. Moreover, the root user and programs running as the root
user have almost total discretion over all resources owned by all users. The
implication for flawed or malicious software is clear: effectively complete con-
trol over files and other resources it controls via the user identity associated
with the program. In a less hostile security environment, DAC provides an
acceptable level of security against unintentional or accidental damage and a
reasonably robust defense against casual attempts to exploit it. DAC also relies
on the good will and common sense of users to exercise their powers respon-
sibly, assuming, for example, that a user won’t make the company payroll files
readable by all users.
836 Chapter 33
42_599496 ch33.qxd 8/30/05 7:31 PM Page 836
Mandatory access control, or MAC, makes no assumptions about users’
responsibilities but does assume a hostile security environment. MAC gives
security and system administrators full control over all of the resources on a
system and, if properly implemented, prevents users from making risky secu-
rity-related decisions. MAC works by defining a policy and then enforcing
that policy on objects on the system. To take a simple example, one policy
might be, “No file can be made world-readable.” To enforce this policy, users
would be prevented from setting the world read bit even on files they own and
programmatic attempts (using the chown system call, for example) to make
world-readable files would also be denied. Even the root user would be sub-
ject to this restriction. Policy enforcement happens at the kernel level and is
dependent not on the user’s identity alone but on any security-related infor-
mation deemed relevant.
SELinux’s MAC implementation makes it possible to create fine-grained
permissions for both subjects and objects. Subjects include users, programs,
processes, and threads, that is, for any entity or actor. Objects refer to files and
devices, or more generally, anything to which you can do something or on
which you can act.
Role-based access control (RBAC) is a specific type of MAC. RBAC works by
grouping subjects into abstract roles. Broadly understood, a role consists of a
discrete set of actions that a subject having that role is permitted to perform.
The policy enforcement occurs when a role is cross-referenced against a list or
table of objects on which the role can act. This cross-referencing is known as
type enforcement because policy enforcement depends on the type of process
(or subject) that seeks to perform some action and the type of object on which
the action would be performed. Each process type, known as a domain, has a
carefully defined set of objects on which it can act and an equally carefully
defined set of actions that it can take. Admittedly complicated, type enforce-
ment allows for fine-grained control over the users, programs, and processes
on a Fedora Core or RHEL system.
Exploring SELinux Security 837
WHY DID THE NSA CHOOSE LINUX?
Because they can. Seriously, the NSA moved their information security research
to Linux for (at least) five reasons:
1. Previous research had been conducted on niche or research operating sys-
tems that didn’t reflect real-world usage.
2. They weren’t seeing the results they wanted.
3. The National Security Council was interested in Linux.
4. The NSA was interested in mutual technology transfer opportunities.
5. Linux was perceived to be the best alternative.
42_599496 ch33.qxd 8/30/05 7:31 PM Page 837
SELinux Policies
Traditional MAC implementations have suffered from a key shortcoming that
limited its popularity and usability: inflexibility. That is, traditional MAC
implementations have been able to enforce only a single access policy. SELinux
introduced the notion of multiple MAC policies and allowed administrators to
define their own policies. The original SELinux policy suffered from a similar
shortcoming and the resulting NSA policy was too strict. SELinux’s develop-
ers eventually created two policies: the strict policy (contained in the Fedora
Core and RHEL package selinux-policy-strict) that was consistent
with the original and restrictive NSA guidelines, and the targeted policy (con-
tained in the Fedora Core and RHEL package selinux-policy-targeted).
The key difference between the strict and the targeted policy is that the tar-
geted policy focuses on restricting and securing a carefully defined set of dae-
mons whose compromise or failure would result in significant integrity,
stability, or security compromise. The balance of the policy allows normal
usage under traditional Linux security, that is, as if SELinux is not enabled. For
Fedora Core 4, the targeted policy covers 80 daemons, which is too long a list
to include here, so please refer to the Fedora Core or RHEL release notes for a
complete list of the daemons included in the targeted policy.
Using SELinux
By default, SELinux as configured on Fedora Core and RHEL systems is uses the
targeted policy and is enabled by default when the system boots. If you disabled
SELinux during installation, you can reenable it using the Security Level Con-
figuration tool. To do so, type system-config-securitylevel in a terminal
window or other command prompt or select Red Hat ➪ System Settings ➪
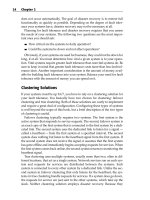
Security Level. Figure 33-1 shows the Security Level Configuration dialog box.
To enable SELinux, click the SELinux tab. See Figure 33-2.
Check the Enabled (Modification Requires Reboot) check box. If the Policy
Type isn’t targeted, use the drop-down box to select the targeted policy. Click
the Relabel on next reboot to relabel files controlled by SELinux appropriately.
Click OK to make your change take effect. Finally, reboot.
CAUTION Relabeling the file system can take a very long time.
Changing the SELinux policy on a running system is one of the few situa-
tions in which you need to restart a running Linux system. Changing the
SELinux policy requires a reboot because restarting the system under a new
policy allows all system processes to be started in the proper context and
reveals any problems in the policy change.
838 Chapter 33
42_599496 ch33.qxd 8/30/05 7:31 PM Page 838
Figure 33-1 The Security Level Configuration tool.
Figure 33-2 The SELinux tab.
Exploring SELinux Security 839
42_599496 ch33.qxd 8/30/05 7:31 PM Page 839
After rebooting, use the sestatus command to ensure that your changes
take effect:
# sestatus
SELinux status: enabled
SELinuxfs mount: /selinux
Current mode: permissive
Mode from config file: permissive
Policy version: 18
Policy from config file:targeted
Policy booleans:
allow_ypbind active
dhcpd_disable_trans inactive
httpd_disable_trans inactive
httpd_enable_cgi active
httpd_enable_homedirs active
httpd_ssi_exec active
httpd_tty_comm inactive
httpd_unified active
mysqld_disable_trans inactive
named_disable_trans inactive
named_write_master_zonesinactive
nscd_disable_trans inactive
ntpd_disable_trans inactive
portmap_disable_trans inactive
postgresql_disable_transinactive
snmpd_disable_trans inactive
squid_disable_trans inactive
syslogd_disable_trans inactive
use_nfs_home_dirs inactive
use_samba_home_dirs inactive
use_syslogng inactive
winbind_disable_trans inactive
ypbind_disable_trans inactive
The first few half dozen lines of output indicate the general status of
SELinux. The output you see should be identical, with the exception of the
Policy version line, which might be different on your system. The output
under the Policy booleans heading shows the daemons and domains
(types) for which SELinux policy is enabled. Type enforcement is enabled on
policies labeled active and disabled on policies labeled inactive. As you
can see in the output in the previous listing, the targeted policy is quite limited
in what it protects.
Check the system log file, /var/log/messages, for messages that read
avc: denied (that’s two spaces between avc: and denied). Such messages
indicate potential problems that might interfere with smooth system usage:
840 Chapter 33
42_599496 ch33.qxd 8/30/05 7:31 PM Page 840
# grep ‘avc: denied’ /var/log/messages
May 16 22:46:59 luther kernel: audit(1116298019.278:0): avc: denied { read }
for pid=3993 exe=/sbin/portmap name=libnsl.so.1 dev=hda3 ino=111865608 scontext=
user_u:system_r:portmap_t tcontext=system_u:object_r:file_t tclass=lnk_file
May 16 22:46:59 luther kernel: audit(1116298019.285:0): avc: denied { read }
for pid=3993 exe=/sbin/portmap name=libnsl-2.3.5.so dev=hda3 ino=109095436 scont
ext=user_u:system_r:portmap_t tcontext=system_u:object_r:file_t tclass=file
May 16 22:46:59 luther kernel: audit(1116298019.314:0): avc: denied { getattr }
for pid=3993 exe=/sbin/portmap path=/lib/libnsl-2.3.5.so dev=hda3 ino=1090954
36 scontext=user_u:system_r:portmap_t tcontext=system_u:object_r:file_t tclass=
file
May 16 22:46:59 luther kernel: audit(1116298019.323:0): avc: denied { execute }
for pid=3993 path=/lib/libnsl-2.3.5.so dev=hda3 ino=109095436 scontext=user_u
:system_r:portmap_t tcontext=system_u:object_r:file_t tclass=file
May 16 22:47:09 luther kernel: audit(1116298029.443:0): avc: denied { read }
for pid=4172 exe=/usr/sbin/ntpdate name=libcap.so.1.10 dev=hda3 ino=109636543
scontext=user_u:system_r:ntpd_t tcontext=system_u:object_r:file_t tclass=file
May 16 22:47:09 luther kernel: audit(1116298029.482:0): avc: denied { getattr
} for pid=4172 exe=/usr/sbin/ntpdate path=/lib/libcap.so.1.10 dev=hda3 ino=1096
36543 scontext=user_u:system_r:ntpd_t tcontext=system_u:object_r:file_t tclass=
file
May 16 22:47:09 luther kernel: audit(1116298029.492:0): avc: denied { execute }
for pid=4172 path=/lib/libcap.so.1.10 dev=hda3 ino=109636543 scontext=
user_u:system_r:ntpd_t tcontext=system_u:object_r:file_t tclass=file
May 16 22:47:09 luther kernel: audit(1116298029.503:0): avc: denied { read }
for pid=4172 exe=/usr/sbin/ntpdate name=libc.so.6 dev=hda3 ino=51207831 scontext
=user_u:system_r:ntpd_t tcontext=system_u:object_r:file_t tclass=lnk_file
May 16 22:47:09 luther kernel: audit(1116298029.515:0): avc: denied { write }
for pid=4172 exe=/usr/sbin/ntpdate name=log dev=tmpfs ino=8273 scontext=user_u:
system_r:ntpd_t tcontext=user_u:object_r:device_t tclass=sock_file
May 16 22:47:09 luther kernel: audit(1116298029.527:0): avc: denied { sendto }
for pid=4172 exe=/usr/sbin/ntpdate path=/dev/log scontext=user_u:system_r:ntpd
_t tcontext=user_u:system_r:unconfined_t tclass=unix_dgram_socket
Messages that read avc: denied mean that the SELinux policy in effect is
not allowing the named executable, such as /usr/sbin/ntpdate or
/sbin/portmap, to take some action. The denied action appears in braces.
For example, consider the following avc: denied message:
May 16 22:47:09 luther kernel: audit(1116298029.527:0): avc: denied { sendto }
for pid=4172 exe=/usr/sbin/ntpdate path=/dev/log scontext=user_u:system_r:ntpd
_t tcontext=user_u:system_r:unconfined_t tclass=unix_dgram_socket
In this message, the /usr/sbin/ntpdate program (exe=/usr/sbin/
ntpdate) is attempting to use the sendto system call ({ sendto }) to write
to the device-special file /dev/log (path=/dev/log), but SELinux is deny-
ing permission to do so. The specific ntpdate process in question is process
4172 (pid=4172).
Use the system for a while, attempting especially to exercise the daemon
executables (shown in boldface in the listing). If you discover a feature on
Exploring SELinux Security 841
42_599496 ch33.qxd 8/30/05 7:31 PM Page 841
which you rely is not working properly, refer to the section titled “Modifying
the Targeted Policy” to learn how to disable policy enforcement. After you
have satisfied yourself that everything is working correctly, start the Security
Level Configuration tool again, and click the Enforcing check box to start
enforcing the new security level. (See Figure 33-3.)
Alternatively, you can use the command setenforce 1 or setenforce
Enforcing at a command prompt:
# setenforce 1
This command enables SELinux policy enforcement. You can use the
getenforce command to see the current enforcement status:
# getenforce
Enforcing
If you change your mind, use the setenforce command with an argument
of 0 or Permissive to disable policy enforcement:
# setenforce Permissive
# getenforce
Permissive
Although not strictly required, it might be wise to reboot the system again.
Enabling SELinux Manually
To enable SELinux manually, use the following steps:
1. Edit /etc/selinux/config and change the policy type to read as
follows:
SELINUXTYPE=targeted
2. While editing /etc/selinux/config, make certain that the
SELINUX variable is set to permissive, that is:
SELINUX=permissive
This line starts SELinux with the correct policy but still enables you to
log in if there is an unanticipated problem.
3. Execute the following command to force the initialization scripts to
relabel the system when it reboots:
# touch /.autorelabel
Relabeling the system refers to setting certain extended file system
attributes that SELinux uses to enforce policy. These extended file
attributes are an important part of SELinux’s protection (and a signifi-
cant source of trouble if the attributes are incorrectly set).
842 Chapter 33
42_599496 ch33.qxd 8/30/05 7:31 PM Page 842
Figure 33-3 Enabling enforcement of the SELinux targeted security policy.
4. Verify that the changes took effect with the sestatus command:
# sestatus -v
5. While the system is still running in permissive mode, check /var/log/
messages for avc: denied messages to identify possible problems
that might interfere with smooth system usage under the new policy.
6. When you are satisfied that the system runs in a stable manner under
the new policy, enable enforcing by changing the SELINUX line in
/etc/selinux/config to SELINUX=enforcing. You can either
reboot or execute setenforce 1 to turn enforcing on in real time.
Modifying the Targeted Policy
To modify the targeted SELinux policy, use the Security Level Configuration
tool. One reason to modify SELinux policy is to eliminate the avc: denied
messages described earlier. These messages indicate that programs are violating
(rather, attempting to violate) some aspect of the targeted policy. For example, the
following code shows that the ntpdate program is triggering policy violations:
# grep ‘avc: denied’ /var/log/messages | grep ntpdate
May 16 22:47:09 luther kernel: audit(1116298029.443:0): avc: denied { read }
for pid=4172 exe=/usr/sbin/ntpdate name=libcap.so.1.10 dev=hda3 ino=109636543
scontext=user_u:system_r:ntpd_t tcontext=system_u:object_r:file_t tclass=file
May 16 22:47:09 luther kernel: audit(1116298029.482:0): avc: denied { getattr
} for pid=4172 exe=/usr/sbin/ntpdate path=/lib/libcap.so.1.10 dev=hda3 ino=1096
Exploring SELinux Security 843
42_599496 ch33.qxd 8/30/05 7:31 PM Page 843
36543 scontext=user_u:system_r:ntpd_t tcontext=system_u:object_r:file_t tclass=
file
May 16 22:47:09 luther kernel: audit(1116298029.503:0): avc: denied { read }
for pid=4172 exe=/usr/sbin/ntpdate name=libc.so.6 dev=hda3 ino=51207831 scontext
=user_u:system_r:ntpd_t tcontext=system_u:object_r:file_t tclass=lnk_file
May 16 22:47:09 luther kernel: audit(1116298029.515:0): avc: denied { write }
for pid=4172 exe=/usr/sbin/ntpdate name=log dev=tmpfs ino=8273 scontext=user_u:
system_r:ntpd_t tcontext=user_u:object_r:device_t tclass=sock_file
May 16 22:47:09 luther kernel: audit(1116298029.527:0): avc: denied { sendto }
for pid=4172 exe=/usr/sbin/ntpdate path=/dev/log scontext=user_u:system_r:ntpd
_t tcontext=user_u:system_r:unconfined_t tclass=unix_dgram_socket
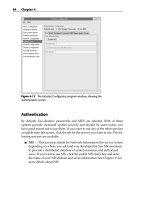
To get rid of these messages and fix ntpdate, start the Security Level Con-
figuration tool and click the SELinux tab. As you can see in Figure 33-4, a num-
ber of policy options are present in the Modify SELinux Policy box.
Expand the SELinux Service Protection item by clicking the triangle next to
that item in the list. Find the Disable SELinux protection for ntpd daemon item
and click the check mark next to it. (See Figure 33-5.)
By disabling the SELinux policy for the NTP daemon, you will eliminate the
policy violations that appear in your system log. You are also preventing
SELinux from protecting NTP against compromise, so proceed cautiously.
Click OK to save your changes. You can make similar changes to a variety of
other daemons protected by SELinux and in doing so will be creating your
own customized version of the targeted security policy.
Figure 33-4 Viewing editable SELinux security policies.
844 Chapter 33
42_599496 ch33.qxd 8/30/05 7:31 PM Page 844
Figure 33-5 Viewing editable SELinux security policies.
Finding More Information about SELinux
This chapter has only scratched the surface of SELinux. For additional infor-
mation about the SELinux extensions, the following sources of information
will prove useful:
■■ NSA Resources
■■ NSA SELinux Information — nsa.gov/selinux
■■ NSA SELinux FAQ — nsa.gov/selinux/info/faq.cfm
■■ Fedora Project and Red Hat Resources
■■ The Fedora Core SELinux FAQ —
/docs/selinux-faq
■■ Running Apache on SELinux —
/docs/selinux-apache-fc3
■■ Fedora Core SELinux Mailing List — hat
.com/mailman/listinfo/fedora-selinux-list
Exploring SELinux Security 845
42_599496 ch33.qxd 8/30/05 7:31 PM Page 845
■■ Community Resources
■■ SELinux community page —
■■ UnOfficial FAQ — crypt.gen.nz/selinux/faq.html
■■ Writing SE Linux policy HOWTO —
/docman/display_doc.php?docid=21959&group_id=21266
■■ Getting Started with SE Linux HOWTO — https://sourceforge
.net/docman/display_doc.php?docid=20372&group_id=
21266
■■ IRC Channel — irc://irc.freenode.net#fedora-selinux
Summary
This chapter introduced you to SELinux, an extremely robust and complex
security enhancement to Linux contributed by the National Security Agency.
SELinux represents a significant departure from the traditional Linux security
model, so it is important to understand not only the weaknesses of the tradi-
tional model that SELinux tries to address but also how SELinux uses manda-
tory access control, role-based access control, and type enforcement to increase
the level of data integrity and information assurance possible on Linux
systems. Because SELinux is complicated, the Security Level Configuration
tool is a real bonus because the tool makes modifying the policies possible
without having to learn yet another arcane configuration language. You will
also find it helpful to know where you can find more information about
SELinux configuration and usage.
846 Chapter 33
42_599496 ch33.qxd 8/30/05 7:31 PM Page 846
847
It’s a dangerous Internet out there. Perhaps the most important task and the
most daunting challenge confronting any system administrator is to protect
systems from external compromise. This chapter shows you how to use ipta-
bles to create and maintain a firewall on your Fedora Core system to (help)
keep the bad guys out while permitting legitimate network traffic into your
LAN. You will also learn how to use LDAP and Kerberos to create a more scal-
able and secure authentication (login) environment.
Creating a Firewall
Firewall is a generic term used to describe methods for selectively permitting
or denying access to a network or a server. As generally used, a firewall is soft-
ware that controls access at the packet level by examining the source and des-
tination IP addresses, including the port number. In some cases, the actual
content (or payload) of the IP packets will be examined to limit the type of traf-
fic permitted to enter a network (referred to as ingress control) or to exit a net-
work (referred to as egress control). Firewalls are not necessarily strictly
software-based. A number of commercial firewall solutions consist of a dedi-
cated hardware device (sometimes referred to as an appliance) running a
security-hardened Linux distribution that includes the firewall software and
Implementing
Network Security
IN THIS CHAPTER
■■ Creating a Firewall
■■ Installing, Configuring, and Using LDAP
■■ Installing, Configuring, and Using Kerberos
CHAPTER
34
43_599496 ch34.qxd 8/30/05 7:25 PM Page 847
application software for configuring the firewall and controlling the appliance
itself. Regardless of the specific details, however, the goal is the same: to pro-
tect a network by controlling the type of traffic that enters it.
The firewall solution this chapter covers is Netfilter, the Linux kernel’s built-
in packet-filtering software. It is often referred to as iptables because the com-
mand used to edit the packet filtering rules is named iptables. The standard
kernels provided in Fedora Core and RHEL include a full suite of loadable ker-
nel modules that provide a complete packet-filtering toolkit. Fedora Core and
RHEL also include an easy-to-use tool for configuring Netfilter rules, the Secu-
rity Level Configuration tool. To get started, select Main ➪ System Settings ➪
Security Level or type system-config-securitylevel in a terminal win-
dow. The main screen should resemble Figure 34-1.
The firewall might already be enabled depending on the options you chose
when you installed Fedora Core or RHEL. If it isn’t, select Enable firewall from
the Security level drop-down box. When you enable the firewall, you can
select the inbound traffic you want to permit for the Trusted services list. The
list of trusted services contains common services for which you might wish to
enable ingress:
■■ WWW (HTTP) — Web server access
■■ FTP — FTP server access
■■ SSH — SSH-based shell account access
■■ Telnet — Telnet-based shell account access
■■ Mail (SMTP) — Mail server access
Figure 34-1 The Security Level Configuration tool.
848 Chapter 34
43_599496 ch34.qxd 8/30/05 7:25 PM Page 848
The smart way to approach access control is to use the principle referred to
in security circles as least-access. This simply means starting from a system to
which no access is granted and then to permit the minimum amount of access
necessary for a system to serve its purpose. For example, if you have a Web
server, you don’t need to enable access to the mail server, the FTP server, or the
SSH server. The idea behind the principle of least-access is to limit the methods
that ne’er-do-wells can attempt to exploit to gain unauthorized access to your
system. If you administer your Web server using SSH, naturally, you will need
to enable SSH access. In the case of a Web server, it isn’t necessary to permit
FTP access even if visitors will be downloading files directly from the server
using their browser because the Web server will serve the files using its built-
in support for the FTP protocol. Figure 34-2 shows the firewall configured to
permit WWW (HTTP) and SSH access.
Notice that Figure 34-2 shows the network interface eth0 as a trusted device.
A trusted device is a network interface through which traffic to the host is permit-
ted. This is most useful on multihomed hosts, that is, hosts that have multiple
network interface cards. For example, Internet gateways often have two Ether-
net cards, say, eth0 and eth1. One (suppose it is eth0) is Internet-facing and is
the interface on which inbound Internet traffic arrives. The other (eth1 in this
case) is usually LAN-facing and is the interface by which LAN clients access the
Internet. The gateway will use network address translation (NAT) and IP mas-
querading to route traffic from the LAN to the Internet (from eth1 to eth0). In
this configuration, the firewall would consider eth0 as a trusted interface and
route (carefully controlled) traffic on to eth1. However, direct connections to
eth1 from outside of the LAN (that is, from the Internet) would be denied.
In the Other ports text box, add the port number and protocol family of ser-
vices not listed in the Trusted services list to which you want to permit access.
The format of these entries is port:family. Multiple entries must be sepa-
rated by commas. For example, if you are running an IRC server, you have to
allow TCP and UDP access to port 6667, so you would enter 6667:tcp 6667:udp
in the Other ports text box. (See Figure 34-3.)
TIP To find out what ports and protocols a given network service uses, you
can look at the /etc/services configuration file. For example, if you want to
know what ports and protocols the IRC daemon, ircd, requires, the following
grep command will show you:
$ grep -i ircd /etc/services
ircd 6667/tcp # Internet Relay Chat
ircd 6667/udp # Internet Relay Chat
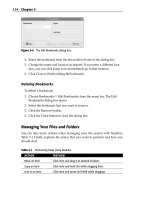
After you have configured access to services and trusted devices, click OK
to save your changes and exit the Security Level Configuration tool. Click Yes
when prompted. (See Figure 34-4.)
Implementing Network Security 849
43_599496 ch34.qxd 8/30/05 7:25 PM Page 849
Figure 34-2 Configuring the firewall to allow HTTP and SSH access.
Figure 34-3 Specifying additional port access.
Figure 34-4 Confirming firewall configuration changes.
850 Chapter 34
43_599496 ch34.qxd 8/30/05 7:25 PM Page 850
To activate your changes, load the new configuration by restarting iptables
using the service utility:
# service iptables restart
Flushing firewall rules: [ OK ]
Setting chains to policy ACCEPT: filter [ OK ]
Unloading iptables modules: [ OK ]
Applying iptables firewall rules: [ OK ]
Once your firewall is up and running, you can test by attempting to access
services to which access is denied.
Installing, Configuring, and Using LDAP
LDAP, the Lightweight Directory Access Protocol, provides a hierarchical
collection of information that can be accessed over a network. LDAP is an
example of a directory service, where the term directory refers to a central infor-
mation resource such as a telephone directory or network-accessible address
book. LDAP directories can be thought of as simple, hierarchical databases
that are accessed using keys that identify the portions of the directory hierar-
chy to traverse to locate a specific unit of information. LDAP is analogous to
other directory services that are in common use on networked systems today,
Implementing Network Security 851
ABOUT NAT AND IP MASQUERADING
Network address translation, or NAT, maps an IP address used on one network
to a different IP address used on another network. As used in this chapter, NAT
translates IP addresses used inside a LAN to an IP address of a system that
faces the Internet. For incoming traffic destined to a specifc IP address inside
the LAN, such as the HTTP responses sent to a client broswer, NAT unmaps the
global IP addresses on incoming packets back to local IP addresses. NAT is
used for two main reasons: to conserve and to limit the number of external
IP addresses a company needs and to enhance network security. NAT limits
the number of externally facing IP addresses a company needs because it
directs all Internet-destined traffic through a single “public” IP address. NAT
strenghtens network secruity because each outgoing or incoming IP package
must pass through a NAT step. The translation step offers the opportunity to
qualify or authenticate the request or match it to a previous request.
IP masquerading is a specific type of NAT that permits multiple hosts on a
private network (a network using an IP address range that is not accessible
across the Internet) to use the Internet via a single IP address that is accessible
to the Internet. It is referred to as masquerading because all of the internal IP
addresses appear to be a single IP, that of the host providing the externally
visible IP address.
43_599496 ch34.qxd 8/30/05 7:25 PM Page 851
such as Novell’s NDS and eDirectory, Netscape’s Directory Server, or Sun’s
SunONE Directory Server software.
LDAP is based on the X.500 standard for directory sharing (www.uth.tmc
.edu/uth_databases/white_pages/rfc-index.html), but is designed
to provide an open, usable model for sharing information over a network that
is unencumbered by the complexity of X.500 specifications and implementa-
tions. LDAP is referred to as a lightweight directory access protocol because it
eliminates the overhead of the seven-layer Open System Interconnect (OSI)
network stack model used by the X.500 specification in favor of using the
TCP/IP layer directly. LDAP also does not support many of the obscure, rarely
used features of the X.500 specification, which simplifies implementation and
provides an easily understandable API. For additional introductory information
about LDAP and X.500, see />/standards-X500.html.
Like all directory services, LDAP is a client-server technology. Clients can
either query or upload information to an LDAP server. In the case of a query,
an LDAP server either responds to a query directly or can forward the query
to another LDAP server, which repeats the “respond or forward” process. The
first LDAP server for Linux systems was developed at the University of Michi-
gan, but most Linux LDAP development now takes place in the OpenLDAP
project (openldap.org), which is the source of the software discussed in this
section.
Using LDAP provides a number of potential benefits to an organization. It
provides a central, network-accessible repository for commonly used informa-
tion. Its hierarchical nature makes it easy to search for and locate specific infor-
mation, while also providing a directory that holds many different types of
information. The idea of directory elements and attributes is easy to understand
and work within light of conceptually similar models for managing information
such as Extensible Markup Language (XML). The LDAP protocol is also inde-
pendent of the underlying storage model used, which makes it easy to map
LDAP data into existing databases or migrate to new, smaller database models.
Overview of LDAP Directory Organization
LDAP directories consist of hierarchical entries with specific attributes that
each define one particular bit of information about that entry. Each entry can
be viewed as an object that contains a number of attribute type/value pairs,
much like an element in an XML document or data description. Each entry is
defined by its distinguished name (DN), which is a unique identifier for that
node in an LDAP directory. In addition to the distinguished name, LDAP
nodes also have a relative distinguished name (RDN), which is a unique iden-
tifier for that node within the context of its parent. A good analogy for DNs
and RDNs is full and relative pathnames in a file system hierarchy. For example,
852 Chapter 34
43_599496 ch34.qxd 8/30/05 7:25 PM Page 852
the distinguished name for the Linux less utility would be /usr/bin/less,
its full pathname. However, its relative distinguished name within the context
of the /usr/bin directory is less, which is enough to uniquely identify it in
that context.
The set of entries that make up a specific LDAP hierarchy are defined in a
schema for that LDAP directory. A schema is a text file that defines the attrib-
utes, types, and values that can belong to each entry in an LDAP directory, the
objects that hold these entries, and the hierarchical context for each of these
objects in an LDAP directory. On RHEL and Fedora Core systems, a number of
basic LDAP schema are provided in the directory /etc/openldap/schema.
Schema files are divided into two basic types of entries: attributetype
definitions and objectclass definitions. As the name suggests, each
attributetype definition describes a specific attribute, defining its name,
the syntax for that object, and how attributes of that type are compared. Simi-
larly, each objectclass definition describes a single class of entries in an
LDAP hierarchy, the context in which they appear in that hierarchy, and any
mandatory components of that object.
Listing 34-1 shows an excerpt from the LDAP core schema, defined in the
file /etc/openldap/schema/core.schema on Fedora Core and RHEL
systems. This excerpt shows the attributetype definition for the dc
(domainComponent) attribute and the objectclass (dcObject) that holds
entries of that type.
# RFC 1274 + RFC 2247
attributetype ( 0.9.2342.19200300.100.1.25
NAME ( ‘dc’ ‘domainComponent’ )
DESC ‘RFC1274/2247: domain component’
EQUALITY caseIgnoreIA5Match
SUBSTR caseIgnoreIA5SubstringsMatch
SYNTAX 1.3.6.1.4.1.1466.115.121.1.26 SINGLE-VALUE )
# RFC 2247
objectclass ( 1.3.6.1.4.1.1466.344 NAME ‘dcObject’
DESC ‘RFC2247: domain component object’
SUP top AUXILIARY MUST dc )
Listing 34-1 Sample LDAP schema entries.
Each of these sample entries contains mysterious strings of decimal num-
bers separated by periods, which are referred to as dotted decimal values.
These dotted decimal entries, such as those in the attributetype, SYNTAX,
and objectclass definitions, are Object Identifiers (OIDs) that refer to pre-
defined X.500 protocol elements, object types, attribute types, and attribute
values. These are present in order to maintain compatibility with and leverage
the X.500 specification.
Implementing Network Security 853
43_599496 ch34.qxd 8/30/05 7:25 PM Page 853
The sample attributetype definition shown in Listing 34-1 contains the
following declarations:
■■ NAME — One or more unique names identifying this attribute.
■■ DESC — Quoted text string that describes the attribute.
■■ EQUALITY — States that comparison of attributes of this type should be
done in a case-insensitive fashion, using International Alphabet 5,
which is an international standard alphanumeric code used to represent
characters within a string. The United States’ version of IA5 is more
commonly known as American Standard Code for Information Inter-
change (ASCII).
■■ SUBSTRING — States that substring comparisons of attributes of this
type should also be done in a case-insensitive fashion using Interna-
tional Alphabet 5.
■■ SYNTAX — Defines the OID for the syntax definition for the value of an
attribute of this type, and that each attribute of this type can only have
a single value.
The sample objectclass definition shown in Listing 34-1 contains the fol-
lowing declarations:
■■ NAME — A unique name identifying this class of objects
■■ DESC — A quoted text string that describes the attribute
■■ SUP — States that this object appears at the top of an LDAP directory,
meaning that it has no superior object, and that it must contain a dc
attribute
NOTE When discussing or examining LDAP directories, you will often see
entries referred to by standard naming attributes such as Common Name (CN)
and Organizational Unit (OU). These names are simply the naming attributes of
specific types of objects — though they often appear to be basic parts of LDAP
syntax, they are really just the names of commonly used attributes.
As you can see, LDAP schema files can be quite complex. They are analo-
gous to the Document Type Definition (DTD) and schema files used to define
the structure and types of content that can be found in XML documents. Like
XML DTDs and schemes, the easiest way to get started using an LDAP schema
is to find one that immediately satisfies your requirements (or, more often, the
requirements of the LDAP clients that you want to use). In smaller organiza-
tions that use LDAP for specific purposes and with existing LDAP clients, you
should easily be able to find an LDAP schema that meets your needs.
854 Chapter 34
43_599496 ch34.qxd 8/30/05 7:25 PM Page 854
As discussed later in this section, OpenLDAP comes with a number of utili-
ties for importing existing data into LDAP directories. Once you’ve settled on
the schema that you want to use, you can use the appropriate utilities to create
text files in LDAP Data Interchange Format (LDIF) that you can then import
into your LDAP directory server. LDIF files are simple text-format files that
make it easy to import new data into an LDAP server, and are analogous to the
tab-delimited or comma-separated value (CSV) files used to import new data
into databases and spreadsheets. You can also use LDIF files as a convenient
mechanism for exporting data from one LDAP server and using this as a
server-independent backup mechanism, or for importing that data into a sep-
arate LDAP directory server or a replica of your primary server.
OpenLDAP Packages for Linux
The packages that provide OpenLDAP libraries, server processes, utilities, and
header files on RHEL and Fedora Core systems are the following:
■■ openldap — Libraries and basic documentation for running
OpenLDAP clients and servers on a system
■■ openldap-clients — OpenLDAP clients and associated
documentation
■■ openldap-servers — OpenLDAP servers, server status utilities,
server configuration files and basic scheme, scripts for migrating data
into or out of an OpenLDAP server, and associated documentation
You can find the specific versions of these packages that are installed on
your system using the following command:
$ rpmquery -a | grep -i ldap
perl-LDAP-0.31-5
openldap-servers-2.2.13-2
compat-openldap-2.1.30-2
openldap-servers-sql-2.2.13-2
mod_authz_ldap-0.26-2
openldap-devel-2.2.13-2
php-ldap-4.3.11-2.4
nss_ldap-220-3
openldap-clients-2.2.13-2
openldap-2.2.13-2
python-ldap-2.0.1-2
The version numbers you see might be slightly different. In addition to the
required core packages, the following auxiliary packages are available in the
distribution media for Fedora Core and RHEL systems:
Implementing Network Security 855
43_599496 ch34.qxd 8/30/05 7:25 PM Page 855
■■ compat-openldap — Compatibility libraries that may be required by
existing LDAP clients.
■■ mod_authz_ldap — An Apache Web server module that enables
Apache users to authenticate against an LDAP directory.
■■ nss_ldap — Provides two sets of LDAP clients and associated files:
nss_ldap and pam_ldap. The nss_ldap package enables X.500 and
LDAP directory servers to be used as the primary source of system con-
figuration files used by the system and the Name Service Switch, such
as /etc/aliases, /etc/group, /etc/hosts, /etc/shadow, and
so on. The pam_ldap package provides Linux Pluggable Authentica-
tion Modules that support authentication, password changes,
Netscape’s SSL, NIS’s ypldapd, and so on.
■■ openldap-devel — Headers, libraries, and associated documentation
needed for developing and compiling OpenLDAP clients and servers.
This package also includes text versions of all of the X.500 and LDAP
RFC (Request for Comment) documents that define these standards.
■■ openldap-servers-sql — A loadable module for the OpenLDAP
server that enables it to read information stored in a SQL database.
■■ perl-LDAP — Modules and associated documentation for interacting
with LDAP servers from within scripts written in the Perl scripting
language.
■■ php-ldap — A dynamic shared object (DSO) module and associated
documentation for the Apache Web server that enables PHP applica-
tions to interact with an OpenLDAP server.
■■ python-ldap — Provides support for accessing OpenLDAP servers
from within scripts written in the Python scripting language.
Core OpenLDAP Server Files, Daemons, and Utilities
This section highlights the most common command server processes, configu-
ration files and directories, and startup scripts associated with an OpenLDAP
server. For additional information about any of these processes or files, consult
the online reference information for them by using the man command.
The following are the most commonly used OpenLDAP binaries on a
Fedora Core or RHEL system:
■■ ldapadd — Adds new entries to an OpenLDAP directory. Located in
the directory /usr/bin.
■■ ldapdelete — Deletes one or more entries from an OpenLDAP direc-
tory. Located in the directory /usr/bin.
856 Chapter 34
43_599496 ch34.qxd 8/30/05 7:25 PM Page 856
■■ ldapmodify — Modifies existing entries in an OpenLDAP directory.
Located in the directory /usr/bin.
■■ ldapsearch — Locates entries in an OpenLDAP directory. Located in
the directory /usr/bin.
■■ slapadd — Imports entries from an LDIF file into an OpenLDAP
directory. Located in the directory /usr/sbin.
■■ slapd — The LDAP server. Located in the directory /usr/sbin.
■■ slapcat — Extracts entries from an LDAP server, creating an LDIF
file. Located in the directory /usr/sbin.
■■ slapindex — Reindexes an OpenLDAP directory. Located in the
directory /usr/sbin.
■■ slappasswd — Generates an encrypted password entry that you can
use in the slapd configuration file or for storage in your LDAP direc-
tory. Located in the directory /usr/sbin.
The OpenLDAP server is typically started, stopped, or restarted using the
command script /etc/init.d/ldap. As with all startup scripts on Fedora
Core or RHEL system, you should symlink this file to start up and kill files in
the directories associated with your system’s multiuser run levels. You can
either do this manually or by using the ckconfig -add ldap command.
All of the systemwide configuration files for the OpenLDAP and the Linux
OpenLDAP daemon are located in the directory /etc/openldap:
■■ ldap.conf — Sets default values used by OpenLDAP clients on your
system. The values in this file can be overridden by the contents of the
user-specific ~/.ldaprc file, or by a file called ldaprc located in the
current working directory.
■■ schemas — A directory that contains a number of default schema defi-
nitions for your use when creating an OpenLDAP directory.
■■ slapd.conf — Configuration information for the slapd server run-
ning on the current system. This file should never be readable by non-
privileged users, because it contains password and other security
information for your OpenLDAP server.
Configuring and Starting an OpenLDAP Server
Configuring an OpenLDAP server is a simple process, requiring a minimum
of two changes to the /etc/openldap/slapd.conf configuration file.
NOTE By default, OpenLDAP password are sent in the clear over a network. If
possible, you should always initially configure your OpenLDAP server from the
system on which it is running.
Implementing Network Security 857
43_599496 ch34.qxd 8/30/05 7:25 PM Page 857
First, you must change the suffix entry so that it correctly identifies your
domain. For example, the default entry in /etc/openldap/slapd.conf is
usually:
suffix “dc=my-domain,dc=com”
You must change this to reflect your domain. For example, to set up an
OpenLDAP server for the domain vonhagen.org, you would change this
line to the following:
suffix “dc=vonhagen,dc=org”
Next, you must change the rootdn entry to reflect the name of a privileged
user who has unrestricted access to your OpenLDAP directory. For example,
the default entry in /etc/openldap/slapd.conf is usually:
rootdn “cn=Manager,dc=my-domain,dc=com”
Continuing with the previous example, you would change this to some-
thing like the following for the vonhagen.org domain:
rootdn “cn=ldapadmin,dc=vonhagen,dc=org”
Though this user is the equivalent of the root user as far as OpenLDAP is
concerned, the name of this user does not have to be a real user on your system.
TIP For security reasons, if your OpenLDAP directory is going to be accessed
from other systems, you may want to use a name other than common defaults
such as “root” or “Manager” for this entry. This will make it more difficult for
someone to attempt to crack your OpenLDAP installation.
Finally, though optional in some sense, you may want to set a unique pass-
word for your OpenLDAP server by modifying the rootpw entry in your
/etc/openldap/slapd.conf configuration file. This enables you to con-
figure, test, and correct your OpenLDAP system over your local network, if
necessary. For example, the default entry in /etc/openldap/slapd.conf
for this entry is the following:
rootpw secret
You can provide a clear text or encrypted password as the value for this
entry. The default entry in the /etc/openldap/slapd.conf file shows the
clear-text password secret. You can use the slappasswd command to gen-
erate an encrypted password that you can paste into the /etc/openldap
/slapd.conf file, as in the following example:
858 Chapter 34
43_599496 ch34.qxd 8/30/05 7:25 PM Page 858