giáo trình Java By Example phần 6 pps
Bạn đang xem bản rút gọn của tài liệu. Xem và tải ngay bản đầy đủ của tài liệu tại đây (168.67 KB, 66 trang )
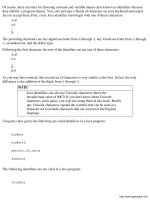
Of course, there are rules for choosing constant and variable names (also known as identifiers because
they identify a program object). You can't just type a bunch of characters on your keyboard and expect
Java to accept them. First, every Java identifier must begin with one of these characters:
A-Z
a-z
_
$
The preceding characters are any uppercase letter from A through Z, any lowercase letter from a through
z, an underscore, and the dollar sign.
Following the first character, the rest of the identifier can use any of these characters:
A-Z
a-z
_
$
0-9
As you may have noticed, this second set of characters is very similar to the first. In fact, the only
difference is the addition of the digits from 0 through 9.
NOTE
Java identifiers can also use Unicode characters above the
hexadecimal value of 00C0. If you don't know about Unicode
characters, don't panic; you won't be using them in this book. Briefly
put, Unicode characters expand the symbols that can be used in a
character set to include characters that are not part of the English
language.
Using the rules given, the following are valid identifiers in a Java program:
number
number2
amount_of_sale
$amount
The following identifiers are not valid in a Java program:
1number
o
amount of sale
&amount
item#
Example: Creating Your Own Identifiers
Suppose that you're now ready to write a program that calculates the total number of parking spaces left
in a parking garage. You know that the total number of spaces in the garage is 100. You further know
that the vehicles in the garage are classified as cars, trucks, and vans. The first step is to determine which
values would be good candidates for constants. Because a constant should represent a value that's not
likely to change from one program run to another, the number of vehicles that the garage can hold would
make a good constant. Thinking hard (someone smell wood burning?), you come up with an identifier of
TOTALSPACES for this value. In Java, the constant's definition looks like this:
final int TOTALSPACES = 100;
In this line, the keyword int represents the data type, which is integer. You should be able to understand
the rest of the line.
Now, you need to come up with the mathematical formula that'll give you the answer you want. First,
you know that the total number of vehicles in the garage is equal to the sum of the number of cars,
trucks, and vans in the garage. Stating the problem in this way not only clarifies what form the
calculation must take, but also suggests a set of good identifiers for your program. Those identifiers are
cars, trucks, vans, and total_vehicles. So, in Java, your first calculation looks like this:
total_vehicles = cars + trucks + vans;
The next step is to subtract the total number of vehicles from the total number of spaces that the garage
holds. For this calculation, you need only one new identifier to represent the remaining spaces, which is
the result of the calculation. Again, stating the problem leads to the variable name, which might be
remaining_spaces. The final calculation then looks like this:
remaining_spaces = TOTALSPACES - total_vehicles;
o
Data Types
In attempting to give you a quick introduction to constants and variables, the preceding sections skipped
over a very important attribute of all constants and variables: data type. You may remember my
mentioning two data types already, these being floating point (represented by the float keyword) and
integer (represented by the int keyword). Java has eight different data types, all of which represent
different kinds of values in a program. These data types are byte, short, int, long, float,
double, char, and boolean. In this section, you'll learn what kinds of values these various data types
represent.
Integer Values
The most common values used in computer programs are integers, which represent whole number values
such as 12, 1988, and -34. Integer values can be both positive or negative, or even the value 0. The size
of the value that's allowed depends on the integer data type you choose. Java features four integer data
types, which are byte, short, int, and long. Although some computer languages allow both signed
and unsigned integer values, all of Java's integers are signed, which means they can be positive or
negative. (Unsigned values, which Java does not support, can hold only positive numbers.)
The first integer type, byte, takes up the least amount of space in a computer's memory. When you
declare a constant or variable as byte, you are limited to values in the range -128 to 127. Why would
you want to limit the size of a value in this way? Because the smaller the data type, the faster the
computer can manipulate it. For example, your computer can move a byte value, which consumes only
eight bits of memory, much faster than an int value, which, in Java, is four times as large.
In Java, you declare a byte value like this:
byte identifier;
In the preceding line, byte is the data type for the value, and identifier is the variable's name. You can
also simultaneously declare and assign a value to a variable like this:
byte count = 100;
After Java executes the preceding line, your program will have a variable named count that currently
holds the value of 100. Of course, you can change the contents of count at any time in your program. It
only starts off holding the value 100.
The next biggest type of Java integer is short. A variable declared as short can hold a value from
-32,768 to 32,767. You declare a short value like this:
o
short identifier;
or
short identifier = value;
In the preceding line, value can be any value from -32,768 to 32,767, as described previously. In Java,
short values are twice as big in memory-16 bits (or two bytes)-as byte values.
Next in the integer data types is int, which can hold a value from -2,147,483,648 to 2,147,483,647.
Now you're getting into some big numbers! The int data type can hold such large numbers because it
takes up 32 bits (four bytes) of computer memory. You declare int values like this:
int identifier;
or
int identifier = value;
The final integer data type in the Java language is long, which takes up a whopping 64 bits (eight bytes)
of computer memory and can hold truly immense numbers. Unless you're calculating the number of
molecules in the universe, you don't even have to know how big a long number can be. I'd figure it out
for you, but I've never seen a calculator that can handle numbers that big. You declare a long value like
this:
long identifier;
or
long identifier = value;
TIP
o
How do you know which integer data type to use in your program?
Choose the smallest data type that can hold the largest numbers you'll
be manipulating. Following this rule keeps your programs running as
fast as possible. However, having said that, I should tell you that most
programmers (including me) use the int data type a lot, even when
they can get away with a byte.
Floating-Point Values
Whereas integer values can hold only whole numbers, the floating-point data types can hold values with
both whole number and fractional parts. Examples of floating-point values include 32.9, 123.284, and
-43.436. As you can see, just like integers, floating-point values can be either positive or negative.
Java includes two floating-point types, which are float and double. Each type allows greater
precision in calculations. What does this mean? Floating-point numbers can become very complex when
they're used in calculations, particularly in multiplication and division. For example, when you divide 3.9
by 2.7, you get 1.44444444. In actuality, though, the fractional portion of the number goes on forever.
That is, if you were to continue the division calculation, you'd discover that you keep getting more and
more fours in the fractional part of the answer. The answer to 3.9 divided by 2.7 is not really 1.44444444,
but rather something more like 1.4444444444444444. But even that answer isn't completely accurate. A
more accurate answer would be 1.44444444444444444444444444444444. The more 4s you add to the
answer the more accurate the answer becomes-yet, because the 4s extend on into infinity, you can never
arrive at a completely accurate answer.
Dealing with floating-point values frequently means deciding how many decimal places in the answer is
accurate enough. That's where the difference between the float and double data types shows up. In
Java, a value declared as float can hold a number in the range from around -3.402823 x 10 38 to
around 3.402823 x 10 38. These types of values are also known as single-precision floating-point
numbers and take up 32 bits (four bytes) of memory. You declare a single-precision floating-point
number like this:
float identifier;
or
float identifier = value;
In the second line, value must be a value in the range given in the previous paragraph, followed by an
upper- or lowercase F. However, you can write floating-point numbers in a couple of ways, using regular
digits and a decimal point or using scientific notation. This value is the type of floating-point number
you're used to seeing:
356.552
o
Now, here's the same number written using Java's rules, in both the number's normal form and in the
form of scientific notation:
356.552f
3.56552e2f
Both of the preceding values are equivalent, and you can use either form in a Java program. The e2 in
the second example is the equivalent of writing x 102 and is a short form of scientific notation that's
often used in programming languages.
NOTE
If you're not familiar with scientific notation, the value 3.402823 x 10
38 is equal to 3.402823 times a number that starts with a 1 and is
followed by 38 zeroes. Computer languages shorten this scientific
notation to 3.402823e38.
The second type of floating-point data, double, represents a double-precision value, which is a much
more accurate representation of floating-point numbers because it allows for more decimal places. A
double value can be in the range from -1.79769313486232 x 10 308 to 1.79769313486232 x 10 308
and is declared like this:
double identifier;
or
double identifier = value;
Floating-point values of the double type are written exactly as their float counterparts, except you
use an upper- or lowercase D as the suffix, rather than an F. Here's a few examples:
3.14d
344.23456D
3.4423456e2d
TIP
When using floating-point numbers in your programs, the same rule
that you learned about integers applies: Use the smallest data type
you can. This is especially true for floating-point numbers, which are
notorious for slowing computer programs to a crawl. Unless you're
doing highly precise programming, such as 3-D modeling, the
single-precision float data type should do just fine.
o
Character Values
Often in your programs, you'll need a way to represent character values rather than just numbers. A
character is a symbol that's used in text. The most obvious examples of characters are the letters of the
alphabet, in both upper- and lowercase varieties. There are, however, many other characters, including
not only things such as spaces, exclamation points, and commas, but also tabs, carriage returns, and line
feeds. The symbols 0 through 9 are also characters when they're not being used in mathematical
calculations.
In order to provide storage for character values, Java features the char data type, which is 16 bits.
However, the size of the char data type has little to do with the values it can hold. Basically, you can
think of a char as being able to hold a single character. (The 16 bit length accommodates Unicode
characters, which you don't need to worry about in this book.) You declare a char value like this:
char c;
or
char c = 'A';
In the second example, you're not only declaring the variable c as a char, but also setting its value to an
uppercase A. Notice that the character that's being assigned is enclosed in single quotes.
Some characters cannot be written with only a single symbol. For example, the tab character is
represented in Java as \t, which is a backslash followed by a lowercase t. There are several of these
special characters, as shown in Table 5.1.
Table 5.1 Special Character Literals.
Character Symbol
Backslash
\\
Backspace
\b
Carriage return
\r
Double quote
\"
Form feed
\f
Line feed
\n
Single quote
\'
Tab
\t
Although the special characters in Table 5.1 are represented by two symbols, the first of which is always
a backslash, you still use them as single characters. For example, to define a char variable as a
o
backspace character, you might write something like the following in your Java program:
char backspace = '\b';
When Java's compiler sees the backslash, it knows that it's about to encounter a special character of some
type. The symbol following the backslash tells the compiler which special character to use. Because the
backslash is used to signify a special character, when you want to specify the backslash character
yourself, you must use two backslashes, which keeps the compiler from getting confused. Other special
characters that might confuse the compiler because they are used as part of the Java language are single
and double quotes. When you want to use these characters in your program's data, you must also precede
them with a backslash.
Boolean Values
Many times in a program, you need a way to determine if a specific condition has been met. For
example, you might need to know whether a part of your program executed properly. In such cases, you
can use Boolean values, which are represented in Java by the boolean data type. Boolean values are
unique in that they can be only one of two possible values: true or false. You declare a boolean value
like this:
boolean identifier;
or
boolean identifier = value;
In the second example, value must be true or false. In an actual program, you might write something
like this:
boolean file_okay = true;
Boolean values are often used in if statements, which enable you to do different things depending on
the value of a variable. You'll learn about if statements in Chapter 9, "The if and switch
Statements."
Table 5.2 summarizes Java's various data types. Take some time now to look over the table and make
sure you understand how the data types differ from each other. You might also want to think of ways you
might use each data type in an actual program.
o
Table 5.2 Summary of Java's Data Types.
Type Value
byte -128 to 127
short -32,768 to 32,767
int -2,147,483,648 to 2,147,483,647
long Huge
float -3.402823e38 to 3.402823e38
double -1.79769313486232e308 to 1.79769313486232e308
char Symbols used in text
boolean True or false
Variable Scope
When you write your Java programs, you can't just declare your variables willy-nilly all over the place.
You first have to consider how and where you need to use the variables. This is because variables have
an attribute known as scope, which determines where in your program variables can be accessed. In Java,
a variable's scope is determined by the program block in which the variable first appears. The variable is
"visible" to the program only from the beginning of its program block to the end of the program block.
When a program's execution leaves a block, all the variables in the block disappear, a phenomenon that
programmers call "going out of scope."
Now you're probably wondering, "What the devil is a program block?" Generally, a program block is a
section of program code that starts with an opening curly brace ({) and ends with a closing curly brace
(}). (Sometimes, the beginning and ending of a block are not explicitly defined, but you don't have to
worry about that just yet.) Specifically, program blocks include things like classes, functions, and loops,
all of which you'll learn about later in this book.
Of course, things aren't quite as simple as all that (you're dealing with computers, after all). The truth is
that you can have program blocks within other program blocks. When you have one block inside another,
the inner block is considered to be nested. Figure 5.1 illustrates the concept of nested program blocks.
Figure 5.1 : Program blocks can be nested inside other program blocks.
In the figure, Block 1 encloses both Block 2 and Block 3. That is, Block 2 and Block 3 are nested within
Block 1, because these blocks occur after Block 1's opening brace but before Block 1's closing brace. If
you wanted, you could also create a Block 4 and nest it within Block 2 or Block 3, and thus create even
another level of nesting. As you'll see when you start writing full-length Java programming, all programs
have a lot of nesting going on.
The ability to nest program blocks adds a wrinkle to the idea of variable scope. Because a variable
remains in scope from the beginning of its block to the end of its block, such a variable is also in scope in
any blocks that are nested in the variable's block. For example, looking back at Figure 5.1, a variable
that's defined in Block 1 is accessible in not just Block 1, but also in Block 2 and Block 3. However, a
o
variable defined inside Block 2 is accessible only in Block 2, because such a variable goes into scope at
the start of Block 2 and goes out of scope at the end of Block 2. If you're a little confused, the following
example ought to clear things up.
Example: Determining a Variable's Scope
Suppose you've written the small Java program shown in Listing 5.3. (Nevermind, at this point, that you
don't know much about writing Java programs. Such minor details will be remedied by the time you
complete this book.) The program shown in the listing follows the same program structure as that shown
in Figure 5.1. That is, there is one large main block that contains two nested blocks. The main block
begins with the opening brace on the second line and ends with the closing brace at the end of the
program. The first inner block begins with the opening brace after the line labeling Function1 and
ends with the closing brace three lines below the opening brace. The second inner block is defined
similarly, with its own opening and closing braces.
Listing 5.3 LST5_3.TXT: Determining Variable Scope.
public class Block1 extends Applet
{
int value1 = 32;
void Block2()
{
float value2 = 4.5f;
value1 = 45;
}
void Block3()
{
value1 = 100;
o
// The following line causes an error.
value2 = 55.46f;
}
}
Now look at the variables being used in this program. The first variable defined in the program is
value1, which is found right after the main block's opening brace. This means that value1 is
accessible in all three blocks, as you can see by looking at the Block2 and Block3 blocks, both of
which assign new values to value1.
The second variable in the program, value2, is defined inside the Block2 block, where it's both
declared and assigned the value 4.5f. In the Block3 block, the program tries to assign a value to
value2. If you tried to compile this program, you'd see that this line creates an error message, as shown
in Figure 5.2. In the figure, the compiler is insisting that value2 in the Block3 block is undefined,
which, of course, is true as far as the Block3 block is concerned. You'd get a similar message if you
tried to access value2 anywhere but within the scope of the Block2 block.
Figure 5.2 : When you try to access a variable that's out of scope, Java's compiler thinks that the
variable is undefined.
You can use variable scope to simplify the access of variables in a program. For example, you will
usually declare variables that you need in many places, so that they are in scope in the entire class. That
way, you can access the variables without having to pass them as arguments to functions. (If you don't
know about argument passing just yet, you will after you read Chapter 12, "Functions.") On the other
hand, you'll have lots of variables that you use only inside one particular program block. You can keep
your program uncluttered by being sure to declare these types of variables only in the blocks in which
they're used. You'll learn more about setting up variables with the proper scope as you write Java
programs later in this book.
Summary
All computers must manipulate data in order to produce output. Java, like all programming languages,
features many data types that you can use for constants and variables in your programs. These data types
enable you to store everything from simple integers like 23 and -10 to strings and complex floating-point
numbers. There's a lot to know about variables, so your head may be spinning a bit at this point. Rest
assured, however, that once you start writing programs and using variables, all the theoretical stuff will
make sense.
o
Review Questions
What is a constant?1.
What is a variable?2.
How do constants and variables make writing programs easier?3.
Name the eight data types used in Java.4.
What is variable scope?5.
Review Exercises
Suppose you need to write a Java program that calculates an employee's paycheck for a given
number of hours of work. Write declarations for the variables you'll need.
1.
Using the variables you declared in exercise 1, write the program lines needed to perform the
paycheck calculations.
2.
Using Figure 5.1 as a guide, create a new figure that adds a program block to the class such that
any variables declared in the new block cannot be accessed in any other program block.
3.
Using the modified figure, add yet another program block, this time adding an additional level of
block nesting.
4.
o
Chapter 6
Simple Input and Output
CONTENTS
Windows and Graphics●
Displaying Text in an Applet
Example: Creating and Running Applet1❍
How Applet1 Works❍
●
Getting Input from the User
How Applet2 Works❍
Example: Retrieving text from a TextField control❍
How Applet3 Works❍
●
Displaying Numerical Values●
Summary●
Review Questions●
Review Exercises●
In the previous chapter, you learned how you can store various types of values in your Java programs. It
may have occurred to you that it doesn't do much good to store data in a computer's memory if you have
no way of actually seeing that data. Also, you need a way to request and receive data from users of your
programs. Both of these tasks-displaying and retrieving data-are accomplished through simple input and
output, or I/O (as it's commonly called). In this chapter, you'll learn how Java enables you to perform
simple I/O in your applets.
Windows and Graphics
Because you'll be writing your applets for a graphical user interface (GUI) such as Windows, you can't
use the same kinds of data input/output that you may have been accustomed to using under another
operating system, such as MS-DOS. This is because, under a system such as Windows, everything that
appears on the screen is graphical (unlike MS-DOS, which displays plain old text).
Still, displaying graphical text doesn't require a whole lot of work, as long as you're not concerned with
things like fonts and the size of the text string you want to display. You have to remember, though, that
almost all graphical text is proportional, meaning that each letter in a line of graphical text takes up a
different amount of space. Under an operating system like MS-DOS, most text output uses
o
non-proportional characters. The difference is illustrated in Figure 6.1.
Figure 6.1 : In a proportional font, each character takes up only as much space as it needs.
Look at the letter "I" in the proportional font. You can see that it takes up much less space than other
letters in the word. On the other hand, the letter "I" in the non-proportional font, as well as the hyphen,
takes up exactly the same amount of space as every other letter.
The point is that, because of the different fonts that are used to print text in a graphical user interface, you
can't assume much about the size of the text that'll be used. There are ways to figure out the actual size of
a text string, but you don't have to be concerned with these details for now. Just be aware that text output
in your applets is going to be graphical.
Displaying Text in an Applet
The easiest thing to display is a line of text. But because the text output will be graphical, you need to use
one of Java's graphical-text functions. The most commonly used is drawString(), which is part of
the Graphics class contained in the awt package. Listing 6.1 shows a simple applet that uses this
method to display a single line of text. Figure 6.1 shows what the applet looks like when viewed with the
Appletviewer application. Finally, Listing 6.2 is an HTML document that tests the Applet1 applet.
NOTE
A package is nothing more than a collection of related classes. The
awt (abstract windows toolkit) package contains all the classes that
handle graphical windows. You'll learn a lot more about classes,
packages, and the awt later in this book.
Listing 6.1 Applet1.java: An Applet That Displays a Single Line of Text.
import java.awt.*;
import java.applet.*;
public class Applet1 extends Applet
{
public void paint(Graphics g)
{
g.drawString("Hello from Java!", 60, 75);
o
}
}
Tell Java that the program uses classes in the awt package.
Tell Java that the program uses classes in the applet package.
Derive the Applet1 class from Java's Applet class.
Override the Applet class's paint() method.
Draw a text string on the applet's surface.
Figure 6.2 : When you run the Applet1 applet, you'll see a single line of text in
the applet's display.
Listing 6.2 APPLET1.htmL: An HTML Document for Testing Applet1.
<title>Applet Test Page</title>
<h1>Applet Test Page</h1>
<applet
code="Applet1.class"
width=200
height=150
name="Applet1">
</applet>
Example: Creating and Running Applet1
In the next section, you'll see exactly how the Applet1 applet works. But before you get too much farther,
you need to know how to create and run the many applets that you'll find in this book. All the applets that
follow use the same sort of procedure. This procedure involves creating the applet's source code,
compiling the code, and then writing the HTML document that demonstrates the applet. Follow the steps
below to get the Applet1 applet up on your screen.
Create a folder called CLASSES on the root directory of your hard drive.1.
o
Type Listing 6.1 and save it in the CLASSES folder as an ASCII file. Name the file
Applet1.java. (Use uppercase and lowercase letters exactly as shown for the program's file
name.) Note that you can also copy the listing from this book's CD-ROM, if you don't want to type
it.
2.
Start an MS-DOS session by selecting Start/Programs/MS-DOS Prompt. If the MS-DOS screen
takes over the entire screen, press Alt+Enter to display the MS-DOS session in a window.
3.
If you haven't added the JAVA\BIN path to your AUTOEXEC.BAT file, type PATH=JAVA\BIN
at the MS-DOS prompt. This ensures that the system will be able to find Java's executables.
4.
Type cd c:\classes to move to your CLASSES folder.5.
Type javac Applet1.java to compile the Applet1 applet. You should receive no error
messages, as shown in Figure 6.3. If you do receive error messages, carefully check your typing of
Listing 6.1. Also, make sure you typed the command line javac Applet1.java properly.
When the compiler finishes, you'll have the file Applet1.class in your CLASSES directory.
This is the applet's byte-code file.
Figure 6.3 : The Applet1.class file must compile with no errors.
6.
Type Listing 6.2 and save it as an ASCII file to your CLASSES folder. Name the file
APPLET1.htmL. (This time, the case of the letters doesn't matter.)
7.
At the MS-DOS prompt, type appletviewer applet1.html (case doesn't matter). When
you do, Appletviewer will load and display the applet.
8.
NOTE
Java insists that the name of a Java source-code file is the same name
as the class contained in the file. If you try to use different names,
even if the difference is only the case of a letter or two, the Java
compiler will complain and refuse to compile the program.
How Applet1 Works
By now, you have the source code for Applet1 properly typed and compiled. You've even run the applet
using Appletviewer. You know that the call to the drawString() method prints a string as graphical
text in the applet's display area. But what are the values between drawString()'s parentheses? And
how does the program know when to execute the call to drawString()?
First, look at the paint() method. Java calls paint() whenever the applet's display area (or canvas,
as it's often called) needs to be redrawn. The paint() method always gets called when the applet first
appears on the screen, which is exactly what's happening in Applet1. You run the applet, Java calls
paint() when the applet appears, and paint() calls drawString(), which displays the text string
"Hello from Java."
NOTE
o
The Java compiler is case-sensitive, meaning that it can differentiate
between upper- and lowercase letters. For this reason, you have to be
extra careful to type method names properly. For example, if you type
Paint() instead of paint(), Java will not recognize the method
and will not call it when the applet needs to be redrawn.
What's that "g" followed by a period in front of the call to drawString()? Remember that I said
drawString() is a method of the Graphics class. If you look at the first line of the paint()
method, you'll see Graphics g in the parentheses. This means that Java is sending an object of the
Graphics class to the paint() method and that object is called g. Whenever you need to call an
object's method, you must preface the method's name with the object's name followed by a period. So,
the line
g.drawString("Hello from Java!", 60, 75);
tells Java to call the g object's drawString() method. The values in the parentheses are called
arguments, which are values that you need to send to the method. The arguments in the above call to
drawString() tell Java to draw the text "Hello from Java!" at column 60 and row 75 of the display
area. (The position is measured in pixels, not characters. A pixel is the smallest dot that can be displayed
on the screen.) To display the text at a different location, just change the second and third arguments. For
example, Figure 6.4 shows the text positioned at 25,25.
Figure 6.4 : Here, Applet1 displays the text at position 25,25.
Getting Input from the User
Again, because you are now programming in a graphical environment, getting input from the user isn't as
easy as just calling an input command. You must first create an area of the screen in which the user can
type and edit his response to your request. There are several ways to do this, but one of the easiest is to
add a control of the TextField class in your applet. A TextField control is much like the edit
boxes you see when using Windows. You might, for example, see a number of edit controls in a dialog
box. Listing 4.3 shows how to include a TextField control in your applet. Figure 6.5 shows the
Applet2 applet in action.
Figure 6.5 : The Applet2 applet displays an area in which you can type.
Listing 6.3 Applet2.java: Getting Input from the User.
import java.awt.*;
import java.applet.*;
o
public class Applet2 extends Applet
{
TextField textField;
public void init()
{
textField = new TextField(20);
add(textField);
}
}
Tell Java that the program uses classes in the awt package.
Tell Java that the program uses classes in the applet package.
Derive the Applet2 class from Java's Applet class.
Declare textField as an object of the TextField class.
Override the Applet class's init() method.
Create the new TextField object.
Add the TextField object to the applet's display.
To run the Applet2 applet yourself, you'll need to type and save the source code, naming it
Applet2.java. (You can copy the source code from the CD-ROM, if you like, and thus save on
typing. Of course, you won't learn as much that way.) Then compile the source code (type javac
Applet2.java at the MS-DOS prompt), which gives you the Applet2.class file. Next, create a
new HTML document from the one shown in Listing 6.2, changing all instances of Applet1 to Applet2.
You can then run Applet2 by typing appletviewer applet2.html at the DOS prompt.
How Applet2 Works
Applet2 looks quite a bit different from Applet1. First, it declares a data field named textField as an
object of the TextField class, which represents a control very much like a standard Windows edit box.
The program declares the control like this:
o
TextField textField;
Notice that the textField object is declared just as you would declare any other kind of data object
such as an integer or a floating-point value. Next, notice that, although the name of the class and the
name of the object are spelled identically, the object's name starts with a lowercase letter. This makes all
the difference in the world to Java, which is a case-sensitive language.
Another difference between Applet1 and Applet2 is that Applet2 has an init() method instead of
paint(). The Init() method is another of those methods that Java calls automatically-in this case, as
soon as you run the Applet2 applet. Because Java calls init() almost immediately, it's a great place to
initialize the applet. (Guess that's why they called it init(), huh?)
In Applet2, when init() gets called, textField has already been declared as an object of the
TextField class, but textField hasn't yet been assigned a value. The first line of code in init()
creates the TextField object and assigns it to textField, like this:
textField = new TextField(20);
After Java executes this line, textField refers to an actual TextField object. The value in the
parentheses is the width of the TextField control; the larger this number, the wider the control. Keep
in mind that a textField control can hold more text than its width allows. If you type past the end of
the control's text box, the text scrolls horizontally.
The next step is to add the object to the applet's display area, like this:
add(textField);
The add() method's single argument is the control you want to add to the applet.
After creating the control and adding it to the applet, the control will automatically appear when Java
draws the applet. You don't need a paint() method to draw a control, because the control can take care
of itself.
Once the TextField control is on the screen, you can type in it. First, click the control to give it the
focus, then type and edit to your heart's content.
Example: Retrieving text from a TextField control
In the Applet2 applet, you can type all you like in the TextField control, but how do you get the text
out of the control and actually do something with it? Follow the steps below to create Applet3, a new
version of Applet2 that can retrieve and display any text entered into the TextField control.
Type Listing 6.4 and save it in the CLASSES folder as an ASCII file. Name the file
Applet3.java. Note that you can copy the listing from this book's CD-ROM if you don't want
1.
o
to type it.
Listing 6.4 Applet3.java: Source Code for the Applet3 Applet.
import java.awt.*;
import java.applet.*;
public class Applet3 extends Applet
{
TextField textField;
public void init()
{
textField = new TextField(20);
add(textField);
}
public void paint(Graphics g)
{
String s = textField.getText();
g.drawString(s, 40, 50);
}
public boolean action(Event event, Object arg)
o
{
repaint();
return true;
}
}
Tell Java that the program uses classes in the awt package.
Tell Java that the program uses classes in the applet package.
Derive the Applet3 class from Java's Applet class.
Declare textField as an object of the TextField class.
Override the Applet class's init() method.
Create the new TextField object.
Add the TextField object to the applet's display.
Override the Applet class's paint() method.
Get the text string from the TextField control.
Display the text in the applet's display area.
Override the Applet class's action() method.
Force the applet to redraw its display area.
Tell Java that the action() method finished successfully.
Start an MS-DOS session by selecting Start/Programs/MS-DOS Prompt. If the MS-DOS screen
takes over the entire screen, press Alt+Enter to display the MS-DOS session in a window.
1.
Type cd c:\classes to move to your CLASSES folder.2.
Type javac Applet3.java to compile the Applet3 applet. You should receive no error
messages. If you do receive error messages, carefully check your typing of Listing 6.4. Also, make
sure you typed the command line javac Applet3.java properly.
3.
Modify Listing 6.2 by replacing all occurrences of Applet1 with Applet3 and save it as an ASCII
file to your CLASSES folder. Name the file APPLET3.htmL.
4.
At the MS-DOS prompt, type appletviewer applet3.html. When you do, Appletviewer
will load and display the applet.
5.
When you run Applet3, go ahead and type some text into the TextField control. When you press
Enter, the text appears in the applet's display area, right below the control (Figure 6.6).
Figure 6.6 : Applet3 can display the text you type into the TextField control.
o
How Applet3 Works
If you look at the Applet3 program code, you can see that you've added a paint() method. This is
where the text that the user types into the TextField control gets displayed. First, paint() extracts
the text from the control, like this:
String s = textField.getText();
This line declares a variable called s to be an object of the String class, and then it sets s equal to the
text string in the control. (The String class is another of Java's built-in classes that you'll learn more
about later. For now, just know that this class represents text strings.) You can see in this line that you're
calling the textField object's getText() method, because of the object and method name
separated by the dot. The getText() method simply returns the text string that's stored in the
textField control.
Displaying the string is as easy as calling on your old friend drawString(), as follows:
g.drawString(s, 40, 50);
One big difference between Applet2 and Applet3 is the action() method. Java calls this method
whenever the user performs some action with controls in the applet. In this case, the action that
action() responds to is the user's pressing Enter after typing text. In Applet3, the action() method
does nothing more than call the applet's repaint() method, which tells Java that you want to redraw
the applet's display area. (You'll learn more about using the action() method later in the book.) This
causes Java to call the paint() method, which very neatly displays the control's string.
Displaying Numerical Values
In the previous chapter, you learned to declare and define a number of different variable types, including
int, byte, short, float, and other numerical values. The problem with numerical values in a
computer is that you can't display them without first converting them to text strings. Luckily, this task is
pretty easy to perform. You need only call the String class's valueOf() method, as shown in Listing
6.5. Figure 6.7 shows Appletviewer running Applet4.
Figure 6.7 : The Applet4 applet converts and displays an integer value.
Listing 6.5 Applet4.java: The Source Code for Applet4.
import java.awt.*;
o
import java.applet.*;
public class Applet4 extends Applet
{
public void paint(Graphics g)
{
int x = 10;
String s = String.valueOf(x);
g.drawString(s, 40, 50);
}
}
Tell Java that the program uses classes in the awt package.
Tell Java that the program uses classes in the applet package.
Derive the Applet4 class from Java's Applet class.
Override the Applet class's paint() method.
Declare the integer x and set its value to 10.
Convert x to a string.
Display the string that represents x's value.
As you can see in Listing 6.5, the String class has a method called valueOf() that can convert
numerical values to strings. The method's single argument is the value you want to convert, which can be
any of Java's numerical data types.
Summary
All computer programs must deal with some form of I/O. At the very least, a program must be able to
display information to the user, as well as retrieve data from the user. Java has several ways to handle
this basic form of I/O, a couple of which you learned in this chapter. As you dig deeper into the art of
writing Java applets, you'll see other ways to perform I/O.
o
Review Questions
What is graphical text?1.
What's the difference between proportional and non-proportional fonts?2.
What are arguments?3.
Describe the three arguments used with the drawString() method.4.
What does the paint() method do?5.
Describe one way to get user input in your applets.6.
Describe how the init() method works.7.
Describe how the action() method works.8.
How can you convert a numerical value to a text string?9.
Review Exercises
Modify Applet1 so that it displays the text string "Out to lunch!" at position 30, 50 in the applet's
display area.
1.
Modify Applet2 so that it displays a TextField control half as wide as the one displayed in the
original program.
2.
Write an applet that displays the days of the week in a column down the center of the applet's
display area.
3.
Using Applet3 as a model, write a new applet called NameApplet that asks the user for her name
and age and then prints the answers in the applet's display area. The finished applet should look
like Figure 6.8. (This one's tough, so, if you get stumped, check out the file NameApplet.java in
the CHAP06 folder of this book's CD-ROM. First try to solve the problem yourself, though.)
Figure 6.8 : This is what the NameApplet applet should look like when it is run with Appletviewer.
4.
o
Chapter 12
Functions
CONTENTS
The Top-Down Approach to Programming●
Example: Using Functions as Subroutines●
Defining and Calling Functions●
Example: Using Functions to Return Values●
Example: Putting Functions to Work●
Summary●
Review Questions●
Review Exercises●
Until now, your programs have been pretty short, each designed to demonstrate a single programming
technique. When you start writing real programs, however, you'll quickly discover that they can grow to
many pages of code. When programs get long, they also get harder to organize and read. To overcome
this problem, professional programmers break their programs down into individual functions, each of
which completes a specific and well-defined task.
The Top-Down Approach to Programming
As I said, long programs are hard to organize and read. A full-length program contains many pages of
code, and trying to find a specific part of the program in all that code can be tough. You can use modular
program-design techniques to solve this problem. Using modular programming techniques, you can
break a long program into individual modules, each of which performs a specific task.
In Chapter 4 "Object-Oriented Programming Concepts," you got a quick look at modular program
design, which is also known as structured programming. In that chapter, I used the example of cleaning a
house as a way to understand the process of breaking tasks up into specific steps. (The only reasonable
way to clean my house is to douse it with gasoline and throw in a lighted match, but we won't get into
that now.) You'll use that metaphor again here, in preparation for learning about functions.
When cleaning a house, the main task might be called CLEAN HOUSE. Thinking about cleaning an
entire house, however, can be overwhelming. So, to make the task easier, you can break it down into a
number of smaller steps. These steps might be CLEAN LIVING ROOM, CLEAN BEDROOM, CLEAN
KITCHEN, and CLEAN BATHROOM.
o