microsoft press windows workflow foundation step by step phần 9 pps
Bạn đang xem bản rút gọn của tài liệu. Xem và tải ngay bản đầy đủ của tài liệu tại đây (1.06 MB, 56 trang )
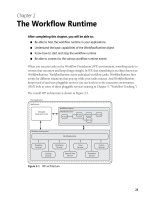
Chapter 14 State-Based Workflows 335
7. Drop another State activity onto the visual workflow designer’s surface, and name it
WaitSelectionState.
8. Drop the final State activity onto the visual workflow designer’s surface, and change its
name to EndState.
9. Just as you reassigned the starting state, so too will you need to tell WF what the ending
state will be. Click the visual workflow designer’s surface outside any State activity to
enable the workflow properties. Assign the CompletedStateName property to be End-
State. Visual Studio then clears EndState’s contents and changes the icon in the upper-
left corner. As before, you can type EndState or select it from the drop-down list.
336 Part III Workflow Processing
10. With the state activities in place, let’s now add details. Starting with StartState, drag an
instance of the StateInitialization activity from the Toolbox and drop it into StartState.
11. Double-click the activity you just inserted, stateInitialization1, to enter the sequential
workflow editor.
12. Drag a copy of the Code activity from the Toolbox, and drop it into the state initialization
activity. Assign its ExecuteCode method to be ResetTotal. Visual Studio then adds the
ResetTotal method for you and switches you to the code editor. Rather than add code at
this point, return to the visual workflow designer.
13. Next drag an instance of SetState onto the designer’s surface, and drop it just below the
Code activity you just inserted.
Chapter 14 State-Based Workflows 337
14. Assign the SetState’s TargetStateName property to be WaitCoinsState.
15. To return to the visual workflow designer’s state editor view, click the Workflow1
hyperlink-style button in the upper-left corner.
The state editor should now indicate that StartState transitions to WaitCoinsState.
338 Part III Workflow Processing
16. StartState is now complete. Next we’ll turn to WaitCoinsState. To begin, drag a copy of the
EventDriven activity onto the designer’s surface and drop it into WaitCoinsState. Name it
CoinInserted by changing its Name property in the Visual Studio Properties pane (you
must press Enter for the change to take place).
17. Double-click the CoinInserted EventDriven activity to enable the sequential workflow
editor.
18. Now drag an instance of the CoinInserted custom activity from the Toolbox and drop it
onto the EventDriven activity’s surface. Note that if you haven’t yet compiled the entire
solution, the CoinInserted event doesn’t appear in the Toolbox. You might have to remove
the EventDriven activity to successfully compile if you skipped step 2.
Chapter 14 State-Based Workflows 339
19. With the ExternalEventHandler coinInserted1 activity selected in the visual workflow
designer, click the CoinValue property in the Properties pane to activate the browse (…)
button, and then click the browse button. This brings up the Bind ‘CoinValue’ To An
Activity’s Property dialog box. Click the Bind To A New Member tab, and type LastCoin-
Dropped in the New Member Name field. The Create Property option should be
selected, but if it isn’t, select it so that you create a new dependency property. Click OK.
20. Now we need to make a decision—did the user just drop enough money to enable soda
selection? To do this, drag an instance of the IfElse activity onto the visual workflow
designer’s surface and drop it into the CoinInserted EventDriven activity, following the
coinInserted1 event handler.
340 Part III Workflow Processing
21. Select the left branch of ifElseActivity1 to display its properties in the Properties pane. For
its Condition property, select Code Condition. Expand the Condition node and in the
child Condition property, type TestTotal. When Visual Studio adds the new method and
switches you to the code editor, return to the visual workflow designer.
22. TestTotal will eventually check the total amount of money inserted into the soda
machine. (We’ll finish the workflow in the visual workflow designer before adding code
because there are properties we need that have not yet been created.) If enough money
has been inserted, we need to transition to the WaitSelectionState. Therefore, drag a copy
of SetState into the left IfElse activity branch, ifElseBranchActivity1, and drop it. Assign its
TargetStateName to be WaitSelectionState.
Chapter 14 State-Based Workflows 341
23. If TestTotal decides there isn’t enough money to purchase a soda, the workflow needs to
communicate the total amount of money inserted into the soda machine so far. To do
this, drag an instance of UpdateTotal from the Toolbox and drop it into the right IfElse
activity branch. UpdateTotal is a customized instance of CallExternalMethod I created for
the job.
24. UpdateTotal requires a total value to communicate, so select its total property and click
the browse ( ) button to activate the bindings dialog box once again. When the bind-
ings dialog box appears, select the Bind To A New Member tab and type Total into the
New Member Name field, again making sure the Create Property option is selected.
Click OK.
342 Part III Workflow Processing
25. Click the Workflow1 hyperlink-style button in the upper-left corner to return to the state
designer view. Drag an instance of StateFinalization onto the visual workflow designer’s
surface, and drop it into WaitCoinsState.
26. Double-click the stateFinalizationActivity1 activity you just inserted to reactivate the
sequential designer view.
27. From the Toolbox, drag an instance of ReadyToDispense and drop it into
stateFinalizationActivity1. ReadyToDispense is also a customized CallExternalMethod
activity.
Chapter 14 State-Based Workflows 343
28. ReadyToDispense1, the activity you just inserted, will return the final total to the main
application. To do that, it needs to access the Total property you inserted in step 24.
Looking at readyToDispense1’s properties, click the finalTotal property, and then click the
browse ( ) button in the finalTotal property. Clicking the browse button activates the
binding dialog box, but this time bind to an existing member. Select the Total property
from the list and click OK.
29. Click the Workflow1 hyperlink-style button to return to the state designer view. There,
select the EventDriven activity from the Toolbox and drag it onto the designer’s surface,
dropping it into the WaitSelectionState activity. Name it ItemSelected.
30. Double-click the ItemSelected EventDriven activity to enter the sequential designer view.
344 Part III Workflow Processing
31. Drag a copy of the custom ExternalEventHandler activity ItemSelected, and drop it into the
ItemSelected EventDriven activity.
32. After the user makes a selection, the main application fires the ItemSelected event. When
that happens, we want to transition to EndState. To do that, of course, we need to insert
a copy of the SetState activity. So drag an instance of SetState from the Toolbox and drop
it into the ItemSelected EventDriven activity following the itemSelected1 event handler.
Assign its TargetStateName to be EndState.
33. Click the Workflow1 hyperlink-style button to return to the state designer view.
Chapter 14 State-Based Workflows 345
34. The workflow is complete from a visual workflow designer’s point of view, but we still
have some code to write. Select Workflow1.cs in Visual Studio’s Solution Explorer, and
click the View Code toolbar button to open the file for editing in the code editor.
35. Scan the Workflow1.cs source file, and locate the ResetTotal method you added in step
12. Insert the following code in the ResetTotal method:
// Start with no total.
Total = 0.0m;
36. Finally, locate the TestTotal method you added in step 21. To that method, add this code:
// Add the last coin dropped to the total and check
// to see if the total exceeds 1.25.
Total += LastCoinDropped;
e.Result = Total >= 1.25m;
37. Compile the entire solution by pressing F6 or by selecting Build Solution from Visual
Studio’s Build menu. Correct any compilation errors.
Now you can run the application by pressing F5 or Ctrl+F5. Click a coin button. Does the total
update in the LCD display? When you insert enough money, can you select a soda?
Note
If the application crashes with an InvalidOperationException, it’s most likely due to
the references not being fully updated by the first complete solution compilation. Simply
recompile the entire application (repeat step 37) and run the application again. It should
run cleanly.
If you want to continue to the next chapter, keep Visual Studio 2005 running and turn to
Chapter 15, “Workflows and Transactions.” In Chapter 15, you’ll take your first steps into the
fascinating world of workflow transactional processing.
If you want to stop, exit Visual Studio 2005 now, save your spot in the book, and close it. Who
needs transactions anyway? Actually, we all do, but we’ll wait for you.
346 Part III Workflow Processing
Chapter 14 Quick Reference
To Do This
Add new states to your state-based workflow Drag as many copies of the State activity onto the visual
workflow designer’s surface as you require. Remember it’s
easier to wire the states together (using the SetState
activity) with the states in place. However, this is not a
requirement.
Receive events within your workflow’s states Drag instances of EventDriven into your State activity, and
assign event handlers to each event. EventDriven can
accept only a single event, so you might need to drop
multiple copies of the EventDriven activity into your State
activity—one for each discrete event you need to accept.
Transition between states Drag an instance of SetState activity into your state’s
EventDriven activity or StateInitialization activity. Assign the
TargetStateName to the name of the state you want to tran-
sition to.
Initialize your state as it is transitioned into Drag a copy of the StateInitialization activity into your
State activity, and drop the necessary activities into
StateInitialization as required for your initialization process.
StateInitialization is a composite, sequential activity, but it
will allow for events to be accepted by your state event
handlers (even if the processing of those events is deferred
until the initialization work is complete). Note that only a
single instance of StateInitialization is allowed per State
activity.
Execute code as your state is transitioned
out of
Drag an instance of StateFinalization onto the visual
workflow designer’s surface, and drop it into your State
activity. Like StateInitialization, the StateFinalization activity
is a composite, sequential activity, and only one per State
activity is allowed.
347
Chapter 15
Workflows and Transactions
After completing this chapter, you will be able to:
■ Understand the classical transaction model and where that model does and does
not fit
■ Know where classical transactions do not fit and when compensated transactions
are appropriate
■ See how transactions are rolled back or compensated
■ See how to modify the default order of compensation
If you write software, sooner or later you’ll need to understand transactional processing.
Transactional processing in this sense means writing software that records information to a
durable resource, such as a database, Microsoft Message Queue (which uses a database under
the covers), Windows Vista with transacted file system and Registry access, or even some
other software system that supports transactional processing. Durable resources retain the
written information no matter what happens to them once the data has been recorded.
Transactions are critical to any business process because, by using transactions, you can be
sure the data contained within your application is consistent. If the business process sustains
an error yet still persists any data, the erroneous data most likely will propagate throughout
the system, leaving you to question which data is good and which data is bad. Imagine order-
ing this book from an online merchant, only to find the merchant “had a little accident” with
your credit card transaction and charged you 100 times the face value of the book instead of
their discounted price. Transactional processing isn’t a laughable or avoidable subject when
errors such as this can happen.
Understanding Transactions
Transactional processing, at its very core, is all about managing your application’s state.
By state, I really mean the condition of all the application’s data. An application is in a deter-
minate state when all of its data is consistent. If you insert a new customer record into your
database and that update requires two insertions (one to add a normalized row to tie the
address to your customer and one to record the actual address information), adding the nor-
malized row but failing to insert the address itself places your application in an indeterminate
state. What will happen later when someone tries to retrieve that address? The system says
the address should be there, but the actual address record is missing. Your application data is
now inconsistent.
348 Part III Workflow Processing
To be sure both updates are successful, a transaction comes into play. A transaction itself is a
single unit of work that either completely succeeds or completely fails. That’s not to say you
can’t update two different database tables. It just means that both table updates are consid-
ered a single unit of work, and both must be updated or else neither one is. If either or both
updates fail, ideally you want the system to return to its state just prior to your attempt to
update the tables. Your application should move forward with no evidence that there had
been an incomplete attempt to modify the tables, and more important, you don’t want to have
data from the unsuccessful update in one table but not in the other.
Note
Entire volumes have been written about transactions and transactional processing.
Although I’ll describe the concepts in sufficient depth to explain how Microsoft Windows
Workflow Foundation (WF) supports transactions, I cannot possibly cover transactional pro-
cessing in great depth in this book. If you haven’t reviewed general transactional support in
.NET 2.0, you should do so. WF transactions model .NET 2.0 transactional support very
closely, and you might find the information in the following article helpful to understanding
WF transactional support: msdn2.microsoft.com/en-us/library/ms973865.aspx.
Traditionally, transactions have come in a single form—that of the XA, or two-phase commit,
style of transaction. However, with the advent of Internet-based communication and the need
to commit long-running transactions, a newer style of transaction was introduced known as
the compensated transaction. WF supports both styles. We’ll first discuss the classical transac-
tion, and then after noting the conditions that make this type of transaction a poor architec-
tural choice, we’ll discuss the compensated transaction.
Classic (XA) Transactions
The first system known to have implemented transactional processing was an airline
reservation system. Reservations that required multiple flights could not progress if any of
the individual flights could not be booked. The architects of that system knew this and
designed a transactional approach that today we know as the. X/Open Distributed Transac-
tion Processing Model, known as XA. (See en.wikipedia.org/wiki/X/Open_XA.)
An XA transaction involves the XA protocol, which is the two-phase commit I mentioned
earlier, and three entities: the application, resource, and transactional manager. The applica-
tion is, well, your application. The resource is a software system that is designed to join in XA-
style transactions, which is to say it enlists (joins) in the transaction and understands how to
participate in the two phases of committing data as well as provides for durability (discussed
shortly). The transactional manager oversees the entire transactional process.
So what is a two-phase commit? In the end, imagine your application needs to write data to,
say, a database. If that write is performed under the guise of a transaction, the database holds
the data to be written until the transactional manager issues a prepare instruction. At that
point, the database responds with a vote. If the vote is to go ahead and commit (write) the data
into a table, the transaction manager proceeds to the next participating resource, if any.
Chapter 15 Workflows and Transactions 349
If all resources vote to commit the data, the transactional manager issues a commit instruction
and each resource writes the data into its internal data store. Only then is the data destined for
your table actually inserted into the database.
If any one resource has a problem and votes not to commit the data, the transactional manager
issues a rollback instruction. All resources participating in the transaction must then destroy
the information related to the transaction, and nothing is permanently recorded.
Once the data has been committed, the XA protocol guarantees that the result of the
transaction is permanent. If data was inserted, it is there for your application to use. If
information was deleted, it has been deleted permanently. Your application, then, can move
forward comfortable in the knowledge that all is well with the data. The data is consistent,
and the application is in a determinate state.
ACID Properties
When we speak of XA transactions, it’s hard not to mention the ACID acronym—Atomic,
Consistent, Isolated, and Durable (en.wikipedia.org/wiki/ACID). All XA-style transactions, to
non-volatile resources, must exhibit these properties or the transaction is architecturally
invalid.
By atomic, we mean the resource enlisted in the transaction supports the two-phase commit
protocol. The data to be transacted is either completely transacted (updated, deleted, or what-
ever) or none of it is. If the transaction fails, the resource returns to the state just prior to the
attempt to transact the data.
Consistency means the data maintains integrity. For databases, this typically means the
data doesn’t violate any constraints, but for other resources maintaining integrity might have
different or additional connotations. If the data violates any rules or constraints, which ulti-
mately would result in an indeterminate application state, the resource must vote to roll back
the transaction to prevent inconsistent data from being permanently recorded in the system.
Isolation is the transactional property that causes the system to be unable to access data
while a transaction is ongoing. In a database, attempting to write to a previously locked row,
or perhaps reading from a row with uncommitted data, is disallowed. Data is available only
when it has been committed, or in the case of the read operation, when you explicitly allow
uncommitted reads (often called “dirty reads”).
Durable resources guarantee that when the data is committed it will always be available in a
nonvolatile manner. If the data is committed and the power to the database server is cut off
one millisecond later, when the database server is back online that data will be in the data-
base, ready for your application to use. This is much more difficult to do in practice than it
sounds, and it is one of the primary reasons architects use a database for persistent data stor-
age rather than simple data files, such as XML, for critical data. (Admittedly, Windows Vista
might change things a bit with its transacted file system, but hopefully you see my point.)
350 Part III Workflow Processing
Long-Running Transactions and Application State
Keep in mind that the entire premise of the XA-style transaction is that your application will
retain its original state if the transaction rolls back. But consider this: What happens to your
application if a transaction takes an inordinate amount of time to commit?
Before I answer that, imagine your online purchasing system received an order from a cus-
tomer, but the credit card validation process got hung up. Clearly your process is running
within a transaction because you don’t want to charge the customer if something fails. But in
the meantime, other customers are placing orders. Lots of orders, if you’re fortunate. If the
first customer’s transaction later fails, what will happen to the orders placed in the meantime?
If the system isn’t designed to isolate individual order failures, then the correct thing to do is
to roll the system completely back to its original state. But considering this, that means we not
only lose the first customer’s order, but we also lose every other customer’s order that was
placed in the interim. Even if it’s only two orders, that’s not good. But if it’s 10,000 orders the
loss of that amount of revenue can’t be tolerated.
Of course, we’ll retain those 10,000 orders and just deal with the first customer as an isolated
event, but we’re taking a chance in this case and intentionally breaking one of the four trans-
actional properties to retain the revenue. It’s a calculated risk, but often a risk we must accept
in real-world situations.
The property that’s being broken is actually atomicity, and for this reason people who write
transactional processing systems strive to keep their transactions as short as possible. You
do only what is required within your transactional bounds and no more, and you do so as
efficiently as possible so that the transaction completes quickly.
Now let’s throw in another complication—the Internet. Your customer is ordering online, and
networks are notorious for slow speeds and even disconnections. So transactional processing
over the Internet is questionable if only because sooner or later a transaction will run overlong
and put our online ordering system in a transactional bind.
Compensation as a Solution
It is precisely this situation that created the need for a compensated transaction. If I give you
five apples using an XA-style transaction and the transaction fails, time itself rewinds to the
point I started to give you the apples. In a sense, history is rewritten such that the five apples
were never given in the first place. But if I give you five apples in a compensated transaction
and that transaction fails, to compensate (so that we maintain a determinate application
state), you must return five apples to me. It might seem like a subtle difference, but there is a
definite difference between the two styles of transactions.
When writing XA-style transactions, the responsibility for rolling back failed transactions falls
to the resource, such as your database. Conversely, when a compensated transaction fails,
you—as a transactional participant—are responsible for compensating by providing a
Chapter 15 Workflows and Transactions 351
compensation function for your part of the transaction. If you debited an online consumer’s
credit card and were later told to compensate, you would immediately credit the customer’s
account with the same amount of money you originally debited. In an XA-style transaction,
the account would never have been debited in the first place. With the compensated transac-
tion, you initiate two actions—one to debit the account and one to later credit it.
Note
Make no mistake, it would be a rare system that could successfully perform XA-style
transactions over the Internet. (I would argue that no system can, but I would be doing just
that—starting an argument—so I accept the fact that some systems will try and even
succeed in some cases.) Compensation is generally called for. But craft your compensation
functions very carefully. Pay attention to details. If you don’t, you could be making a bad
situation worse by injecting error upon error. It is often not easy to write accurate
compensation functions.
Initiating Transactions in Your Workflows
In general, initiating transactions in WF is as simple as dropping a transaction-based activity
into your workflow. If you’re using transactional activities, however, there is a little more you
should know.
Workflow Runtime and Transactional Services
When you use a transaction-based activity in your workflow, two workflow-pluggable services
are required. First, because the two out-of-the-box transaction-based WF activities are both
decorated with the PersistOnClose attribute (mentioned in Chapter 6, “Loading and Unloading
Instances”), you must also start the SqlWorkflowPersistenceService. If you do not, WF won’t
crash, but neither will your transactions commit.
Perhaps more interesting for this chapter is the DefaultWorkflowTransactionService that WF
starts on your behalf when the workflow runtime is started. This service is responsible for
both starting and committing your transactional operations. Without such a service,
transactions within the workflow runtime are not possible.
Note
Although it’s beyond the scope of this chapter, you can create your own
transactional services. All WF transactional services derive from WorkflowTransactionService,
so creating your own service is a matter of overriding the base functionality you want to
change. In fact, WF ships with a customized transactional service for shared Microsoft SQL
Server connections, SharedConnectionWorkflowTransactionService. You can find more
information at msdn2.microsoft.com/en-us/library/ms734 716.aspx.
352 Part III Workflow Processing
Fault Handling
Although it isn’t required that you handle faults in your workflow due to transactional failures,
it’s good practice. But I don’t mention it here simply because it could be considered a best
practice. I mention it because it is possible for you to write your own transactional service that
automatically examines the exception and retries the transaction before actually failing.
Although demonstrating how to do this is outside the scope of this chapter, you should know
this is possible.
Ambient Transactions
The transaction-based activities all work with something known as the ambient transaction.
When your workflow enters a transactional scope, the workflow transactional service auto-
matically creates a transaction for you. There is no need to try and create one yourself. The
activities embedded in a transactional scope all belong to this one ambient transaction and are
committed or rolled back (or compensated) if the transaction succeeds or fails.
Using the TransactionScope Activity
XA-style transactions in WF are implemented by the TransactionScope activity. This activity
is closely aligned with the .NET System.Transactions namespace, and in fact it initiates a
Transaction as the ambient transaction when the activity begins execution. The Transaction-
Scope activity even shares data structures (TransactionOptions) with System.Transactions.
Using the composite activity-based TransactionScope is truly as easy as dropping it into your
workflow. Any activity you place inside the TransactionScope activity automatically inherits
the ambient transaction and operates as typical transactions do when using .NET’s own
System.Transactions.
Note
You cannot place a TransactionScope activity within another transactional activity.
Nesting of transactions is not permitted. (This rule holds true for CompensatableTransaction-
Scope as well.)
Transactional options dictate more precisely how the ambient transaction will operate. These
options, supported by the System.Transactions.TransactionOptions structure, allow you to set
the isolation level and timeout that the ambient transaction will support. The timeout value is
self-explanatory, but the isolation level might not be.
Note
The timeout values have limits, which are configurable. There is a machine-wide
setting, System.Transactions.Configuration.MachineSettingsSection.MaxTimeout, and a local one,
System.Transactions.Configuration.DefaultSettings.Timeout, which set the ceilings on the maxi-
mum value to allow for a timeout. These values override anything you set using
TransactionOptions.
Chapter 15 Workflows and Transactions 353
A transaction’s isolation level defines to a large extent what the transaction can do with data
to be transacted. For example, maybe you want your transaction to be able to read uncommit-
ted data (to preclude being locked out by a previous transactional database page lock). Or the
data you are writing might be critical, and therefore you allow the transaction to read only
committed data, and moreover, you disallow other transactions to work with the data while
your transaction is executing. The isolation levels you can select are shown in Table 15-1.
You set both the isolation level and timeout using the TransactionOptions property of the
TransactionScope activity.
When you drop an instance of the TransactionScope activity into your workflow, the isolation
level is automatically set to Serializable. Feel free to change this as your architecture dictates.
Serializable is the strictest isolation level, but it also limits scalability to some degree. It’s not
uncommon to select ReadCommitted as the isolation level for systems that require a bit more
throughput, but this is a decision only your system can dictate based on your individual
requirements.
Committing Transactions
If you’re used to working with SQL Server transactions, or perhaps COM+ transactions,
you know that once the data has been inserted, updated, or deleted you must commit the
Table 15-1 Transactional Isolation Levels
Isolation Level Meaning
Chaos Uncommitted and pending changes from transactions using higher
isolated level cannot be overwritten.
ReadCommitted Uncommitted data cannot be read during the transaction, but it can
be modified.
ReadUncommitted Uncommitted data can be both read and modified during the
transaction. However, keep in mind that the data may change—
there is no guarantee that the data will be the same on subsequent
reads.
RepeatableRead Uncommitted data can be read but not modified during the
transaction. However, new data can be inserted.
Serializable Uncommitted data can be read but not modified, and no new data
can be inserted during the transaction.
Snapshot Uncommitted data can be read. But prior to the transaction actually
modifying the data, the transaction verifies that another transaction
has not changed the data after it was initially read. If the data has
been changed, the transaction raises an error. The purpose of this is
to allow a transaction to read the previously committed data value.
Unspecified A different isolation level from the one specified is being used, but
the level cannot be determined for some reason. If you try to set the
transactional isolation level to this value, an exception is thrown.
Only the transactional system can set this value.
354 Part III Workflow Processing
transaction. That is, you initiate the two-phase commit protocol and the database
permanently records or removes the data.
However, this is not necessary with the TransactionScope activity. If the transaction is
successful (no errors while inserting, updating, or deleting the data), the transaction is auto-
matically committed for you when the workflow execution leaves the transactional scope.
Rolling Back Transactions
How about rolling back failed transactions? Well, just as transactions are committed for you,
so too will the data be rolled back if the transaction fails. What is interesting about this is the
rollback is silent, at least as far as WF is concerned. If you need to check the success or failure
of your transaction, you need to incorporate logic for doing so yourself. TransactionScope
doesn’t automatically throw an exception if the transaction fails. It merely rolls back the data
and moves on.
Using the CompensatableTransactionScope Activity
If an XA-style transaction won’t do, you can instead drop the CompensatableTransactionScope
activity into your workflow and provide for compensated transactional processing. The
CompensatableTransactionScope activity, like TransactionScope, is a composite activity. However,
CompensatableTransactionScope also implements the ICompensatableActivity interface, which
gives it the ability to compensate for failed transactions by implementing the Compensate
method.
Also like TransactionScope, the CompensatableTransactionScope activity creates an ambient
transaction. Activities contained within CompensatableTransactionScope share this transaction.
If their operations succeed, the data is committed. However, should any of them fail, you
generally initiate the compensation by executing a Throw activity.
Tip
Compensated transactions can enlist traditional resources, such as databases, and
when the transaction commits, the data is committed just as if it were an XA-style transac-
tion. However, a nice feature of compensated transactions is that you do not have to enlist
an XA-style resource to store data. Sending data to a remote site using a Web service is the
classic example for a nonenlistable transactional resource. If you send data to the remote site
but later must compensate, you need to somehow communicate with the remote site that
the data is no longer valid. (How you accomplish this depends on the individual remote site.)
Throw causes the transaction to fail and calls into execution your compensation handler for
your CompensatableTransactionScope activity. You access the compensation handler through
the Smart Tag associated with the CompensatableTransactionScope activity in much the same
way you would add a FaultHandler.
Chapter 15 Workflows and Transactions 355
Note Although throwing an exception kicks off the transactional compensation, the Throw
activity itself is not considered handled. You can also decide to place a FaultHandler activity in
your workflow to preclude premature workflow termination.
Using the Compensate Activity
When you are compensating a failed transaction implemented by CompensatableTransaction-
Scope, the compensation handler is invoked. If you have multiple compensatable transactions,
the transactions are compensated in a default order, starting with the deepest nested transac-
tion and working outward. (You’ll see how this might be accomplished in the next section.)
When your logic calls for compensation, you can place a Compensate activity in your
compensation handler to initiate compensation of all completed activities supporting
ICompensatableActivity.
It will always be the case that exceptions will cause compensation, so the use of the
Compensate activity is not required. Why have it then? Because you might have nested more
than a single compensatable transaction in a CompensatableSequence activity. If one transac-
tion fails and is to be compensated, you can initiate the compensation of the other transaction
even if that transaction previously completed successfully.
Note
The Compensate activity is valid only in compensation handlers, cancellation
handlers, and fault handlers.
You should use the Compensate activity only when you need to compensate activities in an
order other than the default compensation order. Default compensation invokes compensa-
tion for all nested ICompensatableActivity activities in the reverse order of their completion. If
this ordering doesn’t fit your workflow model, or if you want to selectively invoke compensa-
tion of completed compensatable child activities, the Compensate activity is the tool of choice.
Note
The Compensate activity uses its TargetActivityName property to identify which
compensatable activity should be compensated. If more than one compensatable activity
should be queued for compensation, you need to use more than one Compensate activity. If
you decide not to compensate a given transaction, simply do nothing in the compensation
handler for that transaction or in the enclosing parent activity.
The Compensate activity provides you control over the compensation process by allowing you
to decide whether you want to compensate an immediate child activity that supports compen-
sation or not. This ability enables your workflow to explicitly perform compensation on a
nested compensatable activity according to your process’s needs. By specifying which com-
pensatable activity you want to be compensated in the Compensate activity, any compensation
356 Part III Workflow Processing
code in that compensatable activity will be executed as long as the compensatable activity pre-
viously successfully committed.
If you want to compensate more than one nested compensatable activity, you add a
Compensate activity in your handler for each compensatable activity you want to compensate.
If the Compensate activity is used in a handler of a compensatable activity that contains embed-
ded compensatable activities, and if TargetActivityName for that Compensate activity is assigned
to the parent activity, compensation in all child (compensatable) activities that committed
successfully is invoked. Try saying that three times, fast.
Using the CompensatableSequence Activity
The preceding section might leave you wondering why the Compensate activity exists. After all,
you can’t nest compensated transactions. You can’t nest any type of WF-based transaction.
But let’s look at it in a different way. How would you tie two compensatable transactions
together so that the failure of one triggers compensation in the other, especially if the other
already completed successfully? The answer is you pair the compensated transactions in a sin-
gle instance of the CompensatableSequence activity. Then, in the compensation or fault handler
for the CompensatableSequence activity, you trigger compensation of both child transactional
scope activities if either one of them fails. Even more interesting is the situation where you tie
three compensatable transactions together in a single CompensatableSequence activity and
allow one transaction to succeed even if the others fail and are compensated. The Compensate
activity gives you this control.
This highlights the intent of the CompensatableSequence activity. The CompensatableSequence
activity, at its core, is a Sequence activity, and you use the CompensatableSequence activity in the
same way you would any sequential activity. The major difference is that you can embed
multiple compensatable activities in a single CompensatableSequence activity, effectively
tying related transactions together. Coupling the CompensatableSequence activity with both the
CompensatableTransactionScope and Compensate activities provides you with powerful transac-
tional control in your workflow.
Note
CompensatableSequence activities can be embedded within other CompensatableSe-
quence activities, but they cannot be children of CompensatableTransactionScope activities.
Tip When combining multiple compensatable transactions in a single compensatable
sequence, you do not have to assign compensation functions to the individual transacted
activities. Compensation flows to the parent activity if called for, so you can collect your
compensation activities in the enclosing compensatable sequence activity if you want to.
Chapter 15 Workflows and Transactions 357
Creating a Transacted Workflow
I’ve created an application that simulates an automated teller machine (ATM), one where you
provide your personal identification number, or PIN as it’s called, and make deposits to or
withdrawals from your bank account. Deposits will be embedded in an XA-style transaction,
while withdrawals will be compensated if the action fails. To really exercise the transactional
nature of the application, I placed a “force transactional error” check box in the application.
Simply select the check box and the next database-related operation will fail.
The workflow for this application is a state-based one, and it is more complex than the appli-
cation you saw in the previous chapter (Chapter 14, “State-Based Workflows”). I’ve shown the
state machine I based the workflow on in Figure 15-1. Most of the application has already
been written for you. You’ll add the transactional components in the exercises to follow.
Figure 15-1 The WorkflowATM state diagram
Start
KeyPressed
CommandPressed
Wait
PIN
Deposit
Completed
Withdraw
KeyPressed
KeyPressed
Wait
Selection
CommandPressed
CommandPressed
CommandPressed
Invalid PIN
Succeeded
Failed
CommandPressed
Failed
Succeeded
358 Part III Workflow Processing
The user interface for the application is shown in Figure 15-2. This is the initial application
state, akin to the ATM’s state prior to inserting your bank card. Clearly, the sample can’t deal
with a true bank card, so clicking the B key transitions the user interface (and application
state) to the PIN verification state (shown in Figure 15-3).
Figure 15-2 The WorkflowATM initial user interface
Figure 15-3 The WorkflowATM PIN verification user interface
You enter your PIN using the keypad to the right. Once the four-digit code is entered, you click
the C key to kick off a database query to verify the PIN. If the PIN is verified (and note the
account number in the lower-left corner; the PIN must be valid for that account number), the
user interface transitions to the activity selection state, shown in Figure 15-4. Here you decide
to either deposit funds to or withdraw funds from your account.
Chapter 15 Workflows and Transactions 359
Figure 15-4 The WorkflowATM activity selection user interface
The application user interface for depositing and withdrawing funds is similar, so I’ve shown
only the deposit user interface in Figure 15-5. You again use the keypad to enter a monetary
value and then click a command key, the D key, to make the deposit or withdrawal or the E
key to cancel the transaction.
Figure 15-5 The WorkflowATM transaction deposit user interface
If the transaction was successful, you are rewarded with the screen you see in Figure 15-6. If
not, you see the error screen shown in Figure 15-7. Either way, clicking the C key starts the
workflow over again.
Figure 15-6 The WorkflowATM transaction successful user interface