Visual C++ and MFC Fundamentals programming phần 8 pot
Bạn đang xem bản rút gọn của tài liệu. Xem và tải ngay bản đầy đủ của tài liệu tại đây (1.59 MB, 90 trang )
Chapter 16: Text -Based Controls Visual C++ and MFC Fundamentals
496 © FunctionX, Inc.
3. Return to MSVC
16.1.3 Static Labels
Another type of label you can add to a form or dialog box consists of clicking the Static
Text button from the Controls toolbar and clicking on the host. The Static Text control is
based on the CStatic class.
A user cannot directly change any aspect of a label. For this reason, you will usually not
be concerned with a label's IDentifier. In fact, as we will see in this lesson, all controls
that are static type have an identifier called IDC_STATIC. If, for any reason, you want to
refer to a label in your code, you must first change its identifier from IDC_STATIC to
something else.
As stated already, the most important aspect of a label is the text it displays. This is the
Caption property. If the label is used to identify another control, you can help the user
access that control using an indicator called an access key. An access key is a underlined
letter on the label so that, when clicked, it gives access to the accompanying control. To
create an access key, choose a letter on the label and precede it with the ampersand
character “&”. Form example L&etter would produce Letter. When there are many
access keys on a form or dialog box, you should make sure that no two access keys are
the same. That is, you should not use the same letter on various labels, although this is
allowed. Because you can forget to follow this rule, after creating the access keys, you
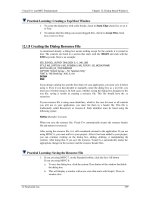
can ask Visual Studio to check for access key duplicates. To do this, right-click the form
or dialog box and click Check Mnemonics:
Visual C++ and MFC Fundamentals Chapter 17: Track-Based Controls
© FunctionX, Inc. 497
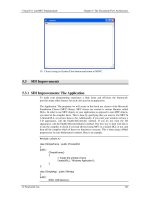
If there are duplicate access keys, you would receive a message accordingly:
If you possible, you should correct by changing one of the access keys without using one
that exists already.
To use the access keys, the user presses Alt and the letter that corresponds to the access
key.
The text of the caption follows a line alignment that can assume one of three values: Left,
Center, or Right. By default, text of a label is aligned to the left. At design time, to
change it, select the desired value using the Align Text combo box from the Styles
property page of the Properties window.
To apply a fancy appearance to a label, you can use the Extended Styles of the Properties
window.
Chapter 16: Text -Based Controls Visual C++ and MFC Fundamentals
498 © FunctionX, Inc.
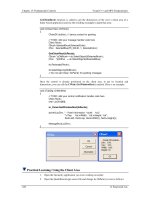
Practical Learning: Using Static Labels
1. From the Dialog folder of the Resource View, double-click the
IDD_CLARKSVILLEICESCREAM1_FORM form to display it
2. On the Controls toolbox, click Static Text and click on the form.
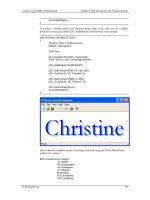
3. On the Properties window, click Caption and type &Date Hired:
4. Using the Static Text control, complete the form as follows:
5. Test the application and return to MSVC
16.2 Edit Controls
16.2.1 Introduction
An edit box is a Windows control used to display text or get it from the user. To provide
its functionality, the control displays a box, whose background is white by default,
surrounded by a black line. If the box is empty, the user may be expected to enter some
letters, numbers, or other characters into it. If the box contains some text, the user should
be able to edit it. Another edit box may be used to present text to the user without his or
her being able to change it. The text that displays in an edit box is referred to as its value.
Like most other controls, the role of an edit box is not obvious at first glance. That is why
it should (always) be accompanied by a label that defines its purpose. From the user’s
standpoint, an edit box is named after the label closest to it. Such a label is usually
positioned to the left or the top side of the edit box. From the programmer’s point of
view, an edit box is a place holder used for various things. For example, you can show or
hide it as you see fit.
To create an edit box, click the Edit Box button from the Controls toolbox and click the
desired area on a form or a dialog box.
Visual C++ and MFC Fundamentals Chapter 17: Track-Based Controls
© FunctionX, Inc. 499
Practical Learning: Creating Edit Boxes
1. Display the form
2. On the Controls toolbox, click the Edit Control button and click on the right
side of the Date Hired label
3. Using the Edit Control and additional labels, complete the form as follows:
4. On the main menu, click Layout or Format and click Tab Order
5. Click the Date Hired edit box to place the number 1 in it and arrange the rest of the
tab sequence as follows:
6. Test the application
Chapter 16: Text -Based Controls Visual C++ and MFC Fundamentals
500 © FunctionX, Inc.
7. Return to MSVC
16.2.2 Edit Control Characteristics
An edit box is a control based on the CEdit class. Therefore, to programmatically create
an edit box, declare a variable of CEdit type using its (default) constructor. To define the
characteristics of this control, you can call the CEdit::Create() method. Its syntax is:
BOOL Create(DWORD dwStyle, const RECT& rect, CWnd* pParentWnd, UINT nID);
The content of an edit box, that is, its value, is a string. It could be considered as null-
terminated constant (LPCTSTR) or a CString value.
Like every other control added during design, you should give some attention to the
identifier of an edit box. The first edit box placed on a form or dialog box receives an
identifier of IDC_EDIT1. The second would be identified as IDC_EDIT2, etc. It is highly
recommended that you give a meaningful and friendly identifier to each control. For
example, if an edit box is used to receive or display an address, you can set its identifier
to IDC_ADDRESS. If an edit box is used to enter an email address, you can change its
ID to IDC_EMAILADDRESS or IDC_EMAIL_ADDRESS. An identifier should have a
maximum of 30 characters. Notice that the ID contains C, which stands for Control.
If you plan to access an edit box in your code, you should create a variable for it. The
variable can be a CEdit or a CString object. The difference is that, if you want to access
the control as an MFC class, you should create the variable as a CEdit object. If you are
more interested with the value (as a string) of the control, you should declare the variable
as CString. Fortunately, you can add two variables for the same control.
Probably the most important characteristic of an edit control for both the programmer and
the user is the text it is displaying or that it can display. When you add an Edit control,
Visual C++ 6 displays Edit and Visual C++ 7 displays Sample edit box. This text is not
part of the control and does not show when the control comes up. It is only an indicator.
Visual C++ and MFC Fundamentals Chapter 17: Track-Based Controls
© FunctionX, Inc. 501
If the user wants to change the text of an edit box and if the control allows changes, he or
she must first click in the control, which places a caret in the edit box. The caret is a
blinking I beam that serves as a reminder that lets the user know what edit control would
receive any change made. This means that if the user starts typing, the edit control in
which the caret is positioned would display a change in its value. The edit box that has
the caret is said to have focus. As mentioned already, the user gives focus to an edit box
by clicking it. Remember that if a label that accompanies an edit box has an access key,
the user can also give focus to the edit control by pressing the access key. Also remember
that you can programmatically give focus to an edit control by calling the SetFocus()
method.
At any time, you can find out what text is in an edit control and there are various
techniques you can use. We saw already how to get a handle to a control by calling the
CWnd::GetDlgItem() method. After calling this method, you can use the
CWnd::GetWindowText() method to find out what text an edit box holds. Here is an
example:
void CEditBoxDlg::CreateName()
{
CEdit *edtFirstName, *edtLastName, *edtFullName;
CString FirstName, LastName;
char FullName[40];
edtFirstName = reinterpret_cast<CEdit *>(GetDlgItem(IDC_FIRST_NAME));
edtLastName = reinterpret_cast<CEdit *>(GetDlgItem(IDC_LAST_NAME));
edtFullName = reinterpret_cast<CEdit *>(GetDlgItem(IDC_FULL_NAME));
edtFirstName->GetWindowText(FirstName);
edtLastName ->GetWindowText(LastName);
sprintf(FullName, "%s %s", FirstName, LastName);
edtFullName->SetWindowText(FullName);
}
void CEditBoxDlg::OnLButtonDblClk(UINT nFlags, CPoint point)
{
// TODO: Add your message handler code here and/or call default
CreateName();
CDialog::OnLButtonDblClk(nFlags, point);
}
Another technique you can use to get the text of an edit control consists of calling the
CWnd::GetDlgItemText() method. It is provided in two syntaxes as follows:
int GetDlgItemText( int nID, LPTSTR lpStr, int nMaxCount ) const;
int GetDlgItemText( int nID, CString& rString ) const;
Chapter 16: Text -Based Controls Visual C++ and MFC Fundamentals
502 © FunctionX, Inc.
The nID argument is the identifier of the control whose text you want to retrieve. The
lpStr or the rString is the returned value of the text in the edit box. It must be provided as
a string variable. If you are using a null-terminated variable, pass a third argument as
nMaxCount that specifies the maximum length of the string. Here is an example:
void CFormView1View::OnButton1()
{
// TODO: Add your control notification handler code here
CString Edit1, Edit2, Result;
GetDlgItemText(IDC_EDIT1, Edit1);
GetDlgItemText(IDC_EDIT2, Edit2);
Result = Edit1 + " " + Edit2;
SetDlgItemText(IDC_EDIT3, Result);
}
As mentioned already, an edit box can be used to request information from the user. If
you want to prevent the user from changing the value of an edit box, you can make it
read-only. This is taken care of by setting the Read-Only property to True or checking its
check box. To do this programmatically, call the CEdit::SetReadOnly() method.
If an edit box is not “read-only”, that is, if it allows the user to change its value, the user
must first give it focus. When an edit box has focus, it displays a blinking caret. By
default, the carret is an I beam. If you want to use a different caret, you have various
options. You can change the caret from an I beam to a wider or taller gray caret by
calling the CWnd::CreateGrayCaret() method. Its syntax is:
void CreateGrayCaret( int nWidth, int nHeight );
This method allows you to specify a width and a height for a gray blinking caret. After
creating the caret, to display it, call the CWnd::ShowCaret() method. Its syntax is:
void ShowCaret( );
Here is an example:
BOOL CSolidCaretDlg::OnInitDialog()
{
CDialog::OnInitDialog();
// TODO: Add extra initialization here
m_Username.CreateGrayCaret(5, 15);
m_Username.ShowCaret();
return TRUE; // return TRUE unless you set the focus to a control
// EXCEPTION: OCX Property Pages should return FALSE
}
Visual C++ and MFC Fundamentals Chapter 17: Track-Based Controls
© FunctionX, Inc. 503
The above caret appears gray. If you want the caret to be completely black, you can call
the CWnd::CreateSolidCaret() method. Its syntax is:
void CreateSolidCaret( int nWidth, int nHeight );
This method creates a rectangular caret of nWidth x nHeight dimensions. Here is an
example:
BOOL CSolidCaretDlg::OnInitDialog()
{
CDialog::OnInitDialog();
// TODO: Add extra initialization here
m_Username.CreateSolidCaret(5, 15);
m_Username.ShowCaret();
return TRUE; // return TRUE unless you set the focus to a control
// EXCEPTION: OCX Property Pages should return FALSE
}
To provide a better designed caret, you can call the CWnd::CreateCaret() method. Its
syntax is:
void CreateCaret(CBitmap* pBitmap);
Before calling this method, you can first design a bitmap, load it, and then pass it as the
pBitmap argument. After initializing and loading the bitmap, to display it in the edit box,
call the CWnd::ShowCaret() method. Here is an example:
BOOL CDialogCaret::OnInitDialog()
{
CDialog::OnInitDialog();
// TODO: Add extra initialization here
CEdit *edtBookTitle;
CBitmap *pBitmap = new CBitmap;
edtBookTitle = reinterpret_cast<CEdit *>(GetDlgItem(IDC_BOOK_TITLE));
pBitmap->LoadBitmap(IDB_BMP_CARET);
edtBookTitle->CreateCaret(pBitmap);
edtBookTitle->ShowCaret();
return TRUE; // return TRUE unless you set the focus to a control
// EXCEPTION: OCX Property Pages should return FALSE
}
Chapter 16: Text -Based Controls Visual C++ and MFC Fundamentals
504 © FunctionX, Inc.
If an edit box is editable and the user starts typing in it, the new characters would display.
As the user is typing, the caret moves from left to right (for US English). The user can
also move the caret back and forth using the Backspace, Delete, Home, End, or the arrow
keys. At any time you can find out the current position of the caret by calling the
CWnd::GetCaretPos() method. Its syntax is:
static CPoint PASCAL GetCaretPos( );
This method retrieves the left (x) and bottom (y) coordinates of the caret in the control
that called it. These coordinates represent the member variables of a CPoint that this
method returns. The measures are relative to the control and not the control’s parent.
Here is an example:
void CDialogCaret::CaretPosition(void)
{
CEdit *edtBookTitle;
CStatic *stcCaretPos;
CPoint CrtPos;
char Msg[40];
edtBookTitle = reinterpret_cast<CEdit *>(GetDlgItem(IDC_BOOK_TITLE));
stcCaretPos = reinterpret_cast<CStatic *>(GetDlgItem(IDC_CARET_POS));
CrtPos = edtBookTitle->GetCaretPos();
sprintf(Msg, "Caret Position: (%d, %d)", CrtPos.x, CrtPos.y);
stcCaretPos->SetWindowText(Msg);
}
void CDialogCaret::OnLButtonDown(UINT nFlags, CPoint point)
{
// TODO: Add your message handler code here and/or call default
CaretPosition();
CDialog::OnLButtonDown(nFlags, point);
}
If want to hide the characters that display in an edit box, you can set the Password
property to True. To do this programmatically, add the ES_PASSWORD style to the edit
control. This style makes the edit control displays each character, or changes each one of
its characters into an asterisk. If you prefer another symbol for the password style, call
the CEdit::SetPassword() method. Its syntax is:
void SetPasswordChar(TCHAR ch);
This method takes as argument the character that you want to use.
Visual C++ and MFC Fundamentals Chapter 17: Track-Based Controls
© FunctionX, Inc. 505
If an edit box is configured to display an asterisk character and you want to find out what
that character is, call the CEdit::GetPasswordChar(). Its syntax is:
TCHAR GetPasswordChar() const;
This method takes no argument but returns the symbol used to mask the characters of a
password-configured edit box.
By default, an edit box is configure to display or receive text of any alphabetic and non-
alphabetic character. The alphabetical letters are received by their case and kept like that,
uppercase and lowercase. If you want to convert an edit box' characters to uppercase, set
the Uppercase property to True or programmatically add the ES_UPPERCASE style. In
the same way, to convert the characters to lowercase, either at design time set the
Lowercase property to True or programmatically add the ES_LOWERCASE style. The
non-alphabetical characters are not treated by their case.
If you want, you can configure the edit box to allow only numeric characters. This is
done by setting the Number property to True.
By default, the characters entered in an edit box start their positioning to the left, which is
the default for regular text. You can align its value to the center or the right by selecting
the desired value from the Align Text combo box. Any of these three alignment modes
can also be set programmatically by adding either the ES_LEFT, the ES_CENTER, or
the ES_RIGHT style.
As mentioned above, the value of an edit box is of high interest to you and your users. If
you want to retrieve the value of an edit box, call the CWnd::GetWindowText()
method. If you want to display or change the text of an edit box, call the
CWnd::SetWindowText() method. As we have seen in the past, SetWindowText() takes
a constant pointer to null-terminated string (LPCTSTR) and displays its value in the edit.
This method is very convenient if you had add a CEdit variable to your edit control. If
you have added the variable as a CString, you can use the CString::Format() method to
change or format the value to display in an edit box.
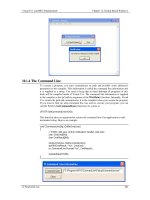
Practical Learning: Configuring Edit Boxes
1. The Clarksville Ice Scream1 application should still be opened
Using the Add Resource dialog box, add a new dialog:
Chapter 16: Text -Based Controls Visual C++ and MFC Fundamentals
506 © FunctionX, Inc.
2. Design the dialog box as follows:
Control ID Caption Other Properties
Dialog Box IDD_DLG_ACCOUNT Employee Account Setup
Static Text
&Full Name
Edit Box IDC_FULL_NAME Read-Only = True
Static Text
&Suggested Username:
Edit Box IDC_USERNAME Lowercase = True
Static Text
&Password
Edit Box IDC_PASSWORD Password = True
Static Text
&Confirm Password
Edit Box IDC_CONF_PASSWORD
Password = True
Button IDC_BTN_VALIDATE &Validate
3. Create a class for the dialog box and name it CAccountDlg
Visual C++ and MFC Fundamentals Chapter 17: Track-Based Controls
© FunctionX, Inc. 507
4. Display the new dialog box, right-click the Suggested Username edit box and click
Add Variable
5. Set the Variable Name to m_StrUsername
6. Set its Category to Value
7. Set the Maximum Characters to 5
8. Add control and value variables to the controls as follows:
Control ID Control
Variable
Value Variable Max
Chars
Edit Box IDC_FULL_NAME m_StrFullName
Edit Box IDC_USERNAME m_Username m_StrUsername 5
Edit Box IDC_PASSWORD m_Password m_StrPassword 14
Edit Box
IDC_CONF_PASSWORD
m_StrConfPassword
9. Display the main form.
10. Add a button under the Web Site edit box and its Caption to Account Setu&p
11. Change the Identifiers of the edit boxes and the button from left to right and from top
to bottom as follows: IDC_DATE_HIRED, IDC_EMPLOYEE_NBR,
IDC_FIRST_NAME, IDC_MI, IDC_LAST_NAME, IDC_ADDRESS, IDC_SUITE,
IDC_CITY, IDC_STATE, IDC_ZIP_CODE, IDC_HOME_PHONE,
IDC_WORK_PHONE, IDC_EMAIL_ADDRESS, IDC_WEB_SITE,
IDC_BTN_ACCOUNT
12. Set the Disabled property of the Account Setup button to True
13. Set the Uppercase of the MI edit box to True
14. Add some CString value and a CButton Control variables to the controls as follows:
Control Identifier Value Variable Control Variable Max Chars
Edit Box IDC_FIRST_NAME
m_StrFirstName
Edit Box IDC_MI m_StrMI 1
Edit Box IDC_LAST_NAME
m_StrLastName
Button IDC_BTN_ACCOUNT m_BtnAccount
15. Add a BN_CLICKED Event Handler to the button associated with the view class
and implement it as follows:
Chapter 16: Text -Based Controls Visual C++ and MFC Fundamentals
508 © FunctionX, Inc.
void CExerciseView::OnBnClickedBtnAccount()
{
// TODO: Add your control notification handler code here
// Take over from the application
UpdateData();
// Get the full name by appending the last name to the first
CString FullName = m_StrFirstName + " " + m_StrLastName;
// Create a temporary username made of the
// first letter of the first name + the last name
CString TempUsername = m_StrFirstName.Left(1) + m_StrLastName;
// Make an attempt to create a username made of 5 letters
CString SuggestedUsername = TempUsername.Left(5);
// What if the attempted username is less than 5 characters
if( TempUsername.GetLength() < 5 )
{
// Since the username is < 5 characters,
// add some digits to make it valid
SuggestedUsername = TempUsername + "1234";
// now that we have a username with at least 5 letters,
// Retrieve only the first 5 to create a new username
SuggestedUsername = SuggestedUsername.Left(5);
}
// It is time to access the Employee Account Setup dialog box
CAccountDlg Dlg;
// Transfer the the full name to the Employee Account Setup dialog box
Dlg.m_StrFullName.Format("%s", FullName);
Dlg.m_StrUsername.Format("%s", SuggestedUsername);
// Display the Employe e Account Setup dialog box
Dlg.DoModal();
// Hand the operations back to the application
UpdateData(FALSE);
}
16. On top of the current source file, include the AccountDlg.h header file
#include "stdafx.h"
#include "Clarksville Ice Scream1.h"
#include "ExerciseDoc.h"
#include "ExerciseView.h"
#include "AccountDlg.h"
17. Test the application and return to MSVC
18. Open the Geometry application. If you do not have it, open one the Geometry4
application that accompanies this book.
19. Open each IDD_CIRCULAR dialog
20. Click the top Radius edit box. Press and hold Ctrl. Then click each one of the other
boxes to select them. Then release Ctrl
21. On the Properties window, set the Align Text property to Right
22. In the same way, set the Align Text property of the edit boxes of the IDD_G3D and
the IDD_QUADRILATERAL dialog boxes to Right
Visual C++ and MFC Fundamentals Chapter 17: Track-Based Controls
© FunctionX, Inc. 509
23. Test the application and return to MSVC
16.2.3 Multiline Edit Boxes
By default, an edit box is used to display a single line of text. An edit box is referred to as
multiline when it can display its text on more than one line.
To create a multiline edit box, use the same Edit control as the above single line Edit box.
To make this a multiline edit box, set its Multiline property to True. To do this at run
time, add the ES_MULTILINE style to the CEdit. At design time, to make it obvious
that the control can display more than one line of text, heighten it:
If the user is typing text in an edit control and press Enter, the control, usually a button,
that is the default would be activated. This feature is valuable for a single line edit box. If
you are creating a multiline edit box, you should allow the user to press Enter while
entering text into the control. This would prevent the default button from being activated
and would transfer the caret to the next line. To provide this functionality, add the
ES_WANTRETURN style or, at design time, set the Want Return property to True.
If the text of the edit control is longer than the edit control can display at one time, you
should equip it with scroll bars. To do this, at design time, set the Horizontal and/or the
Vertical Scroll properties to True. At run time, add the WS_HSCROLL and/or the
WS_VSCROLL properties.
Practical Learning: Designing Edit Boxes
1. Reopen the Clarksville Ice Scream1 application and display the form
2. Add an Edit Control at the bottom section of the form
3. On the Properties window, check the Multiline check box or set its value to True
4. Check the Want Return check box or set its value to True
5. Check the Vertical Scroll check box or set its value to True
6. Check the Modal Frame check box or set its value to True:
Chapter 16: Text -Based Controls Visual C++ and MFC Fundamentals
510 © FunctionX, Inc.
7. Test the application
8. Close the application and return to MSVC
16.2.4 Edit Control Messages
To manage its role on a form or dialog box, an edit control is equipped with some
messages known as notifications. These notifications messages are:
ON_EN_SETFOCUS: The event name for this notification is called OnSetFocus. It is
sent when an edit box receives focus. This happens when the user clicks the edit box or
after previously pressing Tab, to give focus to the control:
BEGIN_MESSAGE_MAP(CDialog3aDlg, CDialog)
//{{AFX_MSG_MAP(CDialog3aDlg)
ON_WM_SYSCOMMAND()
ON_WM_PAINT()
Visual C++ and MFC Fundamentals Chapter 17: Track-Based Controls
© FunctionX, Inc. 511
ON_WM_QUERYDRAGICON()
ON_EN_SETFOCUS(IDC_LAST_NAME, OnSetFocusLastName)
//}}AFX_MSG_MAP
END_MESSAGE_MAP()
void CDialog3aDlg::OnSetFocusLastName()
{
// TODO: Add your control notification handler code here
m_Message.SetWindowText("The First Name has focus");
}
ON_EN_CHANGE: The OnChange event of this notification occurs as the user is typing
text in the edit control. This happens as the user is changing the content of an edit control,
which sends a message that the content of the edit box has changed. You can use this
event to check, live, what the user is doing in the edit box. For example, if you create a
dialog box or a form with a first and last names edit boxes, you can use another edit box
to display the full name. You can implement the OnChange events of the edit boxes as
follows:
BEGIN_MESSAGE_MAP(CDialog3aDlg, CDialog)
//{{AFX_MSG_MAP(CDialog3aDlg)
ON_WM_SYSCOMMAND()
ON_WM_PAINT()
ON_WM_QUERYDRAGICON()
ON_EN_SETFOCUS(IDC_LAST_NAME, OnSetFocusLastName)
ON_EN_CHANGE(IDC_FIRST_NAME, OnChangeFirstName)
ON_EN_CHANGE(IDC_LAST_NAME, OnChangeLastName)
//}}AFX_MSG_MAP
END_MESSAGE_MAP()
void CDialog3aDlg::OnChangeFirstName()
{
// TODO: Add your control notification handler code here
m_FirstName.GetWindowText(m_strFirstName);
m_LastName.GetWindowText(m_strLastName);
CString FullName = m_strFirstName + " " + m_strLastName;
m_FullName.SetWindowText(FullName);
}
void CDialog3aDlg::OnChangeLastName()
{
Chapter 16: Text -Based Controls Visual C++ and MFC Fundamentals
512 © FunctionX, Inc.
// TODO: Add your control notification handler code here
m_FirstName.GetWindowText(m_strFirstName);
m_LastName.GetWindowText(m_strLastName);
CString FullName = m_strFirstName + " " + m_strLastName;
m_FullName.SetWindowText(FullName);
}
ON_EN_UPDATE: The OnUpdate() event is sent after the content of an edit box has
changed but before the text is formally displayed.
ON_EN_MAXTTEXT: When adding a variable for the edit control, you can specify the
maximum allowable number of characters the user can enter. If the user attempts
exceeding this maximum, an OnMaxtext() event is sent. You can catch this event to let
the user know about the problem. If you set up the Maximum Characters fine, you do not
need to perform any "if" or "while" checking. The edit control would do it itself.
ON_EN_ERRSPACE: The OnErrSpace() event is event is sent if the compiler
encountered a problem when attempting to allocate memory space to the control.
ON_EN_KILLFOCUS: The OnExit() event occurs when the control loses focus. In the
case of an edit box, this could happen if the control has focus and the user presses Tab;
the edit box would lose focus.
Practical Learning: Using Edit Box Notifications
1. The Clarksville Ice Scream1 application should still be opened
Display the Employee Account Setup dialog box
2. If you are using MSVC 6, display the Message Maps property page of the
ClassWizard dialog box. Then click IDC_USERNAME
If you are using MSVC 7, right-click the Suggested Username edit box and click
Add Event Handler
3. Add an event handler for the EN_MAXTEXT message and click either Edit Code or
Finish
4. Implement the event as follows:
void CAccountDlg::OnEnMaxtextUsername()
{
// TODO: Add your control notification handler code here
MessageBox("A username must have a maximum of 5 characters");
}
Visual C++ and MFC Fundamentals Chapter 17: Track-Based Controls
© FunctionX, Inc. 513
5. Add an event handler to the Validate button and implement it as follows:
void CAccountDlg::OnBnClickedBtnValidate()
{
// TODO: Add your control notification handler code here
UpdateData();
// In case the user decided to change the username,
// make sure the username is = 5 characters
if( m_StrUsername.GetLength() == 5 )
{
// Since the username is 5 characters, check the password
if( m_StrPassword.GetLength() == 0 )
{
MessageBox("Blank passwords are not allowed");
m_Password.SetFocus();
}
else if( m_StrPassword == m_StrConfPassword )
MessageBox("The account is ready\n"
"To create the account, click OK.\n"
"To stop the account processing, click Cancel.");
else // if( m_StrPassword != m_StrConfPassword )
{
MessageBox("The passwords do not match");
m_Password.SetWindowText("");
m_Password.SetFocus();
}
}
// Since the username specified less than 3 characters, display a message
accordingly
// Set the focus to the Username edit box
else
{
MessageBox("A username must have 5 characters");
m_Username.SetFocus();
}
UpdateData(FALSE);
}
6. Display the main form
7. Set the Disabled property of the Account Setup button to True
8. As done for the EN_MAXTEXT, add an EN_UPDATE event handler to the First
Name edit box
9. Also add an EN_UPDATE event handler to the Last Name edit box
10. Implement both events as follows:
void CExerciseView::OnUpdateFirstName()
{
// TODO: Add your control notification handler code here
// Let the edit boxes take over
UpdateData();
// Make sure both the First Name and the Last Name edit boxes are not empty
// If one of them is, the account cannot be created.
// In which case, disable the the Account Setup button
if( (m_FirstName.GetLength() == 0) || (m_LastName.GetLength() == 0) )
m_BtnAccount.EnableWindow(FALSE);
Chapter 16: Text -Based Controls Visual C++ and MFC Fundamentals
514 © FunctionX, Inc.
else
m_BtnAccount.EnableWindow(TRUE);
// The dialog box can take over now
UpdateData(FALSE);
}
void CExerciseView::OnEnUpdateLastName()
{
// TODO: Add your control notification handler code here
UpdateData();
if( (m_FirstName.GetLength() == 0) || (m_LastName.GetLength() == 0) )
m_BtnAccount.EnableWindow(FALSE);
else
m_BtnAccount.EnableWindow(TRUE);
UpdateData(FALSE);
}
11. Test the application
12. Return to MSVC
16.3 The Rich Edit Control
16.3.1 Overview
A rich edit control is a Windows object that resembles an edit box but can handle text
that is formatted. This mean that it can display text with various characters formats and
can show paragraphs with different alignments. A rich edit control can also allow a user
to change the formatting on characters and control the alignment of paragraphs.
16.3.2 A Rich Edit Control
To create a rich edit control, you ca use the Rich Edit button from the Controls toolbox.
You can also programmatically create this control using the CRichEditCtrl class. To do
this, use its (default) constructor:
CRichEditCtrl RichEditor;
After declaring this variable, you can define the characteristics of the control using the
CRichEditCtrl::Create() method. Its syntax is:
BOOL Create(DWORD dwStyle, const RECT& rect, CWnd* pParentWnd, UINT nID);
The dwStyle argument specifies the window style to apply to the control. Since the rich
edit control is not a container, it is usually positioned on another control such as a form or
dialog box. Therefore, the primary style you must apply is WS_CHILD. To display the
control to the user, also add the WS_VISIBLE style. This primary style can be defined as
follows:
DWORD RichStyle = WS_CHILD | W S_VISIBLE;
Visual C++ and MFC Fundamentals Chapter 17: Track-Based Controls
© FunctionX, Inc. 515
Although a rich edit control can be used as a single-line text object, to make it more
efficient, you should make it use various lines. This can be taken care of by setting the
Multiline property to True or adding the ES_MULTILINE style. An exa mple would be:
DWORD RichStyle = WS_CHILD | WS_VISIBLE | ES_MULTILNE;
Once a rich edit can display multiple lines of text, if the text is longer than the control can
display, you should equip it with scroll bars. The vertical scroll bar is made available by
adding checking the Vertical Scroll check box or setting it to True. This can be done
programmatically by adding the WS_VSCROLL window style. Here is an example:
DWORD RichStyle = WS_CHILD | WS_VISIBLE | WS_VSCROLL | ES_MULTILNE;
The horizontal scroll bar is made possible by setting the Horizontal Scroll property to
True. To do this programmatically, add the WS_HSCROLL window style.
If you do not want the user to change the text in the rich edit control, you can set the
Read-Only property to True. This can also be done by adding the ES_READONLY style.
The rect argument specifies the location and dimensions of the control.
The pParentWnd argument is the control that is hosting the rich edit control. It is usually
a form or a dialog box.
The nID is an identifier for the rich edit control.
Practical Learning: Creating a Rich Edit Application
1. Create a Dialog Based Application Type project named Richer and based on
CformView
2. Delete the TODO line and the OK button
3. Change the caption of the Cancel button to Close
4. On the Control toolbox, click the Rich Edit button and draw a rectangle from the left
border to the left of the Cancel
5. On the Properties window, change its ID to IDC_RICHER
6. Set the following properties to True: Multiline, Want Return, Vertical Scroll
Chapter 16: Text -Based Controls Visual C++ and MFC Fundamentals
516 © FunctionX, Inc.
7. Add a Control variable (of type CRichEditCtrl) to the rich edit control and name it
m_Richer
16.3.3 Rich Edit Properties
At first glance, a rich edit appears like a regular edit control. Its ability to format text and
paragraph sets them apart. To change the appearance of a letter, a word or a paragraph,
you can change its size, height, or weight. This can be done by calling the
CRichEditCtrl::SetSelectionCharFormat() method. Its syntax is:
BOOL SetSelectionCharFormat(CHARFORMAT& cf);
This simply means that the rich edit control relies on the Win32 API's CHARFORMAT
structure to format text. This structure is defined as follows:
typedef struct _charformat {
UINT cbSize;
DWORD dwMask;
DWORD dwEffects;
LONG yHeight;
LONG yOffset;
COLORREF crTextColor;
BYTE bCharSet;
BYTE bPitchAndFamily;
TCHAR szFaceName[LF_FACESIZE];
} CHARFORMAT;
To format the characters, declare a variable of this structure and take its size. Then
initialize the necessary member variables, ignoring those you do not need. To start,
initialize dwMask with the type of formatting you want to apply or the type of operation
you want to perform. The possible values are:
Value Used to
CFM_BOLD Make the character(s) bold
CFM_ITALIC Italicize the character(s)
CFM_UNDERLINE Underline the character(s)
CFM_STRIKEOUT Strike out the character(s)
CFM_SIZE Change the size the character(s)
CFM_CHARSET Access character set
CFM_COLOR Change the color of the text
CFM_FACE Set the font name
CFM_OFFSET Offset the character(s)
CFM_PROTECTED
Protect the character(s)
You can apply the actual text formatting using the dwEffects member variable. Its
possible values are: CFE_AUTOCOLOR, CFE_BOLD, CFE_ITALIC,
CFE_STRIKEOUT, CFE_UNDERLINE, and CFE_PROTECTED. These effects can
be combined as needed using the bitwise OR operator. For example, you can combine
CFE_BOLD and CFE_ITALIC as CFE_BOLD | CFE_ITALIC to have text that is
both in bold and italic.
The yHeight variable is used to set the new height of the text.
The yOffset variable is used to create a superscript or subscript effect.
Visual C++ and MFC Fundamentals Chapter 17: Track-Based Controls
© FunctionX, Inc. 517
The crTextColor variable is used to set the color for the text.
The bCharSet variable is used to the character set value as defined for the Win32's
LOGFONT structure.
The bPitchAndFamily member variable is the same as set for the LOGFONT structure.
The szFaceName variable is used to specify the name of the font to apply to the text.
If you want to find out what formatting is applied on a character or text, call the
CRichEditCtrl::GetSelectionCharFormat() method. Its syntax is:
DWORD GetSelectionCharFormat(CHARFORMAT& cf) const;
This method returns the type of dwMask of the CHARFORMAT structure applied on
the character or text.
To control the alignment of a paragraph on a right edit control, you can call the
CRichEditCtrl::SetParaFormat() method. Its syntax is:
BOOL SetParaFormat(PARAFORMAT& pf);
The actual paragraph formatting is set using the Win32 API's PARAFORMAT structure.
It is created as follows:
typedef struct _paraformat {
UINT cbSize;
DWORD dwMask;
WORD wNumbering;
WORD wReserved;
LONG dxStartIndent;
LONG dxRightIndent;
LONG dxOffset;
WORD wAlignment;
SHORT cTabCount;
LONG rgxTabs[MAX_TAB_STOPS];
} PARAFORMAT;
To define the necessary values for this structure, first declare a variable from it and
retrieve its size. This is done with the cbSize member variable. Secondly, use the dwMask
member variable to specify what formatting you want to perform. For example, to control
paragraph alignment, initialize dwMask with PFM_ALIGNMENT. On the other hand, if
you want to set or remove a bullet on a paragraph, initialize the dwMask variable with
PFM_NUMBERING.
The wNumbering member variable is used to apply or remove the bullet from a
paragraph.
You will need to use wReserved. Therefore, you can either ignore it or set its value to 0.
The dxStartIndent, the dxRightIndent, and the dxOffset member variables are used to
indent text.
If you had initialized dwMask with PFM_ALIGNMENT, you can use wAlignment to
specify the alignment of the paragraph. The possible values are:
Chapter 16: Text -Based Controls Visual C++ and MFC Fundamentals
518 © FunctionX, Inc.
Value Description
PFA_LEFT The paragraph will be aligned to the left
PFA_CENTER
The paragraph will be aligned to the center
PFA_RIGHT The paragraph will be aligned to the right
The cTabCount and the rgxTabs member variables are used to control tab separation.
To retrieve the paragraph formatting applied on a paragraph, you can call the
CRichEditCtrl::GetParaFormat() method. Its syntax is:
DWORD GetParaFormat(PARA FORMAT& pf) const;
This method returns formatting applied on the selected paragraph.
Practical Learning: Using Rich Edit Properties
1. Add the following 8 buttons:
ID Caption
IDC_BTN_BOLD B
IDC_BTN_ITALIC I
IDC_BTN_UNDERLINE U
IDC_BTN_STRIKEOUT S
IDC_BTN_LEFT <
IDC_BTN_CENTER =
IDC_BTN_RIGHT >
IDC_BTN_BULLET :
2. Add a BN_CLICKED event handler for each button and implement the events as
follows:
void CRicher1Dlg::OnBnClickedBtnBold()
{
// TODO: Add your control notification handler code here
CHARFORMAT Cfm;
m_Richer.GetSelectionCharFormat(Cfm);
Cfm.cbSize = sizeof(CHARFORMAT);
Cfm.dwMask = CFM_BOLD;
Cfm.dwEffects ^= CFE_BOLD;
m_Richer.SetSelectionCharFormat(Cfm);
m_Richer.SetFocus();
Visual C++ and MFC Fundamentals Chapter 17: Track-Based Controls
© FunctionX, Inc. 519
}
void CRicher1Dlg::OnBnClickedBtnItalic()
{
// TODO: Add your control notification handler code here
CHARFORMAT Cfm;
m_Richer.GetSelectionCharFormat(Cfm);
Cfm.cbSize = sizeof(CHARFORMAT);
Cfm.dwMask = CFM_ITALIC;
Cfm.dwEffects ^= CFE_ITALIC;
m_Richer.SetSelectionCharFormat(Cfm);
m_Richer.SetFocus();
}
void CRicher1Dlg::OnBnClickedBtnUnderline()
{
// TODO: Add your control notification handler code here
CHARFORMAT Cfm;
m_Richer.GetSelectionCharFormat(Cfm);
Cfm.cbSize = sizeof(CHARFORMAT);
Cfm.dwMask = CFM_UNDERLINE;
Cfm.dwEffects ^= CFE_UNDERLINE;
m_Richer.SetSelectionCharFormat(Cfm);
m_Richer.SetFocus();
}
void CRicher1Dlg::OnBnClickedBtnStrikeout()
{
// TODO: Add your control notification handler code here
CHARFORMAT Cfm;
m_Richer.GetSelectionCharFormat(Cfm);
Cfm.cbSize = sizeof(CHARFORMAT);
Cfm.dwMask = CFM_STRIKEOUT;
Cfm.dwEffects ^= CFE_STRIKEOUT;
m_Richer.SetSelectionCharFormat(Cfm);
m_Richer.SetFocus();
}
void CRicher1Dlg::OnBnClickedBtnLeft()
{
// TODO: Add your control notification handler code here
PARAFORMAT Pfm;
Pfm.cbSize = sizeof(PARAFORMAT);
Pfm.dwMask = PFM_ALIGNMENT;
Pfm.wAlignment = PFA_LEFT;
m_Richer.SetParaFormat(Pfm);
m_Richer.SetFocus();
}
Chapter 16: Text -Based Controls Visual C++ and MFC Fundamentals
520 © FunctionX, Inc.
void CRicher1Dlg::OnBnClickedBtnCenter()
{
// TODO: Add your control notification handler code here
PARAFORMAT Pfm;
Pfm.cbSize = sizeof(PARAFORMAT);
Pfm.dwMask = PFM_ALIGNMENT;
Pfm.wAlignment = PFA_CENTER;
m_Richer.SetParaFormat(Pfm);
m_Richer.SetFocus();
}
void CRicher1Dlg::OnBnClickedBtnRight()
{
// TODO: Add your control notification handler code here
PARAFORMAT Pfm;
Pfm.cbSize = sizeof(PARAFORMAT);
Pfm.dwMask = PFM_ALIGNMENT;
Pfm.wAlignment = PFA_RIGHT;
m_Richer.SetParaFormat(Pfm);
m_Richer.SetFocus();
}
void CRicher1Dlg::OnBnClickedBtnBullet()
{
// TODO: Add your control notification handler code here
PARAFORMAT Pfm;
m_Richer.GetParaFormat(Pfm);
Pfm.cbSize = sizeof(PARAFORMAT);
Pfm.dwMask = PFM_NUMBERING;
Pfm.wNumbering ^= PFN_BULLET;
m_Richer.SetParaFormat(Pfm);
m_Richer.SetFocus();
}
3. Test the application