Visual C++ and MFC Fundamentals programming phần 1 pps
Bạn đang xem bản rút gọn của tài liệu. Xem và tải ngay bản đầy đủ của tài liệu tại đây (2.49 MB, 76 trang )
Visual C++ and MFC Fundamentals Table of Contents
© FunctionX, Inc. 1
an action creates a document and this document must reside somewhere.
Visual C++ and MFC
Programming
Table of Contents Visual C++ and MFC Fundamentals
2 © FunctionX, Inc.
Visual C++ and MFC Fundamentals Table of Contents
© FunctionX, Inc. 3
Table of Contents
TABLE OF FIGURES 13
CHAPTER 1: INTRODUCTION TO MICROSOFT VISUAL C++ 15
1.1 The Microsoft Visual C++ Environment 16
1.1.1 Introduction 16
1.1.2 The Integrated Development Environment 17
1.1.3 The Title Bar 17
1.1.4 The Main Menu 18
1.1.5 The Toolbars 21
1.1.6 The Studio Windows 23
1.2 Floatable and Dockable Windows 26
1.2.1 Description 26
1.3 Visual C++ Projects and Files 27
1.3.1 Creating a New Project 27
1.3.2 Creating Files 28
1.3.3 Adding Existing Files to a Project 29
1.3.4 Adding Classes 30
1.3.5 Opening Files 31
1.3.6 Opening Existing Projects 33
1.4 Getting Help 34
1.4.1 Online Help 34
1.4.2 Other Help Types 35
CHAPTER 2: INTRODUCTION TO MFC 37
2.1 The Microsoft Foundation Class Library 38
2.1.1 Introduction 38
2.1.2 CObject, the Ancestor 38
2.1.3 The Basic Application 39
2.2 Frames Fundamentals 42
2.2.1 Introduction 43
2.2.2 Reference to the Main Window 44
2.2.3 Introduction to Macros 47
2.2.4 Windows Styles 48
2.2.5 Windows Location 51
2.2.6 Windows Size 53
2.2.7 Windows Dimensions 54
2.2.8 Windows Parents 57
2.3 Message Boxes 58
2.3.1 Definition 58
2.3.2 Message Box Creation 59
2.3.3 Message Box Implementation 59
2.3.4 The Box’ Message 60
2.3.5 The Message’ Title 62
2.3.6 Message Box Options 63
2.3.7 The Message’s Return Value 66
CHAPTER 3: WINDOWS RESOURCES 69
Table of Contents Visual C++ and MFC Fundamentals
4 © FunctionX, Inc.
3.1 Introduction to Resources 70
3.1.1 Introduction 70
3.1.2 Converting a Resource Identifier 71
3.2 Icons 73
3.2.1 Icons Overview 73
3.2.2 Icons Design 74
3.3 Menu Fundamentals 80
3.3.1 Overview 80
3.3.2 The Main Menu 80
3.3.3 Main Menu Design 81
3.4 Toolbars 85
3.4.1 Overview 85
3.4.2 Creating a Toolbar 85
3.5 Accelerators 85
3.5.1 Access Keys 86
3.5.2 Shortcuts 86
3.5.3 Accelerator Table 87
3.6 Version Information 88
3.6.1 Overview 88
3.6.2 The Version Information Editor 88
3.7 Cursors 89
3.7.1 Overview 89
3.7.2 Creating and Using Cursors 90
3.8 The String Table 92
3.8.1 Description 92
3.8.2 Creating and Using a String Table 92
3.9 Other Techniques of Creating Windows 94
3.9.1 Window Registration and Standard Resources 94
3.9.2 Window Registration and Custom Resources 95
3.9.3 Frame Loading 97
CHAPTER 4: MESSAGES AND EVENTS 101
4.1 Introduction to Messages 102
4.1.1 Overview 102
4.1.2 A Map of Messages 102
4.2 Windows Messages 104
4.2.1 Window Creation 105
4.2.2 Window's Showing State 106
4.2.3 Window Activation 108
4.2.4 Window Painting 112
4.2.5 Window Sizing 114
4.2.6 Window Moving 116
4.2.7 Window Destruction 119
4.3 Command Messages 119
4.3.1 Definition 120
4.3.2 Creating a Command Message 120
4.4 Keyboard Messages 120
4.4.1 Introduction 120
4.4.2 The Key Down Effect 122
4.4.3 The Key Up Effect 124
4.5 Mouse Messages 124
4.5.1 Introduction 124
4.5.2 Mouse-Down Messages 124
4.5.3 The Mouse-Up Messages 127
4.5.4 The Double-Click Message 129
Visual C++ and MFC Fundamentals Table of Contents
© FunctionX, Inc. 5
4.5.5 Mouse Moving 130
4.6 Anytime Messages 130
4.6.1 Introduction 130
4.6.2 Sending Messages 131
CHAPTER 5: THE DOCUMENT/VIEW ARCHITECTURE 133
5.1 Overview of the Document/View Architecture 134
5.1.1 Introduction 134
5.1.2 The View 134
5.1.3 The Document 134
5.1.4 The Frame 134
5.1.5 The Document/View Approach 135
5.2 The Single Document Interface (SDI) 136
5.2.1 Overview 136
5.2.2 Creating a Single Document Interface 137
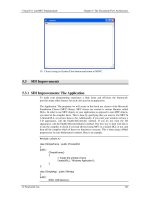
5.3 SDI Improvements 143
5.3.1 SDI Improvements: The Application 143
5.3.2 SDI Improvements: The Document 146
5.3.3 SDI Improvements: The Frame 150
5.3.4 SDI Improvements: The View 151
5.4 The Multiple Document Interface (MDI) 151
5.4.1 Overview 151
5.4.2 Creating a Multiple Document Interface 154
5.4.3 The Visual C++ AppWizard 157
5.5 The AppWizard 157
5.5.1 An SDI With AppWizard 158
5.5.2 An MDI With AppWizard 161
CHAPTER 6: THE GRAPHICAL DEVICE INTERFACE 163
6.1 Introduction to the GDI 164
6.1.1 The Device Context 164
6.1.2 Grabbing the Device Context 164
6.2 The Process of Drawing 165
6.2.1 Getting a Device Context 165
6.2.2 Starting a Device Context's Shape 165
6.3 GDI Lines and Shapes 167
6.3.1 Lines 167
6.3.2 Polylines 170
6.3.3 Multiple Polylines 173
6.3.4 Polygons 175
6.3.5 Multiple Polygons 176
6.3.6 Rectangles and Squares 177
6.3.7 A Rectangle With Edges 179
6.3.8 Ellipses and Circles 180
6.3.9 Round Rectangles and Round Squares 183
6.3.10 Pies 184
6.3.11 Arcs 185
6.3.12 The Arc's Direction 187
6.3.13 Angular Arcs 190
6.3.14 Chords 191
6.3.15 Bézier Curves 192
CHAPTER 7: GDI ACCESSORIES AND TOOLS 197
7.1 Colors 198
Table of Contents Visual C++ and MFC Fundamentals
6 © FunctionX, Inc.
7.1.1 Overview 198
7.1.2 The Color as a Data Type 199
7.1.3 Color Palettes 200
7.2 Drawing With Colors 201
7.2.1 Coloring a Pixel 201
7.2.2 Rectangles With 3-D Effect 201
7.2.3 Drawing Text 202
7.3 Bitmaps 205
7.3.1 Introduction 205
7.3.2 Bitmap Creation 206
7.4 Fonts 209
7.4.1 Introduction 209
7.4.2 Font Selection 209
7.4.3 Font Creation 209
7.4.4 Font Retrieval 215
7.5 Pens 216
7.5.1 Introduction 216
7.5.2 The Fundamentals of a Pen 216
7.5.3 Creating and Selecting a Pen 216
7.5.4 Retrieving a Pen 220
7.6 Brushes 220
7.6.1 Introduction 220
7.6.2 Solid Brushes 221
7.6.3 Hatched Brushes 225
7.6.4 Patterned Brushes 227
7.6.5 Logical Brushes 229
CHAPTER 8: GDI ORIENTATION AND TRANSFORMATIONS 231
8.1 The Default Coordinate System 232
8.1.1 Introduction 232
8.1.2 Changing the Coordinate System 234
8.2 The Mapping Modes 238
8.2.1 Mapping Mode Choices 238
8.2.2 Unit and Coordinate Systems Options 243
CHAPTER 9: STRINGS 249
9.1 Fundamentals of Strings 250
9.1.1 Null-Terminated Strings 250
9.1.2 The Standard string Class 251
9.1.3 The Length of a String 252
9.1.4 String Formatting 253
9.2 Operations of Strings 255
9.2.1 String Copy 255
9.2.2 String Concatenation 257
9.3 The Characters of a String 259
9.3.1 Access to Characters 259
9.3.2 Sub-Strings 260
9.4 The CString Class 260
9.4.1 Introduction 260
9.4.2 String Initialization 261
9.4.3 The String and its Length 261
9.5 Working with Individual Characters 263
9.5.1 Character Indexing 263
9.5.2 Character Insertion 264
9.5.3 Finding a Character 264
Visual C++ and MFC Fundamentals Table of Contents
© FunctionX, Inc. 7
9.5.4 Character Identification 265
9.5.5 Removing Characters 265
9.6 Sub Strings 266
9.6.1 Introduction 266
9.6.2 Finding a Sub String 267
9.6.3 Character and String Removal 268
9.6.4 Replacing String Occurrences 268
9.6.5 String Formatting 269
9.7 Operations on Strings 270
9.7.1 About Constructing a String 270
9.7.2 String Assignment 270
9.7.3 String Copy 271
9.7.4 Strings and Their Cases 271
9.8 String Comparisons 272
9.8.1 Case Sensitivity 272
9.8.2 Case Insensitivity 273
CHAPTER 10: CHARACTERISTICS OF A WINDOW'S FRAME 277
10.1 Introduction to Win32 Library 278
10.1.1 Overview 278
10.1.2 The Framework 279
10.1.3 A Window's Instance 280
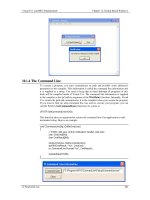
10.1.4 The Command Line 281
10.1.5 Frame Display Options 282
10.1.6 Window Class Initialization 282
10.1.7 Window Registration 291
10.2 Window Creation 292
10.2.1 The Main Window 292
10.2.2 The Window Class Name 294
10.2.3 The Window Name 296
10.2.4 Windows Styles 297
10.2.5 Window's Location and Size 298
10.2.6 Window's Parenting 305
10.2.7 The Window's Menu 306
10.2.8 Window Display 309
10.2.9 Considering Window's Messages 310
10.3 The Mini Frame Window 314
10.3.1 Introduction 314
10.3.2 Creation of a Miniframe Window 314
CHAPTER 11: INTRODUCTION TO WINDOWS CONTROLS 317
11.1 Controls Fundamentals 318
11.1.1 Introduction 318
11.1.2 The Parent-Child Window Relationship 320
11.2 Parent Controls 321
11.2.1 Definition 321
11.2.2 Parent Windows Styles 321
11.3 Windows Controls 321
11.3.1 Introduction 322
11.3.2 Control Creation Options 322
11.3.3 The Control's Class Name 325
11.3.4 The Control's Window Name 327
11.4 Controls Styles and Common Properties 327
11.4.1 Childhood 327
11.4.2 Visibility 328
Table of Contents Visual C++ and MFC Fundamentals
8 © FunctionX, Inc.
11.4.3 Availability 329
11.4.4 Borders 330
11.4.5 Tab Sequence 331
11.5 Extended Styles 332
11.5.1 Introduction 332
11.5.2 Left Text Alignment 333
11.5.3 Right Text Alignment 333
11.5.4 Extended Borders 334
11.5.5 Controls Location and Dimensions 336
11.5.6 Parenthood 339
11.5.7 Control Identification 339
CHAPTER 12: DIALOG-BASED WINDOWS 343
12.1 Dialog Boxes 344
12.1.1 Overview 344
12.1.2 Dialog Box Creation 346
12.1.3 Dialog Box Location 347
12.1.4 Dialog Box Dimensions 348
12.1.5 Windows Styles for a Dialog Box 350
12.1.6 Dialog Box Styles 355
12.1.7 Extended Windows Styles for a Dialog Box 356
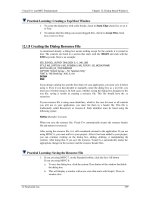
12.1.8 Creating the Dialog Resource File 359
12.1.9 Creating a Class for the Dialog 360
12.1.10 Dialog Box Methods 361
12.2 Modal Dialog Boxes 362
12.2.1 Dialog-Based Applications 362
12.2.2 The MFC Wizard for a Dialog-Based Application 364
12.2.3 A Modal Dialog Box in an Application 366
12.3 Property Sheets and Wizards 367
12.3.1 Introduction to Property Pages 367
12.3.2 Creating Property Pages 368
12.3.3 Property Sheets 374
12.3.4 Wizard Pages 378
CHAPTER 13: CONTROL DESIGN 381
13.1 Forms 382
13.1.1 Introduction 382
13.1.2 Form Creation 382
13.2 Dialog Box Messages and Events 384
13.2.1 The Dialog Box as a Control Initializer 384
13.2.2 Other Dialog-Based Windows Messages 388
13.2.3 Control-Related Messages 389
13.3 Floating Windows 389
13.3.1 Introduction 390
13.3.2 The Modeless Dialog Box 390
13.3.3 Modeless Property Sheets 395
13.4 Control Design 399
13.4.1 Controls Selection and Addition 399
13.4.2 Control’s Location and Size Using Grids 400
13.4.3 Control’s Location and Size Without Grids 401
13.4.4 Selecting Controls on a Parent Window 404
13.4.5 Controls Resizing 406
13.4.6 Controls Positions 408
13.4.7 Tab Ordering 409
Visual C++ and MFC Fundamentals Table of Contents
© FunctionX, Inc. 9
CHAPTER 14: CONTROLS FUNCTIONALITY 411
14.1 Handling Controls 412
14.1.1 Introduction 412
14.1.2 Control's Control Variables: 414
14.1.3 The Control’s Data Exchange 417
14.1.4 Control’s Value Variables 418
14.1.5 Controls Event Handlers 420
14.2 Controls Management 421
14.2.1 Control’s Identification 421
14.2.2 The Client Area 424
14.2.3 The Screen and Client Coordinates 428
14.2.4 The Window: Its Location and Dimensions 432
14.2.5 The Handle or Pointer to a Window 435
14.2.6 The Text of a Control 436
14.2.7 Controls Values Update 441
14.2.8 Window’s Focus 443
14.2.9 The Window’s Visibility 444
14.2.10 The Window’s Availability 446
14.3 Access to a Controls Instance and Handle 447
14.3.1 The Instance of an Application 447
14.3.2 The Handle to a Window 447
14.4 Getting Access to a Control 448
14.4.1 Retrieving Control Information 449
14.4.2 Changing Control Information 450
CHAPTER 15: FUNDAMENTAL CONTROLS 453
15.1 Static Controls 454
15.1.1 Introduction 454
15.1.2 Static Control Properties 454
15.1.3 The Picture Control 456
15.2 Animation Controls 458
15.2.1 Overview 458
15.2.2 Animation Control and Properties 459
15.2.3 Animation Methods 460
15.3 Group Boxes 463
15.3.1 Introduction 463
15.3.2 Group Box Properties and Data Exchange 463
15.4 Command Buttons 464
15.4.1 Overview 464
15.4.2 Command Buttons Properties and Methods 464
15.4.3 Buttons Messages 467
15.5 Property Sheet and Wizard Buttons 471
15.5.1 Property Sheet Buttons 471
15.5.2 Wizard Buttons 483
15.6 Bitmap Buttons 485
15.6.1 Overview 486
15.6.2 Bitmap Button Implementation 486
CHAPTER 16: TEXT-BASED CONTROLS 491
16.1 Labels 492
16.1.1 Overview 492
16.1.2 Drawn Labels 494
16.1.3 Static Labels 496
16.2 Edit Controls 498
Table of Contents Visual C++ and MFC Fundamentals
10 © FunctionX, Inc.
16.2.1 Introduction 498
16.2.2 Edit Control Characteristics 500
16.2.3 Multiline Edit Boxes 509
16.2.4 Edit Control Messages 510
16.3 The Rich Edit Control 514
16.3.1 Overview 514
16.3.2 A Rich Edit Control 514
16.3.3 Rich Edit Properties 516
CHAPTER 17: TRACK-BASED CONTROLS 523
17.1 Spin Button 524
17.1.1 Overview 524
17.1.2 Creating a Spin Button 526
17.1.3 The Spin Button Properties 528
17.1.4 Methods of Managing an UpDown Control 529
17.1.5 The Spin Button Events 535
17.2 The UpDown Control 538
17.2.1 Overview 538
17.2.2 Using an UpDown Control 540
17.2.3 The UpDown Control Events 543
17.3 Slider Controls 545
17.3.1 Overview 545
17.3.2 Slider Creation 550
17.3.3 Slider Properties 551
17.3.4 Slider Methods 554
17.3.5 Slider Events 557
CHAPTER 18: PROGRESS-BASED CONTROLS 559
18.1 Timers 560
18.1.1 Overview 560
18.1.2 The Timer Control 561
18.1.3 The Timer Messages and Methods 562
18.1.4 The Tick Counter 564
18.2 Progress Controls 567
18.2.1 Overview 567
18.2.2 Progress Bar Properties 568
18.2.3 Progress Control Methods and Events 569
18.3 Progress Bars 572
18.3.1 Introduction 572
18.3.2 Creating Progress Bars 572
18.3.3 Progress Bars Methods and Events 575
18.4 Scroll Bars 577
18.4.1 Introduction 577
18.4.2 Creating Scroll Bars on Views and Dialog Boxes 578
18.4.3 Creating a Scroll Bar Control 583
18.4.4 ScrollBar Properties 586
18.4.5 Scroll Bar Methods 589
18.4.6 Scroll Bar Events 593
18.5 Flat Scroll Bars 596
18.5.1 Overview 596
18.5.2 Flat Scroll Bar Properties 596
18.5.3 Flat Scroll Bar Methods and Events 598
CHAPTER 19: SELECTION-BASED CONTROLS 599
Visual C++ and MFC Fundamentals Table of Contents
© FunctionX, Inc. 11
19.1 Radio Buttons 600
19.1.1 Introduction 600
19.1.2 Creating Radio Buttons 602
19.1.3 Radio Button Properties 604
19.1.4 Radio Buttons Methods 607
19.1.5 Radio Buttons Events 611
19.2 Check Boxes 618
19.2.1 Introduction 618
19.2.2 Check Box Properties 620
19.2.3 Check Box Methods 623
19.2.4 Check Box Events 627
CHAPTER 20: LIST-BASED CONTROLS 633
20.1 List Boxes 634
20.1.1 Overview 634
20.1.2 List Box Fundamentals 635
20.1.3 List Box Methods 636
20.1.4 List Box Messages and Events 643
20.2 Combo Boxes 650
20.2.1 Overview 650
20.2.2 Combo Box Properties 652
20.2.3 Combo Box Methods 654
20.2.4 Combo Box Messages and Events 656
20.3 Image Lists 657
20.3.1 Introduction 657
20.3.2 Image List Creation 658
CHAPTER 21: TREE AND LIST CONTROLS 663
21.1 The Tree Control 664
21.1.1 Overview 664
21.1.2 Tree List Properties 667
21.1.3 Tree Controls Methods 669
21.1.4 Tree Control Messages 675
21.1.5 Tree Control With Bitmaps or Icons 679
21.2 The Tree View 681
21.2.1 Overview 681
21.2.2 Tree View Implementation 681
21.3 The List Control 682
21.3.1 Overview 682
21.3.2 List Control Creation 683
21.3.3 Items of a List Control 687
21.3.4 The Report View 689
21.3.5 Views Transition 693
21.3.6 List Control and Icons 694
21.4 The List View 696
21.4.1 Overview 697
21.4.2 List View Implementation 697
CHAPTER 22: CUSTOM LIBRARIES 705
22.1 Introduction to Libraries 706
22.1.1 Overview 706
22.1.2 Libraries Characteristics 706
22.2 General Static Libraries 706
22.2.1 Introduction 706
Table of Contents Visual C++ and MFC Fundamentals
12 © FunctionX, Inc.
22.2.2 Creation of a Static Library 707
22.3 MFC Static Libraries 713
22.3.1 Introduction 713
22.3.2 Creation of an MFC Static Library 713
22.3.3 MFC Static Library Test 716
22.4 Win32 DLL 719
22.4.1 Introduction 719
22.4.2 Fundamentals of a DLL 720
22.4.3 Win32 DLL Test 722
22.5 DLL Module-Definition Files 725
22.5.1 Definition File Fundamentals 725
22.5.2 Usage of a Definition File DLL 728
INDEX 733
Visual C++ and MFC Fundamentals Chapter 1: Introduction to Visual C++
© FunctionX, Inc. 13
Table of Figures
Figure 1: Microsoft Visual Studio IDE 17
Figure 2: Open Workspace 19
Figure 3: Customizing the IDE Resources 22
Figure 4: The Workspace Window 24
Figure 5: The Resource View 25
Figure 6: The ResourceView tab of the Worskpace 25
Figure 7: The Source Code Editor 26
Figure 8: Moving a Dockable Window 27
Figure 9: Creating a New Project - Exercise1 28
Figure 10: Win32 Application Wizard - Exercise1 28
Figure 11: Adding a C++ Class 31
Figure 12: File Opening in Visual Studio 32
Figure 13: Opening a File With the Open Dialog Box 33
Figure 14: A Microsoft Visual C++ Message Box 33
Figure 15: The Options Dialog Box 34
Figure 16: New Project - Windows Fundamentals 40
Figure 17: Win32 Application Wizard - Windows Fundamentals 41
Figure 18: Window Frame Property Pages 41
Figure 19: ADd New Item - Windows Fundamentals 42
Figure 20: Microsoft Development Environment - Message Box 42
Figure 21: Window Illustration 43
Figure 22: A Window Frame with Title Bar 44
Figure 23: A Window Frame with no Caption 44
Figure 24: Windows Application 46
Figure 25: The Title Bar of a Frame 49
Figure 26: A Frame with System Menu 49
Figure 27: A Frame with a Minimize Button 50
Figure 28: A Frame with a Maximize Button 50
Figure 29: Windows Application - Resizing 51
Figure 30: Illustration of Window Origin 52
Figure 31: Illustration of Window Location 53
Figure 32: Illustration of Window Origin and Location 55
Figure 33: Illustration of Window Location, Origin, and Size 56
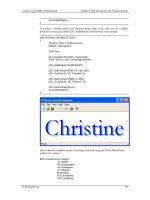
Figure 34: A Simple Message Box 58
Figure 35: An Elaborate Message Box 58
Figure 36: Components of a Message Box 59
Figure 37: A Simple Message Box with MessageBox() 61
Figure 38: A Message's Box on Various Lines 61
Figure 39: Creating a Multiline Message Box 62
Chapter 1: Introduction to Visual C++ Visual C++ and MFC Fundamentals
14 © FunctionX, Inc.
Figure 40: A Message Box with Various Buttons 63
Figure 41: A Message Box with an Icon 64
Figure 42: Creating a Message Box 65
Figure 43: Creating an Elaborate Message Box 66
Figure 44: Add Resource - Icon 70
Figure 45: Add Resource - Icon 75
Figure 46: Simple Menu 84
Figure 47: Version Table 89
Figure 48: Resource Symbols 93
Figure 49: New Symbol 93
Figure 50: Notepad as an SDI 137
Figure 51: New Project - DocView1 138
Figure 52: Win32 Application Wizard - DocView1 139
Figure 53: DocView1 Property Pages 139
Figure 54: Adding an Icon Resource 140
Figure 55: Icon Design - DocView1 140
Figure 56: Icon Design - DocView2 140
Figure 57: A Tree List With One Root 664
Figure 58: A Tree List With Various Roots 664
Figure 59: A Newly added Tree Control 666
Figure 60: A Tree List With All Items As Roots 670
Visual C++ and MFC Fundamentals Chapter 1: Introduction to Visual C++
© FunctionX, Inc. 15
Chapter 1:
Introduction to Microsoft
Visual C++
? The: Microsoft Visual C++ Environment
? Floatable and Dockable Windows
? Visual C++ Projects and Files
? Help
Chapter 2: Introduction to MFC Visual C++ and MFC Fundamentals
16 © FunctionX, Inc.
1.1 The Microsoft Visual C++ Environment
1.1.1 Introduction
Microsoft Visual C++ is a programming environment used to create applications for the
Microsoft Windows operating systems. To use this ebook, you must have installed either
Microsoft Visual C++ 6.0 or Microsoft Visual Studio 6.0.
Although Microsoft Visual C++ .Net provides two programming environments for the
price of one, in this book, we will use Microsoft Visual Studio 6.0 and we will cover only
Microsoft Foundation Class (MFC) library programs.
After installing it, to use the programming environment, you must first open it. To do
that, you would click Start -> (All) Programs -> Microsoft Visual Studio 6.0 -> Microsoft
Visual Studio 6.0.
If you were using version 6, to open it, you would click Start -> (All) Programs ->
Microsoft Visual Studio 6.0 -> Microsoft Visual C++ 6.0
This book uses the -> arrow for the menu requests.
From now on, in this book,
Request Example Means
Edit -> Copy Click Edit then click Copy
View -> Toolbars -> Custom Click View position the mouse on Toolbars, and then
click Custom
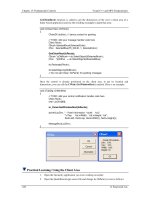
Practical Learning: Launching Microsoft Visual C++
?? To start Microsoft Visual C++ or Visual Studio, on the Taskbar, click Start (All)
Programs -> Microsoft Visual Studio 6.0 -> Microsoft Visual Studio 6.0
Visual C++ and MFC Fundamentals Chapter 1: Introduction to Visual C++
© FunctionX, Inc. 17
Figure 1: Microsoft Visual Studio IDE
1.1.2 The Integrated Development Environment
After Microsoft Visual Studio has been opened, the screen you look at is called an
Integrated Development Environment or IDE. The IDE is the set of tools you use to
create a program. The IDE design of Microsoft Visual C++ 6 and Microsoft Visual
Studio .Net is significantly different. While version 6 had its unique design as compared
to Microsoft Visual Basic, the programming environments of Microsoft share the same
look in the 2002 and 2003 releases.
1.1.3 The Title Bar
1. The system icon is used to identify the application that you are using. Almost
every application has its own system icon. The system icon holds its own list of
actions; for example, it can be used to move, minimize, maximize or close (when
double-clicked) a window.
To see its list of actions, click it
2. To see an example, while the system menu is displaying, click Minimize. To bring
back the IDE, on the Task bar, click Microsoft Visual C++
Chapter 2: Introduction to MFC Visual C++ and MFC Fundamentals
18 © FunctionX, Inc.
3. The main section of the title bar displays Microsoft Visual C++. This starting title
displays in the beginning until you decide to create a particular type of application,
then the title changes. You will experience it once we start some programming
assignments.
4. The main section of the title bar is also used to move, minimize, maximize the top
section of the IDE, or to close Visual Studio. On the right section of the title bar,
there are three system buttons with the following roles
Button Role
Minimizes the window
Maximizes the window
Restores the window
Closes the window
1.1.4 The Main Menu
Under the title bar, there is a range of words located on a gray bar. This is called the
menu or main menu.
In this ebook, the expression “Main Menu” refers to the menu on top of the IDE.
MSVC means Microsoft Visual C++
MSVC 6 means Microsoft Visual C++ 6.0
MSVC 7 means Microsoft Visual C++ 2003
To use a menu, you click one of its words and the menu expands.
If an item is missing from the main menu, you can customize it.
1 Click File. There are four main types of menus you will encounter.
When clicked, the behavior of a menu that stands alone
depends on the actions prior to clicking it. Under the File menu, examples include
Close, Save All, or Exit. For example, if you click Close, Microsoft Visual Studio
will find out whether the current file had been saved already. If it has been, the file
would be closed; otherwise, you would be asked whether you want to save it before
closing it
2 To see an example, click Exit.
3 Start Microsoft Visual C++ the same way we did earlier
4 A menu that is disabled is not accessible at the moment.
This kind of menu depends on another action or the availability of something else.
To see an example, one the main menu, click Window:
Visual C++ and MFC Fundamentals Chapter 1: Introduction to Visual C++
© FunctionX, Inc. 19
5 A menu with three dots means that an intermediary
action is required in order to apply its assigned behavior. Usually, this menu would
call a dialog box where the user would have to make a decision.
As an example, on the main menu, position the mouse on File and click Open
Workspace
6 On the dialog box, locate the folder that has your downloaded exercises. Locate and
display the Exercise1 folder in the Look In combo box:
Figure 2: Open Workspace
7 Click Exercise1 and click Open.
8 A menu with an arrow holds a list of menu
items under it. A menu under another menu is called a submenu. To use such a
menu, you would position the mouse on it to display its submenu.
Chapter 2: Introduction to MFC Visual C++ and MFC Fundamentals
20 © FunctionX, Inc.
For example, on the main menu, click Project and position the mouse on Add To
Project
9 To dismiss the menu, click Project
10 Notice that, on the main menu (and any menu), there is one letter underlined on each
word. Examples are F in File, E in Edit, V in View, etc. The underlined letter is
called an access key. It allows you to access the same menu item using the keyboard.
In order to use an access key, the menu should have focus first. The menu is given
focus by pressing either the Alt or the F10 keys.
11 To see an example, press Alt
12 Notice that one of the items on the menu, namely File, has its borders raised. This
means that the menu has focus.
13 Press t and notice that the Tools menu is expanded.
14 When the menu has focus and you want to dismiss it, you can press Esc.
For example, press Esc.
15 Notice that the Tools menu has collapsed but the menu still has focus.
16 Press f then press o. Notice that the Open dialog box displays.
17 To dismiss the Open dialog box, press Esc
18 On some menu items, there is a key or a combination of keys we call a shortcut. This
key or this combination allows you to perform the same action on that menu using
the keyboard.
If the shortcut is made of one key only, you can just press it. If the shortcut is made
of two keys, press and hold the first one, while you are holding the first, press the
second key once and release the first key. Some shortcuts are a combination of three
keys.
To apply an example, press and hold Ctrl, then press o, and release Ctrl.
19 Notice that the Open dialog box opens. To dismiss it, press Esc
From now on, in this book,
Press Means
T Press the T key
Alt, G Press and release Alt. Then press G
Ctrl + H Press and hold Ctrl. While you are still holding Ctrl, press H once.
Then release Ctrl
Ctrl + Shift + E Press and hold Ctrl. Then press and hold Shift. Then press E once.
Release Ctrl and Shift
Visual C++ and MFC Fundamentals Chapter 1: Introduction to Visual C++
© FunctionX, Inc. 21
One of the differences between Microsoft Visual C++ 6 and Microsoft Visual Studio
.Net is that, on version 6, the menu bar can be moved to any section on the IDE. To do
this, you can click and hold on the small vertical grab bars on the left side of the File
menu, then drag to any location of your choice. In the 2002 and 2003 versions, the
menu bar cannot be moved.
In all versions, the main menu is customizable. This means that you can add and remove
items from the menu.
1.1.5 The Toolbars
A toolbar is an object made of buttons. These buttons provide the same features you
would get from the (main) menu, only faster. Under the main menu, the IDE is equipped
with an object called the Standard toolbar. For example, to create a new project, on the
main menu, you could click File -> New -> Project… On the other hand, the Standard
toolbar is equipped with a button to perform the same action a little faster.
By default, the Standard toolbar is positioned under the main menu but you can position
it anywhere else on the IDE. Like the menu, the toolbars can be customized.
1. Click and drag the gripper on the Standard toolbar down and right:
2. Notice that the toolbar has moved.
3. Once moved, you can resize the toolbar. To do that, position the mouse on the right
border of the toolbar. Click and drag in the left direction:
4. To restore the toolbar to its previous position, double-click its title bar.
5. You can get a list of the toolbars that are available if you right-click any button on
any toolbar or menu.
For example, right-click a toolbar and notice the list
6. To dismiss the menu, press Esc.
In this book, every toolbar is referred to by its name
7. A toolbar is equipped with buttons that could be unfamiliar. Just looking at one is not
obvious. The solution into knowing what a button is used for is to position the mouse
on top of it. A tool tip will come up and display for a few seconds.
As an example, position the mouse (do not click) on the second button from left on
the Standard toolbar:
8. Without clicking, move the mouse to another button and to other buttons
From now on, each button on any toolbar will be named after its tool tip. This
means that, if a tool tip displays "Hungry", its button will be called the Hungry
Button. If a tool tip display "Exercises and Assignments", its button will be called
the Exercises and Assignments button. If you are asked to click a button, position
Chapter 2: Introduction to MFC Visual C++ and MFC Fundamentals
22 © FunctionX, Inc.
your mouse on different buttons until one displays the referred to name.
9. To use a toolbar’s button, you click it. For example, click the Open button .
Notice that the action calls the Open dialog box.
10. Press Esc to dismiss the New Project dialog box.
11. Some buttons present an arrow on their right side. This arrow represents a menu.
To see an example, position the mouse on the Wizard Bar Actions button and click
the arrow on the right side. Observe the menu:
12. Press Esc to dismiss the menu.
13. To customize the Standard toolbar by adding buttons to it, right-click anything on the
menu bar or the toolbar and click Customize
14. On the Customize dialog box, click the Commands tab.
15. In the Categories list, select File
16. Under the Buttons combo box, click and drag the New button. Position it to be the
most left button on the Standard toolbar
Figure 3: Customizing the IDE Resources
17. Release the mouse
18. To add another toolbar button, while the Customize dialog box is still displaying, on
the main menu, click File
Visual C++ and MFC Fundamentals Chapter 1: Introduction to Visual C++
© FunctionX, Inc. 23
19. Press and hold Ctrl. Click and hold Open Workspace… Then drag it and position it
anywhere on the Standard toolbar
20. Release Ctrl and click File to dismiss its menu
21. On the Standard toolbar, click and drag Open Workspace… to position it to the right
of the New button
22. On the Standard toolbar, right-click Open Workspace and click Button
Appearance…
23. Click the Image Only radio button. In the Images section, click the icon on 2
nd
column – 4
th
row
24. Click OK on the Button Appearance dialog box
25. Click the Close button on the Customize dialog box
1.1.6 The Studio Windows
When creating your applications, you will use a set of windows that each accomplishes a
specific purpose. In some windows, information is organized in a tree list equipped with
+ or – buttons. To expand a list, you can click its + button. To collapse a list, click its –
sign
The workspace is divided into individual windows that, by default, are docked together as
an ensemble:
Chapter 2: Introduction to MFC Visual C++ and MFC Fundamentals
24 © FunctionX, Inc.
Figure 4: The Workspace Window
The FileView tab of is used to display the project name and its categories of files. The
categories are organized as folders and include the Source Files, the Header Files and the
Resource Files. They can also display other dependent files.
The Class View is used to display the classes, independent functions and variables used
by the project:
Visual C++ and MFC Fundamentals Chapter 1: Introduction to Visual C++
© FunctionX, Inc. 25
Figure 5: The Resource View
The Resource View displays an organized tree list of the resources used on a project:
Figure 6: The ResourceView tab of the Worskpace
Practical Learning: Using the Studio Windows
1. In the Workspace, click the ClassView tab and, if necessary, click the + button of
Exercise to expand it
2. Notice that the names of classes start with C
3. Double-click CMainFrame
4. Notice that this displays the contents of the CMainFrame class in the Code Editor
5. Also notice that the name of the file displays on the title bar, is MainFrm.h
6. To show the source file of the CMainFrame class, expand the class and double-click
OnCreate to display its listing in the Code Editor: