Visual C++ and MFC Fundamentals programming phần 2 pdf
Bạn đang xem bản rút gọn của tài liệu. Xem và tải ngay bản đầy đủ của tài liệu tại đây (815.01 KB, 66 trang )
Visual C++ and MFC Fundamentals
Chapter 3: Windows Resources
12. On the Colors window, click the red color (3rd column, 2nd row).
13. Draw a reverse graphic with regard to the above dialog as follows:
14. Using the blue and the red colors, design the other diamonds as follows:
15. On the Colors window, click the white button
16. Using the Line Tool, draw four borders as follows:
© FunctionX, Inc.
77
Chapter 3: Windows Resources
Visual C++ and MFC Fundamentals
17. Still using the Line Tool and the white color, draw new white lines as follows:
18. On the Image Editor toolbar, click the Fill Tool button .
19. Using the white, red, and blue colors, fill the icon as follows:
20. To create the smaller equivalent icon, on the main menu, click Image -> New Image
Type...
21. Make sure that 16x16, 16 Colors is selected and click OK.
22. Using the same above approach, design the icon as follows:
78
© FunctionX, Inc.
Visual C++ and MFC Fundamentals
23. To save the icon, click the system Close button
the icon
Chapter 3: Windows Resources
of the window that is displaying
24. Change the Exercise.cpp file as follows:
#include <afxwin.h>
#include "ResourceDlg.h"
class CResApp: public CWinApp
{
public:
BOOL InitInstance();
};
class CResFrame : public CFrameWnd
{
public:
CResFrame()
{
Create(NULL, "Resources Fundamentals");
}
};
BOOL CResApp::InitInstance()
{
m_pMainWnd = new CResFrame;
m_pMainWnd->ShowWindow(SW_SHOW);
m_pMainWnd->UpdateWindow();
return TRUE;
}
CResApp theApp;
25. Test the application:
© FunctionX, Inc.
79
Chapter 3: Windows Resources
Visual C++ and MFC Fundamentals
26. Close the window and return to MSVC
27. Create another icon identified as IDI_APP_ICO and design it follows:
28. Save All
3.3
Menu Fundamentals
3.3.1 Overview
A menu is a list of actions the user can perform on an application. Each item of the list is
primarily a word or a group of words on a line. Different menu items are used for
different reasons. For example, some menu items simply display a word or a group of
words. Some other items display a check mark. This indicates that the item toggles the
availability or disappearance of an object.
When a menu item is only meant to lead to a sub-menu, such a menu item is call a popup
menu. There are two types of popup menus. If the menu displays on top of a window,
which is the type of menu under the title bar, the word on top, which represents a
category of menu, is a popup menu. If a menu item is equipped with an arrow in its right
, which means the menu item has a submenu, such a
menu item is also a popup menu. Popup menus are used only to represent a submenu. No
inherent action is produced by clicking them, except that, when placed on top, such menu
items allow opening the submenu.
To create menus that belong to a group, menu items are separated by a horizontal line
called a separator. Separators are created differently in MSVC 6 and MSVC 7.
There are two primary types of menus in most applications: a main menu and a popup
menu.
3.3.2 The Main Menu
A menu is considered a main menu, when it carries most or all of the actions the user can
perform on an application. Such a menu is positioned on the top section of the main
80
© FunctionX, Inc.
Visual C++ and MFC Fundamentals
Chapter 3: Windows Resources
window in which it is used. A main menu is divided in categories of items and each
category is represented by a word. Here is an example:
On the Visual Studio IDE, the categories of menus are File , Edit, View, Project, etc. To
use a menu, the user first clicks one of the words that displays on top. Upon clicking, the
menu expands and displays a list of items that belong to that category. Here is an
example where the View menu of WordPerfect was clicked and got expanded:
There is no strict rule on how a menu is organized, only suggestions. For example,
actions that are related to file processing, such as creating a new file, opening an existing
file, saving a file, printing the open file, or closing the file usually stay under a category
called File. In the same way, actions related to viewing things can be listed under a View
menu.
3.3.3 Main Menu Design
There are two ways you can create a main menu. You can use the Win32 approach in
which case you would create or open your .rc file and create a section as follows:
IDR_MAINFRAME MENU
BEGIN
POPUP "&File"
BEGIN
MENUITEM "&New",
IDM_FILENEW
MENUITEM "&Open",
IDM_FILEOPEN
MENUITEM SEPARATOR
MENUITEM "E&xit",
IDM_FILEEXIT
END
POPUP "&Help"
BEGIN
MENUITEM "&About",
IDM_HELPABOUT
END
END
© FunctionX, Inc.
81
Chapter 3: Windows Resources
Visual C++ and MFC Fundamentals
If you create your file manually, you must also remember to create or edit the resource.h
file in order to specify an identifier for each menu. The alternative, which we will use, is
to "visually" create the menu in Visual Studio. When doing this, the studio itself would
update the resource.h as items are added or removed.
To create a menu, first add a resource of type Menu. To create a popup menu that would
display on top of the main menu, click the item on top and type the desired string in the
Caption field of the Properties window. Such a popup menu item would not use a specify
identifier.
To create a menu item, click the line under the popup menu, provide an identifier and a
caption. The arrow for the popup menu is readily available so you can use or ignore it.
Practical Learning: Creating a Main Menu
1.
2.
On the Add Resource dialog box, double-click Menu
3.
In the Resource View, click IDR_MENU1 to select it and change its identifier to
IDR_MENU_RES
4.
In the main window, click the top box (in MSVC .Net, it displays Type Here), type
Family and press Enter
5.
Click the item under Family. Type Father and press Enter
6.
Type Mother and press Enter
7.
To add a separator, click the item under mother, type - and press Enter
8.
Complete the menu as follows (remember to add the lower separator):
9.
82
On the main menu, click Project -> Add Resource...
To move the Grand-Child item and position it under the lower separator, click and
hold the mouse on Grand-Child, then drag in the bottom direction until the selection
is in the desired position:
© FunctionX, Inc.
Visual C++ and MFC Fundamentals
Chapter 3: Windows Resources
10. Release the mouse.
11. To create another main menu item, click the box on the right side of Family, type
Category and press Enter
12. Click the item under Category, type Parent and press Enter.
13. Type Child and press Enter
14. To move the Category menu and position it to the left side of Family, click and drag
Category in the left direction
15. When it is positioned to the left of Family, release the mouse. Notice that the popup
menu and its submenus moved.
16. To create a new main menu item, click the box on the right side of Family, type
Job Functions and press Enter
17. Click the box under Job Functions and type Level
18. While Level is still selected, click the box on the right side of Level
19. Type Executive and press Enter
20. Complete the popup menu as follows:
© FunctionX, Inc.
83
Chapter 3: Windows Resources
Visual C++ and MFC Fundamentals
Figure 46: Simple Menu
21. To use the new menu, open the Exercise.cpp file and change the
CFrameWnd::Create() method as follows:
#include <afxwin.h>
#include "resource.h"
class CResApp: public CWinApp
{
public:
BOOL InitInstance();
};
class CResFrame : public CFrameWnd
{
public:
CResFrame()
{
Create(NULL, "Resources Fundamentals",
WS_OVERLAPPEDWINDOW, CRect(200, 120, 640, 400),
NULL,
MAKEINTRESOURCE(IDR_MENU_RES));
}
};
BOOL CResApp::InitInstance()
{
m_pMainWnd = new CResFrame;
m_pMainWnd->ShowWindow(SW_SHOW);
m_pMainWnd->UpdateWindow();
}
return TRUE;
CResApp theApp;
22. Test the application
84
© FunctionX, Inc.
Visual C++ and MFC Fundamentals
Chapter 3: Windows Resources
23. Close the window and return to MSVC
3.4
Toolbars
3.4.1 Overview
A toolbar is a Windows control that allows the user to perform some actions on a form by
clicking a button instead of using a menu. A toolbar provides a convenient group of
buttons that simplifies the user's job by bringing the most accessible actions as buttons so
that, instead of performing various steps to access a menu, a button on a toolbar can bring
such common actions closer to the user.
Toolbars usually display under the main menu. They can be equipped with buttons but
sometimes their buttons or some of their buttons have a caption. Toolbars can also be
equipped with other types of controls
3.4.2 Creating a Toolbar
To create a toolbar, from the Add Resource dialog box, click Toolbar and click New.
A toolbar is only a container and does not provide much role by itself. To make a toolbar
efficient, you should equip it with the necessary controls.
The most common control used on a toolbar is a button. After adding a new toolbar, it is
equipped with a gray button. You can simply start designing that button as you see fit.
Once you start designing a button, a new one is added. You can keep designing the
buttons until you get as many buttons as you need. If you design a button but do not need
it anymore, to delete it, drag it away from the toolbar. The space between two buttons is
called a separator. To put a separator between two buttons, drag one away from the other
just a little.
3.5
Accelerators
© FunctionX, Inc.
85
Chapter 3: Windows Resources
Visual C++ and MFC Fundamentals
3.5.1 Access Keys
An access key is a letter that allows the user to perform a menu action faster by using the
keyboard instead of the mouse. This is usually faster because the user would not need to
position the mouse anywhere, which reduces the time it takes to perform the action.
The most basic accelerator keys allow the user to access each item of the menu with a
key. To do this, the user must first give focus to the menu. This is done by pressing the
F10 function key or Alt. Once the menu has focus, you can provide a unique letter that
the user can press to activate the menu. Each main popup menu must have a unique letter
that serves as access key. The letter is underlined to show that it the access key for that
particular menu.
As a suggestion, when creating the access keys, use the first letter of the menu item, as in
File, Edit, or View. If you have another menu item that starts with a letter already used,
as Format after File, use the next letter that has not been used already. This can result in
File, Edit, View, Fo rmat, Insert, Efficiency. Only items in the same category should
follow this rule. The menu items under a popup menu use access keys that are
independent of another category. This means that, under File, you can use a submenu that
uses the letter E as access key even though Edit on top is using it.
To use access keys, the user press F10 or Alt and presses the underlined letter, which
opens the menu category. Then the user can click the desired underlined letter in the
displayed list.
To create an access key, type an ampersand "&" on the left of the menu item.
Practical Learning: Creating Access Keys
1.
In the Resource View, double-click the identifier of the menu to display the menu.
2.
Right-click Category and click Properties
3.
In the Caption box, click to left of Category, type & and press Enter
4.
Complete the menu with the following captions:
&Category
&Parent
&Child
5.
&Family
&Father
&Mother
&Son
&Daughter
&Grand-child
&Job Functions
&Level
&Executive
&Senior
&Junior
&Assistant
Test the application and return to MSVC
3.5.2 Shortcuts
A shortcut key is a key or a combination of keys the user presses to perform an action
that would otherwise be done on a menu item. Most shortcuts are made of the Ctrl key
simultaneously pressed with a letter key. Examples are Ctrl + N, Ctrl + O, or Ctrl + D.
Some applications, such as Adobe Photoshop or Macromedia Flash, use a shortcut made
of only one key.
86
© FunctionX, Inc.
Visual C++ and MFC Fundamentals
Chapter 3: Windows Resources
To create a shortcut, on the right side of the string that makes up a menu caption, type \t
followed by the desired combination.
Practical Learning: Creating Shortcut Keys
1.
In the Resource View, click Category, right-click Parent, and click Properties
2.
In the Caption box, click to right side of Parent, type \tCtrl+R
3.
In the same way, set the shortcut of Child to Ctrl+D
4.
Test the application and return to MSVC
3.5.3 Accelerator Table
An Accelerator Table is a list of items where each item of the table combines an
identifier, a (shortcut) key, and a constant number that specifies the kind of accelerator
key. Each item is a variable of the ACCEL class whose syntax is:
typedef struct tagACCEL {
BYTE fVirt;
WORD key;
WORD cmd;
} ACCEL, *LPACCEL;
Using a variable or variables of type ACCEL, you can create as many items as needed.
Then declare an HACCEL variable. HACCEL is a handle to a ACCEL and is used to
pass the ACCEL table to the program. This would allow the compiler to translate the
items of the accelerator to keys that the program can use.
Just like the other resources, an accelerator table can be created manually in a .rc file but
MSVC simplifies the process by allowing you to "visually" create the table.
© FunctionX, Inc.
87
Chapter 3: Windows Resources
Visual C++ and MFC Fundamentals
Practical Learning: Creating an Accelerator Table
1.
On the main menu of Visual Studio, click Insert -> Resource... or Project -> Add
Resource...
2.
In the Add Resource dialog box, double-click Accelerator
3.
In the Properties window, click the arrow of the ID combo box and select
ID_CATEGORY_PARENT
4.
Click the Key box and type R
5.
Make sure the Ctrl check box is checked or that the Ctrl field is set to True. Also,
make sure the Type is set to VIRTKEY
6.
In the same way, create an accelerator item for the Child menu:
7.
To use the accelerator, change the program as follows:
class CResFrame : public CFrameWnd
{
public:
HACCEL m_hAccel;
CResFrame()
{
m_hAccel = ::LoadAccelerators(AfxGetInstanceHandle(),
MAKEINTRESOURCE (IDR_ACCELTEST));
Create(NULL, "Resources Fundamentals",
WS_OVERLAPPEDWINDOW,
CRect(200, 120, 640, 400), NULL,
MAKEINTRESOURCE(IDR_TEST));
};
8.
3.6
}
Test the application and return to MSVC
Version Information
3.6.1 Overview
The version of a computer program allows to have some information about the product
such as it official name , a release number, the person or company that owns its copyright,
the year of the current release, etc.
3.6.2 The Version Information Editor
To create the pieces of information that make up the version information, you can use the
Version Information Editor.
88
© FunctionX, Inc.
Visual C++ and MFC Fundamentals
Chapter 3: Windows Resources
Practical Learning: Creating Version Information
1.
On the main menu of MSVC, click Project -> Add Resource
2.
In the Add Resource dialog box, click Version and click New. Notice that a
complete file is generated for you
3.
To change the first key, double-click the top 1, 0, 0, 1 and edit it to display 1, 3, 1, 1
4.
Double-click PRODUCTVERSION and type 1, 2, 2, 3
5.
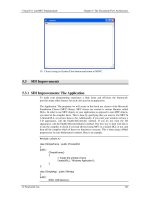
Double-click Comments and type This program is primarily intended as an
introduction to Windows resources
6.
To add a new string, right-click in the window and click New Version Info Block
Figure 47: Version Table
7.
3.7
Save All
Cursors
3.7.1 Overview
A cursor is a small picture that represents the position of the mouse on a Windows object.
Because Windows is a graphic operating system, when it installs, it creates a set of
standard or regularly used cursors. These can be seen by opening the Control Panel
window and double-clicking the Mouse icon. This opens the Mouse Properties dialog box
where you can click the Pointers tab to see a list of standard cursors installed by
Windows:
© FunctionX, Inc.
89
Chapter 3: Windows Resources
Visual C++ and MFC Fundamentals
3.7.2 Creating and Using Cursors
Microsoft Windows installs a wide array of cursors for various occasions. Like all other
resources, a cursor is identified by a constant integer that can be communicated to other
files that need it.
Essentially, a cursor uses only two colors, black and white. This is because a cursor is
only used as an indicator of the presence or position of the mouse pointer on the screen.
Based on this (limitation), you ought to be creative. The minimum you can give a cursor
is a shape. This can be a square, a rectangle, a circle, an ellipse, a triangle, or any shape
of your choice. You can make the cursor fully black by painting it with that color. If you
decide to make the cursor completely white, make sure you draw borders.
Between the black and white colors, two gray degrees are provided to you. In reality
these two colors are used to give transparency to the cursor so the background can be
seen when the mouse passes over a section of the document.
After designing a cursor, you should define its hot spot. A cursor's hot spot is the point
that would be used to touch the specific point that the mouse must touch to perform the
action expected on the mouse. The hot spot must be an area, namely a spot, on the cursor
but it could be anywhere on that cursor. You should specify the hot spot in the most
intuitive section of the cursor. In other words, the user should easily identify it since it is
not otherwise visible.
90
© FunctionX, Inc.
Visual C++ and MFC Fundamentals
Chapter 3: Windows Resources
If you do not want to show a cursor, you can use the Wind32 API ShowCursor()
function. Its syntax is:
int ShowCursor(BOOL bShow);
To hide a cursor, specify the argument as FALSE.
Practical Learning: Creating a Cursor
1.
To create a new cursor, on the main menu, click Project -> Add Resource
2.
In the Insert Resource or Add Resource dialog box, click Cursor and click New
3.
In the Resource View, right-click the name of the cursor and click Properties
4.
Change its ID to IDC_APP_CURS and its Filename to appcurs.cur
5.
On the Toolbox, click the Line tool
6.
Design the cursor as follows:
7.
To define the hot spot, on the toolbar of the editor, click the Set Hot Spot button
and select the black color
. Click the middle of the square:
8.
Save All
9.
Close the Cursor Properties window.
© FunctionX, Inc.
91
Chapter 3: Windows Resources
3.8
Visual C++ and MFC Fundamentals
The String Table
3.8.1 Description
A string table is a list of all object strings that are part of an application. It allows any part
of the program to refer to that table when a common string is needed. The advantage of a
string table is that it can be used as a central place when to store or retrieve strings that
any other objects of the application may need. These can include the titles or captions of
Windows controls, the formatting strings used inside of functions or controls.
3.8.2 Creating and Using a String Table
When you install Microsoft Visual C++, it also installs a lot of strings that are readily
available for your applications. Most of the time, you will also need to create additional
or your own strings. To create a string table, from the Add Resource dialog box, click
String Table and click New. Each item of the table is made of three sections: an
identifier, a constant natural number, and a caption.
To add a new item, you can right-click in the String Table window and click New String.
You can also double-click the last empty row in the window. You can also press Insert.
Either case, the String Properties window would display.
You can either type a new ID or select an existing ID from the ID combo box. Then type
the associated string in the Caption box. Continually, you would have created a String
Table:
The identifier, ID, is the same type of ID used when creating the resources earlier. In fact,
most of the IDs used on a string table are shared among resources, as we will learn when
reviewing the CFrameWnd::LoadFrame() method.
The value column contains a constant LONG integer for each identifier. You will not
need to specify this number when using the String Table window; Visual C++
automatically and independently creates and manages those numbers. If you want to
create a string and specify your own number, on the main menu of MSVC 6, you can
click View -> Resource Symbols...
92
© FunctionX, Inc.
Visual C++ and MFC Fundamentals
Chapter 3: Windows Resources
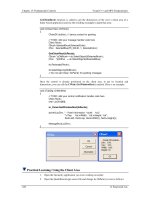
Figure 48: Resource Symbols
In the Resource Symbols window, to create a new string, click the New... button to
display the New Symbol dialog box:
Figure 49: New Symbol
You can then type an IDentifier in the Name edit box and the desired number in the
Value edit box. Over all, you should only use numbers between 101 and 127 and avoid
numbers over 57344.
To edit an item from the String Table window, double-click the row needed to display the
String Properties window with the selected item.
© FunctionX, Inc.
93
Chapter 3: Windows Resources
3.9
Visual C++ and MFC Fundamentals
Other Techniques of Creating Windows
3.9.1 Window Registration and Standard Resources
The CFrameWnd::Create() method we have used so far provides a quick mechanism to
create a window. Unfortunately, it is not equipped to recognize custom resources. In
reality, this method is only used to create a window, not to receive resources. As we saw
in its syntax, its first argument, lpszClassName is used to get a window that has been
built, that is, a window whose resources have been specified. If you do not specify these
resources, that is, if you pass the lpszClassName argument as NULL, the compiler would
use internal default values for the window. These default are: a window that can be
redrawn when the user moves or resizes it, a white background for the main area of the
window, the arrow cursor, and the Windows "flat" icon, called IDI_APPLICATION.
To use your own resources, you must first create then register them. To register the
resources, you can call the AfxRegisterWndClass() global function. Its syntax is:
LPCTSTR AFXAPI AfxRegisterWndClass(UINT nClassStyle,
HCURSOR hCursor = 0,
HBRUSH hbrBackground = 0,
HICON hIcon = 0);
As you can see, this function is used to register, the window style, a cursor, a color for the
background, and an icon. After registering the window's style or the style and the
resources, this function returns a (constant) string that can be passed as the first argument
of the CFrameWnd::Create() method.
Practical Learning: Using Standard Resources
1.
To use the AfxRegisterWndClass() function with default values, change the
Exercise.cpp file as follows:
class CResFrame : public CFrameWnd
{
public:
CResFrame()
{
const char *RWC = AfxRegisterWndClass(NULL, NULL,
(HBRUSH)::GetStockObject(WHITE_BRUSH),
NULL);
Create(RWC, "Resources Fundamentals", WS_OVERLAPPEDWINDOW,
CRect(200, 120, 640, 400), NULL);
}
};
2.
Test the application
3.
After viewing the window, close it and return to MSVC
4.
To use a standard cursor and a standard icon, change the Exercise.cpp file as follows:
CResFrame()
{
94
© FunctionX, Inc.
Visual C++ and MFC Fundamentals
Chapter 3: Windows Resources
HCURSOR hCursor;
HICON hIcon;
hCursor = AfxGetApp()->LoadStandardCursor(IDC_SIZEALL);
hIcon = AfxGetApp()->LoadStandardIcon(IDI_EXCLAMATION);
const char *RWC = AfxRegisterWndClass(CS_VREDRAW | CS_HREDRAW,
hCursor,
(HBRUSH)GetStockObject(BLACK_BRUSH),
hIcon);
Create(RWC, "Resources Fundamentals", WS_OVERLAPPEDWINDOW,
CRect(200, 120, 640, 400), NULL);
}
5.
Test the application
6.
After viewing the window, close it and return to MSVC
3.9.2 Window Registration and Custom Resources
If the standard cursors and/or icons are not enough, you can create your own. To create
your own cursor, display and select Cursor from the Add Resource dialog box. A starting
but empty cursor would be displayed. Design the cursor to your liking.
To use a custom cursor, you can retrieve its identifier and pass it to the
CWinApp::LoadCursor() method. It is overloaded as follows:
HCURSOR LoadCursor(LPCTSTR lpszResourceName) const;
HCURSOR LoadCursor(UINT nIDResource) const;
To use a custom icon, you can pass its identifier to the CWinApp::LoadIcon() method
overloaded as follows:
HICON LoadIcon(LPCTSTR lpszResourceName) const;
HICON LoadIcon(UINT nIDResource) const;
© FunctionX, Inc.
95
Chapter 3: Windows Resources
Visual C++ and MFC Fundamentals
When calling one of these methods, you can simply pass its identifier as argument. You
can also specify the resource identifier as a constant string. To do this, pass the name of
the icon to the MAKEINTRESOURCE macro that would convert its identifier to a
string.
Practical Learning: Using Custom Resources
1.
To use a custom cursor and a custom icon, change the Exercise.cpp file as follows:
#include <afxwin.h>
#include "resource.h"
class CResFrame : public CFrameWnd
{
public:
CResFrame()
{
HCURSOR hCursor;
HICON hIcon;
hCursor = AfxGetApp()->LoadCursor(IDC_APP_CURS);
hIcon = AfxGetApp()->LoadIcon(IDI_APP_ICO);
const char *RWC = AfxRegisterWndClass(CS_VREDRAW | CS_HREDRAW,
hCursor,
(HBRUSH)GetStockObject(BLACK_BRUSH),
hIcon);
Create(RWC, "Custom Resources", WS_OVERLAPPEDWINDOW,
CRect(200, 120, 640, 400), NULL);
};
}
class CResApp: public CWinApp
{
public:
BOOL InitInstance()
{
m_pMainWnd = new CResFrame;
m_pMainWnd->ShowWindow(SW_SHOW);
m_pMainWnd->UpdateWindow();
}
return TRUE;
};
CResApp theApp;
2.
96
Test the application:
© FunctionX, Inc.
Visual C++ and MFC Fundamentals
3.
Chapter 3: Windows Resources
After viewing the window, close it and return to MSVC.
3.9.3 Frame Loading
So far, in order to create a window, we earned to use the CFrameWnd::Create()
l
method. Because that method does not recognize resources, we resolved to use the
AfxRegisterWndClass() function to register the necessary resources before calling the
CFrameWnd::Create() method. The MFC library provides another, simpler, technique
to create a window. This is done using the CFrameWnd::LoadFrame() method.
To create a window with one simple call, first create the necessary resources, namely an
accelerator table, a menu, an icon, a string table (and possible a toolbar). The only rule to
follow is that all of these resources must have the same name. As a habit, the common
name used for resources is IDR_MAINFRAME.
The syntax of the LoadFrame() method is:
BOOL LoadFrame(UINT nIDResource,
DWORD dwDefaultStyle = WS_OVERLAPPEDWINDOW | FWS_ADDTOTITLE,
CWnd* pParentWnd = NULL,
CCreateContext* pContext = NULL );
The only required argument to the LoadFrame() method is the identifier shared by the
resources. Like the Create() method, you can use LoadFrame() to specify the style of
the window. Its characteristics are specified as the dwDefaultStyle argument. If this
window has a parent, you can specify it using the pParentWnd argument.
Practical Learning: Loading a Frame
1.
Create a new project named Frame Loader and stored in C:\Programs \ MSVC
Exercises
Make sure you create it as a Windows Application with an Empty Project
2.
Access the application's settings or properties and specify that you want to use MFC
As A Shared DLL
© FunctionX, Inc.
97
Chapter 3: Windows Resources
Visual C++ and MFC Fundamentals
3.
4.
Change the ID of the menu from IDR_MENU1 to IDR_MAINFRAME and save the
resource as FrmLoad.rc
If using MSVC 6, add the .rc file to the project (Project -> Add to Project -> File,
Form Loader.rc)
5.
Create a new Icon identified as IDR_MAINFRAME and design it as follows:
6.
Create a new accelerator table identified as IDR_MAINFRAME as follows:
7.
Create a String Table and add a string identified as IDR_MAINFRAME with a
Caption as Combined Resources
8.
Create a new C++ source file and name it Main
9.
98
Add a new menu resource as follows:
In the Main.cpp file, create the application as follows:
© FunctionX, Inc.
Visual C++ and MFC Fundamentals
Chapter 3: Windows Resources
#include <afxwin.h>
#include "resource.h"
class CMainFrame : public CFrameWnd
{
public:
CMainFrame ()
{
LoadFrame(IDR_MAINFRAME);
}
};
class CMainApp: public CWinApp
{
public:
BOOL InitInstance()
{
m_pMainWnd = new CMainFrame ;
m_pMainWnd->ShowWindow(SW_SHOW);
m_pMainWnd->UpdateWindow();
return TRUE;
};
}
CMainApp theApp;
10. Test the application.
© FunctionX, Inc.
99
Chapter 5: The Document/View Architecture
100
Visual C++ and MFC Fundamentals
© FunctionX, Inc.
Visual C++ and MFC Fundamentals
Chapter 5: The Document/View Architecture
Chapter 4:
Messages and Events
?
Introduction to Messages
?
Windows Messages
? Command Messages
? Keyboard Messages
? Mouse Messages
© FunctionX, Inc.
101