Beginning SQL Server 2008 for Developers From Novice to Professional phần 7 pot
Bạn đang xem bản rút gọn của tài liệu. Xem và tải ngay bản đầy đủ của tài liệu tại đây (1.54 MB, 45 trang )
CHAPTER 7 ■ DATABASE BACKUPS, RECOVERY, AND MAINTENANCE
245
Figure 7-57. Reporting and logging
Figure 7-58. No operators
6. From Object Explorer, find the SQL Server Agent node, probably at the bottom of the list. Expand the node, and
find an item called Operators. Right-click, and select New Operator, as you can see in Figure 7-59.
Figure 7-59. Selecting to create a new operator
Dewson_958-7C07.fm Page 245 Tuesday, July 1, 2008 9:33 AM
246
CHAPTER 7
■ DATABASE BACKUPS, RECOVERY, AND MAINTENANCE
7. This brings up a New Operator dialog screen. As you can see in Figure 7-60, not only can you send an e-mail, but
you can also do a network send message, providing that this is enabled on your network, and a pager ping. Enter
the details as shown in Figure 7-60. This operator is used to send out an e-mail from our maintenance plan to my
e-mail address. Once you have entered your own e-mail address, click OK.
Figure 7-60. A new operator screen
8. Return to the Reporting and Logging screen. Now when you select the report to send to an e-mail, all will be well,
and the first operator (if you defined any more) will be selected. When you see a screen similar to Figure 7-61,
click OK. Close the maintenance plan and save the changes.
9. You can now execute your maintenance plan. You should receive an e-mail detailing either a success or a failure
of the job.
Dewson_958-7C07.fm Page 246 Tuesday, July 1, 2008 9:33 AM
CHAPTER 7 ■ DATABASE BACKUPS, RECOVERY, AND MAINTENANCE
247
Figure 7-61. Setting up the reporting to send an e-mail
Summary
You have seen a great deal in this chapter that is crucial to ensuring that your database is always
secure if there are any unforeseen problems. As a manager drummed into me, the unexpected will
always happen, but you must always be able to recover from it, no matter what. Therefore, regular
backups that are known to work and even the occasional “disaster recovery test” should be done to
ensure that you can restore when something unexpected happens. No matter what your managing
director says, it is the data of a company that is its most important asset, not the people. Without the
data, a company cannot function. If you cannot ensure that the data will be there, then the company
will be in a very dangerous position.
As part of this maintenance plan, it is also necessary to be notified of problems so that you’re
aware of them and can deal with them quickly and efficiently. A database mail account is perfect for
this, as it can notify you of problems in a process out of SQL Server.
Dewson_958-7C07.fm Page 247 Tuesday, July 1, 2008 9:33 AM
Dewson_958-7C07.fm Page 248 Tuesday, July 1, 2008 9:33 AM
249
■ ■ ■
CHAPTER 8
Working with the Data
We have now built our tables, set up the relationships, and backed up our solution, so we are ready to
start inserting our data. The many tables within the database cover a number of different types of
data that can be stored, ranging from characters and numbers to images and XML. This chapter will
show you how to insert data into columns defined with all of these data types.
Not all the tables will be populated with data at this point. We will insert data in other tables later
on in the book when different functionality of SQL Server is being demonstrated. Although data is
being inserted, the database is still at the stage of being set up, as we are inserting static information
at this point in the examples we are building together. To clarify, static data is data that will not change
once it has been set up, although there may be further additions to this data at periodic intervals such
as when a new share is created.
Not everyone who is allowed to access our database may, or should, be allowed to insert data
directly into all of the tables. Therefore, you need to know how to set up the security to grant permis-
sion to specific user logins for inserting the data. The only people who really ought to be adding data
directly to tables rather than using controlled methods such as stored procedures in production, for
example, are special accounts like dbo accounts. In development, any developer should be able to
insert data, but any login who would be testing out the application should not have that authority.
You will see the reasons for this when we look at the security of adding data later in this chapter, and
you will learn about alternative and more secure methods when we look at stored procedures and views.
Once we have set up users correctly, it is time to demonstrate inserting data into SQL Server. It
is possible to insert data using SQL commands through Query Editor or through SQL Server Manage-
ment Studio. Although both of these tools will have the same final effect on the database, each works
in its own unique way.
When inserting data, you don’t have to insert data into every column necessarily. We take a look
at when it is mandatory and when it is not. There are many different ways to avoid inserting data into
every column. This chapter will demonstrate the various different methods you can use to avoid having
to use NULL values and default values. By using these methods, you are reducing the amount of infor-
mation it is necessary to include with a record insertion. This method of inserting data uses special
commands within SQL Server called constraints. You will see how to build a column constraint
through T-SQL in Query Editor as well as in SQL Server Management Studio.
The T-SQL INSERT Command Syntax
Before it is possible to insert data using T-SQL code, you need to be familiar with the INSERT command
and its structure.
The INSERT command is very simple and straightforward in its most minimal form, which is all
that is required to insert a record.
Dewson_958-7.book Page 249 Monday, June 30, 2008 3:01 PM
250
CHAPTER 8
■ WORKING WITH THE DATA
INSERT [INTO]
{table_name|view_name}
[{(column_name,column_name, )}]
{VALUES (expression, expression, )}
Obviously, we are required to start the command with the type of action we are trying to perform—
for example, insert data. The next part of the command, INTO, is optional. It serves no purpose, but
you will find some do use it to ensure their command is more readable. The next part of the state-
ment deals with naming the table or the view that the insertion has to place the data into. If the name
of the table or view is the same as that of a reserved word or contains spaces, we have to surround
that name with square brackets or double quotation marks, although as mentioned earlier in the
book, it is best to try to avoid names with spaces. However, if you do need to, it is better to use square
brackets, because there will be times you wish to set a value such as Acme’s Rockets to a column data,
which can be added easily by surrounding it by double quotation marks, as covered in the discussion
of SET QUOTED_IDENTIFIER OFF earlier in the book.
I cannot stress enough that really, there is nothing to be gained by using reserved words for
table, views, or column names. Deciding on easy-to-use and unambiguous object names is part of a
good design.
Column names are optional, but it is best practice to list them to help to have reliable code, as
this ensures that data is only inserted into the columns into which you want it to be inserted. Therefore,
it will be necessary to place the column names in a comma-delimited list. The list of column names
must be surrounded by parentheses: (). The only time that column names are not required is when
the INSERT statement is inserting data into every column that is within the table in the same order as
the column names are laid out in the table. However, this is a potentially dangerous scenario. If you
build an INSERT command which you then save and use later, you expect the columns to be in a specific
order because that is the way they have always been. If someone then comes along and adds a new
column, or perhaps alters the order, your query or stored procedure will either not work or give erro-
neous results, as values will be added to the wrong columns. Therefore, I recommend that you
always name every column in anything but a query, which is built, run once, and thrown away.
The VALUES keyword, which precedes the actual values to be entered, is mandatory. SQL Server
needs to know that the following list is a list of values, not a list of columns. Therefore, you have to
use the VALUES keyword, especially if you omit the list of columns as explained previously.
You will have a comma-separated list surrounded by parentheses covering the values of data to
insert. There has to be a column name for every value to be entered. To clarify, if there are ten
columns listed for data to be entered, then there must be ten values to enter.
Finally, it is possible to insert multiple rows of data from the one INSERT statement. You can do
this by surrounding each row you want to add with its own separate parentheses: (). You will see this
in action later in the chapter. As with a single-row addition, it is necessary to have the same number
of columns either as the table you are inserting into, if you are not defining the columns in the INSERT
statement, or as the INSERT statement if you are defining the list. Now that the INSERT command is
clear, it’s time to move on and use it.
INSERT SQL Command
The first method of inserting data is to use the INSERT SQL command as described previously. This
example will insert one record into the ShareDetails.Shares table using Query Editor. When inserting
the data, the record will be inserted immediately without any opportunity to roll back changes. This
command does not use any transaction processing to allow any changes to take place. You will also
see with this example how Query Editor can aid you as a developer in building the SQL command for
inserting a record. Let’s dive straight in and create the record.
Dewson_958-7.book Page 250 Monday, June 30, 2008 3:01 PM
CHAPTER 8 ■ WORKING WITH THE DATA
251
Try It Out: Query Editor Scripting
1. Ensure that you have a Query Editor window open, connected to our ApressFinancial database, and that you
are logged in with an account that has insert permissions on the ShareDetails.Shares table (this will be any
member of the administrator’s or database owner’s role).
2. Right-click against the ShareDetails.Shares table, select Script Table As ➤ INSERT To ➤ New Query
Editor Window.
3. This will bring up the following code. SQL Server covers itself concerning the use of reserved words, spaces in
names, and so on, by surrounding every object name with square brackets. It also fully qualifies the table name
with the database name and schema owner—in this case, ShareDetails. Moving to the values, you can see
the column name repeated so that when altering the values, if the table has a large number of columns, you
know which column you are working with. The final part in the jigsaw is an indication to the data type and length
to aid you as well.
INSERT INTO [ApressFinancial].[ShareDetails].[Shares]
([ShareDesc]
,[ShareTickerId]
,[CurrentPrice])
VALUES
(<ShareDesc, nvarchar(50),>
,<ShareTickerId, nvarchar(50),>
,<CurrentPrice, numeric(18,5),>)
4. We need to place a modification at the top of this code, just to ensure that Query Editor has a setting to allow
double quotes to be used to surround strings. This was covered in Chapter 5 when discussing database options.
To cover yourself, though, you can always place the following code at the start of queries where quotation marks
will be used. There is one hidden downfall that will be covered at the end. Notice as well that a GO command is
included at the end of the SET command. This is because we want this command to take place in its own batch.
Some commands need their own batch, while others don’t. Some that do need their own batch are transaction-
based commands, as you will see later in the book.
SET QUOTED_IDENTIFIER OFF
GO
5. By altering the code within the Query Editor pane, you will see that the next section of code actually inserts the data
into the ShareDetails.Shares table. Notice that no GO statement is included at the end of this code. It is not
necessary because there is only one INSERT and no other commands that need to form part of this same batch.
SET QUOTED_IDENTIFIER OFF
GO
INSERT INTO [ApressFinancial].[ShareDetails].[Shares]
([ShareDesc]
,[ShareTickerId]
,[CurrentPrice])
VALUES
("ACME'S HOMEBAKE COOKIES INC",
'AHCI',
2.34125)
6. Now that all the information has been entered into the Query Editor pane, it is time to execute the code. Press F5
or Ctrl+E, or click the execute button on the toolbar. You should then see the following result, which indicates that
there has been one row of data inserted into the table:
Dewson_958-7.book Page 251 Monday, June 30, 2008 3:01 PM
252
CHAPTER 8
■ WORKING WITH THE DATA
(1 row(s) affected)
After executing the code, the first record of information is placed into the database in the ShareDetails.Shares table.
It is simple and straightforward. All the columns have been listed, and a value has been inserted. Because the name had
a single quotation mark within it, it is simpler to surround the name with double quotation marks. However, to make sure
that this string was not seen as an identifier, we have to switch that option off.
SQL Server Management Studio has the ability to create template scripts for several T-SQL commands. Templates, which
you saw earlier in the book, hold parameter placeholders that require modification to build up the whole command. Template
scripts differ from actual templates, as the information created within Query Editor for these templates is for one command
only. Therefore, what you are actually seeing is the template for a one-line script.
When using the scripting options within Query Editor, it is possible to build the script as you have just seen for inserting a
record into the ShareDetails.Shares table, and save the T-SQL within a new Query Editor pane, to a file, or even to a
clipboard. This would then allow the data to be reinserted instantaneously should the table be deleted. To an extent, scripting to
files or a clipboard is not as useful as scripting to a Query Editor pane. By scripting to files or a clipboard, you would need
to move back into these files to make the necessary changes for data insertion. As you saw, when the script is placed in
the Query Editor pane, the table and the columns are listed, but obviously the values need to be altered. This would have
to be completed in a file or a clipboard by reopening these contents and making modifications after the event.
The scripting template does build the whole INSERT command and lists all the columns as well as—in the VALUES section of
the command—the name of the column and its data type definition. From there, it is easier to know what value is expected
within the INSERT command line.
The example mentions that using SET QUOTED_IDENTIFIER OFF does have one hidden downfall: in many cases, when
using T-SQL commands, it is possible to surround reserved words with double quotation marks, rather than square brackets;
however, with the QUOTED_IDENTIFIER set to OFF, you will only be able to surround reserved words with square brackets. If
you had QUOTED_IDENTIFIER set to ON, then you could not have put ACME'S in the name; the code would have to have
been written with two single quotation marks. Therefore, the code would have had to look like the following:
INSERT INTO [ApressFinancial].[ShareDetails].[Shares]
([ShareDesc]
,[ShareTickerId]
,[CurrentPrice])
VALUES
('ACME''S HOMEBAKE COOKIES INC',
'AHCI',
2.34125)
Now that you know how to construct an INSERT statement, it is time to look at how you need not define all the columns
within a table.
It is not always necessary to define columns with a value when inserting rows of data. This next
section looks at two of these methods: using default values and allowing a NULL value. As you have
just seen in our first examples, we specified every column in the table within the INSERT statement.
You are now probably wondering whether you have to specify every column every time a record is
inserted into a table. The answer is no. However, there are a few areas to be aware of.
Default Values
The first method for avoiding having to enter a value is to set a column or a set of columns with a
default value. We set up the CustomerDetails.Customers table to have a default value when creating
Dewson_958-7.book Page 252 Monday, June 30, 2008 3:01 PM
CHAPTER 8 ■ WORKING WITH THE DATA
253
the tables in Chapter 5. Default values are used when a large number of INSERTs for a column would
have the same value entered each time. Why have the overhead of passing this information, which
would be the column name plus the value, through to SQL Server, when SQL Server can perform the
task quickly and simply for you? Network traffic would be reduced and accuracy ensured as the column
information would be completed directly by SQL Server. Do note, though, that a default value is not
a mandatory value that will always be stored in a column. It is just a value that you think is the best
value to use in the event that no other value is supplied.
Although it has been indicated that default values are best for a large number of INSERTs, it can
also be argued that this need not be the case. Some people feel that all that is required is a significant
number of rows to be affected from a default value setting for the use of default values to be an
advantage. It does come down to personal preference as to when you think setting a default value
will be of benefit. However, if there are times when you wish a column to have an initial value when
a row is inserted with a specific value, then it is best to use a default value.
In the next section’s example, where we’ll build up our next set of INSERT statements, I will
demonstrate how a default value will populate specific columns. When creating the CustomerDetails.
Customers table, we created a column that is set up to be populated with a default value: the DateAdded
column. In this column, we call a SQL Server reserved function, GETDATE(). This function gets the
date and time from the operating system and returns it to SQL Server. By having this within a column
default value, it is then inserted into a record when a row is added.
Using NULL Values
The next method for avoiding having to fill in data for every column is to allow NULL values in the
columns. We did this for some columns when defining the tables. Ensuring that each column’s Allow
Nulls option is checked can ensure this is true for all our columns. If you take a look at Figure 8-1,
you’ll see that one of the columns in the ShareDetails.Shares table, ShareTickerId, does allow a
NULL value to be entered into the column.
Figure 8-1. NULLs selected on a column
Therefore, the previous example could have placed data only in the ShareDesc and CurrentPrice
fields if we’d wanted, as ShareId is an IDENTITY column and is auto-filled. If the ShareDetails.Shares
record had only been inserted with those two columns, the command would have looked like the
following T-SQL:
INSERT INTO [ApressFinancial].[ShareDetails].[Shares]
([ShareDesc]
,[CurrentPrice])
VALUES
("ACME'S HOMEBAKE COOKIES INC",
2.34125)
Dewson_958-7.book Page 253 Monday, June 30, 2008 3:01 PM
254
CHAPTER 8
■ WORKING WITH THE DATA
Figure 8-2 shows what the data would have looked like had we used the preceding T-SQL instead of
the code in the previous section.
Figure 8-2. Insert with NULL
To see the same result as in Figure 8-2, you would view this table in SQL Server Management
Studio. This is covered shortly, as unfortunately we are in the chicken-and-egg scenario of showing
an area before it has been discussed. As you can see, the columns that had no data entered have a
setting of NULL. A NULL setting is a special setting for a column. The value of NULL requires special
handling within SQL Server or applications that will be viewing this data. What this value actually
means is that the information within the column is unknown; it is not a numeric or an alphanumeric
value. Therefore, because you don’t know if it is numeric or alphanumeric, you cannot compare the
value of a column that has a setting of NULL to the value of any other column, and this includes
another NULL column.
■Note One major rule involving NULL values: a primary key cannot contain any NULL values.
Try It Out: NULL Values and SQL Server Management Studio Compared to T-SQL
1. Ensure that SQL Server Management Studio is running and that you are logged in with an account that allows the
insertion of records. Any of our users can do this.
2. Expand the ApressFinancial node in Object Explorer so you can see the CustomerDetails.Customers
table. Right-click this table and select Open Table.
3. In the main pane on the right, you should now see a grid similar to Figure 8-3. This grid would usually show all
the rows of data that are within the table, but as this table contains no data, the grid is empty and ready for the
first record to be entered. Notice that a star appears on the far left-hand side. It will change to an arrow shortly.
This is the record marker and denotes which record the grid is actually pointing to and working with for insertion.
The arrow denotes which record you are viewing, and when the marker changes to a pencil, it denotes that you
are writing data in that row, ready for updating the table—perhaps not so relevant in this instance, but very
useful when several records are displayed.
Figure 8-3. No data held within the table
4. It is a simple process to enter the information into the necessary columns as required. However, if you don’t enter
the data into the correct columns, or leave a column empty when in fact it should have data, you will receive an
error message. The first column, CustomerId, is protected, as this is an IDENTITY column, but if you enter Mr
into the CustomerTitleId column, then you will see something similar to the message shown in Figure 8-4
when moving to another cell. This message is informing you that CustomerTitleId is expecting an integer
data type and that what was entered was not of that type.
Dewson_958-7.book Page 254 Monday, June 30, 2008 3:01 PM
CHAPTER 8 ■ WORKING WITH THE DATA
255
Figure 8-4. Invalid data type
5. Now press the down arrow, after altering CustomerTitleId to the correct data type, to indicate that you have
finished creating this customer and wish to create the next. This of course means that some columns that have
to be populated aren’t, and SQL Server tells you so, as you see in Figure 8-5. I wanted to create a row that was
full of NULL values, but I can’t. The error message indicates that CustomerFirstName has not been set up to
allow a NULL value, and we need to put some data in there.
Figure 8-5. Trying to insert a row with NULL when NULLs are not allowed
6. Clicking OK allows you back into the grid where the whole row can be populated with the correct information.
Notice that we can miss out placing any data in the CustomerOtherInitials column. After populating our
grid, click the down arrow, and our grid should resemble Figure 8-6. The thing to notice is that although this is
the first record entered, the CustomerId is set to 2. Whether insertion of a record is successful or not, an identity
value is generated. Therefore, CustomerId 1 was generated when we received the second error as we were
trying to move on to a new row. It is at this point that SQL Server tried to complete the insertion. It does not attempt
an insertion when moving between cells, so therefore, no identity number will be created. This can and will cause
gaps within your numbering system. You can see how valuable using defaults as initial values for columns can
be. Where the real benefit of using default values comes is in ensuring that specific columns are populated with
the correct default values. As soon as we move off from the new row, the default values are inserted and ready
to be modified. There is now a record of when the record was added, ideal for auditing. After we look at inserting
a row with T-SQL, we will see what we might be able to do about this.
Figure 8-6. The populated grid
Dewson_958-7.book Page 255 Monday, June 30, 2008 3:01 PM
256
CHAPTER 8
■ WORKING WITH THE DATA
■Note By having an IDENTITY column, every time a record is entered or an attempt is made to enter a record
and all the data entered is of valid data types—whether this is through SQL Server Management Studio or an
INSERT statement—the column value within the table will be incremented by the Identity Increment amount.
7. Now open up a Query Editor window and enter the following code. This code will replicate the first part of this
example in which we entered the wrong data type.
USE ApressFinancial
GO
INSERT INTO CustomerDetails.Customers (CustomerTitleId) VALUES ('Mr')
8. Now execute this by pressing Ctrl+E or F5 or clicking the execute button on the toolbar. This code will generate
an error because, once again, this is the wrong data type.
Msg 245, Level 16, State 1, Line 1
Conversion failed when converting the varchar value 'Mr' to data type int.
9. Change the code to replicate our second attempt at entering a row where the data type for the title is now correct
but we are still missing other values.
USE ApressFinancial
GO
INSERT INTO CustomerDetails.Customers (CustomerTitleId) VALUES (1)
10. Now execute this by pressing Ctrl+E or F5 or clicking the execute button on the toolbar. This code will generate
a different error, informing us this time that we didn’t allow a NULL into the CustomerFirstName column, and
therefore we have to supply a value.
Msg 515, Level 16, State 2, Line 1
Cannot insert the value NULL into column 'CustomerFirstName', table
'ApressFinancial.CustomerDetails.Customers'; column does not allow nulls.
INSERT fails.
The statement has been terminated.
11. This final example will work successfully. However, note that the CustomerLastName is before that of the
CustomerFirstName column. This demonstrates that it is not necessary to name the columns within the insertion in
the same order as they are defined within the table. It is possible to place the columns in any order you desire.
INSERT INTO CustomerDetails.Customers
(CustomerTitleId,CustomerLastName,CustomerFirstName,
CustomerOtherInitials,AddressId,AccountNumber,AccountType,
ClearedBalance,UnclearedBalance)
VALUES (3,'Mason','Jack',NULL,145,53431993,1,437.97,-10.56)
12. This time when you execute the code, you should see the following results, indicating the record has been
inserted successfully:
(1 row(s) affected)
Dewson_958-7.book Page 256 Monday, June 30, 2008 3:01 PM
CHAPTER 8 ■ WORKING WITH THE DATA
257
13. Now let’s go back and view the data to see what has been entered. Find the CustomerDetails.Customers
table in Object Explorer again. Right-click the table and select Open Table. The table now has two rows with two
gaps in what we want our ideal ascending sequence to be, as you see in Figure 8-7.
Figure 8-7. Second customer inserted
That is all there is to it. It’s just as simple as using SQL Server Management Studio, but you did get more informative error
messages. We now have a slight problem in that already there are two gaps in the table. This can be remedied easily within
Query Editor, which we’ll do in the next section.
DBCC CHECKIDENT
The DBCC commands can be used for many different operations, such as working with IDENTITY columns.
If you find that when testing out IDENTITY columns, you receive a number of errors, and the identity
number has jumped up farther than you wished, it is possible to reset the seed of the IDENTITY column so
that Query Editor starts again from a known point. The syntax for this command is very simple:
DBCC CHECKIDENT ('table_name'[,{NORESEED |{RESEED[,new_reseed_value]}}])
The following elaborates on the three areas of the syntax that may need explanation:
• The name of the table that you wish to reset the identity value for is placed in single quotation
marks.
• You can then use NORESEED to return back what SQL Server believes the current identity value
should be—in other words, what the current maximum identity value is within the IDENTITY
column.
• The final option is the one we are interested in. You can reseed a table automatically by
simply specifying the RESEED option with no value. This will look at the table defined and will
reset the value to the current maximum value within the table. Or optionally, you can set the
column of the table to a specific value by separating the value and the option RESEED by a comma.
If you use RESEED and there are currently no records in the table, but there had been in the past,
then the value will still be set to the last value entered, so take care.
Resetting the seed for an IDENTITY column, though, does have a danger, which you need to be
aware of. If you reset the point to start inserting values for the IDENTITY column back past the greatest
number on the given table, you will find that there is the potential of an error being produced. When
a value that already exists is generated from an INSERT after resetting the IDENTITY column value, then
you will receive an error message informing you that the value already exists. To give an example, you
have a table with the values 1, 2, 5, 6, 7, and 8, and you reset the IDENTITY value back to 2. You insert
the next record, which will correctly get the value 3, and the insertion will work. This will still work
the same with the next insertion, which will receive the value 4. However, come to the next record,
and there will be an attempt to insert the value 5, but that value already exists; therefore, an error will
be produced. However, if you had reset the value to 8—the last value successfully entered—then
everything would have been OK.
As we do not have the value 1 for the first row in the CustomerDetails.Customers table, it would
be nice to correct this. It also gives a good excuse to demonstrate CHECKIDENT in action. The code that
Dewson_958-7.book Page 257 Monday, June 30, 2008 3:01 PM
258
CHAPTER 8
■ WORKING WITH THE DATA
follows will remove the erroneous record entry and reset the seed of the IDENTITY column back to 0,
to a value indicating that no records have been entered. We will then reenter the customer informa-
tion via T-SQL. Enter the following code, place the code into Query Editor, and execute it. The first
line removes the record from CustomerDetails.Customers, and the second line resets the identity.
Don’t worry too much about the record deletion part, as deleting records is covered in detail later in
the chapter in the “Deleting Data” section.
DELETE FROM CustomerDetails.Customers
DBCC CHECKIDENT('CustomerDetails.Customers',RESEED,0)
INSERT INTO CustomerDetails.Customers
(CustomerTitleId,CustomerFirstName,CustomerOtherInitials,
CustomerLastName,AddressId,AccountNumber,AccountType,
ClearedBalance,UnclearedBalance)
VALUES (1,'Robin',NULL,'Dewson',1333, 18176111,1,200.00,2.00)
INSERT INTO CustomerDetails.Customers
(CustomerTitleId,CustomerLastName,CustomerFirstName,
CustomerOtherInitials,AddressId,AccountNumber,AccountType,
ClearedBalance,UnclearedBalance)
VALUES (3,'Mason','Jack',NULL,145,53431993,1,437.97,-10.56)
When the code is run, you should see the following information output to the Query Results pane:
(2 row(s) affected)
Checking identity information: current identity value '5', current column value '0'.
DBCC execution completed. If DBCC printed error messages, contact your system
administrator.
(1 row(s) affected)
(1 row(s) affected)
Column Constraints
A constraint is essentially a check that SQL Server places on a column to ensure that the data to be
entered in the column meets specific conditions. This will keep out data that is erroneous, and therefore
avoid data inconsistencies. Constraints are used to keep database integrity by ensuring that a column
only receives data within certain parameters.
We have already built a constraint on the CustomerDetails.Customers table for the default value
for the column DateAdded. If you go to Object Explorer, right-click, select Script Table As ➤ Create To,
and put the output in a new query window, you will see the following line from that output. So a
constraint is used for setting a default value.
[DateAdded] [datetime] NULL CONSTRAINT
[DF_Customers_DateAdded] DEFAULT (getdate()),
Constraints are used to not only insert default values, but also validate data as well as primary
keys. However, when using constraints within SQL Server, you do have to look at the whole picture,
which is the user graphical system with the SQL Server database in the background. If you are using
a constraint for data validation, some people will argue that perhaps it is better to check the values
inserted within the user front-end application rather than in SQL Server. This has some merit, but
what also has to be kept in mind is that you may have several points of entry to your database. This
could be from the user application, a web-based solution, or other applications if you are building a
central database. Many people will say that all validation, no matter what the overall picture is, should
Dewson_958-7.book Page 258 Monday, June 30, 2008 3:01 PM
CHAPTER 8 ■ WORKING WITH THE DATA
259
always be placed in one central place, which is the SQL Server database. Then there is only one set of
code to alter if anything changes. It is a difficult choice and one that you need to look at carefully.
You have two ways to add a constraint to a table. You saw the first when creating a default value
as we built a table via SQL Server Management Studio in Chapter 5.
To build a constraint via code, you need to use the ALTER TABLE command, no matter what type
of constraint this is. The ALTER TABLE command can cover many different alterations to a table, but
in this instance, the example just concentrates on adding a constraint. This makes the ALTER TABLE
statement easy, as the only real meat to the clause comes with the ADD CONSTRAINT syntax. The next
example will work with the CustomerDetails.CustomerProducts table, and you will see three different
types of constraints added, all of which will affect insertion of records. It is worth reiterating the
adding of a default value constraint again, as this will differ from the DateAdded column on the
CustomerDetails.Customers table. Once the constraints have been added, you will see them all in
action, and how errors are generated from erroneous data input.
Try It Out: Altering a Table for a Default Value in Query Editor
1. Ensure that Query Editor is running. Although all the examples deal with the CustomerDetails.
CustomerProducts table, each constraint being added to the table will be created one at a time, allowing a
discussion for each point to take place. In the Query Editor pane, enter the following code to add a primary key
to the CustomerDetails.CustomerProducts table. This will place the CustomerFinancialProductId
column within the key, which will be clustered.
USE ApressFinancial
GO
ALTER TABLE CustomerDetails.CustomerProducts
ADD CONSTRAINT PK_CustomerProducts
PRIMARY KEY CLUSTERED
(CustomerFinancialProductId) ON [PRIMARY]
GO
2. Next we add a CHECK constraint on the AmountToCollect column. The CustomerDetails.
CustomerProducts table is once again altered, and a new constraint called CK_CustProds_AmtCheck is
added. This constraint will ensure that for all records inserted into the CustomerDetails.CustomerProducts
table from this point on, the score must be greater than 0. Notice as well that the NOCHECK option is mentioned,
detailing that any records already inserted will not be checked for this constraint. If they have invalid data, which
they don’t, then the constraint would ignore them and still be added.
ALTER TABLE CustomerDetails.CustomerProducts
WITH NOCHECK
ADD CONSTRAINT CK_CustProds_AmtCheck
CHECK ((AmountToCollect > 0))
GO
3. Moving on to the third constraint to add to the CustomerDetails.CustomerProducts table, we have a
DEFAULT value constraint. In other words, this will insert a value of 0 to the Renewable column if no value is
entered specifically into this column. This signifies that the premium collected is a one-off collection.
ALTER TABLE CustomerDetails.CustomerProducts WITH NOCHECK
ADD CONSTRAINT DF_CustProd_Renewable
DEFAULT (0)
FOR Renewable
Dewson_958-7.book Page 259 Monday, June 30, 2008 3:01 PM
260
CHAPTER 8
■ WORKING WITH THE DATA
4. Execute the three batches of work by pressing F5 or Ctrl+E or clicking the execute button on the toolbar. You
should then see the following result:
The command(s) completed successfully.
5. There are two methods to check that the code has worked before adding in any data. Move to Object Explorer in
Query Editor. This isn’t refreshed automatically, so you do need to refresh it. You should then see the three new
constraints added—two under the Constraints node and one under the Keys node—as well as a display change
in the Columns node, as shown in Figure 8-8.
Figure 8-8. CustomerDetails.CustomerProducts table details
6. Another method is to move to SQL Server Management Studio, find the CustomerDetails.CustomerProducts
table, right-click it, and select Design. This brings us into the Table Designer, where we can navigate to the necessary
column to check out the default value—in this case, Renewable. Also notice the yellow key against the
CustomerFinancialProductId signifying that this is now a primary key, as shown in Figure 8-9.
Figure 8-9. Default value constraint on column Renewable
Dewson_958-7.book Page 260 Monday, June 30, 2008 3:01 PM
CHAPTER 8 ■ WORKING WITH THE DATA
261
7. Move to the Table Designer toolbar and click the Manage Check Constraints button, shown here:
8. This will display the Check Constraints dialog box, shown in Figure 8-10, where we will see the AmountToCollect
column constraint displayed. We can add a further constraint by clicking the Add button. Do so now.
Figure 8-10. Check Constraints dialog box
9. This will alter the Check Constraints dialog box to allow a new check constraint to be added, as you see in Figure 8-11.
This check will ensure that the LastCollection date is greater than the value entered in another column. Here
we want to ensure that the LastCollection date is equal to or after the LastCollected date. Recall that
LastCollection defines when we last took the payment, and LastCollected defines when the last payment
should be taken.
Figure 8-11. Adding a new constraint in the Check Constraints dialog box
Dewson_958-7.book Page 261 Monday, June 30, 2008 3:01 PM
262
CHAPTER 8
■ WORKING WITH THE DATA
10. The expression we want to add, which is the test the constraint is to perform, is not a value or a system function
like GETDATE(), but rather a test between two columns from a table, albeit the same table we are working with.
This is as simple as naming the columns and the test you wish to perform. Also, at the same time, change the
name of the constraint to something meaningful. Your check constraint should look something like what appears
in Figure 8-12. Afterward, click Close, which will add the constraint to the list, although it has not yet been added
to the table. It is not until the table is closed that this will happen, so do that now.
Figure 8-12. LastCollection constraint in the Check Constraints dialog box
11. Now it’s time to test the constraints to ensure that they work. First of all, we want to check the AmountToCollect
constraint. Enter the following code, which will fail, because the amount to collect is a negative amount:
INSERT INTO CustomerDetails.CustomerProducts
(CustomerId,FinancialProductId,AmountToCollect,Frequency,
LastCollected,LastCollection,Renewable)
VALUES (1,1,-100,0,'24 Aug 2005','24 Aug 2008',0)
12. When you execute the code in Query Editor, you will see the following result. Instantly, you can see that the constraint
check (CK_CustProds_AmtCheck) has cut in and the record has not been inserted.
Msg 547, Level 16, State 0, Line 1
The INSERT statement conflicted with the CHECK constraint
"CK_CustProds_AmtCheck". The conflict occurred in database
"ApressFinancial", table "CustomerDetails.CustomerProducts",
column 'AmountToCollect'.
The statement has been terminated.
13. We alter this now to have a positive amount, but change the LastCollection so that we break the CK_CustProd_
LastColl constraint. Enter the following code:
INSERT INTO CustomerDetails.CustomerProducts
(CustomerId,FinancialProductId,AmountToCollect,Frequency,
LastCollected,LastCollection)
VALUES (1,1,100,0,'24 Aug 2008','23 Aug 2008')
14. When the preceding code is executed, you will see the following error message:
Dewson_958-7.book Page 262 Monday, June 30, 2008 3:01 PM
CHAPTER 8 ■ WORKING WITH THE DATA
263
Msg 547, Level 16, State 0, Line 1
The INSERT statement conflicted with the CHECK constraint
"CK_CustProd_LastColl". The conflict occurred in database
"ApressFinancial", table "CustomerDetails.CustomerProducts".
The statement has been terminated.
Adding a constraint occurs through the ALTER TABLE statement as has just been demonstrated. However, the ADD
CONSTRAINT command is quite a flexible command and can achieve a number of different goals.
The preceding example uses ADD CONSTRAINT to add a primary key, which can be made up of one or more columns
(none of which can contain a NULL value), and also to insert a validity check and a set of default values. The only option
not covered in the example is the addition of a foreign key, but this is very similar to the addition of a primary key.
The first constraint added is the primary key, which we saw in Chapter 5. The second constraint definition builds a column
check to ensure that the data entered is valid.
ADD CONSTRAINT constraint_name CHECK (constraint_check_syntax)
The syntax for a CHECK constraint is a simple true or false test. When adding in a constraint for checking the data, the
information to be inserted is valid (true) or invalid (false) when the test is applied. As you will see, using mathematical oper-
ators to test a column against a single value or a range of values will determine whether the data can be inserted.
Notice in the example that the ADD CONSTRAINT command is preceded with a WITH NOCHECK option on the ALTER
TABLE statement. This informs SQL Server that any existing data in the table will not be validated when it adds the table
alteration with the constraint, and that only data modified or inserted after the addition of the constraint will be checked.
If you do wish the existing rows to be checked, then you would use the WITH CHECK option. The advantage of this is that
the existing data is validated against that constraint, and if the constraint was added to the table successfully, then you
know your data is valid. If any error was generated, then you know that there was erroneous data, and that you need to fix
that data before being able to add the constraint. This is just another method of ensuring that your data is valid.
Finally, for adding a default value, the ADD CONSTRAINT syntax is very simple.
ADD CONSTRAINT constraint_name
DEFAULT default_value
FOR column_to_receive_the_value
The only part of the preceding syntax that requires further explanation is the default_value area. default_value can
be a string, a numeric, NULL, or a system function (for example, GETDATE(), which would insert the current date and
time). So the default value does not have to be fixed; it can be dynamic.
Inserting Several Records at Once
It is now necessary to enter a few more customers so that a reasonable amount of data is contained
within the CustomerDetails.Customers table to work with later in the book. We need to do the same
with several other tables as well, such as TransactionDetails.TransactionTypes, CustomerDetails.
CustomerTransactions, and so on. This section will prove that no extra or specialized processing is
required when inserting several records. When working with data, there may be many times that
several records of data are inserted at the same time. This could be when initially populate a table or
when testing. In this sort of situation where you are repopulating a table, it is possible to save your
query to a text file, which can then be reopened in Query Editor and executed without having to
reenter the code. This is demonstrated at the end of the upcoming example.
Dewson_958-7.book Page 263 Monday, June 30, 2008 3:01 PM
264
CHAPTER 8
■ WORKING WITH THE DATA
This next example will demonstrate inserting several records. The work will be completed in
batches. There is no transaction processing surrounding these INSERTs, and therefore each insertion
will be treated as a single unit of work, which either completes or fails.
■Note A transaction allows a number of INSERTs or modifications to be treated as one unit, and if any insertion
fails within the transaction, all the units will be returned back to their original value, and no insertions will take place.
Transactions will be discussed in more detail in the upcoming “Transactions” section.
Try It Out: Insert Several Records At Once
1. Ensure that SQL Server Query Editor is up and running. In the Query Editor window, enter the following code.
In this example, several customers will be added through only one INSERT statement.
INSERT INTO CustomerDetails.Customers
(CustomerTitleId,CustomerFirstName,CustomerOtherInitials,
CustomerLastName,AddressId,AccountNumber,AccountType,
ClearedBalance,UnclearedBalance)
VALUES (3,'Bernie','I','McGee',314,65368765,1,6653.11,0.00),
(2,'Julie','A','Dewson',2134,81625422,1,53.32,-12.21),
(1,'Kirsty',NULL,'Hull',4312,96565334,1,1266.00,10.32)
2. Now just execute the code in the usual way. You will see the following output in the results pane. This indicates
that three rows of information have been inserted into the database, one at a time.
(3 row(s) affected)
Retrieving Data
This section of the chapter will demonstrate how to view the data that has been placed in the tables
so far. Many ways of achieving this are available, from using SQL Server Management Studio to using
T-SQL commands, and as you would expect, they will all be covered here.
The aim of retrieving data is to get the data back from SQL Server using the fastest retrieval
manner possible. We can retrieve data from one or more tables through joining tables together
within our query syntax; all of these methods will be demonstrated.
The simplest method of retrieving data is using SQL Server Management Studio, and we will
look at this method first. With this method, you don’t need to know any query syntax: it is all done
for you. However, this leaves you with a limited scope for further work.
You can alter the query built up within SQL Server Management Studio to cater to work that is
more complex, but you would then need to know the SELECT T-SQL syntax; again, this will be explained
and demonstrated. This can become very powerful very quickly, especially when it comes to selecting
specific rows to return.
Dewson_958-7.book Page 264 Monday, June 30, 2008 3:01 PM
CHAPTER 8 ■ WORKING WITH THE DATA
265
The results of the data can also be displayed and even stored in different media, like a file. It is
possible to store results from a query and send these to a set of users, if so desired.
Initially, the data returned will be in the arbitrary order stored within SQL Server. This is not
always suitable, so another aim of this chapter is to demonstrate how to return data in the order that
you desire for the results. Ordering the data is quite an important part of retrieving meaningful
results, and this alone can aid the understanding of query results from raw data.
Retrieving images is not as straightforward as retrieving normal rows of data, so I’ll cover this in
Chapter 12 along with other advanced T-SQL techniques.
Starting with the simplest of methods, let’s look at SQL Server Management Studio and how
easy it is for us to retrieve records. We have partially covered this earlier when inserting rows.
Using SQL Server Management Studio to
Retrieve Data
The first area that will be demonstrated is the simplest form of data retrieval, but it is also the least
effective. Retrieving data using SQL Server Management Studio is a very straightforward process,
with no knowledge of SQL required in the initial stages. Whether you want to return all rows, or even
when you want to return specific rows, using SQL Server Management Studio makes this whole task
very easy. This first example will demonstrate how flexible SQL Server Management Studio is in
retrieving all the data from the CustomerDetails.Customers table.
Try It Out: Retrieving Data Within SQL Server Management Studio
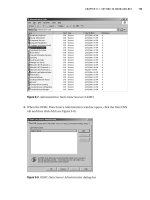
1. Ensure that SQL Server Management Studio is running. Navigate to the ApressFinancial database and click
the Tables node; this should list all the tables in the right-hand pane. Find the CustomerDetails.Customers table,
right-click it to bring up the pop-up menu, and select Select Top 1000 Rows. This instantly opens up a new Query Editor
window pane like the one shown in Figure 8-13, which shows all the rows that are in the CustomerDetails.
Customers table. But how did SQL Server get this data? Let’s find out (the secret may already be there,
depending on the options for SQL Server).
Figure 8-13. CustomerDetails.Customers table retrieving data
2. Above the results, you will see the SELECT T-SQL statement used to return the data. You can see what was
produced in Figure 8-14.
Dewson_958-7.book Page 265 Monday, June 30, 2008 3:01 PM
266
CHAPTER 8
■ WORKING WITH THE DATA
Figure 8-14. Output displayed via the SQL window
3. You can alter the number next to the top clause if you want to return a fewer or a greater number of rows, and
then reexecute the query.For this first time, alter this to 3, and you should see something similar to Figure 8-15.
This will return a maximum of three rows. If we entered a value of 100, we would only get five rows returned, as
that is the maximum number of rows in the table at this moment in time. You would use this perhaps when you
don’t know the number of records within a table, but you are only interested in a maximum number of 100 if
there are more. This would be when you want to look at just a small selection of content in columns within a table.
Figure 8-15. Three rows returned
So now that you know how to return data from SQL Server Management Studio, let’s look at using T-SQL in more detail as
well as the T-SQL statement you will probably use most often: SELECT.
The SELECT Statement
If we wish to retrieve data for viewing from SQL Server using T-SQL commands, then the SELECT
statement is the command we need to use. This is quite a powerful command, as it can retrieve data
in any order, from any number of columns, and from any table that we have the authority to retrieve
data from. It can also perform calculations on that data during data retrieval and even include data
from other tables! If the user does not have the authority to retrieve data from a table, then you will
receive an error message similar to that which you saw earlier in the chapter informing the user that
permission is denied. SELECT has a lot more power than even the functions mentioned so far, but for
the moment, let’s concentrate on the fundamentals.
Let’s take some time to inspect the simple syntax for a SELECT statement.
Dewson_958-7.book Page 266 Monday, June 30, 2008 3:01 PM
CHAPTER 8 ■ WORKING WITH THE DATA
267
SELECT [ ALL | DISTINCT ]
[ TOP expression [ PERCENT ] [ WITH TIES ] ]
{
*
| { table_name | view_name | alias_name }.*
| { column_name | [ ] expression | $IDENTITY | $ROWGUID }
[ [ AS ] column_alias ]
| column_alias = expression
} [ , n ]
FROM table_name | view_name alias_name
WHERE filter_criteria
ORDER BY ordering_criteria
The following list breaks down the SELECT syntax, explaining each option. More explanation will
be given throughout the chapter as well.
• SELECT: Required—this informs SQL Server that a SELECT instruction is being performed; in
other words, we just want to return a set of columns and rows to view.
• ALL | DISTINCT: Optional—we want to return either all of the rows or only distinct, or unique,
rows. Normally, you do not specify either of these options.
• TOP expression/PERCENT/WITH TIES: Optional—you can return the top number of rows, which, as
you remember, will be in an arbitary order unless you use an ORDER BY. You can also add the
word PERCENT to the end: this means that the top n percent of records will be returned. If
PERCENT is not specified, all the records will be returned (unless specific column names are
given). WITH TIES can only be used with an ORDER BY. If you specify you want to return TOP 10
rows, and the 11th row has the same value as the 10th row on those columns that have been
defined in the ORDER BY, then the 11th row will also be returned. It’s the same for subsequent
rows, until you get to the point that the values differ.
• *: Optional—by using the asterisk, you are instructing SQL Server to return all the columns
from all the tables included in the query. This is not an option that should be used on large
amounts of data or over a network. Especially if it is busy, you really should not do this against
production data. By using this, we are bringing back more information than is required. Wherever
possible, we should name the columns instead.
• table_name.* | view_name.* | alias_name.*: Optional—similar to *, but you are defining which
table, if the SELECT is working on more than one table. When working with more than one
table, this is known as a JOIN, and this option will be demonstrated in Chapter 11 when we
take a look at joins.
• column_name: Optional but recommended; not required if * is used—this option is where we
name the columns that we wish to return from a table. When naming the columns, it is always
a good idea to prefix the column names with their corresponding table names. This becomes
mandatory when we are using more than one table in our SELECT statement and instances
where there may be columns within different tables that share the same name.
• expression: Optional—we don’t have to return columns of rows within a SELECT. We can
return a value, a variable, or an expression.
• $IDENTITY: Optional—will return the value from the IDENTITY column.
• $ROWGUID: Optional—will return the value from the ROWGUID column.
•
AS: Optional—we can change the column header name when displaying the results by using
the AS option.
Dewson_958-7.book Page 267 Monday, June 30, 2008 3:01 PM
268
CHAPTER 8
■ WORKING WITH THE DATA
• FROM table_name | view_name: Required—we have to inform SQL Server where the information
is coming from.
• WHERE filter_clause: Optional—if we want to retrieve rows that meet specific criteria, we
need to have a WHERE clause specifying the criteria to use to return the data. The WHERE clause
tends to contain the name of a column on the left-hand side of a comparison operator, such
as =, <, >, and either another column within the same table, or another table, a variable, or a
static value. There are other options that the WHERE statement can contain, where more advanced
searching is required, but on the whole, these comparison operators will be the main constit-
uents of the clause.
• ORDER BY ordering_criteria: Optional—the data will be returned arbitrarily from the table if
no ORDER BY clause is specified. Ascending (ASC) or descending (DESC) is defined for each column,
not defined just once for all the columns within the ORDER BY. Sorting is completed once the
data has been retrieved from SQL Server but before any command such as TOP.
Keep in mind that when building a SELECT statement, you do not have to name all the columns.
In fact, you should only retrieve the columns that you do wish to see; this will reduce the amount of
information sent over the network. There is no need to return information that will not be used.
Naming the Columns
When building a SELECT statement, it is not necessary to name every column if you don’t want to see
every column. You should only return the columns that you need. It is very easy to slip into using *
to return every column, even when running one-time-only queries. Try to avoid this at all costs;
typing out every column name takes time, but when you start dealing with more-complex queries
and a larger number of rows, the few extra seconds are worth it.
Now that you know not to name every column unless required, and to avoid using *, what other
areas do you need to be aware of? First of all, it is not necessary to name columns in the same order
that they appear in the table—it is quite acceptable to name columns in any order that you wish.
There is no performance hit or gain from altering the order of the columns, but we may find that a
different order of the columns might be better for any future processing of the data.
When building a SELECT statement and including the columns, if the final output is to be sent to
a set of users, the column names within the database may not be acceptable. For example, if you are
sending the output to the users via a file, then they will see the raw result set. Or if you are using a tool
such as Crystal Reports to display data from a SELECT statement within a SQL Server stored procedure,
then naming the columns would help there as well. The column names are less user friendly, and
some column names will also be confusing for users; therefore, it would be ideal to be able to alter
the names of the column headings. Replacing the SQL Server column headings with the new alias
column headings desired, in either quotation marks or square bracket delimiters, is easily accom-
plished with the AS keyword. There is more on this in the next section.
Now that you know about naming the columns, let’s take a look at how the SQL command can
return data.
The First Searches
This example will revolve around the CustomerDetails.Customers table, making it possible to
demonstrate how all of the different areas mentioned previously can affect the results displayed.
Dewson_958-7.book Page 268 Monday, June 30, 2008 3:01 PM
CHAPTER 8 ■ WORKING WITH THE DATA
269
Try It Out: The First Set of Searches
1. Ensure that Query Editor is running and that you are within the ApressFinancial database. In the Query Editor
pane, enter the following SQL code:
Select * From CustomerDetails.Customers
2. Execute the code using Ctrl+E, F5, or the execute button on the toolbar. You should then see something like the
results shown in Figure 8-16.
Figure 8-16. Customers listing
3. This is a simple SELECT command returning all the columns and all the rows from the CustomerDetails.
Customers table, as you have just seen. Let’s now take it to the next stage where specific column names will be
defined in the query, which is a much cleaner solution. In this instance from the CustomerDetails.Customers
table, we would like to return a customer’s first name, last name, and the current account balances. This would
mean naming CustomerFirstName, CustomerLastName, and ClearedBalance as the column names in
the query. The code will read as follows:
SELECT CustomerFirstName,CustomerLastName,ClearedBalance
FROM CustomerDetails.Customers
4. Now execute this code, which will return the results shown in Figure 8-17. As you can see, not every column
is returned.
Figure 8-17. Specific columns returned
5. As you have seen from the examples so far, the column names, although well named from a design viewpoint,
are not exactly suitable if we had to give this to a set of users. Using the same query as before, a couple of minor
modifications are required to give the columns aliases. The first alias name is in quotes, as it contains a space.
Notice the last column also does not have AS specified because this keyword is optional.
SELECT CustomerFirstName As 'First Name',
CustomerLastName AS 'Surname',
ClearedBalance Balance
FROM CustomerDetails.Customers
Dewson_958-7.book Page 269 Monday, June 30, 2008 3:01 PM