adobe production premium for final cut studio editors 2009 phần 3 pps
Bạn đang xem bản rút gọn của tài liệu. Xem và tải ngay bản đầy đủ của tài liệu tại đây (2.49 MB, 30 trang )
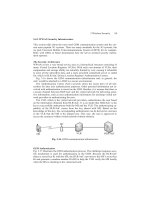
58 Chapter 3 ADOBE ONLOCATION: PREPRODUCTION PLANNING AND ON-SET MONITORING
Grabbing Still Images
One of the more helpful functions of OnLocation is that you
can quickly grab a freeze frame from a live camera or recorded
shot (see Fig. 3.23).
Reviewing Clips
Adding Comments to Shots
Another cool feature of OnLocation is the ability to add comments
linked to specific timecode in a shot. These special markers allow you
to annotate your clips either during production or later, as you review
your work. You can add comments during recording or playback.
To add a comment to a clip, double-click the clip to load it into
the Field Monitor and move the playhead to the position you
want to add the comment.
Press the Set or Edit Comment button (see Fig. 3.26).
This sets a comment marker in the timeline into which you can
enter a comment. When you are done typing, press Enter to save
your text.
To jump between markers, use the Go to Previous Marker or
Go to Next Marker buttons (see Fig. 3.27a and b); there are no
keyboard shortcuts to jump between markers.
Figure 3.26 To add a comment
to a clip, put the playhead where
you want the comment marker
to appear and press the Set
Comment button.
Figure 3.27 To jump between markers, use the Go to Previous Marker or Go to Next Marker buttons.
Chapter 3 ADOBE ONLOCATION: PREPRODUCTION PLANNING AND ON-SET MONITORING 59
Strengths and Weaknesses of OnLocation
I’m of two minds about OnLocation.
I really like its ability to plan and organize my shots prior to
production. The ability to think about and organize what I want
before the pressure of production begins is a big plus.
I also like its ability to directly monitor a camera during pro-
duction. As I mentioned earlier, checking my camera against a
scope allowed me to see that both camera monitors were wrong
and that I needed to make serious exposure adjustments. This
kept me from losing a day’s worth of shooting.
Those two features alone make OnLocation worth having in
my arsenal.
Its ability to add metadata to individual clips, capture directly
to my computer’s hard disk, and a highly customizable interface
all add up to a very attractive package.
On the downside, however, is that it only supports cameras
attached by FireWire. Since all cameras use a FireWire 400 con-
nection, this limits my camera to a 15-foot cable between camera
and computer, severely restricting its mobility, unless I invest in
FireWire repeaters, which can extend the distance of the camera
from the computer to hundreds of feet.
Since OnLocation only supports FireWire-connected cameras,
as we move to tapeless acquisition, especially for HD formats,
this reliance on FireWire becomes a significant limitation.
Finally, I wish that it had a built-in ability to convert native
.m2t HDV files into a much more useful .mov file.
Also, and this isn’t Adobe’s responsibility, Final Cut needs to
access all XMP metadata. Adobe is way ahead of Final Cut in how
it manipulates metadata. At this point, Final Cut stores metadata
solely in the project file, while Adobe makes it available between
applications and platforms. And, the latest release of Final Cut
Studio hasn’t addressed this problem.
Special Notes on Working with HDV and DVCPROHD
As we move into the world of HD, OnLocation is there to help.
But there are special considerations to keep in mind.
First, both HDV and DVCPROHD are video formats that can
record to tapeless media, such as hard disks and P2 cards, yet
OnLocation can only capture files that come in via FireWire.
When you capture DVCPROHD, you need a hard disk capable
of recording 15 MB/s. Most 7200 RPM FireWire 400 hard drives
can do this. The USB drives, generally, cannot. Be sure, also, that
you always save HD media to a second drive. The boot drive won’t
be fast enough to reliably capture your media.
Also, OnLocation does not support 24pN or 30pN frame rates
from Panasonic P2 cameras, because those frame rates are not
60 Chapter 3 ADOBE ONLOCATION: PREPRODUCTION PLANNING AND ON-SET MONITORING
transferred from the camera using FireWire. OnLocation only
supports FireWire transfer.
Adobe’s manual for OnLocation recommends always dedicating a
hard drive specifically for media, defragmenting regularly, and start-
ing each project with an empty hard drive. While I agree with dedi-
cating a hard drive for media, defragmenting does less good than it
used to, and always emptying your drive before a project is rarely
possible when you are editing multiple projects at the same time.
Instead of defragmenting, make a point of regularly running
Disk Utility (Utilities > Disk Utility) and verifying your hard
drives. In addition, once a month, run Alsoft’s Disk Warrior X to
optimize your hard drive directories, which will go a long way to
keeping your system running with peak efficiency.
Second, OnLocation captures media in the native format of
the camera. This means that HDV is captured using the MPEG-2
Transport stream format. (It has an extension of .m2t.) This is not
a format that Final Cut Pro can read directly, which means that
you can’t simply import HDV files from OnLocation into Final Cut
Pro. You need to convert them first.
There are a number of ways of converting .m2t files into
the .mov files that Final Cut needs. Probably the best is MPEG
Streamclip from Squared 5 Software (www.squared5.com). This
free utility converts a wide variety of video formats.
If small file size is most important, transcode (convert) your
files into an HDV format that matches the image size, frame
rate, and scanning of the original material.
If compositing quality, faster rendering, and faster output are
important to you, transcode them into ProRes 422 (normal quality).
Once the files are converted into QuickTime movies, import
them into Final Cut Pro and you are ready to go.
Keyboard Shortcuts
Here are some handy keyboard shortcuts for OnLocation.
Shortcut What it does
F2 Start recording
Esc Stop recording
Home Jump to beginning of clip
End Jump to end of clip
Command 1 Left arrow Jump to previous alert
Command 1 Right arrow Jump to next alert
Up arrow Jump to previous clip
Down arrow Jump to next clip
Command 1 5 Grab still image
61
Like Soundtrack Pro in Final Cut Studio, Soundbooth is a
powerful audio program. The latest version of Soundbooth allows
you to listen to audio, edit audio, repair poor audio, create musi-
cal scores, and perform multitrack mixes.
However, where it stands apart from Soundtrack Pro is in its
ability to import your video or audio and generate a transcript of
a clip’s dialog track, search on that text to jump to a specific place
in your media, and increase your ability to add more metadata to
your clips. This is one of the most fascinating new features in the
Adobe CS4 software suite.
Although not 100% accurate, the generated transcripts can
significantly help you organize how you plan to edit your mate-
rial (especially when editing a documentary), speed up finding a
specific statement in your clips, or help you review what you’ve
already shot.
For me, as a video editor, the two biggest benefits in upgrad-
ing to CS4 are its extensive support for metadata and its ability to
create text transcripts from our media files.
There are, of course, several other features in Soundbooth
besides the Speech-to-Text Transcribing that make it worth con-
sidering for your audio projects. I’ll talk more about them toward
the end of this chapter.
Selecting an Audio Format
Soundbooth supports a range of QuickTime video formats, as
well as a variety of audio formats – AIF, WAV, MP3, AAC, AC3, SDII
– which one should you use?
Final Cut Pro only works with uncompressed audio files: AIF,
WAV, and SDII. (By the way, AIFF and AIF are the same format
using two different filename extensions.)
Windows applications tend to prefer WAV files, while Macintosh
apps prefer AIFs. There is no difference in audio quality between
WAV and AIF files. The only difference is the information at the
4
SPEECH-TO-TEXT TRANSCRIPTS
IN CS4
62 Chapter 4 SPEECH-TO-TEXT TRANSCRIPTS IN CS4
beginning of the file, called the file header, which describes the
format the audio is stored in. The actual audio information is the
same in both.
To keep things simple and reliable, you should work with
sample rates of 44.1 or 48 kHz and always use AIF files. These
work perfectly for both Final Cut Studio and Soundbooth. The
AIF files support both mono and stereo files with no problems.
Creating a Text Transcript
A text transcript is a word-for-word conversion of what a
speaker says in an audio or video clip into text that can be
entered into a word processor or viewed on screen. Transcripts
can be made from audio-only files or video and audio files.
The Old Way
Before we look at how Soundbooth creates transcripts, let’s
look at how the process normally works. Let’s say you need a
word-for-word transcript where each paragraph is referenced to
the timecode of the clip.
You create a videotape, DVD, or QuickTime file of your •
video with burned-in timecode. This generally requires
that you add the burned-in timecode in either Final Cut
Pro – which requires rendering – or Compressor – which
requires extra compression time.
Important Note on
File Extensions
Because all the
applications in
Adobe Production
Premium work on both
Mac and Windows
systems, Adobe expects
all files to have a file
extension. If a file, such
as an AIF recorded using
Final Cut Pro’s voice-over
tool, doesn’t have an
extension, it won’t open in
Soundbooth. It should, but
it doesn’t. So, if a file won’t
open or preview, be sure
it has the appropriate file
extension.
Sample Rate and Audio Fidelity
The sample rate determines the audio fidelity of a media clip. Sample rates are defined by the number of readings, or
samples, of audio that are captured each second by the computer. The higher the sample rate, up to the limit of human
hearing, the closer the digital file comes to exactly reproducing the original sound of the file.
For instance, this table, from the Adobe Soundbooth manual, lists sample rates and their approximate analog
equivalents.
Samples per second Also called Quality level
11,025 11.025 kHz Poor AM radio
22,050 22.05 kHz Near FM radio
32,000 32 kHz Better than FM radio
44,100 44.1 kHz CD audio
48,000 48 kHz Standard DVD and videotape
The higher the sample rate, the greater the quality, but the larger the file size. Also, stereo files are double the size of
mono files.
Chapter 4 SPEECH-TO-TEXT TRANSCRIPTS IN CS4 63
You send this videotape, DVD, or QuickTime file to a •
person or company that specializes in transcription.
The tape is received and handed off to a transcriber who •
listens to your clip over and over while typing what they
hear into a word processor.
In some cases, the software the transcriber uses reads the •
timecode of the videotape or DVD and inserts it, automatically,
at the start of each paragraph. Otherwise, the transcriber will
insert the timecode manually at the start of each paragraph.
This word processing file is then proofed for accuracy by •
someone else and formatted according to company specs.
The start of each document includes the name of the
speaker and an identifier, indicating the source of the file.
Each paragraph starts with a timecode reference, so you
can easily find a quote in the source media.
The final, proofed, file is e-mailed back to you.•
You review the word processing file and use it to find the •
specific quotes you want to use in your project. As you can
see, this process has many built-in delays.
For example, a few years ago, I ran a company that was send-
ing hundreds of hours of audio files out for transcription each
month. It took a team of 20 editors and transcribers to keep up
with the workload, and turn-around time was 1 week to 10 days;
longer if the material was technical.
Even the best manual transcripts still need to be cleaned up to
get them as accurate as possible. In the case of my company, we
needed our transcripts to be as perfect as possible because we
sold the finished transcripts. I had a team of eight editors review-
ing each transcript before release. The whole process took about
three weeks to complete a transcript.
The New Way
However, for most editing purposes, you just need the tran-
script to be “close enough” that you can find the material
you need. You don’t need it to be perfect. In these situations,
Soundbooth can literally save you weeks of time.
When Soundbooth creates a transcript, the whole process gets a
lot easier and much faster. Here’s a quick summary of the workflow:
Open your audio or video clip in Soundbooth.•
Adjust two dialog box settings and click • OK.
Depending upon the speed of your processor and the •
length of the clip, Soundbooth cranks out a transcript in
minutes. No longer do we need to wait days.
When the transcript is complete, every word is referenced •
to timecode so that jumping to a particular spot in the text
is as easy as clicking the word in the transcript where you
want to jump in the waveform.
64 Chapter 4 SPEECH-TO-TEXT TRANSCRIPTS IN CS4
These transcripts are not perfect. If I wanted the same level of
accuracy as the transcripts I created with my old company, I’d still
need to take each transcript through an editorial and proofreading
process. But, most of the time, I just need something to help me
find what I’ve got to work with. Soundbooth is ideal for that.
Learning the Soundbooth Interface
As we learned when looking at Adobe Bridge, all the CS4
applications have a similar look and feel. Built around the CS4 con-
cept of Workspaces, Soundbooth is no different. (For a complete dis-
cussion of the CS4 Workspace interface, please refer to Chapter 2.)
Workspaces in Soundbooth
The Default workspace (see Fig. 4.1) in Soundbooth has a list
of clips in the top-left corner. Similar to the Browser in Final Cut
Pro, you import (Command + I) the clips you
want to work on.
Below it are a series of panels containing
Tasks, Effects, Markers, and Properties. Each
panel contains specific things you can do with
each clip. On the right side is the waveform
of the clip itself, with a global view on the top
and detail view on the bottom.
Since we are concentrating on the creation
of text transcripts, let’s change workspaces to
something a bit more useful for this process.
There are five prebuilt workspaces (see Fig.
4.2) in Soundbooth. The one that is designed for
transcripts is Meta Logging (see Fig. 4.3).
Figure 4.1 This is the default
workspace that opens when you
first load a clip into Soundbooth.
The list of available clips is in the
top left, task and effects windows
are on the left, and waveforms
display on the right.
Figure 4.2 The pop-up menu at the top of the window
allows you to switch between workspaces, or to create
and save your own customized workspace.
Chapter 4 SPEECH-TO-TEXT TRANSCRIPTS IN CS4 65
Getting a File from Final Cut Pro to Soundbooth
Soundbooth prefers editing audio files in one of three formats:
ASND, WAV, AIF. Use ASND if you are working exclusively in
Adobe applications. Use AIF for files transferred from Final Cut.
The WAV files are most common on the PC.
To export a clip or sequence from Final Cut for use in
Soundbooth, use File > Export > Audio to AIFF(s).
There are three ways to get your audio file into Soundbooth for
transcription:
Import it using 1. File > Import > Files (or press Command - I).
Drag it from your hard disk into the Files tab of the 2.
Soundbooth workspace.
Open it directly from Final Cut Pro into Soundbooth.3.
The first two options are fairly obvious, but this last choice is
both faster and easier. Here’s how to configure Final Cut Pro to
support Soundbooth.
First, let’s assume that the clips we want to send to Soundbooth
contain both video and audio. (You can also do this with audio-
only clips, too, which I’ll illustrate shortly.)
Open Final Cut Pro.
Choose Final Cut Pro > System Settings > External Editors
(Fig. 4.4).
Figure 4.3 The Meta Logging
workspace. Notice the new tab
in the lower left titled: Speech
Transcript.
Figure 4.4 System Settings > External Editors determines what application opens a file when you select
Open in Editor.
66 Chapter 4 SPEECH-TO-TEXT TRANSCRIPTS IN CS4
By default, Final Cut opens video files in QuickTime Player.
To get Final Cut Pro to automatically open video files into
Soundbooth, click the Set button for Video Files, navigate to
the Adobe Soundbooth application (Fig. 4.5), select it, and click
Choose. Your External Editors tab should now list Soundbooth
next to your Video Files as shown in Fig. 4.6. (Audio linked to
video travels wherever the video file goes.)
Now, to open a file from Final Cut Pro into
Soundbooth, Control-click the file in either
the Timeline or the Browser and select Open
in Editor from the pop-up menu. As long as
the video file is a format that Soundbooth
supports, the file will be opened directly in
Soundbooth ready for transcribing.
One downside of this approach is that,
similar to Soundtrack Pro, the entire clip is
opened in Soundbooth. This means that you
need to manually set the In and Out points
in Soundbooth to determine the range of audio you want to
transcribe.
Creating Transcripts
OK. Time to get to work.
I’ve loaded a clip into Soundbooth. Just as in Final Cut Pro,
you play, or stop, a clip using the Spacebar. The small wave-
form above the big waveform is called the Global View (see
Fig. 4.7). It always shows your entire clip, while the larger Detail
waveform allows you to zoom in and out and move around inside
the clip.
Figure 4.5 Click the Set button
for video files, and then select
Soundbooth from the Applications
folder. This allows you to quickly
open any video file directly into
Soundbooth.
Figure 4.6 This tab is currently configured so that when
you use Open in Editor, video files with linked audio will
go to Soundbooth while stand-alone audio files will go
to Soundtrack Pro. If you plan on only transcribing video
interviews, this is the way your preferences should be set.
Opening Audio Files from Final Cut Into Soundbooth
As you probably guessed, changing the setting for Audio Files in the External Editor preference tab allows you to
open audio files into Soundbooth as well. The procedure is the same, just adjust the Set button for Audio Files.
Chapter 4 SPEECH-TO-TEXT TRANSCRIPTS IN CS4 67
This is a 20-second voice-over that I recorded specifically to show-
case the strengths and weaknesses of Speech-to-Text transcription.
Let’s resize the Speech Transcript tab by dragging the horizon-
tal bar a bit higher (Fig. 4.8).
Once a clip is loaded, click the Transcribe button at the bottom
of the Speech Transcript tab (Fig. 4.9).
The Speech Transcription Options window opens (Fig. 4.10).
This allows us to preset the language and dialect of the clip,and
determines the quality of the resulting transcript, the number of
speakers, and so on.
One thing I find cool is that Soundbooth distinguishes
between dialects – such as British, American, and Canadian
English, which you can select from the Language drop-down
Figure 4.7 With a clip loaded
into Soundbooth, it’s time to
create a transcript.
My Voice-Over Script
Here’s the script I used in creating this voice-over file:
Hi. This is Larry Jordan.
The new Speech-to-Text transcription inside Soundbooth CS4 can provide documentary filmmakers with a very fast,
very easy way to get quick transcripts of their interviews and to locate those exact words in their media files.
Figure 4.8 To increase the size
of the transcription area, grab the
horizontal bar separating it from
the tab above and drag up. (Or, if
you want to make it smaller, you
can drag down. This works both
ways.)
Figure 4.9 Creating a transcript starts with
loading a clip and then pressing the Transcribe
button.
Figure 4.10 The Transcript window
allows you to properly set up your clip
by telling Soundbooth the language,
quality, and speakers the clip contains.
68 Chapter 4 SPEECH-TO-TEXT TRANSCRIPTS IN CS4
menu (Fig. 4.11). (I guess it’s too much to hope that it would
support central Wisconsinese, where I grew up…)
Next, select the Quality you want (Fig. 4.12). There is an inverse
relationship between transcript quality and the time it takes to
create one.
I just did a couple of quick tests. On my MacBook Pro Core 2
Duo, a medium-quality transcript took one to two times longer
than the length of the clip. A high-quality transcript took twice as
long as the medium quality setting. The transcript results were
about the same. Your results will vary, test to see which one works
best for you. If you are in a hurry, start with medium quality as it
can save you time.
Next, although Soundbooth doesn’t know Fred from Ethyl, it
can recognize when a speaker’s voice changes in a clip and flags
that point by starting a new paragraph with a speaker number at
the start. While it won’t hurt to leave this feature on all the time, if
you only have one speaker, it isn’t necessary.
Once we’ve made all our selections, click OK.
Soundbooth starts the transcription process and displays a
thermometer indicating how much time is left (Fig. 4.13). In this
case, I selected the Quality option as High.
When the transcript is done, the results are displayed in the
Speech Transcript window (Fig. 4.14). If you compare the original
script in the sidebar on page 71, with the results displayed here,
you’ll see that not every word is perfect – but most of them are.
In fact, Soundbooth displays a confidence level for each word
that you can view when you select the word in the generated
transcript (see Figs. 4.15 a–c). This provides a sense of whether
Soundbooth thinks this is the correct word.
Generally, the higher the confidence level, the more likely
Soundbooth feels the word is accurate. (Confidence levels are not
displayed if you select a portion of the Timeline, only when you
select the text.)
Figure 4.13 A standard
thermometer is displayed showing
how much time is left.
Figure 4.14 Here are the results
of a high-quality transcription
of the voice clip. Although not
perfect, it got most of the words
right.
Figure 4.12 Quality and speed
are linked. High quality tends
to take about twice as long as
Medium quality.
Figure 4.11 Soundbooth currently supports seven
languages and five dialects.
Chapter 4 SPEECH-TO-TEXT TRANSCRIPTS IN CS4 69
Limitations of Automatic Transcripts
The first big limitation is that Soundbooth has a lot of trouble
with proper names, nouns, and acronyms. For instance, it did not
get my name right, nor the words Soundbooth or CS4. Adobe tells
me they are working to improve this.
Second, it doesn’t know how to punctuate. It has no sense of
commas or periods; when a sentence starts or stops is not indi-
cated. While you need to do a clean-up pass on your audio, this
lack of punctuation does not cause a problem if you are using
the text as a very, very fast way to search for something in your
media.
Third, it has problems with words that sound very similar: for
instance, “Hi” and “Why” or “then” and “them.”
Fourth, the quality of the recording has a direct impact on the
quality of the transcript. High background noise or situations
where more than one person is talking at the same time is very,
very difficult to transcribe.
Since these automatic transcripts are not perfect, some have sug-
gested that we just throw up our hands and never use the feature.
My feeling is that this is being hasty. Many times, we don’t
need perfection. We just need the transcript to be close and
really, really timely. It’s hard to complain about almost real-time
automatic transcripts that don’t cost any additional money.
Using the Transcript to Search
The power of using a transcript created by Soundbooth is that
it makes searching for a specific word blindingly fast. Watch…
Unlike a printed transcript, where only the start of a paragraph
gets a timecode reference, in Soundbooth, every word has a time-
code reference. This means we can find any word instantly.
Figure 4.15 Here are three examples of confidence levels for the words (a) “why,” (b) “documentary,” and
(c) “words. They range from 21 to 71%.
(a)
(b) (c)
Transcript Time Is
Processor Speed
– Dependent
The time it takes
to create a
transcript depends
upon three things: the
length of the clip, the
quality of the recording,
and the speed of your
processor. Although
multiple processors will
help, especially using OS X
10.6, the flat-out speed of
your processors will make
the most difference.
70 Chapter 4 SPEECH-TO-TEXT TRANSCRIPTS IN CS4
Let’s say we want to find the word “documentary” in the audio
waveform. In the Speech Transcripts tab, click the word “docu-
mentary.” Instantly, that part of the waveform is highlighted! (In
Fig. 4.16, I zoomed into the waveform to make the highlighted
area easier to see. Notice that the waveform for the word “docu-
mentary” is highlighted in both the main waveform and the
global view above it.)
You can also search transcripts
in Soundbooth using Edit > Find.
Once the word you entered is high-
lighted in the transcript text as in
Fig. 4.17, click it to select it, and the
playhead (which Adobe calls the
Current Time Indicator, or CTI) will
jump to that word in the waveform
display.
Also, look at the bottom of the
Speech Transcript tab. Three statis-
tics are displayed: the exact loca-
tion of the selected word in the
waveform, duration, and confidence
level.
Note, also, that the timecode is
not displayed in frames, but in thou-
sandths of a second. This means that
Soundbooth will not be distracted by
Figure 4.17 The lower portion
of the Speech Transcript window
displays the exact location of the
selected word in the text, the
timecode for the location in the
audio file, the duration, and the
confidence level.
Figure 4.16 Searching is really fast. In the transcript, simply click the word you want to
find and it is instantly highlighted in the waveform.
Moving Quickly
between Words
Want a fast
way to move
between words
in a transcript? Press the
Tab key. It jumps you to
the right, from one word
to the next. Shift + Tab
moves you in the opposite
direction. And, as each
word is selected, that
portion of the waveform
highlights as well.
Chapter 4 SPEECH-TO-TEXT TRANSCRIPTS IN CS4 71
the frame rate you use to shoot your
video, since Soundbooth references
to portions of a second rather than
frames. This is a good thing; other-
wise, we would constantly need to
make timing adjustments as frame
rates change.
However, if you want to change the
time display, right-click it and select
the frame rate you want to display
for your video (see Fig. 4.18).
Modifying Transcript Text
There are inaccuracies in the auto-
matic transcript that Soundbooth
created. It would be nice to fix them.
We can and here’s how.
Let’s say we want to change a single word. In this case, the first
word in the audio clip isn’t “why,” its “Hi!”
To change a single word, double-click the word to highlight
it, then type your changes. In this case, I changed “why” to “Hi!”
(Fig. 4.19)
Next, the phrase “does the retort” should be “This is Larry
Jordan.” (This is an example of the name recognition problem
I mentioned earlier.) We can change “does” to “this” by double-
clicking the word to select it and entering new text. But how do
we change the words “the retort” into “is Larry Jordan”?
When you Control-click a word, you have the option to insert,
delete, or merge words. The benefit to using this menu (Fig. 4.20)
as opposed to directly text-editing the document is that you are
able to retain the pointers that connect the word in the transcript
to its place in the waveform. In this case, I’ll replace “retort” with
“is Larry Jordan.”
We can use this technique to go through and clean up the tran-
script, add missing punctuation, or delete “ums” or “ahhs” that
don’t need to be a part of the transcript.
A Sad Note on
Timecode
Audio files
generally
don’t have
timecode. But video
files do. Unfortunately,
Soundbooth doesn’t
recognize the timecode
in a video clip and sets
the timecode at the start
of a clip to 0:00:00:00.
(Unfortunately, there is no
way to reset the starting
timecode.) This makes
referencing between the
transcript and the clip
more difficult. This needs
to be fixed in an update to
Soundbooth.
The easiest work-around
for this is to change
Final Cut Pro to display
the alternate timecode
track, which defaults to
0:00:00:00, in the Viewer
while you edit.
Figure 4.18 Control-clicking
the timecode numbers reveals
a pop-up menu where you
can select the frame rate the
Soundbooth should use for timing
your clip.
Figure 4.19 To change a single
word, double-click the word
to highlight it, then make your
changes.
Figure 4.20 Control-click a word to merge
it with the next, or previous, word.
72 Chapter 4 SPEECH-TO-TEXT TRANSCRIPTS IN CS4
Exporting a Transcript
The bad news is that Soundbooth doesn’t allow print-
ing transcripts. The good news is that there are some simple
work-arounds.
Let’s assume that we want a hard copy of the transcript, so we
can review it. Well, printing text is precisely what a word pro-
cessor is designed to do, and the process of doing so with one
of them is very easy. So we can print our transcript from a word
processor.
Control-click anywhere inside the text transcript and select
Copy All (see Fig. 4.21). Then, open the word processor of your
choice – I decided to use Text Edit – and paste the transcript into
a new document.
Voila! Instant transcript, ready to correct and print (Fig. 4.22).
However, the astute among you will notice that copying the
transcript removes all the time references. Also, we’ve lost all the
duration and confidence information that was with the transcript
inside Soundbooth.
Well, it isn’t lost, but it isn’t part of the Copy/Paste operation.
A more complete way to keep all the information in your tran-
script is to export it.
Go to File > Export > Speech Transcription XML.
In the resulting dialog box, give the file a name and storage
location.
Soundbooth automatically converts the transcript into an
XML file. The good news is that this XML file contains just about
everything that Soundbooth has learned about this file. The bad
news is that while it is easy for computers to read XML, it isn’t
Figure 4.22 Pasting a transcript into a new word processing document allows you to
make changes, improve formatting, and print the transcript.
Figure 4.21 Control-click inside
the transcript and select Copy
All. This allows you to paste
the transcript into the word
processor of your choice.
Speaker IDs Can’t Be
Changed
Unlike text in the
transcript, we can’t
change the labels
that Soundbooth assigns to
the different speakers.
Chapter 4 SPEECH-TO-TEXT TRANSCRIPTS IN CS4 73
particularly easy for us humans, because XML
closely resembles HTML in its structure.
However, as you’ll see in the next chapter,
this can be a beautiful thing when you can
create an FLV movie of your project, post it to
the Web, and make the text searchable.
This XML file contains every word in your
transcript, along with lots of other neat stuff
such as its location, source, and confidence
value.
While I won’t dwell on this, there are a few
things I want to point out. In my screen shot,
I’ve highlighted in blue all the data for the first
word: “Hi!” (Fig. 4.23).
The time is expressed as minutes-seconds-
thousandths of a second (MM:SS.###). To
translate this number, put a period in front of
the right-most three digits. So, in this example,
the word “Hi!” starts 1.120 seconds in from the
start of the clip.
Note, also, that every element is set off
by the phrase Parameter. This makes it easy
for the computer to find different elements.
Soundbooth always exports the following in
the XML file:
The time location of the word from the •
start of the clip
The word itself•
The source of the word•
The duration of the word•
The confidence level of the word•
So, if you want a fast and easy way to print your transcripts,
just Copy/Paste them into a word processor. If you need all the
elements of a transcript, export them as an XML file.
By the time this book is published, I hope to see utilities on the
market which can take this XML data and turn it into something
readable for the rest of us.
Additional Notes on Soundbooth
Final Cut editors are generally comfortable with the idea of
capture files and render files; in other words, files that Final Cut
creates to do its job. Well, just as Final Cut creates work files,
so does Soundbooth. In this section, I want to take a couple of
minutes to share some housekeeping tips that will keep your
system running smoothly.
Figure 4.23 Here is the beginning of the XML export file
for our transcript. I’ve highlighted the results for the first
word “Hi!”
Importing Files into
After Effects
If you import a file
containing speech
transcripts into
After Effects, each word
appears as a layer marker
in the composition.
74 Chapter 4 SPEECH-TO-TEXT TRANSCRIPTS IN CS4
Configure and Clean the Media Cache
Soundbooth creates cache files for each audio and video
file you import. These files increase performance and allow
Soundbooth to support a wide variety of sample rates.
You can customize this loca-
tion – again, I suggest storing it to
a second drive – as well as empty
it from time to time, which will
improve performance.
To do so, go to Adobe
Soundbooth > Preferences >
Media (Fig. 4.24).
By default, media cache files
and the media cache database
are stored in the user’s home
directory.
What I did was create a new
folder on my second drive, called
Soundbooth, and inside it I cre-
ated three new folders: Cache files,
Cache database, and Recordings
(see Fig. 4.25).
Then, I repointed the prefer-
ence settings to these folders.
Benefits of Soundbooth over
Soundtrack Pro
The ability to create, modify, and export
Speech-to-Text transcripts is a huge benefit that
Soundbooth provides and that Soundtrack Pro
does not. In addition, there are several other
features worth mentioning. These include:
• TightintegrationwithAdobeBridge
• AbilitytocreatemusicalScores
• ItssupportforextensiveXMPmetadata
Integration with Adobe Bridge
Only Soundbooth and Premiere are able to create and display
text transcripts. Adobe Bridge does not display transcripted text or
metadata for a clip, although it does easily allow us to search, pre-
view, rename, and delete audio files stored anywhere on our system.
For a more complete discussion of Bridge, please refer to
Chapter 2.
Figure 4.24 For improved performance, move your cache files and database to
a second drive and clean them periodically.
Figure 4.25 To simplify file management, create a new
folder on your second drive, and then put the work folders
the Soundbooth needs inside it.
Chapter 4 SPEECH-TO-TEXT TRANSCRIPTS IN CS4 75
Create Musical Scores
A score is a customized musical soundtrack.
Soundtrack Pro gives us two types of musical cues: loops and
completed pieces of music. Soundbooth Scores are something
in-between – a completed piece of music that can be custom-
ized for length and, to a degree, in instrumentation. Here’s how it
works.
By default, Soundbooth installs two scores:
AquoVisit, which is a piece of music.•
CityStreet, which is an ambience sound effect.•
You can add more scores by clicking More Scores at Resource
Central in the top-right corner of the Scores tab (see Fig. 4.26).
This displays the Resource Central tab (Fig. 4.27), which allows
you to access more scores and other resources from Adobe’s
Web site.
Although there are lots of different musical styles to choose
from, the process of working with a score is the same. In this
example, I chose AquoVisit.
First, switch your workspace back to Default – either from
the Workspace pop-up menu at the top of Soundbooth or the
Window > Workspace menu at the top of your screen.
To listen to a score, select the name of the score, and then click
the right-pointing arrow at the bottom of the Scores tab. Click
it again to stop playback. Or, double-click the score to play it,
double-click again to stop playback.
To modify a Score, select File > New > MultiTrack File (or press
Shift + Command + N). This creates a new MultiTrack project,
which is the only place Scores can be adjusted.
Drag the name of the score you want to use from the Scores tab
on the left side of the workspace into the large Editor tab on the
right side of the window (see Fig. 4.28).
Change the duration of the music by grabbing the right edge
of the clip, indicated where the black of the track turns into
green by a red bracket, and dragging to the duration you want
(see Fig. 4.29).
Figure 4.26 Scores are
customizable music. You can add
more scores by clicking More Scores
at Resource Central in the top-
right corner.
Figure 4.27 Adobe makes lots of
scores, and other audio resources,
available at Resource Central,
which is built into Soundbooth.
Note: The Spacebar
Doesn’t Play Scores
Pressing the
Spacebar won’t
preview scores.
Instead, it only plays clips
located in the Timeline.
Figure 4.28 Drag a Score from
the list in the Scores tab on the
left into the large Editor window
on the right.
76 Chapter 4 SPEECH-TO-TEXT TRANSCRIPTS IN CS4
Or, you can make specific changes in the Property tab, located
in the lower left box of the workspace, such as setting a precise
duration or whether you want the music to have a beginning or
an end (Fig. 4.30).
Here is where Scores gets interesting. In the Properties tab,
click the Keyframing button. This allows you to set keyframes
Figure 4.32 Here is an example of setting keyframes for both Intensity and Synthesizer.
Figure 4.29 Change the duration
of a Score by dragging the right
edge of the music. In this case,
I shortened it from 2½ min to
30 seconds.
Figure 4.31 To increase the
vertical height of a track, click the
Maximize Track button.
Figure 4.30 You can make specific changes in the Property
tab, such as setting a precise duration or whether you want
the music to have a beginning or an end.
How to Zoom the
Timeline
Unlike Final Cut,
to zoom into
the Soundbooth
Timeline, press 1 (plus),
to zoom out press 2
(hyphen). To fit the Timeline
into the window, press \
(backslash). To increase the
vertical height of a track,
click the Maximize Track
button (Fig. 4.31).
Chapter 4 SPEECH-TO-TEXT TRANSCRIPTS IN CS4 77
to adjust the Intensity, Synthesizer, and Volume settings. If the
Synthesizer parameter is not showing, click the Parameters
pop-up menu just at the top of the Multitrack window and check
the Synthesizer option.
To set a keyframe, as in Soundtrack Pro, click the light-green
keyframe line in the Editor window. Remember to set at least
two keyframes – the first is the starting position, and then drag
the second keyframe vertically or horizontally to adjust (see
Fig. 4.32).
Drag the playhead (or CTI) to the beginning of the clip (press
the Home key), and press the Spacebar to play. Listen to the
changes and tweak as necessary.
To export your musical masterpiece as an AIF file, select File >
Export > Multitrack Mixdown. Give your file a name and storage
location and click Save. By default, it creates a stereo AIF file,
which you can use anywhere.
Cool.
Support for XMP Metadata for Audio Files
Like all the Adobe CS4 applications, Soundbooth has extensive
support for metadata. Using the XMP format, Soundbooth gener-
ally stores the metadata in the clip itself so that this information
can be easily shared between applications.
To view the metadata associated with a clip, Choose Window >
Workspace > Meta Logging (Fig. 4.33). Within the Metadata panel
that opens, Soundbooth divides metadata into two sections: File
and Clip (Fig. 4.34).
The File tab displays properties for the currently selected audio
clip. File metadata is stored directly in the file itself.
The Clip tab displays properties for a selected multitrack clip.
This metadata is stored in a separate file, called a sidecar, that has
the same name as the clip, but ends with the extension .xmp.
To enlarge the Metadata panel full screen, press the Tilde (`)
key in the upper left corner of your keyboard.
Entering Metadata
There are four sets of metadata displayed by default in the
File tab:
Dublin Core•
Basic•
Rights Management•
Dynamic Media•
Dublin Core provides general information and commonly
used properties about the clip – including title and subject
(Fig. 4.35).
A Word about
Smartsound and
SonicFire Pro
Soundbooth uses
scores to create
flexible music.
But nothing equals the
flexibility of the music
created by Smartsound
(www.smartsound.com).
With over 2000 music cues
to choose from, you can
create music of any length,
with multiple variations on
the theme, and combine
instruments almost at will.
Smartsound is positively
stunning and blows the
doors off both Soundbooth
and Soundtrack Pro.
In addition, it recently
released a new version
that tightly integrates with
Final Cut Pro.
78 Chapter 4 SPEECH-TO-TEXT TRANSCRIPTS IN CS4
Basic displays creation information about the clip – such as
the application that created it, when it was created, last modified,
and so on (Fig. 4.36).
Rights Management provides a place to enter information
about license terms, security certificates, and Web links (Fig. 4.37).
Dynamic Media is the place to enter all the different technical
information about the clip. Much of this is automatically filled
in by Soundbooth as it reads the file. There are approximately
100 fields that can be entered in this category (Fig. 4.38).
There are actually 14 different categories of metadata,
Soundbooth displays only four of them by default. If you always
use one of these and never use the others, you can choose the
metadata fields that Soundbooth displays by clicking the small
fly-out menu icon in the top-right corner of the Soundbooth win-
dow and selecting Metadata Display (Fig. 4.39).
There are two types of fields: those you can enter data into
(light gray) and those that are completed automatically (dark
gray) for you by Soundbooth.
Figure 4.34 Soundbooth uses
two tabs to display metadata: File
and Clip.
Figure 4.33 Metadata (information about your media) is added using the Meta Logging workspace.
Chapter 4 SPEECH-TO-TEXT TRANSCRIPTS IN CS4 79
Figure 4.36 Basic metadata includes file creation information.
Figure 4.35 The Dublin Core metadata provide basic descriptions of your media clip.
80 Chapter 4 SPEECH-TO-TEXT TRANSCRIPTS IN CS4
Figure 4.38 The Dynamic category is where you’ll put most of your metadata, as this is the section designed
for media clips.
Figure 4.37 Rights information is the place to enter license and copy management data.
Chapter 4 SPEECH-TO-TEXT TRANSCRIPTS IN CS4 81
To enter or edit metadata, simply click in the field you want to
use (Fig. 4.40).
Searching Metadata
Searching metadata in Soundbooth is not the same as search-
ing inside Adobe Bridge. In Bridge, you search across multiple files
to find the files that match your search criteria. In Soundbooth,
you search multiple metadata fields contained within a single clip
to find the metadata that matches your search criteria.
For example, rather than try and figure out where the Description
metadata field is stored, simply type “desc” (or some portion of
its name) into the Metadata tab search field and press Enter (Fig.
4.41). All metadata fields that meet your criteria will be displayed.
Saving Metadata
Metadata is stored automatically as you exit each field (for
example, by pressing Tab or Enter) and is saved when you save
the project. If the metadata is stored in a sidecar file, the data will
be saved when you export the file; for example, when you finish
your multitrack mix. Sidecar files have the same name as your
clip and end with the extension .xml.
Adobe Premiere
Just as we can create transcripts in Soundbooth, we can also
create transcripts in Premiere. With the 4.1 update to Premiere, it
is as easy to move files from Final Cut Pro into Premiere as it is
Figure 4.39 To customize the
metadata choices available to
you, click the small fly-out menu
in the top-right corner and select
Metadata Display.
Figure 4.40 Create custom metadata displays in this window, by checking the categories
you want to display. Click Save Settings, on the right, to save your choices.
Figure 4.41 To find and display
a specific metadata field, enter
at least a portion of its name into
the Search box and press Enter.
82 Chapter 4 SPEECH-TO-TEXT TRANSCRIPTS IN CS4
to move them to Soundbooth. (Unlike Soundbooth, Premiere Pro
allows us to process files in a batch.) Moving files back and forth
is the subject for the next chapter.
Since the process of creating transcripts is very similar between
the two programs and the next chapter talks about integrat-
ing Premiere with Final Cut Pro, we’ll take a side trip in the next
chapter and show you how to use Premiere to create transcripts.
One of the advantages to using Premiere, compared to Final
Cut, for your rough cut is that Premiere allows you to click
a word in your transcript and instantly jump to that word in
the clip. (This is the same feature that Soundboooth provides,
except Premiere offers this in the context of video editing.)
However, as with Soundbooth, you’ll still most likely want a
printout of all your transcripts to enable you to quickly organize
and review transcripts between multiple clips. This is because
Soundbooth and Premiere only display the transcript for the
selected clip.
Integrating Transcript Text with
Final Cut Studio
The one big limitation of creating text transcripts in
Soundbooth is that Final Cut Pro doesn’t display them.
Then, again, Soundbooth and Premiere only show the tran-
script for the highlighted clip, and Bridge doesn’t show the tran-
script at all. I can’t use Bridge, for example, to find all clips where
someone says: “Our problem began back in 2003.” So, regardless
of which application I’m working with, I’d still need to find some
way to track my transcripts.
This means that in a real-world situation, the way I most often
work with transcripts is that I have a sheaf of papers – all my tran-
scripts – printed and on my desk, so I can mark them up, shuffle
them, and start to figure out what clips I want to use to tell my
story.
Based on this, here’s my Final Cut workflow:
Create the transcript in Soundbooth.•
Export it, retaining the Speaker ID, to a word processor.•
Manually enter the timecode at the beginning of a para-•
graph or relevant section.
Clean up the text to the extent necessary. (Remember, it •
doesn’t need to be perfect if you are only using it for find-
ing key sections of a clip.)
Print the transcript to paper, or create a PDF, which is •
searchable on the computer.
Repeat for all necessary clips.•