adobe production premium for final cut studio editors 2009 phần 9 pdf
Bạn đang xem bản rút gọn của tài liệu. Xem và tải ngay bản đầy đủ của tài liệu tại đây (3.27 MB, 30 trang )
Chapter 9 Creating Blu-ray DisCs 241
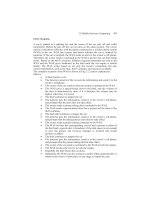
Figure 9.32 Give your project
a name and location. Be sure to
click Blu-ray and set the overall
parameters of your project. These
can be changed later if necessary.
Figure 9.33 Click the small icon
at the left of the row of icons to
display the list of templates. Load
the template you want to use by
double-clicking its name.
242 Chapter 9 Creating Blu-ray DisCs
Before we can create links between our menu and movies, we
need to import and place each movie in a Timeline. DVDs (both
SD and HD) are collections of linked objects that contain stuff.
(“Stuff” is one of my favorite technical terms.) So, we can’t link
a button to a movie. Instead, we place the button in a container
called a menu, and the movie in a container called a Timeline,
then link the two objects.
While you can import the movie as an Asset, then add it into a
Timeline, a much faster way to do this is to import the movie and
instantly turn it into a Timeline (see Fig. 9.34). To do this, either
go to File > Import As > Timeline, or Control-click in the Project
tab. Either way, select your movie in the resulting window.
Each video now appears in its own new Timeline. Even bet-
ter, though we can’t play the compressed movie directly on our
Mac, we can play the movie inside Encore. This is a great way to
make sure that all our compression settings are correct. (As with
Final Cut, you play, or stop, a Timeline movie by pressing the
Spacebar.)
Next, we need to tell Encore where to start playing when the
DVD is inserted into a player. Because we want the main menu
to play before anything else, Control-click the name of the main
menu in the Project tab and select Set First Play (see Fig. 9.35).
If, for example, we want something else to play first, we would
assign the first play option to that.
Figure 9.34 Use File > Import
As > Timeline or Control-click
in the Project tab to select the
assets you want to import and
place them into a Timeline.
Resetting Your
Workspace
If you can’t find
the tabs I mention,
it is probably
due to the two of us using
different workspaces or
screen layouts. To reset
yours, select Window >
Workspace > Default.
Blu-Ray Movies May
Not Play Smoothly
Because the Mac
does not play Blu-
ray natively, when
you play a Blu-ray movie
in Encore, it may not play
smoothly. Not to worry, it
will play fine when it finally
gets burned to a Blu-ray
Disc.
Chapter 9 Creating Blu-ray DisCs 243
Designing text for buttons in Encore is very flexible because
it seamlessly links the menu to Photoshop. In addition, to get us
started, the template already has buttons designed.
To select a button, click it. To change a button, select it and
go to Properties > Basic tab (see Fig. 9.36). Like the Inspector in
DVD Studio Pro, you change the name, formatting, and operation
of the selected button here.
Figure 9.35 Control-click a menu
or Timeline in the Projects tab to
tell Encore what object you want
to play first.
Figure 9.36 Select a button
by clicking it, then change its
properties in the Properties >
Basic tab.
244 Chapter 9 Creating Blu-ray DisCs
To link a button to a Timeline, select the button in the menu,
go to the Properties tab, and grab the curled Pick Whip icon (see
Fig. 9.37). Drag it over to the Project tab and drop it on top of the
Timeline object you want to link to it. If you attempt to link to the
wrong object, the whip will disconnect without linking.
To see how your project is doing, click the Flowchart tab in the
top center of the interface (see Fig. 9.38).
Objects that are not yet linked are displayed at the bottom of
the Flowchart window. To link objects in this window, drag a line
connecting one to the other.
Just as you need to connect a button to a Timeline, you also
need to tell the Timeline where to go when it is done playing. In
DVD Studio Pro, we call this an End Jump. In Encore, it’s called an
End Action.
The fastest way to set the End Action is in the Flowchart by
dragging from the Timeline object to the menu to which you want
it to return (see Fig. 9.39).
When your project is complete and ready to build, click the
Build tab, next to the Project tab (see Fig. 9.40). Set:
Format to • Blu-ray
Output to • Blu-ray Disc
Select your burner in • Destination > Recorder
Figure 9.37 Drag the Pick Whip
icon from the Properties tab of
the select button to connect with
a Timeline in the Project tab.
Figure 9.38 The Flowchart tab
shows graphically the layout of
your project. It also shows objects
at the bottom of the window that
are not yet linked.
Chapter 9 Creating Blu-ray DisCs 245
After making sure your settings are correct, click the Check
Project button. On the screen that follows, click Start to test
your entire project. This will look for any lost links or other miss-
ing pieces. It displays a report listing anything that needs to be
fixed (see Fig. 9.41).
Figure 9.39 Create an end action
by dragging from a Timeline
object to the menu to which you
want it to return.
Figure 9.40 Click the Build tab
to make sure all settings are to
Blu-ray prior to burning. When
everything is set, click the Build
button.
246 Chapter 9 Creating Blu-ray DisCs
When all links are correct, it’s time to create the final Blu-ray
Disc. This is called “building” your project. Click the Build button
in the Build tab to start the process.
That’s it. The process of creating a Blu-ray Disc is similar to
creating a SD DVD. Yes, there’s some new software to learn, but if
you are comfortable with DVD Studio Pro, the process of learning
Adobe Encore is a matter of a few hours.
The capability to create, output, and sell your HD masterpieces
makes the effort fully worthwhile.
Summary
For massive storage, combined with high quality, Blu-ray is a
contender. Now, with the latest releases from Apple, Roxio, and
Adobe, you have a variety of tools you can use to create your own
Blu-ray Discs – including burning them to standard DVD media
to save time and additional hardware purchases.
My Story: Creating Blu-Ray Discs
Mike Chapman
Senior Editor/Associate Producer
DigiNovations, Inc.
www.diginovations.com
As good as Apple’s DVD Studio Pro is, the integration between
Adobe Encore, Photoshop, and After Effects makes the production
of dynamic Blu-ray DVDs a snap. Here’s how I do it in my shop:
First, I export my finished sequence to QuickTime. We usu-
ally work in XDCAM, so I export a finished QT as a reference file by
unchecking the “Make Movie Self-Contained” box in the export
dialog.
Figure 9.41 Just before burning, check your entire project for missing links by clicking
Check Project, then Start, and reviewing the report. If anything is wrong, this will let
you know.
Chapter 9 Creating Blu-ray DisCs 247
Next, I launch Encore and select Create a New
Blu-ray Project. I import my QT reference movie as
an asset and place it into a new Timeline.
Next, I import a still frame from the show. I
had exported it from FCP using Export > Using
QuickTime Conversion. I import the still as an asset,
then create a new blank menu, being sure to check
the 16 3 9 radio button in the Properties tab. I drag
the still into the menu, then right-click to select Edit
Menu in Photoshop. I can then add effects, cor-
rect the color or position of the still, add elements
such as logos, all within Photoshop. When I’m fin-
ished, I simply save it and click back into Encore.
Adobe’s dynamic link updates the menu, and I can
then add buttons (which I could also have edited in
Photoshop) and specify links.
Now, the part that makes our DVDs shine: from the “Menu”
menu, I select Create After Effects Composition . . . AE opens
with a new Comp comprised of the layers of our new menu. From
there, I can be as creative with the individual elements, buttons,
etc. as time or budget allows. In this case, I make two simple
Comps: one that flies the buttons into place and the other that
flies them out and dissolves the background to black. These will
play before and after my static menu.
The beauty of dynamic linking is that I don’t have to render out
a separate movie, all I have to do is drag the Comps from the AE
project window into Encore’s project window. I drag the first Comp
into a new Timeline, which I call Preroll. I’ll select this Timeline as
First Play and specify the static menu as the End Action. I’ll then
create a new Playlist, and use the Pick Whip to specify my second
Comp (which I’ve dragged to a Timeline) and my main movie as
the elements, linking the Playlist to the “Play Video” button.
Now, when I preview the DVD, the menu will fade in from black
while the buttons fly into place, before “cutting” to the menu.
When I select my “Play Video” button and activate it, the buttons
fly off again as the background dissolves to black, followed by
the program itself – very smooth and classy, nothing popping on
and off the screen. (Some older Blu-ray players will occasionally
glitch between the end of the Playlist and the menu. Check with
the manufacturer to see if a firmware update is available.)
If I want to go back and change any of the elements, either in
Photoshop or After Effects, my Encore menu is updated immedi-
ately. This is important and time-saving for fixing those inevitable
goofs (like misspellings!) that occasionally slip through.
FCP and Motion are still the quickest and most reliable ways to
edit and do quick graphics, but for sheer horsepower and integra-
tion, the Adobe Creative Suite is as essential as electricity!
Figure 9.42 Mike Chapman.
249
Blu-ray not withstanding, the Web is an essential element in
any distribution strategy for the projects we create. However, the
combination of Final Cut and Compressor has been able to create
videos for the Web for many years, why should we be interested
in using the applications in Adobe Production Premium?
The answer is simple: Flash.
QuickTime runs on lots and lots of different systems, but it
can’t begin to touch the ubiquity of Flash. Any morning now I’m
expecting to read a news bulletin that Bic just released a Flash-
enable gel pen. (Well, maybe not, but 10 years ago, who would
have bet that we could watch videos on our phones?)
So, this chapter looks at the process of creating Web videos.
There are four ways we can create video for the Web:
Final Cut Pro•
Compressor•
Adobe Media Encoder (AME)•
Adobe Encore•
The latest version of Final Cut Pro adds new export options
to simplify this whole process: Share and Send to Compressor.
Even if you are working with an earlier version of Final Cut, the
export option provides a variety of high-quality options to get our
video ready for the Web.
The latest version of Compressor builds on its impressive com-
pression capability by adding Job Actions, which combine both
compressing and publishing a file – whether to a Blu-ray Disc,
YouTube, or a local Web site.
The problem with both Final Cut and Compressor is that,
unless you purchase third-party plug-ins, both of them only create
QuickTime files. We can’t use either of them to create Flash movies.
To directly create Flash movies, we need to turn to two applica-
tions in Adobe Production Premium: Adobe Media Encoder and
Adobe Encore.
We discussed Adobe Media Encoder earlier in this book. In this
chapter, we’ll take a closer look at its automation and batch pro-
cessing capabilities.
10
CREATING VIDEO FOR THE WEB
Not Strictly True
Although it’s true
that you can’t
create Flash
movies directly from either
Final Cut or Compressor,
there is still the trick of
exporting an H.264
QuickTime video, then
changing the file extension
to .f4v to make Flash think
it’s a Flash video.
250 Chapter 10 CREATING VIDEO FOR THE WEB
Then, we’ll wrap up by returning to Adobe Encore. But this
time, to look at its ability to create a project, and then by chang-
ing only a few simple settings, create a standard DVD, a Blu-ray
Disc, or an interactive Flash Web site. Adobe calls it: “Author
Once, Write Many.” In this chapter, I’ll show you how to create a
Flash project to post to the Web.
Final Cut Pro 7
With the release of Final Cut Pro 7, Apple added two new
options for getting files to the Web: Share and Send. (For those
that have an earlier version of Final Cut, all is not lost. We dis-
cussed how to create high-quality exports from Final Cut in
Chapter 8.)
In talking with editors around the world, one request that
I hear over and over is that compressing video is a technically
complex process. Anything that can be done to simplify the pro-
cess without damaging quality would be great. Apple seems to
have heard this as well because that’s what these two new fea-
tures do.
Share is a one-stop approach to prepping files for the Web. This
allows you to select an Apple preset, export and compress your
file, then automatically send it to the location of your choice. It
also offers a one-button easy approach for exporting files in
a batch. Both Share and Send to Compressor run in the back-
ground, allowing you to export a sequence then quickly get back
to editing!
Send to Compressor is the new replacement for File > Export >
Using Compressor. While they can both do the same thing, the
key advantage of Send is that it runs in the background.
When to Use What
Use Share when you are satisfied with the existing Apple presets or when you have created and saved customized
presets in Compressor. This is very fast, simple, and it runs in the background.
Use Send to Compressor when existing presets are not appropriate, and you need to create a customized setting.
This is very fast and also runs in the background.
Use Export > QuickTime Movie when you want to create a high-quality master file that can be stored, sent to
someone else, or compressed at a future date. For files that you intend to store, be sure to select Make Movie Self-
Contained in the export options. This is fast and provides the highest image quality because it doesn’t compress at all.
Also, this requires a separate compression step to compress a file for the Web. Think of this as an archiving option.
Use Export > Using QuickTime Conversion for freeze frames, or to support third-party plug-ins that don’t use
Compressor. (Telestream’s Flip4Mac comes immediately to mind.)
Chapter 10 CREATING VIDEO FOR THE WEB 251
Sharing Your Files
Share is designed for simplicity. As Apple’s manual states: “From
the Share window in Final Cut Pro, you can quickly create and
deliver output media files in iPod, iPhone, Apple TV, MobileMe,
DVD, Blu-ray Disc, and YouTube formats without having to open
any additional applications. Just choose Share from the File menu,
select the intended playback device or platform, and click Export.”
Share has presets for the following formats:
Apple TV•
Blu-ray•
DVD•
iPhone•
iPod•
MobileMe•
YouTube•
Apple ProRes 422•
Apple ProRes with Alpha•
QuickTime H.264•
But Share does more than just compress the file, it also pub-
lishes it, which means that Share takes the finished file and stores
it in the folder, or Web site, you specify.
You can export a single clip directly from the Timeline or the
Browser, or select a variety of clips, bins, or sequences in the
Browser and process them all as a group. This is a very fast way to
deliver multiple files at once.
Let’s take a look at two scenarios for using Share:
Creating a single video for the iPhone•
Transcoding a group of files from HDV into Apple ProRes 422•
Creating an iPhone File
Here’s an example of Share at it simplest (Fig. 10.1) Load the
sequence you want to export in the Timeline and make sure the
Time line is selected. Then, go to File > Share to display the Share
window.
Share Does More
Share isn’t just
limited to its
presets. You can
select Other in the Share
screen and pick from
any Compressor preset,
including custom presets
that you create and save.
Because Share is just a
front end to Compressor,
it can also be used with
a render cluster to speed
compression.
Figure 10.1 In the Share
window, pick the output type,
destination, and file name for
your file.
Sharing Is Not What
You Think
Contrary to what
you might at first
think, the Share
window does not allow
multiple people to share
the same file, instead it
makes it easy for you to
share your file with others.
252 Chapter 10 CREATING VIDEO FOR THE WEB
The Share window defaults to one destination setting and
one output-type setting (Fig. 10.2). At the bottom, it allows you
to send the file to Compressor (which I’ll talk about in the next
section), determine where the file will be compressed (This
Computer is always the safest option), and start the exporting
process.
Although there is no limit to the number of output types you
can create for each file, you are limited to one destination per
Share window.
From the output type pop-up, select iPhone. This applies
Apple’s recommended compression settings for iPhone videos
to your export. You can add more output types, for example, to
create one version for an iPod and another version for a YouTube
to this same video, by clicking the plus button to the right side
of the window. (To remove an output type, select it, and click the
minus button.)
Make sure the file name is what you want. If you are using the
filename template, position your mouse over the Filename text
box. The yellow tooltip shows you the actual file name.
You can see the specific settings for the file by clicking the
small Show Info button (Fig. 10.3). When everything is set to your
satisfaction, click Export.
Share exports the file in the background, so you can quickly
get back to work in Final Cut. The simplicity of the Share window,
combined with background exporting, makes this feature a huge
time-saver.
Transcoding Several Files into ProRes 422
While the simplicity of the Share window is cool, the
power of Share appears with batch processing. For instance,
imagine that you’ve just captured a flock of HDV clips via
FireWire. However, to simplify your editing and speed up
Figure 10.2 You can select to
create multiple output types for
the same file, or batch of files.
All the compression settings are
preset by Apple.
An Interesting Note
about Filenames
Share defaults
to a filename
template, which
automates naming files
when you export a batch
of files (Fig. 10.4). The
template uses the name of
the sequence, or clip, you
are exporting, followed
by its compression setting.
You can enter your own
file names by selecting the
contents of this text box
and replacing it with your
own file name, or integrate
your file names with these
templates. This template
allows you to establish
a naming convention
for all your clips prior to
compression.
Chapter 10 CREATING VIDEO FOR THE WEB 253
your render times, you’ve decided to transcode (or convert)
them all to ProRes 422 before starting the editing process. (For
HDV, ProRes 422 is more than sufficient. You don’t need to use
ProRes HQ or ProRes 4444.)
In the past, you’d use Batch Export in Final Cut Pro or
Compressor. However, Share means you can do it all in Final Cut,
and run it in the background.
In the Browser, select the clips you want to transcode. You can
select single or multiple clips, bins, or sequences. In this example,
I have five HDV clips in a Bin that I want to convert to ProRes. So,
I Control-click the Bin and select Share (Fig. 10.5).
Figure 10.4 While the Filename text box defaults to a template, you can override this by
entering your own file name.
Customization Means
Compressor
If you want to
create customized
compression
settings, this requires
Compressor. However,
as long as you save your
customized settings, you
can still use Share to create
your export.
Figure 10.3 Click the small Show
Info icon to see the settings you
are applying to your file.
254 Chapter 10 CREATING VIDEO FOR THE WEB
Figure 10.7 As Share does
its work, it displays a status
box indicating how much time
remains on your job and allowing
you to cancel it if you get really
impatient.
When more than one clip is selected, Final Cut asks whether
you want to export them as individual clips or combine them into
a single clip (Fig. 10.6). If you combine them, Share automatically
adds chapter markers at the beginning of each clip. This is a fast
way to build a DVD or Blu-ray screener of multiple clips using the
DVD capabilities of Share to automatically create a chapter menu
based on these chapter markers.
This is a great feature. It means you don’t have to compile
your edited sequences into a master sequence and manu-
ally add chapter markers before exporting. Simply select the
sequences, and Share compiles them with chapter markers
for QuickTime, DVD, or Blu-ray.
Once you decide how you want your clips exported, click OK.
Apply the Apple ProRes 422 output type as the compression
setting. I suggest you create a folder called “Transcoded clips” on
your media drive. Click Choose in the Share window to change
Destinations to this folder.
Click Export when you are ready to go. Figure 10.7 illustrates
the status report Share provides to track your work.
Figure 10.6 This menu, which appears when you select
more than one clip for export, allows you to export each
clip individually or combine them into a single clip.
Figure 10.5 To process a batch of clips, select them in
the Browser and then go to File > Share. In this case, I
selected a bin of HDV clips to transcode.
Chapter 10 CREATING VIDEO FOR THE WEB 255
As a note, you can monitor the status of all files in compres-
sion, whether originating from Share or Compressor using
either Utilities > Batch Monitor or the revised History panel in
Compressor. More on that in a few pages.
When the export is complete, all your newly transcoded files
are stored in the Destination folder.
In summary, Share is the tool of choice when you want to
export files quickly and easily, in the background, using presets
supplied by Apple, or saved by yourself. However, if you need to
send files automatically to remote sites, or want to use the flex-
ibility of Compressor to tweak settings, Share is not the best
option. Instead, use Send to Compressor.
Sending Files to Compressor
Compressor is a high-quality video and audio encoder
that we can use to create a variety of formats for DVD or Web
distribution.
In earlier versions of Final Cut, we could round-trip files (what
Adobe calls Dynamic Linking) by sending them between Final
Cut and Motion, or between Final Cut and Soundtrack Pro. In Final
Cut Pro 7, Apple added a new option: Sending Files to Compressor.
You can send files to compressor from either the Share window
or the File menu. The benefit to using Send from the File > Share
menu is that you can preset compression settings or destina-
tions. The benefit to using Send from the File > Send menu is that
it is fast: select the clips you want to compress in the Browser,
or select a sequence in the Timeline, and select File > Send to
Compressor.
Regardless of the option you select, the huge benefit from
Sending Files to Compressor, unlike the Export > Using Compressor
option in earlier versions of Final Cut, is that sending happens in
the background.
In fact, while you are sending a sequence from the Timeline,
you can be editing the exact same sequence! This is a huge time
saver.
In this example, I’ll send an HD sequence to Compressor,
then modify the compression setting and add a job action, so it
uploads it directly to my YouTube account.
I’ve opened an HD sequence in Final Cut, which I shot on a
Panasonic P2 camera in 720p/60 mode. The portion I’ll be work-
ing with here runs about 30 seconds.
With the Timeline selected, go to File > Share to open the Share
window (Fig. 10.8).
In Share, I applied the QuickTime H.264 output type, set the
Destination to the Compressed Files folder on my second drive,
and verified the filename template. After the file is prepped, click
New Compressor
Feature
The latest version
of Compressor
has added a new
feature called a Web
Reference Movie.
The benefit to using the
Share window is that
you can create batches
more easily and apply
a compression setting to
the clips before sending
them to Compressor. This
option creates a reference
movie that enables a Web
browser and a server to
automatically select the
right movie for any device
or connection speed,
without requiring the
viewer to make a choice.
While we won’t be
covering this feature here,
this has the potential
to provide significantly
greater quality without
adding a lot of time to your
workflow. For this reason,
I wanted to mention it
to you.
256 Chapter 10 CREATING VIDEO FOR THE WEB
Send to Compressor. Final Cut Pro starts Compressor and loads my
sequence, including all settings directly into Compressor (Fig. 10.9).
The file loads automatically into the Task window. Note that the
poster frame for the movie is the Final Cut Pro icon, unlike a movie
imported directly into Compressor that displays the first frame of
the movie. Also, the movie is named for the sequence which con-
tained it. You can easily change this by retyping a new name.
At this point, I could assign a compression setting, modify
the setting, assign a different setting, add more files to the
batch – all different tasks that Compressor supports.
In this case, I want to show how to assign a Job Action to send
this file to YouTube when compression is complete. A Job Action
is what happens after your video is compressed. Think of Job
Actions as automated ways of publishing a file.
Figure 10.9 When the file comes into Compressor, all the settings from the Share
window are retained.
Why Not Use the
YouTube Template?
The YouTube
template, which
appears when
Compressor first opens,
contains both compression
settings and the YouTube
Job Action. This is fine if
the compression presets
meet your needs. But if you
need to customize a preset,
such as add a watermark,
the template won’t work.
In which case, you need
to create your own
compression settings to
the clip, then apply the
YouTube Job Action, which
is what we are doing here.
Figure 10.8 By opening the file
in the Share window, I can apply
basic settings before sending it to
Compressor.
Chapter 10 CREATING VIDEO FOR THE WEB 257
In the Inspector is a new tab, titled Job
Action. Click the Job Action tab and select
Publish to YouTube from the pop-up list
(Fig. 10.10).
In the YouTube pane, enter your account
information (Fig. 10.11). (If you don’t have an
account, you’ll need to get one for this option
to work.) Note that I left the private video box
checked. I tend to always do this. That way,
I can make sure the compression and posting
process was successful before releasing a video
to the world.
Once you apply a Job Action, a gear menu
appears in the upper right corner of the task
window indicating a Job Action was applied
(Fig. 10.12).
Finally, because I want to brand my video, I’ll add a watermark in
the lower right corner during compression (Fig. 10.13). Here’s how:
Click the compressor setting 1. (QuickTime H.264) in the
Task window.
Click the 2. Filters tab in the Inspector (fourth button from
the left).
Scroll down to find, then check, the 3. Watermark filter.
Click 4. Choose to select a PSD file containing the watermark
you want to use.
Figure 10.10 A Job Action is what happens to a file after
compression is complete.
Figure 10.11 Prior to sending your first file to YouTube,
you need to obtain a YouTube account, and then complete
all the fields in this form.
Figure 10.12 Once a Job Action is assigned to a file, the
small gear menu indicates what it is.
258 Chapter 10 CREATING VIDEO FOR THE WEB
When creating the Photoshop file, I place the watermark in 5.
the position I want it to appear. I tend to put watermarks
either in the lower right or upper left corner. (Chapter 6
discusses how to size watermark files.)
Adjust 6. Scaling and Alpha until it has the right size and
opacity.
When all settings are complete, click Submit to begin the com-
pression process.
The YouTube copyright warning appears (Fig. 10.14). Just as
you don’t want people stealing your work without your permis-
sion, be sure to treat the work of others with the same respect. If
you don’t have the legal right to post your material, please don’t.
Assuming everything is OK to post, click OK.
Figure 10.14 Make sure you
aren’t uploading materials you
don’t have the rights to post.
Then, click OK.
Figure 10.13 Here’s what my
finished watermark looks like.
(Thanks to Pond 5 for the image.)
Chapter 10 CREATING VIDEO FOR THE WEB 259
In the final dialog, which asks what computer you want to use
to compress the video, most of the time just accept the defaults
and click Submit.
Depending upon how your Compressor preferences are set,
the Batch Monitor appears, allowing you to track the status of
your files (Fig. 10.15). Or you can use the display in the History
tab. To get more details on how long this will take, click the small
Show Info “i” at the right side of the status bar to display the
compression log.
Applying a Job Action before starting compression means
that Compressor automatically posts your file to YouTube as
soon as the compression is done, and here is the finished movie
(Fig. 10.16).
This is very cool!
So, in summary so far, if you want a fast and easy way to com-
press and post videos to the Web, use File > Share inside Final Cut
Figure 10.15 Turn on Batch
Monitor in Compressor >
Preferences, then Batch Monitor
automatically appears showing
the status of your file.
Finding Batch
Monitor
You can
automatically
display Batch
Monitor by turning it
on in Compressor >
Preferences. Or, run
it after compression
has started by going to
Applications folder >
Utilities folder > Batch
Monitor. This is just a
monitoring program, you
don’t need to run it if you
don’t want to.
Figure 10.16 Here’s our finished
file, posted on YouTube. I make a
point to test all my videos before
releasing them to be sure the
quality is OK.
260 Chapter 10 CREATING VIDEO FOR THE WEB
Pro. If you want to use the power and flexibility of Compressor
while still exporting your videos in the background without wast-
ing time, use File > Send to Compressor.
But, neither of these options allows us to create Flash. That’s
when we need to turn to Adobe, and we’ll start with the Adobe
Media Encoder.
Adobe Media Encoder
The Adobe Media Encoder (AME) can create QuickTime files,
but its real strength is in creating Flash movies. It can create Flash
movies one at a time, or in a batch. It can create video using the
latest Flash codec, or support multiple versions of Flash. Plus, it
can add all the metadata we’ve talked about earlier in this book
so that your videos can be searched on the Web – provided your
media player supports metadata searching.
Let’s take a look at how this works.
First, we need to export our video from Final Cut. We’ve dis-
cussed how to do this in detail in Chapter 9 elsewhere, so here’s
the summary:
1. In Final Cut’s browser, select the clip or sequence you want
to expor Or, open your sequence in the Timeline and make
sure the Timeline is selected.
2. Go to File > Export > QuickTime movie. Give the file a
name and location. Set Settings to Current Settings. If you
are compressing the file on the same system you used to
edit it, don’t check Make Movie Self-Contained. If you are
going to compress it on a different system, check Make
Movie Self-Contained (Fig. 10.17). Click Save.
3. Open Adobe Media Encoder.
4. There are several ways you can add files into Adobe Media
Encoder for compression:
Clicking the • Add button in the top-right corner.
Using • File > Add.
Figure 10.17 These are the
settings I use when exporting
from Final Cut to get the fastest
export with the highest quality. I
almost always store exported files
to my second drive for its size and
speed.
Chapter 10 CREATING VIDEO FOR THE WEB 261
Select them in the Finder and drag them in.•
Processing a Watch folder.•
Watch folders are something that Compressor doesn’t do.
A Watch folder is a location where you drop files, or, in our case, a
folder where we export all the files that need to be converted into
Flash movies. This works best when a number of editors are con-
tributing files into a network based server. Periodically, someone
runs Adobe Media Encoder and starts the Watch Folder queue. All
the files in the folder are compressed based on settings assigned
to that Watch folder. When the compression is done, Adobe Media
Encoder outputs the compressed files to an Output folder located
inside that Watch folder.
While not as automated as Watch folders on other systems, this
provides a one-click preset to process a batch of files.
Creating a Watch Folder
In this exercise, I want to create a Watch folder to compress
movies that are stored in it. Since Watch folders can have only one
compression setting for each folder, I’ll set this folder to compress
files into a 720p HD Flash movie. (You can also use this technique
to compress individual files, without using a Watch folder.)
There is no limit to the number of Watch folders you can cre-
ate, and there’s also no limit to the number of movies you can
drop into a Watch folder.
To create a Watch folder, do the following:
1. Open Adobe Media Encoder and select File > Create Watch
folder.
2. Choose the folder you want to use as a Watch folder and click
Choose. I always create Watch folders with a very specific
name. For example, “Drop HD Files Here for Flash 720p.”
Like I said, I make the name very specific (Fig. 10.18).
3. Adobe Media Encoder moves that folder to the top of its
encoding queue. When processing starts, files in a Watch
folder have priority over all other files.
4. Next, we assign a compression setting to apply to all the
files that are dropped into this folder. Go to the Format
Figure 10.18 Create a folder you
want to use as a Watch folder
and give it a name that you’ll
recognize later. Obvious is good.
When Is a Watch
Folder Not a Watch
Folder
Traditionally, when a
file is dropped
into a Watch
folder, it actives
an automated process
so that the file is
processed by whatever
application is watching
the folder. The key word is
“automatically.”
In the case of Adobe
Media Encoder, however,
nothing happens until you
start the application. In
this case, Adobe Media
Encoder handles watch
folders more like a batch
process, where files are all
gathered into one place,
then processed when the
application starts. The
application does not do so
automatically.
262 Chapter 10 CREATING VIDEO FOR THE WEB
column, click the small down-pointing arrow, and pick
the format you want to compress your videos into. You are
selecting the finished format for your video (Fig. 10.19).
5. Click the down-pointing arrow under Preset to set the
compression settings (Fig. 10.20). If you aren’t worried
about supporting older versions of Flash, set this to version
9 or later. Then, determine the size of your compressed file.
The larger the image size, the bigger the file size and the
longer the download. I always want the fastest download
possible, so I select the preset that keeps file sizes as small
as possible, but still with high quality.
6. At this point, Adobe Media Encoder processes all the files
in this folder when you click Start Queue (Fig. 10.21). (It’s in
the middle right side of the Adobe Media Encoder window.)
Whenever Start Queue is pressed, Adobe Media Encoder 7.
starts compressing all the folders in the Watch folder. (Again,
think of this as a batch-processing system.) It also cre-
ates two folders inside the Watch folder: Output folder and
Figure 10.20 There are lots
of presets to choose from. The
smaller the image size, the
smaller the file and the faster the
download. Pick the preset that
works the best for you.
Figure 10.21 Click the Start
Queue button on the right side of
the window to tell Adobe Media
Encoder to start watching the
Watch folder.
Figure 10.19 From the Format
column header, pick the video
format you want your compressed
files to become. FLV/F4V creates
the most recent versions of Flash.
Chapter 10 CREATING VIDEO FOR THE WEB 263
Source folder. All your compressed files are stored in the
Output folder, while all source files are moved to the Source
folder once compression is complete. Unfortunately, you
can’t change the location of these folders. They are always
inside the Watch folder.
And that’s it.
The Next Step
Once your Flash files are compressed, you’ll find them inside
the Output folder inside the Watch folder. At this point, you can
view them in QuickTime Player or your favorite Flash player to
make sure they look OK. Once you’ve checked them, post them
to the Web for the world to see.
The benefit of using Adobe Media Encoder is that you can cre-
ate files supporting a variety of Flash versions.
But there’s one more very cool thing we can do with Adobe
software that Final Cut Studio doesn’t support. We can create an
Encore project, and, with only a few clicks of the mouse, output
that same project as a standard DVD, a Blu-ray Disc, or a Flash-
based Web site, all from the same Encore project file. Author
once, write many.
That, as they say, is next.
Adobe Encore: Author Once – Write
Multiple Times
In the last chapter, we saw how we can take HD video, com-
press it in Compressor to the Blu-ray spec, then transfer it to
Adobe Encore to build into a Blu-ray Disc.
But, Adobe takes this one very large step farther with their con-
cept of “Author Once – Write Many.” Specifically, we can create a
single project inside Encore, then output that project as a stan-
dard DVD, Blu-ray Disc, or interactive Flash Web site.
In the last chapter, we used Compressor to compress our
media files into Blu-ray format before importing them into
Encore. Although this procedure works well, it only works as long
as Blu-ray is the only output format we need from Encore.
However, in this new example, we want to output to potentially
multiple formats, which means we need to import source media
into Encore. We use source files because Encore it needs to com-
press the media into different formats for each project – MPEG-2
for DVD, H.264 with high data rates for Blu-ray, and H.264 with
low data rates for the Flash.
To illustrate how we can take advantage of this multiple-
output workflow, I modified the project we worked on in the last
Watch Folders Don’t
Support Custom
Presets
Although you can
create custom
compression
presets for Adobe Media
Encoder, you can’t use
those custom settings in a
Watch folder. That’s the
bad news. The good news
is that the existing presets
for Flash do a good job in
most situations.
Note: How Long Does
Compression Take?
The time it takes
to compress a file
depends upon
the speed of your CPU,
the size of the file, the
video format of the source
file, and the compression
setting you selected.
Be Careful of
Automatic Posting
I am very leery
of automatically
posting compressed
files to a public Web site
without first viewing them.
It is very easy to correct
an embarrassing mistake,
provided you are the only
one who sees it. I watch
everything before I post it. It
takes time, and I don’t have
a lot of spare time. But the
risk of posting something
that’s wrong is just too
great.
264 Chapter 10 CREATING VIDEO FOR THE WEB
chapter for Blu-ray. First, I need to substitute the compressed
video with uncompressed source footage, and, to make this proj-
ect a bit more challenging, I decided to use a variety of different
media, especially, HDV 1080i/60, DVCPROHD (P2) 720p/60, and
XDCAM HD 1080i/24.
Using source media means that Encore needs to compress
the footage based on the specs for each project. To make sure the
media is ready to be compressed, widen the Project tab in Encore
(Fig. 10.22). This displays the columns that are relevant to how we
want our video to look: the Transcode Settings.
When we imported the compressed video into the earlier
Blu-ray project, Encore realized that the files were already
compressed, so it set the Blu-ray Transcode Setting to Don’t
Transcode, meaning it won’t recompress the files (Fig. 10.23).
Now in the current example, I imported uncompressed source
footage into Encore using File > Import > As Timeline. Because
this is uncompressed media, the Transcode Status is set to
Automatic by default. However, you can change the specific com-
pression settings by Control-clicking Transcode Status to open
the Transcode window (Fig. 10.24).
Since we first created the Blu-ray project in the last chapter, I
modified it to add a new title and buttons to the menu.
Unlike DVD Studio Pro, Encore expects you to do all your menu
work in Photoshop, even if you are using one of the included
templates. To send a menu to Photoshop, Control-click anywhere
in the menu and select Edit in Photoshop (Fig. 10.25).
Encore is tightly linked to Photoshop and uses it for both menu
and button design. (Look in Photoshop Layer’s palette to see how
button highlights are created.) In this case, I added a title, and
renamed and repositioned the buttons (Fig. 10.26).
Sometimes Transcode
Settings Get Confused
From time to time,
Encore may get the
Transcode Settings
wrong. To be safe, when
you import compressed
footage, scroll right in the
Project tab and be sure
both DVD and Blu-ray
Transcode Settings are set
to Don’t Transcode. You
can change this setting by
Control-clicking the setting
text.
An Editorial
Comment
Use animation
and video on
your home page
with caution. Sites where
the viewer is forced to
sit through endless video
make for impossibly
bloated sites that can’t run
on mobile devices. Keep
your home page simple
and give viewers an option
to go to the more video-
intense portions of your
site.
Figure 10.22 Expanding the Project tab allows you to see the detailed Transcode Settings
for both DVD and Blu-ray Disc.
Figure 10.23 When importing
compressed media, for either
DVD or Blu-ray Disc, be sure the
Transcode Status is set to Don’t
Transcode.
Chapter 10 CREATING VIDEO FOR THE WEB 265
Figure 10.24 By default,
compression settings are set to
Automatic, you can manually
adjust them using the Transcode
pop-up menu.
Figure 10.25 To revise a menu,
right-click the menu image and
select Edit in Photoshop.
Figure 10.26 Here’s the revised
menu displayed in Encore’s Menu
Viewer, reflecting the changes I
made to the Encore template in
Photoshop.
266 Chapter 10 CREATING VIDEO FOR THE WEB
Next, I made sure all the video was placed into Timelines and
properly linked with the menu. If we look at the revised project
from the Flow Chart view (press Control + Shift + 4), you can see
the current layout (Fig. 10.27).
Next, click the Build tab and make sure all links are correct by
clicking the Check Project button (Fig. 10.28). Use this to locate
any problems that need fixing before output. (By the way, Encore
can create far more complex discs than this illustration. However,
I don’t need to build a complex disc to illustrate this idea of
“Author Once – Write Many.”)
You can keep an eye on how much storage you need for your
DVD by watching the Disc Info thermometer at the bottom of
the Build tab (Fig. 10.29). However, these size settings disappear
when you switch to Flash output because they are no longer
relevant – the Web has no size limitations.
Figure 10.28 After a few tests
and corrections, the Check Project
window showed that all my links
were correct and nothing was
missing.
Figure 10.27 Look in the Flow
Chart window to see the layout
for our new project.