mcts training kit 70 - 652 70-622 Configuring Microsoft Exchange Server 2010 phần 4 pps
Bạn đang xem bản rút gọn của tài liệu. Xem và tải ngay bản đầy đủ của tài liệu tại đây (2.26 MB, 92 trang )
Lesson 2: Conguring Federated Sharing CHAPTER 6 249
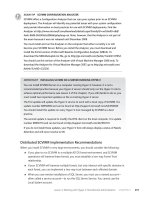
FIGURE 6-11 The New Organizational Relationship Wizard External Organization page
4. Click Next. On the New Organizational Relationship page of the wizard, shown in
Figure 6-12, you can review the summary of the organizational relationship and
then click New to create the organizational relationship. You can click Finish on
the Completion page to close the wizard or click Back and review your settings if
a problem occurred when creating the relationship.
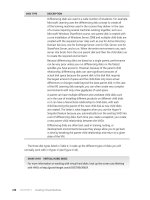
FIGURE 6-12 The New Organizational Relationship page
250 CHAPTER 6 Federated Sharing and Role Based Access Control
To use the EMS to create an organization relationship, you must use the
Get-FederationInformation cmdlet to identify the domain names provided for the external
organization. This cmdlet accesses the Federated Organization Identier (OrgID), which
denes which of the authoritative accepted domains congured in the Exchange organization
are enabled for federation. You pipe the output from the Get-FederationInformation cmdlet
into the New-OrganizationRelationship cmdlet, which attempts to automatically discover
conguration information from the external organization and, if successful, creates the
organizational relationship as specied.
The following command creates an organization relationship with the
Contoso organization, enabling free or busy information and specifying that the
requesting organization receives free or busy, subject, and location information from
the target organization:
Get-FederationInformation -DomainName Contoso.com | New-OrganizationRelationship -Name
"Contoso" -FreeBusyAccessEnabled $true -FreeBusyAccessLevel -LimitedDetails
When you have created an organizational relationship, you can use the
Set-OrganizationRelationship cmdlet to change its settings. For example, the following
command disables the organization relationship with Contoso:
Set-OrganizationRelationship -Identity "Contoso" -Enabled $false
You can discover information about an organizational relationship by using the
Get-FederatedOrganizationIdentier EMS cmdlet to retrieve the Microsoft Exchange
Server 2010 organization’s federated organization identier and related details, such as
federated domains, organization contact, and status. You can obtain details about the
status of federated domains from the Federation Gateway by including the
IncludeExtendedDomainInfo parameter, such as the following:
Get-FederatedOrganizationIdentifier –IncludeExtendedDomainInfo
You can use the Set-FederatedOrganizationIdentier EMS cmdlet to congure federated
organization identiers. You congure a federated organization identier to create an
account namespace for your Exchange organization with the Federation Gateway and enable
federation so that you can make use of the facilities that federation provides, such as sharing
calendars or contacts and accessing free or busy information.
Typically, an organization’s federated organization identier is created using the
organization’s primary domain name. Additional domain names can be added and removed
later by using the Add-FederatedDomain cmdlet (described earlier in this lesson) and the
Remove-FederatedDomain cmdlet.
For example, the following command congures and enables a federated organization
identier for the Adatum.com Exchange organization:
Set-FederatedOrganizationIdentifier -DelegationFederationTrust "Microsoft Federation
Gateway" -AccountNamespace "Contoso.com" -Enabled $true
Lesson 2: Conguring Federated Sharing CHAPTER 6 251
MORE INFO ORGANIZATIONAL RELATIONSHIP CMDLETS
For more information about the Get-FederationInformation cmdlet, see http://technet
.microsoft.com/en-us/library/dd351221.aspx. For more information about the New-
OrganizationRelationship cmdlet, see />.aspx. For more information about the Set-OrganizationRelationship cmdlet, see http://
technet.microsoft.com/en-us/library/ee332326.aspx. For more information about the
Get-FederatedOrganizationIdentier cmdlet, see />library/dd298149.aspx. For more information about the Set-FederatedOrganizationIdentier
cmdlet, see
Conguring Sharing Policies
Sharing policies dene which users in your organization can use the organizational
relationships to share information with other organizations and what types of information
those users can share. The default sharing policy is created when you install Exchange Server
2010. This policy enables sharing with all domains but enables only calendar sharing with free
or busy information. It is assigned to no mailboxes.
If you want to enable users to participate in federated sharing, you can add their mailboxes
to the default sharing policy or create a new sharing policy. When you create a new sharing
policy, you congure the domain name for the external domain and the sharing actions that
are permitted under the policy. Sharing options include the following:
n
Calendar sharing with free or busy information only
n
Calendar sharing with free or busy information, subject, and location
n
Calendar sharing with free or busy information, subject, location, and body
n
Contacts sharing
n
Calendar sharing with free or busy information only and contacts sharing
n
Calendar sharing with free or busy information, subject, and location and contacts
sharing
n
Calendar sharing with free or busy information, subject, location, and body and
contacts sharing
Conguring a sharing policy requires that a federation trust has been created between
your Exchange 2010 organization and the Federation Gateway and that the federated
organization identier is congured. Recipients from an external domain can access your
users’ information only if they have an Exchange 2010 organization and their domain is
federated. To use the EMC to congure sharing policies, carry out the following procedure:
1. Click Mailbox under Organization Conguration in the Console tree.
2. In the Result pane, click the Sharing Policies tab and then right-click the sharing policy
you want to congure and click Properties.
252 CHAPTER 6 Federated Sharing and Role Based Access Control
3. On the General tab of the sharing policy Properties dialog box, shown in Figure 6-13,
you can change the policy name, add one or more external domains, specify the
sharing policy for each domain, and enable or disable the policy.
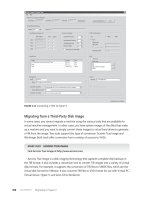
FIGURE 6-13 The General tab of the sharing policy Properties dialog box
4. On the Mailboxes tab shown in Figure 6-14, you can add or remove the mailboxes
in your organization to which this sharing policy applies.
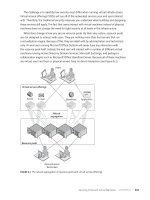
FIGURE 6-14 The Mailboxes tab of the sharing policy Properties dialog box
5. Click OK to apply your policy changes and close the dialog box.
Lesson 2: Conguring Federated Sharing CHAPTER 6 253
NOTE CREATING A NEW SHARING POLICY
The settings you specify when creating a new sharing policy are similar to the settings you
can edit when conguring a sharing policy. In this case, click Mailbox under Organization
Conguration in the Console tree and then click New Sharing Policy in the Result pane.
NOTE APPLYING A SHARING POLICY TO A MAILBOX
You can also apply a sharing policy to a specic mailbox by using the Mailbox Settings
tab in the mailbox’s Properties dialog box.
You can use the New-SharingPolicy cmdlet in the EMS to create a sharing policy and
the Set-SharingPolicy cmdlet to modify a policy. For example, the following command creates
a sharing policy called Blue Sky Airlines for the mail.BlueSkyAirlines.com domain, which is
external to your organization. This policy allows users in the mail.BlueSkyAirlines.com domain
to see detailed free or busy information and contacts. By default, the policy is enabled:
New-SharingPolicy -Name "Blue Sky Airlines" -Domains 'mail.BlueSkyAirlines.com:
CalendarSharingFreeBusyDetail, ContactsSharing'
The following command modies a sharing policy named Contoso for the contoso.com
domain, which is external to your organization, so that users in the Contoso domain can see
your users’ availability (free or busy) information:
Set-SharingPolicy -Identity Contoso -Domains 'contoso.com:
CalendarSharingFreeBusySimple, Contacts'
To get details about a sharing policy, you can use the Get-SharingPolicy EMS cmdlet.
For example, the following command displays all the available information for the sharing
policy Blue Sky Airlines:
Get-SharingPolicy "Blue Sky Airlines" | FL
If you no longer require a sharing policy, you can remove it using the Remove-
SharingPolicy EMS cmdlet. Note that you cannot remove a sharing policy that has mailboxes
assigned to it and that you need to assign them to another policy rst. The following
command removes the sharing policy Blue Sky Airlines and suppresses the requirement that
you enter Y to conrm that you want to remove the policy:
Remove-SharingPolicy -Identity "Blue Sky Airlines" -Confirm:$false
MORE INFO NEW-SHARINGPOLICY, SET-SHARINGPOLICY, AND GET-SHARINGPOLICY
For more information about the New-SharingPolicy cmdlet, see rosoft
.com/en-us/library/dd298186.aspx. For more information about the Set-SharingPolicy
cmdlet, see For more information
about the Get-SharingPolicy cmdlet, see />dd335081.aspx. For more information about the Remove-SharingPolicy cmdlet, see http://
technet.microsoft.com/en-us/library/dd351071.aspx.
254 CHAPTER 6 Federated Sharing and Role Based Access Control
Conguring Mailboxes to Use Sharing Policies
You can congure mailboxes to use sharing policies by using the Get-Mailbox and Set-Mailbox
EMS cmdlets. A command based on the Get-Mailbox cmdlet obtains the mailbox or mailboxes
to which you want to apply the sharing policy by using the criteria you dene (for example,
all mailboxes that are associated with the Sales Department). You pipe the output from this
command into a command based on the Set-Mailbox cmdlet, which applies the sharing policy.
For example, the following command congures all mailboxes associated with the
Marketing Department to use the Adatum Marketing federated sharing policy:
Get-Mailbox –Filter {Department –eq "Marketing"}
You can also use a command based on the Get-Mailbox cmdlet to list the mailboxes that
use a specic sharing policy. To give a convenient display, you can pipe the result into the
format-table function. For example, the following command returns all the mailboxes in an
organization that are provisioned to use the Adatum Marketing sharing policy and lists them
as email addresses:
Get-Mailbox | Where {$._SharingPolicy –eq "Adatum Marketing" } | format-table Alias,
EmailAddress
MORE INFO GET-MAILBOX AND SET-MAILBOX
For more information about the Get-Mailbox cmdlet, see />en-us/library/bb123685.aspx. For more information about the Set-Mailbox cmdlet, see
/>Sharing Information with Users in an External Organization
The sharing policies you congure determine what your users can share with users from
another organization. The mailboxes to which you apply the sharing policy determine which
users can share this information.
Suppose, for example, that you create a sharing policy named Fabrikam01 with the
external domain fabrikam.com, and this permits your users to share calendar free or busy
information, subject, and location. You apply this policy to all the mailboxes belonging to
users in the Marketing Department.
Suppose you create a sharing policy named Fabrikam02 with the same external
domain, and this permits your users to share calendar free or busy information only
and contacts. You apply this policy to all the mailboxes belonging to users in the Sales
Department.
Don Hall, a user in the Marketing Department, can now send sharing invitations through
his email client to users in the fabrikam.com domain. If these invitations are accepted, Don
can share his calendar free and busy information, subject information, and location with
these users.
Lesson 2: Conguring Federated Sharing CHAPTER 6 255
Jeff Hay, a user in the Sales Department, can now send sharing invitations through his
email client to users in the fabrikam.com domain. If these invitations are accepted, Jeff can
share his calendar free and busy information and his contacts information with these users.
Any of your users who do not have a specic sharing policy assigned to his or her mailbox
might still be able to share information with users in a federated domain. This will depend on
your organization’s default sharing policy.
The details that the users in the fabrikam.com domain can, in turn, share with your users
depend on the sharing policies the Fabrikam administrators have congured and applied to
the mailboxes in their domain.
Subject Alternative Name (SAN) Certicates
I
f you need to protect multiple host names with a single certicate, you can use
a SAN certicate. This allows you to specify a list of host names and protect them
with a single SSL certicate.
SANs enable you to secure host names on different base domains with one
certicate and to host multiple virtual SSL sites using a single IP address. Typically,
hosting multiple SSL-enabled sites on a single server requires a unique IP address
per site, but a SAN certicate, also known as a Unied Communications SSL
certicate, can solve this problem. Both Microsoft Internet Information Services
version 6 or later and Apache HTTP server are able to use SAN certicates to host
virtual websites.
SAN certicates can secure multiple fully qualied domain names with a single
certicate. SAN certicates are used to secure Exchange Server 2010 sites where
there is a need to secure multiple domains that resolve to a single IP address (such
as in a shared hosting environment). Using a SAN certicate saves the time required
to congure multiple IP addresses on an Exchange server and bind each IP address
to a different certicate.
When browsers connect to servers using HTTPS, they check to make sure the SSL
certicate matches the host name in the address bar. Browsers nd a match in one
of the following ways:
n
The host name in the address bar exactly matches the common name in the
certicate’s Subject eld.
n
The host name matches a wildcard common name. For example, www.contoso
.com matches the common name *.contoso.com.
n
The host name is listed in the Subject Alternative Name eld.
Normally, a browser compares the server name it connects to with the common
name in the Server certicate. However, if an SSL certicate has a SAN eld, then SSL
clients typically ignore the common name value and seek a match in the SAN list.
256 CHAPTER 6 Federated Sharing and Role Based Access Control
Microsoft Internet Explorer, Microsoft Windows Mobile 5, Firefox, Opera, Safari,
and Netscape all support SAN certicates. However, some mobile devices do
not support SAN certicates, although all of them support exact common name
matching.
Assigning the Federated Sharing Role
Federated sharing is a built-in management role that enables you to manage cross-forest
and cross-organization sharing. It is one of several roles that make up the RBAC permissions
model discussed in Lesson 1, “Role Based Access Control.” This section applies the RBAC
concept to the federated sharing management role.
If you want the federated sharing management role to grant permissions, it must rst be
assigned to a role assignee. This can be a role group, user, or universal security group. You
may also need to apply either a custom or a built-in management scope to specify what
recipient and server objects federated sharing role assignees can modify. If the federated
sharing role is assigned to a role assignee but a management scope allows the role assignee
to manage only certain objects based on a dened scope, the role assignee can use the
permissions granted by the federated sharing role only on those specic objects.
The federated sharing management role is assigned to one or more role groups by default.
You can use the Get-ManagementRoleAssignment EMS cmdlet, discussed in Lesson 1, to list
these groups. To see role details, including a list of groups, users, or universal security groups
assigned to this role, enter the following command in the EMS:
Get-ManagementRoleAssignment -Role "Federated Sharing" | FL
Figure 6-15 shows part of the output of this command.
FIGURE 6-15 Management assignment details for the federated sharing role
You can also remove the federated sharing management role from built-in role groups or
role groups you create and users and universal security groups. However, there must always
be at least one delegating role assignment for this role granted to a role group or universal
Lesson 2: Conguring Federated Sharing CHAPTER 6 257
security group. You cannot delete the last delegating role assignment. This limitation helps
to prevent administrators from locking themselves out of the system. Delegating role
assignments was discussed in Lesson 1.
Adding the federated sharing management role to a role group gives administrators who
are assigned to that management role group the ability to manage federated sharing. You
can use the New-ManagementRoleAssignment cmdlet in the EMS, discussed in Lesson 1,
to add the role to a role group. For example, the following command assigns the federated
sharing management role to the Adatum Federation role group without dening a scope:
New-ManagementRoleAssignment -Name "Federated Sharing Adatum Federation" -SecurityGroup
"Adatum Federation" -Role "Federated Sharing"
The following command assigns the federated sharing role to the Adatum Federation role
group and applies the Organization predened scope:
New-ManagementRoleAssignment -Name "Federated Sharing Adatum Federation" -SecurityGroup
"Adatum Federation" -Role "Federated Sharing" -RecipientRelativeWriteScope Organization
If a predened scope does not meet your needs, you can use a recipient lter to dene a
scope. For example, the following command creates a scope that includes all mailboxes within
the Federation Managers OU in the Adatum.com domain:
New-ManagementScope -Name "Mailboxes in Federation Managers OU"
-RecipientRestrictionFilter { RecipientType -eq 'UserMailbox' } -RecipientRoot "Adatum
.com/Federation Managers OU"
The following command assigns the federated sharing role to the Adatum Federation role
group and applies the Mailboxes in Federation Managers OU scope that you created using
the previous command:
New-ManagementRoleAssignment -Name "Federated Sharing Adatum Federation" -SecurityGroup
"Adatum Federation" -Role "Federated Sharing" -CustomRecipientWriteScope "Mailboxes in
Federation Managers OU"
Removing the Federated Sharing Role from a Role Group
If you do not want members of a management role group to have permissions to manage
federated sharing, you can remove the role assignment between the management role
group and the federated sharing management role that grants the permissions. All members
of the role group lose the ability to manage federated sharing when you remove the role
assignment. If you want to remove the permissions from one member only, you need instead
to remove that member from the management role group.
If you want to remove a management role assignment from a management role group,
you rst need to nd the name of the management role assignment that assigns the role to
the role group (unless you already know this). In the example given in this lesson, the role
group is Adatum Federation. To nd the name of the management role assignment, you enter
the following command in the EMS:
Get-ManagementRoleAssignment –RoleAssignee "Adatum Federation"
258 CHAPTER 6 Federated Sharing and Role Based Access Control
This command would in this instance return the management role assignment name
“ Federated Sharing Adatum Federation”. You could remove this role assignment by entering
the following command:
Remove-ManagementRoleAssignment "Federated Sharing Adatum Federation"
This removes the management role that enables administrators assigned the Adatum
Federation role group to manage federated sharing.
MORE INFO REMOVE-MANAGEMENTROLEASSIGNMENT
AND GET-MANAGEMENTROLEASSIGNMENT
For more information about the Remove-ManagementRoleAssignment cmdlet, see http://
technet.microsoft.com/en-us/library/dd351205.aspx. For more information about the
Get-ManagementRoleAssignment cmdlet, see />dd351024.aspx (this link was given in Lesson 1 but is repeated here for convenience).
Adding the Federated Sharing Role to a User or Universal
Security Group
You can use management role assignments to assign the federated sharing management role
to a user or universal security group. By assigning a role to a user or universal security group,
you enable the user or group members to perform tasks dependent on cmdlets or scripts
related to the federated sharing management role.
The commands to assign the federated sharing role to a universal security group are
the same as those used to assign the role to a management role group except that the
SecurityGroup parameter identies a universal security group rather than a role group.
To assign the role to an individual user (not recommended), you use a command similar
to the following:
New-ManagementRoleAssignment -Name "Federated Sharing Don Hall" -User "Don Hall"
-Role "Federated Sharing"
To remove a role assignment from a user or universal security group, you follow the
same procedure that you did for a management role group. If necessary, rst use the
Get-ManagementRoleAssignment cmdlet to determine the name of the assignment and then
use the Remove-ManagementRoleAssignment cmdlet to remove it.
Lesson Summary
n
You can establish a federated sharing relationship with an external Exchange Server
2010 organization if both your organization and the external organization have
established a federation trust with the Federation Gateway.
n
To establish a federation trust, you need a valid X.509 certicate issued by a
third-party CA trusted by Windows Live Domain Services. The domain you use for
Lesson 2: Conguring Federated Sharing CHAPTER 6 259
establishing the federation trust must be resolvable from the Internet, and you need to
congure DNS with a text (TXT) resource record that provides proof of ownership for
your domain name.
n
A federated sharing relationship permits calendar sharing with free or busy
information, subject, location, and body and contacts sharing. You can send
encrypted and authenticated email messages to and receive such messages from
users in the external organization.
Lesson Review
You can use the following questions to test your knowledge of the information in Lesson 2,
“Conguring Federated Sharing.” The questions are also available on the companion CD if
you prefer to review them in electronic form.
NOTE ANSWERS
Answers to these questions and explanations of why each answer choice is correct or
incorrect are located in the “Answers” section at the end of the book.
1. You are creating a federation trust. You use the Get-ExchangeCerticate EMS cmdlet
to obtain a list of thumbprints of the certicates available on your Client Access server,
choose a certicate, and enter the New-FederationTrust cmdlet with the Thumbprint
parameter to create a federation trust named Microsoft Federation Gateway. You get
the error shown in Figure 6-16. What is the likely cause of this error?
FIGURE 6-16 Error in creating a federation trust
A. The certicate is already being used for another purpose.
B. You cannot use the EMS to create a federation trust named Microsoft Federation
Gateway. You need to use the EMC.
C. You cannot create a federation trust on a Client Access server. You need to do this
on a domain controller.
D. The certicate you have chosen is not trusted by Windows Live Domain Services.
2. You are testing Exchange Server 2010 conguration on a test network that is isolated
from any other network. You have obtained an X.509 certicate from a trusted
third-party CA and have exported it to your test network using removable media.
260 CHAPTER 6 Federated Sharing and Role Based Access Control
You attempt to create a federation trust but are unable to do so. What is the probable
reason?
A. Your test network is not connected to the Internet.
B. Your certicate was exported to your test network using removable media
and is therefore not valid for that network.
C. The EMS is not available on your test network.
D. The CA is not trusted by Windows Live Domain Services.
3. You want to congure all mailboxes in your Exchange organization that are associated
with the Marketing Department so that they use the Adatum Marketing federated
sharing policy. Which of the following commands should you use?
A. Set-Mailbox –Filter {Department –eq “Marketing”} | Get-Mailbox –SharingPolicy
“Adatum Marketing”
B. Get-Mailbox –Filter {Department –eq “Marketing”} | Set-Mailbox –SharingPolicy
“Adatum Marketing”
C. Set-Mailbox –Organization “Marketing” | Get-Mailbox –SharingPolicy “Adatum
Marketing”
D. Get-Mailbox –Filter –Organization “Marketing” | Set-Mailbox –SharingPolicy
“Adatum Marketing”
4. You want to create an account namespace for your Exchange organization with the
Federation Gateway and enable federation so that you can make use of the facilities
that federation provides, such as sharing calendars or contacts and accessing free or
busy information. What EMS cmdlet would enable you to do this?
A. New-OrganizationRelationship
B. Get-FederatedOrganizationIdentier
C. Set-OrganizationRelationship
D. Set-FederatedOrganizationIdentier
5. A federated sharing relationship exists between Blue Sky Airlines and Consolidated
Messenger. A user in Blue Sky Airlines sends an encrypted, authenticated email
message to a user in Consolidated Messenger. Which of the following describes
the rst three steps of the process? (Choose all that apply; each answer forms part of
the solution.)
A. The Blue Sky Airlines Hub Transport server accesses a ConsoldatedMessenger
.com domain controller to verify that a sharing relationship is congured with
ConsolidatedMessenger.com and that the user has permission to send messages
across the sharing relationship.
Lesson 2: Conguring Federated Sharing CHAPTER 6 261
B. The Blue Sky Airlines Hub Transport server accesses a BlueSkyAirlines.com
domain controller to verify that a sharing relationship is congured with
ConsolidatedMessenger.com and that the user has permission to send messages
across the sharing relationship.
C. If both verications succeed, the Blue Sky Airlines Hub Transport server connects
to the Federation Gateway and requests a security token for the Blue Sky Airlines
user. Because BlueSkyAirlines.com is congured in the organization identier, the
Federation Gateway issues the token.
D. The message is sent through a Blue Sky Airlines Mailbox server to a Blue Sky
Airlines Hub Transport server.
E. If both verications succeed, the Consolidated Messenger Hub Transport server
connects to the Federation Gateway and requests a security token for the Blue
Sky Airlines user. Because BlueSkyAirlines.com is congured in the organization
identier, the Federation Gateway issues the token.
F. The message is sent through a Blue Sky Airlines Mailbox server to a Consolidated
Messenger Hub Transport server.
PR AC TI CE Adding a User to a Built-In Role Group
In this practice session, you add Don Hall to various built-in role groups and discover the
tasks that membership of these role groups enables Don to carry out. If you are using virtual
machines, the domain controller VAN-DC1 and the Exchange Server 2010 server VAN-EX1
need to be running and connected.
EX ERC IS E 1 Add Don Hall to the Recipient Management Role Group
In this exercise, you add Don Hall to the Recipient Management built-in role group. You then
use the EMC to verify that Don has only read access to the Exchange Server organization
and cannot modify mailbox database settings. You check that he can modify mailbox and
distribution groups. Carry out the following procedure:
1. Log on to the domain controller VAN-DC1 with the Kim Akers account and the
password Pa$$w0rd.
2. Click Active Directory Users And Computers in the Administrative Tools menu.
3. In Active Directory Users And Computers, expand the Console tree and click the
Microsoft Exchange Security Groups OU.
4. Right-click Recipient Management, as shown in Figure 6-17. Click Properties.
262 CHAPTER 6 Federated Sharing and Role Based Access Control
FIGURE 6-17 Accessing Recipient Management Properties
5. In the Recipient Management Properties dialog box, click the Members tab. Click Add.
6. In the Select Users, Contacts, Computers, Service Accounts, Or Groups dialog box, type
Don Hall in the Enter The Object Names To Select box. Click Check Names, as shown in
Figure 6-18. Click OK.
FIGURE 6-18 Adding Don Hall to the Recipient Management built-in role group
7. Click OK to close the Recipient Management Properties dialog box.
8. If you are already logged on to the Exchange Server 2010 server VAN-EX1, log off.
Lesson 2: Conguring Federated Sharing CHAPTER 6 263
9. Log on to the Exchange Server 2010 server VAN-EX1 with the Don Hall account and
the password Pa$$w0rd.
NOTE CHANGE GROUP POLICY IF YOU CANNOT LOG ON AS DON HALL
As a member of the Backup Operators security group, the Don Hall account should
be able to log on locally to the VAN-EX1 server. If, however, you get the message
“You cannot log on because the logon method you are using is not allowed on this
computer,” run gpedit.msc, expand Windows Settings\Security Settings\Local Policies,
click on User Rights Assignment, and add Don Hall to the Allow Log On Locally right.
10. On the Start menu, click All Programs. Click Microsoft Exchange Server 2010.
Click Exchange Management Console.
11. In the EMC, expand the Console tree. Click Mailbox under Recipient Conguration.
12. Right-click the Don Hall mailbox in the Result pane and click Properties. On the
Address and Phone tab, specify an address, as shown in Figure 6-19. Click OK.
FIGURE 6-19 Don Hall can configure mailbox settings.
13. In the Console tree, click Distribution Group under Recipient Conguration. In
the Actions pane, click New Distribution Group. Check that Don can run the New
Distribution Group Wizard, as shown in Figure 6-20. You can create a distribution
group if you want to, but all that is necessary for the exercise is to show that Don
can access the wizard. Click Cancel.
264 CHAPTER 6 Federated Sharing and Role Based Access Control
FIGURE 6-20 Don can create a distribution group.
14. In the Console tree, click Mailbox under Organization Conguration. Check that the
Don Hall account cannot run the New Mailbox Database Wizard.
15. Log off from the VAN-EX1 Exchange 2010 server. (Note that you need to log off
because the Don Hall account will receive the permissions associated with the role you
assign in Exercise 2 only when you use it to log on.)
EX ERC IS E 2 Add Don Hall to the Public Folder Management Role Group
In this exercise, you remove Don Hall from the Recipient Management built-in role group and
add him to the Public Folder Management built-in role group. You then use the EMS to verify
that Don cannot modify mailbox settings but can manage public folder settings. You need to
have completed Exercise 1 before attempting this exercise. Carry out the following procedure:
1. If necessary, log on to the domain controller VAN-DC1 with the Kim Akers account
and the password Pa$$w0rd.
2. Refer to the procedure you used in Exercise 1 to add the Don Hall account to the
Recipient Management role group. Use the same tools to remove the Don Hall
account from the Recipient Management role group and add it to the Public Folder
Management role group.
3. Log on to the Exchange Server 2010 server VAN-EX1 as Don Hall and open the EMS
from the Microsoft Exchange Server 2010 menu.
4. Enter the following command:
New-PublicFolder –Name "Don Hall Public Folder"
Lesson 2: Conguring Federated Sharing CHAPTER 6 265
Check that Don Hall can create a new public folder, as shown in Figure 6-21.
FIGURE 6-21 Don can create a public folder.
5. Enter the following command:
New-Mailbox –Name "Test Mailbox"
Check that Don Hall cannot create a new mailbox. The error message you should get
is that “New-Mailbox” is not a recognized cmdlet. What this means is it is not a cmdlet
that Don Hall has permission to use.
PR AC TI CE Creating a Sharing Policy and Applying It to Mailboxes
In this practice session, you create a sharing policy with a (nonexistent) external domain.
You apply the policy to the Kim Akers mailbox. You then create a second policy and apply it
to the Don Hall mailbox. In a production environment with federation trusts and a sharing
relationship congured, Kim would be able to share calendar information with users at the
external domain, while Don can share both calendar and contact information. You then
display all the available information for the sharing policy applied to the Don Hall mailbox.
If you are using virtual machines, the domain controller VAN-DC1 and the Exchange Server
2010 server VAN-EX1 need to be running and connected.
EX ERC IS E Create Sharing Policies and Apply Them to Mailboxes
In this exercise, you use the EMS to create two sharing policies and apply them to two
separate mailboxes. You then view the sharing policy information for one of these policies.
Carry out the following procedure:
1. Log on to the Exchange Server 2010 server VAN-EX1 using the Kim Akers account
and the password Pa$$w0rd.
2. Click All Programs, click Microsoft Exchange Server 2010, and then click Exchange
Management Shell.
3. Create a sharing policy named Blue Sky Airlines01 that allows users in the
BlueSkyAirlines.com domain to see the detailed free or busy information and contacts
266 CHAPTER 6 Federated Sharing and Role Based Access Control
of users in your domain who have the policy applied to their mailboxes. To do this,
enter the following command:
New-SharingPolicy -Name "Blue Sky Airlines01" -Domains 'BlueSkyAirlines.com:
CalendarSharingFreeBusyDetail, ContactsSharing'
4. Apply the Blue Sky Airlines01 sharing policy to the Don Hall mailbox. To do this,
enter the following command:
Set-Mailbox –Identity "Don Hall" –SharingPolicy "Blue Sky Airlines01"
5. Create a sharing policy named Blue Sky Airlines02 that allows users in the
BlueSkyAirlines.com domain to see the detailed free or busy information but not the
contacts of users in your domain who have the policy applied to their mailboxes. To
do this, enter the following command:
New-SharingPolicy -Name "Blue Sky Airlines02" -Domains 'BlueSkyAirlines.com:
CalendarSharingFreeBusyDetail'
6. Apply the Blue Sky Airlines02 sharing policy to the Kim Akers mailbox. To do this,
enter the following command:
Set-Mailbox –Identity "Kim Akers" –SharingPolicy "Blue Sky Airlines02"
Figure 6-22 shows the commands that create and assign the two sharing policies.
FIGURE 6-22 Creating and assigning sharing policies
7. Display all the available information for the sharing policy applied to the Don Hall
mailbox. To do this, enter the following command:
Get-SharingPolicy "Blue Sky Airlines01" | FL
Figure 6-23 shows the output from this command.
FIGURE 6-23 Information for Blue Sky Airlines01 sharing policy
Chapter Review CHAPTER 6 267
Chapter Review
To further practice and reinforce the skills you learned in this chapter, you can perform the
following tasks:
n
Review the chapter summary.
n
Review the list of key terms introduced in this chapter.
n
Complete the case scenarios. These scenarios set up real-word situations involving
the topics of this chapter and ask you to create a solution.
n
Complete the suggested practices.
n
Take a practice test.
Chapter Summary
n
RBAC implements a permissions model using management role entries that grant
permissions to management roles through management role assignments. Members
and delegates in management role groups are added to these management roles and
are granted the permissions associated with the roles. Management role scopes dene
the objects to which the permissions granted through membership of a management
role group are applied.
n
A federated sharing relationship can be established between two Exchange Server
2010 organizations provided that both organizations have congured a federated
trust with the Federation Gateway authorized by a valid X.509 certicate issued by
a third-party CA trusted by Windows Live Domain Services. This enables users in
either organization to share calendar and contact information with users in the other
organization and to send encrypted and authenticated email messages between the
organizations.
Key Terms
Do you know what these key terms mean?
n
Federation trust
n
Management role assignment
n
Management role assignment policy
n
Management role entry
n
Management role group
n
Management role group assignment
n
Management role scope
n
Management role
n
Microsoft Federation Gateway organization identier
n
Role Based Access Control (RBAC) role holder
268 CHAPTER 6 Federated Sharing and Role Based Access Control
Case Scenarios
In the following case scenarios, you will apply what you’ve learned about subjects of this
chapter. You can nd answers to these questions in the “Answers ” section at the end of
this book.
Case Scenario 1: Adding a Delegate to a Role Group
Kim Akers is an Exchange organization administrator at Northwind Traders. She wants to add
Don Hall as a delegate to the role group named Recipient Managers. However, this role group
already contains a number of delegates. If Kim merely adds Don to the list, she would need to
enter the entire list as the argument of the ManagedBy parameter of the Set-RoleGroup EMS
cmdlet. She knows that this would be an error-prone and time-consuming procedure. Answer
the following questions:
1. What does Kim do with the current delegate list, and what does she enter in the EMS
to do it?
2. How does Kim add Don to the current delegate list?
3. How does she apply the revised delegate list to the role group?
4. Kim later decides that Don should not after all be a delegate in this role group.
How does she remove him from the delegate list?
Case Scenario 2: Replacing an X.509 Certicate in a Federation Trust
Jeff Hay is an Exchange organization administrator at Fabrikam, Inc. He has obtained and
installed an X.509 certicate issued by a CA that is trusted by Windows Live Domain Services.
He wants to use this certicate to verify the federation trust named Microsoft Federation
Gateway that has been established between Fabrikam and the Federation Gateway. Answer
the following questions:
1. What information does he require about the certicate, and how does he obtain it?
2. How does he specify the certicate he has obtained as the next certicate?
3. What does he then need to do in all the Client Access and Hub Transport servers in the
Fabrikam Exchange Server 2010 organization?
4. How does he congure the trust to use the next certicate as the current certicate?
Suggested Practices
To help you master the examination objectives presented in this chapter, complete the
following tasks.
Take a Practice Test CHAPTER 6 269
Look More Closely at the For Info Links
n
Practice 1 This chapter describes a considerable number of EMS cmdlets, and there
is not space to discuss each of these in depth. The For Info links give you access to
detailed descriptions of the cmdlets, including their syntax and parameters. You are
not expected to remember every parameter, but reading through these detailed
descriptions should give you a feel for the facilities available by using the cmdlets that
the powerful EMS tool provides.
Find Out More about the Microsoft Federation Gateway
n
Practice 1 This chapter describes the Federation Gateway in terms of setting up
federated relationships in order to exchange calendar and contact information and
secure email. There is more to the Federation Gateway than that. Use the For Info
link provided in this chapter and follow subsequent links to nd out just what the
Federation Gateway offers you. Enter "Microsoft Federation Gateway” in a search
engine and access the links.
Use Role Based Access Control
n
Practice 1 If you are accustomed to the ACL model for conguring permissions,
you will nd RBAC to be considerably different. Use this permissions model to set
up roles, assign role entries, and create role groups. Place users or universal security
groups in the role group and test the permissions allocated to them. Experiment with
role scopes. At the very least, become familiar with the built-in role groups and what
members of these groups can and cannot do.
Take a Practice Test
The practice tests on this book’s companion CD offer many options. For example, you can test
yourself on just one exam objective, or you can test yourself on all the 70-662 certication
exam content. You can set up the test so that it closely simulates the experience of taking
a certication exam, or you can set it up in study mode so that you can look at the correct
answers and explanations after you answer each question.
MORE INFO PRACTICE TESTS
For details about all the practice test options available, see the “How to Use the Practice
Tests” section in this book’s Introduction.
Chapter 7 271
C H A P T E R 7
Routing and Transport Rules
T
his chapter discusses messaging policies, which you can use to control and protect
your email trafc, and how you can create transport rules and transport protection
rules that dene these policies. It considers moderated email trafc and how you congure
moderation.
In addition to controlling and protecting message trafc, the lesson also discusses
how you control the route a message takes to its nal destination. It looks at how you use
Receive and Send connectors to control your trafc ow, and how you obtain the necessary
certicates to encrypt and authenticate condential trafc.
In brief, this chapter is about what you send and how you send it.
Exam objectives in this chapter:
n
Create and congure transport rules.
n
Congure message routing.
Lessons in this chapter:
n
Lesson 1: Managing Transport Rules 273
n
Lesson 2: Setting Up Message Routing 312
Before You Begin
In order to complete the exercises in the practice session in this chapter, you need to have
done the following:
n
Installed the Windows Server 2008 R2 domain controller VAN-DC1 and the Windows
Exchange 2010 Enterprise Mailbox, Hub Transport, and Client Access server VAN-EX1
as described in the Appendix, “Setup Instructions for Exchange Server 2010.”
n
Created the Kim Akers account with the password Pa$$w0rd in the Adatum.com
domain. This account should be placed in the Domain Admins security group and
be a member of the Organization Management role group.
Routing and Transport Rules
Before You Begin
Lesson 1: Managing Transport Rules
Using Transport Rules
Managing Transport Rules
Conguring Disclaimers
Conguring Rights Protection
Conguring IRM
Using Transport Protection Rules
Implementing Moderated Transport
Lesson Summary
Lesson Review
Lesson 2: Setting Up Message Routing
Routing Messages
Using Active Directory Sites and Site Costs
for Routing
Using and Conguring Send Connectors
Using and Conguring Receive Connectors
Conguring Foreign Connectors for Compliance
Using TLS and MTLS
Lesson Summary
Lesson Review
Chapter Review
Chapter Summary
Key Terms
Case Scenarios
Suggested Practices
Investigate the Transport Rule Cmdlets
Investigate IRM and AD RMS
Investigate the Send and Receive Connector Cmdlets
Investigate TLS and MTLS
Take a Practice Test
272 Chapter 7 Routing and Transport Rules
n
Created the Don Hall account with the password Pa$$w0rd in the Adatum.com
domain. This account should be placed in the Backup Operators security group (so
it can be used to log on to the domain controller) and should be in the Marketing
organizational unit.
n
Created mailboxes for Kim Akers and Don Hall, accepting the default email address
format for the email addresses.
REAL WORLD
Ian McLean
T
he thing you need to remember about test networks is that they only mimic
real production networks. They cannot be exactly the same.
For example, the rst time I worked with such a network, it had a single Hub
Transport server and no Edge Transport servers at all. We tested any new
features—including transport rules—on this network before installing them on
our production system. Soon we began to realize that certain features, such as
messaging policies designed to block malware and some types of external attack,
should be installed on an Edge Transport server.
So we installed a messaging server with the Edge Transport role on our test
network and tested a number of innovations, including some transport rules that
were appropriate to the Edge Transport role. Everything seemed to work, so we
implemented the changes on our production network.
Nothing actually broke down, but the results were not as expected. The production
network had several Hub Transport and several Edge Transport servers. Previously,
we had tested transport rules on our test Hub Transport server, and when we
implemented them on our production system, Active Directory replication ensured
that the rules were applied on all Hub Transport servers. This doesn’t work with
Edge Transport servers. If you want a transport rule to apply to all Edge Transport
servers, you need to implement it on all of them (possibly by exporting and then
importing such a rule).
We eventually decided to clone all our Edge Transport servers. This provided
failover support and solved the transport rule problem. However, I hope we all
learned a valuable lesson—I know I did. Don’t believe everything you see on a test
network.
Lesson 1: Managing Transport Rules Chapter 7 273
Lesson 1: Managing Transport Rules
This lesson discusses transport rules and how you can use them to apply messaging
policies on both Hub Transport and Edge Transport servers. You can use Windows Rights
Management Services (RMS) to congure Information Rights Management (IRM) so that your
users can send secure IRM-protected messages. The RMS prelicensing agent is installed in
Exchange Server 2010 to enable you to do this. The lesson looks at how you use transport
protection rules to congure rights protection.
Moderated transport is a new feature in Exchange Server 2010 that enables a moderator
to intercept and check mail to a specied recipient (typically a distribution group) and allow
or block delivery depending on the acceptability of the message. This lesson discusses
how moderated transport works, how you congure a moderated recipient and specify
a moderator, and how you congure an additional arbitration mailbox.
After this lesson, you will be able to:
n
Congure transport rules on Hub Transport and Edge Transport servers.
n
Congure IRM and use a transport protection rule to apply an RMS template and
IRM-protect messages.
n
Congure moderated transport.
Estimated lesson time: 50 minutes
Using Transport Rules
Your organization may be required by law, regulatory requirements, or company policies
to apply messaging policies that limit interaction between recipients and senders (both
individual senders and departmental groups). Such limitations can apply both inside and
outside the organization. In addition to limiting interactions inside the organization, you
also need to prevent inappropriate content from entering or leaving the organization, lter
condential information, track or archive specied messages, redirect inbound and outbound
messages so that they can be inspected, and apply disclaimers to messages as they pass
through the organization. The mechanism that enables you to accomplish all these aims is
the transport rule.
You can use transport rules to apply messaging policies to email messages that ow
through the transport pipeline on Hub Transport and Edge Transport servers. These rules
permit you to comply with messaging policies, secure messages, prevent information leakage,
and protect messaging systems.
You create a transport rule by specifying rule conditions, exceptions, and actions.
The transport rule agent (on Hub Transport servers) or the edge rules agent (on edge servers)
processes the transport rule. If the condition is satised and none of the exceptions apply, the
action is performed.
