Beginning Android PHẦN 7 pps
Bạn đang xem bản rút gọn của tài liệu. Xem và tải ngay bản đầy đủ của tài liệu tại đây (1.14 MB, 38 trang )
206
CHAPTER 21
■ LEVERAGING JAVA LIBRARIES
And now, some caveats.
First, not all scripting languages will work. For example, those that implement their own
form of just-in-time (JIT) compilation, generating Java bytecodes on the fly, would probably
have to be augmented to generate Dalvik VM bytecodes instead of those for stock Java imple-
mentations. Simpler languages that execute from parsed scripts, calling Java reflection APIs to
call back into compiled classes, will likely work better. Even there, though, not every feature of
the language may work if the feature relies upon some facility in a traditional Java API that does
not exist in Dalvik—for example, there could be stuff hidden inside BeanShell or the add-on
JARs that does not work on today’s Android.
Second, scripting languages without JIT will inevitably be slower than compiled Dalvik
applications. Slower may mean users experience sluggishness. Slower definitely means more
battery life is consumed for the same amount of work. So, building a whole Android applica-
tion in BeanShell, simply because you feel it is easier to program in may cause your users to be
unhappy.
Third, scripting languages that expose the whole Java API, like BeanShell, can pretty much
do anything the underlying Android security model allows. So, if your application has the
READ_CONTACTS permission, expect any BeanShell scripts your application runs to have the
same permission.
Last, but certainly not least, is that language interpreter JARs tend to be . . . portly. The
BeanShell JAR used in this example is 200KB. That is not ridiculous, considering what it does,
but it will make applications that use BeanShell that much bigger to download, take up that
much more space on the device, etc.
. . . And Not a Drop to Drink
Not all Java code will work on Android and Dalvik. Specifically consider the following:
• If the Java code assumes it runs on Java SE, Java ME, or Java EE, it may be missing some
APIs that those platforms provide that Android does not. For example, some charting
libraries assume the existence of Swing or Abstract Window Toolkit (AWT) drawing
primitives, which are generally unavailable on Android.
• The Java code might have a dependency on other Java code that, in turn, might have
problems running on Android. For example, you might want to use a JAR that relies
upon an earlier (or newer) version of the Apache HTTPComponents than the one that is
bundled with Android.
• The Java code may use language capabilities beyond what the Dalvik engine is capable
of using.
In all these cases, if you have only a compiled JAR to work with, you may not encounter
problems at compile time, but rather when running the application. Hence, where possible it
is best to use open-source code with Android so you can build the third-party code alongside
your own and find out about difficulties sooner.
Murphy_2419-8C21.fm Page 206 Wednesday, April 22, 2009 8:20 AM
207
■ ■ ■
CHAPTER 22
Communicating via
the Internet
The expectation is that most, if not all, Android devices will have built-in Internet access. That
could be WiFi, cellular data services (EDGE, 3G, etc.), or possibly something else entirely. Regard-
less, most people—or at least those with a data plan or WiFi access—will be able to get to the
Internet from their Android phone.
Not surprisingly, the Android platform gives developers a wide range of ways to make use
of this Internet access. Some offer high-level access, such as the integrated WebKit browser
component we saw in Chapter 13. If you want, you can drop all the way down to using raw
sockets. Or, in between, you can leverage APIs—both on-device and from 3rd-party JARs—that
give you access to specific protocols: HTTP, XMPP, SMTP, and so on.
The emphasis of this book is on the higher-level forms of access: the WebKit component
and Internet-access APIs, as busy coders should be trying to reuse existing components versus
rolling one’s own on-the-wire protocol wherever possible.
REST and Relaxation
Android does not have built-in SOAP or XML-RPC client APIs. However, it does have the Apache
HttpComponents library baked in. You can either layer a SOAP/XML-RPC layer atop this library, or
use it “straight” for accessing REST-style Web services. For the purposes of this book, “REST-
style Web services” is defined as simple HTTP requests for ordinary URLs over the full range of
HTTP verbs, with formatted payloads (XML, JSON, etc.) as responses.
More expansive tutorials, FAQs, and HOWTOs can be found at the HttpComponents Web
site.
1
Here, we’ll cover the basics, while checking the weather.
HTTP Operations via Apache HttpComponents
The HTTPClient component of HttpComponents handles all HTTP requests on your behalf.
The first step to using HttpClient is, not surprisingly, to create an HttpClient object. Since
HttpClient is an interface, you will need to actually instantiate some implementation of that
interface, such as DefaultHttpClient.
1. />Murphy_2419-8C22.fm Page 207 Wednesday, April 22, 2009 2:47 PM
208
CHAPTER 22
■ COMMUNICATING VIA THE INTERNET
Those requests are bundled up into HttpRequest instances, with different HttpRequest
implementations for each different HTTP verb (e.g., HttpGet for HTTP GET requests). You create
an HttpRequest implementation instance, fill in the URL to retrieve and other configuration
data (e.g., form values if you are doing an HTTP POST via HttpPost), then pass the method to the
client to actually make the HTTP request via execute().
What happens at this point can be as simple or as complicated as you want. You can get an
HttpResponse object back, with response code (e.g., 200 for OK), HTTP headers, and the like. Or,
you can use a flavor of execute() that takes a ResponseHandler<String> as a parameter—the net
result there being that execute() returns just the String representation of the request body. In
practice, this is not a recommended approach, because you really should be checking your
HTTP response codes for errors. However, for trivial applications, like book examples, the
ResponseHandler<String> approach works just fine.
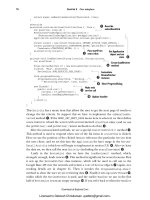
For example, let’s take a look at the Internet/Weather sample project. This implements an
activity that retrieves weather data for your current location from the National Weather Service
(Note: this probably only works in the US). That data is converted into an HTML page, which is
poured into a WebKit widget for display. Rebuilding this demo using a ListView is left as an
exercise for the reader. Also, since this sample is relatively long, we will only show relevant
pieces of the Java code here in this chapter, though you can always download the full source
from the CommonsWare Web site.
2
To make this a bit more interesting, we use the Android location services to figure out
where we are . . . sort of. The full details of how that works is described in Chapter 33.
In the onResume() method, we toggle on location updates, so we will be informed where we
are now and when we move a significant distance (10km). When a location is available—either
at the start or based on movement—we retrieve the National Weather Service data via our
updateForecast() method:
private void updateForecast(Location loc) {
String url=String.format(format, loc.getLatitude(), loc.getLongitude());
HttpGet getMethod=new HttpGet(url);
try {
ResponseHandler<String> responseHandler = new BasicResponseHandler();
String responseBody=client.execute(getMethod, responseHandler);
buildForecasts(responseBody);
String page=generatePage();
browser.loadDataWithBaseURL(null, page, "text/html",
"UTF-8", null);
}
2. />Murphy_2419-8C22.fm Page 208 Wednesday, April 22, 2009 2:47 PM
CHAPTER 22 ■ COMMUNICATING VIA THE INTERNET
209
catch (Throwable t) {
Toast
.makeText(this, "Request failed: "+t.toString(), 4000)
.show();
}
}
The updateForecast() method takes a Location as a parameter, obtained from the location
update process. For now, all you need to know is that Location sports getLatitude() and
getLongitude() methods that return the latitude and longitude of the device’s position,
respectively.
We hold the URL to the National Weather Service XML in a string resource, and pour in
the latitude and longitude at runtime. Given our HttpClient object created in onCreate(), we
populate an HttpGet with that customized URL, then execute that method. Given the resulting
XML from the REST service, we build the forecast HTML page (see “Parsing Responses”) and
pour that into the WebKit widget. If the HttpClient blows up with an exception, we provide that
error as a Toast.
Parsing Responses
The response you get will be formatted using some system—HTML, XML, JSON, whatever. It is
up to you, of course, to pick out what information you need and do something useful with it. In
the case of the WeatherDemo, we need to extract the forecast time, temperature, and icon (indi-
cating sky conditions and precipitation) and generate an HTML page from it.
Android includes:
• Three XML parsers: the traditional W3C DOM (org.w3c.dom), a SAX parser (org.xml.sax),
and the XML pull parser discussed in Chapter 19
• A JSON parser (org.json)
You are also welcome to use third-party Java code, where possible, to handle other formats,
such as a dedicated RSS/Atom parser for a feed reader. The use of third-party Java code is
discussed in Chapter 21.
For WeatherDemo, we use the W3C DOM parser in our buildForecasts() method:
void buildForecasts(String raw) throws Exception {
DocumentBuilder builder=DocumentBuilderFactory
.newInstance()
.newDocumentBuilder();
Document doc=builder.parse(new InputSource(new StringReader(raw)));
NodeList times=doc.getElementsByTagName("start-valid-time");
Murphy_2419-8C22.fm Page 209 Wednesday, April 22, 2009 2:47 PM
210
CHAPTER 22
■ COMMUNICATING VIA THE INTERNET
for (int i=0;i<times.getLength();i++) {
Element time=(Element)times.item(i);
Forecast forecast=new Forecast();
forecasts.add(forecast);
forecast.setTime(time.getFirstChild().getNodeValue());
}
NodeList temps=doc.getElementsByTagName("value");
for (int i=0;i<temps.getLength();i++) {
Element temp=(Element)temps.item(i);
Forecast forecast=forecasts.get(i);
forecast.setTemp(new Integer(temp.getFirstChild().getNodeValue()));
}
NodeList icons=doc.getElementsByTagName("icon-link");
for (int i=0;i<icons.getLength();i++) {
Element icon=(Element)icons.item(i);
Forecast forecast=forecasts.get(i);
forecast.setIcon(icon.getFirstChild().getNodeValue());
}
}
The National Weather Service XML format is . . . curiously structured, relying heavily on
sequential position in lists versus the more object-oriented style you find in formats like RSS or
Atom. That being said, we can take a few liberties and simplify the parsing somewhat, taking
advantage of the fact that the elements we want (start-valid-time for the forecast time, value
for the temperature, and icon-link for the icon URL) are all unique within the document.
The HTML comes in as an InputStream and is fed into the DOM parser. From there, we
scan for the start-valid-time elements and populate a set of Forecast models using those
start times. Then, we find the temperature value elements and icon-link
URLs and fill those
into the Forecast objects.
In turn, the generatePage() method creates a rudimentary HTML table with the forecasts:
String generatePage() {
StringBuffer bufResult=new StringBuffer("<html><body><table>");
bufResult.append("<tr><th width=\"50%\">Time</th>"+
"<th>Temperature</th><th>Forecast</th></tr>");
for (Forecast forecast : forecasts) {
bufResult.append("<tr><td align=\"center\">");
bufResult.append(forecast.getTime());
bufResult.append("</td><td align=\"center\">");
Murphy_2419-8C22.fm Page 210 Wednesday, April 22, 2009 2:47 PM
CHAPTER 22 ■ COMMUNICATING VIA THE INTERNET
211
bufResult.append(forecast.getTemp());
bufResult.append("</td><td><img src=\"");
bufResult.append(forecast.getIcon());
bufResult.append("\"></td></tr>");
}
bufResult.append("</table></body></html>");
return(bufResult.toString());
}
The result can be seen in Figure 22-1.
Figure 22-1. The WeatherDemo sample application
Stuff to Consider
If you need to use SSL, bear in mind that the default HttpClient setup does not include SSL
support. Mostly, this is because you need to decide how to handle SSL certificate presentation—
do you blindly accept all certificates, even self-signed or expired ones? Or do you want to ask
the user if they really want to use some strange certificates?
Similarly, HttpClient, by default, is designed for single-threaded use. If you will be using
HttpClient from a service or some other place where multiple threads might be an issue, you
can readily set up HttpClient to support multiple threads.
For these sorts of topics, you are best served by checking out the HttpComponents Web
site for documentation and support.
Murphy_2419-8C22.fm Page 211 Wednesday, April 22, 2009 2:47 PM
Murphy_2419-8C22.fm Page 212 Wednesday, April 22, 2009 2:47 PM
■ ■ ■
PART 4
Intents
Murphy_2419-8C23.fm Page 213 Wednesday, April 22, 2009 2:48 PM
Murphy_2419-8C23.fm Page 214 Wednesday, April 22, 2009 2:48 PM
215
■ ■ ■
CHAPTER 23
Creating Intent Filters
Up to now, the focus of this book has been on activities opened directly by the user from the
device’s launcher. This, of course, is the most obvious case for getting your activity up and
visible to the user. In many cases it is the primary way the user will start using your application.
However, the Android system is based upon lots of loosely-coupled components. What
you might accomplish in a desktop GUI via dialog boxes, child windows, and the like are mostly
supposed to be independent activities. While one activity will be “special”, in that it shows up
in the launcher, the other activities all need to be reached . . . somehow.
The “how” is via intents.
An intent is basically a message that you pass to Android saying, “Yo! I want to do . . . er . . .
something! Yeah!” How specific the “something” is depends on the situation—sometimes you
know exactly what you want to do (e.g., open up one of your other activities), and sometimes
you don’t.
In the abstract, Android is all about intents and receivers of those intents. So, now that we
are well-versed in creating activities, let’s dive into intents, so we can create more complex
applications while simultaneously being “good Android citizens.”
What’s Your Intent?
When Sir Tim Berners-Lee cooked up the Hypertext Transfer Protocol—HTTP—he set up a
system of verbs plus addresses in the form of URLs. The address indicated a resource, such as
a Web page, graphic, or server-side program. The verb indicated what should be done: GET to
retrieve it, POST to send form data to it for processing, etc.
Intents are similar, in that they represent an action plus context. There are more actions
and more components to the context with Android intents than there are with HTTP verbs and
resources, but the concept is still the same.
Just as a Web browser knows how to process a verb + URL pair, Android knows how to find
activities or other application logic that will handle a given intent.
Pieces of Intents
The two most important pieces of an intent are the action and what Android refers to as the
“data”. These are almost exactly analogous to HTTP verbs and URLs—the action is the verb,
and the “data” is a Uri, such as content://contacts/people/1 representing a contact in the
contacts database. Actions are constants, such as ACTION_VIEW (to bring up a viewer for the
resource), ACTION_EDIT (to edit the resource), or ACTION_PICK (to choose an available item given
a Uri representing a collection, such as content://contacts/people).
Murphy_2419-8C23.fm Page 215 Wednesday, April 22, 2009 2:48 PM
216
CHAPTER 23
■ CREATING INTENT FILTERS
If you were to create an intent combining ACTION_VIEW with a content Uri of content://
contacts/people/1, and pass that intent to Android, Android would know to find and open an
activity capable of viewing that resource.
There are other criteria you can place inside an intent (represented as an Intent object),
besides the action and “data” Uri, such as:
• A category. Your “main” activity will be in the LAUNCHER category, indicating it should
show up on the launcher menu. Other activities will probably be in the DEFAULT or
ALTERNATIVE categories.
• A MIME type, indicating the type of resource you want to operate on, if you don’t know
a collection Uri.
• A component, which is to say, the class of the activity that is supposed to receive this
intent. Using components this way obviates the need for the other properties of the intent.
However, it does make the intent more fragile, as it assumes specific implementations.
• “Extras”, which is a Bundle of other information you want to pass along to the receiver
with the intent, that the receiver might want to take advantage of. What pieces of infor-
mation a given receiver can use is up to the receiver and (hopefully) is well-documented.
You will find rosters of the standard actions and categories in the Android SDK documen-
tation for the Intent class.
Intent Routing
As previously noted, if you specify the target component in your intent, Android has no doubt
where the intent is supposed to be routed to—it will launch the named activity. This might be
OK if the target intent is in your application. It definitely is not recommended for sending
intents to other applications. Component names, by and large, are considered private to the
application and are subject to change. Content Uri templates and MIME types are the preferred
ways of identifying services you wish third-party code to supply.
If you do not specify the target component, then Android has to figure out what activities
(or other intent receivers) are eligible to receive the intent. Note the use of the plural “activi-
ties”, as a broadly-written intent might well resolve to several activities. That is the . . . ummm
. . . intent (pardon the pun), as you will see later in this chapter. This routing approach is referred to
as implicit routing.
Basically, there are three rules, all of which must be true for a given activity to be eligible
for a given intent:
1. The activity must support the specified action.
2. The activity must support the stated MIME type (if supplied).
3. The activity must support all of the categories named in the intent.
The upshot is that you want to make your intents specific enough to find the right
receiver(s), and no more specific than that.
This will become clearer as we work through some examples later in this chapter.
Murphy_2419-8C23.fm Page 216 Wednesday, April 22, 2009 2:48 PM
CHAPTER 23 ■ CREATING INTENT FILTERS
217
Stating Your Intent(ions)
All Android components that wish to be notified via intents must declare intent filters, so Android
knows which intents should go to that component. To do this, you need to add intent-filter
elements to your AndroidManifest.xml file.
All of the example projects have intent filters defined, courtesy of the Android application-
building script (activityCreator or the IDE equivalent). They look something like this:
<manifest xmlns:android=" /> package="com.commonsware.android.skeleton">
<application>
<activity android:name=".Now" android:label="Now">
<intent-filter>
<action android:name="android.intent.action.MAIN" />
<category android:name="android.intent.category.LAUNCHER" />
</intent-filter>
</activity>
</application>
</manifest>
Note the intent-filter element under the activity element. Here, we declare that this
activity:
• is the main activity for this application
•is in the LAUNCHER category, meaning it gets an icon in the Android main menu
Because this activity is the main one for the application, Android knows this is the compo-
nent it should launch when somebody chooses the application from the main menu.
You are welcome to have more than one action or more than one category in your intent
filters. That indicates that the associated component (e.g., activity) handles multiple different
sorts of intents.
More than likely, you will also want to have your secondary (non-MAIN) activities specify
the MIME type of data they work on. Then, if an intent is targeted for that MIME type—either
directly, or indirectly by the Uri referencing something of that type—Android will know that
the component handles such data.
For example, you could have an activity declared like this:
<activity android:name=".TourViewActivity">
<intent-filter>
<action android:name="android.intent.action.VIEW" />
<category android:name="android.intent.category.DEFAULT" />
<data android:mimeType="vnd.android.cursor.item/vnd.commonsware.tour" />
</intent-filter>
</activity>
This activity will get launched by an intent requesting to view a Uri representing a vnd.
android.cursor.item/vnd.commonsware.tour piece of content. That intent could come from
another activity in the same application (e.g., the
MAIN activity for this application) or from
Murphy_2419-8C23.fm Page 217 Wednesday, April 22, 2009 2:48 PM
218
CHAPTER 23
■ CREATING INTENT FILTERS
another activity in another Android application that happens to know a Uri that this activity
handles.
Narrow Receivers
In the examples shown previously, the intent filters were set up on activities. Sometimes, tying
intents to activities is not exactly what we want:
• Some system events might cause us to want to trigger something in a service rather than
an activity.
• Some events might need to launch different activities in different circumstances, where
the criteria are not solely based on the intent itself, but some other state (e.g., if we get
intent X and the database has a Y, then launch activity M; if the database does not have
a Y, then launch activity N).
For these cases, Android offers the intent receiver, defined as a class implementing the
BroadcastReceiver interface. Intent receivers are disposable objects designed to receive intents—
particularly broadcast intents—and take action, typically involving launching other intents to
trigger logic in an activity, service, or other component.
The BroadcastReceiver interface has only one method: onReceive(). Intent receivers imple-
ment that method, where they do whatever it is they wish to do upon an incoming intent. To
declare an intent receiver, add a receiver element to your AndroidManifest.xml file:
<receiver android:name=".MyIntentReceiverClassName" />
An intent receiver is only alive for as long as it takes to process onReceive()—as soon
as that method returns, the receiver instance is subject to garbage collection and will not be
reused. This means intent receivers are somewhat limited in what they can do, mostly to avoid
anything that involves any sort of callback. For example, they cannot bind to a service, and they
cannot open a dialog box.
The exception is if the BroadcastReceiver is implemented on some longer-lived compo-
nent, such as an activity or service—in that case, the intent receiver lives as long as its “host”
does (e.g., until the activity is frozen). However, in this case, you cannot declare the intent
receiver via AndroidManifest.xml. Instead, you need to call registerReceiver() on your Activity’s
onResume() callback to declare interest in an intent, then call unregisterReceiver() from your
Activity’s onPause() when you no longer need those intents.
The Pause Caveat
There is one hiccup with using Intent objects to pass arbitrary messages around: it only works
when the receiver is active. To quote from the documentation for BroadcastReceiver:
If registering a receiver in your Activity.onResume() implementation, you should unregister
it in Activity.onPause(). (You won’t receive intents when paused, and this will cut down
on unnecessary system overhead). Do not unregister in Activity.onSaveInstanceState(),
because this won’t be called if the user moves back in the history stack.
Murphy_2419-8C23.fm Page 218 Wednesday, April 22, 2009 2:48 PM
CHAPTER 23 ■ CREATING INTENT FILTERS
219
Hence, you can only really use the Intent framework as an arbitrary message bus if:
• Your receiver does not care if it misses messages because it was not active.
• You provide some means of getting the receiver “caught up” on messages it missed
while it was inactive.
In Chapters 30 and 31 on creating and using services, you will see an example of the former
condition, where the receiver (service client) will use Intent-based messages when they are
available but does not need them if the client is not active.
Murphy_2419-8C23.fm Page 219 Wednesday, April 22, 2009 2:48 PM
Murphy_2419-8C23.fm Page 220 Wednesday, April 22, 2009 2:48 PM
221
■ ■ ■
CHAPTER 24
Launching Activities
and Sub-Activities
The theory behind the Android UI architecture is that developers should decompose their
application into distinct activities, each implemented as an Activity, each reachable via Intents,
with one “main” activity being the one launched by the Android launcher. For example, a calendar
application could have activities for viewing the calendar, viewing a single event, editing an
event (including adding a new one), and so forth.
This, of course, implies that one of your activities has the means to start up another activity.
For example, if somebody clicks on an event from the view-calendar activity, you might want
to show the view-event activity for that event. This means that, somehow, you need to be able to
cause the view-event activity to launch and show a specific event (the one the user clicked upon).
This can be further broken down into two scenarios:
• You know what activity you want to launch, probably because it is another activity in
your own application.
• You have a content Uri to . . . something, and you want your users to be able to do . . .
something with it, but you do not know up front what the options are.
This chapter covers the first scenario; the next chapter handles the second.
Peers and Subs
One key question you need to answer when you decide to launch an activity is, does your
activity need to know when the launched activity ends?
For example, suppose you want to spawn an activity to collect authentication information
for some Web service you are connecting to—maybe you need to authenticate with OpenID
1
in order to use an OAuth
2
service. In this case, your main activity will need to know when the
authentication is complete so it can start to use the Web service.
In this case the launched activity is clearly subordinate to the launching activity. Therefore
you probably want to launch the child as a sub-activity, which means your activity will be noti-
fied when the child activity is complete.
1. />2. />Murphy_2419-8C24.fm Page 221 Friday, April 24, 2009 9:19 AM
222
CHAPTER 24
■ LAUNCHING ACTIVITIES AND SUB-ACTIVITIES
On the other hand, imagine an email application in Android. When the user elects to view
an attachment, neither you nor the user necessarily expects the main activity to know when the
user is done viewing that attachment.
In this scenario, the launched activity is more a peer of your activity, so you probably want
to launch the “child” just as a regular activity. Your activity will not be informed when the
“child” is done, but, then again, your activity really doesn’t need to know.
Start ’Em Up
The two requirements for starting an activity are an Intent and your choice of how to start it up.
Make an Intent
As discussed in Chapter 1, Intents encapsulate a request, made to Android, for some activity or
other Intent receiver to do something.
If the activity you intend to launch is one of your own, you may find it simplest to create an
explicit Intent, naming the component you wish to launch. For example, from within your
activity, you could create an Intent like this:
new Intent(this, HelpActivity.class);
This would stipulate that you wanted to launch the HelpActivity. This activity would need
to be named in your AndroidManifest.xml file, though not necessarily with any Intent filter,
since you are trying to request it directly.
Or you could put together an Intent for some Uri, requesting a particular action:
Uri uri=Uri.parse("geo:"+lat.toString()+","+lon.toString());
Intent i=new Intent(Intent.ACTION_VIEW, uri);
Here, given that we have the latitude and longitude of some position (lat and lon, respec-
tively) of type Double, we construct a geo scheme Uri and create an Intent requesting to view
this Uri (ACTION_VIEW).
Make the Call
Once you have your Intent, you need to pass it to Android and get the child activity to launch.
You have four choices:
• The simplest option is to call startActivity() with the Intent—this will cause Android
to find the best-match activity and pass the Intent to it for handling. Your activity will
not be informed when the “child” activity is complete.
• You can call startActivityForResult(), passing it the Intent and a number (unique to
the calling activity). Android will find the best-match activity and pass the Intent over
to it. However, your activity will be notified when the child activity is complete via the
onActivityResult() callback (see the text following this list).
Murphy_2419-8C24.fm Page 222 Friday, April 24, 2009 9:19 AM
CHAPTER 24 ■ LAUNCHING ACTIVITIES AND SUB-ACTIVITIES
223
• You can call sendBroadcast(). In this case, Android will pass the Intent to all registered
BroadcastReceivers that could possibly want this Intent, not just the best match.
• You can call sendOrderedBroadcast(). Here Android will pass the Intent to all candidate
BroadcastReceivers one at a time—if any one “consumes” the Intent, the rest of the
candidates are not notified.
Most of the time, you will wind up using startActivity() or startActivityForResult()—
broadcast Intents are more typically raised by the Android system itself.
With startActivityForResult(), as noted, you can implement the onActivityResult()
callback to be notified when the child activity has completed its work. The callback receives the
unique number supplied to startActivityForResult(), so you can determine which child
activity is the one that has completed. You also get the following:
• A result code from the child activity calling setResult(). Typically this is RESULT_OK or
RESULT_CANCELLED, though you can create your own return codes (pick a number starting
with RESULT_FIRST_USER).
•An optional String containing some result data, possibly a URL to some internal or
external resource—for example, an ACTION_PICK Intent typically returns the selected bit
of content via this data string.
•An optional Bundle containing additional information beyond the result code and
data string.
To demonstrate launching a peer activity, take a peek at the Activities/Launch sample
application in the Source Code section at . The XML layout is fairly straight-
forward: two fields for the latitude and longitude, plus a button:
<?xml version="1.0" encoding="utf-8"?>
<LinearLayout xmlns:android=" /> android:orientation="vertical"
android:layout_width="fill_parent"
android:layout_height="fill_parent"
>
<TableLayout
android:layout_width="fill_parent"
android:layout_height="wrap_content"
android:stretchColumns="1,2"
>
<TableRow>
<TextView
android:layout_width="wrap_content"
android:layout_height="wrap_content"
android:paddingLeft="2dip"
android:paddingRight="4dip"
android:text="Location:"
/>
Murphy_2419-8C24.fm Page 223 Friday, April 24, 2009 9:19 AM
224
CHAPTER 24
■ LAUNCHING ACTIVITIES AND SUB-ACTIVITIES
<EditText android:id="@+id/lat"
android:layout_width="fill_parent"
android:layout_height="wrap_content"
android:cursorVisible="true"
android:editable="true"
android:singleLine="true"
android:layout_weight="1"
/>
<EditText android:id="@+id/lon"
android:layout_width="fill_parent"
android:layout_height="wrap_content"
android:cursorVisible="true"
android:editable="true"
android:singleLine="true"
android:layout_weight="1"
/>
</TableRow>
</TableLayout>
<Button android:id="@+id/map"
android:layout_width="fill_parent"
android:layout_height="wrap_content"
android:text="Show Me!"
/>
</LinearLayout>
The button’s OnClickListener simply takes the latitude and longitude, pours them into a
geo scheme Uri, then starts the activity.
package com.commonsware.android.activities;
import android.app.Activity;
import android.content.Intent;
import android.net.Uri;
import android.os.Bundle;
import android.view.View;
import android.widget.Button;
import android.widget.EditText;
public class LaunchDemo extends Activity {
private EditText lat;
private EditText lon;
@Override
public void onCreate(Bundle icicle) {
super.onCreate(icicle);
setContentView(R.layout.main);
Murphy_2419-8C24.fm Page 224 Friday, April 24, 2009 9:19 AM
CHAPTER 24 ■ LAUNCHING ACTIVITIES AND SUB-ACTIVITIES
225
Button btn=(Button)findViewById(R.id.map);
lat=(EditText)findViewById(R.id.lat);
lon=(EditText)findViewById(R.id.lon);
btn.setOnClickListener(new View.OnClickListener() {
public void onClick(View view) {
String _lat=lat.getText().toString();
String _lon=lon.getText().toString();
Uri uri=Uri.parse("geo:"+_lat+","+_lon);
startActivity(new Intent(Intent.ACTION_VIEW, uri));
}
});
}
}
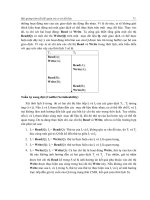
The activity is not much to look at (Figure 24-1).
Figure 24-1. The LaunchDemo sample application, with a location filled in
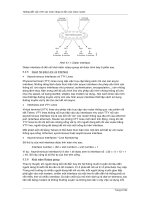
If you fill in a location (e.g., 38.8891 latitude and -77.0492 longitude) and click the button,
the resulting map is more interesting (Figure 24-2). Note that this is the built-in Android map
activity—we did not create our own activity to display this map.
In a Chapter 34, you will see how you can create maps in your own activities, in case you
need greater control over how the map is displayed.
Murphy_2419-8C24.fm Page 225 Friday, April 24, 2009 9:19 AM
226
CHAPTER 24
■ LAUNCHING ACTIVITIES AND SUB-ACTIVITIES
Figure 24-2. The map launched by LaunchDemo, showing the Lincoln Memorial in Washington DC
Tabbed Browsing, Sort Of
One of the main features of the modern desktop Web browser is tabbed browsing, where a
single browser window can show several pages split across a series of tabs. On a mobile device
this may not make a lot of sense, given that you lose screen real estate for the tabs themselves.
In this book, however, we do not let little things like sensibility stop us, so let me demon-
strate a tabbed browser, using TabActivity and Intents.
As you may recall from Chapter 10, a tab can have either a View or an Activity as its content.
If you want to use an Activity as the content of a tab, you provide an Intent that will launch
the desired Activity; Android’s tab-management framework will then pour the Activity’s
user interface into the tab.
Your natural instinct might be to use an http: Uri the way we used a geo: Uri in the
previous example:
Intent i=new Intent(Intent.ACTION_VIEW);
i.setData(Uri.parse(""));
That way, you could use the built-in Browser application and get all of the features that
it offers.
Alas, this does not work. You cannot host other applications’ activities in your tabs—only
your own activities, for security reasons.
So, we dust off our WebView demos from Chapter 13 and use those instead, repackaged as
Activities/IntentTab.
Murphy_2419-8C24.fm Page 226 Friday, April 24, 2009 9:19 AM
CHAPTER 24 ■ LAUNCHING ACTIVITIES AND SUB-ACTIVITIES
227
Here is the source to the main activity, the one hosting the TabView:
public class IntentTabDemo extends TabActivity {
@Override
public void onCreate(Bundle savedInstanceState) {
super.onCreate(savedInstanceState);
TabHost host=getTabHost();
host.addTab(host.newTabSpec("one")
.setIndicator("CW")
.setContent(new Intent(this, CWBrowser.class)));
host.addTab(host.newTabSpec("two")
.setIndicator("Android")
.setContent(new Intent(this, AndroidBrowser.class)));
}
}
As you can see, we are using TabActivity as the base class, and so we do not need our own
layout XML—TabActivity supplies it for us. All we do is get access to the TabHost and add two
tabs, each specifying an Intent that directly refers to another class. In this case, our two tabs
will host a CWBrowser and an AndroidBrowser, respectively.
Those activities are simple modifications to the earlier browser demos:
public class CWBrowser extends Activity {
WebView browser;
@Override
public void onCreate(Bundle icicle) {
super.onCreate(icicle);
browser=new WebView(this);
setContentView(browser);
browser.loadUrl("");
}
}
public class AndroidBrowser extends Activity {
WebView browser;
@Override
public void onCreate(Bundle icicle) {
super.onCreate(icicle);
browser=new WebView(this);
setContentView(browser);
browser.loadUrl(" /> }
}
Murphy_2419-8C24.fm Page 227 Friday, April 24, 2009 9:19 AM
228
CHAPTER 24
■ LAUNCHING ACTIVITIES AND SUB-ACTIVITIES
They simply load a different URL into the browser: the CommonsWare home page in one
(Figure 24-3), the Android home page in the other (Figure 24-4). The resulting UI shows what
tabbed browsing could look like on Android.
Figure 24-3. The IntentTabDemo sample application, showing the first tab
Figure 24-4. The IntentTabDemo sample application, showing the second tab
Murphy_2419-8C24.fm Page 228 Friday, April 24, 2009 9:19 AM
CHAPTER 24 ■ LAUNCHING ACTIVITIES AND SUB-ACTIVITIES
229
Using distinct subclasses for each targeted page is rather wasteful. Instead we could have
packaged the URL to open as an “extra” in an Intent and used that Intent to spawn a general-
purpose BrowserTab activity, which would read the URL out of the Intent “extra,” and use that.
The proof of this is left as an exercise for the reader.
Murphy_2419-8C24.fm Page 229 Friday, April 24, 2009 9:19 AM
Murphy_2419-8C24.fm Page 230 Friday, April 24, 2009 9:19 AM