Beginning microsoft Visual Basic 2010 phần 10 pot
Bạn đang xem bản rút gọn của tài liệu. Xem và tải ngay bản đầy đủ của tài liệu tại đây (3.82 MB, 75 trang )
614
❘
CHAPTER 19 VISUAL BASIC 2010 AND XML
FIGURE 19-7
figure
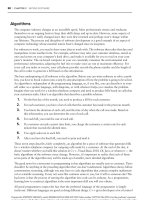
2. On Form1, draw a ListBox control. Change its
IntegralHeight
property to False, its
Dock
property to Fill,andits
Name
to
lstEmails, as shown in Figure 19-7.
3. Double-click the form’s title bar. Add this code to the
Load
event
handler. Remember to add a reference to
System.Xml.dll
and
add this namespace declaration:
Public Class Form1
Private Sub Form1_Load(ByVal sender As System.
Object, _
ByVal e As System.EventArgs) Handles
MyBase.Load
‘ where do we want to get the XML from
Dim filename As String = _
"C:\Users\Bryan\Documents\Visual Studio 10\Projects\Address " & _
"Book\bin\Debug\ AddressBook.xml"
‘ open the document
Dim reader As New XmlTextReader(filename)
‘ move to the start of the document
reader.MoveToContent()
‘ start working through the document
Dim addressData As Collection = Nothing
Dim elementName As String = Nothing
Do While reader.Read
‘ what kind of node to we have?
Select Case reader.NodeType
‘ is it the start of an element?
Case XmlNodeType.Element
‘ if it’s an element start, is it "Address"?
If reader.Name = "Address" Then
‘ if so, create a new collection
addressData = New Collection()
Else
‘ if not, record the name of the element
elementName = reader.Name
End If
‘ if we have some text, try storing it in the
‘ collection
Case XmlNodeType.Text
‘ do we have an address?
If Not addressData Is Nothing Then
addressData.Add(reader.Value, elementName)
End If
‘ is it the end of an element?
Case XmlNodeType.EndElement
‘ if it is, we should have an entire address stored
If reader.Name = "Address" Then
‘ try to create a new listview item
Dim item As String = Nothing
Try
Integrating with the Address Book Application
❘
615
item = addressData("firstname") & _
" " & addressData("lastname")
item &= " (" & addressData("email") & ")"
Catch
End Try
‘ add the item to the list
lstEmails.Items.Add(item)
‘ reset
addressData = Nothing
End If
End Select
Loop
End Sub
End Class
The preceding code assumes that your
AddressBook.xml
will be in
C:\Users\Bryan\Documents\Visual Studio
10\Projects\Address Book\bin\Debug
. If yours isn’t, change
the filename value specified at the top of the code.
FIGURE 19-8
figure
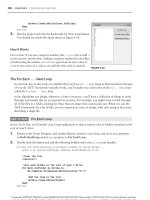
4. Run the project; you should see something like what is shown
in Figure 19-8. Notice that addresses without an e-mail address
display without problems, as the
element in your XML
file contains an empty string value instead of a null value, as is
typically found in databases.
How It Works
To fully appreciate the benefit of this exercise (and therefore the benefit of XML), imagine that before writ-
ing the application you’d never seen the XML formatused by the Address Book application. Because XML
is a text-based format, you’re able to open it in a normal text editor, read it, and make assumptions about
how it works. You know that you want to get a list of names and e-mail addresses, and you understand
that you have an array of
Address
elements, each one containing the three elements you need:
FirstName
,
LastName
,and
. All that remains is to extract and present the information.
Since announcing .NET, Microsoft has a made a big deal about how it is built on XML. This shows in the
.NET Framework support for XML, which offers a dazzling array of classes for reading and writing XML
documents. The
XmlSerializer
object that you’ve been using up until now is by far the easiest one to use,
but it relies on your having classes that match the document structure exactly. Therefore, if you are given a
document from a business partner, you won’t have a setof classes that matches the document. As a result,
you need some other way to read the document and fit it into whatever classes you do have.
In your Address List project, you don’t have applicable
AddressBook
or
Address
classes, so you had to use
some classes to step through a file. The one you’re using is
System.Xml.XmlTextReader
. This class provides
a pointer that starts at the top of the document and, on command, moves to the next part of the document.
(Each of these parts is called a node.) The pointer will stop at anything, and this includes start tags, end
tags, data values, and whitespace.
616
❘
CHAPTER 19 VISUAL BASIC 2010 AND XML
So, when you start, the first thing
XmlTextReader
tells you about is this node:
<?xml version="1.0" encoding="utf-8"?>
When you ask it to move on, it tells you about this node:
<AddressBook xmlns:xsi=" />xmlns:xsd=" />Then, when you ask it to move on again, it tells you about this node:
<Addresses>
Then it tells you about
<Address>
,
<FirstName>Bryan</FirstName>
,and
<LastName>
, and so on until it gets
to the end of the document. In between each one of these, you may or may not get told about whitespace
nodes. By and large, you can ignore these.
What your algorithm has to do, then, is get hold of an
XmlTextReader
and start moving through the doc-
ument one piece at a time. When you first start, the pointer is set ahead of the first node in the document.
Each call to
Read
moves the pointer along one node, so the first call to
Read
that you see at the start of the
Do
While
loop actually sets the pointer to the first node:
Private Sub Form1_Load(ByVal sender As System.Object, _
ByVal e As System.EventArgs) Handles MyBase.Load
‘ where do you want to get the XML from
Dim filename As String = _
"C:\Users\Bryan\Documents\Visual Studio 10\Projects\Address " & _
"Book\bin\Debug\AddressBook.xml\AddressBook.xml"
‘ open the document
Dim reader As New XmlTextReader(filename)
‘ move to the start of the document
reader.MoveToContent()
‘ start working through the document
Dim addressData As Collection, elementName As String
Do While reader.Read
You can use the
NodeType
property of
XmlTextReader
to find out what kind of node you’re looking at. If
you have an
Element
node, then this maps directly onto a start tag in the document. You can use the
Name
property to get the name of the tag. When you find the
<Address>
start tag, you create a new collection
called
addressData
. If the start tag that you’re looking at isn’t the
<Address>
tag, then you store the name
in
elementName
for later use:
‘ what kind of node to we have?
Select Case reader.NodeType
‘ is it the start of an element?
Case XmlNodeType.Element
‘ if it’s an element start, is it "Address"?
If reader.Name = "Address" Then
‘ if so, create a new collection
addressData = New Collection()
Else
‘ if not, record the name of the element
elementName = reader.Name
End If
Alternatively, the node you get might be a lump of text. If this is the case, then you check to see whether
addressData
points to a
Collection
object. If it does, you know that you are inside an
Address
element.
Integrating with the Address Book Application
❘
617
Remember, you’ve also stored the name of the element that you are looking at inside
elementName
.This
means that if
elementName
is set to
FirstName
, you know you’re in the
FirstName
element, and therefore
the text element you’re looking at must be the first name in the address. You then add this element name
and the value into the collection for later use:
‘ if we have some text, try storing it in the
‘ collection
Case XmlNodeType.Text
‘ do we have an address?
If Not addressData Is Nothing Then
addressData.Add(reader.Value, elementName)
End If
As you work through the file, you’ll get to this point for each of the elements stored in the
Address
element.
Effectively, by the time you reach
</Address>
,
addressData
will contain entries for each value stored
against the address in the document.
To detect when you get to the
</Address>
tag, you need to look for
EndElement
nodes:
‘ is it the end of an element?
Case XmlNodeType.EndElement
When you get one of these, if
Name
is equal to
Address
, then you know that you have reached
</Address>
,
and this means that
addressData
should be fully populated. You form a string and add it to the list:
‘ if it is, you should have an entire address stored
If reader.Name = "Address" Then
‘ try to create a new listview item
Dim item As String
Try
item = addressData("firstname") & _
" " & addressData("lastname")
item &= " (" & addressData("email") & ")"
Catch
End Try
‘ add the item to the list
lstEmails.Items.Add(item)
‘ reset
addressData = Nothing
End If
You’ll notice that in your
Try
Catch
you won’t do anything if an exception does occur. To keep this
example simple, you’re going to ignore any problems that do occur. Specifically, you’ll run into problems
if the
Address
element you’re looking through has sub-elements missing — for example, you might not
always have an e-mail address for each address, as shown earlier in Figure 19-8.
You then continue the loop. For each iteration of the loop,
XmlTextReader.Read
is called, which advances
the pointer to the next node. If there are no more nodes in the document,
Read
returns
False
, and the loop
stops:
End Select
Loop
End Sub
It is hoped that this example has illustrated the power of XML from a software integration perspec-
tive. With very little work, you’ve managed to integrate the Address Book and Address List applications
together.
618
❘
CHAPTER 19 VISUAL BASIC 2010 AND XML
If you want to experiment with this a little, try adding and deleting addresses from the Address Book.
You’ll need to close the program to save the changes to
AddressBook.xml
, but each time you start Address
List, you should see the changes you made.
SUMMARY
This chapter introduced the concept of XML. XML is a language based on open standards and can be
used as a tool for software integration. Within a single organization, XML can be used to transport
data across platforms easily. It also enables two organizations to define a common format for data
exchange; and because XML is text-based, it can easily be moved around using Internet technologies
such as e-mail, the Web, and FTP. XML is based on building a document constructed of tags and data.
XML is primarily used for integration work to make the tasks of data transportation and
exchange easier; and you, as a newcomer to Visual Basic and programming in general, are
unlikely to do integration work (as it’s typically done by developers with a lot of experience).
Nevertheless, this chapter helped you get an idea of what this is all about by focusing on using
the
System.Xml.Serialization.XmlSerializer
class to save entire objects to disk (known as
serialization). This same object was used to load objects from disk (known as deserialization). You
built a fully functional address book application that was able to use an XML file stored on the local
computer as its primary source of data.
To round off the chapter and to demonstrate that XML is great for software integration work, you
wrote a separate application that was able to load and make sense of the XML document used by the
Address Book application.
At this point, you should:
➤ Have a better understanding of XML and know what it looks like
➤ Know the basic rules for using XML
➤ Be able to serialize and deserialize XML data into objects
➤ Be able to manipulate XML data in your applications
➤ Be able to use the
XMLTextReader
class to walk through an XML document
EXERCISES
1. Name two reasons to use XML to integrate systems or store data.
2. In what two items do you store data in XML?
3. Is this valid XML?
<Root><one att="red" /></root>
4. Is this valid XML?
<Root><one att="red" >Me & you</one></Root>
5. Is this valid XML?
<Root><one><att>Me</one></att></Root>
Summary
❘
619
WHAT YOU HAVE LEARNED IN THIS CHAPTER
TOPIC CONCEPTS
XML XML files must contain a root element, are tag-based, case sensitive,
self describing, and based on a widely used standard.
Working with XML
Files
You can easily serialize and deserialize XML data to and from files to
work with it as a data source.
Exchanging data
with applications.
You can open XML in many applications, including text editors, and
share the data between these applications.
20
Deploying Your Application
WHAT YOU WILL LEARN IN THIS CHAPTER:
➤ Deployment concepts and terminology
➤ How to deploy a ClickOnce Application with Visual Studio 2010
➤ How to create a setup program with Visual Studio 2010
➤ How to edit the installer user interface
Deploying an application can be a complicated process, especially when dealing with large,
complex applications. A wealth of knowledge is required about nearly every aspect of a deploy-
ment. A large software installation for Windows requires knowledge ranging from Registry
settings, MIME types, and configuration files to database creation and manipulation. Compa-
nies tend to rely on dedicated deployment software for these large installations, together with
key people who understand the processes involved. However, Visual Studio 2010 does provide
some basic deployment functionality, which is tremendously helpful for the standard developer
and smaller installations.
Under the Visual Studio 2010 banner, you can create many different types of applications, from
desktop to web applications and services. All of these have varying degrees of complexity or
peculiarities when it comes installation time.
Since this is a beginner’s guide, this chapter provides an overview of deployment.
WHAT IS DEPLOYMENT?
Deployment is the activity of delivering copies of an application to other machines so that the
application runs in the new environment. It is the larger, architectural view for what you may
know as installation or setup. There is a subtle difference between deployment and installation.
Deployment is the art of distribution. In other words, deployment is the way in which software
is delivered. Installation or setup is a process, whereby you load, configure, and install the soft-
ware. In other words, an installation is what you do to configure the software, and deployment
is how you get it where you want it.
622
❘
CHAPTER 20 DEPLOYING YOUR APPLICATION
With this terminology, a CD is a deployment mechanism, as is the Internet. The two deployment
mechanisms may have different installation requirements. For example, if an installation is on a CD,
you may have all the additional dependent software on that CD. Delivery of the same application via
the Internet might require users to visit additional sites to gather all the dependent software. Another
example that may affect the installation option is one in which you may have written an installation in
JavaScript. This may work fine when executed on a machine by a user who has the correct Windows
user rights, but would not work through Internet Explorer. These kinds of considerations are impor-
tant when deciding upon your best deployment option. The type of installations you require could also
vary per application.
Now that you have an understanding of the terminology, it’s time to learn how to deploy applications
using Visual Studio 2010.
ClickOnce Deployment
ClickOnce deployment is the concept of sending an application or its referenced assemblies to the client
in a way that allows self-updating applications. You have three distribution options for a ClickOnce
application: file share, web page, or external media (CD, DVD, and so on). ClickOnce deployment has
both benefits and limitations. It is a useful deployment option for small- to medium-size applications.
The benefits of ClickOnce deployment include three major factors. First, using this deployment option
allows for self-updating Windows applications. You can post the latest version of the application at the
original location, and the next time the user runs the application, it will install the latest version and
run it. Next, any user can install most ClickOnce applications with only basic user security. With other
technologies, administrator privileges are required. Finally, the installation has little impact on the
user’s computer. The application can run from a secure per-user cache and add entries only to the Start
menu and the Add/Remove Programs list. For programs that can run in the Internet or intranet zones
that do not need to access the Global Assembly Cache (GAC), this is a terrific deployment solution for
distribution via the web or a file share. If you distribute the ClickOnce application through external
media, the installation will be run with higher trust and have access to the GAC.
TRY IT OUT Deploying a ClickOnce Application from the Web
Code file ClickOnce.zip and Publish.zip is available for download at Wrox.com
In this Try It Out, you learn how to deploy a ClickOnce application from the Web.
1. Create a new Windows Forms Application named ClickOnce.
2. On Form1, add a button and label. Change the button’s
Name
property to btnVersion and the
Text
property to Version. Change the label
Name
to lblVersion and clear the
Text
property.
FIGURE 20-1
figure
3. Add the following bolded code to the
Click
event for
btnVersion
:
Private Sub btnVersion_Click(ByVal sender As System.
Object, ByVal e As _
System.EventArgs) Handles btnVersion.Click
lblVersion.Text = "Version 1.0"
End sub
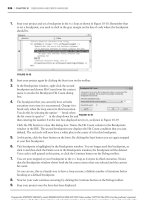
4. Test the form. When the user clicks the button, the label should dis-
play Version 1.0. Your form should look like Figure 20-1.
What Is Deployment?
❘
623
5. Prepare to publish the assembly to the Web.
NOTE If you do not have IIS installed, you can publish the file to a local or
network drive. Just remember how you chose to publish the assembly. You will
need to be running Visual Studio with elevated privileges to complete this. You
may need to close Visual Studio: right-click the shortcut, and choose Run as
Administrator to launch the software.
6. Right-click the ClickOnce project in the Solution Explorer and choose Publish from the context
menu. The Publish Wizard opens (see Figure 20-2). Choose a location to publish the file. In this
example, choose a directory on the local computer like C:\Bryan\Publish.
FIGURE 20-2
NOTE You will need to share this folder. Here the folder is shared as Publish. To
share a folder in Windows 7 with other users on the network or this computer,
navigate to the folder in Windows Explorer and right click the folder to bring up
the context menu. Choose Share With and then Specific People. At your work, you
would choose a group of users that could access the shared folder or network
share. For this example, just select or enter Everyone and then click Add. Next,
click Share and then click Done to share the folder.
After setting the location, click Next.
7. Specify how users will install the application. Select the radio button for ‘‘From a UNC Path or
file share.’’ Enter the UNC path as
\\localhost\Publish
or however you named your file share in
step 6 (see Figure 20-3).
624
❘
CHAPTER 20 DEPLOYING YOUR APPLICATION
FIGURE 20-3
8. Click Next. In this step you can choose whether to install a shortcut on the Start menu and add a
listing in Add/Remove Programs. Select Yes, as shown in Figure 20-4.
FIGURE 20-4
9. You will see the summary of your choices. Click Finish to complete the wizard. The setup files will
be copied to the file share.
What Is Deployment?
❘
625
FIGURE 20-5
figure
10. When you run the install from the share, you
may see a few security warnings, such as the one
shown in Figure 20-5. If you see this, just click
Install to continue. The form you created will
open. Click the Version button and you will see
Version 1.0. You can close the form. Check the
Program Files directory; you will see firsthand
that no files were added for the ClickOnce appli-
cation, and a new shortcut has been added to the
Start menu.
11. To update the application and see the self-
updating capabilities in action, go back to the
ClickOnce Windows application in Visual Studio
and change the button
Click
event to update the label to Version 1.1. Your
Click
event handler
should look like this:
Private Sub btnVersion_Click(ByVal sender As System.Object, ByVal e As _
System.EventArgs) Handles btnVersion.Click
lblVersion.Text = "Version 1.1"
End Sub
12. Test the application to make sure the label now displays Version 1.1.
13. Right-click the project in Solution Explorer and choose Properties from the context menu. This
time you will not use the wizard to publish the assembly. Click the Publish tab on the left side of
the main window.
14. Take a look at the options. You can see all the choices you made using the wizard. Be sure to set
the action for updates. To do this, click the Updates button and select the check box for ‘‘The
application should check for updates.’’ Click the radio button to check before the application
starts. All you have to do is scroll down to the bottom right of the Publish window and click Pub-
lish Now.
15. Notice at the bottom of Visual Studio that it notes that Publish succeeded.
16. Run the application using the shortcut on the Start menu. You will be prompted to update the
application. Click OK (see Figure 20-6). After the form opens, click the Version button; the text of
the label indicates that the application is updated to Version 1.1.
FIGURE 20-6
626
❘
CHAPTER 20 DEPLOYING YOUR APPLICATION
How It Works
That was easy, but what happened? After a few clicks, you deployed a Windows Forms application that
was self-updating. Behind the scenes, Visual Studio completed many tasks that make this deployment
strategy easy to implement.
First, you chose the location to publish the assembly:
C:\Bryan\Publish
was created to host the deploy-
ment files for you. If you go to the folder and open the Application Files folder, you will see each version
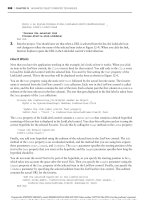
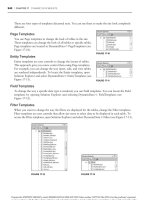
you have published. Your folder will look like Figure 20-7. Note that each version of the assembly has its
own directory. By default, the .NET Framework is installed if the user does not have the correct version of
the Framework. The installer would download it from Microsoft. Feel free to browse around the directory.
We will discuss the other files later.
FIGURE 20-7
Next, you choose how the users will install the application. Here you tell the wizard how to deliver the
application to the users’ computers.
The next step of the wizard enables you to specify whether offline access is allowed. If you decide to allow
offline access, a shortcut is added to Add/Remove Program files and the Start menu. The application is also
installed to a secure cache on your computer. If you decide not to allow offline access, the user must return
to the publishing location to launch the application on each use. In this case, the user would be required to
have access to the share to launch the application for each use.
That’s it. When you click Finish, Visual Studio 2010 goes to work. What happens behind the scenes is
not magic. Actually, you could manually complete everything without Visual Studio if you ever needed to
do so.
Referring back to Figure 20-7, take another look at the files. Here’s what happened: First, the application
was deployed. Then a subdirectory was created for the current version’s files. Also, required manifest
files were generated and placed under the root and version subdirectory. Finally, a
setup.exe
file for
deployment was created.
To install the application, you navigated to the Share and ran Setup. Each time you launch the installed
application, a check is made to see whether a newer version is available. When a new version is available,
Creating a Visual Studio 2010 Setup Application
❘
627
you are notified and presented with the option to install the update. ClickOnce deployment has a large
number of deployment options. This exercise only scratched the surface.
XCOPY Deployment
XCOPY deployment gets its name from the MS DOS
XCOPY
command. XCOPY is a copy procedure
that simply copies a directory and all files, including subfolders. This is commonly associated with web
applications, but with Visual Studio 2010 it can also apply to a desktop application. Since a standard
.NET assembly does not need any form of registration, it fully supports this option. XCOPY does
not work with shared assemblies because they require installation (if they are used from the Global
Assembly Cache). You learn more about shared assemblies later in this chapter. When you use XCOPY
for desktop applications, you have to create any shortcuts or menu items via a script or manually. You
would typically use XCOPY for web site deployment and for testing and prototypes of Windows Forms
applications.
CREATING A VISUAL STUDIO 2010 SETUP APPLICATION
Visual Studio 2010 supports the Windows Installer. But what is it? Windows Installer, which gets
installed with Visual Studio 2010, is a general platform for installing applications in Windows.
It provides a lot of functionality, such as uninstall capabilities and transactional installation
options (the ability to roll back if something fails) as well as other general features. Many of these
features are either built in (so that you do not have to do anything) or are configurable, extensible,
or both.
The Visual Studio 2010 Windows Installer support has made it easier to create a simple installation.
Visual Studio has provided templates in the New Project dialog for this purpose.
Visual Studio 2010 exposes four main templates for creating Windows Installer projects:
➤ Setup Project for desktop or general setup
➤ Web Setup Project for web applications or web services
➤ Merge Module, a package that can only be merged into another setup
➤ Cab Project, which creates a package that can be used as a type of install
Finally, Visual Studio 2010 also has a Setup Wizard Project, which aids you in creating one of the
Windows Installer templates listed here.
When you are creating setup applications, always be aware of the user. By default, all of the
applications you will create with Visual Studio 2010 require version 4 of the .NET Framework on
the installation system. For internal applications, you will know what prerequisites are installed
on each computer, but in many cases you will deliver your application to users with no idea of the
target system configuration. When you are not sure of the user’s configuration, it is up to you to make
all required components available.
Visual Studio 2010 makes the process of including prerequisites easy. Most common requirements can
be included (bootstrapped) by selecting a check box. By default, the .NET Framework is automatically
628
❘
CHAPTER 20 DEPLOYING YOUR APPLICATION
bootstrapped. Any setup application that is created with the default settings will prompt the end user
to install version 4 of the Framework if it is not installed prior to setup.
TRY IT OUT Creating a Setup Application
Code file Prerequisite.zip is available for download at Wrox.com
In this Try It Out, you create a setup application.
1. Open Visual Studio and create a New Windows Forms application named Prerequisite. You will
not make any changes to the form design or code.
2. Save All and then build the project.
3. AddasetupprojectnamedInstaller to the solution, as shown in Figure 20-8. To add a new
project, choose File
➪ Add ➪ New Project from the main menu bar.
FIGURE 20-8
When Visual Studio creates the project, it adds a Designer. There are three main folders in the
left pane of the designer: Application Folder, User’s Desktop, and User’s Programs Menu (see
Figure 20-9).
4. In the Solution Explorer, right-click the Installer project and choose Properties.
5. Find the Prerequisite button to the right and click it. You will see the Prerequisites form, as shown
in Figure 20-10. Notice that by default, the .NET Framework 4 Client Profile is selected, along
with Windows Installer 3.1.
Creating a Visual Studio 2010 Setup Application
❘
629
FIGURE 20-9
6. Select the check box beside Microsoft Visual Basic PowerPacks 10.0 and click OK twice to both
dialogs. Note that by default, the components are set to download from the vendor’s website.
FIGURE 20-10
7. Right-click the Application Folder node in the designer (left pane) and select Add Project Output.
The form will look like Figure 20-11.
8. Select Primary output from the Add Project Output Group form and click OK.
630
❘
CHAPTER 20 DEPLOYING YOUR APPLICATION
9. Right-click Primary output from Prerequisite, which you just added. From the context menu,
select Create a Shortcut to Primary Output from Prerequisite. Rename the shortcut Prerequisite.
Right-click the newly created shortcut and select Cut from the context menu. On the left pane,
right-click User’s Programs Menu and click Paste.
10. Save and build the Installer project.
NOTE You may see some warnings about a public key error when building these
next few Try It Outs. You can ignore these.
11. Right-click the Installer project in the Solution Explorer and select Install. A Windows Installer
will be loaded. This is the Setup project you have just created. Remember the shortcut you added
to the User’s Programs menu. Take a peek at your menu and you will see the shortcut.
How It Works
FIGURE 20-11
When you create the setup application, Visual Studio creates a
Windows Installer application. Changes you make, such as adding
the ClickOnce program to the project, are included in the Installer
database file.
In this example, you add one executable. It is also possible to add
many other types of files, including text files, help files, and other
assemblies.
When you build the project, two files are created: figure
➤ The
msi
file
➤ An installation loader named
setup.exe
You can see these files in your
<solution directory>
\Installer\Release
or
<solution directory>
\
Installer
\
Debug
folder. Your files will be stored in either the Release folder
or the Debug folder, depending on your configuration settings.
You can change between release and debug mode using the Config-
uration Manager under the build menu. To find the path, select the
solution and look at the
Path
property in the Properties window of Visual Studio. If the user does not
have Microsoft Visual Basic PowerPacks 10.0 or the correct version of the .NET Framework, it will be
downloaded from the vendor. You can change that under the settings where you add the dependency for
Microsoft Visual Basic PowerPacks 10.0. You added that requirement just for the exercise of adding it.
Normally, you would only add a prerequisite if it were needed by the application.
USER INTERFACE EDITOR
Installations can be configured to meet almost any need, with Visual Studio 2010. One of the easiest
ways to make your installation look professional is to customize the user interface during installation.
A tool, User Interface Editor, is available to do just this.
With the User Interface Editor, you can configure the installation to do just about anything you want.
You can add prebuilt dialogs such as a license agreement. A number of customizable dialogs are also
User Interface Editor
❘
631
available. You can even add a custom dialog to ensure that a valid serial number is entered during
installation.
TRY IT OUT Customizing the User Interface
Code file UserInterface.zip is available for download at Wrox.com
In this Try It Out, you will customize the installation of a setup application. This exercise demonstrates
only some of the options, of course — almost every aspect of the installation is customizable.
1. Open Visual Studio and create a New Setup Project. Name the project UserInterface.
2. Select View ➪ Editor ➪ User Interface from the menu. The editor will open, as shown in
Figure 20-12. You will see two main items, Install and Administrative Install, both of which have
customizable interfaces. The administrative install is for a special type of installation that we will
not explain in detail; it is used when an administrator installs an application image to a network
share.
FIGURE 20-12
3. Under the Install node at the top, right-click Start and choose Add Dialog from the context menu.
The Add Dialog window will appear (see Figure 20-13).
4. Select the License Agreement dialog and click OK. By default, the dialog box will be added as the
last dialog under the Start node. You will make the dialog box the second window the user sees
by moving it up the tree node. Right-click the License Agreement dialog box and choose Move Up
until it is the second dialog box. Your project will look similar to Figure 20-14.
5. This is where you would normally add a license agreement file using the
LicenseFile
property.
The only requirement is that is it must be in Rich Text Format (RTF). For this example, leave this
property blank.
632
❘
CHAPTER 20 DEPLOYING YOUR APPLICATION
FIGURE 20-13
FIGURE 20-14
6. Add a Customer Information dialog box and make it the third step under the Start process.
Change the
SerialNumberTemplate
property to %%-###-%%% and the
ShowSerialNumber
to True.
7. That is all it takes. Just build the application and install. To install, you can right-click the project
in Solution Explorer and choose Install. You will see the License Agreement dialog box as the sec-
ond screen of the installation. The third step is the Customer Information screen.
Deploying Different Solutions
❘
633
10. In the Customer Information screen, enter 77-000-777 for the serial number (see Figure 20-15).
FIGURE 20-15
11. Complete the installation by clicking Next through the rest of the steps.
How It Works
Wow. How easy is that? You customize the installation package with just a few clicks of the mouse. Visual
Studio makes it easy for you to have complete control over the installation interface.
The second step of the installation is the license agreement you add. After agreeing to install the applica-
tion, Visual Studio adds the dialog boxes in the order you choose.
The third dialog is the Customer Information screen. Without a valid serial number, the installation would
abort. You create a valid serial number based on the
SerialNumberTemplate
property you changed to
%%-###-%%%
.The
%
character signifies that a required digit is included in the algorithm, and the
#
character
is entered for digits that are not included. The serial number algorithm sums up all required digits and then
divides the sum by 7. If the remainder is 0, the serial number entered passed validation. So, the first two
and the last three digits are added together for a total of 35. Then 35 is divided by 7 for a remainder of 0,
and you are allowed to install the application.
DEPLOYING DIFFERENT SOLUTIONS
Deploying applications is actually a large and complex task, made easier by various tools. However,
if you consider a large suite of applications such as Microsoft Office, you will notice that there can be
a vast number of files. All these files require explicit locations or Registry entries. They all tie together
to make the application work. In addition to size, there can also be many other complexities, such as
634
❘
CHAPTER 20 DEPLOYING YOUR APPLICATION
database creation: What happens if the database already exists? What happens with the data that is
already there? This kind of activity, commonly referred to as migration, could potentially mean a lot of
work for an installation expert.
Having multiple application types can also make an installation complex, and detailed knowledge of
the different applications is required for a successful installation. The following sections discuss some
items related to different deployment scenarios surrounding the different types of applications that can
be created with Visual Studio 2010.
Private Assemblies
Private assemblies are installed in a directory named
bin
located under the application directory. These
files are private to the application. There are a few benefits to using private assemblies:
➤ No versioning is required, as long as it is the same version as the one with which the applica-
tion was built.
➤ The private assembly is not a shared assembly, and therefore it cannot be updated by another
application (at least it is not meant to be).
➤ You can manually replace the assembly as long as it is the same version.
➤ It enables XCOPY deployment (the ability simply to copy and paste files to a location and
have it work).
➤ You can make changes to the assembly, and if two different applications use it, you can
update one independently from the other.
➤ No configuration or signing (see the following section) is necessary. It just works.
➤ It is great for small utility assemblies or application-specific code.
Private assemblies have the following negatives:
➤ When you have multiple applications using one assembly, you have to deploy the assembly to
the
bin
directory of each application.
➤ You would normally have to include the assembly in each setup project where it is used.
➤ Versioning is not enforced, as it is in a shared assembly.
➤ It is not strongly named, which means someone could spoof your assembly.
NOTE Spoofing an assembly is when someone creates an assembly that looks
identical to yours and replaces yours with the spoofed copy. This spoofed copy
could behave in malicious ways.
Shared Assemblies
Shared assemblies are actually more stable than private assemblies, and they have a thorough approach
to assembly deployment. A shared assembly can also behave like a private assembly, so all the benefits
Deploying Different Solutions
❘
635
of that approach apply here too. The traditional shared assembly is different because of the extra work
you need to do and the extra capabilities it then gains.
A shared assembly is like going back in time. In Windows 3.1, the main deployment location for these
kinds of DLLs was the
Windows\System
directory. Then you were advised to have these files in the local
application path, which enabled easier installation and uninstallation. Today, the
System
directory
concept returns in a new guise named the Global Assembly Cache (GAC). However, the strong naming
of assemblies is a definite step up.
To install a shared assembly, you have to add the file to a new folder named
Global Assembly Cache
.By
default, this folder is not visible in the three default folders that are listed. To add the GAC folder you
must right-click the node named File System on Target Machine and select Add Special Folder Global
Assembly Cache.
NOTE Note that any project type can use a shared assembly, including a web
application.
A shared assembly offers the following main benefits:
➤ It is signed and cannot be spoofed.
➤ It has strong versioning support and configuration options.
➤ It is stored in one central location and does not need to be copied to the
bin
directory of every
application that uses it.
➤ Many different versions can be running side by side.
Shared assemblies have the following negatives:
➤ You have to sign the assembly.
➤ You have to be careful not to break compatibility with existing applications; otherwise, you
have to configure the different versions.
➤ Configuration can be a nightmare, depending on the requirements.
Deploying Desktop Applications
In the second project, you created a setup for a desktop application. For that you installed only one
executable. It had no dependencies other than the .NET Framework, which is always required. In a
more complete application, you may have various assemblies, WinForm controls, or other files that
you created for the application. Installing a private assembly with the Setup project means that you
include the file by adding it to the setup application.
Deploying Web Applications
A web application, when using private assemblies, can be simple to deploy. You can use the Visual
Studio 2010 Web Application setup project to create a simple web setup. The setup creates a virtual
directory and copies the files you specify to the physical directory location.
636
❘
CHAPTER 20 DEPLOYING YOUR APPLICATION
Deploying XML Web Services
A web service is deployed in much the same way as a web application. It also has a virtual directory.
The files that it requires are somewhat different, though. You need to deploy the
asmx
and
discovery
files together with the assembly.
Useful Tools
This section describes a few tools that either come with .NET or are in Windows already for you to
use. When creating an installation, you need to test it by installing it on various machines. Sometimes,
when things do not go according to plan, you may need to do some or all of the tasks manually to see
which one was the cause of the problem.
For example, perhaps you suspect that the
ASPNET_WP.dll
process has become unstable or broken in
some fashion and has affected the installation. In this scenario, you may want to restart IIS before you
run the install. In a similar vein, perhaps an assembly that was supposed to be registered in the GAC as
a shared assembly cannot be found by the client; you may want to register it manually to check whether
there was a problem with the registration. The following list briefly describes the tools you may need
to use:
➤ ASPNET_RegIIS: The
aspnet_regiis.exe
command line tool can be found in the
<sysdir>\Microsoft.NET\Framework\<version>
directory. This tool makes it an easy
task to reinstall various aspects of the ASP.NET runtime and change settings for ASP.NET
in IIS.
➤ IISReset: IISReset simply restarts IIS without requiring you to open the IIS manage-
ment console. Simply open a DOS prompt and type IISReset, and it will immediately
restart IIS.
➤ ILDasm: If you want to inspect the metadata of an assembly, MSIL Disassembler is the tool
for the job. With this tool, you can inspect everything from the namespaces to the version.
Start MSIL Disassembler by typing ildasm at a Visual Studio command prompt.
➤ GACUtil: This is a Visual Studio command-line tool for registering/unregistering assemblies
from the Global Assembly Cache. The
/I
option is for registering the assembly, and the
/u
option is for unregistering.
➤ RegAsm: This Visual Studio command-line utility is used for creating the necessary Com-
ponent Object Model (COM) information from an assembly. This is used when you need
to expose an assembly for COM Interop. The
regasm
tool includes switches for register-
ing/unregistering type libraries.
➤ InstallUtil: This is a Visual Studio command-line tool for executing the Installer classes
within an assembly. This can execute the InstallerHelper sample you did earlier in this
chapter.
➤ MageUI (Manifest Generation and Editing Tool): This is a graphical tool for generating, edit-
ing, and signing the application and deployment manifest for ClickOnce applications. Run
MageUI from a Visual Studio command prompt to start the tool. A command-line version of
this tool,
Mage.exe
, is available if you prefer to not have the user interface.
Summary
❘
637
SUMMARY
We hope you enjoyed looking at some general aspects of deployment. In the first section of this chapter,
you were introduced to some terminology, and then you learned how to create a ClickOnce application
and a simple Setup application inside Visual Studio. You also learned the positives and negatives of
private versus shared assemblies. Ultimately, we hope you learned that there is potentially a lot to
learn in this area, from getting to know more about the features of the Windows Installer templates to
learning how to do more with ClickOnce deployment.
To summarize, you should know how to:
➤ Create a ClickOnce deployment application
➤ Create a Visual Studio 2010 setup application
➤ Use general deployment terms such as XCOPY, and understand the differences between
shared versus private assemblies
➤ Edit the installer user interface
EXERCISES
1. Where are shared assemblies stored?
2. How are updates handled when using ClickOnce deployment?
3. Name two dialog boxes you can add to a setup project in Visual Studio 2010.
4. How do you arrange the order of dialog boxes in the user interface of installations?
638
❘
CHAPTER 20 DEPLOYING YOUR APPLICATION
WHAT YOU HAVE LEARNED IN THIS CHAPTER
TOPIC CONCEPTS
ClickOnce Deployment Applications will update when a new version is released. Windows
applications can be released from a remote location like a website
or file share. You can choose whether to allow the user to run the
application when not connected to the network or website. This is
a very easy way to manage application installs to users in remote
locations and keep them updated.
XCOPY Deployment A simple copy process. No shortcuts are created.
Setup Application You can add a setup project to your solution to build an
msi/setup
file
installation. This is the standard deployment method most of us are
used to. You have complete control of the setup process.
User Interface Editor Use the editor to add, remove, or reorder the dialogs the the user will
see during installation.You can add many prebuilt dialogs like: License,
Register User, Read Me, Splash, Customer Information, and others.