Building Secure ASP.NET Applications phần 9 pps
Bạn đang xem bản rút gọn của tài liệu. Xem và tải ngay bản đầy đủ của tài liệu tại đây (491.84 KB, 60 trang )
Building Secure ASP.NET Applications442
// Perform the encryption
byte[] cipherText = enc.Encrypt(plainText, key);
// Store the intialization vector, as this will be required
// for decryption
txtInitializationVector.Text = Encoding.ASCII.GetString(enc.IV);
// Display the encrypted string
txtEncryptedString.Text = Convert.ToBase64String(cipherText);
}
catch(Exception ex)
{
MessageBox.Show("Exception encrypting: " + ex.Message,
"Encryption Test Harness");
}
9. Return to Form1 in Designer mode and double-click the Decrypt button to create
a button click event handler.
10. Add the following code to the Decrypt button event handler.
try
{
// Set up the Decryptor object
Decryptor dec = new Decryptor(EncryptionAlgorithm.TripleDes);
// Set the Initialization Vector
dec.IV = Encoding.ASCII.GetBytes(txtInitializationVector.Text);
byte[] key = Encoding.ASCII.GetBytes(txtKey.Text);
// Perform the decryption
byte[] plainText = dec.Decrypt(Convert.FromBase64String(
txtEncryptedString.Text),
key);
// Display the decrypted string.
txtDecryptedString.Text = Encoding.ASCII.GetString(plainText);
}
catch(Exception ex)
{
MessageBox.Show("Exception decrypting. " + ex.Message,
"Encryption Test Harness");
}
11. Return to Form1 in Designer mode and double-click the Write Registry Data
button to create a button click event handler.
12. Add the following code to the event handler.
// Create registry key and named values
RegistryKey rk = Registry.LocalMachine.OpenSubKey("Software",true);
rk = rk.CreateSubKey("TestApplication");
How To: Store an Encrypted Connection String in the Registry 443
// Write encrypted string, initialization vector and key to the registry
rk.SetValue("connectionString",txtEncryptedString.Text);
rk.SetValue("initVector",Convert.ToBase64String(
Encoding.ASCII.GetBytes(txtInitializationVector.Text)));
rk.SetValue("key",Convert.ToBase64String(Encoding.ASCII.GetBytes(
txtKey.Text)));
MessageBox.Show("The data has been successfully written to the registry");
13. Run the application, and then click Encrypt.
The encrypted connection string is displayed in the Encrypted String field.
14. Click Decrypt.
The original string is displayed in the Decrypted String field.
15. Click Write Registry Data.
16. In the message box, click OK.
17. Run regedit.exe and view the contents of the following key.
HKLM\Software\TestApplication
Confirm that encoded values are present for the connectionString, initVector
and key named values.
18. Close regedit and the test harness application.
2. Create an ASP.NET Web Application
This procedure develops a simple ASP.NET Web application that will retrieve the
encrypted connection string from the registry and decrypt it.
To create an ASP.NET application
1. Create a new Visual C# ASP.NET Web Application called EncryptionWebApp.
2. Add an assembly reference to the Encryption.dll assembly.
To create this assembly, you must perform the steps described in “How To:
Create an Encryption Library” in the Reference section of this guide.
3. Open Webform1.aspx.cs and add the following using statements at the top of the
file beneath the existing using statements.
using Encryption;
using System.Text;
using Microsoft.Win32;
Building Secure ASP.NET Applications444
4. Add the controls listed in Table 2 to WebForm1.aspx.
Table 2: WebForm1.aspx controls
Control Text ID
Label lblEncryptedString
Label lblDecryptedString
Button Get Connection String btnGetConnectionString
5. Double-click the Get Connection String button to create a button click event
handler.
6. Add the following code to the event handler.
RegistryKey rk = Registry.LocalMachine.OpenSubKey(
@"Software\TestApplication",false);
lblEncryptedString.Text = (string)rk.GetValue("connectionString");
string initVector = (string)rk.GetValue("initVector");
string strKey = (string)rk.GetValue("key");
Decryptor dec = new Decryptor(EncryptionAlgorithm.TripleDes );
dec.IV = Convert.FromBase64String(initVector);
// Decrypt the string
byte[] plainText = dec.Decrypt(Convert.FromBase64String(
lblEncryptedString.Text),
Convert.FromBase64String(strKey));
lblDecryptedString.Text = Encoding.ASCII.GetString(plainText);
7. On the Build menu, click Build Solution.
8. Right-click Webform1.aspx in Solution Explorer, and then click View in Browser.
9. Click Get Connection String.
The encrypted and decrypted connection strings are displayed on the Web form.
References
For more information, see “How To: Create an Encryption Library” in the Reference
section of this guide.
How To:
Use Role-based Security
with Enterprise Services
This How To describes how to create a simple serviced component that uses
Enterprise Services (ES) roles for authorization.
Notes
●
ES roles are not the same as .NET roles.
●
ES roles can contain Windows group or Windows user accounts.
●
ES roles are maintained in the COM+ catalog.
●
ES roles can be applied at the (ES) application, interface, class or method levels.
●
ES roles can be partially configured declaratively by using .NET attributes in the
serviced component’s assembly.
●
Windows group and user accounts must be added by an administrator at
deployment time.
●
Administrators can use the Component Services administration tool, or script.
●
To effectively use Enterprise Services role-based security from an ASP.NET Web
application, the Web application must use Windows authentication and imper-
sonate callers prior to calling the serviced components.
Requirements
The following items describe the recommended hardware, software, network
infrastructure, skills and knowledge, and service packs you will need.
●
Microsoft® Visual Studio® .NET development system
The procedures in this article also require that you have knowledge of ASP.NET
Web development with the Microsoft Visual C#™ development tool.
Building Secure ASP.NET Applications446
Summary
This How To includes the following procedures:
1. Create a C# Class Library Application to Host the Serviced Component
2. Create the Serviced Component
3. Configure the Serviced Component
4. Generate a Strong Name for the Assembly
5. Build the Assembly and Add it to the Global Assembly Cache
6. Manually Register the Serviced Component
7. Examine the Configured Application
8. Create a Test Client Application
1. Create a C# Class Library Application to Host the Serviced
Component
This procedure creates a new C# class library application that contains the serviced
component.
To create a C# class library application to host the serviced component
1. Start Visual Studio .NET and create a new C# class library application called
ServicedCom.
2. Rename the default class file Class1.cs to SimpleComponent.cs.
3. Double-click SimpleComponent.cs to open it and rename the Class1 type as
SimpleComponent. Also update the name of the class’ default constructor.
2. Create the Serviced Component
This procedure derives the SimpleComponent class from the
EnterpriseServices.ServicedComponent class to turn this type into a serviced
component. You will then create an interface and implement it within the
SimpleComponent class. To use interface and method level security, you must
define and implement interfaces.
To create the serviced component
1. Add a reference to the System.EnterpriseServices assembly.
2. Add the following using statement to the top of the SimpleComponent.cs file
beneath the existing using statements.
using System.EnterpriseServices;
How To: Use Role-based Security with Enterprise Services 447
3. Derive the SimpleComponent class from ServicedComponent.
public class SimpleComponent : ServicedComponent
4. Add the following interface definition within the ServicedCom namespace.
public interface ISomeInterface
{
int Add( int operand1, int operand2 );
}
5. Derive SimpleComponent from this interface.
public class SimpleComponent : ServicedComponent, ISomeInterface
6. Implement the interface within the SimpleComponent class as follows.
public int Add( int operand1, int operand2 )
{
return operand1 + operand2;
}
3. Configure the Serviced Component
This procedure configures the serviced component for method-level role-based
security.
To configure the serviced component
1. Add the following attributes directly above the SimpleComponent class. The
ComponentAccessControl attribute enables component-level access checks and
the SecureMethod attribute enables method level access checks.
[ComponentAccessControl]
[SecureMethod]
public class SimpleComponent : ServicedComponent, ISomeInterface
2. Add the following attribute above the Add method to create the Manager role
and associate it with the method.
[SecurityRole("Manager")]
public int Add( int operand1, int operand2 )
{
return operand1 + operand2;
}
Building Secure ASP.NET Applications448
3. Open assemblyinfo.cs and add the following using statement to the top of the
file below the existing using statements.
using System.EnterpriseServices;
4. Move to the bottom of the file and add the following attributes. These are used
to configure the Enterprise Services application used to host the serviced
component.
// Configure the application as a server (out-of-process) application
[assembly: ApplicationActivation(ActivationOption.Server)]
// For meaningful role-based security, enable access checking at the process
// and component levels by using the following .NET attribute.
[assembly: ApplicationAccessControl(AccessChecksLevel=
AccessChecksLevelOption.ApplicationComponent)]
// Set the name and description for the application
[assembly: ApplicationName("SimpleRoles")]
[assembly: Description("Simple application to show ES Roles")]
// Add some additional roles
[assembly:SecurityRole("Employee")]
[assembly:SecurityRole("Senior Manager")]
4. Generate a Strong Name for the Assembly
Assemblies that host serviced components must be strong named. This procedure
generates a public-private key pair used to strong name the assembly.
To generate a strong name for the assembly
1. Open a command window and go to the current project directory.
2. Use the sn.exe utility to generate a key file that contains a public-private key
pair.
sn.exe -k SimpleComponent.snk
3. In Visual Studio, open assemblyinfo.cs.
4. Locate the [AssemblyKeyFile] attribute and modify it to reference the key file in
the project directory as follows.
[assembly: AssemblyKeyFile(@" \ \SimpleComponent.snk")]
How To: Use Role-based Security with Enterprise Services 449
5. Build the Assembly and Add it to the Global Assembly Cache
This procedure builds the assembly that contains the serviced component and then
adds it to the global assembly cache. Serviced components should generally be
registered in the global assembly cache because they are system level resources.
Serviced components hosted in COM+ server applications require installation in
the global assembly cache, while library applications do not (although it is recom-
mended).
To build the assembly and add it to the global assembly cache
1. On the Build menu, click Build Solution.
2. Return to the command window and run the following command to add the
assembly to the global assembly cache.
gacutil –i bin\debug\ServicedCom.dll
6. Manually Register the Serviced Component
Serviced components can either be manually registered with the Regsvcs.exe tool,
or they can be automatically registered using “lazy” registration. With “lazy”
registration, the component is registered (and the hosting COM+ application cre-
ated and configured using the assembly’s meta data) the first time an instance of the
serviced component is instantiated.
To avoid the one time performance hit associated with this approach, this procedure
manually registers the serviced component.
To manually register the serviced component
1. Return to the command window.
2. Run regsvcs.exe to register the component.
regsvcs bin\debug\ServicedCom.dll
7. Examine the Configured Application
This procedure uses the Component Services tool and examines the catalog settings
created as a result of the .NET attributes used earlier.
To examine the configured application
1. From the Administrative Tools program group, start Component Services.
Building Secure ASP.NET Applications450
2. Expand Component Services, Computers, My Computer, and COM+
Applications.
3. Right-click SimpleRoles, and then click Properties.
4. Click the Security tab and make sure that Enforce access checks for this appli-
cation is selected and that the security level is set to perform access checks at the
process and component level. This configuration is a result of the .NET attributes
used earlier.
5. Click OK to close the Properties dialog box.
6. Expand the SimpleRoles application, and then expand the Components folder
and the ServicedCom.SimpleComponent class.
7. Navigate to the Add method beneath the ISomeInterface method in the Inter-
faces folder.
8. Right-click Add, and then click Properties.
9. Click the Security tab and notice that the Manager role is associated with the
method.
10. Click OK to close the Properties dialog box.
11. Expand the Roles folder beneath the SimpleRoles application. Notice the roles
that you created earlier with .NET attributes. Also notice the Marshaler role.
This is created as a direct result of the [SecureMethod] attribute added earlier,
and is required for method level security.
8. Create a Test Client Application
This procedure creates a Windows Forms-based test client application to instantiate
and call the serviced component.
To create a test client application
1. Add a new C# Windows-based application called TestClient to the current
solution.
2. Add a new project reference to the ServicedCom project.
a. In Solution Explorer, right-click References, and then click Add Reference.
b. Click the Projects tab.
c. Select ServicedCom, click Select, and then click OK.
3. Add a reference to System.EnterpriseServices.
4. Add a button to the application’s main form.
5. Double-click the button to create a button click event handler.
6. Add the following using statement to the top of the form1.cs beneath the exist-
ing using statements.
using ServicedCom;
How To: Use Role-based Security with Enterprise Services 451
7. Return to the button click event handler and add the following code to
instantiate and call the serviced component.
SimpleComponent comp = new SimpleComponent();
MessageBox.Show( "Result is: " + comp.Add(1, 2));
8. On the Build menu, click Build Solution.
9. In Solution Explorer, right-click the TestClient project, and then click Set as
StartUp Project.
10. Press Ctrl+F5 to run the TestClient application.
You should see that an unhandled exception is generated.
11. Click the Details button on the message box to view the exception details.
You will see that a System.UnauthorizedAccessException has been generated.
This is because your interactive logon account used to run the TestClient appli-
cation is not a member of the Manager role, which is required to call the Add on
the serviced component.
12. Click Quit to stop the application.
13. Return to Component Services and add your current (interactive) account to the
Manager role and the Marshaler role.
Note: The Enterprise Services infrastructure uses a number of system-level interfaces that
are exposed by all serviced components. These include IManagedObject, IDisposable, and
IServiceComponentInfo. If access checks are enabled at the interface or method levels,
the Enterprise Services infrastructure is denied access to these interfaces.
As a result, Enterprise Services creates a special role called Marshaler and associates the
role with these interfaces. At deployment time, application administrators need to add all
users to the Marshaler role who needs to access any methods or interface of the class.
You could automate this in two different ways:
1. Write a script that uses the Component Services object model to copy all users from
other roles to the Marshaler role.
2. Write a script which assigns all other roles to these three special interfaces and delete
the Marshaler role.
14. Close the SimpleRoles application to enable the changes to take effect. To do
this, right-click the application name, and then click Shut down.
15. Return to Visual Studio .NET and press Ctrl+F5 to run the TestClient application
again.
16. Click the form’s button and confirm that the method is successfully called.
How To:
Call a Web Service Using
Client Certificates from ASP.NET
Web services often need to be able to authenticate their callers (other applications)
in order to perform authorization. Client certificates provide an excellent authenti-
cation mechanism for Web services. When you use client certificates, your applica-
tion also benefits from the creation of a secure channel (using Secure Sockets Layer
[SSL]) between the client application and Web service. This allows you to securely
send confidential information to and from the Web service. SSL ensures message
integrity and confidentiality.
This How To describes how to call a Web service that is configured to require client
certificates.
Note: The information in this How To also applies to remote components hosted by ASP.NET
and IIS.
Why Use a Serviced Component?
The solution presented in this How To uses a serviced component configured to run
in an Enterprise Services server application, using a custom service account. The
ASP.NET Web application calls the serviced component, which makes the call to the
Web service (passing a client certificate). This solution configuration is illustrated in
Figure 1 on the next page.
Building Secure ASP.NET Applications454
Web Server 1
(Web Service Client)
Web Server 2
(Web Service Host)
Require Secure
Channel (SSL)
(Privacy/Integrity)
.cer file
ASP.NET
Enterprise
Services
(COM+
Server)
ASP.NET
(Web Service
or Remote
Component)
IIS
Custom Run As
Identity (Account
has User Profile)
Require Client
Certificates
(Authentication)
SSL
(Privacy/Integrity)
Figure 1
ASP.NET calls a serviced component to invoke the Web service
This arrangement is to ensure that the system has access to a user profile when
communicating with the Web service. This is required for the initial SSL handshake.
Note: The ASPNET account used to run Web applications has the “Deny interactive logon”
privilege, which prevents you from logging on interactively with this account. As a result, this
account does not have a user profile.
Do not grant the ASPNET account (or any account used to run Web applications) the interactive
logon capability. Always follow the principle of least privilege when configuring accounts to run
Web applications and grant them as few privileges as possible. For more information, see
“How To: Create a Custom Account to Run ASP.NET” in the Reference section of this guide.
Why is a User Profile Required?
When you make a request to a Web service that requires client certificates, there
is an SSL handshake that takes place between the client and server. A few of the
components exchanged are the server certificate, client certificate, and a “pre-master
secret” which is generated by the client. This secret is used later in the protocol to
generate a “master secret.”
In order for the server to verify that the presenter of the certificate is indeed the
holder of the private key, the client must encrypt the pre-master secret with the
private key and send the encrypted pre-master secret to the server. In order for the
system to access the client’s private key to sign the pre-master secret it must access
the private key from the key store of the client. The key store is located in the
client’s profile which must be loaded.
How To: Call a Web Service Using Client Certificates from ASP.NET 455
Requirements
The following items describe the recommended hardware, software, network
infrastructure, skills and knowledge, and service packs you will need.
●
Microsoft® Windows® 2000 operating system
●
Microsoft Visual Studio® .NET development system
●
Access to a Certificate Authority (CA) to generate new certificates
●
A Web server with an installed server certificate
For more information about installing Web server certificates, see “How To:
Setup SSL on a Web Server”.
The procedures in this How To also require that you have knowledge of the
Microsoft Visual C#™ development tool.
Summary
This How To includes the following procedures:
1. Create a Simple Web Service
2. Configure the Web Service Virtual Directory to Require Client Certificates
3. Create a Custom Account for Running a Serviced Component
4. Request a Client Certificate for the Custom Account
5. Test the Client Certificate using a Browser
6. Export the Client Certificate to a File
7. Develop the Serviced Component Used to Call the Web Service
8. Configure and Install the Serviced Component
9. Develop a Web Application to Call the Serviced Component
Note: In this How To, the Web service computer (this hosts the Web service) is named
“WSServer” and the Web service client computer (this hosts the client ASP.NET Web applica-
tion and serviced component) is named “WSClient.”
1. Create a Simple Web Service
To create a simple Web service on the Web service host computer
1. Start Visual Studio .NET and create a new C# ASP.NET Web Service application
called SecureMath.
Building Secure ASP.NET Applications456
2. Rename service1.asmx as math.asmx.
3. Open math.asmx.cs and rename the Service1 class as math.
4. Add the following Web method to the math class.
[WebMethod]
public long Add(long operand1, long operand2)
{
return (operand1 + operand2);
}
5. On the Build menu, click Build Solution to create the Web service.
2. Configure the Web Service Virtual Directory to Require Client
Certificates
This procedure uses Internet Information Services to configure your Web service’s
virtual directory for SSL and to require certificates.
This procedure assumes that you have a valid certificate installed on your Web
server. For more information about installing Web server certificates, see "How To
Setup SSL on a Web Server" in the Reference section of this guide.
To configure the Web service virtual directory to require client certificates
1. Start Internet Information Services on the Web service host computer.
2. Navigate to the SecureMath virtual directory.
3. Right-click SecureMath, and then click Properties.
4. Click the Directory Security tab.
5. Under Secure communications, click Edit.
If Edit is unavailable, it is most likely that you haven’t installed a Web server
certificate.
6. Select the Require secure channel (SSL) check box.
7. Select the Require client certificates option.
8. Click OK, and then click OK again.
9. In the Inheritance Overrides dialog box, click Select All, and then click OK to
close the SecureMath properties dialog box.
This applies the new security settings to all subdirectories beneath the virtual
directory root.
How To: Call a Web Service Using Client Certificates from ASP.NET 457
3. Create a Custom Account for Running the Serviced
Component
This procedure creates a new user account on the Web service client computer that
you will use to run the serviced component that calls the Web service.
To create a custom account for running the serviced component
1. Create a new user account with a strong password on the client computer. Clear
the User must change password at next logon check box, and then select the
Password never expires option.
2. Add the account to the Administrators group.
The account used to load a user profile must be an administrator on the local
computer.
4. Request a Client Certificate for the Custom Account
In this procedure, you will log on to the client computer using the new custom
account. You will then issue a request for a certificate. This procedure assumes that
you are using Microsoft Certificate Services. If you are not using Microsoft Certifi-
cate Services to create new certificates, issue a request to your preferred CA for
a client certificate and install the certificate, while logged on using the custom
account.
This procedure also assumes that Microsoft Certificate Services is configured to
automatically issue certificates in response to certificate requests. It can also be
configured for pending requests, which require an administrator to explicitly issue
the certificate.
To check the Microsoft Certificate Services setting
1. On the Microsoft Certificate Services computer, click Certification Authority in
the Administrative Tools programs group.
2. Expand Certification Authority (Local), right-click the certification authority,
and click Properties.
3. Click the Policy Module tab, and then click Configure.
4. Check the default action.
The following procedure assumes that Always issue the certificate is selected.
Building Secure ASP.NET Applications458
To request a client certificate for the custom account
1. Log off the client computer and log back on using the custom account.
This forces the creation of a user profile for the custom account.
2. Browse to the CA in order to request a client certificate. For example, if your CA
is located on the CAServer computer, browse to the following location.
http://caserver/certsrv
3. Click Request a certificate, and then click Next.
4. Ensure User Certificate is selected, and then click Next.
5. Click Submit.
A request is generated and sent to the CA for processing.
6. After the certificate is issued and you receive a response from the CA server, click
Install this certificate.
7. Ensure that the issuing CA’s certificate is installed as a trusted root certificate
authority on the local computer.
To confirm this, perform the following steps:
a. On the taskbar, click the Start button, and then click Run.
b. Type mmc, and then click OK.
c. On the File menu, click Add/Remove Snap-in.
d. Click Add.
e. Click Certificates, and then click Add.
f. Click Computer account, and then click Next.
g. Click Local Computer: (the computer this console is running on), and then
click Finish.
h. Click Close, and then click OK.
i. In the left pane of the MMC snap-in, expand Certificates (Local Computer).
j. Expand Trusted Root Certification Authorities, and then click Certificates.
k. Confirm that your CA’s certificate is listed.
If the CA’s certificate isn’t listed, perform the following steps:
a. Browse to http://caserver/certsrv.
b. Click Retrieve the CA certificate or certificate revocation list, and then click
Next.
c. Click Install this CA certification path.
How To: Call a Web Service Using Client Certificates from ASP.NET 459
5. Test the Client Certificate Using a Browser
In this procedure, you will browse to the Web service in order to confirm that there
are no problems with either the server or client certificates.
To test the client certificate using a browser
1. Use Internet Explorer and navigate to https://server/SecureMath/Math.asmx.
Make sure that you specify “https” because the site is configured to require SSL.
2. A Client Authentication dialog box should appear. Select your client certificate,
and then click OK.
3. Confirm that the Web service test page is displayed successfully within your
browser.
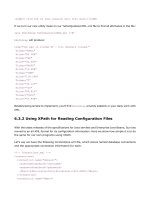
If you see the dialog box illustrated in Figure 2, you need to install the certificate
authority’s certificate into the Trusted Root Certification Authorities store, as
described in the previous procedure.
Figure 2
Security Alert dialog box
6. Export the Client Certificate to a File
This procedure exports the client certificate to a file. This is subsequently retrieved
by the serviced component, when it needs to pass the certificate to the Web service.
To export the client certificate to a file
1. Within Internet Explorer, click Internet Options on the Tools menu.
2. Click the Content tab.
Building Secure ASP.NET Applications460
3. Click Certificates.
4. Click the client certificate, and then click Export.
5. Click Next to move past the welcome dialog box of the Certificate Export
Wizard.
6. Confirm that No, do not export the private key is selected, and then click Next.
7. Make sure that DER encoded binary X.509 (.CER) is selected, and then click
Next.
You must use this format, because the .NET Framework does not support
Base-64 or PKCS #7 formats.
8. Enter an export file name. Note the location of the .cer export file, because you
will require this again in a subsequent procedure.
9. Click Next, and then click Finish to export the certificate.
10. Close Internet Explorer.
11. Log off the computer and log back on using your regular development account.
7. Develop the Serviced Component Used to Call the Web
Service
This procedure creates a new C# Class Library application and creates the serviced
component used to call the Web service. This procedure assumes that you are
working on the client computer.
To develop the serviced component used to call the Web service
1. Start Visual Studio.NET and create a new C# Class Library project called
WebServiceRequestor.
2. Add a Web reference to the SecureMath Web service.
Important: You must temporarily reconfigure your Web service’s virtual directory to not
require client certificates (although still require SSL), prior to adding the Web reference.
After you successfully add the Web reference, change the virtual directory configuration
back to require client certificates.
In practice, if a site requires client certificates, the publisher of the service makes the
WSDL available as a separate offline file, which the consumers (of the service) can use to
create the proxy.
In the Add Web Reference dialog box, be sure to specify https when specifying
the Web service location. Failure to do so results in an error because the Web
service virtual directory is configured to require SSL.
How To: Call a Web Service Using Client Certificates from ASP.NET 461
3. Add a reference to the System.EnterpriseServices assembly.
4. Rename class1.cs as ProfileManager.cs.
5. Add the following class definition to ProfileManager.cs (replacing the skeleton
class1 class). The ProfileManager class uses P/Invoke to call the
LoadUserProfile and UnloadUserProfile Win32 APIs.
internal class ProfileManager
{
[DllImport("Userenv.dll", SetLastError=true,
CharSet=System.Runtime.InteropServices.CharSet.Auto)]
internal static extern bool LoadUserProfile(IntPtr hToken,
ref PROFILEINFO lpProfileInfo);
[DllImport("Userenv.dll", SetLastError=true,
CharSet=System.Runtime.InteropServices.CharSet.Auto)]
internal static extern bool UnloadUserProfile(IntPtr hToken,
IntPtr hProfile);
[StructLayout(LayoutKind.Sequential, CharSet=CharSet.Ansi)]
public struct PROFILEINFO
{
public int dwSize;
public int dwFlags;
public String lpUserName;
public String lpProfilePath;
public String lpDefaultPath;
public String lpServerName;
public String lpPolicyPath;
public IntPtr hProfile;
}
}
6. Add a second class file called MathServiceComponent.cs to the project.
7. Add the following using statements to MathServiceComponent.cs below the
existing using statement.
using System.Net;
using System.Web.Services;
using System.Security.Principal;
using System.EnterpriseServices;
using System.Runtime.InteropServices;
using System.Security.Cryptography.X509Certificates;
using WebServiceRequestor.WebReference1;
Building Secure ASP.NET Applications462
8. Add the following class definition, which provides a public
CallMathWebService method. You will call this method in a later procedure
from a client ASP.NET Web application.
// This class calls the web service that requires a certificate.
public class MathServiceComponent : ServicedComponent
{
[DllImport("advapi32.dll", CharSet=CharSet.Auto, SetLastError=true)]
private extern static bool DuplicateToken(IntPtr ExistingTokenHandle,
int SECURITY_IMPERSONATION_LEVEL,
ref IntPtr DuplicateTokenHandle);
[DllImport("kernel32.dll", CharSet=CharSet.Auto)]
private extern static bool CloseHandle(IntPtr handle);
// Calls the Web service that requires client certificates
// certFilepath points to the .cer file to use
// url is the Web service url
// operand1 and operand2 are the parameters to pass to the Web service
public long CallMathWebService(String certFilepath,
String url, int operand1, int operand2)
{
bool retVal = false;
// Need to duplicate the token. LoadUserProfile needs a token with
// TOKEN_IMPERSONATE and TOKEN_DUPLICATE.
const int SecurityImpersonation = 2;
IntPtr dupeTokenHandle = DupeToken(WindowsIdentity.GetCurrent().Token,
SecurityImpersonation);
if(IntPtr.Zero == dupeTokenHandle)
{
throw new Exception("Unable to duplicate token.");
}
// Load the profile.
ProfileManager.PROFILEINFO profile = new ProfileManager.PROFILEINFO();
profile.dwSize = 32;
profile.lpUserName = @"alexmlaptop\CustomASPNET";
retVal = ProfileManager.LoadUserProfile(dupeTokenHandle, ref profile);
if(false == retVal)
{
throw new Exception("Error loading user profile. " +
Marshal.GetLastWin32Error());
}
// Instantiate the Web service proxy
math mathservice = new math();
mathservice.Url = url;
String certPath = certFilepath;
mathservice.ClientCertificates.Add(
X509Certificate.CreateFromCertFile(certPath));
long lngResult = 0;
try
{
lngResult = mathservice.Add(operand1, operand2);
}
How To: Call a Web Service Using Client Certificates from ASP.NET 463
catch(Exception ex)
{
if(ex is WebException)
{
WebException we = ex as WebException;
WebResponse webResponse = we.Response;
throw new Exception("Exception calling method. " + ex.Message);
}
}
ProfileManager.UnloadUserProfile(WindowsIdentity.GetCurrent().Token,
profile.hProfile);
CloseHandle(dupeTokenHandle);
return lngResult;
}
private IntPtr DupeToken(IntPtr token, int Level)
{
IntPtr dupeTokenHandle = new IntPtr(0);
bool retVal = DuplicateToken(token, Level, ref dupeTokenHandle);
if (false == retVal)
{
return IntPtr.Zero;
}
return dupeTokenHandle;
}
} // end class
9. On the Build menu, click Build Solution.
8. Configure and Install the Serviced Component
This procedure configures the service component, generates a strong name, installs
it in the global assembly cache and registers it with COM+.
1. Open assemblyinfo.cs and add the following using statement beneath the exist-
ing using statements.
using System.EnterpriseServices;
2. Add the following assembly level attribute to assemblyinfo.cs to configure the
serviced component to run within a COM+ server application.
[assembly: ApplicationActivation(ActivationOption.Server)]
3. Open a command prompt window and change to the current project directory.
4. Use the sn.exe utility to generate a key file that contains a public-private key
pair.
sn.exe -k WebServiceRequestor.snk
Building Secure ASP.NET Applications464
5. Return to Visual Studio .NET.
6. Locate the [AssemblyKeyFile] attribute within assemblyinfo.cs and modify it to
reference the key file in the project directory as follows.
[assembly: AssemblyKeyFile(@" \ \WebServiceRequestor.snk")]
7. On the Build menu, click Build Solution.
8. Return to the command prompt and run the following command to add the
assembly to the global assembly cache.
gacutil.exe /i bin\debug\webservicerequestor.dll
9. Run the following command to register the assembly with COM+.
regsvcs bin\debug\webservicerequestor.dll
10. Start Component Services (located beneath the Administrative Tools program
group).
11. Expand the Component Services, Computers, and My Computer nodes.
12. Expand the COM+ Applications folder.
13. Right-click WebServiceRequestor, and then click Properties.
14. Click the Identity tab.
15. Select the This user: option and enter the account details corresponding to the
custom account that you created earlier.
This configures the COM+ application to run using your custom account.
16. Click OK to close the Properties dialog box.
17. Close Component Services.
9. Develop a Web Application to Call the Serviced Component
This procedure creates a simple ASP.NET Web application that you will use as the
client application to call the Web service (via the serviced component).
To develop a Web application to call the serviced component
1. On the Web service client computer, create a new C# ASP.NET Web application
called SecureMathClient.
2. Add a reference to System.EnterpriseServices.
How To: Call a Web Service Using Client Certificates from ASP.NET 465
3. Add a reference to the WebServiceRequestor serviced component.
Browse to WebServiceRequestor.dll located within the bin\debug folder beneath
the WebServiceRequestor project directory.
4. Open WebForm1.aspx.cs and add the following using statement beneath the
existing using statements.
using WebServiceRequestor;
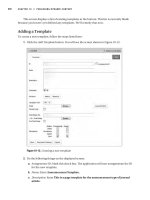
5. View WebForm1.aspx in Designer mode and create the form shown in Figure 3
using the following IDs:
●
operand1
●
operand2
●
result
●
add
Figure 3
Web Form control arrangement
6. Double-click Add to create a button-click event hander.
7. Add the following code to the event handler.
Note: Set the certPath string to the location of the certificate file that you exported during
Procedure 6, “Export the Client Certificate to a File.”
Set the url string with the HTTPS URL to your Web service.
private void add_Click(object sender, System.EventArgs e)
{
// TODO: Replace with a valid path to your certificate
string certPath = @"C:\CustomAccountCert.cer";
// TODO: Replace with a valid URL to your Web service
string url = "https://wsserver/securemath/math.asmx";
MathServiceComponent mathComp = new MathServiceComponent();
long addResult = mathComp.CallMathWebService( certPath,
url,
Int32.Parse(operand1.Text),
Int32.Parse(operand2.Text));
result.Text = addResult.ToString();
}
Building Secure ASP.NET Applications466
8. On the Build menu, click Build Solution.
9. Run the application. Enter two numbers to add, and then click Add.
The Web application will call the serviced component which will call the Web
service using SSL and passing the client certificate.
Additional Resources
For more information, see “How To: Set Up SSL on a Web Server” in the Reference
section of this guide.