Microsoft ASP .NET Fast & Easy Web Development phần 7 pot
Bạn đang xem bản rút gọn của tài liệu. Xem và tải ngay bản đầy đủ của tài liệu tại đây (1.74 MB, 24 trang )
Understanding Default Files Created for Web Services
Table 14.2 discusses the files created by Visual Studio .NET in detail.
Table 14.2: Web Service Project Files Created by Visual Studio .NET
File Description
References The References folder
contains the Web
references for
WebService1. By
default, the
References folder
contains references to
the System.dll,
System.Data.dll,
System.Web.dll,
System.Web.Services
.dll, and
System.XML.dll files.
AssemblyInfo.vb The AssemblyInfo.vb
file contains the
metadata for the
assemblies required
for a Web service.
This metadata
includes information
such as name and
version of the
assembly for a Web
service.
Global.asax The Global.asax file
contains the code for
events generated in
the WebService1
project. In addition,
the Global.asax file
defines variables with
application level
scope and manages
application and
session state.
Service1.asmx The Service1.asmx
file is used to
implement the
functionality of the
Web service. A Web
service has a proxy
Table 14.2: Web Service Project Files Created by Visual Studio .NET
File Description
class that handles the
transfer of SOAP
messages over a
network. The proxy
class is created using
the Wsdl.exe tool and
uses HTTP to transfer
SOAP messages. The
information about this
proxy class is stored
in the Service1.asmx
file.
Web.config The Web.config file
contains the
configuration settings
for ASP.NET Web
services. You can
make changes to the
configuration settings,
if required. This file is
the same as the
Web.config file that is
used in ASP.NET
Web applications.
WebService1.vsdisco The
WebService1.vsdisco
file contains all of the
information that is
required by the Web
service clients to
access the Web
service. This
information includes
the discovery
information about the
Web service and the
Web methods
implemented by the
Web service.
Understanding the Default Code Generated for Web Services
In addition, a public class with the name Service1 that is inherited from the
System.Web.Services.WebService class is created. The Service1 class also contains a
default Web method, HelloWorld().
The HelloWorld() Web method is enclosed within comment entries by default. To run the
Web service, remove the comment entries.
Testing Web Services
After you create a Web service, you need to test it to ensure that it works correctly.
Before testing and debugging a project, you need to set the Service1.asmx page as the
start page.
1. Right-click on the Service1.asmx file in the Solution Explorer. A shortcut menu will
appear.
2. Click on the Set As Start Page option.
Note The functionality in a Web service is provided by the Web methods
that you create in the Web service.
3. Once you have created the Web service, you can test it on a Web browser, such as
Internet Explorer. Click on Debug. The Debug menu will appear.
4. Click on Start. The Web service will be launched in Internet Explorer.
When you run the project, the Service1.asmx page will be displayed in the Internet
Explorer browser window.
This completes the discussion on Web services. In the next chapter, I will continue with
the MySourceCode application, and you will learn to create a Web service for the
application. The Web service accesses XML data and displays the data using a Web
service client.
Chapter 15: Building ASP.NET Web Services
Overview
The last chapter introduced the concept of Web services. ASP.NET Web services can
interact with other applications using XML. Since XML is a platform-independent format
for transferring data, you can create a Web service on one platform and implement it on
another.
ASP.NET provides inherent support for XML Web services. When you create an
ASP.NET Web service in Visual Studio .NET, you don’t need to worry about
implementing the programming logic to make data accessible in XML format to a Web
service client. Instead, you can concentrate on coding the business logic of the Web
service; the development environment takes care of the rest.
This chapter provides you with the skills to create an ASP.NET Web service. In this
chapter, you’ll learn how to:
§ Create an ASP.NET Web service
§ Access a Web service from a Web service client
Creating a Web Service
The ASP.NET Web Service project template is used to create ASP.NET Web services.
You can create a new project by using the template and adding Web methods to the
project. In this section, I will explain the steps to create a Web service using the
ASP.NET Web Service template.
Creating an ASP.NET Web Service Project
To create an ASP.NET Web service project, launch Visual Studio .NET and follow these
steps.
1. Click on File. The File menu will appear.
2. Move the mouse pointer to New. The New submenu will appear.
3. Click on Project. The New Project dialog box will open.
4. Click on the Visual Basic Projects folder in the Project Types pane. The available
Visual Basic .NET templates will be listed in the Templates pane.
5. Click on ASP.NET Web Service. The option will be selected.
6. Change the name of the Web service by appending the name of the Web service to
the location displayed in the Location text box.
7. Click on OK.
Adding Web Methods to the Web Service
After you create the new Web service, you will need to add Web methods to it. You add
Web methods to the Web service using the Code Editor.
1. Double-click on the Service1.asmx.vb page in the Design view. The form will open in
the Code Editor.
2. Type the definition of the Web method as shown here. In this definition, I have used a
FileStream object to open the urllist.xml file from the Web server. The FileStream object
is used to initialize a StreamReader object. The StreamReader object is used as a data
source by a DataSet object, which reads XML data from the urllist.xml file. The data read
by the DataSet object is stored in an ArrayList object, which is returned by the Web
method.
3. Change the name of the Web service class from Service1 to a name that can be
associated with the Web service.
4. Change the default namespace of the Web service and add a description to the
service using the WebService attribute.
After you make these changes, your Web service will be ready.
Testing the Web Service
After you create a Web service, you should test it. You can test a Web service without
creating a Web service client. All you need to do is to run the Web service and use the
HTML interface that is provided by Visual Studio .NET to retrieve data from Web
methods that are defined in the Web service.
After you add the XML file to the root directory of the Web service project, follow these
steps to test the Web service.
1. Click on Debug. The Debug menu will appear.
2. Click on Start. Visual Studio .NET will compile and run the Web service, and the
UsefulSites page will appear.
3. The UsefulSites page provides a list of Web methods implemented by the Web
service client as hyperlinks. To test the Web method that you added to the site, click on
the GetLatestSites link. The GetLatestSites page will appear.
4. The GetLatestSites Web method does not require any parameters; therefore, the Web
service does not prompt you to specify any. Click on Invoke to test the Web method.
Data from urllist.xml will be retrieved and displayed on the Web page.
Accessing a Web Service
A Web service does not display information directly to users. Instead, a Web service is
often associated with one or more Web service clients that can display data. In this
section, I will use a Web service client to access data from the Web service created in
the preceding section.
Adding a Web Reference
Often, an ASP.NET Web service client is an ASP.NET Web application. Visual Studio
.NET enables you to easily implement the functionality of a Web service in an ASP.NET
Web application.
The Web service client that I will use to connect to the Web service is the
MySourceCode application that was discussed in the last few chapters. As you’ll recall,
MySourceCode is an ASP.NET Web application.
Consider that the MySourceCode application needs to display a list of useful Web sites
on its home page. If the Web application does not have direct access to this information,
it can connect to the Web service created in the preceding section and utilize its Web
methods to display data.
To connect to the Web service and utilize its Web methods, you need to add a Web
reference to the Web service. A Web reference enables you to download the description
of the Web service and use the description to write the code for implementing the Web
service.
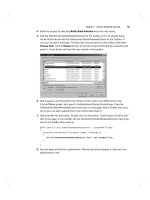
1. Right-click on the name of the solution in the Solution Explorer. A shortcut menu will
appear.
2. Click on Add Web Reference. The Add Web Reference dialog box will open.
3. Click on the Web References on Local Web Server link. A list of Web services
available on the local computer will appear.
4. Click on the link for the Web service that you want to implement. Links to the
contractual information and the documentation of the Web service will be displayed.
5. Click on Add Reference. A reference to the Web service will be added to the
application.
Implementing the Web Service
After you add a Web reference to the Web service, you need to write the code to use the
Web methods of the Web service in your application.
1. Open the form in which you want to implement the Web reference in the Code Editor.
2. Type the code to retrieve data from the Web service, as shown here. In the
GetDataFromWebService function, I have retrieved data from the Web service using its
GetLatestSites Web method. I have displayed the data retrieved from the Web service
by using a Repeater control.
After you write the code to implement a Web service, you can test the Web application to
determine whether the output is what you want.
Testing the Output of a Web Service
You can test the output of the Web service by running the ASP.NET Web application in
which you have implemented the Web service. When you run the application, it will
connect to the Web service, retrieve data using its Web methods, and display data on a
Web form.
This completes the discussion on creating and implementing ASP.NET Web services. In
the next chapter, you will learn how to create applications that can be accessed from
mobile devices.
Chapter 16: Building Mobile Web Applications
Overview
Mobile Web applications enable you to access a Web application using a WAP (Wireless
Access Protocol)-enabled device, such as a cell phone or a personal digital assistant.
Microsoft has provided a Mobile Internet Toolkit that enables you to create mobile
applications using Visual Studio .NET. This chapter describes the procedure for creating
mobile applications using Visual Studio .NET. In this chapter, you’ll learn how to:
§ Install prerequisite software for creating mobile applications
§ Create a mobile application in Visual Studio .NET
Overview of Mobile Web Applications
Before the advent of Visual Studio .NET, it was difficult to create mobile applications.
The reasons why were attributed in part to the lack of a suitable technology that could
cater to the needs of a mobile application developer and in part to the limited capabilities
of mobile devices.
While mobile device manufacturers have done their bit to improve the performance of
mobile devices, Microsoft has introduced the Mobile Internet Toolkit, which can be
integrated with Visual Studio .NET to create mobile applications.
The Mobile Internet Toolkit provides all the necessary tools, mobile Web forms, mobile
Web controls, and extensive documentation that are required to create mobile
applications.
The applications that you create using the Mobile Internet Toolkit are executed in the
.NET Framework environment. Therefore, you can use the class library of the .NET
Framework in mobile applications.
One important component of the Mobile Internet Toolkit is mobile Web forms, which can
be used to design the interface of a Web application as it should appear on the mobile
device. A mobile Web form can contain several forms that can be displayed on the
mobile device one at a time. The advantage to displaying information on multiple forms is
that you can account for the limited display area of the mobile device.
You will learn more about creating mobile applications later in this chapter. First, I will
explain the steps to install prerequisite software for creating mobile applications.
Installing Prerequisite Software
To create mobile Web applications, you need to install the Microsoft Mobile Internet
Toolkit. The toolkit can be downloaded for free from
After you install the Microsoft Mobile Internet Toolkit, you should install Microsoft Mobile
Explorer, which emulates a mobile device and can be used for testing the output of a
mobile application. The Microsoft Mobile Explorer Toolkit can be downloaded from
In this section, I will explain the steps to install the Mobile Internet Toolkit and the
Microsoft Mobile Explorer Toolkit.
Installing the Mobile Internet Toolkit
After you download the Mobile Internet Toolkit, follow these steps to install it.
1. Double-click on the installation file. The Welcome screen of the wizard will appear.
2. Click on Next. The License Agreement screen will appear.
3. Click on the I Accept the Terms in the License Agreement option. The option will be
selected, and the Next button will be enabled.
4. Click on Next. The Setup Type screen will appear.
5. On the Setup Type screen, you can specify whether you want to install all components
of the Mobile Internet Toolkit or only specific components. To install all components,
retain the default option and click on Next. The Ready to Install the Program screen will
appear.
6. Click on Next to begin the installation of the Mobile Internet Toolkit. The setup wizard
will install the toolkit. When the installation is complete, the InstallShield Wizard
Completed screen will appear.
7. Click on Finish to exit the wizard.
After you complete the installation, you can create mobile applications in Visual Studio
.NET.
Installing the Microsoft Mobile Emulator
The Microsoft Mobile Emulator enables you to test the output of your application as it
would appear on a mobile device. To install the Microsoft Mobile Emulator, download the
Microsoft Mobile Explorer Toolkit installation file and follow these steps.
1. Double-click on the installation file. The Welcome screen of the wizard will appear.
2. Click on Next. The License Agreement screen will appear.
3. Click on Yes to accept the license agreement. The Select Components screen of the
wizard will appear.
4. Retain the default options to install all the components of Microsoft Mobile Explorer
and click on Next. The wizard will install Microsoft Mobile Explorer on your computer and
display the Microsoft Mobile Explorer - Readme screen.
5. Click on Finish to exit the wizard.
Creating a Mobile Web Application
To create a mobile Web application, you can use the Mobile Web Application template,
which is installed when you install the Mobile Internet Toolkit. However, you can also add
mobile Web forms to your existing application to make them mobile-device enabled.
Adding a Mobile Web Form to a Project
To add a mobile Web form to your application, follow these steps.
1. Right-click on the solution to which you want to add the mobile Web form. A shortcut
menu will appear.
2. Move the mouse pointer to Add. The Add submenu will appear.
3. Click on Add Web Form. The Add New Item dialog box will open.
4. Click on Mobile Web Form. The option will be selected.
5. Type the name of the Web form in the Name text box and click on Open. A new
mobile Web form will be added to the application.
Designing Forms for a Mobile Application
To design the forms for a mobile application, you can use the mobile controls available in
the Toolbox. If you view the list of mobile controls available in the Toolbox, you will notice
that the list includes a Form control.
The Form control is used to display a different screen on the same Web form. This
control has been included in the Mobile Internet Toolkit to account for the smaller display
area on mobile devices.
To design forms for a mobile application, follow these steps.
1. Click on the Command control in the Toolbox. The control will be selected.
2. Press and hold the mouse button and drag the control to the form.
3. Change the Text property of the control to View Web Server Statistics.
4. Add another Command control to the form and change its Text property to View Site
Statistics.
This completes the design of the first form. However, to display data pertaining to the
performance of the Web server and Web application, you need to add another form to
the application.
1. Click on the Form control in the Toolbox.
2. Press and hold the mouse button and drag the control to the form. A new form will be
placed on the Web form.
3. Add a TextView control to the form. The control will appear on the form.
4. Change the ID property of the TextView control to txtPerformance.
Writing the Code for the Form
After you design the form, you need to write the code for it.
1. Double-click on the View Web Server Statistics button to open the Code Editor.
2. Type the code shown here in the Click event of the control. In this code, I have
determined the amount of time the computer has been running. This value, retrieved by
the Environment.TickCount property, has been assigned to an object of the TimeSpan
class. The object of the TimeSpan class is then used to display the time on the second
form in the Web form. To switch to the second form, I have used the ActiveForm property
of the mobile Web form.
3. Repeat steps 1 and 2 to write the code for the Click event of the View Site Statistics
button. In this code, I have used the GetCurrentProcess method of the Process class to
create an object that represents the application the user is accessing. Then, I used the
StartTime property of the application to determine when the application was started. This
information is displayed to the user in the second form.
Testing a Mobile Application
You can test a mobile application using the Microsoft Mobile Emulator. When you install
the emulator on your computer, two versions of it are installed—the stand-alone version,
which operates as a stand-alone application, and the integrated version, which integrates
with the Visual Studio .NET development environment.
You can use either of the two versions to test your application. To test the application
using the integrated version of the emulator, follow these steps.
1. Click on View. The View menu will appear.
2. Move the mouse pointer to Mobile Explorer Browser. The Mobile Explorer Browser
submenu will appear.
3. Click on Show Browser. The MME Emulator window will appear.
4. In the MME Emulator window, type the address of the mobile Web form and press
Enter.
5. The mobile Web form will appear in the emulator window. Click on the first button to
obtain information about the duration of time for which your computer has been on.
You have now successfully created a mobile Web application. The application can be
accessed on any WAP-enabled mobile device. As you probably noticed, the steps to
create the application are quite similar to the steps to create other Web applications.
Chapter 17: Managing State in ASP.NET
Applications
Overview
HTTP is a stateless protocol. Thus, when a user sends a request to the server, the
request is processed and the data that was involved in processing the request is cleared.
By simply using the HTTP protocol, there is no way in which the server can determine
whether a subsequent request is from the same user. However, it is often necessary to
track the users who are visiting your Web application. For example, to determine which
shopping cart needs to be displayed to a user, you need to know the credentials of the
user who is logged on to the Web application.
ASP.NET allows you to track visitors to your Web site by implementing state
management. State management is a procedure by which a unique session is generated
for every user who visits your Web site. Whenever the user sends a request to the Web
application, the session data is used to retrieve the identity of the user and process the
request.
ASP.NET provides client-side and server-side state management capabilities. In this
chapter, you’ll learn how to:
§ Implement client-side state management
§ Implement server-side state management
Implementing Client-Side State Management
For client-side state management, ASP.NET provides cookies, query strings, and hidden
fields. Each of these options stores data that pertains to the state of the user at the client
end. Therefore, these mechanisms are referred to as client-side state management. In
this section, I will explore these three mechanisms for client-side state management.
Using Cookies
A cookie is a token that is used by a Web server to identify the client of a Web
application. When you enable forms authentication on a Web application, the application
uses client-side cookies to authenticate a user and process user requests.
Cookies can be either temporary or persistent. Temporary cookies are stored in the
client’s browser. These cookies are removed when the browser session with the Web
application ends. Persistent cookies, on the other hand, are stored on the hard disk of
the client computer as a text file. These cookies can be retrieved by the Web application
when the client establishes another session with it.
Using Query Strings
Query strings are used to pass values from one Web form to another. The value that
must be passed from the first form is added to the address of the second form.
Using Hidden Fields
Hidden fields are used by ASP.NET to handle postbacks from a form. Whenever a Web
form submits data to a Web application, the data on the form is processed and the same
form might need to be reloaded. For example, when a user submits a registration form
after filling in all the data fields, the form should be redisplayed to the user if the data in
one or more fields is not valid.
Implementing Server-Side State Management
Server-side state management is implemented in ASP.NET by the Session and
Application state objects. Although the implementation of these objects is quite similar,
their purposes are different. The Application object is used to initialize a set of variables
when the application is first started. The Session object is used to initialize a set of
variables every time a client starts a new session.
In this section, I will examine the steps to configure the Session and Application state
objects for an application.
Implementing Session State Management
The Session object manages the session state. You can use the Start and End events of
the Session object to configure the session state. The Start and End events are always
coded in the global.asax file of the application. The global.asax file defines application
level variables, which can be accessed by all files in the application.
Take a look at an example of the implementation of the Session state object.
Implementing Application State Management
Application state is configured in the same way as the Session state object. Application
state is configured in the Start and End events of the Application object. However, the
code in these events is executed only once; the code for the Start event is executed
when the application is started, and the code for the End event is executed when the
application is terminated.
Variables that need to be accessed from a number of pages in the Web application are
configured in the Application state. For example, you might store the database
connection strings in an XML file. In the Start event of the Application object, you can
retrieve the connection strings and store them in global variables. These variables can
be used throughout the application to connect to the data source and retrieve data.
This completes the discussion on the implementation of state management in ASP.NET.
In the next chapter, you will learn about implementing caching in ASP.NET applications,
which enables you to store frequently used data within the application to improve the
application’s performance.
Chapter 18: Caching in ASP.NET Applications
Overview
Data-intensive applications often require frequent access to the data source. When many
users access an enterprise application, the load on the database might increase
substantially, leading to a decline in performance. You can reduce the load factor on
Web servers and database servers by implementing caching on a Web application.
Caching enables you to store data at temporary locations. When a user requests data
that is cached, the data is retrieved from the cache instead of the original data source,
thus reducing the load on the data source.
ASP.NET provides three types of caching—page-output caching, page-fragment
caching, and page-data caching. Page-output caching and page-fragment caching are
used to cache an entire Web form as it appears on the screen. However, page-data
caching is used to cache specific elements of a Web form, but not its complete interface.
In this chapter, you’ll learn how to:
§ Implement page-output caching
§ Implement page-fragment caching
§ Implement page-data caching
Implementing Page-Output Caching
In page-output caching, when the page is requested for the first time, a page-level cache
is created to cache the contents of a Web form. When subsequent requests are made to
the Web form, the data is retrieved from the cache, which reduces the load on the Web
server.
To implement page-output caching, you need to use the @ OutputCache directive. The
@ OutputCache directive includes a number of attributes that are used to configure the
cache. These attributes include
§ Duration. The Duration attribute determines the number of seconds for which
a cache is valid. For example, if you specify a duration of 60, the cache will
be valid for one minute. After that time, the cache will be recreated.
§ Location. The Location attribute specifies the location of a cache. ASP.NET
applications are capable of caching content on any cache-enabled device,
such as the client computer that has requested the Web form or the proxy
server that is used to access the Web application. By default, the value of