Intermediate System Administration for the Solaris 10 Operating Student Guide phần 3 potx
Bạn đang xem bản rút gọn của tài liệu. Xem và tải ngay bản đầy đủ của tài liệu tại đây (855.9 KB, 73 trang )
Exercise: Working With Disks and Partitions (Level 3)
Managing Local Disk Devices 3-59
Copyright 2005 Sun Microsystems, Inc. All Rights Reserved. Sun Services, Revision A.1
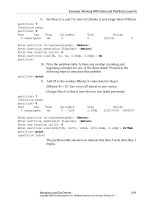
9. Set Slices 5, 6, and 7 to start at Cylinder 0, and assign them 0 Mbytes.
partition> ?
(Partition menu)
partition> 5
Part Tag Flag Cylinders Size Blocks
5 unassigned wm 0 0 (0/0/0) 0
Enter partition id tag[unassigned]: <Return>
Enter partition permission flags[wm]: <Return>
Enter new starting cyl[0]: 0
Enter partition size[0b, 0c, 0e, 0.00mb, 0.00gb]: 0m
partition>
10. Print the partition table. Is there any overlap of ending and
beginning cylinders for any of the slices listed? Proceed to the
following steps to introduce this problem.
partition> print
11. Add 25 to the number Mbytes/4 value listed in Step 6.
(Mbytes/4) + 25: Your entry will depend on your system.
Change Slice 0 so that it uses the new size listed previously.
partition> ?
(Partition menu)
partition> 0
Part Tag Flag Cylinders Size Blocks
0 unassigned wm 0 - 1226 2.10GB (1227/0/0) 4406157
Enter partition id tag[unassigned]: <Return>
Enter partition permission flags[wm]: <Return>
Enter new starting cyl[0]: 0
Enter partition size[4406157b, 1227c, 1226e, 2151.44mb, 2.10gb]: 2175mb
partition> print
(partition table)
The partition table should now indicate that Slice 0 ends after Slice 1
begins.
Exercise: Working With Disks and Partitions (Level 3)
3-60 Intermediate System Administration for the Solaris™ 10 Operating System
Copyright 2005 Sun Microsystems, Inc. All Rights Reserved. Sun Services, Revision A.1
12. Use the modify command from the Partition menu to attempt to fix
this problem. Select Item 0 to modify the current partition table.
partition> ?
(Partition menu)
partition> modify
Select partitioning base:
0. Current partition table (unnamed)
1. All Free Hog
Choose base (enter number) [0]? 0
Which warnings display?
Warning: Overlapping partition (1) in table.
Warning: Fix, or select a different partition table.
13. Modify the partition table. Select Item 1 to use the All Free Hog
option.
partition> modify
Select partitioning base:
0. Current partition table (original)
1. All Free Hog
Choose base (enter number) [0]? 1
14. The partition table appears. Observe the Cylinders and Size columns,
and notice that they are all zero; for example:
Part Tag Flag Cylinders Size Blocks
0 root wm 0 0 (0/0/0) 0
1 swap wu 0 0 (0/0/0) 0
2 backup wu 0 - 4923 8.43GB (4924/0/0) 17682084
3 unassigned wm 0 0 (0/0/0) 0
4 unassigned wm 0 0 (0/0/0) 0
5 unassigned wm 0 0 (0/0/0) 0
6 usr wm 0 0 (0/0/0) 0
7 unassigned wm 0 0 (0/0/0) 0
15. Respond to the prompts to continue the process. Select Slice 4 as the
All Free Hog partition. Use the size listed in Step 6 for Slices 0, 1,
and 3. Set the other slices to Size 0.
Do you wish to continue creating a new partition
table based on above table[yes]? yes
Free Hog partition[6]? 4
Enter size of partition ’0’ [0b, 0c, 0.00mb, 0.00gb]: 2150m
Enter size of partition ’1’ [0b, 0c, 0.00mb, 0.00gb]: 2150m
Enter size of partition ’3’ [0b, 0c, 0.00mb, 0.00gb]: 2150m
Enter size of partition ’5’ [0b, 0c, 0.00mb, 0.00gb]: 0
Enter size of partition ’6’ [0b, 0c, 0.00mb, 0.00gb]: 0
Enter size of partition ’7’ [0b, 0c, 0.00mb, 0.00gb]: 0
Exercise: Working With Disks and Partitions (Level 3)
Managing Local Disk Devices 3-61
Copyright 2005 Sun Microsystems, Inc. All Rights Reserved. Sun Services, Revision A.1
At the end of this process, you should have three slices of equal size,
where Slice 4 takes up any extra room if it exists.
16. Name the partition table "MYDISKpartition", then label the disk.
Okay to make this the current partition table[yes]? y
Enter table name (remember quotes): "MYDISKpartition"
Ready to label disk, continue? y
partition>
partition> quit
(format menu)
format>
17. Save your new partition table to the /etc/format.dat file. Carefully
read the message that is displayed by the format utility, and enter
the correct file name. Quit the format utility when you have
finished. Use the cat command to view the contents of the
/etc/format.dat file. Note that your information is appended to
the file.
format> save
Saving new disk and partition definitions
Enter file name["./format.dat"]: /etc/format.dat
format> quit
#
# cat /etc/format.dat
18. Verify your new partition table with the prtvtoc command.
# prtvtoc /dev/rdsk/c1t3d0s2
19. Create a directory called /vtoc.
# mkdir /vtoc
20. Use the prtvtoc command to print the partition table that you just
created, and save its output to a file in the /vtoc directory. Name the
file so that it corresponds with the disk you are examining. Use the
cat command to verify that valid information exists in the file that
you create.
# prtvtoc /dev/rdsk/c1t3d0s2 > /vtoc/c1t3d0
# cat /vtoc/c1t3d0
Exercise: Working With Disks and Partitions (Level 3)
3-62 Intermediate System Administration for the Solaris™ 10 Operating System
Copyright 2005 Sun Microsystems, Inc. All Rights Reserved. Sun Services, Revision A.1
21. Use the following dd command to destroy the disk label. Be certain
to specify the correct disk device name for the of= argument. Enter
all other arguments exactly as listed.
# dd if=/dev/zero of=/dev/rdsk/c1t3d0s2 bs=512 count=1
1+0 records in
1+0 records out
#
22. Attempt to read the label from the same disk by using the prtvtoc
command.
# prtvtoc /dev/rdsk/c1t3d0s2
What happens?
Different disk types present different results. SCSI disks might report
messages that indicate that the disk label is unreadable, for example:
prtvtoc: /dev/rdsk/c1t3d0s2: Unable to read Disk
geometry errno = 0x16
IDE disks might report a partition table where only Slice 2 remains defined,
for example:
Partition Tag Flags Sector Count Sector
Mount Directory
2501 0
17801280 17801279
Exercise: Working With Disks and Partitions (Level 3)
Managing Local Disk Devices 3-63
Copyright 2005 Sun Microsystems, Inc. All Rights Reserved. Sun Services, Revision A.1
23. If the prtvtoc command reported an “Unable to read Disk
geometry” message, use the format command to place a default
label on the disk for which you destroyed the label earlier.
If the prtvtoc command reports that only Slice 2 exists on the disk,
skip to the next step. Otherwise, perform the commands:
# format
Searching for disks done
c1t3d0: configured with capacity of 8.43GB
AVAILABLE DISK SELECTIONS:
0. c0t0d0 <ST38410A cyl 16706 alt 2 hd 16 sec 63>
/pci@1f,0/pci@1,1/ide@3/dad@0,0
1. c1t3d0 <SUN9.0G cyl 4924 alt 2 hd 27 sec 133>
/pci@1f,0/pci@1/scsi@1/sd@3,0
Specify disk (enter its number): 1
selecting c1t3d0
[disk formatted]
Disk not labeled. Label it now? y
(format menu)
format> q
#
# prtvtoc /dev/rdsk/c1t3d0s2
24. Use the fmthard command to write to the disk the label information
you saved earlier.
# fmthard -s /vtoc/c1t3d0 /dev/rdsk/c1t3d0s2
fmthard: New volume table of contents now in place.
#
25. Attempt to read the label from the same disk.
# prtvtoc /dev/rdsk/c1t3d0s2
Was this successful?
This command should successfully read the disk label.
Introducing the Solaris™ Management Console
3-64 Intermediate System Administration for the Solaris™ 10 Operating System
Copyright 2005 Sun Microsystems, Inc. All Rights Reserved. Sun Services, Revision A.1
Introducing the Solaris™ Management Console
The Solaris Management Console is a Java technology-based tool for the
administration of systems. It provides a central integration point for the
configuration and administration of important applications and services.
The Solaris Management Console software simplifies the job of
configuring and administering servers. With point-and-click graphical
user interface (GUI) tools, the Solaris Management Console makes the
Solaris OS easy to administer, especially for administrators who are not
familiar with the UNIX environment.
Starting the Solaris Management Console
The Solaris Management Console can be started from the command line
or from within the Application Manager by clicking the Solaris
Management Console icon.
Log in to your system as root, and type smc& in a terminal window. You
can start the Solaris Management Console as a normal user, but some
tools and applications are not available to you. When you initiate the
Solaris Management Console for the first time, it can take a few minutes
to launch.
Note – The information provided in this course is only a small subset of
the overall capabilities of the Solaris Management Console.
Introducing the Solaris™ Management Console
Managing Local Disk Devices 3-65
Copyright 2005 Sun Microsystems, Inc. All Rights Reserved. Sun Services, Revision A.1
Using the Solaris Management Console Tools
The default toolbox for a Solaris Management Console server includes the
following folders and tools:
The Solaris Management Console enables local users and administrators
to register remote Solaris Management Console servers and applications
on the network they want to administer. When you access the Solaris
Management Console, it dynamically configures tree views of those
registered hosts and services. Point and click with the mouse to invoke an
application remotely on a selected Solaris Management Console server
and view the application’s GUI on the local display.
Introducing the Help Screen
The online help for the Solaris Management Console provides an
alternative to standard documentation. The information panes that appear
in both the Solaris Management Console and the Solaris Management
Console Toolbox Editor provide the steps necessary to perform the tasks
executed within these windows. In addition, the Help menu item
Contents displays a window that further describes the features and
functions of the window components.
System Status This category includes System Information, Log
Viewer, Processes, and Performance.
System
Configuration
This category includes Users, Projects, Computers
and Networks, and Patches.
Services This category includes Scheduled Jobs.
Storage This category includes Mounts and Shares, Disks,
and Enhanced Storage.
Devices and
Hardware
This category includes Serial Ports.
Introducing the Solaris™ Management Console
3-66 Intermediate System Administration for the Solaris™ 10 Operating System
Copyright 2005 Sun Microsystems, Inc. All Rights Reserved. Sun Services, Revision A.1
Figure 3-14 shows the help functionality of the Solaris Management
Console.
Figure 3-14 Solaris Management Console Help View
Restarting the Solaris Management Console
If you have trouble accessing Solaris Management Console, the reason
might be that the Solaris Management Console server is not running or is
in a problem state.
To determine if the Solaris Management Console server is running,
perform the command:
# /etc/init.d/init.wbem status
Introducing the Solaris™ Management Console
Managing Local Disk Devices 3-67
Copyright 2005 Sun Microsystems, Inc. All Rights Reserved. Sun Services, Revision A.1
If the Solaris Management Console server is running, a response similar to
the following returns: “Solaris Management Console server
version 2.1.0 running on port 898.”
Note – If this is the first time SMC has been run after a reboot, this
command may show an error.
To stop the Solaris Management Console server, as the root user, perform
the command:
# /etc/init.d/init.wbem stop
The following response returns: “SMC stopped.”
To start the Solaris Management Console server, as the root user, perform
the command:
# /etc/init.d/init.wbem start
After a short time, the following response returns: “SMC server
started.”
Identifying the Functional Areas of the Solaris
Management Console
The Solaris Management Console and the Solaris Management Console
Toolbox Editor windows are divided into functional areas as follows:
● Navigation pane
● View pane
● Information pane
● Location bar
● Status bar
Introducing the Solaris™ Management Console
3-68 Intermediate System Administration for the Solaris™ 10 Operating System
Copyright 2005 Sun Microsystems, Inc. All Rights Reserved. Sun Services, Revision A.1
Figure 3-15 shows these divisions.
Figure 3-15 Solaris Management Console Overview
Note – The Location bar does not appear by default when you first launch
the Solaris Management Console. Click View on the Menu bar, select the
Show option, and select the Location option to display the Location bar.
Navigation Pane
The Navigation pane works like a frame in a web page. Clicking an item
in the Navigation pane determines what appears in the View pane. The
turner icon is displayed to the left of items that represent a group of items.
Click the icon or the item to expand or collapse the group.
The Navigation pane is displayed or not displayed, depending on the
Show setting in the View menu. Click View on the Menu bar, select the
Show option, and select or deselect the Navigation option.
Introducing the Solaris™ Management Console
Managing Local Disk Devices 3-69
Copyright 2005 Sun Microsystems, Inc. All Rights Reserved. Sun Services, Revision A.1
View Pane
The View pane displays the contents of the node selected in the
Navigation pane. The contents could be a folder or a tool.
If the node selected in the Navigation pane is a folder, the View pane
displays the contents of that folder.
If the node selected is a simple tool, such as the Process tool, the View
pane displays a list of current processes. If the node selected is a complex
tool, such as User Manager, the View pane displays additional tools, such
as the tools for user accounts and email accounts. Select one of the
additional tools, such as the user accounts node, and the View pane
displays the contents of the tool.
Information Pane
The Information pane at the bottom of the Solaris Management Console
window displays either context help for the object selected in the
Navigation pane or a list of events and alarms for all Solaris Management
Console events.
The Context Help tab and Console Events tab determine what is shown in
the Information pane. Click the Context Help tab to display context help
for the object selected. Click the Console Events tab to display a list of
events and alarms for all Console events.
The Information pane is displayed or not displayed, depending on the
Show setting in the View menu. Click View on the Menu bar, select the
Show option, and select or deselect the Information option.
Location Bar
The Location bar, beneath the tool bar in the Solaris Management Console
window, displays a Home Toolbox icon and a Toolbox field. Click the
Home Toolbox icon to open the home toolbox. The Toolbox field indicates
the current toolbox and the item currently selected in the toolbox. Click
the button to the right of the Toolbox field to display a pull-down menu of
recent toolboxes visited. Select a toolbox from the pull-down menu to
open that toolbox.
The Location bar is displayed or not displayed, depending on the Show
setting in the View menu. Click View on the Menu bar, select the Show
option, and select or deselect the Location option.
Introducing the Solaris™ Management Console
3-70 Intermediate System Administration for the Solaris™ 10 Operating System
Copyright 2005 Sun Microsystems, Inc. All Rights Reserved. Sun Services, Revision A.1
Status Bar
The Status bar, located across the bottom of the Solaris Management
Console window, displays three panes. The left pane of the Status bar
indicates the number of nodes directly subordinate to the node selected in
the Navigation pane. The center pane of the Status bar indicates Console
activity. A moving bar inside the center pane functions as an activity
indicator when Console activity occurs. The right pane of the Status bar
provides progress information during some Console tasks.
The Status Bar is displayed or not displayed, depending on the Show
setting in the View menu. Click View on the Menu bar, select the Show
option, and select or deselect the Status bar option.
Partitioning a Disk by Using the Solaris Management Console Disks Manager Tool
Managing Local Disk Devices 3-71
Copyright 2005 Sun Microsystems, Inc. All Rights Reserved. Sun Services, Revision A.1
Partitioning a Disk by Using the Solaris Management
Console Disks Manager Tool
The following section describes how to partition a disk by using the
Solaris Management Console Disks Manager Tool (from this point on,
referred to as the Disks Tool).
Partitioning the Disk Using the Disks Tool
To partition a disk by using the Disks Tool, you must first locate the
Storage folder within the Navigation pane. The Storage folder consists of
the Mounts and Shares folder, the Disks Tool, and the Enhanced Storage
tools.
Use the Disks Tool to perform the following tasks:
● Display information about a specific disk
● Create Solaris OS disk partitions
● List partitions
● Copy the layout of one disk to another disk of the same type
● Change the disk’s label
Partitioning a Disk by Using the Solaris Management Console Disks Manager Tool
3-72 Intermediate System Administration for the Solaris™ 10 Operating System
Copyright 2005 Sun Microsystems, Inc. All Rights Reserved. Sun Services, Revision A.1
Perform the following steps to partition a disk by using Disks Tool:
1. Click Storage and then the Disks Tool. The Log In: User Name
window appears, prompting you to enter the root password.
Figure 3-16 shows the Log In: User Name window.
Figure 3-16 Log In: User Name Window
Figure 3-17 shows the Solaris Management Console after you have
opened the Storage folder and then the Disks Tool. The figure shows
a system with two disks.
Figure 3-17 Management Tools: Solaris Management Console Window
Partitioning a Disk by Using the Solaris Management Console Disks Manager Tool
Managing Local Disk Devices 3-73
Copyright 2005 Sun Microsystems, Inc. All Rights Reserved. Sun Services, Revision A.1
2. Click to select a specific disk. Then click the Action menu on the
Menu bar.
The Action menu displays a list of functions that this window
performs.
3. To display a graphical representation of a disk’s partitioning, select
the Properties option from the Action menu.
Figure 3-18 shows a 1.3 Gbyte drive.
Figure 3-18 Properties Window
Basic disk information, including size, address, and available free
space, is reported. Move the cursor over any partition on the Disk
Layout bar to see the size and geometry of the partition slice in a
pop-up window.
Partitioning a Disk by Using the Solaris Management Console Disks Manager Tool
3-74 Intermediate System Administration for the Solaris™ 10 Operating System
Copyright 2005 Sun Microsystems, Inc. All Rights Reserved. Sun Services, Revision A.1
4. To create a new partition map on a disk, select the Create Solaris
Partitions option from the Action menu.
Figure 3-19 shows the first window that you use to create partitions
on a disk. This window prompts you to choose between creating
custom-sized partitions and creating equal-sized partitions. In the
figure, Create Custom-Sized Partitions is selected.
Figure 3-19 Create Solaris Partitions on Disk Window
Partitioning a Disk by Using the Solaris Management Console Disks Manager Tool
Managing Local Disk Devices 3-75
Copyright 2005 Sun Microsystems, Inc. All Rights Reserved. Sun Services, Revision A.1
5. Click Next after choosing how to divide the disk.
Figure 3-20 shows the next window that you use to create partitions
on a disk. You are prompted to select the number of partitions. You
can select up to seven partitions. You can also create some of them as
zero-length partitions.
Figure 3-20 Create Solaris Partitions on Disk Window – Specify Number
of Partitions
Partitioning a Disk by Using the Solaris Management Console Disks Manager Tool
3-76 Intermediate System Administration for the Solaris™ 10 Operating System
Copyright 2005 Sun Microsystems, Inc. All Rights Reserved. Sun Services, Revision A.1
6. After selecting the number of partitions, click Next.
Figure 3-21 shows the window that enables you to display each
partition. When a partition is displayed, the size of the partition is
also displayed. You can choose to display the size of the partition in
either a percentage of the disk space or the total number of
megabytes, and you can adjust the size of each partition. The disk
layout bar graphically represents the disk partitions. Place the cursor
over the bar to view the amount of space that remains to be
partitioned.
Figure 3-21 Create Solaris Partitions on Disk Window – Specify Size and
Use of Partitions
Partitioning a Disk by Using the Solaris Management Console Disks Manager Tool
Managing Local Disk Devices 3-77
Copyright 2005 Sun Microsystems, Inc. All Rights Reserved. Sun Services, Revision A.1
7. Use this window to adjust the size of each partition to the desired
size. Click Next when you have finished sizing the partitions.
Figure 3-22 shows the window that allows you to specify the
partitions on which to create file systems.
Figure 3-22 Create Solaris Partitions on Disk Window – Specify Where to
Create File Systems
Partitioning a Disk by Using the Solaris Management Console Disks Manager Tool
3-78 Intermediate System Administration for the Solaris™ 10 Operating System
Copyright 2005 Sun Microsystems, Inc. All Rights Reserved. Sun Services, Revision A.1
8. In the Create Solaris Partitions on Disk window, check the box under
the file system that corresponds to each partition you want to use.
Click Next when you are finished making your selections.
Figure 3-23 displays a list of the disk partitions you have created.
Figure 3-23 Create Solaris Partitions on Disk Window – Confirmation
Partitioning a Disk by Using the Solaris Management Console Disks Manager Tool
Managing Local Disk Devices 3-79
Copyright 2005 Sun Microsystems, Inc. All Rights Reserved. Sun Services, Revision A.1
9. If you are satisfied with the partitions, click Finish. The new
partitioning is written, and the newfs utility runs on the partitions
you selected to create a new file system.
Figure 3-24 displays the disks window of the Solaris Management
Console after you have completed partitioning the disk. The created
partitions are displayed in the Management Tools: Solaris
Management Console window.
Figure 3-24 Management Tools: Solaris Management Console Window –
Partitioning Completed
Performing the Exercises
3-80 Intermediate System Administration for the Solaris™ 10 Operating System
Copyright 2005 Sun Microsystems, Inc. All Rights Reserved. Sun Services, Revision A.1
Performing the Exercises
You have the option to complete either of these labs. To decide which to
choose, consult the following descriptions of the levels:
● Level 1 – This version of the lab provides the least amount of
guidance. Each bulleted paragraph provides a task description, but
you must determine your own way of accomplishing each task.
● Level 2 – This version of the lab is guided. Although each step
describes what you should do, you must determine which
commands (and options) to input.
There are only two levels of this lab due to the nature of working within
the Solaris Management Console GUI. Should you require assistance with
any of the steps, consult the help functionality from the Solaris
Management Console.
Exercise: Working With the Solaris Management Console (Level 1)
Managing Local Disk Devices 3-81
Copyright 2005 Sun Microsystems, Inc. All Rights Reserved. Sun Services, Revision A.1
Exercise: Working With the Solaris Management Console
(Level 1)
In this exercise, you complete the following tasks:
● Launch the Solaris Management Console Disks Manager Tool
● Partition the second drive of your system to match the boot drive
Preparation
This exercise requires a system with at least two disks, one of which is
available for the student to re-partition.
Remote Lab Data Center (RLDC)
In addition to being able to use local classroom equipment, this lab has
also been designed to use equipment located in a remote lab data center.
Directions for accessing and using this resource can be found at:
/>Ask your instructor for the particular SSH (Secure Shell) configuration file
you should use to access the appropriate remote equipment for this
exercise.
Tasks
Complete the following tasks:
● Launch the Solaris Management Console, and choose the Disks Tool
from the Storage folder.
● Authenticate as the root user by typing the root password.
● View information about your boot drive from the Disks Tool, and
make note of it.
● On your spare hard drive, make four equal sized partitions on
Slices 0, 1, 3, and 4.
Exercise: Working With the Solaris Management Console (Level 2)
3-82 Intermediate System Administration for the Solaris™ 10 Operating System
Copyright 2005 Sun Microsystems, Inc. All Rights Reserved. Sun Services, Revision A.1
Exercise: Working With the Solaris Management Console
(Level 2)
In this exercise, you complete the following tasks:
● Launch the Solaris Management Console Disks Manager Tool
● Partition the second drive of your system to match the boot drive
Preparation
This exercise requires a system with at least two disks, one of which is
available for the student to re-partition.
Remote Lab Data Center (RLDC)
In addition to being able to use local classroom equipment, this lab has
also been designed to use equipment located in a remote lab data center.
Directions for accessing and using this resource can be found at:
/>Ask your instructor for the particular SSH (Secure Shell) configuration file
you should use to access the appropriate remote equipment for this
exercise.
Task Summary
Complete the following tasks:
● Launch the Solaris Management Console, and choose the Disks Tool
from the Storage folder.
● Authenticate as the root user by typing the root password.
● View information about your boot drive from the Disks Tool, and
make note of it.
● On your spare hard drive, make four equal sized partitions on
Slices 0, 1, 3, and 4.
Exercise: Working With the Solaris Management Console (Level 2)
Managing Local Disk Devices 3-83
Copyright 2005 Sun Microsystems, Inc. All Rights Reserved. Sun Services, Revision A.1
Tasks
Complete the following steps:
1. Launch the Solaris Management Console from the command line or
by using Application Manager.
2. Open the Disks Tool.
3. Select your boot drive from the Disks Tool, and record the partition
information listed.
4. Select your spare drive from the Disks Tool. Select Create Solaris
Partitions from the Action menu.
5. Choose Create Equal-Sized Partitions, and click Next.
6. Specify Number of Partitions as 4. Click Next.
7. Verify that you have four equal-sized partitions on Slices 0, 1, 3,
and 4. Click Next.
8. Check the box beside Slice 4 to create a File System, and click Next.
9. After reviewing your choices and verifying that they are correct,
click Finish.
The Solaris Management Console window refreshes, and you should
see the four equal-sized partitions listed in the View Pane.
10. Exit from the Solaris Management Console.
