Mastering Excel 2003 Programming with VBA phần 9 ppt
Bạn đang xem bản rút gọn của tài liệu. Xem và tải ngay bản đầy đủ của tài liệu tại đây (1.74 MB, 61 trang )
4281book.fm Page 469 Sunday, February 29, 2004 5:12 PM
469
FORMS ARE MEANT TO BE SHOWN
There isn’t much to this one, is there? Granted, this is a simple form, but usually the code in the
event procedures associated with the various controls on a form is fairly compact. Every form you cre-
ate will use either the Activate or Initialize event to populate its controls before the form actually gets
displayed to the user. The Initialize event only occurs once in a form’s lifetime; it is the first thing to
happen when a form gets created. The Activate event can occur multiple times in a form’s lifetime.
An Activate event typically, though not necessarily, occurs just after the Initialize event. You’ll see the
difference between these two events later in the chapter in the section titled “The Form Lifecycle.”
For now, you can see that I’ve used the Initialize event to populate the text box with the name of the
active sheet and then preselected the text in the text box. If I didn’t preselect the text, the cursor would
appear at the end of the text, which is not very convenient from a user’s perspective.
The only other comment I have regarding this listing is that the SaveSheetName procedure is
called by the cmdOK click event procedure. In order to keep it simple, I’m not bothering to check if
the user actually changes the sheet name or not. I mean, what’s the point? Does it make a difference
if the sheet name is set to the exact same value? I think not. Also, rather than worry about validating
the name entered, it is much easier to let Excel do the validating for me and just continue on my busi-
ness if an error occurs. If this were a production type application, I would probably want to inspect
any error that does occur so that I can notify the user why the name couldn’t be changed.
Forms Are Meant to Be Shown
Of course, you can’t expect your users to open the VBE, select the form they want to run, and then
press F5 to run it. You need some way to allow them to see the form or show it when certain events
happen. Depending on your needs, you have a few ways to go about displaying a form to a user: using
the Show method, using the Load statement, or instantiating a form as an object.
Show First, Ask Questions Later
The easiest and perhaps most frequently used method is the form’s Show method. The syntax of
Show is
frm.Show [modal]
The modal parameter controls a key behavior of a form. A form can be modal (vbModal) or modeless
(vbModeless). When a form is modal, the user must complete her interaction with the form before
she can use any other aspect of Excel. Additionally, any subsequent code is not executed until the form
is hidden or unloaded. When a form is modeless, any subsequent code is executed as it’s encountered.
Listing 20.2 presents an example that displays the Simple form developed previously in the chapter.
The SimpleFormExample shows the form twice—once as a modal form and once as a modeless form.
Listing 20.2: Using the Show Method to Display a Form
Sub SimpleFormExample()
' Show form modally
ShowSimpleForm True
MsgBox "OK - Same form now, but modeless.", vbOKOnly
4281book.fm Page 470 Sunday, February 29, 2004 5:12 PM
470
CHAPTER 20 USER FORM CONSTRUCTION
' Show form modeless
ShowSimpleForm False
MsgBox "Exiting the SimpleFormExample procedure.", vbOKOnly
End Sub
' Display the simple form
Private Sub ShowSimpleForm(bModal As Boolean)
If bModal Then
frmSimpleForm.Show vbModal
Else
frmSimpleForm.Show vbModeless
End If
End Sub
When you run the SimpleFormExample, notice that you don’t get the first message box until after
you dismiss the form the first time. The second message box, however, is displayed immediately after
the form is displayed the second time—before you even get a chance to dismiss the form. As you run
this example, it would also be beneficial to try and interact with Excel as each form is displayed so
that you can experience the full difference between these two behaviors.
Switching from modal to modeless or vice versa often causes trouble because it affects how your code
executes and thus will violate the implicit assumptions you made regarding the execution of your code when
you originally coded it. Therefore, you should choose wisely the first time. In fact, the Simple form dem-
onstrates the impact of this. Simple form was developed in a manner that assumed the form would be
modal. Consequently, Simple form works by modifying the name of the active sheet. When you run Simple
form as a modeless form, it is possible to change worksheets while the form is still open. If you change the
name of the sheet and then change worksheets before clicking OK, Simple form changes the name of the
currently active sheet rather than the sheet that was active when Simple form was originally displayed.
Load and Show
Although most of the time you will simply use the Show method to display forms, occasionally
you’ll need a way to manipulate the form prior to displaying it to the user. In order to achieve this,
you need to use the Load statement to load the form into memory. Once the form is loaded into
memory (but not displayed to the user), you can interact with the form programmatically prior to
displaying the form using the Show method as before. Load gives you a lot more flexibility than
just using Show alone. In fact, when you use Show without using Load, Show calls Load internally
for you. Listing 20.3 presents an example that demonstrates this method.
Listing 20.3: Loading a Form into Memory Prior to Displaying It
' Modify the simple form before showing it
Sub ModifySimpleForm()
Dim sNewCaption As String
' Load the form into memory
4281book.fm Page 471 Sunday, February 29, 2004 5:12 PM
471
FORMS ARE MEANT TO BE SHOWN
Load frmSimpleForm
' Prompt for a new caption
sNewCaption = InputBox("Enter a caption for the form.")
' Set the new caption
frmSimpleForm.Caption = sNewCaption
' Show the form
frmSimpleForm.Show
' Show another instance of the form
MsgBox "OK - same form again except with default caption", vbOKOnly
frmSimpleForm.Show
End Sub
In addition to demonstrating how to use the Load then Show method of displaying a form, this
listing also helps illuminate another facet of using forms. As you’ll see in the following section, a form
is really a fancy class module that knows how to display user interface controls. Because of this, when
you modify the Caption property for one instance of the form, you do not affect any other form
instances. This fact is illustrated in this listing when the last statement shows a (second) instance of
the Simple form by displaying a new form using the Show method.
Classy Forms
So far, you have seen that using the Load then Show method for displaying a form offers more flex-
ibility than using Show alone. You can wring even more flexibility out of your forms by designing
them and using them in the same manner that you would design and use any other class module. As
I mentioned earlier, a form module is really a special kind of class module. You can use your forms
exactly as you would any other class. In order to take advantage of this fact, you should design your
forms appropriately.
The Simple form you developed earlier suffers from one flaw that limits its flexibility. In Listing 20.1,
you can see that both the cmdOK_Click and cmdCancel_Click procedures contain one fatal (liter-
ally) statement—Unload Me. Unload is a VBA statement that unloads an object from memory,
whereas Me is a way to get an object to refer to itself. In order to have the ultimate amount of flex-
ibility, you should place the responsibility of destroying a form with the code that instantiates it.
Note
Although it is good practice to explicitly dereference objects when you’re done using them, VBA automatically
dereferences objects that fall out of scope. For example, an object that is declared local to a procedure is automatically de-
referenced sometime after the procedure finishes executing.
Though traditionally the former two methods for displaying a form are taught, this method isn’t
that radical of an idea. With any other object that you use, either objects that you develop or native
objects from the Excel object model, if you instantiate an object, then it’s yours to use until you deref-
erence it by setting it to Nothing. Objects rarely decide to unload themselves (though VBA may
unload them once it deems that they are no longer being used).
4281book.fm Page 472 Sunday, February 29, 2004 5:12 PM
472
CHAPTER 20 USER FORM CONSTRUCTION
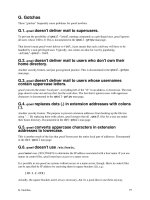
Figure 20.5
The Classy form
That being said, you could argue that the two methods for displaying forms that I’ve already pre-
sented are unorthodox; I wouldn’t disagree. Anyway, perhaps a quick example would clear all of this
up for you. In order to demonstrate this concept, I developed the Classy form shown in Figure 20.5.
All Classy does is allow you to enter some text in a text box and click OK. Pretty boring, eh? Table 20.4
provides the control properties that I modified when creating Classy.
Table 20.4: Classy Control Property Values
Control Property Value
Lable1 (Name) lblStuff
Label1 Accelerator E
TextBox1 (Name) txtStuff
CommandButton1 (Name) cmdOK
CommandButton1 Caption OK
CommandButton1 Default True
In order to make this form work, I only needed to code one event procedure, as shown in Listing 20.4.
Listing 20.4: Classy’s Code
Option Explicit
Private Sub cmdOK_Click()
Me.Hide
End Sub
4281book.fm Page 473 Sunday, February 29, 2004 5:12 PM
473
FORMS ARE MEANT TO BE SHOWN
With those few lines of code, I have finished a form that is fundamentally different from the pre-
vious form. In the previous form, the Simple form unloaded itself when you clicked OK. Classy, on
the other hand, just hides itself. As a result, the form is still accessible in memory even though the user
can’t see it. Listing 20.5 provides an example of how to use such a form.
Listing 20.5: A Classy Example
Sub ClassyFormExample()
Dim frm As frmClassy
Dim vResponse As Variant
' Instantiate frmClassy
' This has the same effect as: Load frmClassy
Set frm = New frmClassy
' Prefill the edit box with a value (just for fun)
frm.txtStuff = "Good Stuff"
frm.Show
' Form is now hidden, but you can still manipulate it
vResponse = MsgBox("The Classy form text box says: " & _
frm.txtStuff & ". View again?", vbYesNo)
If vResponse = vbYes Then
' The form is still alive - show it
' See - txtStuff has the same value as before
frm.Show
End If
' RIP o Classy one
Set frm = Nothing
End Sub
Doesn’t this kind of coding style look familiar? This is the same way you’d go about using an
object. In the first declaration statement, I declare a variable named frm that is typed as an frm-
Classy object. Two statements later, I create a new instance of an frmClassy. This statement per-
forms the exact same process you’d get if you used the Load statement. As you saw in the Load and
Show example (Listing 20.3), once you create a new instance of the form, you can set various form
property values programmatically. Once you click OK after displaying Classy, Classy is hidden by
the cmdClick event procedure. If you click Yes in response to the message box, Classy is seemingly
revived from the dead—complete with all of its values as you left them before you clicked OK.
Finally, the next to last statement unloads Classy from memory by setting the variable used to point
to the form to Nothing.
As another example, consider Listing 20.6. This listing creates two separate instances of Classy.
4281book.fm Page 474 Sunday, February 29, 2004 5:12 PM
474
CHAPTER 20 USER FORM CONSTRUCTION
Listing 20.6: Multiple Instances of the Classy Form
Sub ClassyFormExample2()
Dim frm1 As frmClassy
Dim frm2 As frmClassy
Set frm1 = New frmClassy
Set frm2 = New frmClassy
frm1.Caption = "I am Classy"
frm1.Show
frm2.Caption = "I am Classy too."
frm2.txtStuff = "I am Classy said '" & frm1.txtStuff & "'"
frm2.Show
Set frm1 = Nothing
Set frm2 = Nothing
End Sub
This listing helps drive home the point that forms are classes and can be used as such, particularly
when you don’t destroy the form from within by embedding the Unload statement in one of the
form’s event procedures. Listing 20.6 creates two instances of frmClassy. After you close the first
instance, the second instance reads what you entered in the first instance and tells you what you said.
The Form Lifecycle
As I mentioned earlier, you use one of two form event procedures to perform form initialization
chores: either Activate or Initialize. The Initialize event occurs in response to the form being loaded
into memory, whereas the Activate event occurs in response to the form being shown. That is why Ini-
tialize always runs once and only once for a given form instance whereas Activate may occur multiple
times. Depending on which of the methods you use to display the form, the implications of choosing
Activate and Initialize can yield drastically different results.
Choosing the proper event to respond to doesn’t stop with the choice between using Activate or
Initialize. Nearly every control you add to a form requires you to handle one or more of its events in
order to provide any useful functionality. Many times you will identify more than one event for a par-
ticular control that may serve as a trigger to run code that implements some sort of behavior. In order
to make an informed decision as to which event procedure to use, I often find it helpful to trace the
events that occur in a form during the development process. You can trace events by including a sim-
ple statement in each event procedure of interest that either displays a message box, writes a message
to the Immediate window using Debug.Print, or records each event on a worksheet in your workbook.
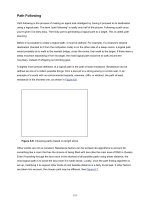
Figure 20.6 shows an example of a form that traces events by writing events of interest to a worksheet.
4281book.fm Page 475 Sunday, February 29, 2004 5:12 PM
475
THE FORM LIFECYCLE
Figure 20.6
The Event Tracing
form in action
In order to have plenty of events to play with, the form has controls on it that implement random
functionality that changes the appearance of a worksheet with a code name of wsEventTracing. You
can set the code name of a worksheet in the VBE by selecting the worksheet that you want to rename
under the Microsoft Excel Objects item in the Project Explorer window and changing the Name
property in the Properties window. As you can see in Figure 20.6, I placed the text “Control” and
“Event” in cells A1 and B1 respectively. Table 20.5 lists the properties I modified as I added controls
to the Event Tracing form.
Table 20.5: Event Tracing Control Properties
Control Property Value
UserForm (Name) frmEventTracing
frmEventTracing Caption Event Tracing
Label (Name) lblWorksheetName
lblWorksheetName Caption Worksheet Name
TextBox (Name) txtName
CheckBox (Name) chkGridlines
chkGridlines Caption Gridlines
CheckBox (Name) chkWeirdFont
4281book.fm Page 476 Sunday, February 29, 2004 5:12 PM
476
CHAPTER 20 USER FORM CONSTRUCTION
Table 20.5: Event Tracing Control Properties (continued)
Control Property Value
chkWeirdFont Caption Use Weird Font
Frame (Name) frmOptions
frmOptions Caption Font Color Options
OptionButton (Name) optBlack
optBlack Caption Black
OptionButton (Name) optBlue
optBlue Caption Blue
OptionButton (Name) optGreen
optGreen Caption Green
CommandButton (Name) cmdHide
cmdHide Accelerator H
cmdHide Caption Hide
CommandButton (Name) cmdOK
cmdOK Caption OK
cmdOK Default True
Label (Name) lblSummary
Listing 20.7 contains the code necessary to implement the functionality of the Event Tracing form.
Listing 20.7: Tracing Form Events
Option Explicit
Dim mws As Worksheet
Dim msColor As String
Private Sub chkGridlines_Click()
RecordEvent chkGridlines.Name, "Click"
ActiveWindow.DisplayGridlines = chkGridlines.Value
SetSummary
End Sub
Private Sub chkWeirdFont_Click()
' It is possible that the font "Bradley Hand ITC"
4281book.fm Page 477 Sunday, February 29, 2004 5:12 PM
477
THE FORM LIFECYCLE
' may not be present on every PC
On Error Resume Next
RecordEvent chkWeirdFont.Name, "Click"
If chkWeirdFont.Value Then
mws.Cells.Font.Name = "Bradley Hand ITC"
Else
mws.Cells.Font.Name = "Arial"
End If
SetSummary
End Sub
Private Sub cmdHide_Click()
RecordEvent cmdHide.Name, "Click"
Me.Hide
' Pause for a brief period and
' then reshow the form
Application.Wait Now + 0.00003
Me.Show
End Sub
Private Sub cmdOK_Click()
RecordEvent cmdOK.Name, "Click"
Unload Me
End Sub
Private Function RecordEvent(sControl As String, sEvent As String)
Dim rg As Range
Set rg = mws.Cells(65536, 1).End(xlUp).Offset(1, 0)
rg.Value = sControl
rg.Offset(0, 1).Value = sEvent
Set rg = Nothing
End Function
Private Sub frmOptions_Click()
RecordEvent frmOptions.Name, "Click"
End Sub
Private Sub optBlack_Change()
RecordEvent optBlack.Name, "Change"
End Sub
Private Sub optBlack_Click()
RecordEvent optBlack.Name, "Click"
msColor = "black"
mws.Cells.Font.Color = vbBlack
4281book.fm Page 478 Sunday, February 29, 2004 5:12 PM
478
CHAPTER 20 USER FORM CONSTRUCTION
SetSummary
End Sub
Private Sub optBlue_Change()
RecordEvent optBlue.Name, "Change"
End Sub
Private Sub optBlue_Click()
RecordEvent optBlue.Name, "Click"
msColor = "blue"
mws.Cells.Font.Color = vbBlue
SetSummary
End Sub
Private Sub optGreen_Change()
RecordEvent optGreen.Name, "Change"
End Sub
Private Sub optGreen_Click()
RecordEvent optGreen.Name, "Click"
msColor = "green"
mws.Cells.Font.Color = vbGreen
SetSummary
End Sub
Private Sub txtName_AfterUpdate()
RecordEvent txtName.Name, "AfterUpdate"
mws.Name = txtName.Value
SetSummary
End Sub
Private Sub txtName_Change()
On Error Resume Next
RecordEvent txtName.Name, "Change"
End Sub
Private Sub UserForm_Activate()
RecordEvent Me.Name, "Activate"
End Sub
Private Sub UserForm_Deactivate()
RecordEvent Me.Name, "Deactivate"
End Sub
Private Sub UserForm_Initialize()
On Error GoTo ErrHandler
' Refer via worksheet code name
4281book.fm Page 479 Sunday, February 29, 2004 5:12 PM
479
THE FORM LIFECYCLE
' since this form can change the display name
Set mws = wsEventTracing
RecordEvent Me.Name, "Initialize"
' Activate the worksheet so you
' can watch the events occur
mws.Activate
' Initialize controls on the form
chkGridlines.Value = ActiveWindow.DisplayGridlines
txtName.Text = mws.Name
If mws.Cells.Font.Name <> "Bradley Hand ITC" Then
chkWeirdFont.Value = False
Else
chkWeirdFont.Value = True
End If
InitializeBackgroundOptions
SetSummary
Exit Sub
ErrHandler:
Debug.Print "UserForm_Initialize: " & Err.Description
Unload Me
End Sub
Private Sub UserForm_Terminate()
RecordEvent Me.Name, "Terminate"
End Sub
Private Sub InitializeBackgroundOptions()
Select Case mws.Cells.Font.Color
Case Is = vbBlack
optBlack.Value = True
msColor = "black"
Case Is = vbBlue
optBlue.Value = True
msColor = "blue"
Case Is = vbGreen
optGreen.Value = True
msColor = "green"
Case Else
mws.Cells.Interior.Color = vbBlack
optBlack.Value = True
End Select
End Sub
Private Sub SetSummary()
Dim sGridlines As String
4281book.fm Page 480 Sunday, February 29, 2004 5:12 PM
480
CHAPTER 20 USER FORM CONSTRUCTION
Dim sColor As String
Dim sFont As String
If chkWeirdFont.Value Then
sFont = "weird"
Else
sFont = "standard"
End If
If chkGridlines.Value Then
sGridlines = "using gridlines"
Else
sGridlines = "without using gridlines"
End If
lblSummary.Caption = mws.Name & " shows its data " & _
sGridlines & " using a " & sFont & ", " & _
msColor & " font "
End Sub
Don’t let the length of Listing 20.7 intimidate you, it’s really a simple form. Most of the
code consists of many small event procedures containing a handful of statements at most. The
UserForm_Initialize procedure has three main tasks as it prepares the form to be displayed: set
a module-level reference to the worksheet of interest, record the event, and set the controls on
the form with appropriate values.
Because the Event Tracing form has functionality to record events and change the appearance of
the worksheet it is logging events to, I declared a module-level variable named mws to hold a reference
to the worksheet. Because one of the things the Event Tracing form can do is rename the worksheet
it operates on, it is easier to refer to the worksheet using its code name, which is presumably a rather
static value. You can use a worksheet’s code name directly in your code without having to access
through the Worksheets collection associated with a workbook. Rather than performing validation
on the worksheet code name prior to using it, I simply enabled error handling for this procedure.
Every event procedure in the listing includes a call to the RecordEvent procedure, and UserForm_
Initialize is no different. The RecordEvent procedure just writes the control name and event name
associated with an event procedure to the worksheet used to trace events.
The final task that the UserForm_Initialize procedure must perform is initializing the controls on
the form with default values. The process of initializing controls in this manner is a task common to
nearly every form you’ll develop.
Notice the cmdHide_Click event procedure. This event just hides the form briefly before redis-
playing it. I included this functionality in order to help demonstrate the difference between the Ini-
tialize event and the Activate event. As you experiment with this form, notice that the Activate event,
but not the Initialize event, is triggered after the form is hidden and then redisplayed. Also, notice that
when you first run the form, a number of events occur between the Initialize event and the Activate
event. Figure 20.7 shows an example of the events that occur after clicking Hide.
4281book.fm Page 481 Sunday, February 29, 2004 5:12 PM
481
USER FRIENDLY SETTINGS
Figure 20.7
Event Tracing
example after
clicking Hide
Before moving on to the next section, I would encourage you to play with the Event Tracing form
for awhile, including calling the RecordEvent procedure from other event procedures that I haven’t
shown here. This is beneficial practice because it helps illustrate the flow of events that occurs as a
user interacts with a form.
User Friendly Settings
In Chapter 12, I presented two classes useful for storing useful bits of information on a worksheet:
the Setting and Settings classes. As I have used these classes and their predecessors over the past few
years, I have frequently needed to provide an easy way for users to modify certain settings. In order
to provide this functionality, I developed the user form shown in Figure 20.8. Let me now explain
how this works.
Because this form is for managing settings, before you begin, you might want to make sure you
have all the required pieces in place. In particular, you need the Setting (Listing 12.1) and Settings
(Listing 12.2) classes I presented in Chapter 12. These classes also require the Settings worksheet
(Figure 12.2). All of these pieces need to be in the same project or workbook.
Once you have finished all the prerequisites, go ahead and insert a UserForm into the project. Table
20.6 lists the pertinent properties you’ll need to set for each control on the form. Because so many more
controls exist on this form than the previous forms in this chapter, I listed them a little differently in Table
20.6. The first time a control is referenced in the table, I list the name given to the control. All following
references to the control use the control’s name. Also, because a screen shot doesn’t provide you with much
perspective regarding the size of the form, I listed the form’s height and width. As before, however, I’ll leave
the positional properties on all of the form’s controls to your own visual preferences.
4281book.fm Page 482 Sunday, February 29, 2004 5:12 PM
482
CHAPTER 20 USER FORM CONSTRUCTION
Figure 20.8
A user-friendly
form for managing
settings
Table 20.6: Settings Form Control Properties
Control
UserForm
frmSettings
frmSettings
frmSettings
Label
lblSetting
lblSetting
ComboBox
cboSetting
Label
lblValue
lblValue
Property Value
(Name) frmSettings
Caption Settings
Height 232.5
Width 204
(Name) lblSetting
Accelerator t
Caption Setting
(Name) cboSetting
TabIndex 0
(Name) lblValue
Accelerator V
Caption Value
4281book.fm Page 483 Sunday, February 29, 2004 5:12 PM
483
USER FRIENDLY SETTINGS
Table 20.6: Settings Form Control Properties (continued)
Control Property Value
TextBox (Name) txtValue
txtValue TabIndex 2
Label (Name) lblDescription
lblDescription Caption Description
TextBox (Name) txtDescription
txtDescription BackColor &H8000000F&
CommandButton (Name) cmdEdit
cmdEdit Accelerator E
cmdEdit Caption Edit
cmdEdit TabIndex 1
cmdEdit TakeFocusOnClick False
CommandButton (Name) cmdSave
cmdSave Accelerator S
cmdSave Caption Save
cmdSave TabIndex 3
cmdSave TakeFocusOnClick False
CommandButton (Name) cmdCancel
cmdCancel Cancel True
cmdCancel Caption Cancel
cmdCancel TabIndex 4
cmdCancel TakeFocusOnClick False
Once you have the visual aspect of the form complete, it’s time to add the code (Listing 20.8)
to implement the desired functionality. There is a lot to discuss regarding this listing. As you
browse over the listing for the first time, you may notice a reference to another form named frm-
Password. frmPassword is a simple form I’ll present after this listing (see the section titled “Prim-
itive Password Collection”) that collects a password from the user when required. If you recall, the
Setting class implements a SettingType property. One type of setting allows users to modify the
setting’s value only if they provide a valid password. This is why you need a way to allow the user
to enter a password.
4281book.fm Page 484 Sunday, February 29, 2004 5:12 PM
484
CHAPTER 20 USER FORM CONSTRUCTION
Listing 20.8: Managing the Settings Form
Option Explicit
Dim moSetting As Setting
Dim moSettings As Settings
Private Sub cboSetting_Change()
' Get indicated setting and update
' controls appropriately
RefreshControls
End Sub
Private Sub cmdCancel_Click()
Unload Me
End Sub
Private Sub cmdEdit_Click()
Dim sPassword As String
If Not moSetting Is Nothing Then
' For setReadProtectedWrite, you need to call
' ChangeEditMode using the Password parameter
If moSetting.SettingType = setReadProtectedWrite Then
' Have the user fill in their password
frmPassword.Show
sPassword = frmPassword.Password
Unload frmPassword
' Make sure they entered a password
If frmPassword.Tag = cStr(vbCancel) Then Exit Sub
' Try and change the edit mode
If moSetting.ChangeEditMode(True, sPassword) Then
txtValue.Enabled = True
Else
txtValue.Enabled = False
MsgBox "Invalid password", vbOKOnly
End If
Else
' Don't need a password for unrestricted
' read/write settings.
moSetting.ChangeEditMode True
4281book.fm Page 485 Sunday, February 29, 2004 5:12 PM
485
USER FRIENDLY SETTINGS
txtValue.Enabled = True
End If
End If
End Sub
Private Sub cmdSave_Click()
If Not moSetting Is Nothing Then
moSetting.Value = txtValue.Text
' Turn off editing ability
moSetting.ChangeEditMode False
cmdSave.Enabled = False
txtValue.Enabled = False
End If
End Sub
Private Sub txtValue_Change()
cmdSave.Enabled = True
End Sub
Private Sub UserForm_Initialize()
Set moSettings = New Settings
cmdSave.Enabled = False
' Load cboSetting with settings
LoadSettings
' Default to first setting in list
If cboSetting.ListCount > 0 Then
cboSetting.ListIndex = 0
End If
End Sub
Private Sub LoadSettings()
Dim lRow As Long
Dim oSetting As Setting
Dim nSettingCount As Integer
Dim nSetting As Integer
nSettingCount = moSettings.Count
' Exit if there aren't any settings
If nSettingCount = 0 Then Exit Sub
For nSetting = 1 To nSettingCount
' Get setting
Set oSetting = moSettings.Item(nSetting)
4281book.fm Page 486 Sunday, February 29, 2004 5:12 PM
486
CHAPTER 20 USER FORM CONSTRUCTION
' Add all settings EXCEPT private settings
If oSetting.SettingType <> setPrivate Then
cboSetting.AddItem oSetting.Name
End If
Next
Set oSetting = Nothing
End Sub
Private Sub RefreshControls()
Dim sSetting As String
Dim sValue As String
Dim sComment As String
Set moSetting = moSettings.Item(cboSetting.Value)
If Not moSetting Is Nothing Then
' Disable edit ability for read-only settings
If moSetting.SettingType = setReadOnly Then
cmdEdit.Enabled = False
Else
' Enable edit ability for other settings
cmdEdit.Enabled = True
End If
txtValue.Text = moSetting.Value
txtDescription.Text = moSetting.Description
End If
txtValue.Enabled = False
cmdSave.Enabled = False
End Sub
Maybe a good way to kick off the discussion of this listing is to present a table (Table 20.7) that
lists all of the procedures in this listing along with a short description of what each does.
Table 20.7: Procedures Required by the Settings Form
Procedure Description
cboSetting_Change An event procedure that calls the RefeshControls procedure
cmdCancel_Click An event procedure that closes the form and unloads it from memory
cmdEdit_Click An event procedure that puts the current setting in Edit mode
cmdSave_Click An event procedure that updates the current setting with the value found in
txtValue
4281book.fm Page 487 Sunday, February 29, 2004 5:12 PM
487
USER FRIENDLY SETTINGS
Table 20.7: Procedures Required by the Settings Form (continued)
Procedure Description
LoadSettings Loads cboSetting with settings retrieved from a Settings object
RefreshControls Updates txtDescription and txtValue with the appropriate values as different
settings are selected in cboSetting
txtValue_Change An event procedure that enables cmdSave so that the user can save the change
UserForm_Initialize A form event procedure that initializes the form by calling LoadSettings
Notice that the Settings form uses two module level variables: moSettings and moSetting.
moSettings is a Settings object used to load the combo box and to provide quick and easy access to
individual Setting objects. moSettings is set by the UserForm_Initialize procedure. Once moSettings
is initialized, it is held in memory and not changed until the form is unloaded. moSetting is a Setting
object representing the current setting being displayed by the form. moSetting is set by the Refresh-
Controls procedure. Because RefreshControls is executed any time a new selection is made in the
combo box, moSetting is frequently reset to a new setting.
The LoadSettings procedure is in charge of populating the combo box (cboSetting) with a list of
settings. In order to do this, LoadSettings obtains a count of the settings contained in moSettings and
then loops through the individual settings, retrieving each item by index number. In order to deal with
one of the clunkiest (programmer slang for unorthodox) features of the Setting class, LoadSettings
observes the SettingType property to see if it is a private setting or not. Private settings are settings
that should never be displayed to the user. This feature is clunky because ideally the Setting class
should implement its features in a way that either simplifies or eliminates the need for consumers of
the class to perform this check.
After the UserForm_Initialize procedure executes LoadSettings, it then makes sure at least one set-
ting exists before instructing cboSetting to display the first item in its list using the ListIndex property
of the combo box. Changing a combo box’s ListIndex programmatically triggers a Change event on
the combo box—in this case it triggers the cboSetting_Change procedure, which in turn calls the
RefreshControls procedure.
The first thing RefreshControls needs to do is retrieve the Setting object specified by cboSetting. After
retrieving the Setting into the module-level variable moSetting, I added a check to validate that the setting
was retrieved. If the Settings class has any problems retrieving a particular setting it will return Nothing.
The next order of business is to decide whether to enable the Edit button or not. Because the Load-
Settings procedure eliminated the possibility of listing any private settings, the only kind of setting that
can never be edited is a read-only setting. Therefore, if the current setting is read-only, the Edit button
should be disabled. Any other type of setting can be edited. After making this determination, it is simple
to make sure the appropriate text is displayed in the Value and Description text boxes. The final task
in this procedure is to make sure that the Value text box and Save button controls are disabled.
At this point, you could add an Unload Me statement to the Close button click event and have a
useful form for displaying setting information. The rest of the functionality is all related to enabling
the ability to edit the values associated with individual settings. I chose to embed an Unload Me state-
ment into this form rather than use Me.Hide as I did in the Classy Forms section. The reason is that
4281book.fm Page 488 Sunday, February 29, 2004 5:12 PM
488
CHAPTER 20 USER FORM CONSTRUCTION
I couldn’t think of any reason why I would ever have a need for this form to hang around in memory
after the user dismisses it. This form is displayed, performs a useful purpose, and once dismissed, has
no residual value. Further, it can be displayed instantly, so there is no performance benefit for just hid-
ing it in case the user wants to display it later. In some instances, if it takes awhile to display a form,
it may be advantageous to hide the form after its first use and then redisplay it (rather than recreate it)
if it’s needed later.
If you recall, the Setting object requires you to put the Setting in edit mode prior to making any
changes to the Value property. The Setting object has a ChangeEditMode method that has a Boolean
parameter that indicates whether edit mode should be on (AllowEditing = True) or off, and it has
an optional Password parameter that is applicable if the SettingType is setReadProtectedWrite.
Inside the cmdEdit_Click event procedure, you need to check the SettingType to see if you need to
collect a password or not. You can use the Password form presented in the next section to collect a
password if one is required. If a password is not required, then all you need to do is call ChangeEdit-
Mode and set the Enabled property of txtValue to true.
Once the form is in edit mode, it isn’t really necessary to enable the Save button unless a change
is made to the value. In order to determine when a change is made, I use the Change event of txtValue.
Once the Save button is enabled, if the user clicks it, all you need to do is set the current setting’s (rep-
resented by moSetting) Value property equal to the Value property of txtValue.
Figure 20.9 shows another picture of the Settings form. In this screenshot, I have already clicked
the Edit button and have changed the setting value shown in Figure 20.8.
Figure 20.9
Editing a setting
value with the
Settings form
4281book.fm Page 489 Sunday, February 29, 2004 5:12 PM
489
USER FRIENDLY SETTINGS
Primitive Password Collection
As discussed in the previous section, the Settings form needs a way to allow a user to enter a password
in order to modify the value associated with a Setting object of type setReadProtectedWrite. In order
to do this, you need to develop a simple form that the Settings form can display when it determines
that a password is required. A picture of the Password form is shown in the following picture.
Table 20.8 lists the various control properties that I modified in the process of creating the Pass-
word form.
Table 20.8: Password Form Control Properties
Control Property Value
UserForm (Name) frmPassword
frmPassword Caption Enter Password
Label (Name) lblPassword
lblPassword Accelerator P
lblPassword Caption Password:
TextBox (Name) txtPassword
txtPassword PasswordChar *
CommandButton (Name) cmdOK
cmdOK Caption OK
cmdOK Default True
CommandButton (Name) cmdCancel
cmdCancel Cancel True
cmdCancel Caption Cancel
The Password form is a good example of a form that needs to be hidden when the user clicks OK
or Cancel rather than unloaded. If you unload this form from within rather than hide it, you won’t have
a convenient way to tell the procedure that calls the form what password the user enters. Listing 20.9
presents the code required by the Password form.
4281book.fm Page 490 Sunday, February 29, 2004 5:12 PM
490
CHAPTER 20 USER FORM CONSTRUCTION
Listing 20.9: Event Procedures for the Password Form
Option Explicit
Dim msPassword As String
Public Property Get Password() As Variant
Password = msPassword
End Property
Private Sub cmdCancel_Click()
msPassword = CStr(vbCancel)
' Tag form to indicate how the form was dispatched
Me.Tag = vbCancel
Me.Hide
End Sub
Private Sub cmdOK_Click()
msPassword = txtPassword.Text
' Tag form to indicate how the form was dispatched
Me.Tag = vbOK
Me.Hide
End Sub
Private Sub UserForm_Initialize()
txtPassword.SetFocus
End Sub
As another example of how you can approach a form module exactly as you would a class module,
notice how I added a Property Get procedure to implement the Password as a property of the form.
This makes retrieving the password a more natural process than it is when the Password is retrieved
directly from txtPassword. In Listing 20.10, I’ve highlighted this difference by showing two alterna-
tive ways to retrieve the password.
Listing 20.10:Retrieving the Password from the Password Form
Sub DemonstratePassword()
' Example 1: Retrieve password by inspecting txtPassword.Value
frmPassword.Show
If frmPassword.Tag <> vbCancel Then
MsgBox "You entered: " & _
frmPassword.txtPassword.Value, vbOKOnly
Else
MsgBox "You clicked Cancel.", vbOKOnly
End If
4281book.fm Page 491 Sunday, February 29, 2004 5:12 PM
491
SUMMARY
' Unload form from memory
Unload frmPassword
' Example 2: Retrieve password as a property of the form
frmPassword.Show
If frmPassword.Tag <> vbCancel Then
MsgBox "You entered: " & _
frmPassword.Password, vbOKOnly
Else
MsgBox "You clicked Cancel.", vbOKOnly
End If
' Unload form from memory
Unload frmPassword
End Sub
Listing 20.10 presents a subtle difference because this example only interacts with the value associ-
ated with one control. Because you need to programmatically interact with more controls on a form, this
difference becomes even more noticeable. Listing 20.10 also helps illustrate the use of the Tag property.
Many controls that you use on a form as well as UserForms themselves implement a Tag property. One
common use of the Tag property is to indicate how the user dispatches a form. In this example, if the
user dispatched the form by clicking the Cancel button, the password (or lack thereof) is irrelevant.
Therefore, it is important that the procedure that displays the Password form has a way of knowing how
the user closed the form so that it can act accordingly.
Summary
For those instances in which you need to provide custom functionality that cannot be presented using
Excel’s normal user interface, you need to develop a user form. To develop a user form, you add a
UserForm module to your project. A UserForm module is a special kind of module in the VBE that
allows you to visually develop a user form or dialog box. To develop the visual aspects of a form, you
drag and drop controls found on the Toolbox (View
� Toolbox) on to your user form. From there,
you can select each control on the form and modify its Properties using the Properties window (F4
or View
� Properties Window).
Once you have laid out the visual components of the form, you proceed to write code that imple-
ments the functionality of the form. In particular, you decide which events your form must respond
to and code the appropriate event procedures. For example, when you add a command button to a
form, you must write code that executes when the user clicks the button.
After you’ve developed a form, there are three methods by which you can use the form in other
procedures. The easiest way is to use the Show method of the form. The next easiest way is to use the
Load statement along with the name of the form you want to load, manipulate the form in some way
before it is displayed to the user, and then use the Show method to display the form to the user. The
final method is to use the form as you would any other object. That is, declare a variable that is typed
as the form you want to display, use the New keyword to create a new instance of the form, and then
use the Show method to display the form to the user. To unload a form in response to a user’s actions,
4281book.fm Page 492 Sunday, February 29, 2004 5:12 PM
492
CHAPTER 20 USER FORM CONSTRUCTION
either you can use the Unload statement along with the name of the form (or the Me keyword when
used within the form itself), or you can use the Hide method followed up by the Unload statement.
The trickiest aspect of form development (other than trivial forms) is handling all of the events
appropriately and dealing with the, sometimes complex, interaction that occurs as your event proce-
dures trigger other events, which trigger other events, and so on. One thing that can help is for you
to develop a better understanding of event interaction. During the development process, you can
understand the sequence of events in your form by incorporating Debug.Print statements or message
boxes in your event procedures that allow you to follow what is happening. Once you determine the
sequence of events, you can add logic in your event procedures that determines why the event proce-
dure occurred and selectively runs chunks of code based on how the event was triggered.
In the next chapter, you’ll learn about some of the newest user interface elements that you can
utilize in your project—the so-called “smart” user-interface technologies—smart tags and smart
documents.