Mastering Excel 2003 Programming with VBA phần 10 docx
Bạn đang xem bản rút gọn của tài liệu. Xem và tải ngay bản đầy đủ của tài liệu tại đây (1.37 MB, 57 trang )
4281book.fm Page 529 Monday, March 1, 2004 1:19 AM
Chapter 22
Application Deployment
Strategies
One thing that will
become evident to you shortly after you release your first Excel application
is that even though you’ve finished developing, your work is far from complete. You have users to
support, bugs to fix (though many strive for it, nobody’s perfect), and new features to add. You know
the saying “If you fail to plan, you plan to fail”? After just a couple of releases, if you don’t plan your
application releases and upgrades, you may find your state of affairs bordering on chaos—especially
if you’ve got lots of users (dozens to hundreds).
In order to manage the product distribution and release cycle, you can employ numerous strategies,
from rudimentary to comprehensive fail-proof release management systems. This chapter introduces
you to a few strategies you can use to manage application distribution.
Another issue related to application deployment is determining what form your application will
be in when you distribute it. You can choose from distributing your application as a standard work-
book, a template, or an add-in. I’ll present the pros and cons of each form so that you can make an
informed choice. The choice of an application deployment strategy is a decision that is best made near
the beginning of the development process because the decisions you make during the development
process can be impacted depending on the distribution form of your application.
Choose the Form
Do you remember the movie Ghostbusters (1984)? The Ghostbusters are fighting the evil demon Gozer
(aka Gozer the Gozerian, Gozer the Destructor, Voguss Zildrohar, The Traveller). Just prior to
assuming a physical presence, Gozer asks the Ghostbusters to choose the form of their destroyer. As
they all stop to ponder their decision, Gozer appears as a giant Stay Puft marshmallow man. Sure
enough, Stantz (played by Dan Akroyd) made the mental decision without the input of his colleagues.
His reasoning? “I tried to think of the most harmless thing… something that could never destroy
us… something I loved from my childhood.” As it turned out, the Ghostbusters eventually destroyed
Gozer before Gozer could bring about worldwide destruction.
When it comes to choosing the form of distribution for your application, it’s safe to say that your
choice won’t have worldwide life and death consequences. There are consequences however.
4281book.fm Page 530 Monday, March 1, 2004 1:19 AM
530
CHAPTER 22 APPLICATION DEPLOYMENT STRATEGIES
I Like Vanilla
The most common form an Excel application takes is as a plain vanilla workbook. This next sentence
is very important so pay attention. In order to create an application that assumes this form, you must
save your workbook (File
�
Save). OK, I’m playing a little bit. Telling you how to save a workbook
is kind of like telling you how to breathe.
The biggest benefit of using a standard Excel workbook is that you don’t need to worry about
installing it before using it. You can e-mail the workbook, place it in a shared network folder, or save
it to portable media. As long as your users can open the workbook, they can use the functionality it
supplies, provided it passes the Microsoft Office security checks.
That said, it is not uncommon for a handful of your users to experience issues related to either a faulty
Office or Excel installation. Well, it’s not necessarily that the original Excel installation was faulty—
rather something probably happened to the computer after the fact that caused an incompatibility or
removed critical system files. If your application works for the vast majority of your users and doesn’t
work at all for a tiny minority, your leading suspect should be the details associated with these indi-
vidual computers. If you quiz these users, usually you’ll find out that they recently had software pack-
age X (substitute any number of software programs here) installed or removed, and that ever since,
Excel has exhibited unpredictable behavior. If my application doesn’t work after I verify that all of the
software requirements it needs have been met, I’ll devise a trivial procedure that should work on every
computer to test the offending computers. If the trivial procedure fails as well, I’ll have the users or
their IT support department reinstall Microsoft Office and all applicable service packs. Most of the
time this solves the problem.
Repeat Your Success with Templates
Another form your solution can assume is a template. Templates are useful for applications that pro-
vide functionality that is used to help automate repeated processes or procedures.
For example, maybe your firm has a standard capital spending approval process that requires finan-
cial justification as part of the approval process. You could develop a template that facilitates this pro-
cess by assisting users with the data input process, producing reports, and submitting workbook data
for approval.
Though you could add functionality to a normal workbook solution to make it act like a template,
why not just save the original as a template and get all of the template functionality for free? (A coun-
terpoint is provided in two paragraphs.) When your users need to create a new capital spending
approval request, all they need to do is select File
�
New, choose the On My Computer link under-
neath Templates in the task pane, and then select the capital spending template.
Templates also allow you to develop worksheet-based solutions. That is, you can develop a work-
sheet that performs some specific task and then save it as a worksheet template. Then you can insert
the worksheet template as a new worksheet in any workbook that requires the functionality provided
by the worksheet.
The minor disadvantage of a template is that it requires a little more knowledge to use than a stan-
dard workbook. Occasionally I find it difficult to remember that some people don’t know how to add
two cells together in Excel (probably a larger percentage of users than you think). The fact is, if your
solution is being distributed to a large number of users, you’ll need to create a utility to install the tem-
plate to the proper template directory (or provide documentation on how to do this manually). Addi-
tionally, you will also need to train people on how to create a workbook based on a template. How
4281book.fm Page 531 Monday, March 1, 2004 1:19 AM
531
CHOOSE THE FORM
you deliver this training (proactive documentation, proactive communication/training, or reactive
communication) is up to you, but you will end up delivering it.
The alternative to using a template is to distribute a standard workbook that contains a user inter-
face element that says something like “Create New <your solution>”. When you click the Create
New button, or whatever, all your code needs to do is provide a way for the user to name the new
workbook and select a location to save it (you can use the GetSaveAsFilename method) and then save
the solution workbook using the new name and location. Whenever the user needs to create a new
document, they open up the original file you distributed and click the Create New button.
Perhaps an example of the different alternatives for delivering template functionality is in order at
this point. I’d like to demonstrate three things: how to create a template, how to create a workbook
that acts like a template, and how to create a worksheet template.
As an example of how to create a template and how to create a workbook that acts like a template,
I’ve taken the Setting and Settings classes along with the Settings worksheet from Chapter 12 and
placed them into a workbook with two empty worksheets. Because I use the settings functionality in
nearly every Excel project, my goal is to create a template that I can use to kick off each Excel appli-
cation I build. Though this example just adds the settings functionality to this workbook, you may
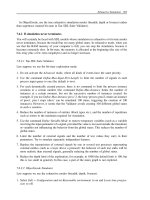
want to add other components that you find yourself using in nearly every project. Figure 22.1 shows
an example of the Excel Project workbook that I’ll turn into a template.
Creating a template given an existing workbook is easy as the following steps illustrate:
1.
Select File
�
Save As.
2.
Change Save As Type to Template (*.xlt).
3.
In order to have the template appear in the list of templates displayed by the Templates
dialog box, you should save the file to the Templates folder, which is located by default at
C:\Documents and Settings\username\Application Data\Microsoft\Templates. I saved
mine with the name Excel Project.
Figure 22.1
This otherwise
empty workbook
contains the compo-
nents necessary
to implement set-
tings as covered in
Chapter 12.
4281book.fm Page 532 Monday, March 1, 2004 1:19 AM
532
CHAPTER 22 APPLICATION DEPLOYMENT STRATEGIES
Tip
You can determine the path to the Templates folder programmatically using Application.TemplatesPath.
Piece of cake! To use the template, follow these steps:
1.
Select File
�
New
2.
Choose the On My Computer option underneath the Templates section in the task pane.
3.
Double-click the Excel Project template.
Warning
The most common error made by users trying to use a template is that they open the template itself (by open-
ing a template workbook directly) rather than creating a new workbook based on a copy of the template.
As you might infer from the warning about opening templates directly being the most common
error, in order to modify a template, you need to open the template up directly by selecting File
�
Open and then selecting the template file.
In order to create a pseudo-template (a workbook that imitates Template functionality) you
need to use some VBA. Listing 22.1 presents an example of code you can use to implement pseudo-
template functionality. If some of the procedures in this listing look familiar, it’s because you saw
a few of them in Chapter 6 when you learned about the Workbook object.
Listing 22.1: Implementing Pseudo-Template Functionality
Option Explicit
' Create new workbook based on this workbook
Sub SimplePsuedoTemplate()
Dim wb As Workbook
Dim sName As String
Dim sDefault As String
Dim sFilter As String
' Default file name
sDefault = GetDefaultName
' Filter for GetSaveAsFilename method
sFilter = "Microsoft Office Excel Workbook (*.xls), *.xls"
' Ask user where to save new file
sName = Application.GetSaveAsFilename(sDefault, sFilter)
' False means user clicked cancel or dismissed dialog box
' without making a choice
If sName <> "False" Then
' See if a file already exists at the selected location
If FileExists(sName) Then
' There IS an existing file - see if the user
' wants to overwrite it.
4281book.fm Page 533 Monday, March 1, 2004 1:19 AM
533
CHOOSE THE FORM
If OkToOverwrite(sName) Then
' Turn off alerts so Excel doesn't bug
' the user about the existing file
Application.DisplayAlerts = False
ThisWorkbook.SaveAs sName
' Turn alerts back on
Application.DisplayAlerts = True
End If
Else
' There IS NOT an existing file so
' go ahead and save thisworkbook as sName
ThisWorkbook.SaveAs sName
End If
End If
Set wb = Nothing
End Sub
' Generates a default file name
Function GetDefaultName() As String
Dim bGotName As Boolean
Dim sName As String
Dim nIndex As Integer
nIndex = 1
bGotName = False
Do
sName = Left(ThisWorkbook.Name, Len(ThisWorkbook.Name) - 4) & _
CStr(nIndex)
If IsWorkbookOpen(sName & ".xls") Then
nIndex = nIndex + 1
Else
bGotName = True
End If
Loop Until bGotName
GetDefaultName = sName & ".xls"
End Function
' See if a given workbook is open or not
Function IsWorkbookOpen(sWorkbookName As String) As Boolean
Dim wb As Workbook
IsWorkbookOpen = False
For Each wb In Workbooks
If StrComp(sWorkbookName, wb.Name, vbTextCompare) = 0 Then
IsWorkbookOpen = True
Exit For
4281book.fm Page 534 Monday, March 1, 2004 1:19 AM
534
CHAPTER 22 APPLICATION DEPLOYMENT STRATEGIES
End If
Next
Set wb = Nothing
End Function
' Ask if it's ok to overwrite a file
Function OkToOverwrite(sFullName As String) As Boolean
Dim sMsg As String
Dim nButtons As Long
Dim nResponse As Long
Dim bOverwrite As Boolean
bOverwrite = False
sMsg = sFullName & " already exists. Do you want to overwrite it?"
nButtons = vbYesNoCancel + vbExclamation + vbDefaultButton2
nResponse = MsgBox(sMsg, nButtons, "Overwrite File?")
If nResponse = vbYes Then
bOverwrite = True
End If
OkToOverwrite = bOverwrite
End Function
' See if a file exists or not
Function FileExists(sFullName As String) As Boolean
Dim bExists As Boolean
Dim nLength As Integer
nLength = Len(Dir(sFullName))
If nLength > 0 Then
bExists = True
Else
bExists = False
End If
FileExists = bExists
End Function
Basically all this listing does is save the workbook using a different name. In order to be a little
more convenient, the listing does things like generate a default filename, prompt the user for a file-
name and storage location, check to see if a file with the same name already exists, and if so, ask if it’s
4281book.fm Page 535 Monday, March 1, 2004 1:19 AM
535
CHOOSE THE FORM
OK to overwrite the existing file. Of course, to make things even more user friendly, if this were a pro-
duction application, you would want to add a user interface element (menu item, command button,
etc.) that calls the SimplePsuedoTemplate procedure for the user.
One of the advantages of using a pseudo-template in place of a real template is that you can build
initialization code into the process that creates the new workbook. For example, it would be easy to
modify Listing 21.1 to prompt for the initial settings for the project such as the App Name, App Ver-
sion, and App Date.
Using Worksheet Templates
Though many people are not aware of it or don’t take advantage of it, you can also create a worksheet
template. Worksheet templates allow you to insert worksheets exhibiting predefined formatting or
functionality into a workbook. Using the Settings functionality as an example, let me explain one way
that you could put a worksheet template to good use—by creating a Settings worksheet template.
Then, if you wanted to add Settings functionality to a particular workbook, you could add a new Set-
tings worksheet (based on the Settings template you’ll create shortly) and import the two classes that
provide setting functionality (the Settings and Setting classes).
Creating a worksheet template is very similar to creating a workbook template. The main differ-
ence is that you need to be sure to limit the worksheets in the workbook to just those that you want
to appear when you insert them into a workbook based on the template. To create a worksheet tem-
plate based on the Settings worksheet, follow these steps:
1.
Create a workbook that contains just one worksheet (the Settings worksheet).
2.
Select File
�
Save As.
3.
Change Save As Type to Template (*.xlt).
4.
In order to have the template appear in the list of templates displayed by the Templates dialog
box, you should save the file to the Templates folder, which is located by default at C:\Doc-
uments and Settings\username\Application Data\Microsoft\Templates. I saved mine with
the name Settings.
Using a worksheet template is easy enough if you know where to look. The only way I know to
insert a worksheet template is to right-click the worksheet tab that I want to insert a worksheet in
front of and select Insert. This displays the Insert dialog box shown in Figure 22.2. Then all I need
to do is select the desired template and click OK.
Note
If you select a template containing more than one worksheet, Excel will insert a worksheet for every worksheet
found in the template.
Blend in with Add-Ins
Add-ins are useful when you have functionality that is not workbook specific—for example, you
could develop a bunch of user-defined functions and distribute them as an add-in. This works won-
derfully, because generally you’ll want to use the functions from within many different workbooks.
4281book.fm Page 536 Monday, March 1, 2004 1:19 AM
536
CHAPTER 22 APPLICATION DEPLOYMENT STRATEGIES
Figure 22.2
Inserting a work-
sheet based on a
template is as easy
as double-clicking
the appropriate
template.
Another benefit of an add-in is that its structure is not visible to the user. A workbook (and there-
fore a template) must have at least one visible worksheet. This rule does not apply to an add-in.
Though you can protect a workbook so that it is difficult, at best, to modify, add-ins cannot be mod-
ified in anyway by a user. The only way to modify an add-in is to modify the workbook with which
the add-in was created.
As an example, I’ve created a simple add-in that contains two user-defined functions: one function
that prints out the connection details of the query table associated with a given range and another that
lists all of the very hidden worksheets in the active workbook. To test this out, create a new workbook
and enter the code from Listing 22.2.
Listing 22.2:Useful Add-In Functions
Option Explicit
' Lists the connection details of the query table that
' intersects with the QueryTableCell parameter
Function ViewQueryTableConnection(QueryTableCell As Range) As String
Dim sResult As String
On Error Resume Next
sResult = ""
If QueryTableCell.QueryTable Is Nothing Then
sResult = "No query table."
Else
sResult = QueryTableCell.QueryTable.Connection
End If
4281book.fm Page 537 Monday, March 1, 2004 1:19 AM
537
CHOOSE THE FORM
ViewQueryTableConnection = sResult
End Function
' Lists any worksheets in the active workbook
' that are very hidden
Function ListVeryHiddenSheets(AnyCell As Range) As String
Dim ws As Worksheet
Dim sResult As String
On Error Resume Next
sResult = ""
For Each ws In AnyCell.Parent.Parent.Worksheets
If ws.Visible = xlSheetVeryHidden Then
sResult = sResult & ws.Name & ", "
End If
Next
' Strip off trailing ", " if needed
If Len(sResult) > 2 Then
sResult = Left(sResult, Len(sResult) - 2)
Else
sResult = "There are no very hidden worksheets."
End If
Set ws = Nothing
ListVeryHiddenSheets = sResult
End Function
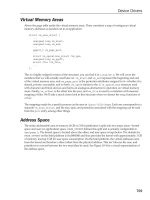
The ViewQueryTableConnection function is useful to view the connection details associated with
a query table. When you use Microsoft Query to bring data from a database into a worksheet, the data
is displayed in a range of cells called a query table. If you use Microsoft Query frequently, occasionally
you will need to figure out what database a particular query table is associated with. You can use
ViewQueryTableConnection to display this information. To use ViewQueryTableConnection, all
you need to do is pass it a reference to a cell that is part of the query table. Figure 22.3 shows an exam-
ple that uses ViewQueryTableConnection.
I added the ListVeryHiddenSheets function as another example in case you wanted to test an add-
in without creating a query table. Pass this function as a reference to any cell in the workbook you
want to inspect and it will return a comma-delimited list of the names of any very hidden worksheets
in the workbook.
To make an add-in, all you need to do is save a workbook as one. Prior to saving the workbook,
you may want to lock the VBA project so that people can’t view the code that implements your add-in.
For this example, perform the following actions:
4281book.fm Page 538 Monday, March 1, 2004 1:19 AM
538
CHAPTER 22 APPLICATION DEPLOYMENT STRATEGIES
Figure 22.3
Viewing the details
associated with a
query table
1.
Select the VBA project associated with Listing 22.2 in the Project Explorer window.
2.
Right-click and select VBAProject Properties.
3.
Click the Protection tab.
4. Check Lock project for viewing and provide a password (I used “password”).
5.
Save the workbook as Simple Add-in.xls.
6.
Now you’re ready to make the add-in. Save the workbook as Simple Add-in.xla. You can do
this by changing the file type to Microsoft Office Excel Add-in (*.xla). When you do this,
Excel will automatically select the AddIns folder associated with your user ID. On my
computer, the default AddIn folder is C:\Documents and Settings\shansen\Application
Data\Microsoft\AddIns.
To test the add-in, you need to load it into memory. In addition, the first time you use an add-
in, you need to instruct Excel where to find it. To test the Simple Add-in, follow these steps.
1.
Select Tools
�
Add-Ins from the Excel menu.
2.
The first time you use an Add-In you need to add it to the list of Add-Ins by clicking Browse.
3.
Locate the Add-In file you created in step 6 of the previous set of instructions. Select the Add-
In and click OK to add the add-in to the list of Add-Ins.
4281book.fm Page 539 Monday, March 1, 2004 1:19 AM
539
MANAGING CHANGE
4.
Once an add-in appears in the list, you can load/unload it by checking/unchecking it in the
Add-Ins dialog box. In the following screenshot I’ve loaded the Simple Add-In add-in.
Managing Change
Now that you understand the various ways that you can deliver your solution, let’s move on. It has
now been six months since you released your application to dozens or possibly hundreds of happy
users. You’ve got minor issues to correct and a list of enhancements to implement. One of your big-
gest considerations is going to be how to go about releasing another version. Addressing that consid-
eration is the topic of this section.
One way you can reduce the impact of version management is to deploy “master” copies to shared
network locations and then create shortcut links on users computers that point to the master copies.
In case of emergency, you can take measures to upgrade or fix existing applications by creating your
own “service pack” that you distribute to your users. A service pack contains all of the code necessary
to fix an existing application.
The best way to go about version management, however, is to plan for it from the beginning.
Expect that you will need to release future versions from day one in the development cycle. By incor-
porating this expectation into the decisions you make as you develop an application, you can take
advantage of the opportunity to make design decisions that will facilitate version management. You
will learn more about this topic later on in the section titled “Implementing Version Awareness.”
Employing Centralized Template Deployment
One problem that is associated with releasing new versions is that it complicates support because not
all of your users may be using the same version. Depending on the extent of your changes, the versions
may not be compatible. Dealing with multiple versions and slow adoption of the latest version are
4281book.fm Page 540 Monday, March 1, 2004 1:19 AM
540
CHAPTER 22 APPLICATION DEPLOYMENT STRATEGIES
most often problems when you are distributing your application using a plain old workbook (not as
a template or add-in) and are using a loosely defined distribution mechanism such as e-mail.
One way that you can reduce the impact of this issue for template-based applications is to use
shortcuts in the Template folder that point to a centralized master copy. The shortcut could point
to a template on a shared server, the intranet, or the Internet. That way, every time a user creates a new
workbook based on the template, they’ll be assured they’ve used the most recent version of the tem-
plate available. Of course, this tip does not address any deficiencies in workbooks created using older
versions of the template.
As an example, let’s assume that you placed the Excel Project template that you saved earlier in the
chapter on your company’s intranet and the URL to the template is
http://intranet/templates/
Excel%20Project.xlt
. Rather than have your users constantly refer to the site to check for updates,
it is much more efficient to instruct them to put a shortcut to this URL in their templates folder as
the following exercise demonstrates.
1.
Right click the Windows Start button and select Explore. Using Windows XP Professional,
this action places you in Windows Explorer at the Start folder associated with your user ID.
2.
Locate and expand the Templates folder associated with your user ID. By default, the relative
path to this starting with the documents folder associated with your login (i.e. C:\Documents
and Settings\shansen) is Application Data\Microsoft\Templates. Figure 22.4 shows an
example of this.
3.
With the Templates folder selected, choose File
�
New
�
Shortcut.
Figure 22.4
Create a shortcut to
master copies of a
template in the
Templates folder.
4281book.fm Page 541 Monday, March 1, 2004 1:19 AM
541
MANAGING CHANGE
4.
In the Create dialog box, browse for or enter the URL to the desired template, such as
http:/
/intranet/templates/Excel%20Project.xlt
, and then click OK. (Substitute the actual URL
to your template). The following screenshot shows an example of this.
5.
Enter the name of the shortcut and click OK. The text you enter here will appear in the Tem-
plates dialog box when you create a new workbook based on a template.
Once you’ve created the shortcut, from the user’s perspective, it works just like any other template.
Go ahead, give it a try!
Implementing Version Awareness
For the ultimate amount of control regarding version management, you can build version awareness
into your solution. Version awareness is functionality that allows the application to know which ver-
sion it is and check to see if it is up to date or not, this functionality also communicates any versioning
issues to the user, and has some ability for self-healing and updating. How much or how little of this
functionality you develop depends on your needs. The most basic solution just checks to see if the
version being used is the most current and displays a message to the user. Ultimately the amount of
functionality you build is only limited by your time and imagination.
4281book.fm Page 542 Monday, March 1, 2004 1:19 AM
542
CHAPTER 22 APPLICATION DEPLOYMENT STRATEGIES
Version awareness solutions aren’t for all types of applications. For one thing, it can take a great
deal of effort to implement version awareness depending on how much functionality you build into
it. Also, any version awareness solution is going to need access to version data (typically stored in a
database) located on another computer. Because not everyone is connected to a network all of the time
(especially those users using laptops), the version awareness functionality must not assume constant
network availability. Finally, you want to be very careful with the version awareness functionality that
you implement. Nothing’s worse than bugs in the functionality that’s supposed to help fix bugs.
In order to stimulate your thoughts, I’ll walk you through a basic version awareness implementa-
tion. As I mentioned earlier, typically a database is used as a centralized store of the version informa-
tion needed to facilitate the required functionality. Though I’m using Access for this example, you
could easily modify the example to work with other database products.
Step 1: Build the Database
To begin, create a new database in Access. I named my database versions.mdb. You can get by with one
table for the basic version awareness implemented in this exercise. Create a new table and add the fields
shown in Table 22.1. Name this table VersionInfo and make the VersionID field the primary key.
Table 22.1: Fields Needed in the VersionInfo Table
Field Name Data Type Field Size Description
VersionID AutoNumber Long Integer Version ID of the version
MinimumVersionID Number Long Integer Version ID of the earliest version
that is still compatible with this
version
CurrentMessage Text 255 Message displayed if the user’s
version is equal to this version
NonCurrentMessage Text 255 Message displayed if the user’s
version is not current, but is still
compatible
NonCompatibleMessage Text 255 Message displayed if the user’s
version is not current and is not
compatible with this version
IsCurrent Yes/No Yes/No Flag to indicate whether the version
is current or not
Version Text 10 Version number in
major.minor.revision format (ex:
1.3.13)
VersionComment Text 255 Description of comment about the
version
VersionLocation Text 255 Instructions on how to obtain the
version
ReleaseDate Date/Time Short Date Date the version was released
4281book.fm Page 543 Monday, March 1, 2004 1:19 AM
543
MANAGING CHANGE
This table will work fine, though it is not optimal. More astute database readers may want to tweak
this to either use more tables or take advantage of features available in their database product of
choice. For example, the MinimumVersionID field is related to the VersionID field. The only valid
values in the MinimumVersionID field should be those values that are already found in VersionID.
It would be a good idea to enforce this relationship.
Another minor flaw in using a simple table structure like this can be found in the IsCurrent field.
Theoretically, only one record should be in the table that has the value YES; this is because only one
version can be current. Nothing is preventing you from having multiple records with the value YES
in this table. This isn’t much of a problem as long as you know about it in advance and write queries
that have a way to determine the “real” current version in case more than one version is marked as cur-
rent. Later in the implementation, you’ll see that I also sorted the results of my query that checks for
the latest version so that they descend by VersionID. If more than one record is marked as current, the
implementation will use the one that was added most recently. A better way to do this may be to have
a separate table with just one record and one field that contains the VersionID of the current version.
Anyway, I digress, for this is a book about Excel VBA, not about database design.
While you still have the database open, you could go ahead and enter a few test versions into the
VersionInfo table. Table 22.2 lists some example data you could use. For the fields that aren’t shown
in Table 22.2, go ahead and make up an appropriate message for the CurrentMessage, NonCurrent-
Message, and NonCompatibleMessage fields.
Table 22.2: Sample Data for the VersionInfo Table
VersionID MinimumVersionID IsCurrent Version
1 1 No 0.3.3
2 2 No 1.0.0
3 2 Yes 1.0.1
Step 2: Prepare an Excel Project
The next thing to do is to put the handy Excel Project template you created earlier in the chapter to
good use and create an empty Excel Project workbook. If you recall, the Excel Project template creates
a workbook that contains the Setting and Settings classes along with a Settings worksheet. You still
have a few details to take care of before you start writing any code.
1.
On the Settings worksheet, provide a value for the App Version setting. Choose a version num-
ber that can be found in the Version field of the VersionInfo table.
2.
You could provide values for the App Name and App Date settings but these settings are not
needed for this exercise.
3.
Add a setting named Version Connection. This setting will hold the connection string
used to connect to the versions database. The value of this setting should be Provider=
Microsoft.Jet.OLEDB.4.0;Data Source=C:\versions.mdb. If you placed the versions
database somewhere else, modify the data source aspect of the connection string
appropriately.
4281book.fm Page 544 Monday, March 1, 2004 1:19 AM
544
CHAPTER 22 APPLICATION DEPLOYMENT STRATEGIES
4.
Switch over to the VBE and add a reference (Tools
�
References) to Microsoft ActiveX Data
Objects 2.7 Library.
Note Not all of your users may have the latest version of ADO. It is a good idea to sample some of your users’ com-
puters before choosing which version of ADO to use. Choose the latest version that is available on each user’s computer.
Alternatively, you can have your users update their computers with the latest available version. For more information see
5.
Save the workbook. I saved mine as Version Example.xls.
Step 3: Implement Version Awareness
Now you’re ready to write some code. Insert a module into the project and add the code shown in
Listing 22.3. Listing 22.3 contains six procedures as shown in Table 22.3.
Table 22.3: Procedures Needed to Implement Version Awareness
Procedure Description
PerformVersionCheck This is the main procedure and the only one that should be called by
a user or user interface element.
CheckVersion CheckVersion compares the version indicated in the workbook
against the current version indicated in the database and displays a
message indicating the results.
GetVersionID Retrieves the VersionID in the database that is associated with the
version given by the App Version setting.
QueryDB A generic procedure that executes a query against the database and
returns a recordset containing the results.
GetConnection Retrieves the connection string stored in the Version Connection
setting.
IsConnectionAvailable Determines whether a connection to the database can be made or not.
Listing 22.3: Implementing Basic Version Awareness
Option Explicit
Sub PerformVersionCheck()
' see if you can make a connection
' to the database before checking
If IsConnectionAvailable Then
CheckVersion
Else
MsgBox "Sorry, can't check version at this time."
4281book.fm Page 545 Monday, March 1, 2004 1:19 AM
545
MANAGING CHANGE
End If
End Sub
Private Sub CheckVersion()
Dim rst As ADODB.Recordset
Dim nWBVersion As Integer
Dim sSQL As String
On Error GoTo ErrHandler
' SQL statement to retrieve list of employees
sSQL = "SELECT VersionID, MinimumVersionID, " & _
"CurrentMessage, NonCurrentMessage, " & _
"NonCompatibleMessage, IsCurrent, Version " & _
"FROM VersionInfo " & _
"WHERE IsCurrent=YES " & _
"ORDER BY VersionID DESC"
' Open the recordset
Set rst = QueryDB(sSQL)
' Make sure we got a recordset. If QueryDB runs into problems
' it returns nothing
If rst Is Nothing Then Exit Sub
If Not rst.EOF Then
' Get the version ID associated with the version indicated
' on the settings worksheet
nWBVersion = GetVersionID
' Compare the version ID against various possibilities
Select Case nWBVersion
Case Is = -1
MsgBox "Unknown version status. Could not find " & _
"version information in the database related " & _
"to the version indicated in this workbook."
Case Is = rst.Fields("VersionID").Value
If Not IsNull(rst.Fields("CurrentMessage").Value) Then
MsgBox rst.Fields("CurrentMessage").Value
Else
MsgBox "Your version is current.", vbOKOnly
End If
Case Is >= rst.Fields("MinimumVersionID").Value
If Not IsNull( _
rst.Fields("NonCurrentMessage").Value) Then
MsgBox rst.Fields("NonCurrentMessage").Value & _
" The current version is: " & _
4281book.fm Page 546 Monday, March 1, 2004 1:19 AM
546
CHAPTER 22 APPLICATION DEPLOYMENT STRATEGIES
rst.Fields("Version").Value
Else
MsgBox "Your version is out of date but still " & _
"compatible.", vbOKOnly
End If
Case Is < rst.Fields("MinimumVersionID").Value
If Not IsNull( _
rst.Fields("NonCompatibleMessage").Value) Then
MsgBox rst.Fields("NonCompatibleMessage").Value & _
" The current version is: " & _
rst.Fields("Version").Value
Else
MsgBox "Your version is out of date and no " & _
"longer compatible.", vbOKOnly + vbCritical
End If
Case Else
' greater than current version in database
' database not updated
' or incorrect version number in workbook
MsgBox "You are using a version newer " & _
"than the current version."
End Select
Else
MsgBox "Unable to determine the current version."
End If
ExitPoint:
Set rst = Nothing
Exit Sub
ErrHandler:
MsgBox "Error checking version: " & Err.Description, vbOKOnly
Resume ExitPoint
End Sub
' Retrieves the version ID associated with the version
' indicated in this workbook
Private Function GetVersionID() As Integer
Dim rst As ADODB.Recordset
Dim oSettings As New Settings
Dim sVersion As String
Dim sSQL As String
On Error GoTo ErrHandler
sVersion = oSettings.Item("App Version").Value
' SQL statement to retrieve list of employees
4281book.fm Page 547 Monday, March 1, 2004 1:19 AM
547
MANAGING CHANGE
sSQL = "SELECT VersionID FROM VersionInfo " & _
"WHERE Version='" & sVersion & "';"
' Open the recordset
Set rst = QueryDB(sSQL)
If Not rst.EOF Then
GetVersionID = rst.Fields(0).Value
Else
GetVersionID = -1
End If
If rst.State = adStateOpen Then rst.Close
ExitPoint:
Set oSettings = Nothing
Set rst = Nothing
Exit Function
ErrHandler:
GetVersionID = -1
Resume ExitPoint
End Function
' Generic function to retrieve a query into a recordset
Private Function QueryDB(sSQL As String) As ADODB.Recordset
Dim sConn As String
Dim rst As ADODB.Recordset
On Error GoTo ErrHandler
' Create a new recordset object
Set rst = New ADODB.Recordset
' Get connection details
sConn = GetConnection
' Open the recordset
rst.Open sSQL, sConn
Set QueryDB = rst
ExitPoint:
Set rst = Nothing
Exit Function
ErrHandler:
Debug.Print "QueryDB error: " & Err.Description
Set QueryDB = Nothing
Resume ExitPoint
4281book.fm Page 548 Monday, March 1, 2004 1:19 AM
548
CHAPTER 22 APPLICATION DEPLOYMENT STRATEGIES
End Function
' Retrieve the connection string stored on
' the settings worksheet
Private Function GetConnection() As String
Dim oSettings As New Settings
On Error GoTo ErrHandler
' Connection details - this is the kind of thing
' that you can use the Settings class for
GetConnection = oSettings.Item("Version Connection").Value
ExitPoint:
Set oSettings = Nothing
Exit Function
ErrHandler:
GetConnection = ""
Resume ExitPoint
End Function
' Check to see if a connnection can be made to the database
Private Function IsConnectionAvailable() As Boolean
Dim sConn As String
Dim conn As New ADODB.Connection
On Error GoTo ErrHandler
sConn = GetConnection
conn.Open sConn
If conn.State = adStateOpen Then conn.Close
IsConnectionAvailable = True
ExitPoint:
Set conn = Nothing
Exit Function
ErrHandler:
IsConnectionAvailable = False
Resume ExitPoint
End Function
I added the PerformVersionCheck procedure primarily so that I could make sure a database con-
nection is available before I use CheckVersion. Validating that you can make a database connection
is more important when you need to access a database that is located on another computer.
4281book.fm Page 549 Monday, March 1, 2004 1:19 AM
549
MANAGING CHANGE
Figure 22.5
Basic version aware-
ness in action.
CheckVersion works by querying the VersionInfo database to retrieve the record marked as cur-
rent (IsCurrent=YES). In order to account for the possibility that more than one record is marked
as current, the query orders the records in descending order by VersionID, and only the first record
is used. Because VersionID is an AutoNumber field in this example, it should represent the last record
that was added (and is marked as current). Once you have the data associated with the current version
from the database, you need to figure out what version is indicated in the workbook. To do this, I
used the GetVersionID procedure to query the database for the VersionID associated with the ver-
sion indicated in the workbook. GetVersionID returns –1 if it cannot find the VersionID associated
with a given version. Anyway, CheckVersion compares (using a Select…Case statement) the Ver-
sionID associated with the workbook’s version to the VersionID of the version that is flagged in the
database as current to figure out which message to display to the user.
QueryDB is a fairly generic procedure used to query the database. QueryDB depends on the Get-
Connection procedure to retrieve the connection string stored on the Settings worksheet. Figure 22.5
demonstrates an example of basic version awareness.
So there you have a basic example of version awareness. You could call the PerformVersionCheck
procedure from the Workbook Open event procedure and/or call the procedure when the user inter-
acts with a given user interface element such as a command button or menu item. If you spend more
than five minutes thinking about it, I bet you could come up with a decent list of enhancements that
you could easily implement. For example, because you have to go to the database to check version
info, why not use this database for more things such as news items or messages that are displayed
somewhere in the workbook. You could also build in functionality for basic self-healing. For exam-
ple, maybe you have a table that contains formula fixes that lists worksheet name, cell address, and
new formula. You could build a process to look in this table and then “fix” a workbook with cor-
rected formulas, values, or whatever. To learn more, read on.…
4281book.fm Page 550 Monday, March 1, 2004 1:19 AM
550
CHAPTER 22 APPLICATION DEPLOYMENT STRATEGIES
Fear Not When Things Go Wrong
Mistakes happen—if you haven’t learned that yet, if you build any applications that get distributed
to other users, you will. Whether it is through programmer error, misinformation supplied to pro-
grammers, or misunderstanding. Depending on the severity of the consequences of the mistake, how
widely the application is distributed, and other factors, the anxiety associated with the mistake will
vary widely. Although it is often embarrassing and tempting to point fingers, don’t blow your top.
You have a lot of options available for rectifying the situation.
Of course, you can always fix the error and redistribute. Occasionally, however, this may be
impractical and should be seen as a last-resort option. For example, if your users have already
expended a lot of effort entering information into a financial model, they will loathe anything that
requires them to throw away their work and start from scratch. Inconvenience notwithstanding, start-
ing over may be expensive to boot. For example, if you’ve distributed an application to 500 users and
each user has 2 hours of time invested in customizing, entering data into, or otherwise working with
the application in a way that a new version will undo, that’s 1000 hours of work that would be thrown
out. All of a sudden, the extra work associated with a solution that fixes existing applications rather
than replaces them seems worth it. Hmm, an extra 8 or 16 hours to figure out how to distribute a ser-
vice pack or 1000 hours of collective user effort. I know which one I’d recommend.
In the previous section, I hinted at using a version database to provide self-healing functionality.
Due to space concerns, I’m not going to show you how to do this. However, I will show you a solution
using many of the procedures you’ve seen throughout this book. From there, it’s not much of a stretch
to make the modifications necessary to make this work from the database.
You’ve already seen the framework that can enable this functionality. From a high level you need to
1. Provide a way for the user to indicate which workbook(s) need to be fixed.
2. Loop through the set of workbooks indicated by the user.
3. Open, fix, save, and close each workbook.
Keeping these three needs in mind, go back to Chapter 6 and skim over the ProcessFileBatch listing
(Listing 6.1). This procedure, along with the procedures it depends on, handles maybe 90 percent of
the work you need to do to provide service pack functionality. All you need to do is write a procedure
to fix the workbook and then call this procedure from within ProcessFileBatch.
As an example, let’s say you need to fix a bunch of formulas in a workbook that you released. You
could use a procedure similar to Listing 22.4 to fix the workbook and call it from ProcessFileBatch.
Note I’ve included ProcessFileBatch and its dependencies in Listing 22.4 for your convenience. For discussion and
analysis of these procedures please refer back to Chapters 5 and 6.
Listing 22.4: Simple Procedure to Fix a Workbook
Option Explicit
Private Sub FixWorkbook(wb As Workbook)
Dim ws As Worksheet
4281book.fm Page 551 Monday, March 1, 2004 1:19 AM
551
MANAGING CHANGE
' It'd be best to test the worksheet name for safety
Set ws = wb.Worksheets("Sheet1")
ws.Range("A1").Formula = "=b1+c1"
ws.Range("A2").Formula = "=b2+c2"
ws.Range("A3").Formula = "=b3+c3"
Set ws = Nothing
End Sub
Sub ProcessFileBatch()
Dim nIndex As Integer
Dim vFiles As Variant
Dim wb As Workbook
Dim bAlreadyOpen As Boolean
Dim sFile As String
On Error GoTo ErrHandler
' Get a batch of Excel files
vFiles = GetExcelFiles("Select Workbooks for Processing")
' Make sure dialog wasn't cancelled - in which case
' vFiles would equal FALSE and therefore is not an array.
If Not IsArray(vFiles) Then
Debug.Print "No files selected."
Exit Sub
End If
Application.ScreenUpdating = False
' OK - loop through the file names
For nIndex = 1 To UBound(vFiles)
' Get the workbook
If IsWorkbookOpen(CStr(vFiles(nIndex))) Then
Set wb = Workbooks(GetShortName(CStr(vFiles(nIndex))))
Debug.Print "Workbook already open: " & wb.Name
bAlreadyOpen = True
Else
Set wb = Workbooks.Open(CStr(vFiles(nIndex)), False)
Debug.Print "Opened workbook: " & wb.Name
bAlreadyOpen = False
End If
Application.StatusBar = "Processing workbook: " & wb.Name
' Code to process the file goes here
4281book.fm Page 552 Monday, March 1, 2004 1:19 AM
552
CHAPTER 22 APPLICATION DEPLOYMENT STRATEGIES
FixWorkbook wb
' Close workbook unless it was already open
If Not bAlreadyOpen Then
Debug.Print "Closing workbook: " & wb.Name
wb.Close True
End If
Next nIndex
ErrHandler:
Application.StatusBar = False
Application.ScreenUpdating = True
End Sub
' This function checks to see if a given workbook
' is open or not. This function can be used
' using a short name such as MyWorkbook.xls
' or a full name such as C:\Testing\MyWorkbook.xls
Function IsWorkbookOpen(sWorkbook As String) As Boolean
Dim sname As String
Dim sPath As String
Dim sFullName As String
On Error Resume Next
IsWorkbookOpen = True
' See if we were given a short name or a long name
If InStr(1, sWorkbook, "\", vbTextCompare) > 0 Then
' We have a long name
' Need to break it down
sFullName = sWorkbook
BreakdownName sFullName, sname, sPath
If StrComp(Workbooks(sname).FullName, sWorkbook, 1) <> 0 Then
IsWorkbookOpen = False
End If
Else
' We have a short name
If StrComp(Workbooks(sWorkbook).Name, sWorkbook, 1) <> 0 Then
IsWorkbookOpen = False
End If
End If
End Function
' Presents user with a GetOpenFileName dialog that allows
' multiple file selection.
' Returns an array of filenames.
Function GetExcelFiles(sTitle As String) As Variant
Dim sFilter As String
4281book.fm Page 553 Monday, March 1, 2004 1:19 AM
553
MANAGING CHANGE
Dim bMultiSelect As Boolean
sFilter = "Workbooks (*.xls), *.xls"
bMultiSelect = True
GetExcelFiles = Application.GetOpenFilename(FileFilter:=sFilter, _
Title:=sTitle, MultiSelect:=bMultiSelect)
End Function
Function GetShortName(sLongName As String) As String
Dim sPath As String
Dim sShortName As String
BreakdownName sLongName, sShortName, sPath
GetShortName = sShortName
End Function
Sub BreakdownName(sFullName As String, _
ByRef sname As String, _
ByRef sPath As String)
Dim nPos As Integer
' Find out where the file name begins
nPos = FileNamePosition(sFullName)
If nPos > 0 Then
sname = Right(sFullName, Len(sFullName) - nPos)
sPath = Left(sFullName, nPos - 1)
Else
'Invalid sFullName - don't change anything
End If
End Sub
' Returns the position or index of the first
' character of the file name given a full name
' A full name consists of a path and a filename
' Ex. FileNamePosition("C:\Testing\Test.txt") = 11
Function FileNamePosition(sFullName As String) As Integer
Dim bFound As Boolean
Dim nPosition As Integer
bFound = False
nPosition = Len(sFullName)
Do While bFound = False