Introduction to using macros in Microsoft Excel 2003 phần 6 ppt
Bạn đang xem bản rút gọn của tài liệu. Xem và tải ngay bản đầy đủ của tài liệu tại đây (1.33 MB, 13 trang )
On Error GoTo Last
in your macro, where Last is a label attached to the Next r
Last: Next r
The effect of this will be to continue doing calculations and just omit the
result for C6.
13.3 To continue with the next line when macro encounters an error
If you wish your macro to execute the next line when an error condition
occurs, include the statement
On Error Resume Next
in the macro.
For the macro described above, the effect will be the same as that described
in section 13.2.
14 Custom dialog boxes
MsgBox and InputBox are two of Excel's built-in dialog boxes. You can
create your own dialog boxes for passing information to and from a macro.
A simple example is described below in which a decorator keeps a record of
the paint he has in stock and provides a facility for customers to enquire
about the availability of a particular colour in either gloss or matt paint.
14.1 The controlling sheet
To create the controlling sheet for this example,
Guide 39: Introduction to using macros in Microsoft Excel 2003 47
1 Open a new workbook and save it as Paint.xls
2 Name the first sheet CustomerEnquiries (for example).
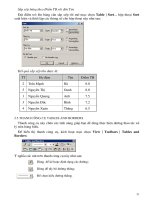
3 Make sure that the Drawing toolbar is visible (View | Toolbars |
Drawing).
4 Click the Oval button on the Drawing toolbar and draw the oval
shape.
5 Right-click on the oval and select Add Text.
6 Type
Paint queries
7 If you would like to give a 3-D effect to the oval, click on the 3-D
button on the Drawing toolbar and select one of the settings offered.
14.2 Paint in stock sheet
The record of tins of paint currently in stock is stored on another sheet.
1 Rename Sheet2 as Stock.
2 Enter the data as shown below.
3 Note that the paint colours are sorted alphabetically.
4 In cell I8, enter the formula =VLOOKUP(H4,B5:D14,H5)
This will give a #N/A result since there is no data in H4 and H5 at the
moment. Those values will be entered automatically when the customer
indicates which paint they are enquiring about.
Guide 39: Introduction to using macros in Microsoft Excel 2003 48
5 If you wish, you can delete any unused sheets.
14.3 Creating the User Form
The user form is the dialog box that is shown to the customer.
1 From the Tools menu, select Macro and then Visual Basic Editor.
2 In the Microsoft Visual Basic window, select UserForm from the
Insert menu.
Excel inserts a new user form and displays the Toolbox.
3 Find out the names of the various tools in the Toolbox by positioning
the cursor over them, but do not click.
There are two ways of drawing on a form. Either drag a button from the
Toolbox to the UserForm window or,
• click a button in the Toolbox window
• position the cursor on the form where the button is to appear
Guide 39: Introduction to using macros in Microsoft Excel 2003 49
• drag to the size required
The layout of the user form is to be as shown below.
4 Drag the bottom right-hand corner of the UserForm1 window to
make it a little larger.
Instruction towards the top of the form
1 Click on the Label control in the Toolbox.
2 Draw a wide, shallow rectangle on the form. Its border will be
composed of dots.
3 Single left-click (do not double-click) in that rectangle until its outline
has diagonal stripes.
4 You will then be able to select the text Label1 and replace it with
Please select colour and type of paint required
5 Click on a clear region of the form.
OK and Cancel buttons
1 Click on the CommandButton control in the Toolbox.
2 Drag to create the leftmost button at the bottom of the form.
3 Single left-click (do not double-click) on this button until its outline has
diagonal stripes.
4 Select its text and change it to OK.
5 Similarly, draw a second button containing the text Cancel.
Large rectangle to hold paint colours
1 Click on the ListBox control in the Toolbox. (If the Toolbox is not
visible, click on a blank region of the user form.)
2 Drag to create the white rectangle shown in the example above.
Guide 39: Introduction to using macros in Microsoft Excel 2003 50
Type of paint
1 Select the OptionButton control.
2 Click on the UserForm where the Gloss button is to go.
3 Select the text OptionButton1 and change it to Gloss.
4 Repeat all that to create the Matt button.
Hint: If you want to precisely line up two items (for example, option buttons),
select the first, hold down the Shift key while selecting the second, right-click
on one of them and select Align from the shortcut menu.
Changing the appearance of text
1 Click on your label (Please select colour…).
2 In the Properties window (to the left), click on the Font entry
(Tahoma).
3 Click on the … in that box.
4 Select Tahoma Bold 8pt and click OK.
5 Adjust the size/position of the label if necessary.
Changing Name properties
1 Click on the Gloss option button.
2 In the Properties window, click on the Alphabetic tab and change
the (Name) property from OptionButton1 to
ChoseGlossOptionButton.
3 Click on the Matt option button.
4 In the Properties window, change the (Name) property from
OptionButton2 to ChoseMattOptionButton.
5 Click on the ListBox (to contain colours eventually).
6 In the Properties window, change the (Name) property from
ListBox1 to WhichColourListBox.
7 Click on the OK button.
8 In the Properties window, change the (Name) property from
CommandButton1 to OKButton.
9 Click on the Cancel button.
10 In the Properties window, change the (Name) property from
CommandButton2 to CancelButton.
Finally, change the name and caption of UserForm1 itself:
1 Click in a clear region of UserForm1 to select it.
Guide 39: Introduction to using macros in Microsoft Excel 2003 51
2 In the Properties window, change the (Name) property from
UserForm1 to PaintDialog.
3 In the Properties window, change the Caption setting from
UserForm1 to WhichPaint?.
Note: It is not essential to change these default names to more meaningful
ones.
14.4 Getting data to and from the list box
The next stage is to arrange for the paint colours to appear in the ListBox.
1 On the UserForm, make sure that the ListBox is selected (click on it
if necessary).
2 In the Properties pane, select the Categorized tab.
3 Scroll down to the Data area.
4 Beside the RowSource box, type stock!b5:b14
Once the customer has selected a colour, that “answer” should be recorded
somewhere on the worksheet. In this example, cell H4 will be used.
5 Beside the ControlSource box (two rows above the RowSource)
type
stock!h4
6 Click on a blank region of your userform.
The colours should now be listed in the box.
14.5 Setting up the macro
A macro has to be assigned to the Paint queries button on the
CustomerEnquiries worksheet. All it will do is
• set the default value for the Gloss/Matt option to Gloss
• present the form to the customer
To create that macro,
1 Make sure that the Visual Basic window is active.
2 From the Insert menu, select Module.
3 In that module, enter the macro shown below. The comments will
help you to remember what each step does.
Sub PaintQueries()
' Load the form
Load PaintDialog
' Set up the default value for the Option buttons
PaintDialog.ChoseGlossOptionButton.Value = True
' Set up the default value for the List Box
PaintDialog.WhichColourListBox.Value = "Black"
' Present the dialog box to the customer
PaintDialog.Show
End Sub
Guide 39: Introduction to using macros in Microsoft Excel 2003 52
This macro has now to be assigned to the button on the
CustomerEnquiries sheet.
1 Right-click on the edge of the Paint queries button on the
CustomerEnquiries sheet. Be careful to select the oval, not the text
box.
2 Select Assign macro.
3 Select the PaintQueries macro and click OK.
14.6 Adding code to the user form
The final stage is to set up procedures to deal with the decisions taken by a
customer who uses the form.
1 Display your PaintDialog form. (If necessary, in the Project pane of
the Microsoft Visual Basic window, right-click on the PaintDialog
form and select View O
bject.)
When a customer clicks the Cancel button on the dialog box, the form
should simply disappear. To achieve that:
2 Right-click on the Cancel button.
3 Select View Code.
4 Add two lines to the macro as follows
Private Sub CancelButton_Click()
' Just hide the dialog box without updating the sheet
PaintDialog.Hide
End Sub
When looking up a particular paint in the table of stocks, the second column
has to be referred to for Gloss and the third for Matt. So, H5 has to have the
value 2 if gloss is selected and 3 otherwise.
Once it is known how many tins are in stock, a suitable message can be
displayed using MsgBox. The calculation of the number of tins is on the
Stock worksheet in cell I8.
This is all controlled from the OK button as follows:
5 Return to the userform by selecting PaintDialog (UserForm) from
the
Window menu.
6 Right-click on the OK button.
7 Select View Code.
8 Enter the following macro.
Guide 39: Introduction to using macros in Microsoft Excel 2003 53
Private Sub OKButton_Click()
' Use info from dialog box
If PaintDialog.ChoseGlossOptionButton = True Then
Range("Stock!H5").Value = 2
Else
Range("Stock!H5").Value = 3
End If
no_tins = Range("Stock!I8").Value
If no_tins > 0 Then
MsgBox "We have " & no_tins & " tins in stock"
Else
MsgBox "Sorry, that paint is not in stock at the moment"
End If
End Sub
Note: If the transferring of the colour selected by the customer from the
dialog box to the worksheet had not been done in step 5 of section 14.4, it
could be done in this macro as described below.
thecolour = PaintDialog.WhichColourListBox.Text
Range("Stock!H4").Value = thecolour
14.7 Testing
It is important to test that everything is working as planned.
1 Click on the Paint queries button on the CustomerEnquiries
worksheet.
2 Check that the defaults are correct (black and gloss).
3 Select a colour and type of paint and click OK.
4 To check that the correct information has been given to you, click on
OK in the Message Box, close the WhichPaint? window and look at
the Stock sheet.
5 Click on the Paint queries button again, try another combination and
click OK.
6 Try clicking Cancel.
7 Click the Paint queries button again.
8 Check that the defaults still work.
9 Click Cancel.
15 Custom functions
These are also known as user-defined functions. They carry out
calculations and return an answer. They cannot be recorded, start with
Function and end with End Function.
A very simple example is given below. This function, called AddThree, adds
three numbers, represented by x, y and z, that will be passed to the function
from a macro.
Guide 39: Introduction to using macros in Microsoft Excel 2003 54
Function AddThree(x, y, z)
AddThree = x + y + z
End Function
The following procedure uses that function to add 12, 14 and 25, and then
displays the answer using MsgBox.
Sub Testing()
a = 12
b = 14
c = 25
answer = AddThree(a, b, c)
MsgBox "The result is " & answer
End Sub
Function AddThree(x, y, z)
AddThree = x + y + z
End Function
16 Ways of working and some “answers”
16.1 Getting organised
People vary in the way they approach the job of writing a macro. For some,
the overall structure of the problem is in their heads and they dive straight in
and start typing the actual instructions.
Another approach is to draw a flow diagram, like the one below, before
embarking on writing the actual code.
Get first data value
Do calculation
Store answer in cell to right
Move to next data value
End of
data?
End macro
Yes
N
o
Some people jot a few guidelines on a sheet of paper before starting —
perhaps something like
1 Activate the cell containing the first data value
Guide 39: Introduction to using macros 55 in Microsoft Excel 2003
2 Do the calculation
3 Store the answer in the cell to the right of that value
4 Activate the cell containing the next data value
5 Keep repeating (2) to (4) until the end of the data is reached
Different approaches suit different problems and different people but it is
very important to approach macro writing in an organised fashion.
16.2 Solutions to exercises
The macros listed in this section are suggestions as to how you might solve
particular problems. There is not just one correct way of writing a macro;
there are usually several possible approaches to any situation. So, if your
macro works correctly and is efficient, it does not matter if it looks different
from the corresponding one listed here.
These solutions assume that the correct workbook and worksheet will be
active when each macro is run. If this is not the case then an instruction
such as
Workbooks("MacroData.xls").Worksheets("Names").Activate or
Workbooks("MacroData.xls").Sheets("Names").Activate should also be
included.
Sub Address_abs() ‘ Section 2.1
' Address_abs Macro
' Enters address starting in cell B3
Range("B3").Select
ActiveCell.FormulaR1C1 = "D.Morgan"
Range("B4").Select
ActiveCell.FormulaR1C1 = "IT Service"
Range("B5").Select
ActiveCell.FormulaR1C1 = "University of Durham"
Range("B3:B5").Select
Selection.Font.Bold = True
Selection.Font.Italic = True
Range("B6").Select
End Sub
Sub Address_rel() ‘ Section 2.3
' Address_rel Macro
' Enters address at the active cell position
' Keyboard Shortcut: Ctrl+Shift+A
ActiveCell.FormulaR1C1 = "D.Morgan"
ActiveCell.Offset(1, 0).Range("A1").Select
ActiveCell.FormulaR1C1 = "IT Service"
ActiveCell.Offset(1, 0).Range("A1").Select
ActiveCell.FormulaR1C1 = "University of Durham"
ActiveCell.Offset(1, 0).Range("A1").Select
ActiveCell.FormulaR1C1 = "DH1 3LE"
ActiveCell.Offset(-3, 0).Range("A1:A4").Select
Selection.Font.Bold = True
ActiveCell.Offset(4, 0).Range("A1").Select
End Sub
Guide 39: Introduction to using macros in Microsoft Excel 2003 56
Sub MyFirst() ‘ Section 7.1
Sheets("Text").Select
Range("B2").Select
ActiveCell.FormulaR1C1 = "I can write macros!"
Selection.Font.Bold = True
End Sub
Sub DeleteValues() ‘ Section 8.8
' Exercise 1
Range("C5:E5").ClearContents
End Sub
Sub EnterValue() ‘ Section 8.8
' Exercise 2
Cells(7, 4).Value = "Year 2000"
End Sub
Sub DeleteRow() ‘ Section 8.8
' Exercise 3
Rows(6).Delete
End Sub
Sub PassFail() ‘ Section 9.1
' Exercise on using If Then Else
If Cells(5, 6) > 49 Then
Cells(5, 7) = "Pass"
Else
Cells(5, 7) = "Fail"
End If
End Sub
Sub SSAW1() ‘ Section 9.2
'Exercise on using Select Case
’Another version shown below
n = Range("R3").Value
Select Case n
Case 3 To 5
Range("S3").Value = "Spring"
Case 6 To 8
Range("S3").Value = "Summer"
Case 9 To 11
Range("S3").Value = "Autumn"
Case 12, 1, 2
Range("S3").Value = "Winter"
End Select
End Sub
Guide 39: Introduction to using macros in Microsoft Excel 2003 57
Sub SSAW2() ‘ Section 9.2
'Exercise on using Select Case
Select Case Range("R3")
Case 3 To 5
Range("S3") = "Spring"
Case 6 To 8
Range("S3") = "Summer"
Case 9 To 11
Range("S3") = "Autumn"
Case 12, 1, 2
Range("S3") = "Winter"
End Select
End Sub
Sub Leaflet1() ‘ Section 9.3.1
’Another version shown below
'Exercise on using If with And
If Cells(3, 23) > 20 And Cells(3, 23) < 36 Then
Cells(3, 24) = "Yes"
Else
Cells(3, 24) = "No"
End If
End Sub
Sub Leaflet2() ‘ Section 9.3.1
'Exercise on using If with And
age = Range("W3")
If age >= 21 And age <= 35 Then
Range("X3") = "Yes"
Else
Range("X3") = "No"
End If
End Sub
Sub AddNumbers1() ‘ Section 11.2
'Exercise on using Do While loop
'Do Until version listed below
total = 0
r = 3
Do While Cells(r, 7) <> "End of data"
total = total + Cells(r, 7)
r = r + 1
Loop
MsgBox "The total is " & total
End Sub
Sub AddNumbers2() ‘ Section 11.2
'Exercise on using Do Until loop
total = 0
r = 3
Do
total = total + Cells(r, 7)
r = r + 1
Loop Until Cells(r, 7) = "End of data"
MsgBox "The total is " & total
End Sub
Guide 39: Introduction to using macros in Microsoft Excel 2003 58
Sub Names() ‘ Section 11.3
'Exercise on using For Next loop
Cells(20, 4) = "Full Name"
Cells(20, 4).Font.Bold = True
For r = 21 To 26
Cells(r, 4) = Cells(r, 3) & " " & Cells(r, 2)
Next r
End Sub
Sub LongList1() ‘ Section 12
'Exercise on using list of unspecified length - cells not selected
'Two other versions shown below
n = Cells(2, 1).End(xlDown).Row
For r = 3 To n
Cells(r, 3) = Cells(r, 2) & " " & Cells(r, 1)
Next r
End Sub
Sub LongList2() ‘ Section 12
'Exercise on using list of unspecified length - cells not selected
'Another version shown below
r = 3
Do While Cells(r, 1) <> ""
Cells(r, 3) = Cells(r, 2) & " " & Cells(r, 1)
r = r + 1
Loop
End Sub
Sub LongList3() ‘ Section 12
'Exercise on using list of unspecified length - cells selected
Range("A3").Select
Do While ActiveCell <> ""
ActiveCell.Offset(0, 2) = ActiveCell.Offset(0, 1) & _
" " & ActiveCell.Value
ActiveCell.Offset(1, 0).Select
Loop
End Sub
Guide 39: Introduction to using macros in Microsoft Excel 2003 59