Visual C# Game Programming for Teens phần 2 pdf
Bạn đang xem bản rút gọn của tài liệu. Xem và tải ngay bản đầy đủ của tài liệu tại đây (475.71 KB, 47 trang )
//random line ends
int x = rand.Next(1, this.Size.Width - 50);
int y = rand.Next(1, this.Size.Height - 50);
Rectangle rect = new Rectangle(x, y, 50, 50);
//draw the rectangle
device.DrawRectangle(pen, rect);
//refresh the drawing surface
pb.Image = surface;
}
private void timer_Tick(object source, EventArgs e)
{
drawRect();
}
}
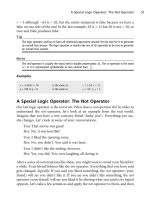
Drawing Text
We will need to draw text onto the game screen using any desired font, and the
Graphics class gives us this ability too, via the DrawString() function. There are
several versions of the function with various sets of parameters, but we will be
using the simplest version that just needs a
String (for the words we want to
print out), a custom Font object, the color, and the coordinates. Figure 2.4 shows
the result of this example program.
using System;
using System.Drawing;
using System.Windows.Forms;
public partial class Form1 : Form
{
string[] text = {
"AVATAR!",
"Know that Brittania has entered into a new age of",
"enlightenment! Know that the time has finally come",
"for the one true Lord of Brittania to take his place",
"at the head of his people. Under my guidance, Brit-",
"tania will flourish. And all of the people shall",
"rejoice and pay homage to their new guardian!",
"Know that you, too, shall kneel before me, Avatar.",
Drawing Text 29
"You, too, will soon acknowledge my authority. For I",
"shall be your companion your provider and your",
"master!", "",
"Ultima VII: The Black Gate",
"Copyright 1992 by Electronic Arts"
};
PictureBox pb;
Bitmap surface;
Graphics device;
Random rand;
public Form1()
{
InitializeComponent();
}
private void Form1_Load(object sender, EventArgs e)
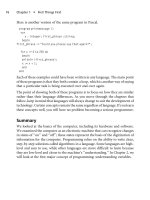
Figure 2.4
Printing text using a custom font and color.
30 Chapter 2
n
Drawing Shapes and Bitmaps with GDI+
{
//initialize
this.Text = "Text Drawing Demo";
this.FormBorderStyle = System.Windows.Forms.FormBorderStyle.
FixedSingle;
this.MaximizeBox = false;
this.Size = new Size(600, 500);
rand = new Random();
//create a new picturebox
pb = new PictureBox();
pb.Parent = this;
pb.Dock = DockStyle.Fill;
pb.BackColor = Color.Black;
//create graphics device
surface = new Bitmap(this.Size.Width, this.Size.Height);
pb.Image = surface;
device = Graphics.FromImage(surface);
//make a new font
Font font = new Font("Times New Roman", 26, FontStyle.Regular,
GraphicsUnit.Pixel);
//draw the text
for (int n = 0; n < text.Length; n++)
{
device.DrawString(text[n], font, Brushes.Red, 10, 10 + n*28);
}
//refresh the drawing surface
pb.Image = surface;
}
private void Form1_FormClosed(object sender, FormClosedEventArgs e)
{
device.Dispose();
surface.Dispose();
}
}
Drawing Text 31
There are other shapes in addition to lines, rectangles, and text that the Graphics
class can draw. Now that you have a foundation, see if you can modify the
program to use any of the following functions:
n DrawArc
n DrawBezier
n DrawCurve
n DrawEllipse
n DrawPie
n DrawPolygon
Trick
To simplify the code in this C# project, I have removed the default namespace that Visual C#
automatically added to the new project. In a larger project with many source code files and
libraries, we would want to use a namespace, but for simple examples like this it is okay to skip the
namespace.
Dissecting Bitmaps
Learning to draw a bitmap is the first step toward creating a 2D game like our
impending Dungeon Crawler game. When we have the ability to draw just one
bitmap, then we can extend that to animation by drawing one frame after
another in a timed sequence—and presto, sprite animation becomes a reality!
We will focus on sprite animation in Chapter 3, and work on the basics of
bitmap drawing now as a prerequisite.
Drawing on the code we learned about earlier in the chapter, a
Bitmap object, a
PictureBox, and a Graphics object work in tandem to represent a rendering
device capable of drawing vector shapes as well as bitmaps. Once again for
reference, we have to declare the two variables:
Bitmap surface;
Graphics device;
and then, assuming we have a PictureBox control called pictureBox1, create the
objects. The
PictureBox control can be created at runtime or we can just add it
to the form manually.
32 Chapter 2
n
Drawing Shapes and Bitmaps with GDI+
surface = new Bitmap(this.Size.Width, this.Size.Height);
pictureBox1.Image = surface;
device = Graphics.FromImage(surface);
So, we already knew this startup code, but—just to lay the groundwork—this is
what is needed up front as a rendering device to draw a bitmap.
Loading a Bitmap File
We can load a bitmap in C# by using the Bitmap class. But there is no Bitmap.
Load()
function (unfortunately!) so we have to use the constructor instead by
passing the bitmap filename when the object is created.
Bitmap bmp;
bmp = new Bitmap("image.bmp");
Definition
A
constructor
is a class function (also called a method) that runs when an object is first created.
This is where class variables (also called properties) are initialized. A
destructor
is a class function
that runs when the object is being destroyed: via object.Dispose() or object = null.
Although both approaches work, and we can even pass a string rather than hard
coding the filename, there is the very serious problem of error handling: if the
file does not exist, an exception error will crash the program. Missing files are
fairly common (usually due to their being in the wrong folder), and we want to
display a friendly error message rather than watch the program crash. The
solution is to wrap the bitmap loading code in a
try catch block. Here is an
example:
try
{
bmp = new Bitmap(filename);
}
catch (Exception ex) { }
This code will not crash if the file is missing or if some other error occurs while
reading the file. So, let’s put it into a reusable function that returns a
Bitmap if
the file exists or Nothing (null) if it fails. One caveat: be sure to free memory used
by the bitmap when the program ends.
public Bitmap LoadBitmap(string filename)
{
Dissecting Bitmaps 33
Bitmap bmp = null;
try
{
bmp = new Bitmap(filename);
}
catch (Exception) { }
return bmp;
}
If the file does not exist, then LoadBitmap() will return Nothing as the object
pointer rather than crashing with an exception error. This is a very handy little
function! And it demonstrates the power of code reuse and customization—
whatever features we need that are not al ready in an SDK or library we can just
write ourselves. One might even go so far as to write their own new
Bitmap
wrapper class (called something like CBitmap?) with a Load() function. You
could easily do this yourself with just the small amount of code we have used so
far. I’m just going to skip this step, though, and add bitmap loading in the
Sprite class when we get to it in Chapter 3.
Hint
To ensure that created objects are properly disposed of when the program ends, I recommend
putting the
Form1_FormClosed() function at the top of the source code, just below the
variable declarations, where it will be quick and easy to write the code needed to free an object.
Always write creation/deletion code together in pairs to avoid memory leaks!
Drawing a Bitmap
There are several versions of the Graphics.DrawImage() function; the alternate
versions are called overloaded functions in “OOP speak. ” The simplest version of
the function calls for just a
Bitmap or Image parameter and then the X and Y
position. For example, this line
device.DrawImage(bmp, 0, 0);
will draw the bitmap bmp at pixel coordinates 0,0. Figure 2.5 shows an example.
We can optionally use a
Point with the X and Y coordinates combined into one
object, or use floating-point Single variables. There are also scaling features that
make it possible to resize the image. By passing additional width and height
34 Chapter 2
n
Drawing Shapes and Bitmaps with GDI+
parameters, we can define a new target size for the image. Figure 2.6 shows
another example with the addition of this line, which draws another copy of the
bitmap scaled down to a smaller size.
device.DrawImage(planet, 400, 10, 64, 64);
Rotating and Flipping a Bitmap
The Bitmap class has some helper functions for manipulating the image and even
its individual pixels. The Bitmap.RotateFlip() function will rotate a bitmap in
90-degree increments (90, 180, and 270 degrees), as well as flip the bitmap
vertically, horizontally, or both. Here is an example that rotates the bitmap
90 degrees:
planet.RotateFlip(RotateFlipType.Rotate90FlipNone);
Figure 2.5
Drawing an image loaded from a bitmap file.
Dissecting Bitmaps 35
The RotateFlipType options are as follows:
n Rotate180FlipNone
n Rotate180FlipX
n Rotate180FlipXY
n Rotate180FlipY
n Rotate270FlipNone
n Rotate270FlipX
n Rotate270FlipXY
n Rotate270FlipY
n Rotate90FlipNone
n Rotate90FlipX
n Rotate90FlipXY
n Rotate90FlipY
Figure 2.6
Drawing a scaled bitmap.
36 Chapter 2
n
Drawing Shapes and Bitmaps with GDI+
n RotateNoneFlipX
n RotateNoneFlipXY
n RotateNoneFlipY
The Bitmap Drawing demo has several buttons on the form to let you explore
rotating and flipping a bitmap in various ways, as you can see in Figure 2.7. In
addition to calling
RotateFlip(), we still need to draw the image again and
refresh the PictureBox like usual:
image.RotateFlip(RotateFlipType.Rotate180FlipNone);
device.DrawImage(planet, 0, 0);
pictureBox1.Image = surface;
Accessing Bitmap Pixels
We can also examine and modify the pixel buffer of a bitmap directly using
functions in the
Bitmap class. The Bitmap.GetPixel() function retrieves the pixel
of a bitmap at given X,Y coordinates, returning it as a
Color variable. Likewise,
Figure 2.7
Rotating and flipping a bitmap.
Dissecting Bitmaps 37
the Bitmap.SetPixel() will change the color of a pixel at the given coordinates.
The following example reads every pixel in the planet bitmap and changes it to
green by setting the red and blue components of the color to zero, which leaves
just the green color remaining. Figure 2.8 shows the Bitmap Drawing demo with
the pixels modified—not very interesting but it does a good job of showing what
you can do with this capability.
for (int x = 0; x < image.Width - 1; x++)
{
for (int y = 0; y < image.Height - 1; y++)
{
Color pixelColor = image.GetPixel(x, y);
Color newColor = Color.FromArgb(0, pixelColor.G, 0);
image.SetPixel(x, y, newColor);
}
}
Figure 2.8
Modifying the color value of pixels in a bitmap.
38 Chapter 2
n
Drawing Shapes and Bitmaps with GDI+
Here is the source code for the Bitmap Drawing demo. There are controls on the
form, so you must open the project in order to run it; the source code here does
not build the user interface like some of our simpler examples have done.
using System;
using System.Drawing;
using System.Windows.Forms;
public partial class Form1 : Form
{
Bitmap surface;
Graphics device;
Bitmap image;
public Form1()
{
InitializeComponent();
}
private void Form1_Load(object sender, EventArgs e)
{
//set up the form
this.Text = "Bitmap Drawing Demo";
this.FormBorderStyle = System.Windows.Forms.FormBorderStyle.
FixedSingle;
this.MaximizeBox = false;
//create graphics device
surface = new Bitmap(this.Size.Width, this.Size.Height);
pictureBox1.Image = surface;
device = Graphics.FromImage(surface);
//load the bitmap
image = LoadBitmap("skellyarcher.png");
//draw the bitmap
device.DrawImage(image, 0, 0);
}
public Bitmap LoadBitmap(string filename)
{
Bitmap bmp = null;
try
{
bmp = new Bitmap(filename);
Dissecting Bitmaps 39
}
catch (Exception ex) { }
return bmp;
}
private void Form1_FormClosed(object sender, FormClosedEventArgs e)
{
device.Dispose();
surface.Dispose();
image.Dispose();
}
private void button9_Click(object sender, EventArgs e)
{
image.RotateFlip(RotateFlipType.Rotate90FlipNone);
device.DrawImage(image, 0, 0);
pictureBox1.Image = surface;
}
private void button10_Click(object sender, EventArgs e)
{
image.RotateFlip(RotateFlipType.Rotate180FlipNone);
device.DrawImage(image, 0, 0);
pictureBox1.Image = surface;
}
private void button11_Click(object sender, EventArgs e)
{
image.RotateFlip(RotateFlipType.Rotate270FlipNone);
device.DrawImage(image, 0, 0);
pictureBox1.Image = surface;
}
private void button12_Click(object sender, EventArgs e)
{
image.RotateFlip(RotateFlipType.RotateNoneFlipX);
device.DrawImage(image, 0, 0);
pictureBox1.Image = surface;
}
40 Chapter 2
n
Drawing Shapes and Bitmaps with GDI+
private void button13_Click(object sender, EventArgs e)
{
image.RotateFlip(RotateFlipType.RotateNoneFlipY);
device.DrawImage(image, 0, 0);
pictureBox1.Image = surface;
}
private void button14_Click(object sender, EventArgs e)
{
image.RotateFlip(RotateFlipType.RotateNoneFlipXY);
device.DrawImage(image, 0, 0);
pictureBox1.Image = surface;
}
private void button15_Click(object sender, EventArgs e)
{
Color white = Color.FromArgb(255, 255, 255);
Color black = Color.FromArgb(0, 0, 0);
for (int x = 0; x < image.Width - 1; x++)
{
for (int y = 0; y < image.Height - 1; y++)
{
if (image.GetPixel(x,y) == white)
image.SetPixel(x, y, black);
}
}
device.DrawImage(image, 0, 0);
pictureBox1.Image = surface;
}
private void button16_Click(object sender, EventArgs e)
{
for (int x = 0; x < image.Width - 1; x++)
{
for (int y = 0; y < image.Height - 1; y++)
{
Color pixelColor = image.GetPixel(x, y);
Color newColor = Color.FromArgb(0, pixelColor.G, 0);
image.SetPixel(x, y, newColor);
}
Dissecting Bitmaps 41
}
device.DrawImage(image, 0, 0);
pictureBox1.Image = surface;
}
}
Creating a Reusable Framework
We have enough code now at this point to begin constructing a game framework
for our future C# projects. The purpose of a framework is to take care of
repeating code. Any variables and functions that are needed regularly can be
moved into a
Game class as properties and methods where they will be both
convenient and easily accessible. First, we’ll create a new source code file called
Game.cs, which will contain the source code for the Game class. Then, we’ll copy
this Game.cs file into the folder of any new project we create and add it to that
project. The goal is to simplify the whole process of creating a new game project
and make most of our C# game code reusable. Let’s get started:
using System;
using System.Drawing;
using System.Diagnostics;
using System.Windows;
using System.Windows.Forms;
public class Game
{
private Graphics p_device;
private Bitmap p_surface;
private PictureBox p_pb;
private Form p_frm;
You might recognize the first three of these class properties from previous
examples. They have a p_ in front of their names so it’s easy to tell at a glance
that they are private variables in the class (as opposed to, say, parameters in a
function). The fourth property,
p_frm, is a reference to the main Form of a
project, which will be set when the object is created. Yes, our
Game class will even
customize its form so we don’t have to do anything more than supply the form
to the class.
42 Chapter 2
n
Drawing Shapes and Bitmaps with GDI+
Hint
A
class
is a blueprint written in source code for how an
object
should behave at runtime. Just as an
object does not exist at compile time (i.e., when we’re editing source code and building the
project), a class does not exist during runtime. An object is created out of the class blueprint.
Game Class Constructor
The constructor is the first method that runs when a class is instantiated into an
object. We can add parameters to the constructor in order to send information
to the object at runtime—important things like the
Form, or maybe a filename, or
whatever you want.
Definition
Instantiation
is the process of creating an object out of the blueprint specified in a class. When this
happens, an object is
created
and the
constructor method
runs. Likewise, when the object is
destroyed, the
destructor method
runs. These methods are defined in the class.
Here is the constructor for the Game class. This is just an early version, as more
code will be added over time. As you can see, this is not new code, it’s just the
code we’ve seen before to create the
Graphics and Bitmap objects needed for
rendering onto a
PictureBox. Which, by the way, is created at runtime by this
function and set to fill the entire form (Dock = DockStyle.Fill). To clarify what
these objects are used for, the Graphics variable is called p_device—while not
technically correct, it conveys the purpose adequately. To help illustrate when
the constructor runs, a temporary message box pops up which you are welcome
to remove after you get what it’s doing.
public Game(Form1 form, int width, int height)
{
Trace.WriteLine("Game class constructor");
//set form properties
p_frm = form;
p_frm.FormBorderStyle = FormBorderStyle.FixedSingle;
p_frm.MaximizeBox = false;
p_frm.Size = new Size(width, height);
//create a picturebox
p_pb = new PictureBox();
Creating a Reusable Framework 43
p_pb.Parent = p_frm;
p_pb.Dock = DockStyle.Fill;
p_pb.BackColor = Color.Black;
//create graphics device
p_surface = new Bitmap(p_frm.Size.Width, p_frm.Size.Height);
p_pb.Image = p_surface;
p_device = Graphics.FromImage(p_surface);
}
Game Class Destructor
The destructor method is called automatically when the object is about to be
deleted from memory (i.e., destroyed). In C#, or, more specifically, in .NET, the
name of the destructor is
Finalize(), but we create a sub-class destructor using
the tilde character (~) followed by the class name. So, if our class name is
Game,
then the destructor method will be
~Game(). In this method, we again send a
message sent to the output console using System .Diag no stic s.Tr ace.W rite Line ().
Feel free to use
Trace any time you need to see debugging information, as it will be
sent to the output window. Note that p_frm is not disposed—leave that alone as it
is just a reference to the actual form.
~Game()
{
Trace.WriteLine("Game class destructor");
p_device.Dispose();
p_surface.Dispose();
p_pb.Dispose();
}
Bitmap Loading
Our first reusable method for the Game class is LoadBitmap:
public Bitmap LoadBitmap(string filename)
{
Bitmap bmp = null;
try
{
bmp = new Bitmap(filename);
}
catch (Exception ex) { }
44 Chapter 2
n
Drawing Shapes and Bitmaps with GDI+
return bmp;
}
Game Updates
We probably will not need an Update() function at this early stage but it’s here
as an option should you wish to use it to update the
PictureBox any time
drawing occurs on the “device.” In due time, this function will be expanded to
do quite a bit more than its meager one line of code currently shows. Also shown
here is a
Property called Device.AProperty allows us to write code that looks
like just a simple class property is being used (like
p_device), when in fact a
function call occurs.
public Graphics Device
{
get { return p_device; }
}
public void Update()
{
//refresh the drawing surface
p_pb.Image = p_surface;
}
}
So, for example, if we want to get the value returned by the Device property, we
can do that like so:
Graphics G = game.Device;
Note that I did not include parentheses at the end of Device. That’s because it is
not treated as a method, even though we are able to do something with the data
before returning it. The key to a property is its
get and set members. Since I did
not want anyone to modify the p_device variable from outside the class, I have
made the property read-only by using a
get without a corresponding set
member. If I did want to make p_device writable, I would use a set member.
Properties are really helpful because they allow us to protect data in the class!
You can prevent changes to a variable by making sure the change value is in a
valid range before allowing the change—so in that sense, a property is like a
“variable with benefits.”
Creating a Reusable Framework 45
Framework Demo
The code in this Framework demo program produces pretty much the same
output as what we’ve seen earlier in the chapter (drawing a purple planet). The
difference is, thanks to the new
Game class, the source code is much, much
shorter! Take a look.
using System;
using System.Drawing;
using System.Windows.Forms;
public partial class Form1 : Form
{
public Game game;
public Bitmap planet;
public Form1()
{
InitializeComponent();
}
private void Form1_Load(object sender, EventArgs e)
{
//set up the form
this.Text = "Framework Demo";
//create game object
game = new Game(this, 600, 500);
//load bitmap
planet = game.LoadBitmap("planet.bmp");
if (planet == null)
{
MessageBox.Show("Error loading planet.bmp");
Environment.Exit(0);
}
//draw the bitmap
game.Device.DrawImage(planet, 10, 10);
game.Device.DrawImage(planet, 400, 10, 100, 100);
game.Update();
46 Chapter 2
n
Drawing Shapes and Bitmaps with GDI+
}
private void Form1_FormClosed(object sender, FormClosedEventArgs e)
{
//delete game object
game = null;
}
}
Eliminating any reusable source code by moving it into a support file is like
reducing a mathematical formula, rendering the new formula more powerful
than it was before. Any code that does not have to be written increases your
productivity as a programmer. So, look for every opportunity to cleanly and
effectively recycle code, but don’t reduce just for the sake of code reuse—make
sure you keep variables and functions together that belong together and don’t
mish-mash them all together.
Level Up!
This chapter gave us the ability to create a rendering system in code and bypass
the Form Designer by creating controls at runtime instead of design time. Using
this technique, we created a
PictureBox for use in rendering. We also learned
how to work with bitmaps and manipulate them in interesting ways that will be
very useful in a game. We have now learned enough about 2D graphics
programming to begin working with sprites in the next chapter!
Level Up! 47
This page intentionally left blank
Sprites and Real-Time
Animation
This chapter will show how to create a sprite using the code developed in the
previous chapter for working with bitmaps. We have a lot of ground to cover
here, and we’ll be going through it thoroughly because this is the foundation of
the Dungeon Crawler game. You will finish this chapter with a solid grasp of
sprite programming knowledge, with the ability to load a sprite sheet and draw a
sprite with timed animation. Because we want a sprite to draw transparently
over any background image in a game, we’ll also learn how to work with an
alpha channel in a bitmap image to render an image with transparency. This
chapter moves along at a pretty good clip, so you don’t want to skip ahead or
you might miss some important detail.
Here’s what we’ll cover in this chapter:
n What is a sprite?
n Sprite animation theory
n Creating a Sprite class
n Improving the Game class
n Adding a real-time game loop
n Gameplay functions
Chapter 3
49
What Is a Sprite?
The first question that often arises when the discussion of sprites comes up is,
“What is a sprite?” To answer this question simply, a sprite is a small,
transparent, animated game object that usually moves on the screen and
interacts with other sprites. You might have trees or rocks or buildings in
your game that don’t move at all, but because those objects are loaded from a
bitmap file when the game starts running, and drawn in the game separately
from the background, it is reasonable to call them sprites. There are two basic
types of sprites. One type of sprite is the “normal” sprite that I just described,
which I refer to as a dynamic sprite. This type of sprite is often called an actor in
game design theory. The other type of sprite might be called a static sprite;itis
the sort that doesn’t move or animate. A static sprite is used for scenery or
objects that the player uses (such as items that might be picked up in the game
world). This type of sprite is often called a prop.
Definition
A
sprite
is a small, transparent, animated game object that usually moves on the screen and
interacts with other sprites. There are two types of sprites: actors and props.
I’m going to treat any game entity that is loaded and drawn separately from the
background as a sprite. So, I might have a whole house, which normally would
be considered part of the background, as a sprite. I use that concept in the
sample program later in this chapter.
Figure 3.1 shows an example sprite of a dragon. The sprite is really just the
detailed pixels that you see at the center of the image, showing the dragon flying.
The sprite itself only takes up about half of the actual size of the image because
the computer only sees sprites in the shape of a rectangle. It is physically
impossible to even store a sprite without the rectangular boundary because
bitmap images are themselves rectangular. The real problem with a sprite is
what to do about all the transparent pixels that should not be shown when the
image is displayed on the screen (or rather, on the back buffer surface).
The amateur game programmer will try to draw a sprite using two loops that go
through each pixel of the sprite’s bitmap image, drawing only the solid pixels.
Here is some pseudo-code for how one might do this:
50 Chapter 3
n
Sprites and Real-Time Animation
For Y = 1 To Sprite_Height
For X = 1 to Sprite_Width
If Pixel At X,Y Is Solid Then
Draw Pixel At X,Y
End
Next X
Next Y
This pseudo-code algorithm (so named because it would not compile) goes
through each pixel of the sprite image, checking for solid pixels, which are then
drawn while transparent pixels are ignored. This draws a transparent sprite, but
it runs so slowly that the game probably won’t be playable (even on a top-of-the-
line PC).
And yet, this is the only way to draw a transparent sprite! By one method or
another, some process must check the pixels that are solid and render them. The
key here is understanding how drawing works, because this very critical and
time-consuming algorithm is quite old and has been built into the silicon of
video cards for many years now. The process of copying a transparent image
from one surface to another has been provided by video cards for decades now,
dating back to the old Windows 3.1 and “video accelerator” cards. The process is
Figure 3.1
The sprite boundary is a rectangle that encloses the sprite with transparent pixels.
What Is a Sp rite? 51
called bit block transfer or just blit for short. Because this important process is
handled by an extremely optimized and custom video chip, you don’t need to
worry about writing your own blitter for a game any longer. (Even older systems
like the Nintendo Game Boy Advance have a hardware blitter.)
The video card uses alpha blending to draw textures with a translucent effect
(which means you can see through them like a window) or with full trans-
parency. Fifty-percent translucency means that half of the light rays are blocked
and you can only see about half of the image. Zero-percent translucency is called
opaque, which is completely solid. The opposite is 100-percent translucency, or
fully transparent, which lets all light pass through. Figure 3.2 illustrates the
difference between an opaque and transparent sprite image.
When an image needs to be drawn with transparency, we call the transparent
color a color key, and the process of alpha blending causes that particular pixel
color to be completely blended with the background. At the same time, no other
pixels in the texture are affected by alpha blending, and the result is a
transparent sprite. Color key transparency is not often used today because it’s
a pain. A better way to handle transparency is with an alpha channel and a file
format that supports it such as tga or png. (Note: bmp files do not support an
alpha channel.)
How Visual C# Handles Pathnames
A path is a complete description of a directory location. Consider a file with an absolute path, as in
the following example:
C:\Program Files\Microsoft Visual Studio 8\Common7\IDE\devenv.exe
Figure 3.2
The sprite on the right is drawn without the transparent pixels.
52 Chapter 3
n
Sprites and Real-Time Animation
The filename is located at the end, “devenv.exe,” while the path to this filename is everything else
in front of the filename. The complete “path” to a file can be described in this absolute format.
The problem is, Visual C# compiles programs into a subdirectory under your project directory called
bin
. Inside bin, depending on whether you’re building the Debug or Rele ase version of your
program, there will be a folder called bin\Debug or bin\Release. You need to put all of your game’s
asset files (bitmaps, waves, etc.) inside this folder in order for it to run. You would not want to
store your game’s files inside the main folder of the project because when it runs (inside bin\Debug,
for instance) it will not know where the files are located, and the program will crash.
You can hard-code the path into your game (like C:\Game), but this is a bad idea because then
anyone who tries to play your game will have to create the exact same directory that you did when
you created the game. Instead, put your artwork and other game resources inside bin\Debug while
working on your game. When your game is finished and ready for release, then copy all of the files
together into a new folder with the executable.
Animating a Sprite
After you have written a few games, you’ll most likely find that many of the
sprites in your games have similar behaviors, to the point of predictability. For
instance, if you have sprites that just move around within the boun daries of the
screen and wrap from one edge to the other, you can create a subroutine to
produce this sprite behavior on call. Simply use that subroutine when you
update the sprite’s position. If you find that a lot of your sprites are doing other
predictable movements, it is really helpful to create many different behavioral
subroutines to control their actions.
This is just one simple example of a very primitive behavior (staying within the
boundary of the screen), but you can create very complex behaviors by writing
subroutines that cause sprites to react to other sprites or to the player, for
instance, in different ways. You might have some behavior subroutines that
cause a sprite to chase the player, or run away from the player, or attack the
player. The possibilities are truly limited only by your imagination, and,
generally, the most enjoyable games use movement patterns that the player
can learn while playing. The Sprite demo program in this chapter demonstrates
sprite movement as well as animation, so you may refer to that program for an
example of how the sprite movement code is used.
Animating a Sprite 53