office 2010 All-in-One For Dummies phần 10 pdf
Bạn đang xem bản rút gọn của tài liệu. Xem và tải ngay bản đầy đủ của tài liệu tại đây (2.1 MB, 81 trang )
Chapter 6: Automating Tasks
with Macros
In This Chapter
✓ Understanding what a macro is
✓ Displaying and hiding the Developer tab
✓ Examining macro security issues
✓ Recording, running, and editing a macro
✓ Placing a macro button on the Quick Access toolbar
T
his brief chapter explains how macros can make your work a little
easier. I describe how to display the Developer tab on the Ribbon,
record a macro, run a macro, and edit a macro. I also look into macro
security issues and show you how to place a macro button on the Quick
Access toolbar.
What Is a Macro?
A macro is a set of command instructions recorded under a name. When you
activate a macro, the program you’re working in carries out the instructions
in the macro. Macros help automate repetitive and complex tasks. Instead
of entering commands yourself, the macro does it for you — and it enters
the commands faster and more efficiently. Instead of reaching into several
dialog boxes to get a task done, you can run a macro and let it do the work.
Not that you necessarily need to know it, but playing a macro involves
running command sequences in Visual Basic for Applications (VBA), a
programming language built into all the major Office 2010 applications.
Behind the scenes, the application you’re working in executes VBA code
when you run a macro.
Displaying the Developer Tab
Before you can run a macro or do anything in the wonderful world of
macros, you must display the Developer tab. Figure 6-1 shows the Developer
tab in PowerPoint. Follow these steps to display or remove this tab:
54_497487-bk08ch06.indd 70954_497487-bk08ch06.indd 709 3/25/10 8:46 PM3/25/10 8:46 PM
710
Managing the Macro Security Problem
Figure 6-1:
The
Developer
tab (in
PowerPoint).
1. On the File tab, choose Options.
You see the Options dialog box.
2. Go to the Customize Ribbon category.
3. On the right side of the dialog box, select the Developer check box.
4. Click OK.
Managing the Macro Security Problem
A macro is a little (and sometimes not so little) computer program in its own
right. As such, macros can contain computer viruses. When you run a macro
in a PowerPoint presentation, Word document, Excel workbook, or any other
file, you run the risk of infecting your computer with a virus.
To help protect you against macro viruses, Office gives you the opportunity
to decide how you want to handle files that contain macros. You can disable
all macros, disable some macros, or enable all macros. (If you’re working in
an office on a network, the network administrator may have decided for you
whether you can run macro files on your computer. Network administrators
can disable all files that contain macros.)
Follow these steps to tell Office how you want to handle macros:
1. On the Developer tab, click the Macro Security button.
You see the Macro Settings category of the Trust Center dialog box, as
shown in Figure 6-2.
2. Under Macro Settings, declare how you want to handle Office files
that contain macros.
Your choices are as follows:
• Disable All Macros without Notification: You can’t run macros, and
moreover, you’re not alerted to the fact that your file contains
macros or given the opportunity to enable the macros.
54_497487-bk08ch06.indd 71054_497487-bk08ch06.indd 710 3/25/10 8:46 PM3/25/10 8:46 PM
Book VIII
Chapter 6
Automating Tasks
with Macros
711
Managing the Macro Security Problem
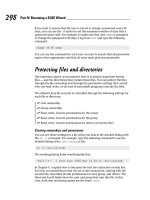
• Disable All Macros with Notification: When you open a file with
macros, you see the panel shown in Figure 6-3. It tells you that
macros have been disabled, but gives you the opportunity to enable
the macros by clicking the Enable Content button.
• Disable All Macros Except Digitally Signed Macros: You can run only
macros that have been certified with a digital signature. Developers
can apply for digital signatures that deem their macros safe to run.
When you open a file with digitally signed macros, a dialog box tells
you who developed the macros and gives you the opportunity to
decide whether you want to allow them. However, you can’t run
macros that don’t have a digital signature.
• Enable All Macros: You can run all macros, no matter where they
came from and who made them. Choosing this option is a risky
proposition. Choose it only if you get Office files from people or
parties you know and trust.
3. Click OK.
Figure 6-2:
Choosing
how to
handle
macro
security.
Figure 6-3:
Choose
whether to
run macros.
Excel, PowerPoint, and Word files that contain macros have a file extension
that ends in the letter m (the m stands for “macro”). Excel files have the
extension .xlsm, PowerPoint files the extension .pptm, and Word files
the extension .docm. Even if you disable macros, you can glance at a file’s
extension letters to tell whether it includes macros.
54_497487-bk08ch06.indd 71154_497487-bk08ch06.indd 711 3/25/10 8:46 PM3/25/10 8:46 PM
712
Recording a Macro
Recording a Macro
Recording a macro in an Office application is a matter of turning on the
Macro Recorder and giving commands. The Macro Recorder is modeled
after a tape recorder. You turn on the recorder, choose commands, and
turn the thing off. Following are ground rules and instructions for recording
macros.
Unless you want to construct them on your own using VBA code, you can’t
record your own macros in PowerPoint, Outlook, or Publisher. (You can
record macros in Word, Excel, and Access.) To make use of macros in
PowerPoint, Outlook, or Publisher, you have to obtain them from a devel-
oper or have them already in your files.
Enabling your files for macros
To record macros, you must make sure that the file in which you record
them is macro enabled. Macro-enabled files have file extensions that end
in m (the m stands for “macro”). Excel files have the extension .xlsm,
PowerPoint files the extension .pptm, and Word files the extension .docm.
Follow these steps to macro-enable a file so that you can record and run
macros in it:
1. On the File tab, choose Save As.
2. In the Save As dialog box, open the Save As Type drop-down list and
choose the macro-enable option.
For example, to macro-enable a Word document, choose Word Macro-
Enabled Document (*.docm).
3. Click the Save button.
Ground rules for recording macros
Before you record a macro, observe these ground rules:
✦ Plan ahead. If the actions you intend to record in the macro are complex,
write them down beforehand so that you can execute the commands
without making any mistakes.
✦ Set up the program the way it will be when you play back the macro.
Before creating a macro that manipulates information in a worksheet,
for example, open a worksheet that is typical of the kind of worksheet
on which you’ll run the macro. Unless you prepare yourself this way,
you may have to pause the Macro Recorder (you can do that in Word)
as you record, or you may have to edit the macro in the Visual Basic
Editor later.
54_497487-bk08ch06.indd 71254_497487-bk08ch06.indd 712 3/25/10 8:46 PM3/25/10 8:46 PM
Book VIII
Chapter 6
Automating Tasks
with Macros
713
Recording a Macro
✦ Toggle commands that you can switch on and off have no place in
macros because when the macro starts running, the Macro Recorder
can’t tell whether the command is on or off.
✦ Close open files that might get in the way. For example, before creating
a macro that copies information from one file to another, close any open
files that might confuse the issue.
✦ If you intend to include a Find or a Find-and-Replace operation in a Word
macro, open the Find dialog box in Word before you start recording the
macro, click the More button, and then click Cancel. This way, you can
get to all the find-and-replace options when you open the dialog box as
part of recording the macro.
✦ In Excel, click the Use Relative References button on the Developer tab if
you want to record cell references as relative, not absolute, references.
Recording the macro
Having read and followed the ground rules, follow these steps to record a
macro in Word or Excel:
1. On the Developer tab, click the Record Macro button.
The Record Macro dialog box, shown in Figure 6-4, opens.
Figure 6-4:
The Macro
Recorder
dialog box in
Word (left)
and Excel
(right).
If you can’t find the Record Macro button, chances are an administrator
removed it to prevent you from using or recording macros. Depending
on which version of Windows you have, administrators can remove
all macro and VBA functionality from Office by not installing the VBA
component, or they can install the component but prevent individuals
from accessing macros and VBA.
2. In the Macro Name text box, enter a name for your macro.
Macro names can be 80 characters long, must begin with a letter, and
can include numbers and underscores. Blank spaces, symbols, and
punctuation are not allowed in macro names.
54_497487-bk08ch06.indd 71354_497487-bk08ch06.indd 713 3/25/10 8:46 PM3/25/10 8:46 PM
714
Recording a Macro
3. If you so desire, assign a toolbar button or keyboard shortcut to the
macro.
In Word, you can click the Button or the Keyboard icon and assign a
button or keyboard shortcut for activating the macro. Later in this
chapter, “Running a Macro from a Button on the Quick Access Toolbar”
explains how to put a macro on the Quick Access toolbar. Chapter 1 of
this mini-book explains how to assign a keyboard shortcut to a Word
macro.
In Excel, you can assign a Ctrl+key combination to a macro by entering a
key in the Ctrl+ text box.
4. In the Store Macro In drop-down list, decide where to store the macro
you’re about to record.
In Word, you can store macros in the document you’re working on,
the template the document is attached to, or the Normal template (the
global template that’s always loaded). Store a macro with a template if
you’d like to be able to run the macro in all documents you create with
your template.
In Excel, you can store macros in the workbook you’re working on
(choose the This Workbook menu item), a new workbook, or the
Personal.Macro Workbook. The Personal.Macro Workbook is designed
expressly for storing macros. It is created automatically the first
time you choose Personal.Macro Workbook. The workbook is called
Personal.xlsb, and it’s stored in this folder if your machine runs
Windows 7 or Windows Vista:
C:\Users\Your Name\AppData\Roaming\Microsoft\Excel\XLStart
The Personal.xlsb workbook is stored in this folder if your machine
runs Windows XP:
C:\Documents and Settings\Your Name\Application Data\Microsoft\Excel\
XLSTART
5. In the Description text box, enter a concise description of what the
macro does.
6. Click OK.
The Record Macro dialog box closes.
7. Perform the actions you want to record in the macro.
The Macro Recorder records every action you take, but it doesn’t
record actions in real time. Take your time when recording a macro.
Concentrate on taking the actions in the right order so that you don’t
need to adjust the code afterward.
Word offers the Pause Recording button. You can click it to suspend
recording. Click it again to resume recording.
54_497487-bk08ch06.indd 71454_497487-bk08ch06.indd 714 3/25/10 8:46 PM3/25/10 8:46 PM
Book VIII
Chapter 6
Automating Tasks
with Macros
715
Running a Macro
Avoid using the mouse as you record a macro (although you can use
it to open menus and select menu commands). The Macro Recorder
interprets some mouse actions ambiguously. Select data by using key
presses. (In Excel, you can select cells with the mouse because the
Macro Recorder is able to recognize cell addresses.)
When you visit a dialog box as part of recording your macro, take into
account all the dialog box settings. For example, if you visit the Font
dialog box and choose 12 points on the Font Size drop-down list, the
Macro Recorder duly records the 12-point font size, but it also records
the Times Roman font in the macro if Times Roman happens to be the
font that is chosen in the Font dialog box. The moral: Take account of all
the settings in a dialog box when you visit it while recording a macro.
In dialog boxes with tabs, you can’t click tabs to switch from tab to tab
and choose commands. Instead, click OK to close the dialog box, reopen
it, click a different tab, choose a command on the tab, and close the
dialog box again.
8. Click the Stop Recording button.
That’s all she wrote — your macro is recorded. I suggest you test it to
see how well it runs.
To delete a macro, click the Macros button on the Developer or View tab,
and in the Macros dialog box, select the macro you want to delete and then
click the Delete button.
Running a Macro
Before you run a macro, take note of where the cursor is located. The macro
may require the cursor to be in a certain place to run properly. Follow these
steps to run a macro:
1. On the Developer or View tab, click the Macros button (or press
Alt+F8).
The Macro dialog box, shown in Figure 6-5, appears.
2. Select the macro that you want to run.
Macros have cryptic names, but you can usually tell what they do by
glancing at their descriptions.
If you don’t see the macro you want, make a new selection in the Macro
In drop-down list.
3. Click the Run button.
54_497487-bk08ch06.indd 71554_497487-bk08ch06.indd 715 3/25/10 8:46 PM3/25/10 8:46 PM
716
Editing a Macro
If your macro is a long one and you need to stop it from running, press
Ctrl+Break. (On most keyboards, the Break key is located along with the
Pause key on the right side of the keyboard, to the right of the F12 key.)
Figure 6-5:
The Macro
dialog box.
Editing a Macro
Editing a macro entails opening the Visual Basic Editor and editing
Visual Basic codes, which is not for the faint of heart. If your macro is an
uncomplicated one, you’re better off re-recording it. This book isn’t a
developer’s guide, so it can’t go into the details of using the Visual Basic
Editor. However, the following pages explain the basics of reading a macro
in the Visual Basic Editor, deleting parts of a macro, and editing the text in
a macro.
Follow these steps to view a macro in the Visual Basic Editor:
1. On the Developer tab, click the Macros button (or press Alt+F8).
You see the Macro dialog box (refer to Figure 6-5).
2. Select the name of the macro that needs editing.
3. Click the Edit button.
You see the Visual Basic window, as shown in Figure 6-6.
4. Choose File➪Save (or press Ctrl+S) after you finish editing your macro.
Macro names appear in the Procedure box on the right side of the window.
Those computer codes in the Code window are scary, aren’t they? You can
find one line of code for each command in your macro. Edit computer codes
the same way that you edit text in a Word document. For example, click
to the left of a line to select it and then press Delete to delete a line. Or type
in the Code window to add commands or change the text that the macro
enters in documents.
54_497487-bk08ch06.indd 71654_497487-bk08ch06.indd 716 3/25/10 8:46 PM3/25/10 8:46 PM
Book VIII
Chapter 6
Automating Tasks
with Macros
717
Editing a Macro
Figure 6-6:
Edit macros
in the Visual
Basic Editor
window.
Reading a macro in the Code window
Before you can do any editing in the Visual Basic Editor, you have to know
how to read the codes in the Code window. Observe these attributes of the
Code window:
✦ Sub and End Sub line: A macro begins with the Sub line and ends with
the End Sub line.
✦ Apostrophes (’) at the beginning of lines: Lines that begin with an
apostrophe (’) are descriptive comments and aren’t part of the macro
except insofar as they help you understand what it does. Notice, for
example, that the description line (the one you wrote before recording
the macro) near the top of the macro appears after an apostrophe. Enter
blank lines and lines of commentary to make macros easier to read and
understand.
✦ Text enclosed in double quotation marks (”): Text that is typed in as
part of the macro is enclosed in double quotation marks (”). If you need
to edit the text in your macro, edit the text inside double quotation
marks.
✦ With and End With lines: Codes that pertain to choices made in a dialog
box begin with the With line and end with the End With line.
54_497487-bk08ch06.indd 71754_497487-bk08ch06.indd 717 3/25/10 8:46 PM3/25/10 8:46 PM
718
Running a Macro from a Button on the Quick Access Toolbar
✦ All dialog box options are recorded: Even if you select only a single
option in a dialog box, the macro records all the options in the dialog
box. A visit to the Font dialog box, for example, adds more than 20 lines
to a macro, one for every option in the dialog box. However, you can
edit out lines that your macro does not require.
Editing the text that a macro enters
As I mention earlier, text that is typed during a macro procedure is enclosed
in double quotation marks (”) in the Code window. To edit the text in a
macro, you can edit the text between double quotation marks in the Code
window. Edit this text as though you were editing it in Word.
Deleting parts of a macro
Delete part of a macro when you want to remove a command or command
sequence. For that matter, you may delete parts of a macro if they are
unnecessary. Deleting unnecessary lines makes a macro easier to read and
run faster. As I mention in the preceding section of this chapter, a visit to a
dialog box, such as the Font dialog box, adds many lines to a macro, most of
which are unnecessary. Your macro requires only the lines that pertain to
changing settings.
To delete part of a macro, delete the lines as though they were text in a
Word document: Click or click and drag in the left margin and then press the
Delete key.
Running a Macro from a Button
on the Quick Access Toolbar
Any macro that you run often is a candidate for the Quick Access toolbar. As
Chapter 1 of this mini-book explains, you can place your own buttons on the
Quick Access toolbar and move the toolbar below the Ribbon as well. Follow
these steps to assign a macro to a button and place the button on the Quick
Access toolbar:
1. Right-click any button or tab and choose Customize Quick Access
Toolbar on the shortcut menu.
You see the Quick Access Toolbar category of the Options dialog box.
2. In the Choose Commands From drop-down list, choose Macros (you
can find it near the top of the list).
The cryptic names of macros in your file appear in the dialog box.
54_497487-bk08ch06.indd 71854_497487-bk08ch06.indd 718 3/25/10 8:46 PM3/25/10 8:46 PM
Book VIII
Chapter 6
Automating Tasks
with Macros
719
Running a Macro from a Button on the Quick Access Toolbar
3. Select the macro you want to assign to a button and click the Add
button.
The macro’s name appears in the right side of the dialog box alongside
the names of buttons already on the Quick Access toolbar.
4. Make sure that your macro is still selected and click the Modify button.
The Modify Button dialog box appears. It offers symbols you can place
on your macro button.
5. Select a symbol and click OK.
6. Click OK in the Options dialog box.
A button representing your macro appears on the Quick Access toolbar.
You can click this button to run your macro. If you want to remove the
button, right-click it and choose Remove from Quick Access Toolbar.
54_497487-bk08ch06.indd 71954_497487-bk08ch06.indd 719 3/25/10 8:46 PM3/25/10 8:46 PM
720
Book VIII: Office 2010: One Step Beyond
54_497487-bk08ch06.indd 72054_497487-bk08ch06.indd 720 3/25/10 8:46 PM3/25/10 8:46 PM
Chapter 7: Linking and Embedding
in Compound Files
In This Chapter
✓ Understanding what object linking and embedding (OLE) is
✓ Linking to foreign data in another file
✓ Embedding foreign data in a file
A
compound file is a computer file that brings together data created
in different programs. A year-end report is a classic example of a
compound file. Typically, a year-end report includes word-processed text,
worksheet tables, and graphics. Thanks to object linking and embedding
(OLE), you can create compound files. They can include data from differ-
ent sources — Excel worksheets, Word text, or Paint graphic files. What’s
better, you can copy and continuously update material from other programs
without leaving the Office 2010 program you’re working in.
All this magic is accomplished with something called object linking and
embedding (OLE). This chapter explains OLE, tells you how to embed data
from another file, and explains how to link data from another file so that
your files are updated automatically.
By the way, OLE is pronounced the same as olé (“oh-lay”), which is the word
that the bullfighting audience shouts when the bull passes under the matador’s
cape. ¿Loco, verdad?
What Is OLE, Anyway?
Object linking and embedding (OLE) is a means of putting more than one
program to work on the same file. You can think of OLE as a high-powered
version of the standby Copy and Paste commands. As you probably know,
the Copy and Paste commands are for copying material from one place or
program to another. For example, with the Copy and Paste commands, you
can copy text from an Excel worksheet into a Word document. You can
copy columns and rows from a Word table and paste them straight into a
PowerPoint table.
55_497487-bk08ch07.indd 72155_497487-bk08ch07.indd 721 3/25/10 8:44 PM3/25/10 8:44 PM
722
What Is OLE, Anyway?
Linking and embedding
Object linking takes the copy-and-paste concept a step further. When you
copy text from a Word document to a PowerPoint slide, you can link the
Word file and PowerPoint slide so that changes made to the Word text are
made as well to the same text on your PowerPoint slide. In effect, linking
means that you can run the Copy and Paste commands in the background
without having to actually choose Copy or Paste. Linking establishes a
connection between the two objects, in this case the text in the Word
document and the text in the PowerPoint slide, so that the one automatically
updates the other.
Similarly, embedding enables you to keep, or embed, foreign data from
another program in the file you’re working on. The program you’re working in
understands that the data is foreign. When you click the data, the program’s
tabs and buttons disappear to be replaced by tabs and buttons belonging
to the program designed to handle the data. For example, when you click
an Excel worksheet embedded in a Word document, you see Excel tabs and
buttons for handling the worksheet data. In effect, you can open a second
program inside the first program and use the second program to create data
without having to copy the data from the second program. The object — the
Word document or Excel worksheet — isn’t connected to another file but is
contained within the file.
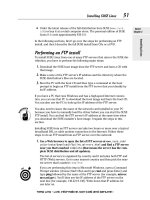
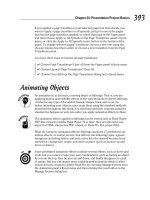
Figure 7-1 shows an Excel worksheet embedded in a PowerPoint slide. Notice
the Excel tabs and buttons in the window. The tabs and buttons are at the
ready. After you finish using them, you can click outside the embedded
object — you can click outside the Excel worksheet — and go back to using
the PowerPoint tabs and buttons. Although the table data was made in
Excel, it looks like a PowerPoint table. Embedding an object spares you from
having to open a different program, construct material there, and copy it
into the file you’re working on.
A linked object is a little bit different from an embedded object. In the linked
relationship, the program you’re currently using shouts out to the program
where the material was created to find out whether the material was edited
or altered in any way. If the material was updated, you can tell Office to
gather the updated material and incorporate it into your current file. Linking
is an opportunity for you to keep your files up-to-date. You can fold the work
that you or a co-worker did to the original file into your file without having
to go outside the program you’re using, and then copying and pasting it.
Uses for linking
Linking was designed to let files dynamically share information. The object —
the Excel worksheet or Word file, for example — remains connected to its
source. As the source file is updated, the files to which it is linked can be
updated, too.
55_497487-bk08ch07.indd 72255_497487-bk08ch07.indd 722 3/25/10 8:44 PM3/25/10 8:44 PM
Book VIII
Chapter 7
Linking and
Embedding in
Compound Files
723
What Is OLE, Anyway?
Figure 7-1:
An Excel
worksheet
embedded
in a
PowerPoint
slide.
Linking saves you the trouble of updating files that often change. Co-workers
can maintain a library of source files and use them to update the files to
which the source files are linked. Here are some examples of object linking
coming in handy:
✦ Your PowerPoint presentation contains sales data, and you want the
data to be up-to-date. You create a link to the Excel worksheet where the
sales data is stored so that your PowerPoint slide remains up-to-date as
sales data changes.
✦ A co-worker has created an Excel worksheet with demographic data that
often changes. In your Word report, you create a link to your co-worker’s
worksheet so that demographic data appears in your report and is
always up-to-date.
✦ Your company maintains a Word file with a list of branch office
addresses and telephone numbers, and you want this list to be available
to employees. You link your Word file to the company’s Word file. Your
address and telephone list document stays up-to-date as addresses and
telephone numbers change.
55_497487-bk08ch07.indd 72355_497487-bk08ch07.indd 723 3/25/10 8:44 PM3/25/10 8:44 PM
724
Linking to Data in a Source File
Uses for embedding
Embedding enables you to work inside an Office program on data that the
program isn’t equipped to handle or display. Embed an Excel worksheet in
a Word document if you want to have a table with complex mathematical
formulas. Embed a Word document in an Excel worksheet if you want to
write paragraphs of explanatory text and be able to call upon Word formatting
commands. Consider embedding an object if you want to attempt something
that you can’t normally do in the program you’re working in.
Pitfalls of linking and embedding
Linking and embedding aren’t for everybody. Here are some OLE pitfalls:
✦ File size: Including embedded objects in a file makes the file grow in
size — and I mean really grow. A large file can be unwieldy and hard to
store. It takes longer to load on-screen. By linking, you solve the file-size
problem because the item has to be stored only once — in its original
location.
✦ Carrying charges: Links are broken if you move your file or you or
someone else moves a file to which your file is linked. A file with links
can’t be sent over the Internet or copied to a laptop without the links
being broken. Linking is out of the question in the case of files that
travel to other computers. If you link to files over a network, establish a
scheme for storing files with your co-workers so that files aren’t moved
inadvertently.
✦ Formatting embedded and linked objects: Unfortunately, linked and
embedded objects are often hard to format. Selecting the same fonts and
colors as the fonts and colors in your file can be difficult because you
have to rely on the commands in the source file to do the formatting.
The end result is that linked and embedded objects sometimes look out
of place.
Before you undertake any activity regarding object linking and embedding,
save the file you’re working on. The program with which you’re working
needs to know precisely where OLE objects go in order to execute OLE
commands. Therefore, your file must be completely up-to-date for OLE
commands to work.
Linking to Data in a Source File
Link a slide, document, or worksheet to another file so that changes made to
the other file are made automatically to your slide, document, or worksheet.
Earlier in this chapter, “Uses for linking” explains the benefits of linking to
another file. These pages explain how to establish the link between your files,
how to update the link, how to break a link, and how to mend broken links.
55_497487-bk08ch07.indd 72455_497487-bk08ch07.indd 724 3/25/10 8:44 PM3/25/10 8:44 PM
Book VIII
Chapter 7
Linking and
Embedding in
Compound Files
725
Linking to Data in a Source File
Links are broken when files are renamed or moved to different folders.
Linking files is more trouble than it’s worth if you often move or rename
files. Very carefully create or choose folders for storing linked files so that
you don’t have to move them.
Before you link one file to another, save the file you’re working on. Your
program needs to know precisely where OLE objects go in order to execute
OLE commands. Therefore, your file must be completely up-to-date — and
saved — for OLE commands to work.
Establishing the link
For the purposes of linking, the original file with the data you will link to
is the source. Follow these steps to establish a link between your file and
the source file so that your file can be updated whenever the source file is
changed:
1. Open the source file with the data that you’ll link to your file.
2. Select the data you need and copy it to the Windows Clipboard.
You can do that by right-clicking and choosing Copy or pressing Ctrl+C.
3. Click in the file where you want the linked data to appear.
4. Click the Save button.
As I explain earlier, all files must be saved and up-to-date for links to be
successfully made.
5. On the Home tab, establish the link between the source file and
your file.
How you do this depends on the Office program you are working in. Do
one of the following:
• Link and use styles: Open the drop-down list on the Paste button
and choose Link & Use Destination Styles on the drop-down list.
You can also choose Link & Keep Source Formatting in the unlikely
event that you want the text formatting in the source file to be
retained in your file.
• Paste Special dialog box: Open the drop-down list on the Paste button
and choose Paste Special. You see the Paste Special dialog box.
If you’re pasting data between different programs as well as different
files, the Paste Special dialog box has an As list that shows what kind
of data is being transferred. Make sure that the correct option is
chosen in the As list and click OK in the Paste Special dialog box.
If you’re pasting data between files created in the same program,
the Paste Special dialog box offers options for choosing whether to
copy formats and other things. For example, to copy data between
Excel worksheets, you can copy the formulas or values only. Choose
options and click the Paste Link button.
55_497487-bk08ch07.indd 72555_497487-bk08ch07.indd 725 3/25/10 8:44 PM3/25/10 8:44 PM
726
Linking to Data in a Source File
6. Save your file by clicking the Save button.
Congratulations. The link is established.
In some Office programs, you can open the source file from inside your
file by right-clicking the linked data and choosing Linked Object➪Open (or
Open Link). The Linked Object command is named for the kind of data being
linked. For example, if the link is to an Excel worksheet, the command is
called Linked Worksheet Object.
To change the size of a linked object, click it, move the pointer over a
selection handle, and drag. To move a linked object, move the pointer over
the object and drag when you see a four-headed arrow. (To be able to move
an object in Word, go to the Page Layout tab, click the Wrap Text button,
and choose an option other than In Line with Text on the drop-down list.)
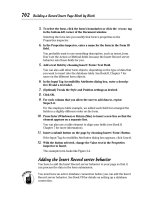
Updating a link
Each time you open a file with data linked to a source file, the program
you’re working in asks whether you want to update your file from the source
file, as shown in Figure 7-2. Click the Yes, Update, or Update Links button in
the dialog box to get new, up-to-the-minute data from the source file.
In some Office programs, you can update a link after you open a file. To do
so, right-click the linked data and choose Update Link on the shortcut menu.
Figure 7-2:
Click Yes,
Update,
or Update
Links to
update your
file from the
source file.
55_497487-bk08ch07.indd 72655_497487-bk08ch07.indd 726 3/25/10 8:44 PM3/25/10 8:44 PM
Book VIII
Chapter 7
Linking and
Embedding in
Compound Files
727
Linking to Data in a Source File
Editing data in the source file
Suppose, while staring at the linked data in your file, you notice something
wrong. The numbers in the table aren’t accurate. There’s a misspelling in the
list. In some Office programs, you can open the source file and edit the data:
1. Right-click the linked data and choose Linked Object➪Edit (if the
linked data is in an Office program) or Linked Object➪Open (if the
linked data is not in an Office program).
The program in which the source file was created and the source file
itself open.
2. Edit the data in the source file.
Changes you make are transferred immediately from the source file to
your file.
3. Click the Save button in the source file to save the editorial changes
you made there.
When you return to your file, you see the changes you made.
Converting a linked object to an embedded object
As the start of this chapter explains in torturous detail, “embedded object”
is Microsoft’s term for data in a file that you create and manipulate with a
program other than the one you are working in. In a Word document, for
example, you can embed Excel data in a file and be able to edit the Excel
data without leaving Word.
Suppose that the linked data in a file would serve you better if it were
embedded. Rather than go to the source file to edit the data, you can put the
data in your file by embedding it. For these occasions, convert your linked
object into an embedded object by following these steps:
1. Right-click the linked data and choose Linked Object➪Convert.
The Convert dialog box, shown in Figure 7-3, appears.
2. Select the Convert To option.
3. If necessary, select what type of data you are dealing with in the list.
4. Click OK.
There is a drawback to converting a linked object to an embedded
object. The link to the source is broken, and you can no longer update
the data from its original source.
55_497487-bk08ch07.indd 72755_497487-bk08ch07.indd 727 3/25/10 8:44 PM3/25/10 8:44 PM
728
Embedding Data from Other Programs
Figure 7-3:
Converting a
linked to an
embedded
object.
Embedding Data from Other Programs
By embedding data, you can enter and edit foreign data without leaving
the program you’re working in. An Excel worksheet, for example, can be
embedded on a PowerPoint slide (refer to Figure 7-1) When you double-click
the embedded object, the computer program with which it was created
opens so that you can start editing.
Embedding foreign data
How you embed data that is foreign to the program you’re working in
depends on whether the data has already been created. You can get a
head start embedding data if you or someone else has already created it.
Following are instructions for embedding an object so that you can enter the
data on your own and embedding data that has already been created.
Creating an embedded object from scratch
Create an embedded object from scratch if the data you need hasn’t been
created yet. Follow these steps:
1. Go to the Insert tab.
If your aim is to create an Excel table, click the Table button, choose
Excel Spreadsheet, and be done with it.
2. Click the Object button.
You see the Object (or Insert Object) dialog box, as shown on the left
side of Figure 7-4.
3. Click the Create New option tab (or option button).
4. In the Object Type list, choose the name of the program that handles
the kind of data you want to embed.
For example, to insert a space for Word text, choose Microsoft Word
Document.
55_497487-bk08ch07.indd 72855_497487-bk08ch07.indd 728 3/25/10 8:44 PM3/25/10 8:44 PM
Book VIII
Chapter 7
Linking and
Embedding in
Compound Files
729
Embedding Data from Other Programs
Figure 7-4:
Creating
space for
embedding
data
(left) and
embedding
an entire file
(right).
5. Click OK.
Where your program’s tabs and buttons used to be, you see different
tabs and buttons. Use them to create and edit data.
Click outside the data when you finish working on it.
Embedding data that has already been created
If the data you want to embed has been created already in another program,
you can embed the data in your file by following these steps:
1. Open the file with the data you want to embed.
Open the file in the program with which it was created.
2. Copy the portion of the file you want to embed with the Copy command.
Select the data, right-click, and choose Copy in the shortcut menu.
3. Return to the program where you want to embed the data.
4. Go to the Home tab.
5. Open the drop-down list on the Paste button and choose Paste Special.
You see the Paste Special dialog box, as shown in Figure 7-5.
6. Select the Paste option button.
7. In the As list, choose an option with the word Object in its name.
Which options appear in the list depends on which type of object you’re
embedding. The options without Object in their names are for pasting
the data in picture format.
8. Click OK.
The data lands in your file.
55_497487-bk08ch07.indd 72955_497487-bk08ch07.indd 729 3/25/10 8:44 PM3/25/10 8:44 PM
730
Embedding Data from Other Programs
Figure 7-5:
Choose the
program
where the
embedded
data comes
from.
Embedding an entire file
You can embed an entire file in the file you’re working on by following these
steps:
1. In the Insert tab, click the Object button.
You see the Object (or Insert Object) dialog box.
2. Select the Create from File tab (or option button).
You see the version of the Object (or Insert Object) dialog box, as shown
on the right side of Figure 7-4 (shown previously).
3. Click the Browse button.
The Browse dialog box opens.
4. Select the file you want to embed in your file and click OK (or Insert).
5. Click OK in the Object (or Insert Object) dialog box.
That’s all there is to it.
Editing embedded data
To edit an embedded object, double-click it. Where your program’s tabs and
buttons used to be, you see a new set of tab and buttons — ones belonging
to the program normally used to edit the type of object you’re editing. When
you finish editing the foreign data, click outside it.
To change the look of embedded data, right-click it and choose Format
Object. Then choose formatting commands in the Format Object dialog box.
The techniques for changing the size and position of embedded objects are
the same as the techniques for resizing and repositioning shapes, graphics,
clip-art images, and other objects (Book I, Chapter 8 enumerates these
techniques). To reposition an embedded object, move the pointer onto its
perimeter and drag. To resize an embedded object, move the pointer over a
selection handle and then drag.
55_497487-bk08ch07.indd 73055_497487-bk08ch07.indd 730 3/25/10 8:44 PM3/25/10 8:44 PM
Chapter 8: Office Web Apps
In This Chapter
✓ Understanding how online applications work
✓ Understanding how the Office Web Apps work
✓ Signing up with Windows Live
✓ Going to the SkyDrive window
✓ Handling SkyDrive folders and files
✓ Working on Office Web App files
✓ Collaborating on and sharing files with others
T
his chapter looks into Office Web Apps, the online versions of Word,
Excel, PowerPoint, and OneNote. Respectively, these applications are
called Word Web App, Excel Web App, PowerPoint Web App, and OneNote
Web App. Anyone can use these applications. You don’t have to install
Office 2010 or pay a fee of any kind. All you need is an Internet connec-
tion and an account with Windows Live. Moreover, users of the Office Web
Apps can collaborate online with one another to create Word documents,
Excel worksheets, PowerPoint presentations, and OneNote notebooks. As
long as both of you are connected to the Internet, you and a colleague can
work together on the same file simultaneously, even if one of you is in the
Bugunda Kingdom and the other is in Uzbekistan.
Introducing Online Applications
The notion of using online applications takes some getting used to, but like it
or not, you’ll have to get used to it because soon the majority of applications
will be online applications. These pages explain how online applications work
and the advantages and disadvantages of using Office Web Apps and other
online applications.
A new concept
Here’s a computing concept that’s in your future: In the years ahead, the
personal computer as we know it will become obsolete and most computing
activity will take place over the Internet. Rather than store files on the hard
drive of your computer, you will store files on a Web server on the Internet.
Rather than install and run programs on your computer, you will run pro-
grams that someone else installed for you on a Web server. To work on a file,
you’ll take these steps:
56_497487-bk08ch08.indd 73156_497487-bk08ch08.indd 731 3/25/10 8:44 PM3/25/10 8:44 PM
732
1. Open your Web browser.
For example, open Internet Explorer or Firefox.
2. Go to the Web site where your files are stored.
3. Submit your password to the Web site.
As a security measure, you submit a password to identify yourself and
prevent others from seeing or editing your files.
4. Open an online application on the Web site.
Online applications look and work like the applications you use today on
your personal computer. The difference is that online application soft-
ware is installed on and run from a server on a Web site, not from a hard
drive on a computer.
5. Locate the folder where you store the file you want to work on.
On the Web site, files are kept in folders. The folders look and work just
like the folders on a personal computer.
6. Open the file and get to work using the commands you see in your
browser window.
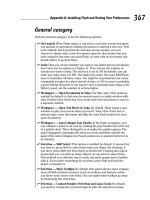
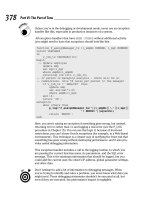
Does computing online and running online applications seem like science
fiction? If it does, have a look at Figure 8-1. This figure shows an Excel work-
sheet called “Project01” inside a Web browser window. Notice the Ribbon
and the familiar commands on the Home tab. What you’re looking at is the
Excel Web App, the online version of Excel. The Office Web Apps are online
applications that you run by way of your browser from a Web site, working
with files that you keep on the Web site.
Figure 8-1:
The Excel
Web App,
the online
version of
Excel.
Introducing Online Applications
56_497487-bk08ch08.indd 73256_497487-bk08ch08.indd 732 3/25/10 8:44 PM3/25/10 8:44 PM
Book VIII
Chapter 8
Office Web Apps
733
Advantages and disadvantages
of online applications
Online applications are the wave of the future because the advantages of
online applications are too good to pass up. Online applications are easier to
install and maintain than traditional software. If you work in an office, you’ve
had the experience of having to leave your desk while a technician installs
new software or upgrades software on your computer. A technician doesn’t
have to visit computers throughout an office to install or upgrade an online
application because online applications are installed in a single location — a
Web server. As soon as a technician installs or upgrades an online applica-
tion on the server, it becomes available to all the people who connect to the
server to do their computing.
Online applications also make computing possible wherever you can find
an Internet connection. You don’t have to be in your office or your home
or even carry your laptop with you. From a hotel room or friend’s house,
you can open a Web browser, connect to the Web site where your files are
stored, and get to work. And because your files are kept in one place, not on
one or more computers, you don’t have to copy files between computers or
wonder whether you’re working on the most current file.
Storing files on a server frees you from having to back up files. Technicians
back up files on the Web server, and if a file is corrupted and needs restor-
ing, they can restore the file. Most people are not very good about backing
up their files. Giving this onerous task to a technician is very nice indeed.
Another advantage of online applications, at least in the case of the Office
Web Apps, is being able to work collaboratively. Because files are stored
online where everyone who has permission can access them, more than one
person can work on the same file simultaneously. For example, co-workers
in various cities can go online and make last-minute changes to a PowerPoint
presentation without having to endure a frantic conference call or pass the
presentation around by e-mail.
With so many advantages to online applications, why would anyone not use
them? In a word, the answer is privacy. Breaking into files stored on a Web
server on the Internet is easier than breaking into files stored on a hard
drive behind a firewall. Keeping files on a Web server — especially a server
owned and maintained by a company that isn’t your own — makes many
people nervous.
Compared to Office 2010, the Office Web Apps present another disadvan-
tage. Word Web App, Excel Web App, PowerPoint Web App, and OneNote
Web App are stripped-down versions of Word, Excel, PowerPoint, and
OneNote. The Office Web Apps don’t have nearly as many features or ameni-
ties as their Office 2010 counterparts.
Introducing Online Applications
56_497487-bk08ch08.indd 73356_497487-bk08ch08.indd 733 3/25/10 8:44 PM3/25/10 8:44 PM