filemaker pro 11 the missing manual phần 5 docx
Bạn đang xem bản rút gọn của tài liệu. Xem và tải ngay bản đầy đủ của tài liệu tại đây (1.34 MB, 91 trang )
340
FM P : T M M
Creating Layouts for
Printing
6. Click OK.
If your printer’s driver software hogs up even more margin space, then you see
a warning message, but it doesn’t tell you which margin setting is too narrow.
Tweak the margins until the warning no longer appears. The Layout Setup dia-
log box disappears, and you’re looking at your layout again. If you have sharp
eyes, then you notice the page width has shrunk a bit, as shown in Figure 7-52.
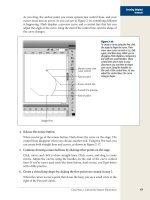
Figure 7-52:
The page break line (circled) shows
where your layout cuts off when printed.
You can now fill up your layout any way
you choose, confident that it’ll all print
properly on anybody’s printer.
Tip: If you like working in pixels and don’t want the bother of switching units, take heart. You can prob-
ably do the math in your head even faster. Remember, you have 72 pixels per inch: A one-inch margin
would be 72 pixels, and a half-inch margin would be 36. (If you like centimeters, then figure 28 pixels per
centimeter.)
Now that you’ve fixed the usable space on the layout, you can rearrange the fields so
that they fit nicely in the available width.
Columns
Occasionally your printed page needs to spread records across several columns. For
example, when you print on address label sheets, the sheets you buy usually have
two or three columns of labels on one page. Even when printing a List or Detail
layout, if your data’s narrow, then you can save paper by printing two records side by
side. FileMaker has a built-in solution to just this problem: Choose Layout➝Layout
Setup, switch to the Printing tab, and then turn on the “Print in” checkbox. When
you do, you can tell FileMaker how many columns you want by typing a number in
the little entry box by the checkbox. When you turn on column printing for a layout,
FileMaker shows you what’s going on in Layout mode, as Figure 7-53 shows.
341
:
Creating Layouts for
Printing
Figure 7-53:
Top: FileMaker draws a dashed line through
your layout to show you where the columns
land. It also covers every column but the first
with a dotted pattern. This pattern is its way of
saying, “Don’t expect anything you put here
to print.” Since every column is identical, you
just have to lay out the first. FileMaker repeats
it for the rest.
Bottom: With the layout set to print in two col-
umns, everything comes together in Preview
mode or when you print.
The column setting has no effect on your layout in Browse or Find modes. But if you
print or switch to Preview mode, then you see the effect. Instead of repeating the
Body part just vertically, FileMaker tiles the Body part both horizontally and verti-
cally so that it fills the page.
Every column has to be the same width (this makes sense because every column
contains the same kind of information). FileMaker automatically sets the column
width so that the columns perfectly divide the page. But it bases its assumptions
about the size of the page on the settings in the Print Setup (Windows) or the Page
342
FM P : T M M
Creating Layouts for
Printing
Setup (Mac OS X) dialog box at the time you turn on columns. If you later switch to a
different paper size or orientation, then you probably want to resize the columns. To
do so, just drag the first (leftmost) dashed line on the layout. When you finish, File-
Maker makes every column the same width as the first one, with no space between
them. (You can always simulate padding or a gutter between columns by keeping the
things you add to your layout away from the column edges.)
Lastly, FileMaker gives you two choices for the way it arranges records in the col-
umns. Choose “Across first” in the Layout Setup dialog box if you want the second
record to be at the top of the second column. Choose “Down first” if it should be the
second item in the first column. The flow arrows on the icons in the Layout Setup
dialog box show how the data flows onto the printout.
Sliding Layout Objects
Suppose you want to add the Notes field to the printed report so you can use it on
the road. You know enough already to get the job done. Make the Body part a little
taller, and then use the Field tool to add the Notes field to the layout. When you’re
done, your layout might look like Figure 7-54.
Figure 7-54:
Here’s how you might add the Notes
field to your layout. It lives below
a row of data, and it’s italicized to
make it visually distinct from the
other fields. Of course you can make
it look any way you want.
If you preview this report, though, then you quickly spot a problem. Figure 7-55
shows the trouble.
Normally, a field on the layout takes up a fixed amount of space, no matter how
much (or how little) data is inside. You might be tempted to try to fix this with a
merge field, but that doesn’t help here because no matter how tiny the text gets, the
Body part is still just as tall as ever. You need some way for everything on the layout
to slide up if the Notes field isn’t full. Luckily, FileMaker’s Inspector has the answer in
the form of the Position tab’s Sliding & Visibility section.
343
:
Creating Layouts for
Printing
Figure 7-55:
When you preview the report, you quickly
see that your nice compact printout is now
very space-inefficient. The Notes field is
often empty, or holds just a line of text, but
FileMaker reserves lots of space for it just in
case. Also, if you have lots of notes in one
record, then the field may not be big enough,
so the text is cut off. But if you make the field
even bigger, then you just waste more space.
Sliding layout objects are the solution.
When to use sliding
Usually the normal field behavior doesn’t cause a problem. After all, you may want
that empty space because you’re printing onto a preprinted form, and everything
needs to go in just the right spot on the page, or maybe your report design counts
on consistent field sizes so things line up properly. But sometimes you can’t get the
effect you want without adjusting the layout based on the amount of data—usually
when you’re trying to tighten things up on the printed page to avoid wasted paper or
excessive spacing around data.
Sliding does three things to help in this situation. First, it lets fields shrink to just the
right size for their data. After a field has shrunk, any object on the layout can slide
up or to the left to fill the space left behind.
Choosing the objects to slide
Object sliding in FileMaker is notoriously hard to figure out. It’s a bit like that board
game Go. The rules take a minute to learn but a lifetime to master. Here goes.
344
FM P : T M M
Creating Layouts for
Printing
FREQUENTLY ASKED QUESTION
Merge Fields vs. Sliding
Why should I bother with sliding? Isn’t that what merge
fields are for?
It’s true that merge fields and sliding objects have some
things in common. Both adjust the data shown on a layout,
squeezing things together in the process. But they have
some major differences:
• Merge fields work everywhere, even in Browse mode.
Sliding objects, on the other hand, have no effect on
Browse mode (or Find mode). Instead, they do their
thing only in Preview mode and when printing.
• Any object on a layout, including pictures, can slide.
You can’t incorporate pictures into merge fields.
• Fields that slide act just like normal fields in Browse
mode, in that you can edit the data in them. Merge
fields are just text objects, and only for display.
Bearing all these differences in mind, you can easily figure
out which method to use. If you have a few fields that you
want to display as a single block of text, then use merge
fields. If your needs are more complex (incorporating
graphics, for instance), or you need to be able to edit data
on the layout, then use sliding objects instead.
Also, there’s absolutely nothing wrong with using both on
one layout. In fact, the layout you just created could use
merge fields for the name and address, along with the
sliding to the Notes field. You can even tell a text object
containing merge fields to slide if you want.
Sliding exists for only one reason: to compensate for changing field data. Therefore,
unless you set at least one field to shrink, nothing on the layout moves. Unfortunately,
you can’t explicitly set a field to shrink. Instead, you set it to slide—and FileMaker
makes sure it shrinks too. This seemingly simple principle is guaranteed to confuse
you at least 36 times in the near future. You’ve been warned. Figure 7-56 shows how
this field-shrinking business works.
Once you’ve figured out which fields should shrink to fit their contents, you need
to decide which objects should slide. What does that mean exactly? Normally, when
you add an object to a layout, you specify exactly where it goes. But when the object
is set to slide, its position is no longer fixed at an exact spot on the layout.
Instead, it moves up (or to the left) if other objects above it (or to the left of it) move
or shrink.
Setting sliding options
Once you have a general idea of which elements need to slide (and which fields have
to shrink accordingly), you can start telling FileMaker.
Here’s how to fix up your Report layout:
1. Select the Notes field, click the Inspector’s Position tab, and then locate the
Sliding & Visibility section.
345
:
Creating Layouts for
Printing
Figure 7-56:
Top: The thick black line is set to slide up and close the empty space
below the text, but clearly it’s not.
Bottom: After the field is also configured to slide up, it shrinks to be
just tall enough for its contents and the black line can now slide up.
2. Turn on the “Sliding up based on” checkbox.
If you stop here, you don’t quite have your problem solved. Even though the
Notes field shrinks as much as possible, the Body part itself doesn’t shrink, and
your report still wastes paper. To solve this problem, turn on “Also reduce the
size of the enclosing part”.
3. Click OK.
If you view your report now, things should look much better. Figure 7-57 agrees.
Note: Once you start adding sliding to your layout, you might have trouble keeping track of which objects
do what. To ease the pain, choose View➝Show➝Sliding Objects. When you do, FileMaker adds little
up-pointing and/or left-pointing arrows to each object that slides. Now you can see at a glance what goes
where.
346
FM P : T M M
Creating Layouts for
Printing
Figure 7-57:
With the Notes field set to slide up, your lay-
out can now show long or short notes without
wasting space. (In this picture, the layout
arrangement has been improved from the
one in Figure 7-55 to make things look more
pleasing to the eye. You can do the same with
your own layouts.)
More Sliding & Visibility options
The Inspector’s Sliding & Visibility section has several options to control just how
the selected objects slide (and shrink if appropriate). In general, an object can slide
left, up, or both.
If you want something to just slide left, you’re in luck. Simply turn on the “Sliding
left” checkbox, and you’re done. When you print or preview the layout, the objects
slide to the left when field data isn’t long enough to fill the full width of the field.
Objects that slide up, on the other hand, need a little more thought. To start, turn
on the “Sliding up based on” checkbox. When you turn this checkbox on, you make
three more options available. The “All above” and “Only directly above” radio but-
tons are hard to explain. Figure 7-58, however, is worth a thousand words about
sliding up.
347
:
Creating Layouts for
Printing
Figure 7-58:
Top: Everything on this layout is “above”
the Do Not Contact checkbox. But for the
purposes of sliding, only two count. From
FileMaker’s perspective, the Address field is
directly above it, while the Phone field is sim-
ply above it. If the Address field and the Do
Not Contact checkbox are both set to slide
up, then the “All above” or “Only directly
above” choice becomes important.
Middle: If you choose “All above”, then the
checkbox never slides because the Phone
field doesn’t.
Bottom: If you choose “Only directly above”,
then it sticks with the Address field, even if
that means sliding up alongside the Phone
field.
Finally, if you turn on “Also reduce the size of the enclosing part”, then the part the
object is on shrinks to fit its contents. Be sure to test and retest your layout. If you set
a field to slide up and reduce the size of the enclosing part, all the layout objects be-
low it have to be set to slide up too. If you don’t, the sliding object will indeed shrink,
but the non-sliding objects below will obstinately hold their ground and you’ll sim-
ply end up with a gap between them.
Be cautious when sliding up based on “All above”. “All above” includes items to the
right of the vertical page break. When previewing and printing, FileMaker ignores
layout items to the right of the vertical page break, So it’s a handy spot to put on-
screen notes or instructions that you don’t need printed. But no matter how far to the
348
FM P : T M M
Creating Layouts for
Printing
right you place an object, it’s still above any objects further down the printable area.
In other words, a layout object off to the right that by definition can’t be printed, can
still prevent an object from sliding past it. The simplest solution is to slide based on
“Only directly above”.
One more Sliding & Visibility option is pretty self-explanatory. If you turn on “Do
not print the selected objects”, then every object you select before you open the dia-
log box disappears in Preview mode and when printing. This option is handy for
things like navigation buttons that shouldn’t show up on the printed page, or back-
ground graphics that would waste ink.
349
Understanding
Calculations
W
hen you learned about tables, fields, and relationships in the previous
chapters, you dabbled in FileMaker’s calculation dialog box. Most people
first encounter the Specify Calculation window when they’re creating a
calculation field, so it’s easy to think that’s the only place it’s used. True, writing for-
mulas for calculation fields is probably the most common use of FileMaker’s calcula-
tion engine (that’s the fancy name for the code that handles math for your database),
but it’s far from the only use, as you’ll see later in this chapter.
No matter where you run into the Specify Calculation window, it works the same
way. You use that window’s field list, operators and predefined functions to tell the
calculation how to find the value you need. This chapter tells you how the basic
concept works.
While calculations can make your database total invoices, analyze trends, and cal-
culate dates and times, they aren’t limited to number-crunching tasks. You can use
them to find out about the computer your database is running on, track who’s logged
into the system, monitor their privileges, and then perform logical tests based on
what you find. You’ll start by learning how FileMaker handles calculations, and then
you’ll see how some common functions can take your database up to a new level of
power.
Understanding Calculations
Way back on page 131, you saw how to create a field that’s defined as a calculation.
A calculation is a mathematical formula that manipulates the information in your
database to give you the answers you need. For example, for a line item on an In-
voice, you need to multiply the price of an item by the quantity to get an extended
350
FM P : T M M
Understanding
Calculations
price. To hand that task over to FileMaker, you create a calculation field, and then
write a formula that refers to the appropriate fields by name. FileMaker takes the
information in the invoice fields, and does the math.
Note: The exercises in this chapter refer to the Jobs database from this book’s Missing CD page at www.
missingmanuals.com.
FileMaker calculations can also do more than math. For starters, you can do cal-
culations on time, date, timestamp, container, and text fields, too. (See the box on
page 352 for an example.) Calculation fields work just like any other FileMaker field,
except that you can’t type data into them. The calculations you give them determine
what data they show. If you change the data a calculation refers to, you see FileMaker
update the data automatically. Figure 8-1 shows where calculation fields can benefit
your Invoice layout.
Figure 8-1:
Without calculations, you have to manually
calculate the extended price for each line item
by multiplying the quantity times the price. And
then, if the quantity changes, you have to visit
your calculator again. But with calculation fields,
the database does the math as soon as there’s
data in the fields the calculation refers to. Here
the Extended Price field multiplies Price Each by
Quantity (249 * 3 = 747). Plus, if data in either
field changes, FileMaker updates the Extended
Price automatically.
Total due
Extended Price
You can use a calculation field just like any other field: Put it on a layout, use it in
Find mode, and even use it in other calculation fields. But as a calculation field, its
value always stays up-to-date automatically.
It’s the fact that they change, yet update automatically that makes calculations useful
for so many tasks. For example, you can use a calculation with the Records➝Replace
Field Contents command (see page 380). Instead of replacing the data in every re-
cord with the same value, a calculation can produce a unique value for each record.
In the Manage Database dialog box, you can start using the Auto-Enter Calculation
and Validation Calculation field options, making those features much more power-
ful. Scripts, as you’ll learn in Chapter 10, use calculations in many of their script
steps. Here are some other places you can use the Specify Calculation dialog box:
351
:
Understanding
Calculations
• Auto-enter field options let you put a calculated result in a field when someone
creates a record or edits data (page 240).
• Field validation uses calculations to make sure the data entered in a field con-
forms to rules you set up (page 248).
• Portal filtering lets you show only some related records in a portal (page 567).
For example, you can filter a portal so it only shows invoices with the status
“Unpaid” or another portal could show only jobs.
• The Send Mail command can create email addresses or concatenate the body
of an email (page 437).
• Chart titles, labels, and even x- and y-axes can be calculated (page 624).
• Tooltips can use calculations to change what’s displayed in the tooltip (page
329). For example, you can show a list of related data, like the number of items
remaining in inventory, or the Totals of all Invoices for a specific customer.
• Conditional formatting lets you apply logic to objects on a layout to change the
way they look (page 618). On an invoice layout, for example, you can display the
Total Due field in a bold red font if the invoice is more than 30 days overdue.
• Scripts let you use calculations to change the way script steps work. You can
test conditions, create dynamic data, or even take different actions based on the
results of calculations. Chapter 10 introduces you to scripts.
• The Data Viewer lets you preview your calculations without making a fake field
or destroying a perfectly good calculation that needs tweaking. (You need File-
Maker Pro Advanced to use the Data Viewer; see page 521.)
• Accounts & Privileges can use calculations to limit access to tables, records, and
fields. Chapter 18 tells you how to use calculations for tighter database security.
Creating a Calculation
As the Jobs database now stands, when you add line items to an invoice, you have to
type the quantity and price for each item. Then you have to multiply them together
to get the extended price, and then you have to type the result. In this section, you’ll
learn how to tell FileMaker to do that all work for you, using a calculation that names
your fields and uses computer shorthand to do the math:
1. In the Jobs database, choose File➝Manage Database, and then make sure
you’re on the Fields tab. From the Table pop-up menu, choose Line Items.
That’s the table with your Extended Price field in it.
2. In the field list, select the Extended Price field. From the Type pop-up menu,
choose Calculation, and then click Change.
FileMaker warns you that when it converts the field, it changes (read: over-
writes) any information already in the field. See Figure 8-2.
352
FM P : T M M
Understanding
Calculations
Figure 8-2:
This warning is serious. Your new calculation overwrites existing
data when you close the Manage Database window. But you’re
safe until you click OK. If you change your mind and don’t want
the calculation after all, just click Cancel instead, and you get the
chance to discard all the changes you’ve made in the dialog box.
FREQUENTLY ASKED QUESTION
Text Calculations?
Aren’t calculations just for numbers?
Many people see the Manage Database window’s Calcula-
tion field type and assume it’s for numbers. Too bad, because
calculations can do all this:
• Calculations can pick apart text and put it together in
different ways (on page 613, you’ll use a calculation
to make a web address that links to a customer’s ad-
dress map). You can even modify fonts, sizes, colors,
and styles (turn every occurrence of the word “credit”
to bold text, for instance).
• You can do math on dates, times, and timestamps.
You can find out how old someone is based on his
birth date, figure out how long you worked on a job,
or see which payment came first.
• If you’ve stored a reference to a file in a container
field, then you can use a calculation to retrieve the
path to the original file.
You can even convert one kind of value into another when
you use calculations. For example, if you have a text field
that contains “12/29/2011”, then you can use a calculation
to turn that date into a proper date value.
They’re so useful that if you have a problem to solve, a
calculation is likely to form at least part of the solution.
3. Click OK.
The Specify Calculation dialog box appears, as shown in Figure 8-3.
4. In the Calculation box, type Price Each * Quantity.
You’ve just added a brand-new calculation that multiplies the contents of the
Price Each by the contents of the Quantity field. The “*” is the same symbol you
see on your computer’s keypad, and it means multiply. See page 359 for details
on other symbols (or operators) used for math.
353
:
Understanding
Calculations
Figure 8-3:
Any time you create
or edit a calculation,
you see a window just
like this one. You have
lots of tools here, all
focused on helping
you create a calcula-
tion. You’ll learn
how to use all these
options in the rest of
this chapter. And now
that you recognize the
Specify Calculation
dialog box, you’ll start
seeing it everywhere:
scripts, conditional
formatting, accounts
& privileges, and even
custom menus.
Field List Operators
Table
pop-up
Context
pop-up
Functions
pop-up
Function
list
A calculation Result type
pop-up
Note: Although case doesn’t matter, spelling and spacing do: You have to match the exact name of the
fields you want FileMaker to handle.
5. In the Manage Database window, click OK until all windows are closed.
You’re back where you started.
Tip: If FileMaker complains about not being able to find a field when you click OK, check the spelling of
your field names. And if you hate to type, you can double-click the fields in your field list instead of typing.
Switch to the Invoices layout, and then add a line item. You see that the Extended
Price field updates automatically once there’s a value in both the fields you referred
to in the calculation (Price Each and Quantity).
354
FM P : T M M
The Structure of a
Calculation
The Structure of a Calculation
If you accidentally mistyped or misspelled a field name in the example in the pre-
vious section, you already know that FileMaker is picky about how you create a
calculation. Syntax—the order of elements and punctuation—is critical when you’re
creating calculations. So before you learn more tricks, this section outlines common
calculation terms and rules of thumb.
Note: Calculations are often called calcs for short, or formulas. Although some slight differences exist
between a calculation and a formula, people usually use the terms interchangeably. Sometimes, a formula
is so useful or common that FileMaker defines it as a reusable formula, also known as a function (see
page 362).
In the next examples, don’t focus on what the example calculation does. You’ll get to
that. Right now, focus on structure. A calculation can be short and simple:
Pi * Diameter
Or it can be more complicated:
Case ( Shape = "Circle" ; Pi * (Diameter/2) ^ 2 ;
Shape = "Rectangle" ; ShapeLength * Width ;
)
Note: FileMaker doesn’t let you give a field the same name as an existing function. The field contain-
ing the length of a rectangular object has the unwieldy name “ShapeLength” to avoid confusion with
FileMaker’s Length() function. The field name “Width” is fine, because there’s no width function.
In fact, calculations can be really long and complicated if you need them to be—up
to 30,000 characters. Practically speaking, the only limit on the complexity of a cal-
culation is your patience for creating it.
Regardless of its complexity, a calculation, or formula, is made up of three different
elements: field references, constants, and operators. In the first example above, “Pi”
is a constant, “*” is an operator, and “Diameter” is the name of a field. The second
example uses a function, called a “case statement.” In that example, “Shape” and “Di-
ameter” are field references, “Circle” and “2” are constants, and “=,” “*,” and “^” are
operators.
Field references tell the calculation engine where to find the values it’ll be working
on. When the calculation is performed or evaluated, first the field references are re-
placed with the actual values in those fields, then the operators tell FileMaker what
to do to those values, and finally, FileMaker returns a result in your field.
355
:
The Structure of a
Calculation
Note: FileMaker uses the value stored in (not displayed in) a field. So if you have a number field with
3.1415926 as the stored value, but you’ve formatted the field on the layout to display only two decimal
places, FileMaker still uses all the digits in the stored value to do its math. If you don’t want to use all those
digits past the decimal place, use the round function (see page 386).
Here are some helpful definitions of terms you’ll see throughout the next chapters:
• Field references are just what they sound like. They refer FileMaker to the data
in the field you specify. Since the data inside those fields can change on each
record in your database, the values in each record can give a different result.
• Constants stay the same each time FileMaker does the calculation. Turn the
page for details.
• Operators tell FileMaker what to do with the values in the calculation. See page
357 for a listing of operators and what they do.
• FileMaker has more than 180 defined functions that you can use as shortcuts
when you create your formulas. You learn about some of the most common
functions later in this chapter. Chapter 15 introduces you to more advanced
functions, and shows you how to create your own reusable functions, called
custom functions.
• Each calculation has a result. This result is, in a sense, the “answer” to the calcu-
lation. The result of the first calculation above is the circumference of the circle.
The second calculation is a little more complex: Its result is the area of a circle
or a rectangle, depending on the value in the Shape field. (Don’t worry if this
calculation doesn’t make sense to you now. It will before too long.)
• The result of a calculation has a type (just like every field has a type). The type
can be any of the standard field types—text, number, date, time, timestamp,
or container—or a Boolean (page 644). Chapter 9 goes into more detail about
calculations and data types.
Note: Sometimes people call a Boolean value “True or False” or “One or Zero” instead. Which term you
use doesn’t matter much if you just remember that there’s a yes-like value and a no-like value. See page
644 for more on Boolean values.
Using Fields in Calculations
It’s very common to reference fields in calculations. For example, let’s say a field has
this calculation:
First Name & ″ ″ & Last Name
356
FM P : T M M
The Structure of a
Calculation
POWER USERS’ CLINIC
Evaluating Calculations: Now or Later
When you use a calculation, you’re asking FileMaker to
do something with your fields, constants, and operators
and come up with a result. In technical lingo, FileMaker
evaluates the calculation. When the evaluation takes place
depends on where in your database FileMaker encounters
the calculation. Sometimes FileMaker evaluates right away,
as when you’re calculating an Extended Price. As soon as
you type either a price or a quantity, FileMaker tries to mul-
tiply the value. But since one of the fields is empty, the
Extended Price calculation has a result of zero (because
any value times zero equals zero). When you provide the
second value, FileMaker immediately does the math and
shows you your result:
• If you create a new calculation field after you already
have data in your database, then FileMaker updates
the data when you close the Manage Database dialog
box. You may see a progress bar if you have a slower
computer and a lot of records.
• When you run the Records➝Replace Field Contents
command, FileMaker evaluates the calculation you
specify once for every record as soon as you click
OK. As above, this may take a couple seconds, but
it’s happening just as soon as FileMaker can plow
through your found set.
• Validation calculations evaluate whenever you
change the field, or exit the record (you get to de-
cide). See page 377 for more on these.
• Calculations used in scripts are evaluated when the
script runs.
Note: See page 116 to learn how to use this calculation to show data from more than one field in a value
list.
When FileMaker evaluates the calculation, it replaces the First Name and Last Name
field names with the person’s first and last names from a given record. The field type
determines the calculation’s automatic result type: A number field has a number
value, a text field has a text value, and so forth. On page 372 you’ll learn how to
change the automatic result type.
Using Constants in Calculations
As handy as it is to refer FileMaker to a field to find the values in your calculations,
you don’t want to have to store everything in fields just to use it in a calculation.
When a value is going to be the same for every record, it’s time to call in a constant.
You simply include that value right in the calculation.
Number constants
Sales tax is one of the most common constants. If you need to add sales tax to your
order, you can just type the percentage right in the calculation, since it’s the same
for everybody:
Order Total * 1.0625
357
:
The Structure of a
Calculation
You can enter numbers in any of the formats supported by number fields:
• 37
• .65
• 28.3
• 6.02E23
Text constants
You can also use a constant to have FileMaker plunk some text in with your results.
If you want a text value instead of a number, put it in quotes:
Age & " years old"
Everything within the quote marks is a text constant (some people call it a string as
in “string of characters”). Those quote marks in the calculation are very important.
Suppose you have a field called First Name, and a calculation like this:
"This is my First Name"
The quote marks enclose the text that is also a field name, so the result of this calculation is
always (constantly) “This is my First Name”. FileMaker makes no connection what-
soever between the First Name field and the words “First Name” in the text, because
the text is in quote marks.
Forgetting quote marks around a text string, or putting them in the wrong place, can
make FileMaker whiny. If you make the following calculation:
"This is" my First Name.
FileMaker shows you a warning message that says, “The specified field cannot be
found”, when you try to click OK to close the Manage Database dialog box (Figure
8-4). The characters “my First Name” are highlighted in your calculation so you
can tell exactly which part of the calculation confuses FileMaker. Move your quotes
appropriately, and FileMaker stops telling you that it can’t find your field reference.
Here’s the correct formula:
"This is my " & First Name
Using Operators in Calculations
The power of calculations comes from their ability to combine various values to
come up with a new and meaningful value. Here’s where operators come in. An
operator takes the values on either side of it (the operands) and does something (op-
erates) with them.
A special symbol or word stands for each operator. This calculation uses the + (ad-
dition) operator:
3 + 2
In this case, the + operator is given 3 and 2 as operands. When the calculation evalu-
ates, the operator and its operands combine to produce a single value.
358
FM P : T M M
The Structure of a
Calculation
Figure 8-4:
When you click OK,
FileMaker tries to
evaluate your calcula-
tion. If it finds any
part of the text that
seems like it should
be a field name, but
there’s no field with
that name, then
you see this error
message. Notice
that in the window
behind the warning,
FileMaker highlights
the part of your
calculation it doesn’t
understand.
Sometimes you’ve
made a typing error,
but sometimes the
field you want is in
another table.
Operators come in three flavors:
• Mathematical and logical operators combine two values into one. The + opera-
tor is a good example; it takes two number values, and adds them together. Its
resulting value is the sum of the two numbers.
• Comparison operators compare two values. For example, the = operator tells
you if two values are exactly the same. This kind of operator always produces a
Boolean value.
• Parenthesis operators are used to group parts of a calculation together.
Remember your eighth grade math teacher carrying on about the “order of
operations”? (Working from left to right multiplication and division first, and
then addition and subtraction) FileMaker remembers, too, and it uses those
same rules to figure out how to evaluate calculations. If the rules don’t work for
you, then parentheses let you take more control.
359
:
The Structure of a
Calculation
Note: Two buttons in the Specify Calculation window’s Operators section aren’t really operators at all. The
¶ is a special character that tells FileMaker you want a new line in your calculation result, and the quote
marks are for entering text values. See the box below to learn how to use quotes inside text.
FREQUENTLY ASKED QUESTION
Quotes in Quotes
You’re saying that I should use quote marks to incorporate
a word or a phrase into the results of a calculation. But
what if I want to put a quote mark inside my text?
You’re out of luck. No, just kidding. Just put a backslash
(\) in front of the quote mark, and FileMaker pretends it
doesn’t exist when it analyzes your calculation. When a
quote is preceded with a backslash, you say it’s escaped,
and \ is called the escape character: When you put the
escape character in front of another character, it tells File-
Maker to ignore any special meaning that character might
have and treat it as ordinary text. It looks like this:
"Then Joseph Adama says, \"Balance it
out.\" That's when I got hooked on Ca-
prica."
This calculation is just one long text constant. The two
quote marks inside it are escaped.
If you’re a real troublemaker, then your next question is,
“What if I want to put a real backslash and quote mark
inside my text constant?”
Luckily, that’s easy, too. Just escape the backslash, and then
escape the quote:
"I really want this: \\\" inside my text"
This calculation evaluates to:
I really want this: \" inside my text
Mathematical operators
A calculation’s most obvious use is to do a little math, so you’ll use these opera-
tors often. Maybe your database of products includes fields for dimensions (Length,
Width, and Height), and you want to know the volume. This calculation does the
trick:
Length * Width * Height
It consists of three field values and two copies of the * (multiplication) operator. The
result is just what you’d get if you used a calculator to multiply the three field values
together.
FileMaker includes operators for basic math:
• + for addition
• – for subtraction
• * for multiplication
• / for division
• ^ for exponentiation (“to the power of ” a value)
360
FM P : T M M
The Structure of a
Calculation
The concatenation operator
While the mathematical operators combine numbers, the “&” (concatenation) op-
erator works with text. It hooks together two text values:
Length & " inches"
If the Length field contains 36, then the result of this calculation is 36 inches.
Tip: FileMaker can mix numeric values and text together in the same calculation. If you use a number
value or field where FileMaker is expecting text, then it just converts the number into text, and gets on
with its business.
Comparison operators
You often need to compare two values to learn about them. For example, you may
need to add an additional shipping charge if the total weight of an order is more than
20 pounds. All comparison operators result in a Boolean value (page 644).
FileMaker can compare things in several ways:
• = tells you if two values are the same.
• ≠ or <> tells you if the two values are different.
• > tells you if the first value is bigger than the second.
• < tells you if the first value is smaller than the second.
• ≥ or >= tells you if the first value is bigger than or equal to the second.
• ≤ or <= tells you if the first value is smaller than or equal to the second.
Logical operators
The logical operators evaluate values and come up with a Boolean (Yes/No) result
(page 644). Unlike the other operators, most of them are recognizable words:
• The and operator tells you if both values are Yes. The calculation below uses the
and operator. It evaluates to Yes if the length is more than 3 and the height is
more than 5.
Length > 3 and Height > 5
• The or operator tells you if either value is Yes. The or calculation below evaluates
to Yes if the length is more than 3 or the height is more than 5.
Length > 3 or Height > 5
• The xor operator’s function is as offbeat as its name. It stands for exclusive or.
The xor operator tells you when only one of your two choices is Yes. Put another
way, if you find yourself thinking, “I want one of two things to be true, but
not both of them,” then xor saves the day. For instance, you may want to track
361
:
The Structure of a
Calculation
whether you’ve billed a customer or you’ve marked her character rating below
3. That formula looks like this:
Invoice Sent = Yes xor Character Rating < 3
Note: If you can’t think of a use for xor, don’t worry. Most of the time when you need an “or” calculation,
you can handle it with plain old or and not exclusive or.
• The last logical operator, not, stands alone: It works only on one value, not two
like every other operator. It simply reverses the Boolean value that comes after
it. So the calculation below would evaluate to Yes if the length is not more than 3.
Not Length > 3
Note: People usually use comparison and logical operators with logical functions. Chapter 9 covers those.
The ^ operator
The last—and probably least used—operator is the exponentiation, or ^ operator.
This lets you use exponents in calcualtions:
Pi * Radius ^ 2
This calculation uses the exponentiation operator and squares the value in the Ra-
dius field.
Parentheses
FileMaker uses standard mathematical rules to decide in what order to evaluate
things. The order of evaluation is exponentiation, then multiplication/division, then
lastly addition/subtraction. If you need FileMaker to do part of your calculation first,
before moving onto any other operators, put it in parentheses. The parentheses tell
FileMaker to treat everything between them as a single unit.
In the calculation below, FileMaker multiplies 3 and 2 before adding 4, and gives you
a result of 10:
4 + 3 * 2
Even though the + operator comes first in the calculation, FileMaker follows the
order of calculation. If you want to add 4 and 3 before multiplying, you need to use
parentheses:
(4 + 3) * 2
Thus, it sees that it needs to add 4+3 first, then multiply by 2, for a result of 14. You
can see the value of parentheses in calculations like the one below, which calculates
the interest on the sum of the balance and service charge. Without the parentheses,
FileMaker would calculate the interest on only the service charge, and then add that
to the balance due, with an entirely different result:
(Balance Due + Service Charge) * Interest Rate
362
FM P : T M M
The Structure of a
Calculation
Note: If you have trouble remembering (nay, understanding) the order of calculation, then just use
parentheses when in doubt. It certainly doesn’t hurt to be too explicit.
Functions
The meat of calculations is found in the Function list (which you saw briefly back
in Figure 8-3). A function is a predefined formula, and FileMaker’s list covers most
common calculation purposes. If you find a function that already does what you
want to do—like average all invoices—use it. When you add these tried-and-true
formulas to your calculations, you save time and even help prevent errors.
For example, if you didn’t know about functions, you could find your average with a
series of fields. First, you’d need to create a calculation field to total all the invoices in
your found set. Then you’d need another field to count the invoices in the set and a
third one that divides the first field by the second. It would work, but it’d be clumsy
and inefficient, since you’ve created at least two fields that you didn’t really need.
Because you often need to find averages, FileMaker gives you a function that handles
the math in a given field. All you have to do is tell FileMaker which field you want to
average. The function takes care of figuring out the total of the found set, and how
many records you have. It looks like this:
Average ( Line Item::Quantity )
The word “Average” is the function’s name. “Line Item::Quantity” is a reference to a
related field. This field reference is called a parameter. Parameters tell the function
how to perform its specific calculation. The average function has only a single
parameter, but many functions have two or more.
Parameters are always enclosed in parentheses. (A few functions—most notably,
Random—don’t need any parameters, so you leave the parentheses off all together.)
When there’s more than one parameter, they’re separated by a semicolon, as in the
date function below:
Date ( Month ; Day ; Year )
FileMaker has almost 250 functions, divided into 16 groups, as described below.
Later in this chapter, you’ll learn how to use some of the more common functions.
(Functions come into play in Chapters 9 and 15 as well.)
Tip: FileMaker has a lengthy help file (Ctrl+? or ⌘+?) that lists each function and some sample uses. If
you want to explore a function that isn’t covered here, open Help, and then type the function’s name.
Text functions
Dozens of text functions let you work with text values. You can compare them, con-
vert them into other types (like numbers), split them up in various ways, count the
363
:
The Structure of a
Calculation
number of letters, words, or lines, change case, and replace parts of them with new
text values. If you’re trying to slice, mix, or examine words, look here first.
Text formatting functions
Text formatting functions let you adjust the font, size, style, and color of all or part of
a text value. For instance, you could make the account balance for a customer turn
red if it’s over $100. See page 618 for another way to format data conditionally.
Number functions
Number functions do everything with numbers—from the mundane (rounding)
to the esoteric (combinatorics). In between, you can get rid of the decimal part of
a number, calculate logarithms and square roots, convert signs, generate random
numbers, and perform modulo arithmetic.
Date functions
Date functions make working with dates a breeze. You can safely create date values
without worrying about the computer’s date settings. You can also pick date values
apart (for example, get just the month from a date), convert day and month numbers
into proper names, and work with weeks and fiscal years.
Time functions
Time functions are few: They create time values from hours, minutes, and seconds,
and split times up into the same parts. You use these values most frequently when
you’re trying to find out how long something took. For instance, if you bill your
services hourly, then you can create Start Time and Finish Time fields. Then, in a
Duration field, you can subtract finish time from start time to find out how long you
worked on a project.
Timestamp functions
There’s only one timestamp function: It lets you build a timestamp value from a
separate date and a time. If you’re creating your own data, then you already know
that FileMaker needs both a date and a time for a valid Timestamp field, and you’ve
planned accordingly. But you may receive data from an outside source in which the
date and time aren’t already in a single field. No problem, just use the timestamp
function.
Aggregate functions
Aggregate functions calculate statistics like average, variance, and standard deviation.
They can also count things, sum things, and find minimums and maximums. By
definition, aggregate functions gather up multiple values, and find results based on
the group as a whole. (See the box on page 364 for more detail.)
364
FM P : T M M
The Structure of a
Calculation
UP TO SPEED
Aggregate Functions
As you saw on page 363, aggregate functions work on
groups of things. They can work on multiple fields within
a record, a group of related records or even multiple func-
tions. This function helps you add up the various charges
on an invoice, using fields on the Invoice layout:
Sum ( Subtotal ; Sales Tax ; Shipping )
But since you can use an operator to get the same result
(Subtotal + Sales Tax + Shipping), this type of
use isn’t very common. More often an aggregate function
refers to a related field. In that case, FileMaker aggregates
that field’s values from every related record:
Sum ( Line Items::Extended Price )
An aggregate function can also reference a single repeating
field, either a local one or a related one. As with a reference
to a related field, a Sum function that refers to a repeating
field adds the values in every repetition into a single value.
This special behavior for related or repeating fields works
only if you use a single parameter. You can’t, for example,
sum two sets of related fields as one like this:
Sum ( Line Items::Extended Price ; Line
Items::Shipping Charge )
If you refer to more than one field in a sum function, then
it looks at only the first related value or repetition for each
field. Of course, if you do want to total two related fields,
you can do so by calling Sum twice and adding their results:
Sum ( Line Items::Extended Price ) +
Sum ( Line Items::Shipping Charge
Summary functions
You have only one summary function—GetSummary(). Its primary purpose is to let
you use the value of a summary field (page 240) in your calculations. In the olden
days, before FileMaker was the robust relational database it is now, the GetSummary()
function was the best way to sort and summarize certain kinds of data. Now that
FileMaker is relational, you usually use calculations through table occurrences (page
570) to do that work.
Repeating functions
Repeating functions work with repeating fields, and some of them work with related
fields as well. You can make nonrepeating fields and repeating fields work together
properly in calculations, access specific repeating values, or get the last non-empty
value. Since repeating fields have limited uses in these days of related tables within
files, so do these functions. However, these functions have a few valid uses, as you’ll
learn in Chapter 11.
Financial functions
Financial functions make the MBAs in the audience feel right at home. Calculate
present value, future value, net present value, and payments. Non-MBAs could cal-
culate the cost of competing loans with these functions.