Introduction to Character Animation phần 3 ppsx
Bạn đang xem bản rút gọn của tài liệu. Xem và tải ngay bản đầy đủ của tài liệu tại đây (407.31 KB, 18 trang )
BSoD/Introduction to Character Animation/Mouth and
head
From BlenderWiki
< BSoD | Introduction to Character Animation
Contents
1 Modeling the rest of the head
2 Making the inside of the mouth
3 Closing the mouth
4 Final adjustments
5 The finished face
Modeling the rest of the head
N
ow we'll finish modeling the head. It will consist of several extrusions and moving lots of vertices around.
Alt RMB to loop-select the outside edge, as in Head vertices to extrude.
E to extrude, as in Head extrusion 1.
Move vertices so they're a little closer to the same plane (Adjusting vertices).
Alt RMB to loop-select the new outside edge, and extrude this new edge as in Head extrusion 2.
Now let's do a third extrusion, but not on the whole edge. This time, select just the middle four vertices and extrude
them straight backward as in Head extrusion 3.
Switch to Rear View ( Ctrl NumPad 1 ). Adding the Ctrl to the hotkey for Front View ( NumPad 1 ) gives us
the opposite (rear) view.
Move the newly extruded vertices toward the center of the head with G . Thanks to the Mirror modifier and
Do Clipping, they can't go any farther than the center plane (Merging the back of the head). Once they get to the
center line, they snap there and essentially merge with the centerline.
Head vertices to extrude.
Head extrusion 1. Adjusting vertices.
Close off the holes by making faces: select four vertices at a time ( RMB ) and create a face out of those vertices
(
F ). See Finishing head 1, Finishing head 2, and Finishing head 3.
Making the inside of the mouth
The next step is to close up the mouth. To do that we'll have to extrude the lips inward to make a "pocket" that will form
the inside of the mouth. We'll use a new feature,
Alt B , to work on the inside of the mesh.
Switch to side view (
NumPad 3).
Clip the view by pressing Alt B and dragging a box around the lower
front part of the head,
LMB to confirm. (Clipping the view). Clipping
the view is a valuable tool for working with complex meshes. It is a way of
hiding parts of a mesh you don't need to see. It might take a little practice to
figure out how to get the view you want, but once you figure it out it's very
helpful. You can always hit
Alt B again to restore the view.
Head extrusion 2.
Head extrusion 3.
Merging the back of the
head.
Finishing the head 1.
Finishing the head 2.
Finishing the head 3.
Clipping the view.
Now rotate the view to see the inside of the head.
Loop-select the lips with Alt RMB , as in Lips selected in clipped view.
Switch to Side View in Wireframe mode ( NumPad 3 , then Z ). This is so
we can extrude backward and see how far back we're going.
Extrude the edgeloop straight back (Extruding lips backward).
Switch back to Solid mode so we can easily see the faces we're about to
make (
Z).
Starting from one end of the extruded edge loop, select four vertices at a
time and press
F to make a face out of them. Make several faces to close
off the back of the mouth, as in Closing off the back of the mouth.
Lips selected in clipped view.
Extruding lips backward.
Closing off the back of the mouth.
Make a loop-cut ( Ctrl R around the inside of the mouth, as in Loop
cutting the inside of the mouth. This will allow us to give the mouth
enclosure more volume.
Shape the inside of the mouth, as in Shaping the inside of the mouth:
Enlarge the newly loop-cut vertices
Narrow the newly created faces at the back of the mouth
Lower the back of the mouth.
Closing the mouth
Make two more loop cuts:
One on the front of the face (A loop cut on the front)
One on the inside of the mouth (Another loop cut on the inside of the mouth).
By having several vertex loops close to each other like this, the transition between face, lips, and mouth will be more
distinct.
Loop cutting the inside of the mouth.
Shaping the inside of the mouth.
A loop cut on the front.
Another loop cut on the inside of the
mouth.
N
ow we're ready to close the mouth. This is basically just grabbing vertices and moving them, but there are a couple of
things you should be aware of:
The final character is going to have the Subsurf modifer applied (it will be "subsurfed") to make it look nice and smooth.
Meshes look different depending on whether they are subsurfed or not. It's possible that the mouth might look closed with
Subsurf turned off, but once we turn on Subsurf the mouth opens a little. The trick is to make sure the mouth is closed
when the mesh is subsurfed. To do this:
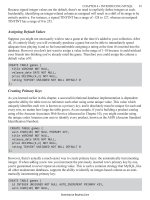
Use the Subsurf modifier buttons and apply it to the editing cage
(remember the gray circle on the right side of the Subsurf
Modifier? See Modifier stack buttons). If you don't turn on
subsurf in edit mode, you'll find that it's difficult to know when
the mouth is fully closed.
Now select vertices and start closing the mouth. As you're
closing the mouth, you'll have to move the vertices in several
edgeloops. You'll get a better shape that way.
Try to make the expression of the face "bored". We will be
forming mouth shapes and expressions later on, and it's best to
start with a face with no expressions - so no smile or frown or
anything on the shape we're building now.
The series of images below shows the progressive closing of the
mouth, with Subsurf turned on in Edit Mode. When moving the lips, I
grabbed the vertices just inside the mouth, not just the lip vertices.
First the top lip was moved down, then the bottom lip moved up, and
then the sides of the mouth were brought in a little bit.
Modifier stack buttons.
Closing the mouth 1 (Lip vertices, as
well as nearby vertices inside the
mouth, are selected.)
Closing the mouth 2 (moved the top
lip, along with the vertices just inside
the mouth, downward).
Final adjustments
Turn off Subsurf in Edit Mode, by
using the buttons in the Subsurf
Modifier. Now we can see the
underlying editing cage, as in
Subsurf modifier turned off. Note
that the upper lip of the editing cage
appears to be pulled down past the
lower lip. You can't even see some
of the lower lip vertices, because
they're covered by the upper lip.
That's OK! A subsurfed surface is always
smaller than its editing cage (picture a sheet
hanging from the vertices of the editing
cage). We want the mouth to be closed
when it's subsurfed in other words, we
want the subsurfed faces to touch each
other. In order to do that we have to overcompensate by pulling the un-subsurfed
upper lip over the lower lip vertices. By editing the mesh as we did earlier with Subsurf applied to the editing cage, we
didn't have to guess how far to pull the upper lip down. We were able to edit it directly.
N
ow with Subsurf still turned off, you can see a dark area around the upper lip. This dark area is often caused by extreme
stretching or bending of the editing cage. This often happens if you shape your mesh exclusively with Subsurf turned on.
To fix it, either add more vertices or move nearby vertices closer. Luckily, we made that loop cut a couple steps back to
give ourselves more vertices to work with.
Move the second row of vertices in the upper lip down a little (as in Fixing the extreme angles), this will smooth
out the mesh.
The finished face
Closing the mouth 3 (moved the
bottom lip upward).
Closing the mouth 4 (moved the
corners of the mouth down and
inward a little to get rid of the faint
smile).
Subsurf modifier turned off. The
upper lip appears to be pulled over
the lower lip.
Fixing the extreme angles on the
upper lip by moving nearby vertices.
The finished face looks like Finished face 1
and Finished face 2. The difference
between the two that (1) is in orthographic
view, and (2) is in perspective view. You
can switch between the views with
NumPad 5.
Orthographic view is the default view. In
orthographic view, all planes in the view
are perpendicular to each other - there's no
p
erspective, no "vanishing points", no
taking distance into account. Ortho view is
handy for when you want to transform
vertices only in one plane, when you want
to model mechanical objects, or when
you're trying to be more exact in how the
vertices are moved.
Perspective view is a "real-life" kind of view - distance is taken into account. It's also the default view for the camera, so
when you render a project the final image will be in perspective view. This view more realistic, and is useful for getting
the final shape of objects.
Don't forget to save a version with
F2 - NumPad +-Enter !
Summary:
That's it! Now you have a face with enough
geometry that you can animate facial expressions. Next, we'll
create a body for the character, before moving on to rigging and
animation. Get ready for more extruding and moving!
You can download the .blend file for the finished head here:
Media:Tutorial_head.blend
N
ext: BSoD/Introduction_to_Character_Animation/Neck_shoulders_and_arms
Previous: Face and eyes
Back to Index
Retrieved from " />This page was last modified 15:46, 27 July 2006.
Finished face 1 (Ortho view).
Finished face 2 (Perspective view).
BSoD/Introduction to Character Animation/Neck
shoulders and arms
From BlenderWiki
< BSoD | Introduction to Character Animation
Neck and shoulders
Starting from the head created in the last section of the tutorial, we'll extrude the rest of the body.
Note: In this section of the tutorial we're only worried about the
geometry: which vertices are connected to which and how many
vertices there are. So don't worry about extruding vertices
exactly as they are in the screenshots.
In the next section, there will be plenty of time for shaping the
body.
Delete the vertex shown in Delete vertex to extrude neck.
Alt RMB to loop-select the surrounding vertices, and extrude downward to form the neck as in Extrude the
neck.
Shape the neck vertices so they're more even with each other, and loop cut ( Ctrl R ) as shown in Reshape neck
and loop cut around the head. This will give us more vertices to work with when creating the shoulder.
During this tutorial we've been making many loop cuts. Most of the time, the way I know to tell you to make a loop cut is
because after some trial and error, it looks like the next couple steps are going to need some extra vertices to make things
come out correctly. For example, I tried making the shoulder without the loop cut we just made, and found it would be
difficult. So I backed up a couple steps and made the loop cut, and that's where we are now.
Delete vertex to extrude neck.
Extrude the neck.
Reshape neck and loop cut around
the head.
When you're making your own model, generally you'll try to work with the vertices you have, and then make loop cuts or
add vertices when you find you can't make the shapes you want with the vertices you have. This cuts down on
unnecessary complexity of the mesh.
Extrude the neck and shape it as in Extruding the neck and reshaping 2.
Extrude the front three vertices down, as in Extruding the chest as well as
the back three vertices (you can see them extruded in Building the shoulder
1).
Extrude the top corners of the shoulder down (Building the shoulder 1).
Extruding the neck and reshaping 2.
Extruding the chest.
Building the shoulder 1.
Make triangle faces out of the newly extruded vertices and the neighboring
vertices (Building the shoulder 2).
Extrude the bottoms of the triangles down (Building the shoulder 3).
Extrude the front middle two vertices down ('Building the shoulder 4).
Building the shoulder 2.
Building the shoulder 3.
Building the shoulder 4.
Make a quad face in the obvious spot (Building the shoulder 5).
Make a quad face on the back to close the mesh (Building the shoulder 6).
Connect the front and back below the armpit by selecting the 2 vertices and
hitting
F to make a 2-vertex face - that is, an edge (Building the shoulder
7).
Building the shoulder 5.
Building the shoulder 6.
Building the shoulder 7.
Extrude the entire bottom edge downward (Building the shoulder 8).
Loop-cut the newly created face (Building the shoulder 9).
Finally, reshape the shoulder area so that the empty hole forms the shape of
the arm (Shaping the root of the arm).
Extruding the arm
N
ext, we'll make the arm by extruding, moving, and scaling rings of vertices.
Select the ring of vertices shown in Shaping the root of the arm.
Building the shoulder 8.
Building the shoulder 9.
Shaping the root of the arm.
Extrude the vertices, move them to the right, and scale them a little.
Extrude, move, and scale for a total of 6 extrusions (Extruding the arm 1-6).
Note that we're putting an extra loop around the elbow. That will help it bend better when we start animating.
Making the hand
N
ow we'll make the hand. It'll be a simple "mitten" type hand since we're trying to keep it simple here . . .
Extrude the end of the arm several times to make the hand (Extruding the hand 1-4).
Extruding the arm 1. Extruding the arm 2. Extruding the arm 3.
Extruding the arm 4. Extruding the arm 5. Extruding the arm 6.
Extruding the hand 1. Extruding the hand 2.
Extruding the hand 3. Extruding the hand 4.
Widen the hand ( NumPad 7 for top view, S to scale, Y to constrain
scale axis), as in Widening the hand from top view.
Close off the end of the hand with faces ( F, Closing off the hand).
Now spend some time shaping the
hand. I prefer to turn Subsurf on in
Edit Mode when doing this kind of
work.
While you're shaping, make room
for the thumb to be extruded. I made
sure there was a square face for the
thumb to be extruded (Shaped hand,
with square face to extrude thumb
from).
Extrude the thumb from the hand, as
in Thumb extruded from hand. Up
until this point, everything we have
extruded has been an edge. This is
the first time we're extruding a face,
so we'll get some options from an
Extrude menu. Select Region from
the extrude menu. This is the most
commonly used option, and you can
experiment with the other options to
see what they do.
N
ote that when you extrude, there is a orange line that the extruded region moves along. This is so that the extruded faces
have the same orientation as the "parent" face. To cancel this constrained move,
MMB to get into free move mode.}}
Don't forget to save a version with
F2 - NumPad +-Enter !
The character so far is shown below. Next, we'll create the rest of the torso and make some legs.
Widening the hand from top view.
Closing off the hand 1. Closing off the hand 2. Closing off the hand 3.
Shaped hand, with square face to
extrude thumb from.
Thumb extruded from hand.
N
ext: Torso, legs, and feet
Previous: Finishing the head
Back to Index
Retrieved from
" />This page was last modified 15:48, 27 July 2006.
The character so far.
BSoD/Introduction to Character Animation/Torso legs
and feet
From BlenderWiki
< BSoD | Introduction to Character Animation
Contents
1 Creating the torso
2 Shaping the torso
3 Extruding the legs
4 Creating the feet
5 The finished model, with .blend file
Creating the torso
The bulk of the torso is very easy - it's just a couple of extrudes. The trick is to shape it later on to give it some mass, so it
doesn't look like a square chunk.
Extrude the lower edge loop several times to form the torso. Here, I've
extruded three times (Extruding the torso).
Extruding the torso.