Red Hat Linux Networking and System Administration Third Edition phần 7 docx
Bạn đang xem bản rút gọn của tài liệu. Xem và tải ngay bản đầy đủ của tài liệu tại đây (2.24 MB, 103 trang )
using Gigabit Ethernet (GigE) whenever possible will improve Internet server/
service performance. Finally, using a higher-performance filesystem on the
directories that hold email can substantially improve performance. For exam-
ple, ext3 does a great job on mail partitions because short-lived mail files might
not even need to be created in the filesystem if they pass through the filesystem
journal quickly enough. ReiserFS can be a good idea for mail partitions on
which hundreds of thousands of tiny files live in the same directories.
Optimizing LDAP Services
Several items in the slapd configuration can be tweaked to give better server
performance. The items shown in the following list show configuration direc-
tives that can be modified for performance reasons:
■■ Cache size modification — You can increase the size of the cache using
the cachesize directive in slapd.conf. For example, the following
directive sets the number of LDAP entries stored in the cache to
100,000:
cachesize 100000
■■ Disk subsystem — As suggested elsewhere in this chapter, replace
IDE disks with SCSI disks, and replace or augment SCSI disks with
FibreChannel. If SCSI and FibreChannel are too rich for your budget,
using Serial ATA (SATA) drives (and a SATA controller, of course) hits a
good middle ground because SATA is faster than IDE and less expensive
than SCSI and FibreChannel. If you have multiple LDAP data stores, sit-
uate each store on its own disk and, if possible, its own dedicated I/O
controller in order to minimize I/O contention with other processes.
■■ Filesystem tuning — On filesystems that support it, disable updating
file access and modification timestamps, which will decrease the num-
ber of file operations that have to be performed by two-thirds. Fewer
CPU cycles spent on bookkeeping means more CPU cycles spent doing
actual LDAP-related work.
■■ Indexing — With limits, indexes increase performance, but at the cost
of additional memory, disk, and CPU usage. Accordingly, don’t index
data you don’t (often) search. By way of guidelines, index only heavily
used parts of your schema.
■■ Logging — If you are persuaded that excessive message logging is
hampering the performance of your LDAP server, add the following
entry to slapd.conf:
loglevel 0
This entry disables logging via the system log.
582 Chapter 25
32_599496 ch25.qxd 8/30/05 7:32 PM Page 582
■■ System memory — In addition to adding more physical memory,
increase the size of OpenLDAP’s cache to use more RAM.
For more details about these performance tuning tips, have a look at the
OpenLDAP FAQ, available on the Web at openldap.org/faq/data
/cache/190.html.
Optimizing DNS Services
Optimizing DNS services centers on reducing the latency involved in making
DNS queries. For client programs, that is, for applications requesting DNS ser-
vices, the best all around performance enhancement is to maintain a local
cache of DNS information. You get the most bang for your performance buck
by reducing the number of DNS queries that have to go to a remote server,
even if that server is inside the subnet to which you are connected. The typical
approach is to run a caching-only name server on client machines. On the
server side, you have a much wider range of options, as discussed in the sec-
tion titled “Tweaking DNS Servers,” later in this chapter.
Improving the Performance of DNS Clients
To increase the performance (and security) of your caching-only servers on the
DNS clients, several options can be modified in the /etc/named.conf file
created during the installation of BIND. The /etc/named.conf file is shown
in Listing 25-1.
// generated by named-bootconf.pl
options {
directory “/var/named”;
/*
* If there is a firewall between you and nameservers you want
* to talk to, you might need to uncomment the query-source
* directive below. Previous versions of BIND always asked
* questions using port 53, but BIND 8.1 uses an unprivileged
* port by default.
*/
// query-source address * port 53;
};
//
// a caching only nameserver config
//
controls {
inet 127.0.0.1 allow { localhost; } keys { rndckey; };
Listing 25-1 The /etc/named.conf file. (continued)
Optimizing Internet Services 583
32_599496 ch25.qxd 8/30/05 7:32 PM Page 583
};
zone “.” { type hint; file “named.ca”; };
zone “localhost” {
type master;
file “localhost.zone”;
allow-update { none; };
};
zone “0.0.127.in-addr.arpa” {
type master;
file “named.local”;
allow-update { none; };
};
include “/etc/rndc.key”;
Listing 25-1 (continued)
The section of the file in which you are interested is the options section.
Since this is a caching-only server, you can safely disable functions that are not
necessary for this type of server. You can also add options that do apply to a
caching-only server.
By default, BIND allows zone transfers to all hosts. However, zone transfers
are necessary only for master and slave servers; they aren’t necessary for DNS
clients. You can disable zone transfers by adding the following line to
/etc/named.conf:
allow-transfer {
none;
};
You can also configure you caching-only server to respond to regular
queries only from specific hosts. BIND’s default setting is to allow queries
from any host. Typically, you want to allow queries only from hosts inside
your firewall. You can add the following line to the options section in
/etc/named.conf, replacing www.xxx.yyy.zzz with your network IP
number:
allow-query {
www.xxx.yyy.zzz;
localhost;
};
You can also configure your caching-only server to respond to recursive
queries from only specific hosts. BIND’s default setting is to allow queries
584 Chapter 25
32_599496 ch25.qxd 8/30/05 7:32 PM Page 584
from any host. Typically, you want to allow queries only from hosts inside of
your firewall. You can add the following line to the options section of
/etc/named.conf, again replacing www.xxx.yyy.zzz with your network
IP number:
allow-recursion {
www.xxx.yyy.zzz;
localhost;
};
Typically, a caching-only server does not have direct access to the Internet,
so it creates a cache file to hold dns information. This is the purpose of a
caching-only server, and it boosts performance by eliminating the need to send
queries to external servers. But if the server does not have the information it
needs in its local cache, it needs to send a request to other servers. You can
specify the IP address of the servers to which you want to forward requests.
Add the following line to the options section of /etc/named.conf, replac-
ing www.xxx.yyy.zzz with the IP address of the name server to which
requests should be forwarded:
forwarders {
www.xxx.yyy.zzz;
};
What happens if the servers you are forwarding to are down? Your server
tries to forward the request to other servers. You can prevent this from hap-
pening by adding this line:
forward only;
Tweaking DNS Servers
To increase the performance and security of your master domain server on the
DNS clients, several options can be modified in the /etc/named.conf file
created during the installation of BIND. Make changes to the options section
of /etc/named.conf.
By default, BIND allows zone transfers to all hosts. Zone transfers are nec-
essary only between the master and slave servers, so you can specify the IP
address of your slave server by adding the following entry (replace www
.xxx.yyy.zzz with the IP address of your slave server):
allow-transfer {
www.xxx.yyy.zzz;
};
Optimizing Internet Services 585
32_599496 ch25.qxd 8/30/05 7:32 PM Page 585
You can also configure your master server to respond to regular queries only
from specific hosts. The default setting in BIND is to allow queries from any
host. Typically, you want to allow other types of queries only from hosts inside
your firewall. You can add the following line to the options section:
allow-query {
www.xxx.yyy.zzz;
localhost;
};
Replace www.xxx.yyy.zzz with your internal network IP number.
You can also configure your caching-only server to respond to recursive
queries only from specific hosts. The default setting in BIND is to allow
queries from any host. Typically, you want to allow queries only from hosts
inside of your firewall. You can add the following line to the options section:
allow-recursion {
www.xxx.yyy.zzz;
localhost;
};
Again, replace www.xxx.yyy.zzz with your internal network IP number.
Logging
You can configure your caching-only slave and master servers to automati-
cally rotate your /var/log/named.log file to prevent your filesystem from
filling up with old information. The file /etc/logrotate.d/named should
have been created during the installation of BIND and should be similar to
Listing 25-2.
/var/log/named.log {
missingok
create 0644 named named
postrotate
/sbin/service named reload 2> /dev/null || true
endscript
}
Listing 25-2 The /etc/logrotate.d/named file controls log rotation of BIND’s log files.
If you do not have /etc/logrotate.d/named on your system, create it
by copying the file as shown in the listing. Then make the following changes.
Remove this line:
create 0644 named named
586 Chapter 25
32_599496 ch25.qxd 8/30/05 7:32 PM Page 586
Change the line:
/sbin/service named reload 2> /dev/null || true
to:
/bin/kill -HUP `cat /var/run/named.pid 2> /dev/null` 2> /dev/null ||
true
Be sure to save your changes and restart the named server.
Another tweak you can make is to disable logging for LAME servers. These
are servers that appear to be name servers for a domain but are not. This
reduces system-resource use. Add the following line to your /etc/named
.conf file:
logging {
category lame-servers { null; };
};
Optimizing Mail Services
To improve the speed of your mail services, you can take one of several
approaches. Busy sites often use multiple mail servers in order to spread the
mail processing load across a number of systems. This reduces the demand on
any single system. Another common performance enhancement is to replace
Sendmail with another mail server, such as Postfix. If your mail server sup-
ports a number of mailing lists, you might consider handling list traffic on one
server and regular (nonlist) mail traffic on another server. If you are not in a
position to buy a beefier mail server, to buy more mail servers, or to replace
Sendmail with Postfix, the section titled “Getting More from Sendmail,” later
in this chapter, offers a number of tips and hints to help you squeeze more
speed out of it. “Getting More from Postfix,” also later in this chapter, gives
you a number of methods you can try to get better performance from Postfix.
Getting More from Sendmail
The /etc/mail/sendmail.cf file contains many options that can be tweaked
to give better performance and increase the efficiency of your mail server. The
most common Sendmail tweak if to change the frequency with which it runs the
queue. You can modify this by editing /etc/sysconfig/sendmail and
changing the line that reads QUEUE=1h, which causes Sendmail to process the
mail queue every hour, to, for example, QUEUE=15m, which runs the queue every
Optimizing Internet Services 587
32_599496 ch25.qxd 8/30/05 7:32 PM Page 587
15 minutes. If you modify this file, you have to restart Sendmail. A good source
for some performance-tuning tips can be found at the Sendmail Web site at
sendmail.org/~ca/email/doc8.12/TUNING.
Getting More from Postfix
If you have a lot of mail that just seems to sit in Postfix’s outbound queue, you
may be trying to deliver mail to a site that is quite busy. One way to work around
this problem is to create a transport map entry for such a site that enables multi-
ple parallel connections and then to give each connection to that site a shorter
timeout. Suppose, for example, that you know that slowsite.com and
reallyslowsite.net are busy sites, and you have trouble getting email to
them in a timely manner. First, create entries resembling the following in
/etc/postfix/transport:
slowsite.com deadbeats:
reallyslowsite.net deadbeats:
These entries in /etc/postfix/transport add slowsite.com and
reallyslowsite.net to an alias named deadbeats. Next, create a corre-
sponding entry in /etc/postfix/main.cf that increases the number of
simultaneous connections to 50, which allows more mail to slowsite.com
and reallyslowsite.net to be transmitted at once.
transport_maps = hash:/etc/postfix/transport
deadbeats_destination_concurrency_limit = 50
The key directive here is deadbeats_destination_concurrency_limit
=50, which increases the number of parallel connections to slowsite.com
and reallyslowsite.net to 50.
deadbeats unix - - n - - smtp
-o smtp_connect_timeout=5 -o smtp_helo_timeout=5
These entries from /etc/postfix/master.cf tell Postfix that SMTP con-
nections to sites in the deadbeats alias should timeout after 5 seconds and
that, similarly, an SMTP transaction must commence within 5 seconds of the
HELO command, or the connection will be closed.
If incoming mail seems to queue up while outbound mail gets delivered, then
outgoing mail is crowding out incoming mail. Postfix can waste a great deal of
time waiting for connections to time out, so, again, the solution is to reduce
the connection timeout for incoming email, modifying /etc/postfix
/master.cf as follows:
588 Chapter 25
32_599496 ch25.qxd 8/30/05 7:32 PM Page 588
relay unix - - n - - smtp
-o smtp_connect_timeout=2 -o smtp_helo_timeout=2
If you see that Postfix pegs disk I/O when processing incoming mail, the
real solution is to get faster disks or to allocate one disk for logging, one disk
for the mail queue, and a third disk for user mailboxes. Postfix-caused disk sat-
uration is especially a problem if you are serving multiple virtual hosts on a
single system. One workaround is to configure multiple IP addresses for the
machine and to run a Postfix instance for each IP address, where each Postfix
instance writes to a different disk. It is easier to configure than it might seem at
first glance. The key is starting each Postfix instance with a different configu-
ration directory:
# postfix -c conf_dir start
Replace conf_dir with the name of the configuration directory assigned
to each IP address. Within each conf_dir, main.cf has a different
$myhostname, $queue_directory, and $inet_interfaces setting,
depending on the interface or IP it handles. For example, if you have two virtual
hosts, first.vhost.com and second.vhost.com, you might arrange it
like this: For first.vhost.com, suppose that the Postfix’s configuration
directory is /first/postfix. Thus, the configuration file /first/postfix
/main.cf might have the following entries:
queue_directory = /first/queue/dir
myhostname = first.vhost.com
inet_interfaces = $myhostname
Accordingly, start the Postfix instance for first.vhost.com this way:
postfix -c /first/postfix start
Make a similar arrangement for second.vhost.com. If the configuration
directory is /second/postfix, the configuration file is /second/postfix
/main.cf, which has the following entries for second.vhost.com:
queue_directory = /second/queue/dir
myhostname = second.vhost.com
inet_interfaces = $myhostname
The proper Postfix invocation is:
postfix -c /second/postfix start
Optimizing Internet Services 589
32_599496 ch25.qxd 8/30/05 7:32 PM Page 589
If Postfix responds too slowly to incoming SMTP connections but POP or
IMAP connections are acceptably fast, you need to run more SMTP server
processes. Edit the smtpd entry in the master.cf file and increase the
process limit. Alternatively, increase the default_process_limit setting
in the main.cf file.
TIP Anytime you edit one of Postfix’s configuration files, be sure to use the
postfix reload command to activate the changes.
Optimizing FTP Services
Out of the box, vsftpd is pretty darn fast and makes lightweight demands on a
system’s memory and CPU resources. If its speed fails to suit you, the follow-
ing tips, adapted from the vsftpd documentation, might help:
■■ If possible, disable the NIS and NIS+ (nis and nisplus) for passwd,
shadow, and group lookups in /etc/nsswitch.conf. The idea
with this tip is to avoid loading unnecessary runtime libraries into the
vsftpd’s memory space and to avoid using NIS for lookups that can be
resolved more quickly by resorting to file-based lookups.
■■ Break directories with more than a few hundred entries into smaller
directories. Many file systems, such as ext2 and ext3, do not handle
such cases efficiently at all, and the process of creating listings of large
directories (with, for example, the ls or dir commands) causes vsftpd
to use moderate amounts of memory and CPU. If you are stuck with
large directories, use a file system, such as XFS, JFS, or ReiserFS,
designed to work with large directory structures.
■■ Limit the number of simultaneous connections to the FTP server.
■■ More drastically, if the load on your FTP server is bogging down the
system, you could disable anonymous FTP altogether or dedicate a
machine to providing FTP services.
■■ Take advantage of vsftpd’s bandwidth throttling features to limit the
network bandwidth consumed by any one connection or connection
classes.
Optimizing Web Services
Chapter 23 briefly touched on Apache configuration settings you can modify
that affect Apache’s performance. The settings mentioned in that section are
590 Chapter 25
32_599496 ch25.qxd 8/30/05 7:32 PM Page 590
good starting points for fine-tuning Apache, but they do not exhaust the
possibilities. To recap that discussion:
■■ Increasing the MaxClients setting (to a maximum of 256) increases
the maximum number of simultaneous client connections to the httpd
server before the server starts refusing additional connections. The
default value is 150 (clients). One generally-accepted rule-of-thumb
formula is:
MaxClients = Physical RAM – 128 MB + Size of Active Pages
Nonshared Memory per httpd Process
The theory is that you should use physical RAM for system resources and
caching active pages. Leftover RAM should be used by httpd processes
serving up active pages. If you have more clients, you will end up swap-
ping, which degrades performance. If you have fewer clients, you will not
be maximizing the available system resources. In practice, you will have
to decide what constitutes an active page. One way to go about this is to
use the server logs to evaluate which pages are served more than once
every TimeOut period, which defaults to 300 seconds (5 minutes).
■■ The TimeOut directive controls how long the server waits between pro-
tocol messages before it closes a connection. The longer the TimeOut
directive, the longer a client connection will be tied up and, thus,
unavailable to another client. The default value is 300 (seconds).
■■ The MaxRequestsPerChild setting controls how many HTTP requests
an httpd child process will service before a new child process starts. The
default value is 100, but setting it to 0, for unlimited requests, will work
just fine on a Red Hat system.
■■ MaxKeepAliveRequests, 100 by default, sets the upper limit on the
total number of requests from the same client on the same connection.
The following tips and suggestions appear in no particular order. Your
mileage may vary, and if breaks, you get to keep both pieces. Some of the fol-
lowing might work better than others; others ideas might fail miserably. If
your server is running a lot of CGI scripts or using PHP markup, you should
look into resources that discuss Apache tuning in depth. The overhead
requirements of PHP and CGI scripts involve creating new processes rather
than merely additional RAM, network, or disk I/O.
■■ Set HostnameLookups to Off. Each resolver call impairs performance.
If you need to resolve IP addresses to hostnames, you can use Apache’s
logresolve program or one of the resolver programs available in the log
reporting and analysis packages.
Optimizing Internet Services 591
32_599496 ch25.qxd 8/30/05 7:32 PM Page 591
■■ Similarly, use IP addresses instead of host names in Allow from
domain and Deny from domain directives. Each such query, when
domain is a name, performs a reverse DNS query followed by a forward
query to make sure that the reverse query is not being spoofed. Using
IP addresses avoids having to resolve names to IP numbers before per-
forming the reverse and forward queries.
■■ If you do not use Options FollowSymLinks, or if you do use
Options SymLinksIfOwnerMatch, Apache performs extra system
calls to check symbolic links. For example, suppose you have the fol-
lowing configuration:
DocumentRoot /var/www/htdocs
<Directory />
Options SymLinksIfOwnerMatch
</Directory>
If a client then requests /index.html, Apache performs an lstat()
system call on /var, /var/www, /var/www/htdocs, and /var/www
/htdocs/index.html to check the owner matching of the symbolic
link. The overhead of these lstat() system calls occurs for each
request, and Apache does not cache the results of the system calls. For
the best performance (and, unfortunately, the least security against
rogue symlinks), set Options FollowSymLinks for all directories
and never set Options SymLinksIfOwnerMatch.
■■ A similar performance problem occurs when you use .htaccess files
to override directory settings. In this case, Apache attempts to open
.htaccess for each component of a requested filename. For the best
performance use AllowOverride None everywhere in the Web space
Apache is serving.
■■ Unless you rely on the MultiView option, turn it off. It is perhaps the
single biggest performance hit you can throw at an Apache server.
■■ Do not use NFS mounted file systems to store files that Apache serves
unless absolutely necessary. Not only is the read performance of NFS
slower than the read performance of a local file but also the file being
served via NFS might disappear or change, causing NFS cache consis-
tency problems. Moreover, if the Apache server is somehow compro-
mised, the NFS mount will be vulnerable.
■■ If you must use NFS-mounted file systems, mount them as read-only.
Read-only NFS mounts are significantly faster than read/write mounts.
Not only will this improve performance, disabling write access adds
another barrier to bad guys who might compromise the system.
592 Chapter 25
32_599496 ch25.qxd 8/30/05 7:32 PM Page 592
■■ The single most important system resource that Apache uses is RAM.
As far as Apache is concerned, more RAM is better because it improves
Apache’s ability to store frequently requested pages in its cache. You
can also help by limiting the non-Apache processes to the absolute min-
imum required to boot the system and enable Apache to run — that is,
run a dedicated Web server that doesn’t need to share the CPU or mem-
ory with other processes. Naturally, a faster CPU, a high-speed Ethernet
connection, and SCSI disks are preferable.
Summary
Fedora Core and RHEL systems are commonly deployed to provide Internet
services, so this chapter mentioned some methods you can use to improve the
performance of several key Internet services: LDAP, DNS, email, and Web ser-
vices. We could list only some of the areas to consider when tuning LDAP,
because LDAP performance tuning is a complex subject best addressed by the
LDAP authorities. DNS is more easily tuned. A DNS client’s performance can
often be improved simply by running a caching nameserver, while there are
several methods available for getting better query performance from a server.
Mail servers are high-volume, heavy throughput systems requiring careful
tuning, but sometimes, simply replacing Sendmail with Postfix can fix slow
mail-processing times. We also mentioned a number of methods you can use
to get faster page-serving behavior from Apache.
Optimizing Internet Services 593
32_599496 ch25.qxd 8/30/05 7:32 PM Page 593
32_599496 ch25.qxd 8/30/05 7:32 PM Page 594
PART
Four
System Administration
Chapter 26: Keeping Your System Updated with up2date and the
Red Hat Network
Chapter 27: Upgrading and Customizing the Kernel
Chapter 28: Configuring the System at the Command Line
Chapter 29: Administering Users and Groups
Chapter 30: Installing and Upgrading Software Packages
Chapter 31: Backing Up and Restoring the File System
Chapter 32: Performance Monitoring
33_599496 pt04.qxd 8/30/05 7:21 PM Page 595
33_599496 pt04.qxd 8/30/05 7:21 PM Page 596
597
Keeping Your System
Updated with up2date and
the Red Hat Network
IN THIS CHAPTER
■■ Using the RedHat up2date Agent
■■ Registering Your System with the Red Hat Network
■■ Accessing the Red Hat Network with a Web browser
The Red Hat Network up2date agent is a program that is installed by default
when you install Fedora Core or Red Hat Enterprise Linux. The Red Hat Net-
work up2date software will give you visual notification of the update right on
your desktop. If you purchased Enterprise Linux, you are entitled to subscribe
to the Red Hat Network, which gives you access to many additional services,
such as registering your system, receiving email notifications and scheduling
automatic system updates. As a registered Red Hat Network user, you can use
a Web browser to access your account.
This might not sound like much at first, but think about the many steps
involved in keeping your system up to date with the latest versions of the hun-
dreds of packages that are installed on your system. The Red Hat Network
practically eliminates the need for you to search for these packages because
you can receive this information by email. As a registered Red Hat Network
user, or a Fedora Core user you can also search for updates by using the
up2date agent. With the Red Hat Network, you can now easily keep your sys-
tem running reliably and securely. A few steps are involved in setting up the
Red Hat Network, but they are well worth the effort. In this chapter, you can
read how to configure the up2date agent, and then connect to look for updated
files. If you are running Enterprise Linux you learn how to register your sys-
tem with Red Hat.
CHAPTER
26
34_599496 ch26.qxd 8/30/05 7:19 PM Page 597
Using the Red Hat up2date Agent
The up2date agent is a valuable tool for you because it helps you keep your
system running the most current versions of the packages installed on your
system. During the system installation, an Alert icon is placed on the right side
of the top desktop panel that provides visual notification when your system
needs to be updated. Figure 26-1 shows the location of the Alert icon on the
panel.
The Alert icon is colored-coded, representing a different state of the update.
The icons and their meaning are discussed in the following list:
■■ Blue check mark — The system is up to date.
■■ Green double arrows — The system is checking for updates.
■■ Red exclamation point — The system needs to be updated.
■■ Gray question mark — An error has occurred.
Figure 26-1 The Red Hat Network Alert icon.
598 Chapter 26
34_599496 ch26.qxd 8/30/05 7:19 PM Page 598
Configuring the up2date Agent
Before you can use the Red Hat up2date agent, you need to configure it. The
first time you start the up2date agent you will be prompted to install the GPG
public key from Red Hat, which is used to verify the packages are signed and
are from Red Hat. Be sure to install the key.
You can start the up2date Agent Configuration tool by doing any of the
following:
■■ Open a terminal window, and from the command line, type
up2date-config.
■■ Right-click the alert icon, and choose Configuration from the pop-up
menu.
Choose Application ➪ System Settings ➪ Red Hat Network Configuration.
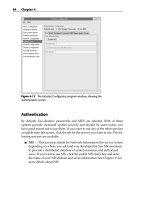
The Red Hat Network Configuration dialog box, shown in Figure 26-2, opens.
This dialog box has three tabs — General, Retrieval/Installation, and Pack-
age Exceptions:
■■ General — The General tab is the tab shown by default when the dia-
log box opens. A server is already selected for you to use, and you
should not need to change it. If you need to use a proxy server to con-
nect to the Web, you can enter this information here by first selecting
the Enable HTTP Proxy check box and then entering the name of your
server in the field next to the check box. If you need to use authentica-
tion, you can enable it by selecting the Use Authentication check box
and filling in the Username and the Password fields.
Figure 26-2 The Red Hat Network Configuration dialog box.
Keeping Your System Updated with up2date and the Red Hat Network 599
34_599496 ch26.qxd 8/30/05 7:19 PM Page 599
■■ Retrieval/Installation — From this tab (see Figure 26-3), you can
choose options that affect how the packages are retrieved and
subsequently installed.
The Package Retrieval Options are:
■■ Do Not Install Packages After Retrieval — By default, packages are
automatically installed after they are retrieved. If you enable this
option, packages are retrieved to the specified directory but not
installed.
■■ Do Not Upgrade Packages When Local Configuration File Has
Been Modified — If you have manually modified configuration
files for packages on your system, these packages are not displayed
by default. If you disable this option, the packages are displayed.
■■ Retrieve Source RPM Along with Binary Package — By default,
the source Red Hat Package Manager (RPM) is not downloaded
with the binary version of the package. By enabling this option,
you also retrieve the source of the RPM.
The Package Verification Options has but one choice:
■■ Use GPG to Verify Package Integrity — By default, for security
purposes, the packages are verified to ensure they contain the Red
Hat GPG signature. If you disable this option, the security check is
not performed.
Figure 26-3 The Retrieval/Installation tab.
600 Chapter 26
34_599496 ch26.qxd 8/30/05 7:19 PM Page 600
NOTE GPG stands for GNU Privacy Guard, which is the open-source
replacement for PGP. PGP (Pretty Good Privacy) was developed in the mid-
1990s by Phil Zimmerman to provide data encryption. GPG was developed to
replace PGP because PGP contained a patented algorithm and its use was
restricted. GPG can be freely used without concern for patented information.
The Package Installation Options are:
■■ After Installation, Keep Binary Packages on Disk — By default, the
packages are removed from the local disk after they are installed.
Enabling this option leaves a copy of the package in the specified
directory.
■■ Enable RPM rollbacks — Choosing this option lets you restore your
system to its condition before the RPM was installed.
The last two items on this tab are:
■■ Override Version Stored in System Profile — By filling in this field, you
can override the version stored in your System Profile with the ver-
sion in the field.
■■ Package Storage Directory — Here you can specify the storage location
of the packages on your system.
■■ Package Exceptions — From this tab (see Figure 26-4), you can choose to
exclude packages by the name of the package or by the name of the file.
■■ To exclude a package by package name — Type the name of the package
in the Add New field in the Package Names to Skip section, and
then click the top Add button.
■■ To exclude a package by filename — Type the name of the file in the
Add New field in the File Names to Skip section, and then click the
bottom Add button.
After you make any changes to the three tabs, click OK. Your configuration
changes are saved, and you can now use the up2date agent.
Keeping Your System Updated with up2date and the Red Hat Network 601
34_599496 ch26.qxd 8/30/05 7:19 PM Page 601
Figure 26-4 The Package Exceptions tab.
Updating Your System
Whenever your system needs to be updated, the Alert icon will appear as a red
circle containing an exclamation point. You can roll the mouse over the Alert
icon to view a small pop-up window that gives additional information. If your
system needs to be updated the pop-up window will show the number of
updates available.
There are multiple ways to start the up2date agent, here is one way. To start
the up2date agent to update your system, do the following:
1. Right-click the Alert icon and select Launch Up2date from the contextual
menu. You see the Red Hat Update Agent Welcome screen.
NOTE If you are not logged in as root, you will be prompted for the root
password.
2. Click Forward to continue to the Channels dialog box, as shown in
Figure 26-5.
3. The channels dialog box lists the channels that will be searched from
which the updated packages will be obtained. You can think of the
channels as file repositories on various servers in many locations. Click
Forward to continue.
602 Chapter 26
34_599496 ch26.qxd 8/30/05 7:19 PM Page 602
The program connects to the selected channel to search for package
updates. Next you see the Skipped Packages dialog box, as shown in
Figure 26-6. By default the kernel packages are not automatically
updated and will be listed as packages to be skipped.
Figure 26-5 The Channels dialog box.
Figure 26-6 The Skipped Packages dialog box.
Keeping Your System Updated with up2date and the Red Hat Network 603
34_599496 ch26.qxd 8/30/05 7:19 PM Page 603
4. If you want to update the kernel packages check the appropriate box
and then Click Forward to continue. You see the Package List dialog
box with the available packages, as shown in Figure 26-7. If your sys-
tem is updated, you won’t see any packages listed.
5. You can select packages individually by selecting the check box in front
of the package name, or you can mark the Select All Packages check box
to select all packages. After you finish selecting packages, click Forward
to begin package retrieval. You see the Package Retrieval dialog as
shown in Figure 26-8.
6. The up2date program gets the packages and prompts you to continue
after the packages have been retrieved. Click Forward to install the
packages.
7. You see a progress dialog box during the package installation. After all
the packages that you selected for installation are installed, you see a
dialog box indicating the package installation has finished. Click Finish
to complete the update process.
NOTE You can click the Alert icon to open a dialog box listing all available
packages. You can also launch up2date from here.
Figure 26-7 The Package List dialog box.
604 Chapter 26
34_599496 ch26.qxd 8/30/05 7:19 PM Page 604
Figure 26-8 The Package Retrieval dialog box.
Registering Your System
NOTE If you installed Fedora Core on your system, you can skip this section
because you do not need to register this version. If you installed any version of
Enterprise Linux, you should register your system.
Before you can begin using the Red Hat Network, you must first register your
system with Red Hat by using the Red Hat Network registration client.
NOTE You can also register for the Red Hat Network at the Red Hat Web site
by using your Web browser to go to />creating a login, and filling in the online registration form.
You must be logged in as root to perform the registration, and you must also
have a connection to the Internet to be able to log on to the Red Hat Web site.
If you aren’t connected to the Internet, you receive an error message, and the
program closes when you click OK.
Keeping Your System Updated with up2date and the Red Hat Network 605
34_599496 ch26.qxd 8/30/05 7:19 PM Page 605
You start and use the registration client by following these steps:
1. Open a terminal and enter the command up2date –register at the
command line.
You see the Red Hat Network Configuration screen where you can set a
proxy server and authentication information if you need to. Click OK to
go on and click Yes to install the GPG key. The Red Hat Update Agent
screen appears that provides a description and lists the benefits of the
Red Hat Network. If you choose not to use the Red Hat Network, you
can click Cancel to end the process.
2. Click Forward to continue to the Up2date Login Page dialog box, as
shown in Figure 26-9.
You use this dialog box to create a new account or use an existing one if
you’ve already created an account.
3. If you already have an account, check I have an existing Red Hat login
radio button and enter the username and password in the appropriate
text boxes. Go to Step 4.
If you don’t have a Red Hat Network login, you need to create one.
Check the I don’t have radio button and click Forward. A new page
opens where you can enter your information. (See Figure 26-10.) All
fields with an asterisk are required fields.
Figure 26-9 The Up2date Login dialog box.
606 Chapter 26
34_599496 ch26.qxd 8/30/05 7:19 PM Page 606