html xhtml and css for dummies 7th edition phần 7 pdf
Bạn đang xem bản rút gọn của tài liệu. Xem và tải ngay bản đầy đủ của tài liệu tại đây (2.32 MB, 41 trang )
226
Part IV: Scripting and (X)HTML
Webmonkey offers a good overview of the difference between get and post
in its “Add HTML Forms to Your Site” article at www.webmonkey.
com/2010/02/add_html_forms_to_your_site.
Markup
The markup in Listing 14-1 creates a form that uses the post method to send
user-entered information to a form handler (guestbook.php) to be pro-
cessed on the Web server.
Listing 14-1: A Simple Form Processed by a Form Handler
<!DOCTYPE html PUBLIC “-//W3C//DTD XHTML 1.0 Transitional//EN”
“ /><html
xmlns=” /><head>
<title>
Forms
</title>
<meta http-equiv=”Content-Type” content=”text/html; charset=ISO-8859-1” />
</head>
<body>
<form action=”cgi-bin/guestbook.php” method=”post”>
<! form input elements go here >
</form>
</body>
</html>
The value of the action attribute is a URL, so you can use absolute or rela-
tive URLs to point to a form handler on your server. Absolute and relative
URLs are covered in more detail in Chapter 6.
Input tags
The tags you use to solicit input from your site visitors make up the bulk of
any form. HTML supports a variety of different input options — from text
fields to radio buttons and from files to images.
Every input control associates some value with a name:
✓ When you create the control, you give it a name.
✓ The control sends back a value based on what the user does in the form.
For example, if you create a text field that collects a user’s first name, you
might name the field firstname. When the user types her first name in the
field and submits the form, the value associated with firstname is whatever
name the user typed in the field.
22_9780470916599-ch14.indd 22622_9780470916599-ch14.indd 226 11/30/10 12:26 AM11/30/10 12:26 AM
227
Chapter 14: Working with Forms
The whole point of a form is to gather values associated with input controls,
so how you set the name and value for each control is important. The follow-
ing sections explain how you should work with names and values for each of
the input controls.
The input element (and by extension, the empty <input … /> tag) is the
major player when it comes to using HTML forms to solicit user input. Inside
the input element is where you define the kinds of input you want to collect,
and how you package and present the input fields and cues you present to
users so they can give you what you’re asking for.
Input fields
You can use a variety of input fields in your forms, such as text, password,
radio buttons/check boxes, hidden, and more. Not all fields require values for
name and type attributes (for example, text box or password fields), but it’s
a good idea to provide users with explanatory labels and examples of input
data any time they might have questions about formats — as when ponder-
ing whether or not to include dashes or spaces in credit card or telephone
numbers. Check boxes and radio buttons, on the other hand, require such
information so they can be properly labeled when the browser shows users
what selections are available.
For input elements that require a user to select an option (a check box or
radio button) rather than typing something into a field, you define both the
name and the value. When the user selects a check box or a radio button and
then clicks the Submit button, the form returns the name and value assigned
to the element.
We discuss these two types of input fields in the upcoming section, “Check
boxes and radio buttons.”
Text fields
Text fields are single-line fields in which users type information. When you
need to offer the user the opportunity to fill in more than one line, you use a
text box, as we discuss in the upcoming section, “Multiline text boxes.”
Here’s how to create a single-line text field:
1. Define the input type as a text field by using the <input /> element
with the type attribute set to text.
<input type=”text” />
2. Then use the name attribute to give the input field a name.
<input type=”text” name=”firstname” />
The user supplies the value when she types in the field.
22_9780470916599-ch14.indd 22722_9780470916599-ch14.indd 227 11/30/10 12:26 AM11/30/10 12:26 AM
228
Part IV: Scripting and (X)HTML
The following markup creates two text input fields — one for a first name and
one for a last name:
<form action=”cgi-bin/guestbook.php” method=”post”>
<ul style=
”
list-style-type: none;
”
>
<li>
First Name:
<input type=”text” name=”firstname” /></li>
<li>
Last Name:
<input type=”text” name=”lastname” /></li>
</ul>
</form>
In addition to the <input /> elements, the preceding markup includes list
(<ul> and <li>) elements and some text to label each of the fields. By them-
selves, most form elements don’t give the user many clues about the type
of information you want them to enter. Lists are covered in more detail in
Chapter 5.
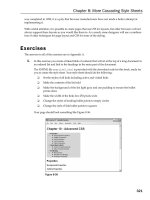
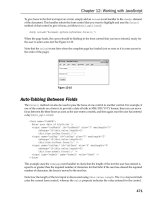
You must use HTML block and inline elements to format the appearance of
your form and also to supply the necessary text. Figure 14-5 shows how a
browser displays this kind of HTML. (To see the HTML source that produced
this figure, visit our Web site at www.dummieshtml.com, pick Chapter 14,
and look at the source code for Figure 14-5.)
Figure 14-5: Text entry fields in a form.
You can control the size of a text field with these attributes:
✓ size: The length (in characters) of the text field
✓ maxlength: The maximum number of characters the user can type into
the field
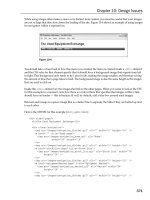
The following markup creates a form that sets both fields to a size of 30
(characters long) and a maxlength of 25 (characters long). Even though
each field will be about 30 characters long, a user can type only 25 characters
into each field, as shown in Figure 14-6. (Setting the size attribute greater
22_9780470916599-ch14.indd 22822_9780470916599-ch14.indd 228 11/30/10 12:26 AM11/30/10 12:26 AM
229
Chapter 14: Working with Forms
than maxlength ensures that the text field will always have some white
space between the user input and the end of the field box on display; you
don’t have to do this yourself, but we find it visually pleasing.)
<form action=”cgi-bin/guestbook.php” method=”post”>
<ul style=
”
list-style-type: none;
”
>
<li>
First Name:
<input type=”text” name=”firstname” size=
”
30
”
maxlength=
”
25
”
/></li>
<li>
Last Name:
<input type=”text” name=”lastname” size=
”
30
”
maxlength=
”
25
”
/></li>
</ul>
</form>
Figure 14-6: You can specify the length and maximum number
of characters for a text field.
Password fields
A password field is a special text field that doesn’t display what the user
types. Each keystroke is represented on the screen by a placeholder char-
acter, such as an asterisk or bullet, so that someone looking over the user’s
shoulder can’t see sensitive information.
You create a password field by using the <input /> element with the type
attribute set to password, as follows:
<form action=”cgi-bin/guestbook.php” method=”post”>
<ul style=
”
list-style-type: none;
”
>
<li>
First Name:
<input type=”text” name=”firstname” size=
”
30
”
maxlength=
”
25
”
/></li>
<li>
Last Name:
<input type=”text” name=”lastname” size=
”
30
”
maxlength=
”
25
”
/></li>
<li>
Password:
<input type=”password” name=”psswd” size=”30”
maxlength=”25” /></li>
</ul>
</form>
22_9780470916599-ch14.indd 22922_9780470916599-ch14.indd 229 11/30/10 12:26 AM11/30/10 12:26 AM
Downloa d f r o m W o w ! e B o o k < w w w.wowebook.com>
230
Part IV: Scripting and (X)HTML
Password fields are programmed like text fields.
Figure 14-7 shows how a browser replaces what you type with bullets. Note:
Depending on the browser’s default settings, some browsers will replace the
text with asterisks or some other character.
Figure 14-7: Password fields mask the text a user enters.
Check boxes and radio buttons
If only a finite set of possible values is available to the user, you can give him
a collection of options to choose from:
✓ Check boxes: Choose more than one option.
✓ Radio buttons: Choose only one option.
Radio buttons differ from check boxes in an important way: Users can
select a single radio button from a set of options but can select any
number of check boxes (including none, one, or more than one).
If many choices are available (more than half-a-dozen or so), use a drop-down
list instead of radio buttons or check boxes. We show you how to create
those in the upcoming section, “Drop-down list fields.”
To create radio buttons and check boxes, you
1. Use the <input /> element with the type attribute set to radio or
checkbox.
2. Create each option with these attributes:
• name: Give the option a name.
• value: Specify what value is returned if the user selects the
option.
22_9780470916599-ch14.indd 23022_9780470916599-ch14.indd 230 11/30/10 12:26 AM11/30/10 12:26 AM
231
Chapter 14: Working with Forms
You can also use the checked attribute (with a value of checked) to specify
that an option should be already selected when the browser displays the
form. This is a good way to specify a default selection in a list.
The following markup shows how to format check box and radio button
options:
<form action=”cgi-bin/guestbook.cgi” method=”post”>
<p>
What are some of your favorite foods
?</p>
<ul style=
”
list-style-type: none;
”
>
<li><input type=”checkbox” name=”food” value=”pizza” checked=”checked” />
Pizza
</li>
<li><input type=”checkbox” name=”food” value=”icecream” />
Ice Cream
</li>
<li><input type=”checkbox” name=”food” value=”eggsham” />
Green Eggs
and Ham
</li>
</ul>
<p>
What is your gender?
</p>
<ul style=
”
list-style-type: none;
”
>
<li><input type=”radio” name=”gender” value=”male” />
Male
</li>
<li><input type=”radio” name=”gender” value=”female” checked=”checked” />
Female
</li>
</ul>
</form>
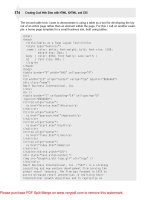
In the preceding code, each set of options uses the same name for each input
control but gives a different value to each option. You give each item in a set
of options the same name to let the browser know they’re part of a set. Figure
14-8 shows how a browser displays this markup, where we also checked the
box for Pizza and left the default check next to Ice Cream as-is. If you want
to, in fact, you can check as many boxes as you like by default in the page
markup, simply by including checked=”checked” in each <input … />
element you choose to check in advance.
Hidden fields
A hidden field gives you a way to collect name and value information that the
user can’t see along with the rest of the form data. Hidden fields are useful
for keeping track of information associated with the form, such as its version
or name.
If your Internet service provider (ISP) provides a generic application for a
guest book or feedback form, you might have to put your name and e-mail
address in the form’s hidden fields so that the data goes specifically to you.
22_9780470916599-ch14.indd 23122_9780470916599-ch14.indd 231 11/30/10 12:26 AM11/30/10 12:26 AM
232
Part IV: Scripting and (X)HTML
Figure 14-8: Check boxes and radio buttons offer choices.
To create a hidden field, you
✓ Use the <input /> element with its type attribute set to hidden.
✓ Supply the name and value pair you want to send to the form handler.
Here’s an example of markup for a hidden field:
<form action=”cgi-bin/guestbook.php” method=”post”>
<input type=”hidden” name=”e-mail” value=”” />
<ul style=
”
list-style-type: none;
”
>
<li>
First Name:
<input type=”text” name=”firstname” size=
”
30
”
maxlength=
”
25
”
/></li>
<li>
Last Name:
<input type=”text” name=”lastname” size=
”
30
”
maxlength=
”
25
”
/></li>
<li>
Password:
<input type=”password” name=”psswd” size=”30”
maxlength=”25” /></li>
</ul>
</form>
As a general rule, using your e-mail address in a hidden field is just asking for
your address to be picked up by spammers. If your ISP says that this is how
you should do your feedback form, ask for suggestions as to how you can
minimize the damage. Surfers to your page can’t see your e-mail address, but
spammers’ spiders can read the underlying tags. At a minimum, you would
hope that your ISP supports one of the many JavaScript encryption tools
available to obscure e-mail addresses from harvesters.
22_9780470916599-ch14.indd 23222_9780470916599-ch14.indd 232 11/30/10 12:26 AM11/30/10 12:26 AM
233
Chapter 14: Working with Forms
File upload fields
A form can receive documents and other files, such as images, from users.
When the user submits the form, the browser grabs a copy of the file and
sends it with the other form data. To create this file upload field
✓ Use the <input /> element with the type attribute set to file.
The file itself is the form field value.
✓ Use the name attribute to give the control a name.
Here’s an example of markup for a file upload field:
<form action=”cgi-bin/guestbook.php” method=”post”>
<p>
Please submit your resume in Microsoft Word or plain text format:
<br />
<input type=”file” name=”resume” />
</p>
</form>
Browsers render a file upload field with a Browse button that allows a user to
navigate a local hard drive and select a file to send, as shown in Figure 14-9.
Figure 14-9: A file upload field.
22_9780470916599-ch14.indd 23322_9780470916599-ch14.indd 233 11/30/10 12:26 AM11/30/10 12:26 AM
234
Part IV: Scripting and (X)HTML
When you accept users’ files through a form, you may receive files that are
either huge or perhaps virus-infected. Consult with whomever is program-
ming your form handler to discuss options to protect the system where files
get saved. Several barriers can help minimize your risks, including
✓ Virus-scanning software
✓ Restrictions on file size
✓ Restrictions on file type
Drop-down list fields
Drop-down lists are a great way to give users lots of options in a small amount
of screen space. You use two different tags to create a drop-down list:
✓ <select> creates the list.
Use a name attribute with the <select> element to name your list.
✓ A collection of <option> elements identifies individual list options.
The value attribute assigns a unique value for each <option> element.
Here’s a markup example for a drop-down list:
<form action=”cgi-bin/guestbook.cgi” method=”post”>
<p>
What is your favorite food?
</p>
<select name=”food”>
<option value=”pizza”>
Pizza
</option>
<option value=”icecream”>
Ice Cream
</option>
<option value=”eggsham”>
Green Eggs and Ham
</option>
</select>
</form>
The browser turns this markup into a drop-down list with three items, as
shown in Figure 14-10.
You can also enable users to select more than one item from a drop-down list
by changing the default settings of your list:
✓ If you want your users to be able to choose more than one option (by
holding down the Ctrl [Windows] or Ô [Mac] key while clicking options
in the list), add the multiple attribute to the <select> tag. The value
of multiple is multiple.
Because of XHTML rules, standalone attributes cannot stand alone;
therefore, the value is the same as the name for the attribute.
22_9780470916599-ch14.indd 23422_9780470916599-ch14.indd 234 11/30/10 12:26 AM11/30/10 12:26 AM
235
Chapter 14: Working with Forms
✓ By default, the browser displays only one option until the user clicks the
drop-down menu arrow to display the rest of the list. Use the size attri-
bute with the <select> tag to specify how many options to show.
If you specify fewer than the total number of options, the browser
includes a scroll bar with the drop-down list.
Figure 14-10: A drop-down list.
You can specify that one of the options in the drop-down list be already
selected when the browser loads the page, just as you can specify a check
box or radio button to be checked. Simply add the selected attribute to
have a value of selected for the <option> tag you want as the default. Use
this when one choice is very likely, but don’t worry — users can override
your default selection quickly and easily.
The following markup example
✓ Allows the user to choose more than one option from the list
✓ Displays two options
✓ Selects the third option in the list by default
<form action=”cgi-bin/guestbook.cgi” method=”post”>
<p>
What are some of your favorite foods?
</p>
<select name=”food” size=”2” multiple=”multiple”>
<option value=”pizza”>
Pizza
</option>
<option value=”icecream”>
Ice Cream
</option>
<option value=”eggsham” selected=”selected”>
Green Eggs and Ham
</option>
</select>
</form>
22_9780470916599-ch14.indd 23522_9780470916599-ch14.indd 235 11/30/10 12:26 AM11/30/10 12:26 AM
236
Part IV: Scripting and (X)HTML
Figure 14-11 shows how adding these attributes modifies the appearance of
the list in a browser.
Figure 14-11: A drop-down list with modifications.
Multiline text boxes
If a single-line text field doesn’t offer enough room for a response, create a
text box instead of a text field:
✓ The <textarea> element defines the box and its parameters.
✓ The rows attribute specifies the height of the box in rows based on the
font in the text box.
✓ The cols attribute specifies the width of the box in columns based on
the font in the text box.
The text that the user types into the box provides the value, so you need only
give the box a name with the name attribute:
<form action=”cgi-bin/guestbook.cgi”
method
=”post”>
<p>
Please include any comments here.
</p>
<textarea rows=”10” cols=”40” name=”comments”>
comments here
</textarea>
</form>
Any text you include between the <textarea> and </textarea> tags
appears in the text box in the browser, as shown in Figure 14-12 (and con-
trary to expectation, default text does not appear flush left in a text box: It’s
slightly offset to the right, but not centered, either). The user then enters
information in the text box and overwrites your text.
22_9780470916599-ch14.indd 23622_9780470916599-ch14.indd 236 11/30/10 12:26 AM11/30/10 12:26 AM
237
Chapter 14: Working with Forms
Figure 14-12: A text box.
Submit and Reset buttons
Submit and Reset buttons help the user tell the browser what to do with the
form. You can create buttons to either submit or reset your form, using the
<input /> element with the following type and value attributes:
✓ Submit
Visitors have to tell a browser when they’re done with a form and want
to send the contents. You create a button to submit the form to you by
using the following markup:
<input type=”submit” value=”Submit” />
You don’t use the name attribute for the Submit and Reset buttons.
Instead, you use the value attribute to specify how the browser labels
the buttons for display.
✓ Reset
Visitors need to clear the form if they want to start all over again or
decide not to fill it out. You create a button to reset (clear) the form by
using the following markup:
<input type=”reset” value=”Clear” />
You can set the value to anything you want to appear on the button. In our
example, we set ours to Clear. Of course, you can use something that’s
more appropriate to your Web site if you’d like.
Listing 14-2 shows an example of markup to create Submit and Reset buttons
named Send and Clear, respectively:
22_9780470916599-ch14.indd 23722_9780470916599-ch14.indd 237 11/30/10 12:26 AM11/30/10 12:26 AM
238
Part IV: Scripting and (X)HTML
Listing 14-2: A Complete Multi-Part Form
<!DOCTYPE html PUBLIC “-//W3C//DTD XHTML 1.0 Transitional//EN”
“ /><html xmlns=” lang=”en” xml:lang=”en”>
<head>
<title>Basic Form Markup</title>
<meta http-equiv=”Content-Type” content=”text/html; charset=ISO-8859-1” />
<style type=”text/css”>
h1 {background-color: silver;
color: black;
font-size: 1.2em;
font-family: Arial, Verdana, sans-serif;}
hr {color: blue;
width: thick;}
body {font-size: 12pt;
color: brown;
font-family: Tahoma, Bodoni, sans-serif;
line-height: 0.8em;}
</style>
</head>
<body>
<h1>Multi-Part Form</h1>
<hr />
<div>
<form action=”cgi-bin/guestbook.cgi” method=”post”>
<h1>Name and Password</h1>
<p>First Name: <input type=”text” name=”firstname” size=”30”
maxlength=”25” /></p>
<p>Last Name: <input type=”text” name=”lastname” size=”30”
maxlength=”25” /></p>
<p>Password: <input type=”password” name=”psswd” size=”30”
maxlength=”25” /></p>
<h1>Favorite Foods</h1>
<p>What are some of your favorite foods?</p>
<p><input type=”checkbox” name=”food” value=”pizza”
checked=”checked” />Pizza</p>
<p><input type=”checkbox” name=”food” value=”icecream” />
Ice Cream</p>
<p><input type=”checkbox” name=”food” value=”eggsham” />
Green Eggs and Ham</p>
<h1>Gender Information</h1>
<p>What is your gender?</p>
<p><input type=”radio” name=”gender” value=”male” />Male</p>
<p><input type=”radio” name=”gender” value=”female” />Female</p>
<p style=”line-height: 2em; margin: 2em;”>
22_9780470916599-ch14.indd 23822_9780470916599-ch14.indd 238 11/30/10 12:26 AM11/30/10 12:26 AM
239
Chapter 14: Working with Forms
<input type=”submit” value=”Send” />
<input type=”reset” value=”Clear” />
</p>
</form>
</div>
<hr />
</body>
</html>
Figure 14-13 shows how a browser renders these buttons in a form.
Figure 14-13: Submit and reset buttons labeled as Send and Clear.
Customizing Submit and Reset buttons
If you don’t like the default Submit and Reset buttons that a browser creates,
you can monkey with the CSS style definitions to your heart’s content, as we
did here:
22_9780470916599-ch14.indd 23922_9780470916599-ch14.indd 239 11/30/10 12:26 AM11/30/10 12:26 AM
240
Part IV: Scripting and (X)HTML
input {background-color: teal;
font-family: Lucida Console, Arial, sans-serif;
padding: 6px;
margin: 0.2em;
font-size: 1.2em;
color: white;
border-left-color: gray;
border-top-color: gray;
border-bottom-color: black;
border-right-color: black;
border-style: double;
font-weight: bold;}
In about ten minutes of fooling around, we created the snazzy-looking but-
tons you see in Figure 14-14.
Figure 14-14: A little creative CSS goes a long
way toward snazzing up your buttons.
On the other hand, if you desire something more sophisticated, you can sub-
stitute your own graphical buttons by using
✓ The <input /> element with a type of image.
✓ An src attribute that specifies the image’s location.
✓ A value that defines the result of the field:
• For an image that submits the form, set value to submit.
• For an image that clears the form, set value to reset.
Use the alt attribute to provide alternative text for browsers that don’t
show images (or for users who can’t see them). This will allow you to use
fancy buttons with rounded corners, dropshadows, and other cool effects
like those available at www.buttongenerator.com.
22_9780470916599-ch14.indd 24022_9780470916599-ch14.indd 240 11/30/10 12:26 AM11/30/10 12:26 AM
241
Chapter 14: Working with Forms
The following markup creates customized Submit and Reset buttons:
<p>
<input type=”image” value=”submit” src=”submit_button.gif” alt=”Submit” />
<input type=”image” value=”reset” src=”reset_button.gif” alt=”Clear” />
</p>
Form validation
No matter how brilliant your site’s visitors may be, there’s always a chance
that they’ll enter data you aren’t expecting. JavaScript to the rescue!
Form validation is the process of checking data the user enters before it’s
put into your database. Check the data with both JavaScript and Common
Gateway Interface (CGI) scripts on your server.
JavaScript
You can validate entries in JavaScript before data goes to the server. This
means that visitors don’t wait for your server to check the data. They’re told
quickly (before they click Submit, if you want) if there’s a problem.
If you want to use JavaScript in your forms and on your Web site, you can
read more about it in Chapter 13 of this book, or online at
✓ www.w3schools.com/js/default.asp
✓ www.quirksmode.org/js/forms.html
✓ />CGI
You need to validate your form data on the server side because users can
surf with JavaScript turned off. (They’ll have a slower validation process.)
Find out more about CGI in the next section and at
✓ www.4guysfromrolla.com/webtech/LearnMore/Validation.asp
✓ www.cgi101.com/book
Processing Data
Getting form data is really only half the form battle. You create form elements
to get data from users, but then you have to do something with that data. Of
course, your form and your data are unique every time, so no single, generic
22_9780470916599-ch14.indd 24122_9780470916599-ch14.indd 241 11/30/10 12:26 AM11/30/10 12:26 AM
242
Part IV: Scripting and (X)HTML
form handler can manage the data for every form. Before you can find (or
write) a program that handles your form data, you must know what you want
to do with it. For example:
✓ If you just want to receive comments from a Web form by e-mail, you
might need only a simple mailto: URL.
✓ If a form gathers information from users to display in a guest book, you
• Add the data to a text file or a small database that holds the
entries.
• Create a Web page that displays the guest-book entries.
✓ If you want to use a shopping cart, you need programs and a database
that can handle inventory, customer order information, shipping data,
and cost calculations.
Your Web-hosting provider — whether it’s an internal IT group or an ISP to
which you pay a monthly fee — has the final say in what kind of applications
you can use on your Web site to handle form data. If you want to use forms
on your site, be sure that your hosting provider supports the applications
you need to run on the server to process form input data (which will nor-
mally use the post or get method that we discuss earlier in this chapter).
Chapter 3 includes more information on finding the right ISP to host your
pages.
Processing forms on your pages
Typically, form data is processed in some way or another by some kind of
program running on a Web server. It might be a CGI script written in some
programming language such as Perl, Java, or AppleScript, or a different han-
dler program written using PHP, Apache, Java Server Pages (JSP), ASP, or
other programs that run on Web servers to process user input. These pro-
grams make data from your form useful by
✓ Putting it into a database or sharing it with some other kind of program
✓ Creating customized HTML based on the data
✓ Writing the data to a flat file
Flat file is computer-geek speak for a plain, unadorned text file, or one
that uses commas or tab characters on individual lines of text to sepa-
rate field values (also known as CSV for comma-separated values or TSV
for tab-separated values).
You don’t have to be a programmer to make the most of forms. Many ISPs
support (and provide) scripts for processing common forms, such as guest
books, comment forms, and even shopping carts. Your ISP may give you
22_9780470916599-ch14.indd 24222_9780470916599-ch14.indd 242 11/30/10 12:26 AM11/30/10 12:26 AM
243
Chapter 14: Working with Forms
✓ All the information you need to get an input-processing program up and
running
✓ HTML to include in your pages so they can interact with that program
You can tweak the markup that manages how the form appears in the canned
HTML you get from an ISP, but don’t change the form itself — especially the
form tag names and values. The Web-server program uses these to make the
entire process work.
Several online script repositories provide free scripts that you can download
and use along with your forms. Many of these also come with some generic
HTML you can dress up and tweak to fit your Web site. You simply drop
the program that processes the form into the folder on your site that holds
programs (sometimes called cgi-bin, often something else), add the HTML
to your page, and you’re good to go. Some choice places on the Web to find
scripts you can download and put to work immediately are
✓ Matt’s Script archive: www.scriptarchive.com/nms.html
✓ The CGI Resource Index:
✓ ScriptSearch.com: www.scriptsearch.com
If you want to use programs that aren’t provided by your ISP on your Web
site, you need complete access to your site’s scripts or processing programs
folder (sometimes named cgi-bin). Every ISP setup is different, so read
your documentation to find out
✓ Whether your ISP allows you to use programs or scripts in your Web
pages
✓ Which languages the ISP supports
Perl and PHP are generally safe bets, but it’s best to be sure.
Sending form data by e-mail
You can opt to receive your form data from e-mail instead of using a script
or other utility to process a form’s data. You get just a collection of name-
and-value pairs tucked into a text file sent to your e-mail address, but that
isn’t necessarily a bad thing. You can include a short contact form on your
Web site that asks people to send you feedback (a feature that always looks
professional); then you can simply include, in the action URL, the e-mail
address where you want the data sent:
<form action=”mailto:” action=”post”>
22_9780470916599-ch14.indd 24322_9780470916599-ch14.indd 243 11/30/10 12:26 AM11/30/10 12:26 AM
244
Part IV: Scripting and (X)HTML
Many spam companies grab e-mail addresses by trolling Web sites for
mailto: URLs. Consider setting up a special e-mail account just for com-
ments so that your regular e-mail address won’t get pulled onto spam
mailing lists. On the other hand, you can also use JavaScript-based e-mail
address encryption tools that will garble and disguise the contents of such
addresses — as long as they can be un-encrypted on the receiving end,
that is!
Designing User-Friendly Forms
Designing useful forms is a different undertaking from designing easy-to-use
forms. Your form may gather the data that you need, but if your form is dif-
ficult for visitors to use, they may abandon it before they’re done.
As you use the markup elements from this chapter, along with the other ele-
ments that drive page layout, keep the following guidelines in mind:
✓ Provide textual cues for all your forms. Be clear about
• Information you want
• Format you need
For example, tell users details such as whether
• Dates must be entered as mm/dd/yy (versus mm/dd/yyyy).
• The number of characters a field can take is limited.
As you learned earlier in this chapter, character length can be lim-
ited by using the maxlength attribute.
✓ Use field width and character limits to provide visual clues. For exam-
ple, if users should enter a phone number as xxx-xxx-xxxx, consider cre-
ating three text fields — one for each part of the phone number.
✓ Group similar fields. A logical grouping of fields makes filling out a form
easier. It’s confusing if you ask for the visitor’s first name, then birthday,
and then last name.
✓ Break long forms into easy-to-manage sections. Forms in short chunks
are less intimidating and more likely to be completed.
Major online retailers (such as Amazon.com — www.amazon.com) use
this method to get the detail they need for orders without making the
process too painful.
✓ Mark required fields clearly. If some parts of your form can’t be left
blank when users submit the form, mark those fields clearly.
22_9780470916599-ch14.indd 24422_9780470916599-ch14.indd 244 11/30/10 12:26 AM11/30/10 12:26 AM
Downloa d f r o m W o w ! e B o o k < w w w.wowebook.com>
245
Chapter 14: Working with Forms
You can identify required fields by
• Making them bold
• Using a different color
• Placing an asterisk beside them
✓ Tell users what kind of information they need for the form. If users
need any information in their hands before they fill out your form, a form
gateway page can detail everything users should have before they start
filling out the form.
The RateGenius page (shown in Figure 14-15) lays out clearly for visitors
about to fill out a long form exactly what information to prepare before
starting.
Figure 14-15: A form gateway page helps users prepare to fill out a long form.
The series of forms that RateGenius uses to gather information for car loans
and loan refinancing are excellent examples of long forms that collect a vari-
ety of different kinds of data by using all the available form markup elements.
Visit www.rategenius.com to review its form techniques.
22_9780470916599-ch14.indd 24522_9780470916599-ch14.indd 245 11/30/10 12:26 AM11/30/10 12:26 AM
246
Part IV: Scripting and (X)HTML
Other Noteworthy Forms-Related Markup
Table 14-1 lists other forms-related (X)HTML markup attributes that you
might find in HTML files.
Table 14-1 Other Forms-Related (X)HTML Attributes
Name Function/Value
Equals
Value Types Related
Element(s)
Accept
Lists acceptable
MIME types for
file upload
CS Media types
<form>
<input />
Accept-
charset
Lists character
encodings
character set
encodings
<form>
Checked
Preselects option
for select lists
“checked” <input />
MIMDisabled
Disables form ele-
ments
“disabled” <button>
<input>
<optgroup>
<option>
<select>
<textarea>
Enctype
Specifies encod-
ing method for
form input data
Media type
<form>
For
Points to ID refer-
ence from other
attributes
Idref
<label>
Label
Identifies a group
of options in a
form
Text
<optgroup>
Label
Specifies an
option name in a
form
Text
<option>
Method
HTTP method to
use when submit-
ting a form
{“get”|
”put”}
<form>
Multiple
Permits selection
of multiple options
in a form
“multiple” <select>
22_9780470916599-ch14.indd 24622_9780470916599-ch14.indd 246 11/30/10 12:26 AM11/30/10 12:26 AM
247
Chapter 14: Working with Forms
Name Function/Value
Equals
Value Types Related
Element(s)
Name
Names a specific
form control
CDATA
<button>
<textarea>
Name
Names a specific
form input field
CDATA
<select>
Name
Names a form for
script access
CDATA
<form>
Readonly
Blocks editing of
text fields within
a form
“readonly” <input />
<textarea
Size
Specifies number
of lines of text to
display for a drop-
down menu
Number
<select>
Tabindex
Defines tabbing
order for form
fields
Number
<a><area />
<button>
<input />
<object>
<select>
<textarea>
Type
Defines button
function in a form
{“button”|
”reset”|
”submit”}
<button>
Type
Specifies type of
input required for
form input field
{“button”|
”checkbox”|
”file”|
”hidden”|
”image”|
”password”|
”radio”|
”reset”|
”submit”|
”text”}
<input />
Value
Supplies a value
to send to the
server when
clicked
CDATA
<button>
Value
Associates
values with radio
buttons and
check boxes
CDATA
<input />
22_9780470916599-ch14.indd 24722_9780470916599-ch14.indd 247 11/30/10 12:26 AM11/30/10 12:26 AM
248
Part IV: Scripting and (X)HTML
Key for the Value Types Column in Table 14-1:
✓ CDATA: SGML character data type permits all keyboard characters to
be used
✓ CS Media Types: Case-sensitive type names such as “text/html” “image/
gif” or “text/css”
✓ Character set encodings: Usually UTF-8, ISO-LATIN-1, or ISO-8859-1; for a
more complete list, see www.w3schools.com/TAGS/ref_character
sets.asp
✓ MIME: Abbreviation for Multi-part Internet Mail Extensions, a standard
method to encode various document and data types for e-mail attach-
ments and for HTTP; for more info see />wiki/MIME.
Form Frameworks
Form frameworks basically put all the building blocks for building, validating,
and processing forms data together into a single coherent collection of tools
and code. When you learn how to use a framework, it’s trivial to build com-
plex robust forms of your own — at least, as long as that framework is avail-
able on your Web server!
✓ Wufoo (): Wufoo is an HTML form builder that
helps you to create contact forms, online surveys, and invitations so you
can collect data, registrations, and online payments you need without
writing a single line of code. Quick and easy!
✓ jQuery Validation Plugins ( />Validation): Even though jQuery makes it easy to write your own vali-
dation plugins, there are still a lot of subtleties you must worry about.
For example, you need a standard library of validation methods (think of
e-mails, URLs, and credit card numbers). You need to place error mes-
sages into Web documents, and then show and hide them when appro-
priate. You want to react to more than just a submit event, like keyup or
blur. You may need different ways to specify validation rules, based on
the server-side environment in use for a particular project. And after all,
you don’t want to reinvent the wheel, do you?
✓ Validatious (
Validatious offers easy form validation with unobtrusive JavaScript sup-
port, using a predefined CSS class named validate. This makes valida-
tions simply a matter of adding validator names to form elements, such
as input, select, textarea, and so forth. It’s not a complete forms
framework but does make the validation part — often the trickiest for
newbies and professionals alike — smooth and straightforward.
22_9780470916599-ch14.indd 24822_9780470916599-ch14.indd 248 11/30/10 12:26 AM11/30/10 12:26 AM
249
Chapter 14: Working with Forms
In addition, many Web-oriented development environments, such as Visual
Studio, Web Expressions, ASP.NET, and so forth also include extensive form
design and processing components. These work like frameworks, too, but
generally require you to work within their overall environments to take
advantage of their often awesome capabilities.
CAPTCHA This!
CAPTCHA stands for completely automated public turing test to tell computers
and humans apart — in other words, it’s a way of interacting on the Web that
permits developers to assume (with great assurance) that the entity typing
input on the other end of a remote connection is a person and not a program.
CAPTCHA is an important technique used to verify that a person is providing
input (especially, updating sensitive or valuable information) to a Web form
or other user input mechanism. The reason for this technology is to stymie
spammers and phishers from creating bogus e-mail addresses and Web
accounts that they can then use to pursue their own malicious ends. You
may not need to use CAPTCHA on your Web pages, but you need to know
what it is and why it’s important.
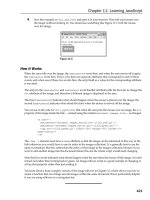
Basically, CAPTCHA works by bending text in wavy lines and overlaying
extra strokes or black marks, so that while humans can read the copy they
must enter at the keyboard to prove their intelligence is at work, computer
programs generally can’t decipher and regurgitate the text involved. The
standard example from www.captcha.net appears as Figure 14-16 with the
words “overlooks inquiry” subjected to the aforementioned treatment.
Figure 14-16: The CAPTCHA
example from the home page
at
www.captcha.net.
The Web site at www.captcha.net explains the technology in more detail,
and goes on to describe how you can use it to add another level of authenti-
cation to your Web pages. It’s not necessary for simple forms, but any time
you let users set up accounts, manage account info, or access sensitive data
(personally identifiable information, or PII, such as Social Security numbers,
credit card numbers, account numbers, and so forth, are prime targets for
such protection), it’s a good idea to put CAPTCHA in the way of would-be
evildoers.
22_9780470916599-ch14.indd 24922_9780470916599-ch14.indd 249 11/30/10 12:26 AM11/30/10 12:26 AM
250
Part IV: Scripting and (X)HTML
22_9780470916599-ch14.indd 25022_9780470916599-ch14.indd 250 11/30/10 12:26 AM11/30/10 12:26 AM