using microsoft powerpoint 2003
Bạn đang xem bản rút gọn của tài liệu. Xem và tải ngay bản đầy đủ của tài liệu tại đây (1.76 MB, 69 trang )
Guide 42
Version 1.0
Using Microsoft PowerPoint 2003
This guide provides an introduction to using Microsoft PowerPoint 2003 for the
production of OHP slides, for posters and for on-screen presentations including
animation.
The guide assumes a basic understanding of Windows.
£2
Document code: Guide 42
Title: Using Microsoft PowerPoint 2003
Version: 1.0
Date: June 2006
Produced by: University of Durham Information Technology Service
Copyright © 2006 University of Durham Information Technology Service
Conventions:
In this document, the following conventions are used:
• A typewriter font is used for what you see on the screen.
• A bold typewriter font is used to represent the actual characters you type at the
keyboard.
• A slanted typewriter font is used for items such as filenames which you should replace
with particular instances.
• A bold font is used to indicate named keys on the keyboard, for example, Esc and
Enter, represent the keys marked
Esc and Enter, respectively.
• A bold font is also used where a technical term or command name is used in the text.
• Where two keys are separated by a forward slash (as in Ctrl/B, for example), press and
hold down the first key (
Ctrl), tap the second (B), and then release the first key.
Contents
1 Introduction 1
1.1 What is PowerPoint? 1
1.2 What’s New in PowerPoint 2003 1
2 Getting started with PowerPoint 2
2.1 Deciding what type of presentation you require 2
2.1.1 Overhead transparencies 2
2.1.2 On screen presentation 2
2.1.3 Page/poster layout 2
2.1.4 Colour or monochrome? 3
2.1.5 Do I require speaker’s notes? 3
2.2 Opening PowerPoint 3
3 The New Presentation Task Pane 4
3.1 Best Method to start a presentation 4
3.1.1 Blank presentation 5
3.2 New from existing presentation 5
3.3 New from template 5
4 AutoContent Wizard 5
5 Navigation 6
5.1 Via scrollbar 6
5.2 Keyboard shortcuts 7
5.3 The Outline/Thumbnail pane 7
6 The Views 7
6.1 Normal view 7
6.2 Slide sorter view 8
6.2.1 Re-ordering slides 8
6.2.2 Copying slides 8
6.2.3 Deleting slides 9
6.3 Notes page view 9
6.4 Slide show view 9
7 Design Templates 9
7.1 Applying a design 10
7.2 Changing to another design 10
7.3 Modifying a design 10
8 Creating a new slide 10
8.1 Choosing an Slide Layout 11
8.2 Slide Objects 11
8.2.1 Formatting slide objects 11
8.2.2 Deleting slide objects 12
8.3 Working with text 12
8.3.1 Using auto-layout text boxes 12
8.3.2 Adding Text 13
8.3.3 Formatting 13
8.3.4 Deleting 15
9 Adding additional slides 15
9.1 Adding a completely new slide 15
Guide 42: Using Microsoft PowerPoint 2003 i
9.2 Duplicating the current slide 15
9.3 Deleting the Current Slide 16
10 Text formatting: bullets 16
11 Master views 17
11.1 Slide Master 17
11.1.1 Handout master view 18
11.1.2 Notes master view 18
12 Clip Art 19
12.1 Clip Art AutoLayout 19
12.2 Inserting clip art manually 20
13 Inserting, scaling, moving and deleting objects 20
13.1 To resize an object 21
13.2 To move an object 21
14 Images 21
14.1 Altering images 22
15 Organisation charts 23
15.1 Deleting boxes 24
15.2 Adding additional boxes 24
15.3 Moving boxes 25
15.3.1 Selecting boxes 25
15.3.2 Formatting 25
15.3.3 Layout 25
16 Diagrams 25
17 Charts and graphs 26
17.1.1 Activating the chart edit mode 28
17.2 Changing data in graphs 28
17.3 Changing the appearance of the constituent parts of a graph 28
17.3.1 Changing the appearance of the axes 29
18 Comments 29
19 Working with drawing tools 30
19.1 AutoShapes 30
19.2 Drawing AutoShapes 30
19.2.1 Lines 31
19.2.2 Connectors 31
19.2.3 Basic Shapes 31
19.2.4 Block Arrows 32
19.2.5 Flowchart 32
19.2.6 Stars and Banners 32
19.2.7 Callouts 33
19.2.8 Action Buttons 33
19.2.9 More AutoShapes 33
19.3 Fills 34
19.3.1 Solid colours 34
19.3.2 Graded fills 34
19.3.3 Lines 36
19.3.4 3-D Effects 37
Guide 42: Using Microsoft PowerPoint 2003 ii
19.3.5 Word Art 38
19.3.6 Text boxes 39
20 Layout 40
20.1 Order 40
20.2 Grouping and ungrouping 41
20.3 Aligning objects 41
20.3.1 Using rulers 42
20.3.2 Using guides 42
20.3.3 Using ‘Snap to Grid’ and ‘Snap to Shape’ 43
20.3.4 Freehand alignment 44
20.4 Rotation 44
21 Using the colour palettes 45
21.1 Basic palettes 45
21.2 Standard colours 45
21.3 Customised colours 46
22 Multi-media elements 46
22.1 Types of media objects 47
23 Slide Shows 47
23.1.1 Moving through slides 48
23.1.2 Drawing tool in preview 48
24 Transitions, simple text animation effects and timings 48
24.1 Slide transitions 49
24.2 Simple text animation effects 50
24.3 Rehearsing presentations 50
25 Applying animation effects to text and objects 51
25.1 Custom animations 51
26 Customising shows 54
26.1 Running shows manually 54
26.2 Running shows automatically 55
26.3 Action buttons 56
26.3.1 Hiding slides 57
26.4 Custom Shows 57
26.5 Hyperlinking 58
27 Page /slide format 58
28 Printing 59
28.1 Greyscale preview 59
28.2 Printing and print set-up considerations 60
28.2.1 Printing all slides 60
28.2.2 Controlling the printed output 60
29 Saving presentations 62
30 Creating a slide show file 62
31 Exiting PowerPoint 63
32 Getting help 63
Guide 42: Using Microsoft PowerPoint 2003 iii
1 Introduction
1.1 What is PowerPoint?
PowerPoint forms part of the Microsoft Office suite. It is a presentation package that
allows you to produce on-screen computer presentations, overhead projection
transparencies, posters and web pages. PowerPoint allows you to manipulate text
and graphical elements with great creative flexibility, whilst also providing a set of
pre-designed templates which make it possible for even the most non-artistic user
to produce professional layouts.
Presentations
• pre-designed templates to produce quick results
• Use multimedia tools to enhance the presentation
• Add graphics, sound, video clips
• Animate text or objects
• Use transition effects, colour schemes to add emphasise
• Add graphs, tables and diagrams very easily
• Create automatic slide shows, time rehearsals
• Ability to create speaker notes, handouts, outlines from the one PowerPoint
file.
It will save presentations as HTML Web pages easily so that presentations can be
posted on the Web for others to view.
PowerPoint is ideal for producing full-screen computer presentations to enhance
lectures, demonstrations or displays.
You may choose to use the package to produce posters, leaflets, booklets or other
textual or graphical designs such as tutorials (on-screen or printed), information
sheets or publicity materials.
1.2 What’s New in PowerPoint 2003
New slide Show Toolbar
The new Slide Show toolbar provides easy access to slide show navigation while
you are making a presentation. Common slide show tasks are simplified as the
toolbar puts ink annotation tools, pen and highlighter options, and the menu within
easy reach during a presentation.
The toolbar is not obtrusive or obvious to your audience.
Improved slide show ink annotations
Use ink to mark up your slides while giving a presentation, or draft slides for review
by using the ink features. You can keep the ink that you used in your slide show
presentation or discard them. You can also turn on or off the slide show markup
even if you have saved the ink markup in your presentation.
Bitmaps
Guide 42: Using Microsoft PowerPoint 2003 1
Bitmaps in Microsoft Office PowerPoint 2003 are larger and have better resolution
when exported.
Movies
There is now an option to view and play your movies in full screen presentation.
Right-click the movie, click Edit Movie Object on the shortcut menu, and then
select the Zoom to full screen check box.
You will need Microsoft Windows Media Player version 8 or later is installed. If a
required media codec isn't present, PowerPoint 2003 will attempt to download it by
using Windows Media Player technology
2 Getting started with PowerPoint
2.1 Deciding what type of presentation you require
PowerPoint can be used to produce overhead transparencies, on-screen
presentations, 33mm slides, banners, poster layouts and web pages. It is best to
decide the type of output required before the document is created, as it is often to
change designs at a later stage. It is also important to consider the printer you may
use; slides designed in full colour may not look so good when output to a black and
white printer.
2.1.1 Overhead transparencies
To print slides onto transparencies for use with an over-head projector:
• Choose File | Print
• Select Ink Jet A4 Colour Transparency – Machine Room
• Check that the correct Print Range is selected before clicking OK
2.1.2 On screen presentation
There are a number of factors to consider when designing an on-screen
presentation.
How will the audience see your slides?
There are different requirements for presentations that people will work with at their
own PCs or for small groups than larger audiences where the projected slides may
need less text and more contrasting colours.
2.1.3 Page/poster layout
You can use PowerPoint to create artistic layouts for A4, A3 and A0 pages.
Remember to consider the appropriate page orientation (See Section 27), and
whether or not you will be using a colour printer.
See Guide 140: Printing to the A0 printer for more information.
Guide 42: Using Microsoft PowerPoint 2003 2
2.1.4 Colour or monochrome?
Whilst working with PowerPoint, there is an option to toggle the view of your
presentation between colour and black and white. If chosen carefully
(considering tone as well as the colour), a presentation may work equally well
when printed in full colour or monochrome.
2.1.5 Do I require speaker’s notes?
PowerPoint has a facility which allows you to print copies of your slides annotated
with speaker's notes. You can type in your script and print it beneath a copy of each
appropriate slide. You may find it useful to compile speaker’s notes whilst you
create your slides. It is also possible to use speaker’s notes to annotate slide
illustrations for publication as booklets.
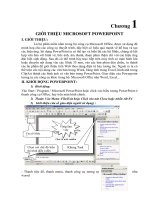
2.2 Opening PowerPoint
If you wish to use PowerPoint on the ITS Networked PC service, first you should log
in. a stand alone PC
1 Select Start | Programs | Microsoft PowerPoint.
The screen has three working areas. This view is known as the Normal View.
On the left are tabs that alternate between an outline of your slide text (Outline tab)
and your slides displayed as thumbnails (Slides tab). See section
5.3.
In the centre of the screen is the workspace which displays a large view of the
current slide; and at the bottom is the notes pane where notes can be entered about
the current slide. (See section 6.3).
Guide 42: Using Microsoft PowerPoint 2003 3
The task pane appears at the right of the screen.
3 The New Presentation Task Pane
When you first open PowerPoint, the Getting Started pane appears on the right
and a new presentation opens automatically. Use the drop-down arrow to select
different options for creating a presentation.
Choose New Presentation
The Task Pane appears on the right, showing the methods of creating a
presentation. This pane will also appear if you choose File | New. If the task pane is
not visible, select View | Task Pane. Initially the options available relate to how you
want to start the presentation.
For help with the content of your presentation using a template choose From
AutoContent Wizard.
If you already have ideas for your content but need help with a design or colour
scheme, choose From Design Template.
If you know your content and colour design or wish to create a poster, choose
Blank Presentation.
You can convert the type of presentation you have chosen at a later date.
3.1 Best Method to start a presentation
If the following choices are not visible, click the arrow on the Task Pane and select
New Presentation.
Autocontent
wizard
Useful for
certificates
Can be used to
create plans,
Wizard takes you
through step-by-
Guide 42: Using Microsoft PowerPoint 2003 4
projects step
Design Template
Predefined colours
and text styles
Can be altered at
any stage
Easy and quick for
on screen
Blank
Presentation
No colour scheme
or styles
Choice of pre-
designed layouts
Good for posters
New from
existing or
template
Uses settings from
either a template
or another file
Useful if you want
to use an old
presentation and
just add new
content.
3.1.1 Blank presentation
This starts an empty presentation devoid of any design or sample text. This may be
the most appropriate starting point if you wish to produce a poster.
3.2 New from existing presentation
Create a copy from an existing presentation so that you can make design and
content changes to it for a new presentation, without altering the original.
3.3 New from template
Create a new presentation based on an existing template. You can save an existing
presentation as a template and re-use your own design for future presentations.
4 AutoContent Wizard
1 Select from the New Presentation menu on the Task Pane.
Using the wizard can save time by providing a set of slides with relevant text
already in place. This text is generic and you will want to replace it with something
more meaningful to your exact requirements but it nevertheless guides you in
structuring the presentation and will help you organise your ideas.
Guide 42: Using Microsoft PowerPoint 2003 5
2 Click Next >.
3 Select a type of presentation and select Next >.
4 Work through the options, customising the presentation.
Note: You can click the Finish button at any time in the Wizard.
Since the presentation has been created with the wizard, the slides will have
demonstration text and topics in the content. You can, of course, overwrite any of
these topics with your own points. For more information about working in Outline
see section 5.3.
Always remember to regularly save your work especially if the presentation
contains several slides. PowerPoint files are saved with a .ppt extension.
5 Navigation
When working with a presentation consisting of more than one slide, you will need
to move between the different slides.
5.1 Via scrollbar
At the right side of the slide pane is a scrollbar. This consists of a single up arrow, a
single down arrow and double up and down arrows as well at the scrollbar button
itself. Clicking on the double arrows will move you one slide backwards or forwards
through your presentation. Clicking on the single arrows will move you up and down
the slide that is on view at the moment.
Note: if you can see the entire slide, the single arrows will also move you to the next
or previous slide; they only move you up/down on the present slide if you have
zoomed in and can not see the entire slide at once.
If you click on the scrollbar button, a pop-up will appear telling you which slide you
are viewing. For example, Slide 3 of 5. The title of the slide will also be displayed.
Guide 42: Using Microsoft PowerPoint 2003 6
To move to a specific slide, click the scrollbar button and drag it up or down. As you
move this button it will show you the descriptions of previous or following slides.
Releasing the button when it indicates the slide you want, will take you directly to
that slide.
5.2 Keyboard shortcuts
You might find the following keyboard shortcuts useful when navigating through
your slides:
Page Up Move to the previous slide
Page Down Move to the next slide
Home Move to the first slide
End Move to the last slide
5.3 The Outline/Thumbnail pane
This is positioned at the left of the screen and shows the whole presentation in one
of two ways.
Outline
When the Outline tab is selected the titles and main text from each slide are shown.
The slide that is currently shown in detail in the slide pane is highlighted in the
outline list. In the Outline pane you can edit titles and body text, rearrange text
within a slide and move entire slides from one position to another simply by
dragging and dropping.
You can use the pane to navigate through a presentation by clicking on the different
slides.
Thumbnail
When the Slides tab is selected small thumbnails of all the slides in the
presentation are shown. This is useful if your slides have no text that would be
displayed with the Outline tab. Again you can navigate through your presentation by
clicking on a thumbnail, or re-arrange your slides by clicking and dragging.
6 The Views
PowerPoint features four main ways of viewing your presentation, plus a range of
master views which you use to control common elements. Three of these views can
be accessed via either the Views buttons at the bottom left corner of the
PowerPoint window, or from the View dropdown menu.
6.1 Normal view
This is the default view. When you open PowerPoint, you will be placed in this view.
It allows you to see the slides you have created. It is within this view that you will
create new slides, amend existing slides, add objects, images and so forth.
To return to this view, click the Normal View button or select View | Normal.
Guide 42: Using Microsoft PowerPoint 2003 7
6.2 Slide sorter view
To use this view, click the Slide Sorter View button or select View | Slide
Sorter.
The slide sorter allows you to see miniature representations of your slides all at
once. You will be able to see the slides, their graphical and textual content and any
special transitions or timings you have applied to them (see section
24).
6.2.1 Re-ordering slides
This can be done either in the Outline/Thumbnail pane in Normal View, or in the
Slide Sorter View:
1 Click on the slide you wish to move (it will become highlighted).
2 Drag it to the gap after the slide you wish it to precede.
For example, to move slide 9 so that it appears between slides 3 and 4; click on the
slide, drag and drop it between slides 3 and 4. All slides will be re-numbered
according to any changes you make. It is from within this view that you can copy,
move or delete slides.
You can move multiple slides by holding down the Ctrl key whilst clicking all slides
for inclusion in the selection.
6.2.2 Copying slides
In Slide Sorter view and within the Slide Tab in Normal View, you can copy slides if
you wish to include duplicate slides.
1 Click on slide 3, to select it.
2 Click on the Copy button,
Guide 42: Using Microsoft PowerPoint 2003 8
or select Edit | Copy.
3 Click in the gap between slides 7 and 8, where you want the slide to appear
(or before the first slide/after the last slide).
4 Click the Paste button.
or select Edit | Paste.
You can copy multiple slides by holding down the Ctrl key whilst clicking all slides
for inclusion in the selection.
6.2.3 Deleting slides
To delete slides in Slide Sorter view, select any slide(s) you wish to remove from
your presentation and press the
Delete key on your keyboard. In Normal View
select File | Delete Slide to delete the current slide.
You can delete multiple slides from the Outline/Thumbnail pane by holding down
the
Ctrl key whilst clicking all slides for inclusion in the selection.
Note: if you delete a slide by accident, you can get it back by clicking the Undo
button or selecting Edit | Undo.
6.3 Notes page view
In Normal View there is a small pane at the bottom of the screen, where you can
enter notes to accompany the slide. Unless you are only adding only a short note,
you may find it easier to work in Notes Page View.
To use this view, select View | Notes Page.
This view presents you with a representation on the current slide with space
beneath to add notes. You might use this to include your script within the
PowerPoint file and, as you can print out notes pages, you can have a paper
version of the slides, annotated with the script.
The Notes Page View prompts you to Click to add text, and you can see exactly
where the text will appear. You can format the text using the usual text formatting
options and you can use the zoom button to magnify each page if required.
6.4 Slide show view
This will be coved later in section 23.
Close PowerPoint and don’t save the changes.
7 Design Templates
This option displays a list of design templates and you
can choose a pre-formatted style for your slides.
These templates have already taken into
consideration such issues as appropriate font size,
colour schemes and background graphics. They
Guide 42: Using Microsoft PowerPoint 2003 9
automatically format everything in the presentation, giving each slide a consistent
look.
1 Start PowerPoint if not already open.
2 Select the From Design Template option from the New Presentation Task
Pane. (If a different task pane or no task pane is showing use File
| New to
display the New Presentation Task Pane.)
The list of templates available to you will appear in the task bar. When the mouse is
positioned over a design the name of the template will appear.
7.1 Applying a design
Clicking on a design will apply it to all the slides in a presentation. You can easily
change to a different design by choosing another from the list. You can also modify
the design in a number of ways. See section 7.3
When you position the mouse over a design, a bar with a downward arrow appears
on the design. Clicking on this allows you further choice as to how you apply the
design. You can if you wish apply the design to only some of the slides.
Click on the Blends design from the list.
The template will be loaded and you can begin working on your presentation.
7.2 Changing to another design
Choose an alternative design from the Slide Design Task Pane.
If this Task Pane is not showing, either click the Slide Design button (top right) or
use the Format |Slide Design menu to display it.
7.3 Modifying a design
Designs can be modified in a variety of ways. Fonts and alignments can be modified
using the Slide Masters (see section 11.1). The colour scheme of a design can be
modified by selecting Color Schemes in the Slide Design Task Pane. A selection
of alternate colour schemes is offered. By using the down arrow attached to each
scheme you can choose which slides to apply the new
colours to. If you wish you can customise the colours
further by selecting Edit color schemes at the bottom of
the Task Pane.
8 Creating a new slide
When you start a new presentation the first slide layout is
for a title. If you do not want this you can change it to
another layout by using the Slide Layout Task Pane. If
this task pane is not shown, use Format | Slide Layout to
display it or choose Slide Layout from the drop down
menu on the Task Pane
Guide 42: Using Microsoft PowerPoint 2003 10
8.1 Choosing an Slide Layout
The Slide Layout Task Pane allows you to choose a layout type (auto-layout) for
the current slide. It contains a series of thumb-nail illustrations of different layouts.
You can scroll through the list of layouts. When you have found the layout closest to
your requirements, click the
OK button. Your selected layout will be applied to the
current slide. You can, of course, modify this layout if it does not meet your exact
requirements.
8.2 Slide Objects
PowerPoint treats every element you wish to add to your presentation as an object.
Each object has a set of properties which you can alter or define. These include
size, fill colour, outline colour, texture, and certain animation effects. Objects also
have positions on the slide and can be moved, deleted, copied, rotated or combined
with other objects.
The types of objects you are most likely to encounter are:
Text — See section 8.3 for more details.
Clip art — See section 12 for further details.
Images — See section 14 for further details.
Organisation charts — See section 15 for further details.
Diagrams — See section 16 for further details.
Graphs — See section 17 for further details.
Drawings — See section 19 for further details.
Multi-media elements — See section 22 for further details
8.2.1 Formatting slide objects
Objects can be formatted in a variety of ways. See specific sections for more
details.
In general, an object can be formatted by either:
• Using the Format menu.
Or
• Right- clicking on the object and selecting Format “Name of Object”.
See sections
20 and 21 for more information about objects.
Guide 42: Using Microsoft PowerPoint 2003 11
8.2.2 Deleting slide objects
1 Click on the object to select it. If the object is a text box, click on the text box
border (you will see a dotted border).
2 Press the Delete key.
8.3 Working with text
8.3.1 Using auto-layout text boxes
If you choose an auto-layout that includes a textual element you will be presented
with a blank slide containing a text box. Simply click inside the box and begin typing.
1 Select Title Slide from the Slide Layout Task Pane (if not already chosen).
2 Place your mouse pointer on the Click to add title text box, click the left
mouse button to select it and type Computer Software Presentation.
3 Select the Click to add subtitle text box and type:
Note: If an auto-layout contains a text box that you do not wish to be visible on the
output, do not enter any text in the box or highlight and press the delete key.
Guide 42: Using Microsoft PowerPoint 2003 12
8.3.2 Adding Text
If you wish to include additional text:
1 Click the Insert Text Box button from the drawing toolbar at the bottom of
the screen (if the drawing toolbar is not shown, use the View
| Toolbars
menu and check Drawing).
or select Insert | Text Box from the dropdown menu.
2 Click on the slide where you wish the text to appear.
A small box will appear with a flashing insertion cursor.
3 Type This is a text box and then click anywhere on the slide.
Note: text positioned in this way will not automatically wrap around onto a new line.
If you try to re-size an additional text box before you enter any text, the box will
disappear. When entering text, you can press the Enter key to force a new line.
8.3.3 Formatting
You can change the appearance of any text in your presentation. To do this, you
must first select the text by highlighting it. Click and drag over the text you wish to
alter.
Font
1 Select the new font from the font drop down list — the selected text will be
changed to that font.
Size
1 Select the new size from the point size drop down list
or
Click on either the Increase Font Size or Decrease Font Size buttons in the
toolbar.
Guide 42: Using Microsoft PowerPoint 2003 13
The more times you click, the bigger, or smaller the selected text will become.
Format
You can make the selected text Bold, Italic or Underlined
or you may apply a
shadow.
1 Click on the appropriate button to apply that format.
You will notice that the button you clicked to apply the format will appear to be
pressed — this shows that the chosen style has been applied.
Note: if you wish to remove Bold, Italic, Underline or Shadow from the selected text,
click once more on the appropriate button and it will no longer appear to be
pressed.
Alignment
These buttons allow you to specify text alignment. You can align blocks of text to
the left (with a ragged right edge), the right (with a ragged left edge) or fully justified
(with straight edges on both the left and right sides).
Note: The text will be aligned in relationship to the text box that holds it, not the
entire slide. See Section 20.3 for more details of how to align objects.
Colour
PowerPoint allows you to specify a colour for any text character. Normally you
would colour words or sentences, however it is also possible to colour individual
characters and thereby produce some interesting effects.
1 To colour text, select it (click and swipe over the specific character, word or
sentence) and choose a colour by clicking on the down-arrow beside the
Font Color button on the Toolbar (usually located at the bottom of the
screen).
or
2 Select the text and choose Format | Font to bring up the text formatting
dialogue box. There is a
Color option from which you can choose a colour
for your text.
Guide 42: Using Microsoft PowerPoint 2003 14
See Section 21 for more details about working with colour palettes.
8.3.4 Deleting
Individual words or characters
1 To delete part of the text in a text block, such as individual words or
characters, click in the text box to make it the active object (you can tell it
has been selected by the hashed border that will appear).
2 Either
Select the text to be deleted and press the Delete key,
or
delete to the left or right of the cursor using the Backspace or Delete key.
Whole blocks of text
To delete a whole block of text:
1 Click anywhere in the text to highlight the chosen text box (you will see a
diagonally hatched border).
2 Click on the text box border to select the text box as an object (you will see a
dotted border).
3 Press the Delete key.
9 Adding additional slides
There are various ways of adding new slides to your presentation.
9.1 Adding a completely new slide
1 Select Insert | New Slide
or click on the New Slide button on the toolbar (top right).
A slide with the same layout as the current slide will be inserted after the current
slide.
Use the Slide Layout Task Pane to choose a layout style.
2 Choose the Title and text layout
3 Type a title of your choice.
4 Type a bulleted list.
9.2 Duplicating the current slide
Another method of adding new slides is to duplicate the current slide. This is
particularly useful if you want to mimic a simple animation - the second slide might
Guide 42: Using Microsoft PowerPoint 2003 15
differ from the first only very slightly and when you move from one to the next in an
on-screen display the effect will be to introduce only the differences between the
two slides.
On the current slide, select Insert|Duplicate Slide.
9.3 Deleting the Current Slide
Slides can be deleted in a number of ways, either by pressing the delete key in
Slide Sorter View or by selecting Edit | Delete slide.
On the duplicated Types of Software slide, select Edit | Delete Slide.
10 Text formatting: bullets
Text in a list in PowerPoint is normally bulleted. These bullets can be turned on or
off by using the Bullets button. The type, colour and size of the bullet can be
changed by selecting Format | Bullets and numbering or right-clicking and
selecting Bullets and Numbering. This displays the Bullet and Numbering dialog
box.
From this dialog box you can select the style of the list and the format of the bullet
symbol. There are a number of bullet styles available
By selecting Picture, colourful and even animated bullets can be selected
(Animations will only be viewed on a Slide Show, see section 23)
The type of bullet can be chosen from the grid. If a different font for the bullet is
required, choose from the Fonts: box.
1 Select text in a list.
2 Select the Bullets button to remove the bullets. Click on the button again to
reapply them.
3 Select Format | Bullets and Numbering. The Bullets and Numbering dialog
box appears.
Guide 42: Using Microsoft PowerPoint 2003 16
4 Click the Customize button.
5 Choose a different bullet from the grid, click OK, then OK again
Note: This only affects current slide. If you wish to change the bullets for all slides
you need to change them on the master slide (see section
11).
11 Master views
Master views allow you to see the underlying templates which determine slide
backgrounds, initial layouts, default fonts and colours, and common elements which
appear on all slides, notes pages and handouts.
11.1 Slide Master
Each slide is based on a template, or Slide Master. Any element that is placed on
the slide master will appear on every slide. Any change made to an element on the
slide master will affect every occurrence of that element in all the slides that make
up the presentation.
For example, if you wish to change the title font for every slide you could make the
change on each individual slide, however it would be far more sensible to make the
change once, on the slide master, and have that change filter through to all the
slides. Each design Slide master has an associated Title Master, which applies to
the Title slide of a presentation only.
Changing something on the slide master will also cause that change to be reflected
in any new slides you create.
1 To view the slide master, either select View | Master | Slide Master
or hold down the Shift key and click the Normal View button.
Guide 42: Using Microsoft PowerPoint 2003 17
2 Highlight the text Click to edit Master title style.
3 Format the text in bold, underline and colour red.
4 Select View | Normal, to view the slide and notice all the titles are now
formatted as in the Slide Master.
From the Slide Master, you can also add footers and slide numbers to your
presentation.
If you want a common element, such as your departmental logo, to appear on each
slide, add it to the master.
It is possible to have more than one Slide Master within a presentation if you want
different formatting for certain parts of the presentation.
Bullet styles
If you do not like the default bullet style:
1 Go to the Slide Master, select the level of bulleted text you want to change
by highlighting it and pick
Format | Bullets and Numbering from the
dropdown menu.
See section 10.
Overriding master styles
You can if you wish override a master element on a particular slide. For example,
you have standard bullet points on all of your slides, but on just one of these slides
you want the bullets to appear as ticks. Go to the slide (in Normal View) that you
wish to change and then re-format the bullets using the
Format | Bullets and
Numbering option. For this slide only, the master style will be over-ridden.
11.1.1 Handout master view
PowerPoint lets you produce audience handouts. These printed sheets show
thumbnail illustrations of your slides. Handouts can include one, two, three, four, six
or nine slides illustrations per page and may also include space for the audience to
make notes.
To view the handout master, either select
View | Master | Handout Master or hold
down the Shift key and click the Slide Sorter button.
You will be presented with the handout master screen and an additional floating
toolbar that allows you to specify how many thumbnails should appear per page.
You can add common elements that appear on each handout sheet, such as page
numbers, date and time, a header, footer or imported graphic.
11.1.2 Notes master view
The Notes Master allows you to make decisions about the layout of all your notes
pages. You can specify which font to use throughout your document for the notes
Guide 42: Using Microsoft PowerPoint 2003 18
and you can add common elements to all the notes pages. Any changes made on
the notes master will, be reflected on all the notes pages.
To view the notes master, select View | Master | Notes Master.
12 Clip Art
Microsoft Office comes supplied with a wide range of pre-drawn pictures which you
can import to your presentation. If you are using a stand-alone computer you may
find that not all the clip art has been installed or that you are asked to insert the
Microsoft Office CD-ROM on which the images have been stored. If you are using
PowerPoint on the Networked PC service, you will find that the ClipArt is readily
available.
12.1 Clip Art AutoLayout
1 Insert a new slide.
2 Select one of the ClipArt and text AutoLayouts from the Slide Layout Task
Pane – these are shown under Content Layouts (scroll down).
3 Add a title and /or a bulleted list
4 Double click on the clip art section to take you to the ClipArt.
Each picture in the Clip Gallery is associated with keywords that you can use to
search for images. To search for a picture, enter a search word in the Search text
field.
Guide 42: Using Microsoft PowerPoint 2003 19