- Trang chủ >>
- Khoa Học Tự Nhiên >>
- Vật lý
Giới thiệu về phương pháp Phần tử hữu hạn mở rộng XFEM
Bạn đang xem bản rút gọn của tài liệu. Xem và tải ngay bản đầy đủ của tài liệu tại đây (3.67 MB, 20 trang )
Introduction to eXtended Finite Element (XFEM)
Method
Dibakar Datta
No. Etudiant : 080579k
Erasmus MSc in Computational Mechanics
Ecole Centrale de Nantes
FRANCE
Present Address: or
Abstract: In the present study the software CrackComput , based on the Xfem and Xcrack libraries has been
used for three problems- to experiment on the convergence properties of the method applied to elasto-statics
crack problems, comparison of stress intensity factors to simplified analytical results and study of the Brazilian
fracture test. All the problems are treated in two dimensions under plane strain assumption and the material is
supposed elastic and isotropic. For the first example, comparison for different parameter-enrichment type and
radius, degree of polynomial has been performed. Second example convergence of SIF with the L/h ratio has
been performed and compared with the analytical solution. Third example is the study of snapback
phenomenon.
1. Introduction: The extended finite element method (XFEM), also known as generalized finite
element method (GFEM) or partition of unity method (PUM) is a numerical technique that extends the
classical finite element method (FEM) approach by extending the solution space for solutions to differential
equations with discontinuous functions. The extended finite element method was developed to ease difficulties
in solving problems with localized features that are not efficiently resolved by mesh refinement. One of the
initial applications was the modeling of fractures in a material. In this original implementation, discontinuous
basis functions are added to standard polynomial basis functions for nodes that belonged to elements that are
intersected by a crack to provide a basis that included crack opening displacements. A key advantage of XFEM
is that in such problems the finite element mesh does not need to be updated to track the crack path. Subsequent
research has illustrated the more general use of the method for problems involving singularities, material
interfaces, regular meshing of micro structural features such as voids, and other problems where a localized
feature can be described by an appropriate set of basis functions. It was shown that for some problems, such an
embedding of the problem's feature into the approximation space can significantly improve convergence rates
and accuracy. Moreover, treating problems with discontinuities with eXtended Finite Element Methods
suppresses the need to mesh and remesh the discontinuity surfaces, thus alleviating the computational costs and
projection errors associated with conventional finite element methods, at the cost of restricting the
discontinuities to mesh edges. The present study is the application of this concept for solving three real life
problems.
The outline of the report is as follows. In section 2 the problems of convergence analysis has been described.
Section 3 deals with the crack in a beam and comparison of the numerically computed SIF with the analytical
one. Section 4 is the study of the Brazilian test. The report is closed in section 5 with some concluding remarks.
2. Convergence Analysis:
2.1 Problem Statement:
2.2 Parameters selected for the Problem:
Fig 2.1: Crack in an infinite
plane, modeled using stress of
the exact solution at the
boundary
Description: The mode I and II crack opening for an infinite plate will be
studied. To emulate the infinite problem, a square shaped domain will be
used. On the boundary of the domain, the traction stress of the exact solution
is imposed. The elastic numerical displacement field can then be computed
numerically on the domain and a H1 norm of the error can be computed in a
post processing phase.
Objective: The objective of the study is to measure the error between the
exact solutions and the numerical solution as well as the convergence rate for
different simulation parameters. The improvement related to the use of the
tip enrichment function and the size of the enrichment zone is to be studied
and the error results are to be presented as curves as a function of element
size in log log scale.
Mode I
Scalar Enrichment
Vector Enrichment
Polynomial
Degree: 1
Polynomial
Degree: 2
!
Polynomial
Degree: 1
!
Polynomial
Degree: 2
!
Enrichment
Radius:
a) 0.10
b) 0.30
c) 0.50
d) 1.0
Enrichment
Radius:
a) 0.10
b) 0.30
c) 0.50
d) 1.0
!
Enrichment
Radius:
a) 0.10
b) 0.30
c) 0.50
d) 1.0!
Enrichment
Radius:
a) 0.10
b) 0.30
c) 0.50
d) 1.0!
!
2.3 A Brief Theoretical Background:
2.3.1: The concept polynomial in approximation theory: In approximation methods like FEM,
the unknown function id approximated as polynomial. When a polynomial is expressed as a sum or difference
of terms (e.g., in standard or canonical form), the exponent of the term with the highest exponent is the degree
of the polynomial. The approximation by of an unknown function by a polynomial will be more close to exact
in case a higher order polynomial is used. As shown in the Fig 2.2, the approximation of a quadric polynomial
with the piecewise linear function induces error apart from the nodal point. Numerical illustration will show that
the selection of higher order polynomial gives less error.
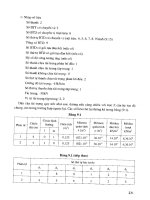
NOTE: Simulation performed on a sample size of
10 mm by 1 mm. In each case the simulation is
performed using number of elements: 10,
20,30,40,50.
!
Crack!
!
Fig 2.2: A function in H
1
0
, with
zero values at the endpoints (blue),
and a piecewise linear
approximation (red).
!
!
Fig 2.3: Basis functions v
k
(blue)
and a linear combination of
them, which is piecewise linear
(red).
!
Fig 2.4: Second order
polynomial. The unknown
function is approximated
by quadratic polynomial.
Fig 2.5: Higher order
polynomial. The unknown
function is approximated
by cubic, quatric and
higher polynomial.!
!
!!!!!!2.3.2: The Concept of Enrichment:
The traditional Finite Element Method (FEM) coupled with
meshing tools does not yet manage to simulate efficiently the
propagation of 3D cracks for geometries relevant to engineers in
industry. In the XFEM approach, In order to represent the crack on its
proper length, nodes whose support contains the crack tip (squared
nodes shown in figure 2.6) are enriched with discontinuous functions
up to the point t but not beyond. Such functions are provided by the
asymptotic modes of displacement (elastic if calculation is elastic) at
the crack tip.
!!!!!!!!
!Fig 2.6: Crack not aligned with a mesh; the
circled nodes are enriched with the
discontinuous function and the squared!
nodes with the tip enrichment functions.
The enriched Finite Element approximation is written as:
!
Where,
• is the set of nodes in the mesh.
• is the scalar shape function associated to node i.
• is the subset of nodes enriched by the Heaviside function. The corresponding (vectorial) DOF are
denoted
• are the set of nodes to enrich to model crack tips numbered 1 and 2, respectively. The
corresponding degrees of freedom are .
• Functions modeling the crack tip are given in elasticity by :
!
• is the classical (vectorial) degree of freedom at node i.
!
Topological and geometrical enrichment strategies:
!!!! !!!!!!!!!!
!!!!!!!!!!!!!!!!!
Fig 2.8: Topological Enrichment
!
!
Fig 2.7: Geometrical Enrichment!
!
Topological enrichment consists in enriching a set of nodes
around a tip. It does not involve the distance from the node
to the tip.
Geometrical enrichment consists in enriching all nodes
located within a given distance to the crack tip.
!!!!!!!
!
!
!
!
!
2.3.4: Result and Discussions:
Table 2.1: Table for the error.
!!!!
!
!
!
Error
Enrichment
type
Radius
Degree
Mode
nelem=10
nelem=20
nelem=30
nelem=40
nelem=50
Vector
0.1
1
1
0.244894
0.169134
0.125591
0.106975
0.089638
Vector
0.1
2
1
0.10463
0.071143
0.0397
0.034069
0.025796
Vector
0.3
1
1
0.196668
0.130976
0.097203
0.080513
0.068605
Vector
0.3
2
1
0.068576
0.040318
0.027794
0.022942
0.019485
Vector
0.5
1
1
0.17509
0.114009
0.085842
0.07061
0.060568
Vector
0.5
2
1
0.057539
0.033955
0.025161
0.021125
0.018473
Vector
1
1
1
0.145229
0.093322
0.071888
0.059798
0.051911
Vector
1
2
1
0.047704
0.029847
0.023623
0.020215
0.017977
Scalar
0.1
1
1
0.230946
0.151312
0.096895
0.081758
0.063587
Scalar
0.1
2
1
0.093008
0.061212
0.029211
0.025099
0.019488
Scalar
0.3
1
1
0.143692
0.086514
0.057819
0.045911
0.037359
Scalar
0.3
2
1
0.050444
0.030693
0.022454
0.019104
0.016779
Scalar
0.5
1
1
0.108513
0.062699
0.043323
0.033735
0.027722
Scalar
0.5
2
1
0.043381
0.027519
0.021656
0.018793
0.016826
Scalar
1
1
1
0.056658
0.032469
0.023866
0.019262
0.016373
Scalar
1
2
1
0.038506
0.026522
0.021816
0.019019
0.017089
Vector and Scalar Enrichment (Ref. to Fig 2.6):
Vector Enrichment:
!
Scalar Enrichment:
2.3.3 Analytical Solution:
!!!!!
!!!!!!!! !!!!!!!!!!
!!!
Fig 2.9: Normalized Stress Distribution for
Mode 1.
Fig 2.10: Normalized Displacement Distribution
for Mode 1.
!
! !
Fig 2.11: Crack tip circular region
!
Solution for Stress Field:
!
Solution for Displacement Field:
!
The numerically computed solution is to be
compared with the analytical solution as given
below and the H1 norm of the error is to be
computed in a post processing phase.
2.3.4.1: Comparison of error for different enrichment radius:
!
0.01!
0.1!
1!
7! 70!
Enrichment!
Radius:!0.10!
Enrichment!
Radius:!0.30!
Enrichment!
Radius:!0.50!
Enrichment!
Radius:!1.0!
Enrichment Type:
SCALAR
log(1/mesh size)
log(Error)!
Fig 2.11:Comparison of error for different scalar type of
enrichment radius for polynomial degree 1
!
0.05!
0.5!
7! 70!
Enrichment!
Radius:!0.10!
Enrichment!
Radius:!0.30!
Enrichment!
Radius:!0.50!
Enrichment!
Radius:!1.0!
Enrichment Type:
VECTOR
log(1/mesh size)
log!(Error)!
Fig 2.12: Comparison of error for different vector type
of enrichment radius for polynomial degree 1
!
0.01!
0.1!
7! 70!
Enrichment!
Radius:!0.10!
Enrichment!
Radius:!0.30!
Enrichment!
Radius:!0.50!
Enrichment!
Radius:!1.0!
Enrichment Type:
SCALAR
log(1/mesh size)
log(Error)!
Fig 2.13 :Comparison of error for different types of
scalar type of enrichment radius for polynomial degree 2
!
0.01!
0.1!
7! 70!
Enrichment!
Radius:!0.10!
Enrichment!
Radius:!0.30!
Enrichment!
Radius:!0.50!
Enrichment!
radius:!1.0!
Enrichment Type:
VECTOR
log(1/mesh size)
log(Error)!
Fig 2.14: Comparison of error for different types of
vector enrichment radius for polynomial degree 2
Comment:
Fig 2.15: Geometric Enrichment
Circled nodes are enriched with the
Heaviside function while squared nodes are
enriched by tip functions!
All the nodes within the specified distance (indicated
by blue arrow) from the crack tip are enriched.
In all four cases, the error due to the enrichment radius 1.0 is
less .Because with larger enrichment radius, the number of
nodes enriched in the neighborhood of crack tip is more.
Hence the approximation function is drawn from the largest
space. In general the error can be given by:
However, in case of traditional
FEM approach, with the halving of the mesh size, the error
gets reduced by . In case of XFEM, with the
conventional topological enrichment, the error gets reduced
by ½. Hence with the use of more enrichment function, the
reduction of error with the decrease of the mesh size is more.
The reduction of error with the decrease of mesh size is
distinct in case of polynomial degree 1 as in this case the
2.3.4.2: Comparison of error for different polynomial degree:
unknown function is approximated with the linear function. Hence a priori there is error. Hence the use
of more enrichment functions plays a dominant role in reducing the error of approximation.
In case of polynomial degree 2, the reduction of error with the decrease of mesh size is not distinct
(especially at the smaller mesh size). Because the use of polynomial degree 2 plays the role of reducing
the error. Hence use of higher enrichment radius is of no significant use.
In all cases, the difference of error at larger mesh size is distinct for different enrichment radius. As the
error is proportional to the power of h (mesh size). Hence with the smaller mesh size the error due to
mesh size is significantly reduced. Hence the reduction of error with the use of higher enrichment radius
is not significant.
It is important to note that use of more enrichment function also increases the computation cost. Hence it
requires optimizing the enrichment radius in order to avoid the high computation cost.
!
!
0.01!
0.1!
1!
7! 70!
Polynomial!
Degree:!1!
Polynomial!
Degree:!2!
Fig 2.16: Enrichment Type: Scalar, Radius: 0.10
log(Error)!
log(1/mesh size)
!
0.01!
0.1!
1!
7! 70!
Polynomial!
Degree:1!
Polynomial!
Degree:2!
log(Error)!
Fig 2.17: Enrichment Type : Scalar, Radius: 0.30
log (1/mesh size)
!
0.01!
0.1!
1!
7! 70!
Polynomial!
Degree:1!
Polynomial!
Degree:2!
log(Error)!
log(1/mesh size)
Fig 2.18: Enrichment Type: Scalar, Radius: 0.50
!
0.01!
0.1!
1!
7! 70!
Polynomial!
Degree:!1!
Polynomial!
Degree:2!
log(1/mesh size)
log(Error)!
Fig 2.19: Enrichment Type: Scalar, Radius:1
!
0.01!
0.1!
1!
7! 70!
Polynomial!
Degree:1!
Polynomial!
Degree:2!
Fig 2.20: Enrichment Type: Vector, Radius: 0.10
log(1/mesh size)
log(Error)!
!
0.01!
0.1!
1!
7! 70!
Polynomial!
Degree:1!
Polynomial!
Degree:2!
log(1/mesh size)
Fig 2.21: Enrichment Type: Vector, Radius: 0.30
!
0.01!
0.1!
1!
5! 50!
Polynomial!
Degree:!1!
Polynomial!
Degree:2!
log(1/mesh)
log(Error)!
Fig 2.22: Enrichment Type:Vector, Radius: 0.50
!
0.01!
0.1!
1!
7! 70!
Polynomial!
Degree:1!
Polynomial!
Degree:2!
log(1/mesh size)
log
(Error)!
Fig 2.23: Enrichment Type : Vector, Radius: 1
Comment:
I
!
!
!
Fig 2.24: Use of different degree polynomial in approximation theory.
In all the cases, the error is
considerably less in case of
polynomial degree 2. It is
obvious as it can be seen
from Fig 2.24 that use of
higher order polynomial gives
solution close to the exact
even with small number of
elements as compared to less
degree polynomial.
Ref to fig 2.24, quadratic
element (polynomial of
degree 2) can almost exactly
represent an exact solution
with just two elements. While
the for linear polynomial i.e.
polynomial of degree 1, it
requires 8 elements.
Hence, for a given number of
elements, higher order
polynomial gives better
result.
Ref. to Fig 2.25, it can be
seen that in case of
enrichment, higher order
makes different.
It can be observed that for
scalar type enrichment with
enrichment radius 1, at the
smaller mesh size, both
polynomial degrees give
close result. According to the
limited knowledge of the
author, reduction of the error
mainly governed by scalar
type enrichment which uses
more number of integration
points. This will be
thoroughly discussed in the
next section.
2. 3.4.3: Comparison of error for different types of enrichment (Scalar or Vector):
Fig 2.25: In case of enrichment, higher order makes different.
!
!
!
0.01!
0.1!
1!
7! 70!
Scalar!
Enrichment!
Vector!
Enrichment!
log(1/mesh size)
log(Error)!
Fig 2.30 Polynomial Degree:2, Enrichment Radius:0.10
!
0.01!
0.1!
1!
7! 70!
Scalar!
Enrichment!
Vector!
Enrichment!
log(1/mesh size)
log(Error)!
Fig 2.31: Polynomial Degree 2 : Enrichment Radius: 0.30
!
0.01!
0.1!
1!
7! 70!
Scalar!
Enrichment!
Vector!
Enrichment!
log(1/mesh size)
log(Error)!
Fig 2.28: Polynomial Degree:1, Enrichment Radius: 0.50
!
0.01!
0.1!
1!
7! 70!
Scalar!
Enrichment!
Vector!
Enrichment!
log(1/mesh size)
log(error)!
Fig 2.29: Polynomial Degree 1: Enrichment Radius:1
!
0.01!
0.1!
1!
7! 70!
Scalar!
Enrichment!
Vector!
Enrichment!
log(1/mesh size)
!!!!!log(Error)!
Fig 2.32: Polynomial Degree:2, Enrichment Radius: 0.50
!
0.01!
0.1!
1!
7! 70!
Scalar!
Enrichment!
Vector!
Enrichment!
log(1/mesh size)
log(Error)!
Fig 2.33:Polynomial Degree 2; Enrichment Radius:1
!
0.01!
0.1!
1!
7! 70!
Scalar!
Enrichment!
Vector!
Enrichment!
log(1/mesh size)
log(Error)!
Fig 2.26: Polynomial Degree:1, Enrichment Radius:0.10
!
0.01!
0.1!
1!
7! 70!
Scalar!
Enrichment!
Vector!
Enrichment!
log(1/mesh size)
log(Error)!
Fig 2.27: Polynomial Degree:1, Enrichment Radius:0.30
Comment:
For polynomial degree 1, the error in case of scalar enrichment is considerably less. In scalar
enrichment, as mentioned earlier, four enrichment functions are used at each node in two directions.
Hence total at each DOF, total 8 DOF are used. Hence more number of integration points is used in this
case. In vector enrichment, only 2 DOF (asymptotic mode that needed) is retained and other terms are
neglected depending on the 6 coefficients. By playing around with the 4 functions, it exactly represents
the function.
Hence in case of vector enrichment, less number of integration points is used. Hence one of the possible
2.3.4.4: Displacement and Stress Field:
reasons may that use of more number of gauss points for the numerical integration yields better result.
In case of polynomial degree 2, error due to scalar and vector enrichment does not differ significantly
with the decrease in mesh size. As discussed earlier, higher order polynomial can approximate a function
more accurately as compared to the lower order polynomial. Hence for higher order polynomial, the
error is not significantly governed by the enrichment type.
!
!
!!!!!!!!!!!!!!!!!!!!!!!!!!!!!!!!!!!!!!!!!!!!!!!!!!!!!!!!!!!!!!!!!!!!!!!!!!!!!!!!!!!!!!!!!!!!!!!!!!!!!!!!!!!!!!!!!!!!!!!!!!!!!!
!
!
!
!
!
!
!
!
!
!
!
!
!
!
!
!
!
!
!
!
!!!!! !
Displacement Field:
Displacement along the y –direction is given by:
!
The displacement field is discontinuous along the
crack length.
Stress Field:
As mentioned earlier, the stress field is proportional
to . Hence the stress field is singular at the tip of
the crack.
At the crack tip, theoretically the stress reaches the
maximum value of infinity.
!
!!!! !
Fig 2.34: Displacement Field.
Fig 2.35: Stress Field
Term causing discontinuity
3. Crack in a beam:
3.2 Selection of the Mesh Size:
For a particular length, simulation is performed on different mesh size until the stress intensity factor (SIF) for
the second mode ( ) converges to zero. The following parameter is selected for the analysis.
Height (h):
1
Length (L):
10
Polynomial Degree:
2
Point on the lip :
5
Enrichment Radius : 0.4
Enrichment Type:
Scalar Enrichment
Young modulus :
1
poisson :
0
Fig 3.1: Crack in a beam
3.1 Problem Statement:
Description: A crack in an enhanced beam must be modeled
in two dimensions. The stress intensity factor is to be computed
for different L/h ratio until convergence.
Objective: Comparison and analysis of the analytical stress
intensity factor (SIF) with the computed SIF at the crack tip. The
analytical model is based on a strain energy analysis on two
beams.
L=10!
h=1!
Crack!Length!(a)!=5!
Fig 3.1: Initial geometry for selection of the mesh size.
!
NOTE: The number of
element in the longer
direction (say M) and in the
vertical direction (say N) are
selected in such a way so
that L/M = h/N.
L
K
II
10
1.48E-06
20
3.41E-07
30
2.09E-07
40
1.65E-07
!!
!
0.00E+00!
5.00EG07!
1.00EG06!
1.50EG06!
2.00EG06!
0! 10! 20! 30! 40! 50!
No of Element in vertical direction
K
II
!
Table: L v/s K
II
No of element selected
for the analysis
Fig 3.2: No. of element v/s K
II
plot.
!
3.3 Determination of K
I
:
The length of the specimen is increased. The length of the crack is kept as half the length of the specimen. The
number of element is increased in such a way so that the mesh size in the longer direction is kept constant for
all the length.
!
!!!!!!!!!!!!L/h!
!!!!!K
I!
10!
5.37EG03!
20!
1.43EG03!
30!
6.51EG04!
40!
3.70EG04!
50!
2.39EG04!
60!
1.66EG04!
70!
1.23EG04!
80!
9.41EG05!
90!
7.45EG05!
100!
6.05EG05!
110!
5.00EG05!
120!
4.21EG05!
130!
3.59EG05!
140!
3.10EG05!
150!
2.70EG05!
3.3 Analytical Solution for K
I
:
In the present problem, we are considering the case of constant displacement. In this section, analytical
solution of K
I
will be developed for this case.
!
0.00E+00!
1.00EG03!
2.00EG03!
3.00EG03!
4.00EG03!
5.00EG03!
6.00EG03!
0! 20! 40! 60! 80! 100! 120! 140! 160!
!!!Fig 3.3: The K
I
v/s L/h profile
!!!!!!!L/h!
K
I
!
!
!
!
Fig 3.4: Cracked body with energy changes
Fig 3.5: Load v/s Displacement diagram for a growing
crack
Ref. to Fig 3.4:
The input energy change
Change in dissipated energy as heat.
Total potential elastic energy
Change in kinetic energy of the system.
Consequently, the conservation of energy change
due to the displacements arising from the fracture
area change can be defined as:
!
Energy release rate is given as:
If the cracked plate shown in Figure 3.4 is subjected to an external load P and the crack growth very slow, then
the load-points undergo a relative displacement perpendicular to the crack plane and the crack length
extends an amount .Consequently, the work done responsible for such an increment in displacement and
crack length is defined by :
Consider mode I (tension) loading and the linear behavior shown in Figure 3.5. The stored energy due to tension
loading can be defined as the area under the curve.
Hence, and .
Consider the present problem under constant displacement. In this case, the load and load gradient expressions
are
, Hence we get:
Since , we get: !
The SIF for Mode I loading is given by: !
For the present problem, , Substituting these values, we get:!
, Numerical value of:
!
!!!!!!! !
!!!!!! !
Displacement and Stress Field:
!!!!!!!!!!!!!!!!!!!!!!!!!!!!!!!!!!!!!!!!!!!!!!!!!!
Comment:
• The analytical solution is developed for one dimensional beam problem. Hence the length of the beam is
increased keeping the height constant until the L/h ratio is predominantly large i.e the geometry can be
considered as one dimensional. However, the analytical solution is not exactly same as the numerical
one as the numerical solution always associates different kinds of numerical error. However the order of
magnitude is same.
•
Enrichment
Recommended
Enrichment
Not Recommended
The enrichment zone used should be well
inside the geometry. As shown in the
adjacent figure, enrichment zone exceeding
the geometry of the beam is not
recommended.
4. Brazilian Test:
!
!!
!
!
Fig 4.1: Schematic Diagram of the
Setting of the Brazilian Test
Fig 4.2: The Setting of the Brazilian Test
!
Fig 4.3: The Experimental Set Up of the
Brazilian Test
!
4.1 Problem Statement:
The Brazilian Test is a famous experiment on concrete sample, as represented on the figure. The goal of this
exercise is to reproduce the experiment, where a crack appear in the center of the sample in the vertical direction
and then propagate vertically until total failure of the sample. The displacement/force curve is to be plotted at
the loading point while the crack propagates under the assumption that the crack propagate at constant value of
K
I
stress intensity factor.
2a
Crack
Length
4.2 A Brief Background:
The Brazilian test was developed to measure the tensile strength of
brittle materials like rocks and concrete (Berenbaum and Brodie,
1959). The Brazilian testing procedure is simple and the specimen
preparation is easy compared to other test methods. Standard test
method had been suggested (ISRM, 1978). The indirect tensile
strength of a disc sample (Figure 1) of radius R and thickness t, with
known load at failure P is given by
!!!!!!!!!!!!!!!!!!!!!!!!!!!!!!!!!!!!!!!!!!!!!!!!!!!! !
!!!!!!! !
Fig 4.1: Brazilian test for indirect tensile
strength
!
The stress field inside the disc can be obtained by solving a
differential equation that employs Airy’s stress function and satisfies
the boundary condition of the sample.
Brazilian tests simulation of rock samples with pre-existing cracks is
executed with the crack length and orientation taken as variables.
Visible new cracks are generated right after the global peak in the load –
displacement curve. It is seen that the macro tensile strength decreases as
the pre-existing crack length increases.
Numerous studies of Brazilian tests have concentrated on the numerical
Enrichment Zone Inside
the geometry
Enrichment Zone
Exceeding the
Geometry
Fig 4.2: Fracture initiation and propagation in a
disc with a 40 mm long pre-existing inclined crack
at the disc centre, oriented at
4.3: Test Sample and the Boundary Condition:
!!!!
!!! !!!!!!!!!!!!!!!!!!!!!!!!!!!!!!!!!!!!!!!!!!!!!!!
!
!! !
!
!
!
!
2a!
Crack
Length
Fig 4.4: Test Sample before failure
Fig 4.5: Test Sample after failure
!
Fig 4.3: Sample for Brazilian
Test
O!
A!
B!
NOTE:
The crack in the 3D sample is a penny
shaped. The length of the crack is given by
the diameter of the crack. Because of
symmetry in loading and geometry, half of
the sample is analyzed. The length of the
crack is given by the radius.
Boundary Condition:
Until the crack propagation causing the
failure of the sample, the BC is given by
the Fig 4.4. The midpoint (O) motion is
prevented in the X-direction and the
motion of the other points is restricted in
the Y-direction.
After the failure of the sample i.e. the crack
propagates through the sample, the BC
condition is given by Fig 4.5. Point A and
B are restricted in the X-direction.
X!
Y!
4.4: Methodology:
The SIF is related to the force as: . The analysis is performed for a load of 1N. Hence, .
Now the critical force can be obtained as: . The is taken as 1. Hence .
Hence the obtained value is inverted to get the critical force. The obtained displacement from the simulation
is for a force of 1N. Hence the true displacement is obtained by multiplying the obtained displacement with the
.
The sample with no crack will behave linearly (i.e. the Force v/s Displacement curve is linear). The sample will
have higher modulus of elasticity. With the initiation of the crack, the sample will start losing the strength and
will undergo snap back phenomenon. After the propagation of the crack through the body, the sample will still
withstand load. But it will have the minimum strength.
The simulation if performed for the crack length from 0.10 to 0.95. The radius of the sample is 1. Hence a crack
length > 1 stands for the full propagation of the crack and the failure of the material.
4.5: Results and Discussions:
Table 4.1 : Table for Force and Displacement
Crack
Radius
Displacement for F=1 N
K
I
Critical Force
Actual
Displacement
0.1
5.31E-09
6.89E-02
1.45E+01
7.70E-08
0.15
5.33E-09
8.56E-02
1.17E+01
6.22E-08
0.2
5.35E-09
1.01E-01
9.89E+00
5.29E-08
0.25
5.38E-09
1.16E-01
8.61E+00
4.63E-08
0.3
5.42E-09
1.32E-01
7.60E+00
4.12E-08
0.35
5.46E-09
1.47E-01
6.79E+00
3.71E-08
0.4
5.52E-09
1.64E-01
6.11E+00
3.37E-08
0.45
5.60E-09
1.81E-01
5.53E+00
3.10E-08
0.5
5.69E-09
1.99E-01
5.03E+00
2.86E-08
0.55
5.80E-09
2.18E-01
4.60E+00
2.67E-08
0.6
5.94E-09
2.36E-01
4.23E+00
2.51E-08
0.65
6.11E-09
2.55E-01
3.92E+00
2.39E-08
0.7
6.31E-09
2.73E-01
3.67E+00
2.31E-08
0.75
6.55E-09
2.85E-01
3.50E+00
2.30E-08
0.8
6.83E-09
2.89E-01
3.46E+00
2.36E-08
0.85
7.16E-09
2.75E-01
3.63E+00
2.60E-08
0.9
7.51E-09
2.33E-01
4.30E+00
3.23E-08
0.95
7.87E-09
1.43E-01
6.97E+00
5.49E-08
Force v/s Displacement Curve:
Details of the Plotting of the Force- Displacement Curve (Ref. Fig 4.6):
Curve DCE:
The numerical simulation is performed for different length of the crack. The obtained value of K
I
is inverted to
get the actual force which when multiplied with the obtained displacement gives the true displacement. The
obtained actual force and displacement is plotted to get the curve DCE.
Line OA:
Line OB:
0.00E+00!
5.00E+00!
1.00E+01!
1.50E+01!
2.00E+01!
2.50E+01!
0.00E+00! 2.00EG08! 4.00EG08! 6.00EG08! 8.00EG08! 1.00EG07! 1.20EG07! 1.40EG07! 1.60EG07! 1.80EG07!
Displacement
Force
A
B
D!
E!
Curve DCE
O!
Line OA
Line OB
!
!C!
Fig 4.6: Force v/s Displacement Curve
!
Displacement
For F=1N in
mm.
Displacement
for Applied
Force (mm)
True Applied
Force (N)
0
0
0.00E+00
5.16E-09
1.03E-07
2.00E+01
!!
Line OA corresponds to the case of NO CRACK.
Simulation performed for force of 1 N. The displacement (in
the Y direction) is multiplied by 2 for an applied force of 2
N. The data in the last two columns of the table 4.2 are used
to plot Line OA.
Table 4.2: Table for the Line OA.
!
Table 4.3: Table for the Line OB.
Displacement
For F=1N in
mm.
Displacement
for Applied
Force (mm)
True Applied
Force (N)
0
0
0.00E+00
8.08E-09
1.62E-07
2.00E+01
!
Line OB corresponds to the case of COMPLETE CRACK
PROPAGATION. Simulation performed for force of 1 N.
The displacement (in the Y direction) is multiplied by 2 for
an applied force of 2 N. The data in the last two columns
of the table 4.3 are used to plot Line OB.
!
Significance of the Force- Displacement Curve:
!!!! !!!!!!!!!!!!!!!!!!!!!!!!!!!!!!!!!!!!!!!!!!!!!!!!!!!!!!!!!!!!!!!!!!!!!!!!!!!!!!!!!!!!!!!!!!!!!!!!!!!!!!!!
O!
F!
Area OBG is measure of
stored energy in the
system after the failure
of the sample and the
load is at B
Area OAF is
measure of
stored energy in
the system for
the case of NO
CRACK.!
Area OAH is measure of the loss of
energy of the system when the load
is reduced from A to H
Slope of the line is a
measure of Young
Modulus of the system at
this stage.
!
!!!!!!!!!!!
!!!!!!!!! !
F!
d!
Jump
Phenomenon
Fig 4.8: Jump Phenomenon
The force displacement curve is an example of Snap Back phenomenon.
The are under the curve at a particular stage is a measure of the stored
energy in the system. The difference of the area between the two stages
gives a measure of the loss of energy of the system due to change in
loading on the system. At a particular state, the slope of the line is a
measure of the Young Modulus of the system.
NOTE: In practice during experiment, it is difficult to capture the sudden change in the Force v/s displacement
curve (the position of the global peak i.e. the Point of Bifurcation). The curve jumps suddenly from point A to
point B . The phenomenon is known as Jump Phenomenon.
!
A!
B!
Displacement and Stress Plot:
Crack Length
Displacement Plot
Stress Plot
!!!
!
!
!
!
0 (NO CRACK)
!!!!!
!!!! !
!
!
!!!!!! !
!
!
!
!
!
!
!
!
!!!!! !
Point of
Bifurcation
Crack Length
Displacement Field
Stress field
0.40
0.60
0.80
10
(After the
failure of the
sample)
Comment:
Brazilian Test gives an idea of the strength of the concrete specimen and its behavior under the uniaxial
loading. The force at which the crack initiation occurs can be captured from the load displacement
diagram.
!
!
4.00EG09!
4.50EG09!
5.00EG09!
5.50EG09!
6.00EG09!
6.50EG09!
7.00EG09!
G0.4! 0.1! 0.6! 1.1!
Dispalcement
Fig : Displacement v/s Crack Length Plot
Crack Length
Failure of the
Sample
The displacement at the tip of the crack keeps on
increasing with the increase of the crack length.
Since the loading and the sample geometry is
symmetric, the displacement field is also
symmetric.
!!!!!!!!!!!!!!!!! !
Like the displacement field, the stress field is also
symmetric due to the symmetry in loading and
geometry.
The stress is maximum at the tip of the crack. The
stress is also reaches high value just beneath the
loading plate.
Stress is maximum at
the crack tip
(Theoretically
Infinite)
Stress is also high just
below the loading
plate.
Fig: Stress Field at crack length 0.40
6. References:
1. “Introduction to Fracture Mechanics” by Perez.
2. “ The eXtended Finite Element Method(X-FEM) Lecture Notes for the Erasmus Mundus Master of Science
in Computational Mechanics” by Nicolas MOES.
3. Class Note by N. MOES and N.Chavagan
4. www.wikipedia.com
5. www.imechanica.com
5. Conclusive Discussion:
The study of convergence analysis gave an idea of the set of parameter that yields proper convergence.
However the set of parameter should be optimally selected so as to optimize the speed of computation
also.
The convergence study can also be extended for the case of mixed mode, presence of hole, curved
boundaries and other kinds of discontinuity which will simulate the real problems. The study can also be
extended for other fields like stress, pressure, strain etc.
The study of crack in a beam gives an idea about the SIF value when the 2-D model is enlarged enough
to have 1-D behavior. Hence the study can be extended for the evaluation of SIF for 2-D model, for the
mixed mode and for other discontinuities.
The study of the Brazilian Test gives an idea of the Snap Back behavior of the sample under the
specified loading condition. The Boundary Condition for the case of no crack and the failure of the
sample should be properly chosen while analyzing the half of the sample.
The study can be extended for the mixed mode and other types of loading condition (e.g. random
loading, dynamic loading).
Acknowledgement:
The author of this project report is highly indebted to Prof. Nicolas Chevaugeon, the instructor of the
computer laboratory on X-FEM for his outstanding guidance throughout the session. It is only because of his
soft guidance, the author was able to complete the project. The author is also highly indebted to Prof. Nicolas
MOES, the instructor of the X-FEM module for his awesome instruction.
!