trixbox2 without tears
Bạn đang xem bản rút gọn của tài liệu. Xem và tải ngay bản đầy đủ của tài liệu tại đây (8.74 MB, 248 trang )
TRIXBOX-2 without Tears
Incorporating PBX in a Flash
The ICT serial following
Trixbox without Tears
If you find this book helpful and you are a private user, a small PayPal donation made to
would be very highly appreciated. If you are in Australia and don’t have Paypal, you may
forward a cheque made to:
Ben Sharif, PO Box 70 Kingswood NSW 2747, Australia.
(For business use or using this as manual for your customers, prior arrangement with the author is required)
/>
TRIXBOX-2 Without Tears
Page 1 of 248
Intentionally left blank
TRIXBOX-2 Without Tears
Page 2 of 248
For TRIXBOX® 2.x with freePBX
(Version 2.6.2)
(Work is Perpetually in Progress)
by
Ben Sharif
(The same author who brought you Asterisk@Home without tears and Trixbox without tears)
About the Author
Photography is my passion
/>Last updated on April 10, 2009
Please send comment or suggestions to me at the address below
mailto:
First Published on 1st January 2007
This document is released under the Creative Commons By-Attrib Non-Commercial Share-Alike 2.1 licence.
This work is dedicated to my wife, who has been very patient with me, Andrew Gillis, Ward
®
®
®
Mundy and Rob Thomas whose devotions to TRIXBOX , PiaF and freePBX made it all
possible.
*
Asterisk™ is a trademark of Digium, Inc. Digium™ is a trademark of Digium Inc. Elastix™ is a
trademark of PaloSanto Solutions SugarCRM™ is a trademark of SugarCRM Inc. Vtiger CRM™ is a
registered trademark of Vtiger, Plc. Freepbx™ is a registered trademark of Atengo LLC Hylafax™ is a
trademark of Silicon Graphics, Inc
Stay tuned for our next episode – TRIXBOX version X
TRIXBOX-2 Without Tears
Page 3 of 248
Intentionally left blank
TRIXBOX-2 Without Tears
Page 4 of 248
TABLE OF CONTENT
Going Forward ............................................................................................................................. 11
1 Introduction.............................................................................................................................. 12
1.1 Is VoIP for you?............................................................................................................ 12
1.1.1 What is it going to cost?........................................................................................ 12
1.1.2 What will the quality of the phone calls be?.......................................................... 12
1.2 What is Trixbox?........................................................................................................... 12
1.3 The IP PBX Components ............................................................................................. 13
1.3.1 The IP PBX ........................................................................................................... 13
1.3.2 Phones .................................................................................................................. 14
1.3.3 SIP Gateway ......................................................................................................... 14
1.3.4 Home Network ...................................................................................................... 14
1.3.5 VOIP Service Providers ........................................................................................ 14
2 Initial Preparation and Planning............................................................................................. 15
3 Installation................................................................................................................................ 16
3.1 Initial Installation........................................................................................................... 16
3.2 Change Default Settings .............................................................................................. 19
3.2.1 To get Help ........................................................................................................... 20
3.2.2 Change IP Address (set IP address to Static) ...................................................... 20
4 Set-up TRIXBOX....................................................................................................................... 23
4.1 Installing Trixbox Modules............................................................................................ 24
4.2 Installing freePBX Modules .......................................................................................... 26
5 Basic configuration using freePBX ....................................................................................... 30
5.1 General Settings........................................................................................................... 30
5.1.1 Dial Command Options......................................................................................... 31
5.2 Extensions.................................................................................................................... 34
5.2.1 Create Extensions................................................................................................. 34
5.2.2 Enable Voicemail ................................................................................................... 36
5.3 Follow Me ..................................................................................................................... 37
5.4 Ring Groups ................................................................................................................. 38
6 Set up softphones. .................................................................................................................. 40
6.1 CounterPath X-Lite Softphone ..................................................................................... 40
6.2 BOL SIPPhone ............................................................................................................. 41
Profile Tab....................................................................................................................... 41
Audio & Video Tab .......................................................................................................... 42
Network Tab.................................................................................................................... 42
STUN Tab ....................................................................................................................... 42
Call Forward.................................................................................................................... 43
7 Trunks to the outside world ................................................................................................... 44
7.1 What is a Dial Pattern? ................................................................................................ 44
7.2 What is a Trunk? .......................................................................................................... 44
7.3 Trunks and Outbound Routes – a circus of confusion ................................................. 45
7.3.1 Outgoing Route Dial Pattern................................................................................. 45
7.3.2 Trunk Outgoing Dial Rules.................................................................................... 45
7.4 Let’s Create The VoIP Trunks...................................................................................... 46
7.4.1 Pennytel ................................................................................................................ 46
7.4.2 Oztell (SIP)............................................................................................................ 48
6.4.3 Oztell (IAX)............................................................................................................ 49
8 Calls Handling.......................................................................................................................... 51
8.1 Inbound Routes (Incoming Calls)................................................................................. 51
8.1.1 Inbound Route from ZAP Trunk............................................................................ 52
8.2 Time Conditionds ......................................................................................................... 53
8.2.1 Simple Time Condition.......................................................................................... 54
8.2.2 Complex Time Condition....................................................................................... 54
8.3 Outbound Routes ......................................................................................................... 55
8.3.1 What is an Outbound Route? ............................................................................... 55
8.3.2 How does it work?................................................................................................. 55
8.3.3 International .......................................................................................................... 56
8.3.4 Domestic ............................................................................................................... 57
TRIXBOX-2 Without Tears
Page 5 of 248
8.3.5 MobileAust ............................................................................................................ 58
8.3.6 Oztellonly .............................................................................................................. 58
8.4 ENUM........................................................................................................................... 59
8.4.1 Setting up ENUM Trunk ........................................................................................ 59
8.4.2 Setting up ENUM Outbound Route....................................................................... 60
9 Custom Contexts Module ...................................................................................................... 61
Downloading and unpacking module. ................................................................................. 61
Installing Custom Context Module ...................................................................................... 61
Add and Configure New Custom Context ........................................................................... 62
Apply a Custom Context to Extension................................................................................. 63
10 System Recordings ............................................................................................................... 64
10.1 Direct recording .......................................................................................................... 65
10.2 Upload Pre-recorded Material .................................................................................... 65
11 Digital Receptionist ............................................................................................................... 67
11.1 Setting Up Digital Receptionist................................................................................... 67
11.2 Multi-Language IVR.................................................................................................... 70
11.2.1 Complimentary multi-language MOH.................................................................. 71
11.3 Multi-Tenants IVR....................................................................................................... 72
12 Get Under The Bonnet .......................................................................................................... 74
12.1 Editing The .conf Files................................................................................................ 75
12.1.1 sip_general_custom.conf.................................................................................... 75
12.1.2 sip_custom.conf .................................................................................................. 75
12.1.3 iax_general_custom.conf.................................................................................... 75
12.1.4 iax_custom.conf .................................................................................................. 76
12.1.5 Indications.conf ................................................................................................... 76
12.1.6 enum.conf ........................................................................................................... 76
12.1.7 extensions_custom.conf ..................................................................................... 76
12.1.8 features_general_custom.conf ........................................................................... 76
13 Check your System ............................................................................................................... 78
13.1 System Process Status .............................................................................................. 78
13.2 Asterisk Info................................................................................................................ 79
14 Interfacing Asterisk to PSTN ................................................................................................ 81
14.1 A100P FXO PCI Card ................................................................................................ 81
14.2 Create a ZAP trunk..................................................................................................... 82
14.2.1 zapata.conf ......................................................................................................... 82
14.2.2 zapata-auto.conf ................................................................................................. 82
14.2.3 zaptel.conf........................................................................................................... 82
14.3 OpenVox A400P FXO/FXS Card ............................................................................... 83
14.3.1 zapata-auto.conf ................................................................................................. 83
14.3.2 modprobe.conf .................................................................................................... 84
14.4 Is the A100P/A400P installed?................................................................................... 85
14.5 Caller ID (CID) using ZAP device............................................................................... 86
14.5.1 zapata.conf ......................................................................................................... 86
14.6 Sipura SPA3000/3102 as a PSTN Interface .............................................................. 87
14.6.1 Log in to SPA3000/3102..................................................................................... 87
14.6.2 Change the settings ............................................................................................ 87
14.6.3 Add SIP Trunk..................................................................................................... 89
14.6.4 SPA3000 as an outbound PSTN Trunk .............................................................. 90
14.7 SPA3000 remote management................................................................................... 90
14.8 Use STUN Server on SPA3000 ................................................................................. 91
15 PSTN to VOIP Gateway ......................................................................................................... 92
16 DISA ........................................................................................................................................ 93
16.1 DISA - Hand Coding Method...................................................................................... 93
16.2 DISA – Using freePBX ............................................................................................... 94
17 Operator Panel ....................................................................................................................... 95
17.1 Flash Operator Panel (FOP) ...................................................................................... 95
17.1.1 Setting the Admin Password............................................................................... 96
17.1.2 Hang-up a Call .................................................................................................... 96
17.1.3 Transfer a Call .................................................................................................... 96
17.1.4 Initiate a Call ....................................................................................................... 96
TRIXBOX-2 Without Tears
Page 6 of 248
17.1.5 Barge in or Create a Conference........................................................................ 96
17.2 HUDLite...................................................................................................................... 97
17.2.1 Setting up HUDLite Admin .................................................................................. 97
17.2.2 Setting Up HUDLite............................................................................................. 98
17.2.3 What if it does not work? .................................................................................. 101
18 Call parking and transfer .................................................................................................... 102
18.1 Call Transfer - Managed .......................................................................................... 102
18.1.1 How is it done? ................................................................................................. 102
18.2 Call Transfer – Blind................................................................................................. 103
18.3 Put a Call On Hold.................................................................................................... 103
18.4 Call Pickup ............................................................................................................... 103
18.5 Filter Your Incoming Calls - Only Accept Known Calls ............................................ 104
19 Conference ........................................................................................................................... 106
meetme.conf ................................................................................................................. 106
meetme_additional.conf................................................................................................ 106
19.1 Create Conference .................................................................................................... 106
19.2 Invalid Conference number ...................................................................................... 107
20 Voicemail .............................................................................................................................. 109
20.1 Enabling Email Notification ...................................................................................... 109
20.1.1 Installing sendmail ............................................................................................ 109
20.1.2 /etc/hosts........................................................................................................... 110
20.2 Use Postfix Instead of Sendmail .............................................................................. 112
20.2.1 Where Relay ISP does not require authentication............................................ 112
20.2.2 Where authentication is required ...................................................................... 112
20.3 How to Retrieve Voicemail from External Phone ..................................................... 113
20.3.1 Method 1 ........................................................................................................... 113
20.3.2 Method 2 ........................................................................................................... 113
20.4 How to Change Voice Mail Greetings ...................................................................... 114
21 Fax to E-Mail......................................................................................................................... 115
21.1 Installing Fax for TRIXBOX ...................................................................................... 115
22 Weather Reports .................................................................................................................. 116
22.1 Configure Weather Report – On Demand................................................................ 116
22.1.1 Create Extension codes.................................................................................... 117
22.2 Configure Weather Report – Background Method................................................... 117
22.2.1 Create Extension codes.................................................................................... 118
22.3 Now put it in your Digital Receptionist...................................................................... 119
23 Remote Management .......................................................................................................... 120
23.1 httpd.conf.................................................................................................................. 120
24 How to set up a Remote Extension.................................................................................... 121
24.1 Create a new extension ........................................................................................... 121
24.2 IAX_General_Custom.Conf...................................................................................... 122
24.3 Sip_Nat.Conf ............................................................................................................ 122
24.4 Setting up an IAX Softphone.................................................................................... 122
24.4.1 First the general options ................................................................................... 122
24.4.2 Accounts options............................................................................................... 123
25 Calls Recordings ................................................................................................................. 124
25.1 ARI Interface ............................................................................................................ 124
25.1 Record all calls by default ........................................................................................ 125
25.2 Record calls on demand. ......................................................................................... 125
26 STUN Servers....................................................................................................................... 126
27 Dialing through MS Outlook® ............................................................................................ 126
27.1 Download AstTapi .................................................................................................... 126
27.2 Install AstTapi........................................................................................................... 127
27.3 Configure Outlook Address Book............................................................................. 127
28 Speed Dial ............................................................................................................................ 129
28.1 The Dumb-Me method ............................................................................................. 129
28.2 TRIXBOX’s method (Version 1.x) ............................................................................ 130
28.3 TRIXBOX’s method (Version 2.x) ............................................................................ 130
29 How to use Window Messenger® 5.x ................................................................................ 132
30 How to interconnect 2 boxes.............................................................................................. 134
TRIXBOX-2 Without Tears
Page 7 of 248
30.1 Method 1 - With the Peer Asterisk box as Extensions ............................................. 134
30.2 Method 2 - In a Peer/User Arrangement .................................................................. 135
30.3 Method 3 – Friend/Friend Arrangement ................................................................... 136
30.4 Thinking of more than 2 boxes?............................................................................... 137
30.5 Redirect Incoming in Box A to Box B ....................................................................... 137
31 Customised Voice ............................................................................................................... 139
31.1 Customising Voice Prompts ..................................................................................... 139
31.2 Installing Other Languages ...................................................................................... 140
31.3 Converting WAV files ............................................................................................... 140
31.3.1 Converting WAV to GSM .................................................................................. 140
31.3.2 Converting WAV to SLN ................................................................................... 141
32 MOH (Music On Hold).......................................................................................................... 142
32.1 Customising MOH .................................................................................................... 142
32.2 MOH for different trunks........................................................................................... 143
32.3 Streaming Music on Hold ......................................................................................... 144
Method 1 ....................................................................................................................... 144
Method 2 ....................................................................................................................... 145
33 Backup and restore ............................................................................................................. 150
33.1 Schedule a Backup .................................................................................................. 150
33.2 To Restore a Backup................................................................................................ 152
34 SugarCRM ............................................................................................................................ 153
35 USB Phone Support ............................................................................................................ 155
36 Codec (Coder Decoder) ...................................................................................................... 156
36.1 Installing G729 and G723 CODECs......................................................................... 157
36.2 To Install CODECS on PiaF...................................................................................... 158
37 PSTN Trunk – Special Handling ......................................................................................... 160
37.1 Dial 0 for Outside Line.............................................................................................. 160
37.1.1 Using Zaptel Card Method................................................................................ 160
37.1.2 Using SPA3K Method ....................................................................................... 160
37.2 Giving Priority to Emergency Numbers (E.g. 000) ................................................... 161
38 Advanced Trunks Handling ................................................................................................ 162
38.1 Balancing Trunk Usage............................................................................................ 162
38.2 Cascading Trunk Usage........................................................................................... 165
39 Port Forwarding and QOS – Routers................................................................................. 171
39.1 Port Forwarding........................................................................................................ 171
39.2 QOS – Routers......................................................................................................... 171
40 Upgrading your system ...................................................................................................... 173
40.1 Upgrading Trixbox .................................................................................................... 173
40.2 Upgrading freePBX .................................................................................................. 173
41 Tools ..................................................................................................................................... 174
41.1 Webmin for Trixbox .................................................................................................. 174
41.1.1 To update WebMin............................................................................................ 175
41.2 Putty ......................................................................................................................... 175
41.3 WinSCP.................................................................................................................... 175
42 Use ACCESS to connect to Database ............................................................................... 177
42.1 Setting up a new MySQL user ................................................................................. 177
42.2 Configure MySQL ODBC for Windows .................................................................... 178
42.3 Connecting using MSACCESS ................................................................................ 180
43 My TRIXBOX® PBX Network ............................................................................................. 184
44 Trouble Shooting ................................................................................................................. 185
44.1 Debug Messages and Log Files are your friends .................................................... 185
44.2 Unable to log on to Packages? ................................................................................ 186
44.3 Asterisk Feature Codes not working ........................................................................ 186
44.4 Asterisk Drops Calls after a few seconds ................................................................ 186
44.5 Pennytel Asterisk Problem ....................................................................................... 186
44.6 Unable to receive Incoming Calls............................................................................. 186
44.7 Sipura SPA3000 – Not hanging up after PSTN Calls .............................................. 187
44.8 System Not Working after changing to Static IP ..................................................... 187
44.9 No Audio on Analog line........................................................................................... 188
44.10 Unexplained Crashes............................................................................................. 188
TRIXBOX-2 Without Tears
Page 8 of 248
44.11 ZAP Inbound Route Does not Work....................................................................... 188
44.12 Occassional FATAL Error when defining extension............................................... 188
44.13 All extensions failed to work when Internet down .................................................. 189
Appendix A................................................................................................................................. 190
A.1 Asterisk Feature Codes ............................................................................................. 190
A.2 Asterisk CLI commands............................................................................................. 191
A.2.1 General commands ............................................................................................ 191
A.2.2 AGI Commands .................................................................................................. 192
A.2.3 Database Handling ............................................................................................. 192
A.2.4 IAX Channel Commands .................................................................................... 192
A.2.5 SIP Channel commands..................................................................................... 193
A.2.6 Server management ........................................................................................... 193
A.3 Asterisk Special Extensions....................................................................................... 193
A.4 Asterisk Common Variables ...................................................................................... 194
A.5 Indications for Various Countries............................................................................... 195
Appendix B................................................................................................................................. 204
B.1 – Australian VSPs (trunks).......................................................................................... 204
B.1.1 BBPglobal........................................................................................................... 204
B.1.2 Engin BYO.......................................................................................................... 204
B.1.3 Faktortel (IAX) .................................................................................................... 205
B.1.4 iPrimus................................................................................................................ 205
B.1.5 MyNetFone ......................................................................................................... 206
B.1.6 Nehos ................................................................................................................. 206
B.1.7 Nodephone ......................................................................................................... 207
B.1.8 SipMe.................................................................................................................. 207
B.2 – New Zealand VSPs (trunks) .................................................................................... 208
B.2.1 iTalk .................................................................................................................... 208
B.2.2 Double Zero 64 (IAX)......................................................................................... 208
B.3 – Other VSPs (trunks)................................................................................................. 209
B.3.1 Broadvoice.......................................................................................................... 209
B.3.2 FWD aka Pulver(IAX) ......................................................................................... 209
B.3.3 SipBroker............................................................................................................ 209
B.3.4 SipPhone ............................................................................................................ 210
B.3.5 VOIP Buster........................................................................................................ 210
Appendix C................................................................................................................................. 211
C.1 Voice for Asterisk Messages ..................................................................................... 211
C.2 Australian Voice and Language Set for Asterisk ....................................................... 212
C.3 More Australian Voice for Asterisk ............................................................................ 212
Appendix D (ATAs and Routers).............................................................................................. 213
D.1 Alcatel SpeedTouch 510/530 ADSL Router .............................................................. 213
D.2 Billion 7402 VL........................................................................................................... 213
D.3 Linksys PAP2 and Sipura SPA2000.......................................................................... 214
Appendix E (Users’ Contributions).......................................................................................... 216
E.1 Suggestions for Dial Plan and configuration.............................................................. 216
E.3 Eliminating Echo Problems in SPA-3000 .................................................................. 219
E.4 Immediate Answer of PSTN Calls ............................................................................. 221
E.5 Rebuild Zaptel Driver (Users’ Suggestions) ............................................................. 221
E.5.1 As experienced by marner – a Whirlpool Forum participant. ............................. 221
E.5.2 As suggested by Rob Thomas (the FreePBX guru)........................................... 221
E.6 Zaptel card configuration for Australia ....................................................................... 222
E.7 RAID1, LVM (logical volumes) – how to .................................................................... 224
E.8 V2.2 Trixbox Load Config to include IDE raid............................................................ 233
E.9 TEST Bench Anyone? ............................................................................................... 236
Appendix F (Publications and References) ........................................................................... 237
F.1 DUNDi – a guide to a Simple Setup........................................................................... 237
F.2 The future of Telephony by O’Reilly Publishing......................................................... 237
F.3 Other Asterisk Forums, Tutorials and Wikis ............................................................. 237
F.4 Voice over IP – Per call bandwidth consumption....................................................... 237
Notes........................................................................................................................................... 238
A2Billing............................................................................................................................. 238
TRIXBOX-2 Without Tears
Page 9 of 248
Delete Call Records from CDR ......................................................................................... 238
Extension Numbers to avoid using.................................................................................... 239
sip_nat.conf ....................................................................................................................... 239
How to restrict Outgoing Calls – Manual Method.............................................................. 239
Bugs Reports ............................................................................................................................. 243
Asterisk re-load issue ........................................................................................................ 243
Are you still having problem? ............................................................................................ 243
Hangs on shutdown........................................................................................................... 243
Zaptel Not Detected on Trixbox 2.2.4 ............................................................................... 244
All phones UNUSABLE if internet connection is lost. ....................................................... 244
Cheat Sheet ................................................................................................................................ 246
Some Linux commands in common use ........................................................................... 246
Bibliography............................................................................................................................... 247
Changes Made since last Update............................................................................................. 248
TRIXBOX-2 Without Tears
Page 10 of 248
GOING FORWARD
Following the tradition of Asterisk@Home without Tears and Trixbox without Tears, this
guide is not meant to be a detailed manual for Trixbox®; instead it is just a quick and dirty
guide and a resource to assist you get started with minimum pain. As always, use this
document only as a guide, not as a Gospel. It does not cover every detail in Trixbox or
PiaF neither will it provide you with a complete solution or spiritual guidance.
Only a competent VoIP consultant can provide you the necessary know-how for a
complete solution, and as for spiritual guidance, I will leave that entirely to you.
This document was compiled mainly based on Australian conditions, through my
experience going through the wash, supplemented by inputs from dozens of participants
in the Whirlpool and other Trixbox and Asterisk related forums. These people were
mentioned in A@H and Trixbox without tears. They have helped me whenever I get into
difficulties, and I still seek guidance (the Trixbox/PiaF/Asterisk type) from them.
I take no primary credit for this document (I am only the compiler of the not so divine
revelation). I invite others to participate in improving this document. Please send me your
feedbacks; so together we can make this document a valuable resource for our peers in
the Trixbox/PiaF/freePBX community, experienced and new alike.
It is also not my intention to violate any copyright or trademarks in preparing this
document. I ask those who think that their copyright or trade marks have been violated to
inform me so it can be remedied.
- Ben Sharif January 1, 2007.
The usual disclaimer: (Don’t you just hate it, having to say this.)
In its Basic form, all that I have outlined worked for me but it may contain many errors –
typographical, omissions and even misguidance that may require a lot of extra corrections.
While I have taken due care, however, it may not necessarily be suitable for your individual
configuration. I do not take; neither will I accept any responsibility for any losses incurred due
to actions or inaction conducted as a result of methods or advice found in this document.
I do not provide Trixbox/PiaF/freePBX support and neither do DIGIUM. If assistance is
required, please post in the forum. Participants in the various forums may have a
number of solutions and at the same time providing the opportunity for others with
similar questions to benefit from the solutions provided.
/>
Ever since the release of A@H without Tears, I have received numerous emails asking
for assistance. Since I am putting a lot of efforts into providing personal assistance to
those who have sent me donations (incidentally, my only source of income), the volume
of email I received has become unmanageable. While I will try to assist within my limited
knowledge, I hope you will understand if I don’t answer each and every email.
I am not an expert and therefore I do not have all the answers. I ask those requiring
assistance to post their questions in the Whirlpool, Digium, freePBX, PiaF or Trixbox
Forum (forum participants may not answer any question if the solution is already in this
guide) where there are many knowledgeable Asterisk and Linux savvy participants who
will be able to assist.
TRIXBOX-2 Without Tears
Page 11 of 248
1 INTRODUCTION
AsteriskTM is a Linux based IPBX application developed by Mark Spencer of Digium™,
the company behind Asterisk. Trixbox and PiaFTM (PiAF is Ward Mundy’s PBX in a
Flash) evolved from the core Asterisk. It is made up of several major components. These
were developed under GPL supported relatively by users themselves. It consists of
applications, a provisioning system, an installer, and an operating system that, together,
make a complete package ready for use as an out of the box PBX.
Within this document, Trixbox, PiaF and Asterisk will be referred to frequently and they
®
are interchangeable as Trixbox and PiaF are in essence supersets of the Asterisk .
1.1 IS VOIP FOR YOU?
Whether VOIP is for you or not depends on a number of or combinations of factors.
Some economic and quality requirements should be considered.
1.1.1 What is it going to cost?
Assuming that you already have a broadband service, a router, and a Windows PC to
run the softphone, the cost will be minimal.
If you already have a spare computer to dedicate to this task, then the cost is almost
nothing unless you need to buy an audio headset ($15.00 from your local electronic
store) for the softphone. If you do not have a spare PC with the above specification,
then you may be able to buy one from your local swap meets for under $200.00,
which may include a monitor. Ensure that the PC has an Ethernet NIC for connecting
to your home network.
Your only other initial cost will be the $20.00 or so activation fee to Oztell (or other
VSP of your choice). In fact many VSPs, the like of Pennytel, Primus etc., will
register you for free if you want to restrict your calls to VoIP only within the same
VSPs. If you want the ability to make to PSTN or between different VSPs, you may
have to pay for the calls.
All these “Major Expenses” will be recovered when you receive your monthly Telstra
or Optus phone bills.
1.1.2 What will the quality of the phone calls be?
If you are expecting the quality to be consistently as good as your existing PSTN
calls, you will be somewhat disappointed, but if you will be happy with a quality that is
comparable to your mobile phone, not quite but close to your existing PSTN calls and
also be prepared for the whining by the other half, the phone calls are not being as
good, while you are leaching off the P2P, you might be in luck.
VoIP via the Public Internet is very much dependant on a number of factors –
available bandwidth not withstanding, your usage habit of the internet and LAN traffic
and equipment quality, amongst others, also play very important roles.
For further information please refer to the link below:
/>
1.2 WHAT IS TRIXBOX?
Trixbox is a collection of telecommunication utilities and tools compiled together to
become an integrated IP PBX. The major components that make up Trixbox are;
TRIXBOX-2 Without Tears
Page 12 of 248
•
•
•
•
•
•
•
•
•
Asterisk, the core PBX
Sugar, a CRM system
A2Billing – Calling Card platform
Flash Operator Panel, a screen-based operator’s console
Web Meet Me Control, a meet me conferencing control application
freePBX a web-based User Interface tool for Trixbox.
A report system – the part of freePBX that provides CDR reporting.
A Maintenance system, also part of Trixbox, which provides low level interfaces
to some components and real time system information
CentOSR, a version of Linux related to a very well known Enterprise Linux (but
without the branding and support).
1.3 THE IP PBX COMPONENTS
Four main components needed to set up VoIP PBX:
•
•
•
•
Trixbox, the Asterisk powered IP PBX
The phones (or softphones)
The VOIP gateway services that let you call other VOIP users and people on the
PSTN.
Have a home network and broadband access with a router and hubs/switches if
needed. If you are restricting the usage to PSTN only, you will not need the
broadband, but then it will defeat the whole purpose.
Trixbox-2 while essentially similar to the previous version 1.x, does consist some set-up
differences that warrant explanation. I will attempt to describe the set-up of each of
these. In most cases it does not matter if you are behind a firewall provided that you have
all the appropriate ports forwarded correctly. You are not required to do anything special
like running the IP PBX outside the NAT or in the DMZ. However, it is important to
ensure that you have enough bandwidth (upstream and downstream) to carry voice
traffic.
1.3.1 The IP PBX
You will need a computer to run the IP PBX. It is recommended that you run a
dedicated PC for this purpose. The PC described below (minimum) will be sufficient
to power the IP PBX in a small office or home environment. Therefore don’t throw
away that old Pentium II clunker you have in the attic.
•
•
•
•
•
•
350Mhz Pentium II PC or better (PIII 800 will give extra comfort).
256MB RAM – the more the better
4 GB Hard disk space - minimum.
10/100 NIC
CD-ROM Drive
10/100 4 or 8 ports Ethernet hub/switch (not required if your router has spare
ports)
If you are using Telstra Alcatel SpeedTouch 510/530 ADSL Router, you will need
to unbind port 5060. To do this, please refer to this link (or see Appendix D).
/>
When you install Trixbox on this “old” computer, it will take it over – it starts by
formatting all the hard disks (if you happen to have more than one), so make sure
there is nothing on the machine that you want to keep. Detailed instructions are
given in the installation section.
TRIXBOX-2 Without Tears
Page 13 of 248
1.3.2 Phones
You can buy SIP phones from Grandstream, SNOM, and Cisco etc. Or you can buy
an ATA (Analogue Telephone Adapter) produced by Linksys, Netcomm or Sipura and
a few others, which enables you to use an analogue phone (the Linksys PAP2 will
allow you to hang two analogue phones to it). The Netcomm and Linksys ATAs can
be bought from Harris Technology and a number of VSPs.
Register with a VSP such as Faktortel, Oztell, Pennytel and several other VOIP
Service Providers (VSPs) or you may buy Engin locked ATAs from Harvey Norman
and Dick Smith Electronic. The choice is yours.
To get started, it is easiest to get a softphone and run it on another computer. See
the section on installation of Softphone later in this document.
1.3.3 SIP Gateway
It is most likely that you want to communicate with others on the PSTN network, so
you need to obtain a VOIP gateway service. Since part of the call is being carried on
the circuit switched network, it costs real money. This means that you will have to
pay for this part of the system.
Setting up gateways will be covered in the installation section below.
1.3.4 Home Network
The fact that you are reading this and contemplating on installing Trixbox , I assume
that you have a home network, a broadband service, and are set up behind a Router
of some sort.
You will need to pick a static IP address for your IP PBX that is on your home network
e.g. 192.168.0.100. To keep it simple, please ensure that the Asterisk box is in the
same network segment of your existing LAN.
1.3.5 VOIP Service Providers
If you are in Australia, the Whirlpool VOIP forum has a list of VOIP providers in
Australia at the following link: />
TRIXBOX-2 Without Tears
Page 14 of 248
2 INITIAL PREPARATION AND PLANNING
Before setting up your IP PBX, it is recommended that you map out what your home (or
small office) telephony requirements are.
Compare the requirements with what facility you already have. You may find that you
may need to provide extra facilities that you do not already have e.g. Network switches,
router, ATAs or IP Phones and needless to say a suitable broadband service.
For the purpose of this guide, I have determined that we will start with the following:
•
•
•
•
•
•
•
•
•
2 extensions with voicemail using a Linksys PAP2 ATA
1 extension using a Linksys SPA3000 ATA
2 extension using Softphone (we will use these 2 extension for initial testing)
3 extension using IP Phones
2 VoIP service providers
2 PSTN trunks – for the purpose of this exercise, I will be using a Linksys
SPA3000 for one PSTN trunk and a X100P for the other PSTN trunk.
IVR
Music on hold
A number of customised voice prompts and announcements
Once the above are set-up, I will customise it further with the following;
•
•
•
•
•
•
Time conditions
Ring groups
Follow me
Conference facility
DISA
Etc.
In this exercise we will cover all of the above (not necessarily in the stated sequence) and
we may also look at other possibilities as we go along, if time and/or resources permit.
This is not an industrial grade installation. This installation is for training
purposes only and to assist new hopefull to get started with Trixbox and nothing
more.
Once you are clear on what you want, you can start the installation in earnest.
TRIXBOX-2 Without Tears
Page 15 of 248
3 INSTALLATION
A PC is a prerequisite. You can either install Trixbox in a virtual machine in your
Windows based PC (there is a version of Trixbox for this) or install Trixbox on a dedicated
PC. The later is recommended given that once it is set-up, we will need to leave the PC
running and not burden it with other daily applications such as playing games, browsing
the internet or doing the children school assignments.
For stability, I will suggest that Trixbox be installed on a dedicated machine. This is what
we are setting out to do.
3.1 INITIAL INSTALLATION
The Trixbox version that we will be installing is the latest current version available today –
Trixbox 2.0. You will need to download the ISO from the Trixbox website below.
/>After you have completed the download,
•
Burn the ISO image that you have just downloaded to a blank CD.
•
Ensure that your PC will boot from the CD.
settings to enabled this.
•
**NOTE: This will erase all data on the hard drives of the PC.
If you have 2 drives, both may be blown away as well - beware.
•
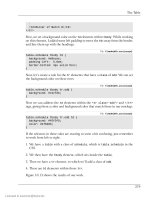
Boot your Trixbox PC with the CD in the CD Drive and press enter. After a few
seconds, the following screen will be displayed. You press F2 to see the various
options. However, it is not really necessary. Just press [Enter] to start the
installation
•
Press the Enter key to start the installation.
TRIXBOX-2 Without Tears
If necessary change the BIOS
Page 16 of 248
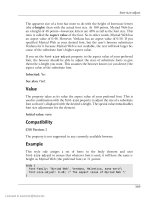
•
After initial system detection, you will be asked to select the type of keyboard that
you will be using. Use your cursor keys to navigate the keyboard types and use
the Tab key to move the focus to the OK or Back option. Select the appropriate
keyboard. Selected us and move the focus to OK and hit [Enter]
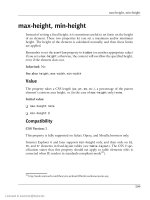
•
After system hardware probing is completed, you will be asked to select the Time
Zone you are in.
•
Use your cursor arrow keys to navigate to the appropriate time zone. In our case,
we will selected Australia/NSW. Use the TAB key to move the focus to OK and
hit [Enter] to accept (see cheat sheet to set NTP time manually).
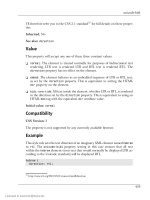
•
Next you will be asked to enter your root password (remember this password).
TRIXBOX-2 Without Tears
Page 17 of 248
•
After entering and confirming your password, installation will now commence by
first formatting the Hard Disk/s.
•
From this point it will take about 30-45 minutes for the installation to be complete
and ready for the configuration stage.
•
During this stage, you will see screens similar to the following. Linux and the
required files are being installed. All you do is, wait for it to finish.
•
After Linux is loaded the CD will eject. Take the CD out and wait for the system to
reboot.
•
When it reboots, you will be presented with the following screen.
TRIXBOX-2 Without Tears
Page 18 of 248
•
After a moment, it will continue and you will see lots of lines of codes. This
process will take a while because it is building Asterisk.
•
When Asterisk build is complete, it will reboot itself. Once rebooted, Trixbox is
ready for you to continue configuring and make changes to the system default.
3.2 CHANGE DEFAULT SETTINGS
Once Trixbox has been installed, some changes need to be made to secure your
installation.
Log in to your new Trixbox (user: root, password: The one you gave earlier)
Trixbox 2.0 uses freePBX 2.1.3. To take full advantage of the latest freePBX
features, lets upgrade the existing freePBX to the latest version 2.2. See the section
on upgrading freePBX. Once that is done we will come back here.
TRIXBOX-2 Without Tears
Page 19 of 248
3.2.1 To get Help
At the command line, type
help-trixbox
A list of help will be displayed – see illustration below:
The help screen will also tell you the necessary command required to
change the password of the various default users e.g. passwd-maint for
user maint and passwd for user root.
3.2.2 Change IP Address (set IP address to Static)
(If you are installing Trixbox v2.6.0.5, I suggest that you DO NOT use NetConfig, instead
use webmin or the Trixbox GUI to change your IP address because using NetConfig may
cause you some problem)
The following example is for those still using Trixbox v2.2.x or earlier on Centos prior
to version 5. For Centos 5, please refer to the second part of this section.
To change Asterisk IP address from DHCP to Static. At the command prompt enter:
Netconfig
You will see the following:
TRIXBOX-2 Without Tears
Page 20 of 248
Select [Yes] to set up networking and hit enter.
You will then see the following screen.
(If you are installing Trixbox v2.6.0.5, I suggest that you DO NOT use NetConfig, instead
use webmin or the Trixbox GUI to change your IP address because using NetConfig may
cause you some problem)
Use the Tab key to cycle through the fields. Enter the IP address that is to be
allocated to the Asterisk box, the Netmask (subnet mask), Default Gateway, and
Primary nameserve as per the example above. In my example above, I used my
existing network regime.
•
•
•
•
In the IP address field, enter an IP address Trixbox making sure it is within your
network range e.g.: 192.168.1.100
Netmask is normally 255.255.255.0 unless your network has different Network
mask.
Default gateway IP is the address of your router. In my case, my router address
is 192.168.1.1
Primary nameserver is the address of your Name Server, usually your domain
server if you have a network domainserver but if you are running workgroup, use
the address of your default gateway e.g.: 192.168.1.1
Once done, select OK.
TRIXBOX-2 Without Tears
Page 21 of 248
Those using Centos 5 are advised to use the Trixbox GUI to change the IP address
to a Static IP address (see illustration below).
Hover mouse on the System tab and select Network.
Select the appropriate interface device as per the illustration below.
Change the IP address appropriately.
Those are the initial inputs that require immediate attention. Others, such as Admin
password etc, are optional although it is recommended that you change them. Once
done, log off Linux and reboot.
amportal stop
Shutdown –r now
Asterisk will now start with the new IP address.
TRIXBOX-2 Without Tears
Page 22 of 248
4 SET-UP TRIXBOX
Now, using your browser, you can connect to http://ipaddress/ (e.g. http:192.168.1.100)
to configure Trixbox .
You will be presented with the Trixbox initial User Mode splash screen as illustrated
below.
This screen (once Trixbox has been properly set-up) enables users to monitors ARI, FOP
(flash operator panel), Client Manager (SugarCRM) and setup personal MeetMe
requirement.
As it stands, Trixbox need to be configured before any of those facilities are operable by
users.
Initial Welcome Screen (User Mode) v2.2 – 2.6
To start configuring Trixbox, it is necessary to switch to Admin Mode. To do this, click on
the “switch” label situated on the top right hand corner of the screen (marked with an
arrow in the illustration above).
A username and password dialog screen will appear where the default username and
password need to be entered as per the illustration below.
The Username is maint and the default password is password, unless you have
changed the default password for user maint to something else using the passwd-maint
command in chapter 3.2 above.
TRIXBOX-2 Without Tears
Page 23 of 248
Log in to System Administration
To log in to System Administration, use user: maint, password: password unless you
have changed the user maint password during initial set up in 3.2
Once you logged in, you will be presented with the following screen
Admin Mode Initial Configuration Screen
4.1 INSTALLING TRIXBOX MODULES
In most cases, all the modules that you will required have already been installed as
defaulty. However, should you need other modules that were not included, you may need
to install them from the online repository. At this stage, it is unlikely that we will need
other modules.
To install the Trixbox modules, you will need to log on to the Package Manager site to
enable you to get a list of all the available modules (see Unable to log to Packages).
I am already registered to the site and therefore I simply need to enter my username and
password to login otherwise registration will be required before one can log on to the
Package Manager site.
If you are new, click on the “Register” button and register. Simply follow the prompt.
However if you are unable to register through this method (some Firefox users are having
this problem – Ed Note. Since the new interface, neither Firefox nor IE is able to register
this way), you will need to go to and register to be a member of the
forum.
TRIXBOX-2 Without Tears
Page 24 of 248
It is this username and password that you that is required for you to successully log in to
Packages database (Please don’t ask me why this is so).
Once logged in, select/click on the “Packages” tab (marked with an arrow above) and the
current package list will be downloaded as illustrated below.
Most of the modules necessary to get Trixbox operational are already pre-installed and
ready for the individual administrator to start setting-up. However there are other optional
modules that can be installed if necessary, MySqlManager, tbm-phpmyadmin.noarch is
one such example. Without this package you will not be able to get to phpadmin through
the GUI.
For this installation, we will simply use the standard default modules and for the purpose
of the exercise, we will additionally install “webmin” using the module manager.
To find the package, you may need to scroll down the list till you get to the package called
“webmin noarch” adjacent to Trixbox update as per the illustration below and place a tick
in the install box (in the illustration it was shown that the tick was in the update box
because webmin was already installed and to upgrade to a new version, place a tick in
the upgrade box instead).
TRIXBOX-2 Without Tears
Page 25 of 248