5 speed conversion
Bạn đang xem bản rút gọn của tài liệu. Xem và tải ngay bản đầy đủ của tài liệu tại đây (94.32 KB, 5 trang )
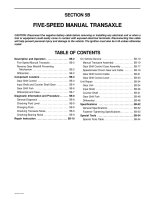
5 Speed Conversion
Author: William "Huck" Huckelby
PREFACE:
This Swap is not for the faint of heart, nor the mechanically challenged, but with persistence and a fair
share of experience (not to mention some patience), can be done by an average guy that doesn't mind
getting his hands dirty.
If you can't afford to be without your car for 4 weeks I wouldn't try it, it shouldn't take that long but
always expect the unexpected!
THE "LAUNDRY LIST":
1. A 5-Speed tranny with the matching rear diff. and shifter (with the boot) from a Legacy or
Impreza (I used an Impreza one), It needs to have a cable activated clutch fork to go with my setup, hydraulic is possible, but would be much more complicated to install, and add components to
the list. I prefer the K.I.S.S. engineering points (Keep It Simple Stupid) to make it as easy as
possible.
2. A Manual flywheel from a Legacy (not a turbo) or Impreza (I used one from a Legacy), be sure to
get the flywheel bolts and the pressure plate bolts with the flywheel.
3. A manual pedal assembly, including the cable (I used one from a XT-6), I believe that the best
match would be the early Legacy pedal assemblies, which from looking at the diagrams seams to
be close to the assembly in the SVX, but you will probably have to do some cutting and retrofitting onto the original SVX assembly, as I had to do with mine. On a side note this is where I cut
my left middle finger to the bone (5 Stitches), sort of slowed my progress till my finger healed, so
be careful.
4. If you're lucky enough to have the component drive-shaft you can have the front section
lengthened 2" (as the manual tranny is 2" shorter than the auto one), if not I advise you order one,
I had an extension machined to mount to the front of the rear diff., which also meant I had to
relocate the carrier bearing 2" forward, which would not be necessary if I had, had the component
drive-shaft instead of the non-component one (you can't disassemble the non-component one to
put in a lathe).
5. Of course you'll need a new clutch, pressure plate, throw-out bearing, and a new pilot bearing. I
recommend getting a high performance clutch & pressure plate, as the stock Legacy one (which I
used), won't handle the extra torque that the 3.3 has under hard driving, but works fine for day to
day driving.
6. You'll need some misc. steel, about 18" of ½" solid round Cold Rolled Steel (this is used for
lengthening the shifter rods) and some ¼" plate for making some modified motor mounts. And
access to a welder (also for the shifter rods). And a 1" hole saw for cutting the hole in the firewall
to run the clutch cable through.
7. Of course you'll need new grease for the tranny and the rear diff. And a couple cans of black paint
(you want it to look good don't you!) and a few cans of brake and parts cleaner, along with some
hand cleaner (you're going to need it).
I think that's about it for the "What you need " list.
GETTING STARTED:
First off I had to jack up the car and support it with jack stands on all 4 corners, then I started taking off
the relative parts, which consisted of:
1. The auto transmission (which could be a paragraph by itself, but any good manual will give you
step by step on that).
2. The automatic's flexplate (or flywheel if you prefer).
3. The driver's seat (for better access).
4. The center console.
5. The shifter (you can just take out the row of bolts around the bottom, remove and presto! You've
got a big hole in your floor).
6. The steering column (a bit of a pain, but makes the pedals MUCH easier).
7. The dash (I didn't take mine out, so it's not necessary, but would make the removing the pedals
that much easier).
8. If you opt not to take out the dash, you'll still need to remove the TCU and CPU (the TCU doesn't
get reinstalled) for better access to the pedal assembly.
9. The pedal assembly (unbolt the gas pedal and leave in the car)
THE INSTALLATION:
1. Take your original pedal assembly, lay it and the manual pedal assembly side by side for
comparison, if the Legacy set were to have all the same mounting points, you can just swap it in
there, the XT-6 one I used didn't. If it's not a direct swap then you need to remove the bolt thru the
pedal pivot point, and fit the manual BRAKE pedal in place of the Auto Brake pedal (cutting the
sleeve may be necessary), using the longer Manual assemblies pivot bolt, the bolt should stick out
on the Clutch pedal side, slide the clutch pedal on the outside of the Original assembly over the
exposed bolt. Now you'll have to cut the brackets off the manual pedal assembly that mounts the
clutch cable and supplies the outer support for the clutch pedal, then weld it in place on the
original assembly; make sure you use the original brake pedal switch, and also the manual clutch
switch. You can now reinstall the finished assembly in to the car.
2. Now you need to drill a hole in the firewall for the clutch cable, The ideal place is directly in line
with the clutch pedal, but the brake booster is in the way (main reason I didn't want to use a
hydraulic clutch), so I drilled a hole (1" hole saw I believe) approximately 2"(please check for
clearance as this is from memory) directly beside the hole for the steering column, this allowing
the cable to come out without the brake booster being a problem, it does make an "S" bend in the
cable, but not bad enough to be a problem. After drilling the hole, feed the clutch cable through
the hole and hook up the pedal end.
3. Now let's crawl under the car, and install the flywheel and clutch (you did remember to get the
bolts with the flywheel didn't you? As the flexplate bolts are to short). First install the new pilot
bearing in the manual flywheel, and then bolt the flywheel to the motor. Next install the clutch and
pressure plate (be sure to align it with the alignment tool, that should have came with the clutch).
4. Next comes the transmission, remember what a pain to remove the auto was, relax the standard is
much lighter and smaller, allowing more working room. First install the new throw-out bearing
onto the clutch fork, then position the transmission on the jack, then raise it up and slide it into the
clutch and pressure plate (using a jack under the front of the motor to raise the front which in turn
tilts the rear of the motor down really helps to align the transmission with the motor), if it gets
close but not quite close enough, the shaft is probably hitting the pilot bearing and isn't aligned
just perfect, my solution to this (from many clutch jobs on muscle cars), is to shake the crap out of
it while still applying pressure toward the transmission and it should slip in. Once it is pulled up
snug to the motor, torque the bell housing bolts, and install the strut rod to the top of the
transmission from the firewall, the transmission will sit unsupported which will allow you to take
measurements for the modified mounts to your crossmember.
5. Now let's work on the shifter, I used one from an Impreza and had to lengthen it, a Legacy shifter
might have long enough rods, so test fit it by bolting it to the transmission, and seeing how it fits
into the hole in the floor (where the auto shifter was). If it needs to be lengthened, cut both rods in
the middle of the straight section
then clean up the cut ends, and purchase 2 pieces of ½" round cold rolled steel, about 2" longer
than you need to extend the rods, the ½" round bar should slide up inside of the shifter rods rather
snugly so you can bolt the shifter back to the transmission and mount the rear shifter brace to the
floor behind the opening (you can also see this in the "shifter" picture), now you can get in the car
and move the shifter to the position you want it in, then crawl back under the car and tack weld the
rods in place. Then remove the shifter assembly and weld the rods up, spray a little paint on them,
then reinstall. Now you've got a shifter!
6. At this point you can hook up the transmission end of the clutch cable, reinstall the starter,
reinstall the steering column, and the CPU (but NOT the TCU). Then you have to make a jumper
for the ignition lock switch at the shifter, the 4 prong plug that you had to unplug from the shifter,
is the plug to jump, it's the end 2 wires that need to be jumped.
*{Now you need to remove the "Neutral Safety Switch" from the outside of the auto transmission,
then plug it into the original wiring harness in the engine bay, and set it to "Neutral" there is a
round indentation that will line up with the hole in the side lever on the NSS, to set it to neutral.}*
*EDIT TO ORIGINAL INSTALL INSTRUCTIONS: I have now taken the NSS off completely,
and now use the clutch position switch to allow the car to start, this ALSO retains the use of your
cruise control where the NSS didn't, first thing is check the clutch position switch, it has to be a
closed circuit when the clutch is depressed, if not you need a Position switch that does, they come
both ways, (I used one off the XT-6's brake pedal) once you've gotten one with the correct
function, you need to run the 2 wires through the firewall, and to the smaller of the 2 wire
harnesses that hooked up to the auto transmission, the 2 wires need to be spliced into the Black
w/Yellow tracer and the Blue w/White tracer wires of the harness (they are next to each other in
one corner of the connecter). Now it will start when the clutch is depressed, and will kick the
cruise off when the clutch is depressed also. Now reinstall your front axles. At this point you can
start the beast (very loud as you've not installed the pipes yet), and run it through the gears to be
sure everything is working (clutch, shifter). If so and you're doing this to a FWD SVX then put the
pipes back on and dress out your console for the shifter boot then you're done, go out and roast
those tires!
7. As for the rest of us with AWD, the next things is to take the ring and pinion out of the rear diff
you got with the 5-speed, and install it into the original LSD rear diff (you have to do this to use
the original axles, and to retain the "Limited Slip Differential").
Note: the LSD axles don't have the spring pins to retain them, they just pop out of the rear diff.
Now reinstall the original rear diff with the new gears and fill with LSD grease.
8. Take the front section of the component drive shaft to a machine shop that does drive shafts and
have it lengthened 2" (again it wouldn't hurt to check this measurement, in case your transmission
is a different length than mine, easiest way would be to measure your original auto transmission
and then your 5-speed to calculate the difference). Once you get it back from the machine shop,
put the drive shaft back together, and reinstall it into the car. (Don't forget the heat shield that goes
above it!)
9. Reinstall the exhaust system. (Wow an easy part!)
10. Fill the Transmission with grease. (Another easy one!)
11. Reinstall the Console, Driver's seat, and dash lower trim panel, the shifter surround needs to be
trimmed to accept the manual shifter boot, a Dremel tool works pretty well.
12. Well now for your maiden voyage! Take it for a spin, to see if you need to adjust the clutch (make
sure it's out of gear the first time you start it, in case the clutch isn't releasing). It's a good ideal to
get back under it after a short drive to check for loose bolts, leaks, ETC.
Well it kicks butt, doesn't it!! All the hard work seems worth it on that first drive.
I hope this helps anyone interested in doing a 5-speed swap, either by giving them a guideline to go by, or
by convincing them it's too big an undertaking to mess with without a good deal of mechanical
experience.
Sheeeeesh, my fingers are numb.