Atlas phẫu thuật vùng mắt Atlas of oculoplastic and orbital surgery
Bạn đang xem bản rút gọn của tài liệu. Xem và tải ngay bản đầy đủ của tài liệu tại đây (25.41 MB, 128 trang )
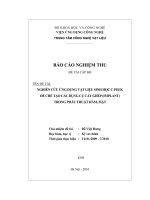
Atlas of
Oculoplastic
and Orbital
Surgery
Thomas C Spoor
AT L A S O F O C U L O P L A S T I C
A N D O R B I TA L S U R G E RY
Thomas C Spoor MD, FACS
Professor Emeritus
Departments of Ophthalmology and Neurosurgery
Wayne State University School of Medicine
and
Oculoplastic and Orbital Surgery
St John Hospital System, Detroit, Michigan and
Sarasota Retina Institute, Sarasota, Florida
USA
© 2010 Informa UK
First published in 2010 by Informa Healthcare, Telephone House, 69-77 Paul Street, London EC2A 4LQ. Informa Healthcare is a trading division of Informa
UK Ltd. Registered Office: 37/41 Mortimer Street, London W1T 3JH. Registered in England and Wales number 1072954.
All rights reserved. No part of this publication may be reproduced, stored in a retrieval system, or transmitted, in any form or by any means, electronic,
mechanical, photocopying, recording, or otherwise, without the prior permission of the publisher or in accordance with the provisions of the Copyright,
Designs and Patents Act 1988 or under the terms of any licence permitting limited copying issued by the Copyright Licensing Agency, 90 Tottenham Court
Road, London W1P 0LP.
Although every effort has been made to ensure that all owners of copyright material have been acknowledged in this publication, we would be glad to
acknowledge in subsequent reprints or editions any omissions brought to our attention.
A CIP record for this book is available from the British Library.
Library of Congress Cataloging-in-Publication Data
Data available on application
ISBN-13: 978 1 841 84586 9
Orders from
Informa Healthcare
Sheepen Place
Colchester
Essex CO3 3LP
UK
Telephone: +44 (0)20 7017 5540
Email:
Typeset by Exeter Premedia Servies Private Ltd., Chennai, India
Printed and bound in Great Britain by MPG Books Ltd, Bodmin, Cornwall, UK
Contents
Dedication
Foreword
Preface
iv
v
vi
1 Lower Eyelid Surgery
1
2 Ectropion Repair
16
3 Entropion Repair
26
4 Lower Eyelid Retraction
32
5 Complications of Lower Eyelid Surgery
38
6 Upper Eyelid Surgery
48
7 Complications of Upper Eyelid Surgery
73
8 Tearing and Dry Eye—Evaluation and Treatment
84
9 Orbital Surgery, Optic Nerve Sheath Decompression, and Temporal Artery Biopsy
95
Index
118
iii
Dedication
I would like to dedicate this book to those who made me what I am (for better or worse). My parents Herbert and Edna Spoor, my wife
Deanne and daughter Kristen.
I also thank the members of the oculoplastic service at the New York Eye and Ear Infirmary where I was an OR technician and a resident.
Many are long dead but are still quoted and remembered. Thanks also to my preceptor in Orbital surgery Dr John S Kennerdell for giving
me an opportunity to do a unique fellowship in orbital disease. Thanks also to my many fellows and residents. Their input, ideas and
mistakes were always stimuating.
iv
Foreword
One might appropriately ask whether there is a need for yet
another atlas of oculoplastic surgery. Dr. Thomas Spoor has
nicely compiled and detailed his personal experience with
common oculoplastic conditions over his nearly 30 years of
practice. This book, while not claiming to be comprehensive,
emphasizes more of the common oculoplastic conditions likely
to present to a busy comprehensive ophthalmologist with an
interest in oculoplastic conditions. There are nine chapters in
the book and the first seven deal with the eyelids. Separate chapters on complications of upper eyelid and lower eyelid surgery
are timely and helpful. Another chapter devoted to the evaluation and treatment of tearing and a dry eye contains many
practical pearls. The final chapter is much more specialized and
deals with temporal artery biopsy, orbital surgery, and optic
nerve sheath fenestration. The last two procedures are more
fitting for an oculoplastic or neuro-ophthalmic surgeon. The
chapters are short and practical with helpful hints and suggestions to avoid or manage complications. Surgical points are
emphasized with many patient photographs. For the conditions
listed and the procedures described, Dr. Spoor’s techniques have
stood the test of time. Dr. Spoor’s new surgical atlas is a useful
addition to anyone’s library.
James A Garrity MD
Whitney and Betty MacMillan
Professor of Ophthalmology
Mayo Clinic
Rochester, MN
v
Preface
Over 50 years ago, three surgeons in New York—Byron Smith,
Wendell Hughes, and Sidney Fox—working quite independently,
realized that plastic surgery around the eye was different. The eye
has special needs and should be treated in a special manner to
protect its function. Since its inception two generations ago,
oculoplastic surgery has constantly evolved. What was once
dogma may now be passé. Procedures that were once passé may be
resurrected and utilized again. The only constant in oculoplastic
surgery is change and evolution. Although I learned this specialty
from some of the best in the business, little I do today is the way
it was taught to me. Thirty years of teaching residents and fellows
modifies conventional wisdom and we all learn from one another.
There is a need to describe practical, simple surgical techniques
allowing the comprehensive ophthalmologist to manage basic
eyelid and orbital disorders in a safe and effective manner. There
is also a need for younger or inexperienced oculoplastic surgeons,
neuro-ophthalmologists, and plastic surgeons to benefit from the
mistakes and successes of an experienced practitioner. The
practice environment 30 years ago was much less competitive and
more forgiving, providing a large volume of surgery and allowing
for a great deal of innovation.
vi
This book presents a practical, problem-oriented guide to the
management of common oculoplastic and orbital disorders. These
are mostly simple solutions to often-complicated problems that
I have learned over a lifetime of academic and private practice.
The procedures are described with surgical photos and illustrations
in a casual, didactic fashion, as I would use instructing a resident
or fellow. This is not an all-encompassing, encyclopedic text but a
practical, somewhat dogmatic approach to the management of
common eyelid and orbital disorders. I describe these procedures
in a step-by-step manner, which should be very user friendly and
has successfully educated a generation of ophthalmology residents
and fellows.
This book will teach you to avoid and manage surgical complications and provide guidance for performing a variety of
oculoplastic and neuro-ophthalmic surgical procedures effectively and quickly, as developed over a busy 30-year surgical
career with extensive input from a plethora of residents and
fellows. There may be better ways to perform these procedures
but not many.
Thomas C Spoor md, facs
1
Lower Eyelid Surgery
BASIC LOWER EYELID BLEPHAROPLASTY—TRANSCONJUNCTIVAL
Basic Anatomy
There are three fat pads in the lower eyelid: medial, central, and
lateral (Fig. 1.1). The inferior oblique muscle separates the medial
from the central fat pad (Fig. 1.2). When approaching the lower
eyelid via a transconjunctival incision, this is really all you need to
know. As the conjunctival flap is dissected and the eyelid is
retracted, the fat pads become readily apparent (Fig. 1.3). The
orbital septum and capsulopalpebral fascia are retracted with the
rest of the eyelid (Fig. 1.3A).
Most transconjunctival dissections of the lower eyelid are done
behind the orbital septum, directly exposing the orbital fat pads.
Deep to the orbital fat is the capsulopalpebral fascia, which is
analogous to the levator aponeurosis in the upper eyelid (Fig. 1.1).
The capsulopalpebral fascia needs to be identified and reattached
to the tarsus to properly repair an involutional entropion (see
chapter “Entropion Repair”).
Transconjunctival blepharoplasty with or without a tarsal
strip procedure is the mainstay of lower eyelid surgery. The vast
majority of lower eyelid blepharoplasties should be performed via
a transconjunctival approach. Excessive skin rarely needs to be
removed in younger patients since it takes more skin to fill the
concavity remaining after removal of orbital fat than it did to
cover the antecedent convexity formed by the herniated fat
(Fig. 1.3B). Transcutaneous lower eyelid blepharoplasty should be
reserved for elderly patients with excessive festoons (bags on bags)
or patients with an entropion that needs repair by reattaching the
capsulopalpebral fascia (see chap. 3, “Entropion Repair”).
with a bipolar cautery (Fig. 1.12A–D). Before releasing the fat,
grasp it with forceps and inspect it for bleeding. If there is none,
release the fat back into the orbit (Fig. 1.13). It is much easier to
cauterize visible vessels before they have retracted into the orbit.
If you do release a bleeding fat pad into the orbit, expose it by
applying gentle pressure to the globe, grasp the fat with forceps, and
cauterize the bleeding vessel again.
Approach the medial fat pad in a similar fashion. Apply pressure
to the globe, prolapse the fat pad (Fig. 1.14A), dissect it with the
Ocutemp cautery (Fig. 1.14B), cauterize the overlying vessels
(Fig. 1.14C), clamp and excise the fat pad (Fig. 1.14C–E), cauterize the stump of fat, and maintain control and observe for
bleeding before releasing the hemostat (Fig. 1.14C and D). Use
bipolar cauterization for hemostasis. The middle fat pad may be
removed in a similar fashion (Fig. 1.15). The inferior oblique
muscle lies between the medial and middle fat pad and is easily
identified and avoided (Figs. 1.2 and 1.16). It is very difficult to
cause clinical diplopia by inadvertent injury to the inferior
oblique muscle, as any experienced eye muscle surgeon can
relate that the inferior oblique muscle continues to function
quite well when partially removed. After obtaining hemostasis,
inspect the eyelid for contour and symmetry (Fig. 1.17A and B).
Reattach the conjunctiva and recess it about 5 mm posterior to
its original attachment to the tarsus (Fig. 1.18A and B). Reattaching
the conjunctiva avoids potential pyogenic granuloma formation.
Now tighten the lower eyelid, if necessary, with a tarsal strip
procedure.
TARSAL STRIP PROCEDURES
Technique
Inject a local anesthetic containing epinephrine into the eyelid
10 to 15 minutes prior to surgery (Fig. 1.4). Pass two 4-0 silk
traction sutures through the eyelid margin and invert the lower
eyelid. Inject ½ to 1 cm3 of anesthetic solution beneath the
palpebral conjunctiva (Fig. 1.5). A lateral canthotomy (Fig. 1.6)
may or may not be performed. A canthotomy often facilitates
removal of the lateral fat pad avoiding an unsightly inferior
orbital mass after surgery. Make an incision through the conjunctiva just posterior to the tarsus and extend it along the
entire horizontal length of the eyelid (Fig. 1.7A–C). Pass two
6-0 Vicryl™ traction sutures through the conjunctiva applying
upward traction with hemostats (Fig. 1.8). Dissect a conjunctival
flap and obtain hemostasis with a hot Ocutemp™ cautery (Fig.
1.9A and B). This exposes the lower eyelid fat pads. Enhance
exposure by retracting the lower eyelid with a Desmarres or
similar retractor (Fig. 1.3). Use bipolar cauterization to coagulate any large overlying blood vessels (Fig. 1.10). Expose the
inferior orbital fat pads by dissecting with the Ocutemp cautery.
Enhance exposure of the fat pads by applying gentle pressure on
the globe (Fig. 1.11A and B). Clamp the prolapsed fat with a
hemostat, excise it with scissors, and cauterize the clamped fat
Variations on the theme of tightening the lateral canthal tendon
are the mainstays of lower eyelid surgery. Do this by splitting the
canthus for lesser degrees of laxity, splitting the eyelid into an
anterior and posterior lamella for greater degrees of laxity, or
tightening the common canthal tendon to treat rounding of the
canthus and mild canthal dystopia. These procedures are so
important that they are worth describing in the context of lower
eyelid blepharoplasty and later when discussing ectropion
repair.
Clamp the lateral canthus and incise it with scissors (Fig. 1.19).
Extend the lateral canthotomy incision with a sharp blade (Fig. 1.20).
Dissect the lower eyelid into an anterior (skin and orbicularis
muscle) and posterior lamella (tarsus and conjunctiva) (Fig. 1.21).
A horizontal cut posterior and parallel to the tarsus forms a tarsal
strip (Fig. 1.22). Pass a double-armed 5-0 Dexon™ or polypropylene suture with a large curved needle through the tarsal strip
from posterior to anterior and tie it to prevent it from pulling
through the tissue (Fig. 1.23). Pass both arms of the suture through
the lateral orbital wall at the level of the lateral orbital tubercle.
This suture placement has classically been described as through
the periosteum at the lateral orbital rim, but you will get much
better fixation of the eyelid to the lateral orbital rim if you pass the
1
atlas of oculoplastic and orbital surgery
(A)
Figure 1.1 Preaponeurotic fat pads of the upper and lower eyelids.
Figure 1.2 The inferior oblique muscle lies between the medial and central
fat pads.
(B)
Figure 1.3 Apply gentle pressure to the globe. This facilitates exposure of the lower
eyelid fat pads (A). It takes more skin to fill a concavity than a convexity hence most
patients can undergo a transconjunctival blepharoplasty without an external incision and removal of skin (B).
2
lower eyelid surgery
(A)
Figure 1.4 Blanching of the skin at the operative site indicates sufficient vasoconstriction to enhance hemostasis and greatly facilitates the operation. It is very
helpful to inject the anesthetic in the preoperative holding area and let the
epinephrine constrict the vessels while the patient is prepared for surgery.
Figure 1.5 Invert the lower eyelid with a 4-0 silk suture and inject additional
anesthetic beneath the conjunctiva.
(B)
Figure 1.6 A lateral canthotomy (A) with or without a cantholysis facilitates exposure of the lateral fat pads (A, B). Cantholysis entails cutting the inferior crus of the
lateral canthal tendon (B).
(A)
(B)
(C)
Figure 1.7 Make an incision just below the tarsus (A) and extended it along the entire horizontal length of the eyelid (B, C).
3
atlas of oculoplastic and orbital surgery
(A)
(B)
Figure 1.8 Nasal and temporal sutures retract the conjunctival flap superiorly, facilitating dissection (A, B).
(A)
(B)
Figure 1.9 The conjunctival flap can be dissected in a bloodless fashion using hot cauterization (A, B). Make sure the supplemental nasal oxygen is discontinued before
using this form of cauterization.
Figure 1.10 Large vessels should be cauterized with a bipolar cautery.
4
lower eyelid surgery
(A)
(B)
Figure 1.11 Ocutemp hot cauterization facilitates dissection of the orbital fat capsule (A), exposing the individual orbital fat pads (B).
(A)
(B)
(C)
(D)
Figure 1.12 Technique for removal of orbital fat requires exposure, enhanced by digital pressure on the globe (A), clamping the protruding fat (B), excising the clamped
fat (B), and cauterizing the clamped fat (C). This busy illustration (D) demonstrates the techniques of clamping, cutting, and cauterizing the fat pads.
5
atlas of oculoplastic and orbital surgery
Figure 1.13 Hold the fat stump with forceps, inspect it for bleeding, and cauterize
as necessary before releasing it into the orbit.
(A)
(B)
(D)
(C)
(E)
Figure 1.14 Expose the medial fat pad by applying gentle pressure upon the globe (A). The capsule is dissected with hot cauterization (Fig. 1.11A). Exposed vessels are
cauterized with a bipolar cautery. The exposed fat pad is clamped (B), cut (C), cauterized (D), and inspected before being released back into the orbit (E).
6
lower eyelid surgery
Figure 1.15 The middle fat pad is clamped, cut, and cauterized in a similar fashion.
Figure 1.16 The inferior oblique muscle separates the middle from the medial fat pad.
(A)
(A)
(B)
Figure 1.17 The contour and symmetry of the concave, just operated upon lower
eyelid (A) compared to the contralateral, convex, unoperated lower eyelid (B).
(B)
Figure 1.18 Reposition the conjunctiva to the eyelid and recess it about 5 mm (A,
B). This can be done with sutures or with Evicel™ fibrin/thrombin sealant.
7
atlas of oculoplastic and orbital surgery
(B)
(A)
Figure 1.19 Clamp the lateral canthus (A) and incise it with scissors (B).
Figure 1.20 Extend the incision over the lateral canthus with a sharp blade.
Figure 1.21 Divide the eyelid into an anterior lamella of skin and orbicularis
muscle and a posterior lamella containing conjunctiva and tarsus. Do this with a
sharp blade and straight scissors.
Figure 1.22 A cut parallel to the eyelid margin forms a tarsal/conjunctiva strip.
8
lower eyelid surgery
(A)
(B)
Figure 1.23 Pass both arms of a double-armed suture with a sharp, curved needle through the tarsal strip (A) and tied in a double knot (B).
(A)
(B)
Figure 1.24 If possible, pass both needles through the bone (not periosteum as described for years) of the lateral orbital rim at the level of the lateral orbital tubercle (A, B).
9
atlas of oculoplastic and orbital surgery
Figure 1.25 Passing the needles through the bone ensures excellent apposition of
the eyelid to the globe when the suture is tied.
Figure 1.27 Passing both arms of the suture through the strip and tying a
double knot.
(A)
(B)
Figure 1.26 The upper eyelid may be shortened in a similar fashion by forming a
tarsal strip (A, B).
10
suture directly into the bone (Fig. 1.24). This is actually easily
accomplished if you use the proper needles (needle types) and
results in excellent eyelid tightening (Fig. 1.25). If the eyelid is in
the appropriate position—not too slanting and not too retracted—
tie the suture and close the skin incision (Fig. 1.25).
If the upper eyelid needs to be tightened due to floppy eyelid
syndrome or windshield wiper epitheliopathy, do this at the
same time. Divide the upper eyelid into an anterior and posterior tarsal strip. Pass a double-armed suture placed through the
posterior strip as described for the lower eyelid (Figs. 1.26 and
1.27). Then pass both arms of the suture through the bone at
the level of the lateral orbital tubercle (Figs. 1.28 and 1.29).
Tighten and tie the suture, reapproximating the eyelid to the
globe.
If there is a minimal degree of eyelid laxity, it is not necessary to
perform an eyelid splitting tarsal strip. The edges of the eyelids
outlined by the canthotomy can be reattached to the lateral orbital
wall (Fig. 1.30). This will correct a mild degree of eyelid laxity and
is especially useful in cosmetic blepharoplasty when you wish to
tighten the eyelid but not distort the canthus.
It is imperative to place the sutures inside the orbital rim to obtain
the appropriate tightening and contour (Fig. 1.31). A superficial
suture placement will result in an upper eyelid that is not flush
against the globe and the eyelid will remain dysfunctional.
TRANSCUTANEOUS LOWER EYELID BLEPHAROPLASTY
Reserve this procedure for patients with excessive, redundant
lower eyelid skin or extensive festoons (Fig. 1.32A).
lower eyelid surgery
(A)
(B)
Figure 1.28 Try to pass both needles through the lateral orbital bone (A). This effectively tightens both upper and lower eyelids (B).
Avoid this procedure in younger patients who really need
inferior orbital fat removal, best accomplished through the conjunctiva. It takes more skin to fill a concavity than a convexity.
Removal of orbital fat converts the bulging, convex preoperative lower eyelid outline to a concave postoperative appearance
(Fig. 1.32B). This change in topography usually accommodates
the excessive skin.
Figure 1.29 A more graphic photo to emphasize the importance of passing the
sutures through the bone of the lateral orbital wall, not the periosteum.
Technique
Outline a subciliary incision just below the lash line and extend it
about 1 to 2 cm lateral to the lateral canthus—more or less
depending on the amount of skin that needs to be removed
(Fig. 1.33). Make an incision with a superblade™ along the entire
horizontal length of the eyelid and extend it over the lateral
canthus. Place a double-armed 4-0 silk suture through the eyelid
at the incision line. This allows you to apply upward traction on
the eyelid. Make a button hole incision through the orbicularis at
the lateral portion of the incision.
Place a hemostat into the incision, extend it along the entire
horizontal length of the eyelid, and spread it open. This will rapidly develop a skin muscle flap and exposes the inferior orbital
fat pads (Fig. 1.34). Control bleeding with bipolar cauterization
augmented with cotton pledgets soaked in xylocaine with epinephrine and added phenylephrine (one drop of 10% topical
phenylephrine per cubic centimeter of anesthetic solution).
Obtain superficial hemostasis before removing the orbital fat.
11
atlas of oculoplastic and orbital surgery
(A)
(B)
Figure 1.30 If less tightening is necessary, a lateral canthotomy may be performed (A) and the lids tightened with a double-armed suture passed through the lateral lid
margin (B). A formal tarsal strip may not be necessary if the eyelid laxity is not too great. This technique is excellent for tightening the lower eyelid during a cosmetic
blepharoplasty.
(A)
(B)
Figure 1.31 Again, it is essential to pass both needles through the boney lateral orbital wall (A, B).
12
lower eyelid surgery
Figure 1.33 Make a subciliary incision and extend it over the lateral canthus.
(A)
(A)
(B)
Figure 1.32 Patients with excessive lower eyelid skin and/or festoons are excellent
candidates for transcutaneous lower eyelid blepharoplasty (A). Removing excessive orbital fat converts a convex lower eyelid into a concave lower eyelid (B).
It requires more skin to fill a concavity than a convexity.
(B)
Figure 1.34 Develop a skin muscle flap exposing the inferior orbital fat pads (A).
Gentle digital pressure accentuates the appearance of the fat pads (B).
13
atlas of oculoplastic and orbital surgery
Figure 1.36 The applicator stick points to the inferior oblique muscle located
between the middle and nasal fat pads.
Figure 1.35 Exposure of the medial and lateral fat pads.
Figure 1.38 With the patient’s mouth open, overlap the skin edges to determine
the amount of skin that needs to be removed.
Figure 1.37 Opening the mouth mimics the effect of gravity and will help prevent
excising an excessive amount of skin.
Figure 1.39 A thin strip of skin is excised beneath the lower eyelid. A larger amount
of skin is excised in the lateral canthal area.
14
lower eyelid surgery
This ensures that you will not confuse superficial bleeding with
deep orbital fat bleeding. Superficial bleeding is benign, untreated
deep bleeding may be blinding. It is important to distinguish
between them.
Dissect the inferior orbital fat pads with a hot cauterization
exactly as described above. Enhance exposure by applying gentle
pressure upon the globe (Fig. 1.34B). Clamp the exposed fat pad
with a hemostat, excise it with scissors, and cauterize with a
bipolar cautery. Release the clamp while holding the fat with forceps, inspect it for bleeding, and release it into the orbit as
described above. Start with the lateral fat pad and work toward
the medial fat pad (Fig. 1.35). Remember that the inferior oblique
muscle lies between the middle and nasal fat pads (Fig. 1.36).
Remove fat from both sides before tightening the eyelids and
removing the skin. Compare the contour of both lower eyelids.
If equal, tighten both with the tarsal strip variant appropriate for
the degree of eyelid laxity (see above). Tightening the lower eyelid
often makes the residual lateral fat pad more obvious. If that
occurs, remove more lateral fat pad. Obtain meticulous hemostasis.
Apply gentle pressure to the globe. This exposes the remnants of
the fad pads allowing you to inspect them for residual bleeding.
Cauterize any residual bleeding vessels with bipolar cautery,
irrigate the wound, and take another look to ensure that there is
no bleeding.
After hemostasis is obtained and the eyelid is tightened, conservatively remove excessive skin. Ask the patient to open their
mouth. This puts the lower eyelid skin on inferior stretch mimicking the effect of gravity (Fig. 1.37). Grasp the eyelid skin with
forceps and overlap the eyelid margin (Fig. 1.38). Make sure that
the patient’s mouth is still open. Make a vertical incision through
the excessive skin to the level where it overlaps the eyelid margin
(Fig. 1.39). Err on the conservative side. Incise a triangle of excessive skin from the vertical incision to the punctum. Narrow
the amount of skin removed asymptotically as you approach the
punctum. Remove less skin medially than laterally. Now excise
the excessive lateral skin, extending the incision lateral to the lateral
canthus as necessary to obtain a smooth contour of skin removal
(Fig. 1.39). Excise a thin strip of orbicularis muscle with the hot
cautery. This enhances the appearance of the incision after healing.
Close the incision with interrupted sutures.
15
2
Ectropion Repair
Ectropion may be punctal, involutional, or cicatrical (Figs. 2.1–
2.3). It is often a combination of several or all of the above. Many
surgical techniques have been described for ectropion repair, some
are good and some are not so good. I will describe three techniques that work most of the time and can be used in combination
to treat any type of ectropion.
PUNCTAL ECTROPION
Simple punctal ectropion of the lower eyelid (Fig. 2.1) is a common cause of tearing. Punctal ectropion may be subtle but still
symptomatic. Careful slit lamp examination usually leads to the
correct diagnosis. This can be facilitated with lissamine green
staining. The devitalized conjunctival tissue of the ectropic punctum will stain with lissamine green. This staining will be obvious
even when obfuscated by an increased tear film (Fig. 2.4).
A simple punctal ectropion, with minimal eyelid laxity, can
be inverted with a transcutaneous figure of eight suture placed
posterior to the ectropic punctum (Fig. 2.5). This is a simple
technique that can easily be performed in the office.
Technique
The conjunctiva posterior to the ectropic punctum is anesthetized
with a piece of cotton soaked in 4% topical lidocaine. Local
anesthetic containing epinephrine and hyaluronidase is then
painlessly injected through the conjunctiva into the medial eyelid.
The lower eyelid is exposed with either a traction suture or finger
pressure. An oval wedge of conjunctiva and subconjunctival tissue
posterior to the punctum is excised with scissors (Fig. 2.6). The
incision may be deepened, and hemostasis is obtained with hot
cauterization (Fig. 2.7). A 5-0 Dexon™ suture is passed through
the eyelid from the skin surface into the wound (Fig. 2.8). It is
then passed through the conjunctival edges anterior to posterior, posterior to anterior in a figure of eight pattern (Figs. 2.5
and 2.9). The needle is then passed back through the eyelid exiting
the skin surface adjacent to its entry site (Fig. 2.10). It is then
tied. This very effectively inverts the punctum obviating the
ectropion (Fig. 2.11).
ECTROPION WITH LOWER EYELID LAXITY
If there is significant laxity of the lower eyelid, it needs to be tightened
(horizontally shortened) with a variation on the theme of the
lateral tarsal strip procedure. Clamp the lateral canthus and perform a canthotomy. Extend the incision exposing the lateral orbital
rim (Fig. 2.12). Pass each arm of a double-armed 5-0 Dexon suture
through the lateral portion of the lower eyelid and tie a double
knot (Fig. 2.13). Pass both arms of the suture through the bone of
the lateral orbital rim at the level of the lateral orbital tubercle
(Fig. 2.14). The type of suture is not that important. I prefer an
absorbable suture but a multifilament nonabsorbable suture
(i.e., polypropylene is certainly acceptable).
16
The important issues are the stout, curved, double-armed suture
needles. They need to be sufficiently curved and stout to pass
through the lateral orbital wall or periosteum without breaking.
Conventional teaching suggests passing the suture through the
periosteum of the lateral orbital rim but passage through the bone
itself provides more stable fixation. This is easily accomplished in
over 90% of patients. One or two skin sutures will close the lateral
canthal wound.
More severe eyelid laxity and ectropion may require a formal
tarsal strip procedure as described by Anderson. The lower eyelid
is split into anterior and posterior lamellae with a blade and
scissors (Fig. 2.15). The posterior lamella contains tarsus and conjunctiva, the anterior lamella contains skin and orbicularis muscle.
A cut is made in the posterior lamella, parallel to the eyelid margin
with scissors (Fig. 2.16). This forms the tarsal strip. Both arms of
a double-armed suture are passed through the tarsal strip and tied
in a double knot (Fig. 2.17A and B). This is sutured to the lateral
orbital rim as described above and effectively tightens even the
most lax eyelids (Fig. 2.18A and B). It is best to use two sutures
when performing a formal tarsal strip. This avoids total dehiscence of the lower eyelid if a lone suture breaks immediately after
surgery.
A tarsal strip may also be performed to tighten the upper eyelid
in patients with floppy eyelids and windshield wiper epitheliopathy
(see section “Wedge Resection of Upper Eyelid” in chap. 8).
CICATRICAL ECTROPION
If there are significant cicatrizing forces exacerbating the ectropion (Figs. 2.19 and 2.20), they need to be released and a skin graft
is placed in the defect. These areas may be small, just below the
punctum (Fig. 2.19) or extend the entire horizontal length of
the eyelid (Fig. 2.20).
Make a subciliary incision along the horizontal length of the
cicatrical ectropion (Figs. 2.21 and 2.22). Pass a 4-0 silk suture
through the eyelid margin and stretch it superiorly (Fig. 2.22).
Dissect a flap of skin and orbicularis muscle with scissors until the
cicatrizing forces are released (Fig. 2.22). This is the bed for the
skin graft. Invert the punctum and then tighten the eyelid with a
tarsal strip procedure (see “Tarsal Strip Procedures” in chap. 1).
The eyelid must be tightened before sizing and placing the skin
graft. Tightening the eyelid decreases the size of skin graft needed
to fill the defect.
If the area needing a skin graft is small, a pinch graft from the
lateral portion of either upper eyelid is ideal. Obtain the graft by
pinching the excessive skin with a forceps and excising it with
straight scissors (Fig. 2.23A and B). The donor site is closed with
sutures or Indermil® surgical glue. The graft is placed on and
sutured into the recipient site (Figs. 2.24 and 2.25).
If a larger skin graft is needed, the next best place to obtain it
is the retroauricular area of the ipsilateral ear, followed by the
supraclavicular region (Fig. 2.26). The graft site is often determined
ectropion repair
Figure 2.2 Punctal ectropion combined with eyelid laxity is an involutional ectropion.
Repair requires tightening the lower eyelid in addition to inverting the punctum.
Figure 2.1 Punctal ectropion: The punctum is ectropic. Lower eyelid laxity and
scarring is not an issue and does not need correction.
Figure 2.4 Lissamine green staining of a subtle punctal ectropion makes it easier to
recognize.
Figure 2.3 Cicatrical ectropion resulting from previous eyelid and facial surgery.
Repair most always requires a skin graft in addition to eyelid tightening and
punctal inversion.
Figure 2.5 Diagrammatic representation of the transcutaneous figure of eight
suture used to invert the punctum.
Figure 2.6 Invert the medial eyelid with digital pressure or a suture and excise an
oval of conjunctiva and deeper tissue.
17
atlas of oculoplastic and orbital surgery
Figure 2.8 Pass a 5-0 Dexon suture through the eyelid into the oval defect.
Figure 2.7 The oval is deepened with a hot cauterization.
Figure 2.10 Pass the needle back through the eyelid.
Figure 2.9 Pass the suture through the edges of the oval in a figure of eight pattern.
18