Illustrated series microsoft office 365 and powerpoint 2016 introductory 1st edition by beskeen solution manual
Bạn đang xem bản rút gọn của tài liệu. Xem và tải ngay bản đầy đủ của tài liệu tại đây (4.72 MB, 74 trang )
Microsoft Office 2016 Illustrated Introductory
PowerPoint 2016 Module 2 Modifying a Presentation
PowerPoint - 1
Illustrated Series: Microsoft Office 365 & PowerPoint 2016: Introductory 1st edition by
David W. Beskeen Solution Manual
Link full download solution manual: />Link full download test bank: />
Module 2
Modifying a Presentation
Module 2: Modifying a Presentation ................................................................................................. 1
Concepts Review ......................................................................................................................... 1
Skills Review................................................................................................................................ 2
Table of Contents
Independent Challenge 1 ............................................................................................................. 3
Independent Challenge 2 ............................................................................................................. 3
Independent Challenge 3 ............................................................................................................. 4
Independent Challenge 4: Explore................................................................................................ 4
Visual Workshop .......................................................................................................................... 5
een
ing
ing
ms
Module 2: Modifying a Presentation
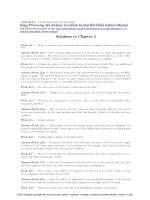
Concepts Review
iple
ce
Microsoft Office 2016 Illustrated Introductory
PowerPoint 2016 Module 2 Modifying a Presentation
Scr
Label
1. Merged shape
2. SmartArt graphic
3. Footer; Footer text
4. Vertical guide
5. Sizing handle
6. Horizontal guide
7. Mini Toolbar
8. Rotate handle
9. Ruler
Match
10. d
11. b
12. f
13. a
14. c
15. e
Ite
PowerPoint - 2
Mult
16. b
17. c
18. d
19. b
20. a
21. c
22. a
Choi
Microsoft Office 2016 Illustrated Introductory
PowerPoint 2016 Module 2 Modifying a Presentation
PowerPoint - 2
Microsoft Office 2016 Illustrated Introductory
PowerPoint 2016 Module 2 Modifying a Presentation
PowerPoint - 2
Skills Review
Data Filename: PPT 2-2.pptx
Solution Filename: PPT 2-Inverter.pptx
Steps 1b – 1d: Students begin with a data file which they are asked to modify by first creating a
new slide, entering the text and then moving a slide to a new position.
Steps 2a – 2e: Students do some basic formatting with the Mini Toolbar
Steps 3a – 3f: Text on Slide 4 is converted to a SmartArt graphic. Make sure students end up
using the Accent Process layout graphic with the Intense Effect style applied to the graphic.
Steps 4a – 4f: Insert, modify, and position a plus shape on Slide 3. The slide should look similar
to the following figure (Figure 2-19 in the book):
Steps 5a – 5g: Resize the text object on Slide 3, then insert a 1-inch hexagon shape to merge
with the plus shape. Use the Send to Back command to achieve the correct look of the shape.
Steps 6a – 6f: Make a copy of the elbow shape on Side 3, then rotate the copied shape using the
Flip Horizontal command. Type text in three shapes, then resize an arrow shape.
Steps 7a – 7g: Add guides to the slide, move the vertical guide left until 3.42 appears, select the
five small triangles on the slide. Align and distribute the small triangles, rotate and group the
triangles. Duplicate the grouped triangles twice then position as shown in the following figure
(Figure 2-20 in the book):
Microsoft Office 2016 Illustrated Introductory
PowerPoint 2016 Module 2 Modifying a Presentation
PowerPoint - 3
Steps 8a – 8j: Apply footer text, except to Slide 1, to every slide in the presentation. Apply a
fixed date, page number and class name to the Notes and Handouts pages.
Independent Challenges
Because students will solve the independent challenges in different ways, it is important to
stress there is not just one correct solution. The following are examples of possible solutions for
the Independent Challenges in Module 2 of this book.
Independent Challenge 1
Data Filename: PPT 2-3.pptx
Solution Filename: PPT 2-Arts.pptx
Students start out with a data file and modify it by adding specific text to the Commitment to
Excellence slide. Make sure students have applied the Ion theme and have applied the Trapezoid
List SmartArt graphic to the text on Slide 5 along with the Polished SmartArt Style. The figure
below shows Slide 5 from the solution presentation provided.
Independent Challenge 2
Data Filename: PPT 2-4.pptx
Solution Filename: PPT 2-Broker.pptx
Students start out with a data file and modify it by aligning shapes on slide 3, as detailed in Steps
c and d. Verify that students have applied the Facet theme to the presentation. Students should
format the shapes on Slide 3 using the instructions in Steps e, f, and g, including merging 2
shapes together. Make sure that students have inserted footer information and have spellchecked the document. The figure below shows Slide 4 from the solution presentation provided
(Figure 2-21 in the book).
Microsoft Office 2016 Illustrated Introductory
PowerPoint 2016 Module 2 Modifying a Presentation
PowerPoint - 4
Independent Challenge 3
Data Filename: Create new
Solution Filename: PPT 2-Southern.pptx
In this Independent Challenge, students are asked to start a new project. They are given a
specific theme (Wood Type) and a specific title and subtitle, detailed in Step b. Next, students
are asked to add five more slides and are given titles only. They must supply their own text
based on the subject matter presented in the introduction. Verify that on at least one slide,
students have converted text to a SmartArt graphic and have applied the Inset Effect SmartArt
Style. Also, verify that students have created and merged 2 two shapes together. The figure
below shows a slide from the solution presentation provided.
Independent Challenge 4: Explore
Data Filename: PPT 2-5.pptx
Solution Filename: PPT 2-Basset.pptx
In this Independent Challenge, students are given a data file and asked to modify it by adding a
new slide with the information outlined in Step b. Make sure students have applied the
Retrospect theme and have carried out the text formatting outlined in Steps d, e, and f. Finally,
Microsoft Office 2016 Illustrated Introductory
PowerPoint 2016 Module 2 Modifying a Presentation
PowerPoint - 5
on Slide 4, students are asked to change the text to a SmartArt graphic and apply a SmartArt
Style of their choice. The figure below shows a slide from the solution presentation provided.
Visual Workshop
Data Filename: Create new
Solution Filename: PPT 2-Nebraska Trade.pptx
The student presentation should look like figures below (Figures 2-22 and 2-23 in the book).
The SmartArt graphic layout is the Diverging Radial layout (Cycle group) with the (3D) Inset
SmartArt Style applied to it. The notes and handouts should include the student's name in the
footer.
Microsoft Office 2016 Illustrated Introductory
PowerPoint 2016 Module 2 Modifying a Presentation
PowerPoint - 6
PowerPoint 2016 Instructor’s Manual
Page 1 of 9
PowerPoint Module 2: Modifying a Presentation
A Guide to this Instructor’s Manual:
We have designed this Instructor’s Manual to supplement and enhance your teaching experience
through classroom activities and a cohesive module summary.
This document is organized chronologically, using the same heading in blue that you see in the textbook.
Under each heading you will find (in order): Lecture Notes that summarize the section, Teacher Tips,
Classroom Activities, and Lab Activities. Pay special attention to teaching tips, and activities geared
towards quizzing your students, enhancing their critical thinking skills, and encouraging experimentation
within the software.
In addition to this Instructor’s Manual, our Instructor’s Resources CD also contains PowerPoint
Presentations, Test Banks, and other supplements to aid in your teaching experience.
Table of Contents
Module Objectives
PowerPoint 26: Enter Text in Outline View
PowerPoint 28: Format Text
PowerPoint 30: Convert Text to SmartArt
PowerPoint 32: Insert and Modify Shapes
PowerPoint 34: Rearrange and Merge Shapes
PowerPoint 36: Edit and Duplicate Shapes
PowerPoint 38: Align and Group Objects
PowerPoint 40: Add Slide Footers
End of Module Material
1
2
4
6
8
10
12
14
16
18
Module Objectives
After completing this module, you will be able to:
Enter text in Outline view
Format text
Convert text to SmartArt
Insert and modify shapes
Rearrange and merge shapes
Edit and duplicate shapes
Align and group objects
Add slide footers
PowerPoint 26: Enter Text in Outline View
LEARNING OUTCOMES
Enter text in Outline view
Create a new slide
LECTURE NOTES
Demonstrate how to type in the Outline view.
© 2017 Cengage Learning. All rights reserved. May not be copied, scanned, or duplicated, in whole or in part, except for use as permitted in a
license distributed with a certain product or service or otherwise on a password-protected website for classroom use.
Page 2 of 9
PowerPoint 2016 Module 2
Explain that typing in the Outline view is useful if you are eager to enter text in a
presentation because you can enter the text and worry about the format and design later.
Demonstrate how to create a new slide and how to indent in the Outline view to create
bullets.
Also show how easy it is to reorder the slides by dragging the slide icon up or down.
TEACHER TIP
Students may need help when setting indents for bulleted lists. Make sure each student is
comfortable with promoting and demoting bullets in the Outline view using [Tab] and
[Shift][Tab].
CLASSROOM ACTIVITIES
1. Lab Activity: Assign students the task of creating five new slides in Outline view. Each new
slide should have one bullet. (Students can type days of the week, colors, course names,
family names, etc. to create text on each slide.) Ask students to rearrange the order of slides
by dragging the slide icon in the Outline view up or down.
2. Class Discussion: Discuss Outline view. When do students think they would use Outline view?
Explain that typing in the Outline view is useful for entering text quickly. Demonstrate how
to insert an outline from Word into PowerPoint. Discuss the benefits and disadvantages of
entering text using Outline view vs. inserting an outline created in Word.
PowerPoint 28: Format Text
LEARNING OUTCOMES
Modify text characteristics
LECTURE NOTES
Focus on the importance of formatting text to emphasize a message.
Demonstrate how to select text and then choose options in the group on the HOME tab.
Explain that the Mini toolbar provides quick access to some of the most common formatting
options on the Ribbon.
Review the difference between selecting a text box and selecting text inside a text box.
List ways to distinguish text boxes from each other by changing the font color, adding a
shadow, or changing the case.
© 2017 Cengage Learning. All rights reserved. May not be copied, scanned, or duplicated, in whole or in part, except for use as permitted in a
license distributed with a certain product or service or otherwise on a password-protected website for classroom use.
PowerPoint 2016 Instructor’s Manual
Page 3 of 9
TEACHER TIP
The ’Replacing text and fonts’ box on page PowerPoint 29 discusses how to replace text and
fonts. Review different fonts with students to show how different a page can look depending on
the font. Which fonts seem more formal? Which seem more casual? Which seem more artistic?
Discuss when different types of fonts should be used and remind students not to overdue the
use of too many fonts on a slide or in a presentation as overuse of fonts can be distracting.
CLASSROOM ACTIVITIES
1. Lab Activity: Create a slide with text on it, and then select the text. Use the Mini toolbar to
change the font, font size, font color, alignment, and any other options you wish. Format a
second line of type using the same settings but this time use the corresponding buttons on
the HOME tab of the Ribbon. Add a fill color and fill border to the text box using buttons on
the FORMAT tab. Write a brief paragraph explaining when you might use the Mini toolbar
and when you might use the HOME tab to format text. Also discuss why you think the
commands for formatting the text box aren’t on the Mini toolbar.
2. Critical Thinking: Imagine if PowerPoint had a Mini toolbar for formatting text boxes (not the
text inside the box, just the box itself). If you were a software designer, what features would
you add to a Mini toolbar for manipulating text boxes? (Answers may include things such as
1) copy and paste the text box; 2) move the text box; 3) resize the text box; 4) rotate the text
box; and so on.)
PowerPoint 30: Convert Text to SmartArt
LEARNING OUTCOMES
Create a SmartArt graphic
Modify the SmartArt design
LECTURE NOTES
Define a SmartArt graphic as a professional-quality diagram that visually illustrates text.
Explain that SmartArt is used when you want dynamic results that you cannot get with
formatting alone.
Describe the eight categories of SmartArt graphics by clicking a text placeholder, clicking the
Convert to SmartArt button.
Demonstrate how you can convert existing text to SmartArt or start a new SmartArt graphic
from scratch.
Explain to students that they can radically change how the SmartArt graphic looks by
applying a SmartArt Style. A SmartArt Style is a preset combination of simple and 3-D
formatting options that follows the presentation theme.
© 2017 Cengage Learning. All rights reserved. May not be copied, scanned, or duplicated, in whole or in part, except for use as permitted in a
license distributed with a certain product or service or otherwise on a password-protected website for classroom use.
Page 4 of 9
PowerPoint 2016 Module 2
TEACHER TIP
Students will love SmartArt and be tempted to apply it to text, but they may overlook the need
to apply SmartArt to the appropriate types of text. For example, remind students while looking
at the SmartArt categories that if they want to choose, say, the Basic Timeline style, the text that
they are applying that style to should involve some sort of timeline. Otherwise, the resulting
SmartArt graphic will not make sense.
CLASSROOM ACTIVITIES
1. Work with SmartArt: Choose a SmartArt graphic with room for four text entries. Click a blank
text placeholder, click Convert to SmartArt click a category, then choose a style, read its
description, then click OK. Enter appropriate text in the text placeholders of the SmartArt
graphic that would make sense. (For example, if a student chooses a process-oriented
SmartArt graphic, he/she could type: 1) Sort clothes, 2) Put clothes in washing machine, 3)
Add laundry soap, 4) Press Start button on washer.)
2.
Quick Quiz
1. When you want to enter text in a SmartArt graphic, you can enter it in the graphic or in
the
. (Answer: Text pane)
2. Click the Convert button in the
group, then click Convert to Text to revert
the
SmartArt graphic to a standard text object. (Answer: Reset)
3. A SmartArt
is a preset combination of simple and 3-D formatting options
that follows the presentation theme. (Answer: Style)
PowerPoint 32: Insert and Modify Shapes
LEARNING OUTCOMES
Create a shape
Modify a shape's style
LECTURE NOTES
Show students that they can create simple shapes using the Shapes button in the Drawing
group.
Shapes can be simple or complex by creating multiple shapes and arranging them as
necessary.
Demonstrate how you can modify shapes using the Shape Styles group on the DRAWING
TOOLS FORMAT tab.
Define a Quick Style as a set of formatting options, including line style, fill color, and effects
that you can apply to a shape.
Refer to FIGURE 2-7 when pointing out the rotate handle and refer to FIGURE 2-8 when
pointing out the adjustment handle.
Demonstrate the ways that you can edit a shape by rotating it, changing its size, or reshaping
it using its adjustment handle. Point out the yellow adjustment handle and the green rotate
handle on a selected shape.
© 2017 Cengage Learning. All rights reserved. May not be copied, scanned, or duplicated, in whole or in part, except for use as permitted in a
license distributed with a certain product or service or otherwise on a password-protected website for classroom use.
PowerPoint 2016 Instructor’s Manual
Page 5 of 9
TEACHER TIP
Demonstrate the effect of using [Shift] as follows:
Show students that by pressing [Shift] while dragging the Oval or Rectangle tool, they can
create a perfect circle or a perfect square, respectively.
Show students that by pressing [Shift] while dragging a shape, they can drag along the same
vertical or horizontal axis in order to ensure proper placement.
Show students that by pressing [Shift][Ctrl] while dragging a shape, they can copy it as well
as drag it along the same vertical or horizontal axis in order to duplicate the object on the
same axis.
CLASSROOM ACTIVITIES
1. Lab Activity: Create shapes using objects from the Shapes gallery in the Drawing group
on the HOME tab. Practice applying Quick Styles to shapes. Your completed project
should have five shapes, each formatted differently. Beneath each shape, describe how
this shape or object could be used along with text in a PowerPoint presentation. For
example, a callout shape could be used to show what someone is thinking. To create
your descriptions of each shape, click the INSERT tab on the Ribbon, then click the Text
Box button in the Text group to make text boxes on the slide.
2.
Classroom Activity: Ask students to create a large circle on a slide. Next, have them add
different colored shapes inside the circle that represent the different areas of their life
(such as family, friends, soccer, etc.). Ask them to make each shape a different color and
to place text inside the shape indicating what it represents. Ask them to add as many
shapes as they like (the more the better), resizing them as necessary to get them all to
fit. Have students work with a partner to critique their shape creations in terms of
visually getting across their message. What does the shape say to the viewer? Is the
message clear? What could they do to improve the shapes creation?
PowerPoint 34: Rearrange and Merge Shapes
LEARNING OUTCOMES:
Reorder shapes
Combine shapes together
LECTURE NOTES
Explain to students that every object on a slide is placed on the slide in the order it was
created. This means that objects can be moved up or down in the stacking order.
Demonstrate how to open and use the Selection pane to change the stacking order of
objects on a slide.
Explain to students that they can merge shapes to create a variety of unique geometric
shapes that are not available in the Shapes gallery.
© 2017 Cengage Learning. All rights reserved. May not be copied, scanned, or duplicated, in whole or in part, except for use as permitted in a
license distributed with a certain product or service or otherwise on a password-protected website for classroom use.
Page 6 of 9
PowerPoint 2016 Module 2
TEACHER TIP
Remind students that every object, word, link on their slides must support the message of the
slide and the presentation. Caution students about cluttering their slides with too many unique
shapes. Point out that they should not create unique objects just because they can but rather
when a unique object will enhance and support the message of the presentation. Explain that
sometimes such artwork can be distracting to the viewer and take away from the message of the
presentation.
CLASSROOM ACTIVITIES
1. Class discussion: Demonstrate how to open the Selection pane. Discuss the different
features of the Selection pane, including the ability to hide and unhide selected
objects, change the order of the objects, the difference between the various layering
objects such as Bring Forward and Bring to Front, and how to drag an object to
change the stacking order.
2. Lab Activity: Invite students to create a variety of shapes on one slide. Have them
practice moving the shapes around the slide, placing them on top of one another,
then using the Selection pane to reorder the shapes. How do their images change?
When would they use this feature? Why is it helpful to be able to rearrange the
order of objects? Then have students practice merging two of shapes and
experimenting with the various merge options. How does the merge shape differ
depending on which shape is selected? How do the different merge shape options
affect the merged object?
PowerPoint 36: Edit and Duplicate Shapes
LEARNING OUTCOMES
Modify shape size and design
Duplicate shapes
LECTURE NOTES
Show students how you can duplicate a shape by first copying it and then pasting it.
Demonstrate also how to duplicate a shape by pressing [Ctrl] while dragging it.
Demonstrate how to use gridlines to help align objects on the slide.
Discuss the snap-to-grid feature and why it is helpful, then demonstrate how to temporarily
turn this feature off by pressing and hold [Alt} while dragging an object.
TEACHER TIP
Help keep gridlines and ruler guides straight for students by showing them the trick of rightclicking a slide, then clicking Grid and Guides to open the Grid and Guides dialog box. Point out
to students that using the settings in this dialog box, they can choose to snap items to the
gridlines or not, they can change the spacing of the grid settings, they can display drawings on
the screen, and they display smart guides when shapes are aligned. Point out that the changes in
settings can be saved as the default.
© 2017 Cengage Learning. All rights reserved. May not be copied, scanned, or duplicated, in whole or in part, except for use as permitted in a
license distributed with a certain product or service or otherwise on a password-protected website for classroom use.
PowerPoint 2016 Instructor’s Manual
Page 7 of 9
CLASSROOM ACTIVITIES
1. Class Discussion: Demonstrate how to toggle these features on and off by checking
the check box next to each feature in the Show group on the VIEW tab: Ruler,
Gridlines, and Guides. Discuss the purpose of each of these features. Ask students
when they might use each of these features and when they might want to toggle
them off.
2. Lab Activity: Have students check the settings in the Grid and Guides dialog box to
be sure snap to gridlines option is active. Then, have students create a shape and
then duplicate it by using Copy and Paste or by [Ctrl]-dragging the shape. Next,
create a different shape. Format the three shapes with three different colors. Have
students practice placing the objects on their slides using the ruler and the gridlines.
Have them turn off the snap to gridlines feature. How does that change their ability
to place the object? When would using the snap to gridline feature be useful? When
would it create problems?
PowerPoint 38: Align and Group Objects
LEARNING OUTCOMES
Move shapes using guides
Align and group shapes
LECTURE NOTES
Teach students the importance of aligning, distributing, and grouping objects in order to
ensure professional looking slides.
Define aligning objects as lining up objects by their tops, bottoms, centers, or left or right
sides.
Define distributing objects as inserting an equal amount of space between them vertically or
horizontally, relative to each other or to the slide.
Point out the Align command on the Arrange group.
Demonstrate how to group two or more objects, and explain how grouping objects secures
the alignment and distribution applied to objects.
TEACHER TIP
Create three objects on a slide. Demonstrate how to align the objects vertically and horizontally,
then demonstrate how to distribute the objects, both relative to each other and relative to the
slide edge. Be sure students under the difference between aligning and distributing objects.
CLASSROOM ACTIVITIES
1. Critical Thinking: There are two ways to distribute objects in PowerPoint: relative to
each other and relative to the slide edge. Ask students to think through when they
would use each method of distributing objects. If they were working for Microsoft
developing the PowerPoint software, what would be a third way that they would
invent for distributing objects?
© 2017 Cengage Learning. All rights reserved. May not be copied, scanned, or duplicated, in whole or in part, except for use as permitted in a
license distributed with a certain product or service or otherwise on a password-protected website for classroom use.
Page 8 of 9
PowerPoint 2016 Module 2
2. Lab Activity: Ask students to start out with a blank slide and create a dart board.
They can start out using the Oval tool. Tell students that their dartboards should
include at least five circles, each with a different fill color assigned to it. Circles
should be perfectly aligned by their center points, and they should be stacked from
smallest to largest. Then have students create one dart object below the dart board.
Have students duplicate the dart object at least two times, then have them align and
distribute the dart objects along the bottom of the slide.
PowerPoint 40: Add Slide Footers
LEARNING OUTCOMES
Add footer text to slides
LECTURE NOTES
Show students what headers and footers are and give examples of each, including page
numbers, dates, company names, names of presentations, and so on.
Point out that on slides you can only add footers.
Demonstrate how to include a header and/or footer using the Header and Footer dialog box.
Explain that you can also create headers and footers for notes and handouts. These headers
and footers are visible when you print notes pages, handouts, and the outline.
TEACHER TIP
Spend time discussing the Header and Footer dialog box shown in FIGURE 2-15. Point out the
options on each tab, especially the Don’t show on title slide check box. Discuss when they might
want to include each option, such as the date and time, the slide number, or having the date
update automatically.
CLASSROOM ACTIVITIES
1. Lab Activity: Create a short presentation of at least four slides using the skills you have
learned so far in this module. Your presentation should include text, at least one
SmartArt graphic, and several shapes that are aligned and distributed. Create a footer on
each slide called “My First Presentation.” Also, include your name and the date in the
footer. Do not have the date update automatically.
2. Critical Thinking: In the Header and Footer dialog box, you can have a date that updates
each time the presentation is opened or you can choose a fixed date. What are some
examples of when you would need to use both types of dates in a presentation?
© 2017 Cengage Learning. All rights reserved. May not be copied, scanned, or duplicated, in whole or in part, except for use as permitted in a
license distributed with a certain product or service or otherwise on a password-protected website for classroom use.
PowerPoint 2016 Instructor’s Manual
Page 9 of 9
End of Module Material
Concepts Review – Includes screen identification, multiple choice, and matching
questions.
Skills Review – Provides additional hands-on exercises that mirror the progressive style
of the lesson material.
Independent Challenges 1, 2, and 3 – Case projects that require critical thinking and
application of the modules kills. The Independent Challenges increase in difficulty, with
the first being the easiest (with the most step-by-step detailed instructions).
Independent Challenges 2 and 3 become increasingly more open ended.
Independent Challenge 4: Explore – Using a real world focus to apply the module skills,
students create documents that will benefit their everyday lives.
Visual Workshop – A practical, self-graded capstone project that requires independent
problem solving.
Top of Document
© 2017 Cengage Learning. All rights reserved. May not be copied, scanned, or duplicated, in whole or in part, except for use as permitted in a
license distributed with a certain product or service or otherwise on a password-protected website for classroom use.
Name:
Class:
Date:
Productivity App: Productivity Apps for School and Work
1. OneNote will not function at all without an Internet connection.
a. True
b. False
ANSWER:
False
POINTS:
1
REFERENCES:
PA-2
Syncing a Notebook to the Cloud
QUESTION TYPE: True / False
HAS VARIABLES: False
DATE CREATED: 4/26/2016 7:21 PM
DATE MODIFIED: 4/26/2016 7:26 PM
2. OneNote allows users to convert handwriting to text using the Ink to Text button.
a. True
b. False
ANSWER:
True
POINTS:
1
REFERENCES:
Converting Handwriting to Text
PA-3
QUESTION TYPE: True / False
HAS VARIABLES: False
DATE CREATED: 4/26/2016 7:26 PM
DATE MODIFIED: 4/26/2016 7:27 PM
3. It is possible to record audio conversations with OneNote if your computer or device has a camera and/or a
microphone.
a. True
b. False
ANSWER:
True
POINTS:
1
REFERENCES:
PA-4
Recording a Lecture
QUESTION TYPE: True / False
HAS VARIABLES: False
DATE CREATED: 4/26/2016 7:27 PM
DATE MODIFIED: 4/26/2016 7:29 PM
4. Microsoft Sway is available as an app on Office365 or at Sway.com.
a. True
b. False
ANSWER:
True
POINTS:
1
REFERENCES:
Introduction to Sway
PA-6
Copyright Cengage Learning. Powered by Cognero.
Page 1
Name:
Class:
Date:
Productivity App: Productivity Apps for School and Work
QUESTION TYPE: True / False
HAS VARIABLES: False
DATE CREATED: 4/26/2016 7:35 PM
DATE MODIFIED: 4/26/2016 7:38 PM
5. Sway users work through a Storyline, which has tools and a work area for composing a digital story.
a. True
b. False
ANSWER:
False
POINTS:
1
REFERENCES:
Creating a Sway Presentation
PA-6
QUESTION TYPE: True / False
HAS VARIABLES: False
DATE CREATED: 4/26/2016 7:38 PM
DATE MODIFIED: 4/26/2016 7:46 PM
6. Sway will not resize background images, so it is necessary to purchase a separate app to do that.
a. True
b. False
ANSWER:
False
POINTS:
1
REFERENCES:
Introduction to Sway
PA-6
QUESTION TYPE: True / False
HAS VARIABLES: False
DATE CREATED: 4/26/2016 7:46 PM
DATE MODIFIED: 4/26/2016 7:48 PM
7. Office Mix is an add-in for Microsoft PowerPoint, which allows users to enhance PowerPoint presentations.
a. True
b. False
ANSWER:
True
POINTS:
1
REFERENCES:
Introduction to Office
PA-10
QUESTION TYPE: True / False
HAS VARIABLES: False
DATE CREATED: 4/26/2016 7:48 PM
DATE MODIFIED: 4/26/2016 7:49 PM
8. Through Office Mix, video clips, slide notes, and screen recordings can be added to PowerPoint presentations.
a. True
Copyright Cengage Learning. Powered by Cognero.
Page 2
Name:
Class:
Date:
Productivity App: Productivity Apps for School and Work
b. False
ANSWER:
POINTS:
REFERENCES:
True
1
Capturing Video Clips
PA-11
QUESTION TYPE: True / False
HAS VARIABLES: False
DATE CREATED: 4/26/2016 7:50 PM
DATE MODIFIED: 4/26/2016 7:51 PM
9. Office Mix is currently capable of handling extended response quizzes, with more quiz types to be available soon.
a. True
b. False
ANSWER:
False
POINTS:
1
REFERENCES:
Inserting Quizzes, Live Webpages, and Apps
PA-12
QUESTION TYPE: True / False
HAS VARIABLES: False
DATE CREATED: 4/26/2016 7:51 PM
DATE MODIFIED: 4/26/2016 7:52 PM
10. Microsoft Edge is a Web browser that was designed as an add-in to Internet Explorer.
a. True
b. False
ANSWER:
False
POINTS:
1
REFERENCES:
Introduction to Microsoft Edge
PA-14
QUESTION TYPE: True / False
HAS VARIABLES: False
DATE CREATED: 4/26/2016 7:52 PM
DATE MODIFIED: 4/26/2016 7:53 PM
11. Cortana appears as an animated circle in the Address bar when it is turned on and you might need assistance.
a. True
b. False
ANSWER:
True
POINTS:
1
REFERENCES:
Locating Information with Cortana
PA-14
QUESTION TYPE: True / False
HAS VARIABLES: False
Copyright Cengage Learning. Powered by Cognero.
Page 3
Name:
Class:
Date:
Productivity App: Productivity Apps for School and Work
DATE CREATED: 4/26/2016 7:54 PM
DATE MODIFIED: 4/26/2016 7:55 PM
12. Microsoft Edge will allow users to save webpages, but they cannot be written on.
a. True
b. False
ANSWER:
False
POINTS:
1
REFERENCES:
Annotating Webpages
PA-15
QUESTION TYPE: True / False
HAS VARIABLES: False
DATE CREATED: 4/26/2016 7:56 PM
DATE MODIFIED: 4/26/2016 7:57 PM
13. Each OneNote notebook is divided into sections, also called Section Tabs.
ANSWER:
True
POINTS:
1
REFERENCES:
Introduction to OneNote 2016
PA-2
QUESTION TYPE: Modified True / False
HAS VARIABLES: False
DATE CREATED: 4/26/2016 7:57 PM
DATE MODIFIED: 4/26/2016 7:59 PM
14. It is possible, through OneNote, to draw directly on the screen using drawing tools.
ANSWER:
True
POINTS:
1
REFERENCES:
Introduction to OneNote 2016
PA-2
QUESTION TYPE: Modified True / False
HAS VARIABLES: False
DATE CREATED: 4/26/2016 7:59 PM
DATE MODIFIED: 4/26/2016 7:59 PM
15. OneNote only allows one type of project to be stored at a time.
ANSWER:
False POINTS:
1
REFERENCES:
Creating a OneNote Notebook
PA-2
QUESTION TYPE: Modified True / False
HAS VARIABLES: False
DATE CREATED: 4/26/2016 8:01 PM
DATE MODIFIED: 4/26/2016 8:03 PM
Copyright Cengage Learning. Powered by Cognero.
Page 4
Name:
Class:
Date:
Productivity App: Productivity Apps for School and Work
16. A Sway site can be shared on Microsoft-approved devices only.
ANSWER:
POINTS:
REFERENCES:
False 1
PA-6
Introduction to Sway
QUESTION TYPE: Modified True / False
HAS VARIABLES: False
DATE CREATED: 4/26/2016 8:03 PM
DATE MODIFIED: 4/26/2016 8:05 PM
17. Storyline selections, called Frames, allow users to add content.
ANSWER:
False POINTS:
1
REFERENCES:
Creating a Sway Presentation
PA-6
QUESTION TYPE: Modified True / False
HAS VARIABLES: False
DATE CREATED: 4/26/2016 8:05 PM
DATE MODIFIED: 4/26/2016 8:06 PM
18. Users can add Facebook or OneNote pictures in Sway without leaving the app.
ANSWER:
POINTS:
REFERENCES:
True
1
Adding Content to Build a Story
PA-7
QUESTION TYPE: Modified True / False
HAS VARIABLES: False
DATE CREATED: 4/26/2016 8:07 PM
DATE MODIFIED: 4/26/2016 8:08 PM
19. To use Office Mix, an account is necessary at mix.office.com.
ANSWER:
True
POINTS:
1
REFERENCES:
Adding Office Mix to PowerPoint
PA-10
QUESTION TYPE: Modified True / False
HAS VARIABLES: False
DATE CREATED: 4/26/2016 8:08 PM
DATE MODIFIED: 4/26/2016 8:09 PM
20. Office Mix is an integral part of PowerPoint--it need not be downloaded and installed.
ANSWER:
False Copyright Cengage Learning. Powered by Cognero.
Page 5
Name:
Class:
Date:
Productivity App: Productivity Apps for School and Work
POINTS:
REFERENCES:
1
PA-10
Adding Office Mix to PowerPoint
QUESTION TYPE: Modified True / False
HAS VARIABLES: False
DATE CREATED: 4/26/2016 8:10 PM
DATE MODIFIED: 4/26/2016 8:11 PM
21. Using Office Mix, screen recordings can be captured and used to help enhance a presentation.
ANSWER:
POINTS:
REFERENCES:
True
1
Capturing Video Clips
PA-11
QUESTION TYPE: Modified True / False
HAS VARIABLES: False
DATE CREATED: 4/26/2016 8:12 PM
DATE MODIFIED: 4/26/2016 8:13 PM
22. In Microsoft Edge, Reading View will not block pop-up ads or other clutter on a webpage.
ANSWER:
False POINTS:
1
REFERENCES:
Browsing the Web with Microsoft Edge
PA-14
QUESTION TYPE: Modified True / False
HAS VARIABLES: False
DATE CREATED: 4/26/2016 8:13 PM
DATE MODIFIED: 4/26/2016 8:14 PM
23. The Inking toolbar in Microsoft Edge allows users to write on webpages and save the webpage as well as the
writing on it.
ANSWER:
True
POINTS:
1
REFERENCES:
Annotating Webpages
PA-15
QUESTION TYPE: Modified True / False
HAS VARIABLES: False
DATE CREATED: 4/26/2016 8:15 PM
DATE MODIFIED: 4/26/2016 8:15 PM
24. Microsoft Edge runs in a partial Sandbox, which helps prevent attackers from gaining control of a computer.
ANSWER:
POINTS:
True
1
Copyright Cengage Learning. Powered by Cognero.
Page 6
Name:
Class:
Date:
Productivity App: Productivity Apps for School and Work
REFERENCES:
Annotating Webpages
PA-15
QUESTION TYPE: Modified True / False
HAS VARIABLES: False
DATE CREATED: 4/26/2016 8:16 PM
DATE MODIFIED: 4/26/2016 8:17 PM
25. Microsoft OneNote is a
app for your academic and professional life.
a. spreadsheet
b. notetaking
c. database
d. gaming
ANSWER:
b
POINTS:
1
REFERENCES:
Introduction to OneNote 2016
PA-2
QUESTION TYPE: Multiple Choice
HAS VARIABLES: False
DATE CREATED: 4/26/2016 8:17 PM
DATE MODIFIED: 4/26/2016 8:23 PM
26. OneNote is divided into sections similar to that of a
a. spiral notebook.
b. map
c. compass
d. desktop
ANSWER:
a
POINTS:
1
REFERENCES:
Creating a OneNote Notebook
PA-2
QUESTION TYPE: Multiple Choice
HAS VARIABLES: False
DATE CREATED: 4/26/2016 8:56 PM
DATE MODIFIED: 4/26/2016 8:58 PM
27. The Microsoft OneNote mobile app
a. was subcontracted for Microsoft by Google.
b. runs a full version of OneNote 2016.
c. is a lightweight version of OneNote 2016.
d. syncs with all Apple products.
ANSWER:
c
POINTS:
1
REFERENCES:
Syncing a Notebook to the Cloud
Copyright Cengage Learning. Powered by Cognero.
Page 7
Name:
Class:
Date:
Productivity App: Productivity Apps for School and Work
PA-2
QUESTION TYPE: Multiple Choice
HAS VARIABLES: False
DATE CREATED: 4/26/2016 8:59 PM
DATE MODIFIED: 4/26/2016 9:01 PM
28. OneNote creates a Drawing Canvas, which is
a. a container for shapes and lines.
b. a personal assistant.
c. a storyline for interactive video content
d. .a teleprompter.
ANSWER:
a
POINTS:
1
REFERENCES:
Syncing a Notebook to the Cloud
PA-2
QUESTION TYPE: Multiple Choice
HAS VARIABLES: False
DATE CREATED: 4/27/2016 3:07 PM
DATE MODIFIED: 4/27/2016 3:14 PM
29. Microsoft Sway utilizes Responsive Design, which means
a. the software responds to hackers and other threats responsively.
b. what you create becomes the exclusive property of Microsoft.
c. your content only works with Microsoft-approved products.
d. your content adapts perfectly to any screen size.
ANSWER:
d
POINTS:
1
REFERENCES:
Introduction to Sway
PA-6
QUESTION TYPE: Multiple Choice
HAS VARIABLES: False
DATE CREATED: 4/27/2016 3:14 PM
DATE MODIFIED: 4/27/2016 3:16 PM
30. In Sway, each storyline can include
a. text, images, and videos.
b. databases, word-processor documents, and spreadsheets.
c. games, productivity apps, and home-office applications.
d. other Sways.
ANSWER:
a
POINTS:
1
REFERENCES:
Creating a Sway presentation
PA-6
Copyright Cengage Learning. Powered by Cognero.
Page 8