Xe ô tô hyundai excel toàn tập hyundai excel - P6
Bạn đang xem bản rút gọn của tài liệu. Xem và tải ngay bản đầy đủ của tài liệu tại đây (826.64 KB, 44 trang )
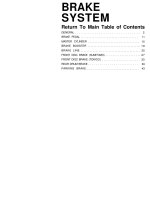
BRAKE
SYSTEM
Return To Main Table of Contents
GENERAL
..............................
2
BRAKE PEDAL
.....................................
11
MASTER CYLINDER
................................
15
BRAKE BOOSTER
.....................................
18
BRAKE LINE ........................................
25
FRONT DISC BRAKE (SUMITOMO)
....................
27
FRONT DISC BRAKE (TOKICO)
.......................
35
REAR DRUM BRAKE
..........................
39
PARKING BRAKE
.................................
43
GENERAL
GENERAL
SPECIFICATIONS
Master cylinder
Type
Bore
Fluid level sensor
Tandem type
20.64 mm (0.81 in.), fitted with brake booster
Provided
Brake booster
Type
Effective dia. of power cylinder
Boosting ratio, with brake pedal applied with a
force of 160 N (36 Ibs.)
Vacuum type
180 mm (7.1 in.)
3.0 : 1
Proportioning valve
Cut-in pressure (Split point)
Reducing ratio
Manufacturer
3.1 MPa (455 psi)
3.33 : 1
Sumitomo
Front brakes
Type
Disc
Disc O.D.
229 mm (9.02 in.)
Pad thickness
10.0 mm (0.39 in.)
Disc thickness
13 mm (0.512 in.)
Cylinder bore
51.1 mm (2.01 in.)
Clearance adjustment Automatic adjustment
Manufacturer
Sumitomo (PS 15)
Rear brakes
Type
Drum I.D.
Brake lining thickness
Cylinder bore
Clearance adjustment
Parking brake
Type
Activation
Brake type
Leading-trailing, drum
180 mm (7.1 in.)
4.3 mm (0.17 in.)
19.05 mm (0.75 in.)
Automatic adjustment (with use of parking brake)
Mechanical brake acting on rear wheels
Cable
Lever type
3.6 MPa (525 psi)
3.7 : 1
Kelsey-hayes
Floating type with ventilated
disc
242 mm (9.53 in.)
10 mm (0.39 in.)
19 mm (0.75 in.)
51.1 mm (2.01 in.)
Automatic adjustment
Tokico (CR20V)
58-2
GENERAL
SERVICE STANDARD
Standard value
Brake pedal height
Stop light switch outer case to pedal arm clearance
Brake pedal free play
Brake pedal to floorboard clearance
Booster push rod to master cylinder piston clearance
Parking brake lever stroke adjustment
Limit
182-187 mm (7.2-7.4 in.)
0.5-1.0 mm (0.02-0.04 in.)
10-15 mm (0.4-0.6 in.)
40 mm (1.6 in.) or more
0.40-0.80 mm (0.016-0.031 in.)
5-7 clicks
Master cylinder to piston clearance
0.15 mm (0.006 in.)
Pad thickness
1.0 mm (0.04 in.)
Disc thickness Sumitomo
11.4 mm (0.45 in.)
Tokico
17.0 mm (0.67 in.)
Disc runout
Sumitomo
0.15 mm (0.006 in.)
Tokico
0.15 mm (0.006 in.)
Drum brake lining thickness
1.0 mm (0.04 in.)
Brake drum inner diameter
182 mm (7.2 in.)
Wheel cylinder to piston clearance
0.15 mm (0.006 in.)
TIGHTENING TORQUE
Nm kg.cm Ib.ft
Master cylinder
Master cylinder to brake booster
Brake fluid reservoir to master cylinder bolt
Piston stopper
Brake booster to booster mounting holder
Booster mounting holder to pedal support member
Brake booster hose fitting to manifold
Bleeder screw
Brake line flare nuts
Brake hose
Proportioning valve mounting bolt
Disc brake (SUMITOMO)
Caliper inner and outer bridge bolts
Caliper assembly to knuckle
Disc to hub
Disc brake (TOKICO)
Cylinder mounting bolt
Cylinder pin bolt
Caliper assembly to knuckle
Disc to hub
Leading-trailing drum brake
Wheel cylinder
Braking plate to housing
7.8-12
80-120 5.8-8.7
1.5-2.9 15-30 1.1-2.2
1.5-2.9 15-30 1.1-2.2
7.8-12 80-120 5.8-8.7
7.8-12 80-120
5.8-8.7
7.8-12 80-120
5.8-8.7
6.9-8.8 70-90 5.1-6.5
13-17
130-170
9.4-12
12-16 120-160
8.7-11
7.8-12
80-120 5.8-8.7
78-93 800-950 58-69
59-78 600-800 43-58
49-59 500-600 36-43
22-31
220-320 16-23
34-44
350-450
25-32
64-74 650-750 47-54
49-59
500-600
36-43
7.8-12 80-120
5.8-8.7
49-59 500-600 36-43
LUBRICANTS
Recommended lubricant
Quantity
Brake fluid DOT 3 or equivalent As required
58-3
GENERAL
SPECIAL TOOLS
58-4
GENERAL
TROUBLESHOOTING
Symptom
Noise or vibration when
brakes are applied
Vehicle pulls to one side
when brakes are applied
Insufficient braking power
Increased pedal stroke
(Reduced pedal to floorboard
clearance)
Probable cause
Backing plate or caliper improperly mounted
Loose backing plate or caliper mounting bolts
Unevenly worn or cracked brake drum or brake disc
Foreign material in brake drum
Seized pad or lining contact surface
Excessive caliper to pad assembly clearance
Uneven pad contact
Lack of lubrication in sliding parts
Loose suspension parts
Difference in left and right tire inflation pressure
Inadequate contact of pad or lining
Grease or oil on pad or lining surface
Drum eccentricity or uneven wear
Incorrect wheel cylinder installation
Auto adjuster malfunction
Low or contaminated brake fluid
Air in brake system
Brake booster malfunction
Inadequate contact of pad or lining
Grease or oil on pad surface
Auto adjuster malfunction
Overheated brake rotor due to dragging of pad
or lining
Clogged brake line
Proportioning valve malfunction
Air in brake system
Brake fluid leaks
Auto adjuster malfunction
Excessive push rod to master cylinder clearance
Remedy
Correct
Retighten
Replace
Clean
Replace
Correct
Correct
Lubricate
Retighten
Adjust
Correct
Replace
Replace
Correct
Correct
Replenish or change
Bleed the system
Correct
Correct
Replace
Correct
Correct
Correct
Replace
Bleed the system
Correct
Correct
Adjust
58-5
GENERAL
Symptom
Brake drag
Insufficient parking
brake function
Probable cause
Incomplete release of parking brake
Incorrect parking brake adjustment
Weak brake pedal return spring
Clogged master cylinder return port
Broken rear drum brake shoe return spring
Lack of lubrication in sliding parts
Defective master cylinder check valve or
piston return spring
Insufficient push rod to master cylinder clearance
Worn brake lining
Grease or oil on lining surface
Parking brake cable sticking
Auto adjuster malfunction
Excessive parking brake lever stroke
Remedy
Correct
Adjust
Replace
Correct
Replace
Lubricate
Replace
Adjust
Replace
Replace
Replace
Correct
Adjust the parking
brake lever stroke or
check the parking
brake cable routing
58-6
GENERAL
SERVICE BRAKE PEDAL INSPECTION AND AD-
JUSTMENT
1.
Measure the brake pedal height as illustrated. If the brake pedal
height is not within the standard value, adjust as follows.
Pedal height (from upper surface of the panel floor to top of the
brake pedal pad) A
[Standard value] . . . . . . . . . . . . . . . . . . 182-187 mm (7.2-7.4 in.)
(a) Move the stop light switch to a position where it does not
contact the brake pedal arm.
(b) Adjust the brake pedal height by turning the operating rod
with pliers (with the operating rod lock nut loosened), until
the correct clearance is obtained
(c) Adjust the stop light switch until the dimension between the
outer case of the stop light switch and the brake pedal arm
reaches the standard value, and then lock the switch in
place with lock nut.
Dimension B [Standard value] . . . . . . . . . . . . . . . . . . . . . . . . . . . . .
0.5-1.0 mm (0.02-0.04 in.)
2. While the engine is stopped, apply the brake pedal two or
three times. After thus eliminating the vacuum in the power
brake booster, press the pedal down by hand, and confirm that
the amount of movement before resistance is correct.
Brake pedal free play C [Standard value]. . . . . . . . . . . . . . . . . . . .
10-15 mm (0.4-0.6 in.)
If the free play is less than the standard value, confirm that the
clearance between the outer case of the stop light switch and
brake pedal is within the standard value.
3. Start the engine, apply the brake pedal with approximately
500 N (110 Ibs.) of force, and measure the clearance between
the brake pedal and the floor board.
Pedal to floorboard clearance D when pedal is depressed [Pedal
depressing force: about 500 N (110 Ibs.)] [Standard value]
. . . . . . . . . . . . . . . . . . . . . . . . . . . . . . . . . . .
40 mm (1.6 in.) or more
If the pedal to floor board clearance is less than the standard
value, correct it according to the troubleshooting chart.
58-7
GENERAL
PARKING BRAKE STROKE ADJUSTMENT
1. Pull the brake lever with a force of approx. 196 N (44 Ibs.), and
count the numbers of clicks.
Parking brake lever stroke [Standard value] . . . . . . . . . . . . . . . . .
5-7 clicks
2. If the number of notches is not the standard value, adjust the
cable length with the adjusting nut of the equalizer.
CAUTION:
(a) Adjust the right and left cables so that when the lever is
pulled, their lengths will be almost equal.
(b)
If the rear cable is too taut when the lever is returned, the
adjuster lever will not engage the adjuster and the auto-
matic shoe clearance adjustment mechanism will not
function.
3. Loosen the parking brake switch mounting bolt to adjust the
switch so that the indicator light will go out when the brake
lever is fully released, and will light with the lever pulled one
notch.
4. After the adjustment, check to ensure that the rear brakes do
not drag with the parking brake lever released.
58-8
GENERAL
BRAKE BOOSTER OPERATING TEST
Test Without a Tester
For simple checking of the brake booster operation, carry out
the following tests:
1. Run the engine for one or two minutes, and then stop it.
Depress the brake pedal several times with normal pressure.
If the pedal depresses fully the first time but gradually becomes
higher when depressed succeeding times, the booster is operat-
ing properly. If the pedal height remains unchanged, the boost-
er is defective.
2.
With the engine stopped, depress the brake pedal several times
with the same foot pressure to make sure that the pedal height
will not change.
Then depress the brake pedal and start the engine. If the pedal
moves downward slightly, the booster is in good condition. If
there is no change, the booster is defective.
3.
With the engine running, depress the brake pedal and then stop
the engine.
Hold the pedal depressed for 30 seconds. If the pedal height
does not change, the booster is in good condition, if the pedal
rises, the booster is defective.
If the above three tests are okay, the booster performance can
be determined as good.
If one of the above three tests is not okay, the check valve,
vacuum hose, or booster will be defective.
PROPORTIONING VALVE FUNCTION TEST
1. Connect two pressure gauges, one each to the input side and
output side of the proportioning valve, as illustrated.
2. With the brakes applied, measure the input pressure and the
output pressure. If the measured pressures are within the per-
missible ranges shown, the proportioning valve is good.
3. If the measured pressures are not within the permissible
ranges, replace the proportioning valve as an assembly.
4. Reconnect the brake tubes in their original positions and bleed
the system.
NOTE:
This figure indicates only when the pressure of the master
cylinder is rising.
58-9
GENERAL
BRAKE BLEEDING
The brake hydraulic system should be bled whenever the brake
tube, brake hose, master cylinder or wheel cylinder has been
removed or whenever the brake pedal feels spongy when
depressed.
Bleed the brake system in the sequence shown in the
illustration.
Recommended brake fluid.. . . . . . . . . . . . . . . . . . . . . . . . . . . . . . . .
DOT 3 or equivalent.
CAUTION
(a) Use the specified brake fluid. Avoid using a mixture of
the specified brake fluids.
(b)
If brake fluid is exposed to the air, it will absorb moisture;
As water is absorbed from the atmosphere, the boiling
point of the brake fluid will be lowered and the braking
performance will be seriously impaired. For this reason,
use a hermetically sealed 1 liter (1.06 U.S.qts., 0.88 Imp.qts.)
or 0.5 liter (0.52 U.S.qts., 0.44 Imp.qts.) brake fluid
container.
(c)
Firmly close the cap of the brake fluid container after use.
58-10
BRAKE PEDAL
BRAKE PEDAL
COMPONENTS
TORQUE: Nm (kg.cm, lb.ft)
58-11
BRAKE PEDAL
REMOVAL
1. Remove the coupling bolt of the steering shaft and universal
joint and remove the steering shaft and column as an assembly.
NOTE
When only the bushing is to be replaced, the steering shaft
need not be removed.
2. Remove the brake pedal return spring, clutch cable and cover.
3. Separate the operating rod and brake pedal from each other.
4. Remove the stopper and the washer.
5. Remove the pedal support (left) and draw out the pedal toward
the left.
58-12
BRAKE PEDAL
INSPECTION
TORQUE: Nm (kg.cm, lb.ft)
1. Check the bushing for wear.
2. Check the stop light switch operation.
3. Check the brake pedal for bend or twisting.
4. Check the brake pedal return spring for damage.
INSTALLATION
1. Apply chassis grease to the bushing bore and flanges.
NOTE
Install bushing in the correct position as shown in illustra-
tion.
58-13
BRAKE PEDAL
CAUTION
Be sure to install the split pin on the operating rod clevis pin.
2. Apply chassis grease to the sliding surface of the brake pedal
and operating rod clevis pin.
3. Adjust the brake pedal height and free play.
4. Adjust the clutch pedal stroke and free play.
5. Install the steering shaft.
58-14
MASTER CYLINDER
MASTER CYLINDER
COMPONENTS
REMOVAL
1. Disconnect the harness connector of the fluid level sensor.
2. Detach the brake tubes from the master cylinder.
3. Remove the master cylinder from the brake booster.
DISASSEMBLY
1. Remove the reservoir.
2. Remove the piston stopper bolt, while depressing the piston.
58-15
MASTER CYLINDER
3. Remove the piston stopper ring.
4. Remove the primary and secondary pistons from the master
cylinder body.
CAUTION
Do not disassemble the primary and secondary pistons.
INSPECTION
1. Check inner surface of master cylinder body for rust or scoring.
2. Check primary and secondary pistons for rust, scoring, wear,
damage or deterioration.
3. Check primary and secondary piston springs for deterioration.
4. Check clearance between master cylinder inner diameter and
piston outer diameter as described below.
Clearance between Master Cylinder Inner Diameter and Piston
Outer Diameter.
1. Measure three positions of the master cylinder inner diameter
(bottom middle and top) by using a cylinder bore gauge.
Master cylinder to piston clearance [Limit] . . . . . . . . . . . . . . . . . .
0.15 mm (0.006 in.)
2. If the clearance between these inner diameters and the piston
outer diameter exceeds the limit, replace the master cylinder
and the piston assembly as a set.
REASSEMBLY
1.
Apply the specified brake fluid to the inner surface of the master
cylinder body and to the entire periphery of the secondary and
primary pistons.
Recommended brake fluid.. . . . . . . . . . . . . . . . . . . . . . . . . . . . . . .
DOT 3 or equivalent
2. Assembly is the reverse of the removal procedure.
58-16
MASTER CYLINDER
INSTALLATION
1. Check master cylinder push rod adjustment.
2. Bleed the brake system.
MASTER CYLINDER PUSH ROD ADJUSTMENT
1.
Measure the clearance between the brake booster push rod and
the primary piston.
Booster push rod to master cylinder piston clearance
A (A=B-C-D) [Standard value] . . . . . . . . . . . . . . . . . . . . . . . . . . . . .
0.4-0.8 mm (0.016-0.031 in.)
NOTE
If the clearance is not within the standard value range, adjust
the push rod length by turning the screw of the push rod.
CAUTION
Insufficient clearance may cause brake drag.
2.
Make sure that the brake pedal free play is within the standard
value range.
Brake pedal free play [Standard value]. . . . . . . . . . . . . . . . . . . . . .
10-15 mm (0.4-0.6 in.)
3. Torque all parts to specifications during assembly.
58-17


