The Visual Studio 2005 IDE
Bạn đang xem bản rút gọn của tài liệu. Xem và tải ngay bản đầy đủ của tài liệu tại đây (623.95 KB, 23 trang )
The Visual Studio 2005 IDE
A
lthough I mentioned in the introduction that a working knowledge of the Visual Studio
2005 IDE is essential for this book, I strongly believe in including a quick walkthrough of it for
reference to benefit beginner-level readers. You can go through this appendix to get a refresher
on the essentials of the VS 2005 IDE. As you read through this appendix, you’ll notice that the
menus, toolbars, and windows making up the development interface workspace represent the
common UI approach from Microsoft.
Covering every aspect of the IDE is beyond the reach of this book. Therefore, I’m dis-
cussing the frequently used aspects that will matter most while developing reports. So, let’s
get started!
Launching the Visual Studio 2005 IDE
First things first, you need to know how to launch the VS 2005 IDE. You can start by clicking
the Windows Start button
➤
All programs
➤
Microsoft Visual Studio 2005. Next, click the
Microsoft Visual Studio 2005 icon; the VS 2005 IDE will start.
If you recall, the first time you launched the IDE, you were asked to select the default
environment settings. If you selected Visual C# Development Settings, your IDE should look
similar to Figure A-1.
As you can see in Figure A-1, the IDE consists of the menus, toolbars, and various Win-
dows. As you use different features of IDE, you’ll come across different windows and toolbar
choices
.
■
Note
If you are starting the IDE for the first time, select Visual C# Development Settings when you’re
prompted to select default environment settings.
443
APPENDIX
8547appAfinal.qxd 8/30/07 4:17 PM Page 443
Figure A-1. The Visual Studio 2005 IDE after launch
The Structure of the Visual Studio 2005 IDE
The structure of the VS 2005 IDE consists of various components. I’ll discuss the three most
important ones:
• Menus
• Toolbars
• Windows
When you launch the VS 2005 IDE, the default menu structure is composed of the follow-
ing seven options (the number varies if your default language is not C#): File, Edit, View, Tools,
Window, Community, and Help. The physical location of the menu bar is fixed in the top right-
hand corner, unless you dock a toolbar adjacent to it (see Figure A-1).
As you create different clients using the IDE, the menu will dynamically change according
to the client selection. Like menus, toolbars have a dynamic nature—they also change accord-
ing to the choice of the client pr
oject you’re developing. Additionally, toolbars are not static
like menus; you can arrange them and add or remove items from them according to your pref-
erence and convenience.
Finally, you’ll notice several different windows as you go on developing various reports.
Some windows are always part of the project, and some are available only in certain situa-
tions. For example, all projects should have the Solution Explorer window (Figure A-1 shows
a blank Solution Explorer window). As you know, the structure of IDE changes according to
the pr
oject; let
’
s look at the basics of the IDE no
w.
APPENDIX
■
THE VISUAL STUDIO 2005 IDE444
8547appAfinal.qxd 8/30/07 4:18 PM Page 444
The Basic IDE Structure
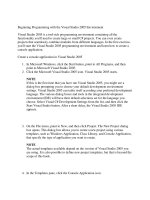
Let’s explore the basics of the IDE structure using a Windows Forms application project. Please
use the following steps to create a Windows application project:
1. Click File
➤
New
➤
Project, or press Ctrl+Shift+N.
2. In the “Project types” pane of the New Project dialog box, select Visual C#
➤
Windows.
3. In the Templates pane, select
➤
Windows Application.
4. You may name the project or leave the default suggestion provided by the IDE (I’m
keeping it at the default,
WindowsApplication1). Click the OK button to finish the
process. Visual Studio 2005 will create a new Windows Forms application project. You’ll
also notice that a new form with name
Form1 is part of the project. Your IDE should
look similar to Figure A-2.
Figure A-2. The
VS 2005 IDE after creating the Windows application project
Menus
As you can see, the first launch of the IDE has seven menu choices. After we create the Win-
dows Forms project, we get five more choices—12 in total. So, what are those five extra menu
options? Well, before we look into them, let’s quickly glance at the default seven menu choices.
The File menu consists of choices to manage the various project development activities,
like creating a project, opening an existing project, and saving a project.
The Edit menu, as the name suggests, has the choices to manage common editing
actions, such as Copy, Cut, Paste, and Undo.
APPENDIX
■
THE VISUAL STUDIO 2005 IDE 445
8547appAfinal.qxd 8/30/07 4:18 PM Page 445
The View menu has the choices to manage the presentation of various components of the
I
DE. For example, you can hide or unhide a window. You can also have the choice to switch
between the design and the code windows.
The most often used choice in the Tools menu is Options, though you also have other
selections that allow you to perform activities such as customizing the IDE, working with add-
ins, and accessing macros.
The Window menu gives you the facility to manage the various windows in the IDE.
The Community and Help menus are there to help you with your development efforts.
The Help menu connects to the online help, to make you more productive. Developers can
also interact with others in the community by discussing issues or asking for the help using
the Community menu.
Please go through the official Microsoft help documents to learn more details about each
of the menu choices.
■
Note
Menu choices change dynamically based on the design-time and run-time mode of IDE.
The five extra menu choices are specific to the Window Forms project. The Project
menu choice has the options to manage the project; if you were building a web site instead
of a Windows Forms application, this menu would be Website (see Figure A-3). The Build
menu is used to make builds of the project, and Debug lets you run through the debugging
process. Please see Figure A-3 for the differences in menus between the web site and the
Windows Forms projects.
Figure A-3. Menu choices for web site and Windows Forms projects
Toolbars
Toolbars provide shortcut methods to perform tasks. For example, if you don’t want to click
the File menu and then click the Save option, you can do the same task by simply clicking the
toolbar icon with a pictur
e of a little blue floppy disk.
When it comes to using the IDE, w
e all have our o
wn ways
.
You might like to work with
the keyboard best, or you might prefer to use the mouse to the max. Using the toolbars,
though, is the most common method to do various tasks during both design time and run
time
. Almost all common dev
elopment tasks hav
e a toolbar choice av
ailable to improve the
user experience.
Toolbars are not static in position like the menus. The most common place for toolbars is
immediately under the menu choices
, but they can be mo
v
ed to positions along the r
ight, left,
APPENDIX
■
THE VISUAL STUDIO 2005 IDE446
8547appAfinal.qxd 8/30/07 4:18 PM Page 446
or bottom edges of the IDE. Toolbars can also float. Figure A-3 shows the default position of
t
he standard toolbar.
How you want to place your toolbars is purely your choice. Feel free to adjust them inside
the IDE to suit your preference. Toolbars change dynamically based on the mode of the IDE,
that is, whether you are working in design-time or run-time mode. Please consult with Micro-
soft help for more information on the toolbars. Please see Figure A-4 for a typical look of the
IDE with various toolbars available to streamline the development process.
Figure A-4: Three more toolbars in addition to the standard toolbar
Windows
The Visual Studio 2005 IDE consists of many windows. All windows have specific roles to play:
some are active and helpful while in design-time; others are available only in run-time mode.
Covering every window available in the IDE is beyond the reach of this book. Therefore, I’ll
discuss the three most common and important ones here:
• Solution Explorer
• Toolbox
• Properties
In Figure A-2, the Toolbox window is docked on the right side of the IDE, and both the
Solution Explorer and the Properties windows are docked on the left side. Before we look
inside each window in detail, let’s look at the generic characteristics that are common to all
the windows. The look of a window generally differs because of its content; for example, the
contents of the T
oolbox
W
indow are different than the content of the Properties window. What
is common among the windows is they way they blend into the IDE.
Let me ask y
ou a question her
e: do y
ou think that windows have a fixed position inside
the IDE? I’m sur
e y
our answ
er is
,
“
No.”
Like toolbars, windows can be placed according to your individual preference. For
instance
, y
ou can shuffle the position of the S
olution Explorer and the Toolbox windows. If
y
ou want, y
ou can keep the windows floating or auto-hide them, which means y
ou hide the
content of the window and just display the window icon. Figure A-5 shows various options for
windo
ws
’ positions and points out the auto-hide option.
A
t times
, y
ou need more space to work with on the IDE’
s design sur
face. In such situa-
tions, auto-hide is a handy feature. If you auto-hide a window, as soon as you move the mouse
o
v
er the windo
w’s icon, the window becomes visible again.
APPENDIX
■
THE VISUAL STUDIO 2005 IDE 447
8547appAfinal.qxd 8/30/07 4:18 PM Page 447
Figure A-5. A window’s position and auto-hide options
■
Note
You can use the View menu choice to set up commonly used windows. For example, if you’ve
hidden the Properties window, you can make it visible by clicking the View menu and selecting the Proper-
ties menu option.
In addition to hiding a window and making it visible, you can keep a window’s position
floating or dock it. I always like to see the Toolbox window on the left-hand side of the IDE,
so I dock it there. Docking a window is simple: You just drag the window by holding the
blue title area. As you drag, you will see a guideline to dock either on the left, right, top, or
the bottom position. A guideline showing all four directions allows you to show the window
as a tab choice inside the IDE designer. Figure A-6 shows docking in action.
Figure A-6. Docking a window
APPENDIX
■
THE VISUAL STUDIO 2005 IDE448
8547appAfinal.qxd 8/30/07 4:18 PM Page 448
Solution Explorer
Solution Explorer is the location for all the information to manage the solution and one or
m
ore associated projects; you can manage individual projects and their related files here. If
you take a look Figure A-7, you’ll notice that the solution WindowsApplicaton1 is presented in
the tree structure format. The hierarchy of the information trails from the solution to the proj-
ects and ends with the individual files. Often, the individual files are further separated by
putting them inside the folders.
Have you noticed the different icons in the tree structure? I’m sure you have. These
images help you to identity each file type and section. You can click on the plus (+) and
minus (–) symbols in Solution Explorer to hide or expand any section.
Figure A-7. Solution Explorer
As you can see, the top section of the Solution Explorer window has six icons. Consider
them as six differ
ent commands that y
ou can per
form from within this window; they all have
important roles to play. As you can see in Figure A-7, the first command helps you to probe the
proper
ty of any selected file. The second command is to show all the files; this means to show
Bin and Obj folders in the tr
ee
, which ar
e hidden b
y default (see Figur
e A-8).
Next in line is the Refresh command; you can click this button to refresh the Solution
E
xplor
er window. As you add or remove files from Solution Explorer, the VS 2005 IDE automat-
ically r
efr
eshes the windo
w content to its most curr
ent status.
The next three buttons on the Toolbar help you to quickly access various aspects of
selected files
. From the left to the right, they display the code window, the designer associated
with the file, and the class diagr
am.
APPENDIX
■
THE VISUAL STUDIO 2005 IDE 449
8547appAfinal.qxd 8/30/07 4:18 PM Page 449
Figure A-8. Solution Explorer (showing all files)
Toolbox
As you can see in Figure A-2, the Toolbox window is docked on the left side of the IDE. Like the
Solution Explorer window, this window is also often used by developers; it contains various
elements that you can add to the project.
The content of this window depends on the type of project. In Figure A-9, you have stan-
dard Windows Forms controls. If the project is a web site, then the content will reflect that
project selection.
The elements are separated into different tabs, such as Common Controls, Containers,
and Data. You can also create your own tab to host third-party or custom controls.
APPENDIX
■
THE VISUAL STUDIO 2005 IDE450
8547appAfinal.qxd 8/30/07 4:18 PM Page 450
Figure A-9. The Toolbox window
Properties
The third window that I’d like to discuss in this section is Properties. As you can see in
Figure A-2, the Properties window is docked on the right side of the IDE with the Solution
Explorer window. You can use the Properties window to access the individual characteristics
related to specific elements of the project; the element could be a form, file, class, or control.
As Figure A-10 shows, all associated properties of
Form1 are displayed as content in this
window
. You can set the properties’ values inside the window.
You can view properties according to their categories or sort them alphabetically. In
Figure A-10, properties are alphabetically sorted. Which is better, sorting by category or sort-
ing alphabetically?
W
ell, that choice is differ
ent fr
om developer to developer. I personally like
the alphabetically sorted view. But if you like to see all the appearance-related properties, such
as color and fonts, together, the categorized view is best for you.
APPENDIX
■
THE VISUAL STUDIO 2005 IDE 451
8547appAfinal.qxd 8/30/07 4:18 PM Page 451