User and System Ministration
Bạn đang xem bản rút gọn của tài liệu. Xem và tải ngay bản đầy đủ của tài liệu tại đây (526.42 KB, 40 trang )
Chapter 5. User and System
Administration
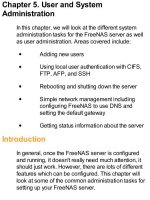
In this chapter, we will look at the different system
administration tasks for the FreeNAS server as well
as user administration. Areas covered include:
Adding new users
Using local user authentication with CIFS,
FTP, AFP, and SSH
Rebooting and shutting down the server
Simple network management including
configuring FreeNAS to use DNS and
setting the default gateway
Getting status information about the server
Introduction
In general, once the FreeNAS server is configured
and running, it doesn't really need much attention, it
should just work. However, there are lots of different
features which can be configured. This chapter will
look at some of the common administration tasks for
setting up your FreeNAS server.
Local User Management
Until now, we have only used the FreeNAS server in
an "anonymous" mode, meaning that anyone can
connect to the server and read, create, and delete
files. This isn't always what you want, so FreeNAS
has some user management features that change the
way CIFS, FTP, and AFP allow users to connect to
the server.
The 0.6 series of FreeNAS releases
has rather blunt user management. The
defined users have access or they don't
have access, period. There is no
granularity; for example being able to
give some users read access while
others have read/write access.
The roadmap for the 0.7 releases
promises the ability to create a share
(meaning a folder on a selected disk),
with user/group/quota property on this
share. This implies a greater level of
control.
The first step to creating a user is in fact to create a
group. Each user must belong to a group. Groups are
sets of users who are associated with one another.
So in your business, you might have a sales group
and a engineering group. At home, you probably only
want one group, for example home.
1. 1. To create a group, go to Access: Users
and Groups and click on the Group tab.
2. 2. Now click on the add circle.
3. 3. The form is very simple; you need to add
a name and a description. For example
sales and "The sales people".
4. 4. Now click Add and then apply the
changes.
Only a-z, A-Z, and 0-9 are supported in
the group name. _ (underscores) and
spaces are not supported, neither are
punctuation characters like $%&* etc.
Now that you have a group created, you can create a
user.
1. 1. Click on the Users tab.
2. 2. And then on the add circle.
There are four mandatory fields:
Login: This is the unique login name of
user. If the user already has a login
name on other servers or workstations,
like a Windows user name or a Linux
user name, it is best to keep it the same
here. This way the user doesn't need to
try an remember an extra username and
also some programs (particularly
Windows) try and log in with the
Windows user name before asking
which name it should use. Keeping them
the same will ease integration.
Full Name: The user's full name. Often,
the login name is an abbreviation or
short name for the user like john, gary.
Here you need to enter the full name so
that it is easy to tell which login name
belongs to which person.
Password: Their password (with
confirmation). The colon ':' character
isn't allowed in the password.
Primary Group: The group to which
they belong, for example sales.
3. 3. To finish, you need to click Add and
apply the changes.
You now have a user added to your FreeNAS server.
There are three more optional fields when adding a
user: Home Directory, Full Shell, and Administrator,
and we shall look at these in a moment, but first let's
look at what effect adding a user has on the rest of
the FreeNAS server.
Using CIFS with Local Users
To use the users you have defined with Windows
networking, you need to go to the Services:
CIFS/SMB page and change the Authentication
field to Local User. Then click Save and Restart to
apply your changes.
What this means is that only authenticated users can
now access the FreeNAS shares via CIFS.
In version 0.6, this user authentication is
for all the shares, the user has access to
everything or nothing. This should
change with 0.7.
When trying to connect now from a Windows Vista
machine, a window pops up asking for a user name
and password.
Once authenticated, the user has access to all the
user shares on the FreeNAS server.
FTP and User Login
On the Services: FTP, there are two fields that
control how users log in to the FreeNAS server:
Anonymous login: This allows you to
enable anonymous login. This means the
user connects with the user name
anonymous and any password.
Local User: This enables a local user
login. Users log in using the user name and
passwords defined in the Access: Users
and Groups page.
The two can be used together; however, they do
negate one another in terms of security. It is best to
run the FTP with either anonymous logins enabled
and local user logins disabled or vice versa. If you run
with both enabled, then people can still log in using
the anonymous method even if they don't have a user
account and so, it diminishes the benefits of having
the user accounts enabled.
Other than the security benefits, another advantage of
local user login with FTP is that you can define a
home directory for the user and when the user logs in,
they will be taken to that directory and only they have
access to that directory and those below it. This
effectively offers each user their own space on the
server and other users cannot interfere with their files.
To get this working, you need to create a directory on
your shared disk. You can do this with any of the
access protocols CIFS, NFS, FTP, and AFS. You
need to connect to the shared disk and create a new
folder.
Then, in Access: Users, either create a new user or
edit an existing one (by clicking on the 'e' in a circle).
In the Home directory, you need to enter the
directory for that user. For example for the user john,
you might create a directory cunningly named john.
Assuming the disk is named store (as per the quick
start guide) then the path for the home directory would
be: /mnt/store/john.
Click Save and apply the changes. Now when John
logs in using the user name john he will be taken
directly to the john directory. He doesn't have access
to other files or folders on the store disk, only those in
john and any sub folder.
chroot() Everyone, but Root
In the advanced settings section of the
Services: FTP page, there is a field
called chroot() everyone, but root.
What this means is that when a user
logs in via FTP, the root directory (top or
start directory) for them will be the
directory set in the Home directory
field. Without this set, the user will log in
to the server at the physical / and will
see the server in its entirety including the
FreeNAS and FreeBSD system files. It
is much safer to have this box checked.
The exception to this is the user root
(which in FreeBSD terms is the system
administer account). If Permit root
login is enabled, then the user root can
log in and they will be taken to the root of
the actual server. This can be useful if
you ever need to alter any of the system
files on the FreeNAS, but this isn't
recommend unless you absolutely know
what you are doing!
Authenticating AFP Users
Like CIFS and FTP, the Apple Filing Protocol (AFP)
can also use the local user authentication features of
FreeNAS.
In the Services: AFP page, there are two options for
controlling access to the server via AFP:
Enable guest access, meaning that
anyone can connect without giving a
username or password. The users have full
read and write access.
Enable local user authentication,
meaning that only users defined on the
FreeNAS server (on the Access: Users
page) can access the server. The user
name and password set in the FreeNAS
server need to be given to authenticate.
Like FTP, the two can be used together, however,
they do negate one another in terms of security. It is
best to run the AFP service with either guest logins
enabled and local user logins disabled or vice versa.
If you run with both enabled then people can still log in
using the guest account even if they don't have a user
account and so it reduces the benefits of having the
user accounts enabled.
With just local user authentication enabled, initial
connections from an Apple Macintosh will fail. In the
top right-hand corner of the Finder window, there is a
button labeled Connect As... Use that to enter a user
name and password.
Connect to the FreeNAS Server via SSH
One of the services that hasn't been mentioned much
in this book so far is Secure Shell access or SSH for
short. It is really for advanced users and it will be used
to connect to the server in Chapter 10, when we look
at FreeBSD and command line tools available.
However, SSH depends heavily on the local users
defined on the server and as such it is worth looking
at now.
SSH is a network protocol that allows data to be
exchanged over an encrypted (secure) channel
between two computers. It is commonly used as a
secure command line interface to a remote computer.
This means that you can access the command line
interface of the FreeNAS server from a remote
computer without having to access the keyboard the
and monitor of the FreeNAS server. On the FreeNAS
server, it is also used in conjunction with the Unison
suite of programs. Unison uses SSH to log in to the
server and start the synchronization process.
On the Access: Users: Add page, there is a field
called Full Shell, which when enabled, gives that
user access to the FreeNAS server via SSH.
To test SSH connectivity:
1. 1. Create a user and make sure that Full
Shell is enabled.
2. 2. Go to the Services: SSHD and enable
the service.
3. 3. Make sure that Password authentication
is ticked.
4. 4. Click Save and Restart.
5. 5. Connect to the FreeNAS server using a
SSH client (see below).
Password Authentication
It is possible to connect to the FreeNAS
server without giving a user name and
password but by relying on an exchange
of encryption keys that verify that you are
who you claim to be. With Password
Authentication enabled, you are able to
log in just using a username and
password.
You can connect to the FreeNAS server via the
command line program ssh using Linux and Mac OS
X. For Windows, you will need a SSH client, the best
one is called Putty (
/>We will look in more detail at Putty in Chapter 10.
From a Linux or OS X command line type:
ssh -l john 192.168.1.250
Don't forget to change the address to
that of your FreeNAS if you aren't using
the default.
The -l tells the SSH program which user you want to
use as the login name, in this case, I have chosen
john.
The first time you log in, you may be asked if you trust
the remote machine as you are about to enter into
encrypted communications with it. It should read
some thing like this:
The authenticity of host '192.168.1.250 (192.168.1.250)' can't be established.
DSA key fingerprint is b2:d0:99:cb:6e:b2:53:95:4d:f6:b3:02:1d:bc:36:db.
Are you sure you want to continue connecting (yes/no)? yes
Warning: Permanently added '192.168.1.250' (DSA) to the list of known hosts
Answer yes and then type in the password for the
user. You are now connected to the FreeNAS server
via SSH. From here, you can access the command
line tools of the FreeNAS server. See chapter 10 for
more details.
Services that Don't Use Local User
Accounts
Not all services provided by FreeNAS use local
accounts for authentication, most notably NFS. This
requires a note of caution. If you have NFS enabled,
and are using local user authentication for CIFS, FTP,
and AFP be aware that users can still connect to the
FreeNAS server using NFS without any username
and password. This is an easy way for people to
circumvent the local user authentication process.
Using FreeNAS with the Microsoft Active
Directory
Until now, we have defined all the user information
locally on the FreeNAS server. This is fine for small
networks but if you have a large business network,
you may already have Microsoft's Active Directory
deployed. FreeNAS can use the user database of a
Microsoft Active Directory (Windows 2000/2003) to
authenticate user names and passwords and
therefore, remove the need to define users locally.
When Active Directory is being used, the FreeNAS
server will authenticate users using the directory for
the following services: CIFS, FTP, SSH, and Unison.
Pre-Windows 2000
FreeNAS is considered as a pre-
Windows 2000 client and as such the
Active Directory must be configured with
pre-Windows 2000 compatibility.
Assuming the Active Directory is installed and
running:
1. 1. Go to Access: Active Directory.
2. 2. Tick the Enable check box in the title bar
of the table.
3. 3. Enter the Active Directory server name in
the AD server name field. For example the
Windows Server 2003 server on my test
network is called WS2003, so I entered
WS2003.
4. 4. Enter the IP address of the Active
Directory server in the AD server IP field.
5. 5. Enter the domain name for Active
Directory. This is in pre-Windows 2000
format.
6. 6. Enter the domain administrator account
user name (probably Administrator) and the
password.
7. 7. Finally, click Save.
To check if the FreeNAS is able to communicate with
the Active Directory correctly:
1. 1. Go to Diagnostics: Information
2. 2. Click the MS Domain tab.
This will test the connecting to the Active Directory.
A successful test will look like this:
Accessibility test to MS domain:
Results for net rpc testjoin:
Join to 'FREENAS' is OK
Ping winbindd to see if it is alive:
Ping to winbindd succeeded on fd 4
Check shared secret:
Checking the trust secret via RPC calls
succeeded
After the Active Directory is configured, CIFS, FTP,
SSH, and Unison authentication will rely only on
account information in the Active Directory.
The authentication method for CIFS/SMB is
automatically changed to Domain when the Active
Directory is configured for use.
To check this, go to Services: CIFS/SMB and notice
that Authentication is now set to Domain.
To test the use of Active Directory, try connecting to
the FreeNAS server via CIFS, FTP or SSH and use
account information from the Active Directory.
System Admin
Some of the common administration tasks for the
system admin:
How to Change the Web GUI User Name
and Password
When you first install or boot-up the FreeNAS server
it has a default username and password for
accessing the web GUI. These are admin and
freenas respectively. If your FreeNAS is in an
environment where others could potentially access
the FreeNAS server and change settings, either
maliciously or by accident/curiosity, it is advisable
that you change the password and possibly even the
username for access to the web GUI.
To change the password, go to System: General
and click on the Password tab. Enter the current web
GUI password (which is probably freenas) and then
enter the new desired password twice, the second
time for confirmation to make sure you entered the
right characters. Now click on Save.
Once saved, you will automatically asked to log in
again. So enter the username (probably admin) and
then the new password you entered.
Choosing a Good Password