Pro SQL Server 2008 Policy-Based Management- P3
Bạn đang xem bản rút gọn của tài liệu. Xem và tải ngay bản đầy đủ của tài liệu tại đây (1.03 MB, 50 trang )
CHAPTER 3 EVALUATING POLICIES
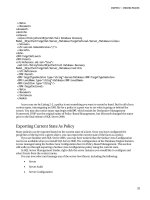
Figure 3-36. Export Registered Servers dialog box
3. Right-click the Central Management Server folder and select Tasks o
Import.
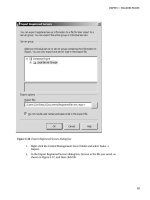
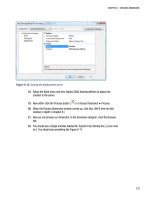
4. In the Import Registered Servers dialog box, browse to the file you saved, as
shown in Figure 3-37, and then click OK.
83
Please purchase PDF Split-Merge on www.verypdf.com to remove this watermark.
CHAPTER 3 EVALUATING POLICIES
Figure 3-37. Import Registered Servers dialog box
The Central Management Server now has the same folder structure and SQL Server instances
registered as defined in the Local Server Groups registered server list.
Evaluating Policies against a Central Management Server Group
Right-clicking a server group provides you with a few options that you can execute against all the servers
in the group, as shown in Figure 3-38. In this section, we’ll look at the Evaluate Policies option for a
Central Management Server group.
84
Please purchase PDF Split-Merge on www.verypdf.com to remove this watermark.
CHAPTER 3 EVALUATING POLICIES
Figure 3-38. Central Management Server group options
Now that you have servers in you Central Management Server groups, you can see the real power of
using Policy-Based Management with Central Management Servers.
Execute one or more policies against all of the servers in a server group by following these steps:
1. Right-click a Central Management Server group and select Evaluate Policies
(see Figure 3-38),
2. In the Evaluate Policies dialog box, you’ll need to select the source for your
policy store. Click the ellipsis button next to the Source field (see Figure 3-
12).
3. In the Select Source dialog box, select whether your policies are on the file
system or stored on a SQL Server instance. For this walk-through, we’re
going to use the ones stored on our SQL Server 2008 instance (see Figure 3-
9).
4. The Evaluate Policies dialog box will now be populated with the policies that
are stored on the server (see Figure 3-13).
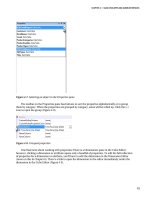
5. Select a single or multiple policies to evaluate, as shown in Figure 3-39, and
then click the Evaluate button.
85
Please purchase PDF Split-Merge on www.verypdf.com to remove this watermark.
CHAPTER 3 EVALUATING POLICIES
Figure 3-39. Selecting policies to evaluate against a Central Management Server group
You’ve now evaluated the selected policies against all the servers in the group at the same time. The
Evaluate Policies dialog box will show the evaluation status of each object (in this example, databases) in
the Targets Details section, as shown in Figure 3-40.
86
Please purchase PDF Split-Merge on www.verypdf.com to remove this watermark.
CHAPTER 3 EVALUATING POLICIES
87
Figure 3-40. Evaluate Policies dialog box showing results of evaluating against a Central Server
Management group
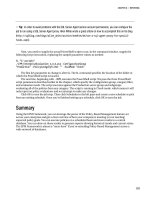
Summary
In this chapter, we introduced you to the different execution modes you can use to evaluate policies. We
have shown the out-of-the-box ways to evaluate a single policy, as well as to evaluate multiple policies at
once. We also demonstrated how you can configure a Central Management Server that will allow you to
evaluate your policies against multiple SQL Server instances.
Please purchase PDF Split-Merge on www.verypdf.com to remove this watermark.
Please purchase PDF Split-Merge on www.verypdf.com to remove this watermark.
C H A P T E R 4
Policy-Based Management
Using PowerShell
PowerShell is a very useful scripting tool that enables system administrators to automate server
administration, gather information, and deploy applications. Microsoft introduced support for Windows
PowerShell version 1 with SQL Server 2008, and support for Windows PowerShell version 2 will be
released with SQL Server 2008 Release 2.
In this chapter, we will create some basic PowerShell scripts to demonstrate how to use this tool
with Policy-Based Management. We will use PowerShell to run a single policy against a single instance of
SQL Server, and then to run a group of policies against a single instance of SQL Server. We will then store
and query the policy results. Finally, we will tie in the use of a Central Management Server to execute
and store the results of a category of policies against all the instances in a server group.
Creating a Basic PowerShell Script
When you create a PowerShell script, there are two ways of connecting to and querying a SQL Server
instance: using T-SQL and using SQL Server Management Objects (SMO). We’ll look at both the T-SQL
and SMO methods, and then demonstrate how to interrogate the class to find out the properties and
methods available to you.
Using T-SQL
You can connect to a database from PowerShell, run a T-SQL query against the database, and return a
result set back to PowerShell. The procedure is as follows:
1. Create a connection to SQL Server using the .NET data provider.
2. Build your connection string.
3. Create a T-SQL command to run against a SQL Server database.
4. Populate a container (
DataSet) with the results of the T-SQL query.
5. Return the results stored in the container to the shell window.
6. Close the connection to SQL Server.
Listing 4-1 shows an example of connecting to and querying a database using T-SQL in PowerShell.
89
Please purchase PDF Split-Merge on www.verypdf.com to remove this watermark.
CHAPTER 4 POLICY-BASED MANAGEMENT USING POWERSHELL
Listing 4-1. Connecting to and querying a SQL Server instance using T-SQL in PowerShell
$SQLCon = New-Object System.Data.SqlClient.SqlConnection
$SQLCon.ConnectionString
= "Server = TE
STLAB01\BENCHDBS04TESTLAB01\BENCHDEV04; Database = msdb;
Integrated Security = True"
$SQLCmd = New-
Object System.Data.SqlClient.SqlCommand
$SQLCmd.CommandText = "SELECT [name] FROM dbo.syspolicy_polic
ies"
$SQLCmd.Connection = $SQLCon
$SQLDataAdapter = New-Object System.Data.SqlClient.SqlDataAdapter
$SQLDataAdapter.SelectCommand = $SQLCmd
$DataSet = New-Object System.Data.DataSet
$SQLDataAdapter.Fi
ll($DataSet)
$DataSet.Tables[0]
$SQLCon.Close()
Edit the code in Listing 4-1 so that the server is your SQL Server 2008 Policy-Based Management
instance. Then save it as Example4-1.ps1.
Execute Example4-1.ps1 by opening a command prompt and running the
sqlps utility, as shown in
Figure 4-1. The results should list the policies that you currently have stored, as shown in the example in
Figure 4-2.
Figure 4-1. Running Example4-1.ps1
90
Please purchase PDF Split-Merge on www.verypdf.com to remove this watermark.
CHAPTER 4 POLICY-BASED MANAGEMENT USING POWERSHELL
Figure 4-2. Results from Example4-1.ps1
Using SQL Server Management Objects
Another way to connect to and query an instance is to use SMO classes. In this section we’re going to
look at the following namespaces and objects:
Microsoft.SQLServer.Management.sdk.sfc: A namespace that contains a set of
classes, interfaces, structures, delegates, and enumerations that support SQL SMO.
91
Please purchase PDF Split-Merge on www.verypdf.com to remove this watermark.
CHAPTER 4 POLICY-BASED MANAGEMENT USING POWERSHELL
Microsoft.SQLServer.Management.DFM: A namespace that contains classes that
represent the SQL Server Policy-Based Management objects.
SQLStoreConnection: A class in the Microsoft.SQLServer.Management.sdk.sfc
namespace that represents a connection to a SQL Server instance.
PolicyStore: An object in the Microsoft.SQLServer.Management.DFM namespace
that represents a Policy-Based Management policy store that holds information
about policies, conditions, object sets, and subscriptions
Furthermore, our SMO example makes use of an important SMO class known as
$Policy.Name. It’s a
useful class that implements many properties and methods to help you work with Policy-Based
Management from PowerShell.
Listing 4-2 shows how to connect and query for the same information as in Listing 4-1. The
difference is that this time we are using SMO rather than T-SQL.
Listing 4-2. Connecting to and querying a SQL Server instance using SMO in PowerShell
$SQLPBMConnection = new-object
Microsoft.SQLServer.Management.Sdk.Sfc.SqlStoreConnection("server=
TES
TLAB01\BENCHDBS04TESTLAB01\BENCHDEV04;
Trusted_Connection=true");
$SQLPolicyStore = new-object
Micro
soft.SqlServer.Management.DMF.PolicyStore($SQLPBMConnection);
foreach ($Policy in $SQLPolicyStore.Po
licies)
{
$Policy.Name
}
Edit the code in Listing 4-2 so that the server is your SQL Server 2008 Policy-Based Management
instance. Then save it as Example4-2.ps1. Execute Example4-2.ps1. The results should look similar to
Figure 4-3 and identical to the results from Listing 4-1.
92
Please purchase PDF Split-Merge on www.verypdf.com to remove this watermark.
CHAPTER 4 POLICY-BASED MANAGEMENT USING POWERSHELL
Figure 4-3. Results from Example4-2.ps1
Interrogating for Members and Properties
SMO enables you to interrogate a class for the members and properties that it implements. We’ve been
working with the
$Policy.Name class. Listing 4-3 shows how you can invoke the Get-Member cmdlet to
interrogate that class for the properties and methods it implements.
Listing 4-3. Using the Get-Member cmdlet to retrieve a listing of available properties and methods
$SQLPBMConnection = new-object
Microsoft.SQLServer.Management.Sdk.Sfc.SqlStoreConnection("server=TEST
LAB01\BENCHDBS04;
Trusted_Connection=true");
$SQLPolicyStore = new-object
Microsoft.SqlServer.Manage
ment.DMF.PolicyStore($SQLPBMConnection);
$SQLPolicyStore | get-member
93
Please purchase PDF Split-Merge on www.verypdf.com to remove this watermark.
CHAPTER 4 POLICY-BASED MANAGEMENT USING POWERSHELL
Again, edit this code so that the server is your SQL Server 2008 Policy-Based Management instance,
save it as Example4-3.ps1, and then execute Example4-3.ps1. The results should look similar to Figure
4-4.
Figure 4-4. Results from Example4-3.ps1
Now that you have seen how to connect to a SQL Server instance using PowerShell, we will look at
using PowerShell to run a single policy against a SQL Server instance.
94
Please purchase PDF Split-Merge on www.verypdf.com to remove this watermark.
CHAPTER 4 POLICY-BASED MANAGEMENT USING POWERSHELL
Running a Policy Against a SQL Server Instance
PowerShell can be used to run a policy against an instance of SQL Server to determine if the instance is
compliant with the condition of the policy. In this section, we’re going to show you how to do the
following:
x Use the
Invoke-PolicyEvaluation cmdlet to run a policy stored on the file system.
x Get detailed results in XML form by using the
–OutputXML parameter to specify an
output location.
x Use the
Invoke-PolicyEvaluation cmdlet to run a policy stored on a server.
Invoking a Policy from a File
The Invoke-PolicyEvaluation cmdlet reports whether or not a target set of SQL Server objects complies
with the conditions specified in one or more Policy-Based Management policies. Listing 4-4 shows how
to invoke a policy defined in a file stored on your file system. This policy checks that all databases for the
evaluated instance have autoshrink disabled.
Listing 4-4. Using the Invoke-PolicyEvaluation cmdlet to run a policy stored on the file system
Set-Location "C:\Program Files\Microsoft SQL Server\100\Tools\Policies\DatabaseEngine\1033"
Invoke-Po
licyEvaluation -Policy "Database Auto Shrink.xml" -TargetServer
"TESTLAB01\BENCHDBS04"
The path for Set-Location is the local path that is storing policies on the file system. Edit the code in
Listing 4-4 so that the
TargetServer is the SQL Server instance that you would like to run this policy
against. Save the code as Example4-4.ps1, and then execute it. Figure 4-5 shows an example of the
results.
Figure 4-5. Results from Example4-4.ps1
95
Please purchase PDF Split-Merge on www.verypdf.com to remove this watermark.
CHAPTER 4 POLICY-BASED MANAGEMENT USING POWERSHELL
In this example, the SQL Server instance did not have any databases with autoshrink enabled. If any
databases had autoshrink enabled, the result column for the execution would read
False. The
information provided here is very limited, as it does not give you any details on which databases passed
or failed the policy check. In the next section, we’ll show you how to output detailed results to an XML
file and review the information in that file.
Getting Detailed Results
Listing 4-5 shows how to invoke a policy evaluation and write detailed results to an output file. The
output will be in XML form, and you specify the file using the
–OutputXML parameter.
Listing 4-5. Using the Invoke-PolicyEvaluation cmdlet to run a policy stored on the file system and saving
the results to an XML file
Set-Location "C:\Program Files\Microsoft SQL Server\100\Tools\Policies\DatabaseEngine\1033"
Invoke-Po
licyEvaluation -Policy "Database Auto Shrink.xml" -TargetServer "TESTLAB\BENCHDBS01"
-OutputXML > C:
\AutoShrink.xml
Note: The
–OutputXML
path can be either a local path or a UNC path.
Edit the code so that the TargetServer is the SQL Server instance that you would like to run this
policy against, and change the OutputXML path to where you would like the XML results file to be
generated. Save the code as Example4-5.ps1, and then execute it, as shown in Figure 4-6.
Figure 4-6. Results from Example4-5.ps1
The results of the policy execution are not reflected in the command prompt window, because we
wrote the results to an XML file. To review those results, you will need to open that XML file. You can do
that using any text editor or an XML editor. When you open the file, you will see XML in the form shown
in Listing 4-6, which shows a small subset of the entire XML file.
96
Please purchase PDF Split-Merge on www.verypdf.com to remove this watermark.
CHAPTER 4 POLICY-BASED MANAGEMENT USING POWERSHELL
Listing 4-6. Portion of an XML file with results from Example4-5.ps1
<DMF:ResultDetail type="string"><Operator><?char 13?> <TypeClass>Bool</TypeClass><?char 13?>
<OpType>
EQ</OpType><?char 13?> <ResultObjType>System.Boolean</ResultObjType><?char 13?>
<ResultValue>True</Re
sultValue><?char 13?> <Count>2</Count><?char 13?> <Attribute><?char 13?>
<TypeClass>Unsupported</Type
Class><?char 13?> <Name>AutoShrink</Name><?char 13?>
<ResultObjType>System.Boolean</ResultObjType><?c
har 13?>
<ResultValue>False</ResultValue><?char 13?> </Attribute><?char 13?> <Function><?char 13?>
<T
ypeClass>Bool</TypeClass><?char 13?> <FunctionType>False</FunctionType><?char 13?>
<ReturnType>Bool</
ReturnType><?char 13?> <ResultObjType>System.Boolean</ResultObjType><?char
13?> <ResultValue>False</R
esultValue><?char 13?> <Count>0</Count><?char 13?> </Function><?char
13?> </Operator></DMF:ResultDeta
il>
<DMF:TargetQueryExpression
type="string">SQLSERVER:\SQL\TESTLAB01\BENCHDBS01\Databases\Northwin
d</DMF:TargetQueryExpressi
on>
<DMF:ID type="long">1</DMF:ID>
<DMF:Result type="boolean">true</DMF
:Result>
The <DMF: TargetQueryExpression> tag shows the database that this policy was evaluated against,
and the
<DMF: Result> tag shows the results. In this example, for the Northwind database, the Auto
Shrink Enabled policy evaluated to
true.
Invoking a Policy Defined on the Server
Listing 4-4 showed how to invoke a policy when the definition is stored in a file on the file system. You
can also store policy definitions in a SQL Server instance. Listing 4-7 shows how to invoke such policies.
Listing 4-7. Using the Invoke-PolicyEvaluation cmdlet to run a policy stored in a SQL Server instance
Set-Location SQLSERVER:\SQLPolicy\TESTLAB01\BENCHDBS04\Policies
Get-ChildItem | Where-Object {$_.Name
-eq "Database Auto Shrink"} |
Invoke-PolicyEvaluation -TargetServer "TESTLAB01\BENCHDBS04"
Note: The example instance is TESTLAB01\BENCHDBS04\. If you are not using a named instance, then it would
be TESTLAB01\DEFAULT\.
Again, be sure to change the Set-Location value to the SQL Policy store the SQL Server instance that
is storing the policies and the
TargetServer value to the instance that you want to evaluate the policy
against. Save the code as Example4-6.ps1 and execute it. Figure 4-7 shows an example of the results.
97
Please purchase PDF Split-Merge on www.verypdf.com to remove this watermark.
CHAPTER 4 POLICY-BASED MANAGEMENT USING POWERSHELL
Figure 4-7. Results from Example4-6.ps1
Running Multiple Policies Against a SQL Server Instance
In this section, we will show you how to run multiple policies against an instance in one go. There are
different approaches you can take to that problem. We’ll look at the following three possible solutions:
x Add file system policies to the Invoke-PolicyEvaluation cmdlet.
x Search for a policy category on the file system.
x Search for a policy category in a SQL Server instance.
Invoking Multiple Policies from the Cmdlet
Listing 4-4 demonstrated how to use the Invoke-PolicyEvaluation cmdlet to run a single policy from
PowerShell. Running multiple policies is a simple extension of what you saw earlier. Simply list more
than one policy name, as shown in Listing 4-8. Notice the list of file names following the
–Policy
parameter.
Listing 4-8. Running multiple policies by adding file system policies
Set-Location "C:\Program Files\Microsoft SQL Server\100\Tools\Policies\DatabaseEngine\1033"
Invoke-Po
licyEvaluation -Policy "Database Auto Shrink.xml", "Database Auto Close.xml" -
TargetServer "TESTLAB01
\BENCHDBS04"
Edit the code in Listing 4-8 so that the TargetServer is the SQL Server instance that you would like to
run this policy against. Save the code as Example4-7.ps1 and execute it. Figure 4-8 shows an example of
the results. The Database Auto Shrink policy and the Database Auto Close policy were evaluated, and the
results were returned to the command prompt window.
98
Please purchase PDF Split-Merge on www.verypdf.com to remove this watermark.
CHAPTER 4 POLICY-BASED MANAGEMENT USING POWERSHELL
Figure 4-8. Results from Example4-7.ps1
Invoking a Category of Policies from the File System
When you define policies, you can group them into categories. You can take advantage of that grouping
to invoke an entire collection of policies to evaluate at once. Listing 4-9 shows how to invoke all of the
policies in the Microsoft Best Practices: Maintenance category.
Listing 4-9. Running multiple policies by searching for a policy category on the file system
Set-Location "C:\Program Files\Microsoft SQL Server\100\Tools\Policies\DatabaseEngine\1033"
$AllPolicies = get-childitem -Name
foreach ( $Policy in $AllPolicies)
{
$PolicyInCategory = select-string "M
icrosoft Best Practices: Maintenance" $Policy
If ($PolicyInCategory -ine $null)
{
Invoke-PolicyE
valuation -Policy $policy -TargetServer "TESTLAB01\BENCHDBS04"
}
}
Edit the code so that the TargetServer is the SQL Server instance that you would like to run this
policy against. Save the code as Example4-8.ps1 and execute it. As shown in the example in Figure 4-9,
multiple policies are evaluated at the same time, and the results are returned to the command prompt
window.
99
Please purchase PDF Split-Merge on www.verypdf.com to remove this watermark.
CHAPTER 4 POLICY-BASED MANAGEMENT USING POWERSHELL
Figure 4-9. Results from Example4-8.ps1
Invoking a Category of Policies from an Instance
If you store your policy definitions in a SQL Server instance, you can still invoke them by category.
Listing 4-10 shows how to do that.
Listing 4-10. Using the Invoke-PolicyEvaluation cmdlet to run a category of policies stored on a server
Set-Location SQLSERVER:\SQLPolicy\TESTLAB01\BENCHDBS04\Policies
Get-ChildItem | Where-Object {$_.Poli
cyCategory -eq "Microsoft Best Practices: Maintenance"}
| Invoke-PolicyEvaluation -TargetServer "TES
TLAB01\BENCHDBS04"
Edit the code so that the server is the SQL Server instance that contains the policies and
TargetServer is the SQL Server Instance that you would like to run this policy against. Save the code as
Example4-9.ps1, and then execute it. Figure 4-10 shows an example of the results.
Figure 4-10. Results from Example4-9.ps1
100
Please purchase PDF Split-Merge on www.verypdf.com to remove this watermark.
CHAPTER 4 POLICY-BASED MANAGEMENT USING POWERSHELL
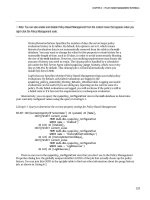
One advantage to having policies defined and stored in an instance is that you can more easily
confirm that they have run as you expected. For example, if you want to validate that the code from
Listing 4-10 worked properly, and that only the policies that are categorized as Microsoft Best Practices:
Maintenance were evaluated, you can do that. To do so, open SQL Server Management Studio and
connect to the instance that contains the policies. Then expand Management, expand Policy
Management, and select the folder called Policies. You should see a list of the policies that are
categorized as Microsoft Best Practices: Maintenance. If the instance that stores the policies is the same
instance that you used as your
TargetServer value, the state is equivalent to the evaluation result. In the
Object Explorer Details window, the information should look similar to that shown in Figure 4-11,
depending on the target server you chose and the evaluation results.
Figure 4-11. Object Explorer Details window showing policies
Querying and Storing Policy Execution Results
Earlier in this chapter, you saw how to save the policy evaluation results from PowerShell to an XML file.
Saving the results to a file is fine when only one policy is involved. However, when you are evaluating
multiple policies at the same time, things get more complicated. Writing all the output to a single file
makes it difficult to work with the results. You can make your job easier by moving that XML into a
database table.
Note: The scripts presented in the remainder of this chapter are based on the great work of Lara Rebbulke,
Technology Solution Professional; Dmitri Tchikatilov, Technology Solution Professional; and Tom Davidson,
Solution Specialist—all with Microsoft. They developed the Enterprise Policy Management Framework, introduced
in Chapter 1, which should be the cornerstone of any Policy-Based Management implementation. We use their
scripts here by permission.
In this section, you’re going to learn how to do the following:
x Create a staging table.
101
Please purchase PDF Split-Merge on www.verypdf.com to remove this watermark.
CHAPTER 4 POLICY-BASED MANAGEMENT USING POWERSHELL
x Load policy evaluation history into that table.
x Query policy evaluation history results using T-SQL.
Creating a Staging Table
To create a staging table, execute the statements shown in Listing 4-11. The result from Listing 4-11 will
be a table named PolicyHistory_staging, with columns that give easy access to results from policy
evaluations. You may want to create your table in a reporting schema, possibly in an instance set aside
just for your own purposes.
Listing 4-11. Creating the staging table
USE PBMResults
CREATE TABLE [dbo].[PolicyHistory_staging](
[PolicyHistoryID] [int] IDENTITY(1,1) NO
T NULL,
[EvalServer] [nvarchar](100) NULL,
[EvalDateTime] [datetime] NULL,
[EvalPolicy] [nvarchar]
(max) NULL,
[EvalResults] [xml] NULL,
CONSTRAINT [PK_PolicyHistory_staging] PRIMARY KEY CLUSTERED
(
[PolicyHistoryID] ASC
)WITH (PAD_INDEX = OFF, STATISTICS_NORECOMPUTE = OFF, IGNORE_DUP_KEY = OFF
, ALLOW_ROW_LOCKS
= ON, ALLOW_PAGE_LOCKS = ON) ON [PRIMARY]
) ON [PRIMARY]
GO
ALTER TABLE [dbo].[
PolicyHistory_staging] ADD CONSTRAINT [DF_PolicyHistory_EvalDateTime]
DEFAULT (getdate()) FOR [Eval
DateTime]
GO
Note: The section uses a new empty database called
PBMResults
. If you do not have a database in which you
would like to store this information, you can create a new one.
Loading Policy Evaluation History
Now that you’ve created the staging table, you can populate it with the XML results from policies you
evaluated using PowerShell. Listing 4-12 shows how to load results from an XML file into the table.
102
Please purchase PDF Split-Merge on www.verypdf.com to remove this watermark.