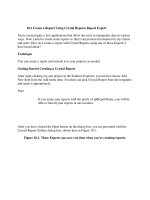
Create a Simple XML Web Service Using Parameters
Bạn đang xem bản rút gọn của tài liệu. Xem và tải ngay bản đầy đủ của tài liệu tại đây (14.63 KB, 5 trang )
13.2 Create a Simple XML Web Service Using Parameters
I have seen how to create a Web Service using the sample that Microsoft provides. This
was instructive but not very useful. How do I create a Web Service that uses parameters?
Technique
For this How-To, you are going to create the start of a security Web Service. This
security Web Service is going to take in two parameters: Login Name and Password. It
will then check against a table that you will create of names, passwords, and security
levels.
The method you will create first will then pass back True or False if the name and
password are found.
Looking at the Security Table
The security table is included in the Web Service's Web folder. It is called
WebServiceSecurity.MDB and is, in fact, a jet database. You can see the table created,
tblUsers, in Figure 13.8.
Figure 13.8. Using the tblUsers, you can look up usernames and passwords
The method created for this first real example will take in the username and password
and then look up the username. If the username is found, the method will then compare
the password. If the password matches, then True will be returned from the method.
Otherwise, False will be returned.
Passing Parameters
You will pass parameters to Web Service methods just as you would to any other
methods or functions, as shown in the function header for the Web Service method
created in this How-To:
Public Function TestUser(ByVal strUserID As String, ByVal strPassword As String) As
Boolean
The return value is also assigned to the name of the function.
Specifying Descriptions for the Web Service and Methods
You can help developers who use your Web Service by adding descriptions to the Web
Service and each of the methods you create. This cuts down on the number of support
requests you get, and is a good habit to get into. For the Web Service, you will place it in
the WebService header, where you will want to specify your own namespace as well:
<WebService(Namespace:=" _
Description:="Testing of security routines.")> _
Public Class SecurityServices_
This causes the description specified to be displayed as the first line on the main test
page.
For the method, you will include the description in the Web Method header:
<WebMethod(Description:="This method takes a user ID and Password " & _
"and returns True or False based on if the User and Password exist.")>
Public Function TestUserPassword(ByVal strUserID As String, _
ByVal strPassWord As String) As Boolean
You can see what the lines of code look like in the designer in Figure 13.9.
Figure 13.9. Adding descriptions to the Web Service.
Now it's time to put it all together.
Steps
Open and run the SecurityWebService solution. From the main test page, click on the link
for the method TestUserPassword. You are presented with a page to input the user ID and
password (see Figure 13.10.) If you type FSBarker for the strUserID and test for the
strPassword, the value True is returned; otherwise, False is returned.
1. Create an ASP.NET Web service project, calling it SecurityWebService.
2. Highlight the default .asmx file created in the Solution Explorer, renaming it to
SecurityServices.asmx.
3. Click on the View Code button in the Solution Explorer. Change the WebService
at the top of the code to read as follows:
4. <WebService(Namespace:=" _
5. Description:="Testing of security routines.")> _
6. Public Class SecurityServices
7. Add the code in Listing 13.2 to the code of the Web Service. (Double-click on the
Web Service to bring up the code.) You could replace the commented out lines
that display for the Hello World Web method. This code starts off by specifying
the description for the Web Method and then declaring the function header for the
method called TestUserPassword. The parameters strUserID and strPassword are
passed, and a Boolean type value is returned. The rest of this routine should look
somewhat familiar because a DataAdapter object is created, and a DataTable
object is filled, based on the username that was passed in.
If a record is not found for the user, then False is passed back.
If a record is found and the password matches, then True is passed back. If the
password for the user does not match, then False is passed back.
Listing 13.2 SecurityServices.asmx.vb: Web Method to Validate Username
and Password
<WebMethod(Description:="This method takes a user ID and Password " & _
"and returns True or False based on if the User and Password exist.")>
Public Function TestUserPassword(ByVal strUserID As String, _
ByVal strPassword As String) As Boolean
Dim ocnn As New _
OleDb.OleDbConnection("Provider=Microsoft.Jet.OLEDB.4.0;" & _
"Data Source=E:\InetPub\wwwroot\SecurityWebService\" & _
"WebServiceSecurity.MDB")
Dim odaUsers As New _
OleDb.OleDbDataAdapter("Select * from tblUsers " & _
"Where UserID = '" &strUserID & "'", ocnn)
Dim dtUsers As New DataTable()
odaUsers.Fill(dtUsers)
If dtUsers.Rows.Count = 0 Then
TestUserPassword = False
ElseIf dtUsers.Rows(0).Item("Password") = strPassword Then
TestUserPassword = True
Else
TestUserPassword = False
End If
End Function
Note
If you have a problem with sharing rights on the database, you
might want to include "Mode=Share Deny None;" in your
connection string.
8. Press the Start button on the toolbar to test the service.
Figure 13.10. Testing a simple security Web Service.
Comments
When you are working in code for your Web Service, you can perform the majority of
tasks, including ADO.NET, that you can in ASP.NET, except for those depending on a
user interface (UI).
You have now seen how to specify parameters. Now check out the next How-To to see
how to consume, or use, your Web Service in an application.