Foundation Flash CS5 For Designers- P2
Bạn đang xem bản rút gọn của tài liệu. Xem và tải ngay bản đầy đủ của tài liệu tại đây (1.81 MB, 50 trang )
LEARNING THE FLASH CS5 PROFESSIONAL INTERFACE
29
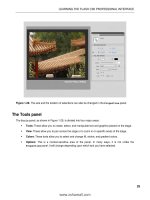
Figure 1-28. The size and the location of selections can also be changed in the Properties panel.
The Tools panel
The Tools panel, as shown in Figure 1-29, is divided into four major areas:
Tools: These allow you to create, select, and manipulate text and graphics placed on the stage.
View: These allow you to pan across the stage or to zoom in on specific areas of the stage.
Colors: These tools allow you to select and change fill, stroke, and gradient colors.
Options: This is a context-sensitive area of the panel. In many ways, it is not unlike the
Properties panel. It will change depending upon which tool you have selected.
www.zshareall.com
Please purchase PDF Split-Merge on www.verypdf.com to remove this watermark.
CHAPTER 1
30
Figure 1-29. The Tools panel
This book was purchased by
www.zshareall.com
Please purchase PDF Split-Merge on www.verypdf.com to remove this watermark.
LEARNING THE FLASH CS5 PROFESSIONAL INTERFACE
31
If there is a small down arrow in the bottom-right corner of a tool, this indicates additional tool options.
Click and hold that arrow, and the options will appear in a drop-down menu, as shown in Figure 1-30.
Figure 1-30. Some tools contain extra tools, which are shown in a drop-down list.
The Library panel
The Library panel is one of those features of the application that is so indispensable to Flash developers
and designers that we simply can’t think of anybody who doesn’t use it . . . religiously.
In very simple terms, it is the place where content, including video and audio, that is used in the movie is
stored for reuse later in the movie. It is also the place where symbols and copies of components that you
may use are automatically placed when the symbols are created or the components are added to the
stage.
Let’s wander over to the Library and take a look. If the Properties.fla file isn’t open, open it now.
Click the Library icon on the right side of the screen, or click the Library tab if the panel isn’t
collapsed. The Library will fly out, as shown in Figure 1-31. Inside the Library, you will see the
Summer Palace image is actually a library asset. Drag a copy of the image from the Library to the
stage. Leave it selected, and press the Delete key. Notice that the image on the stage disappears, but the
Library item is retained. This is an important concept. Items placed on the stage are, more often than
not, instances of the item and point directly to the original in the Library.
To collapse the Library panel, click the stage. Panels, opened from icons, are configured to collapse
automatically. If, for some reason, you want to turn off autocollapse, select Edit
➤
Preferences
(Windows) or (Flash
➤
Preferences) to open Preferences. Click General, and deselect Auto-
Collapse Icon Panels when the preferences open. Another way of opening and closing the Library
is to press Ctrl+L (Windows) or Cmd+L (Mac).
www.zshareall.com
Please purchase PDF Split-Merge on www.verypdf.com to remove this watermark.
CHAPTER 1
32
Figure 1-31. The Library panel
Using layers
The next stop on our walkabout is found under the stage: the layers feature of the timeline. There are a
few things you need to know regarding layers:
You can have as many layers in a Flash movie as you need. They have no effect upon the file
size.
Use layers to manage your movie. Flash movies are composed of objects, media, and code, and
it is a standard industry practice to give everything its own layer. This way, you can easily find
content on a crowded stage. In fact, any object that is tweened must be on its own layer.
Layers can be grouped. Layers can be placed inside a folder, which means you can, for example,
have a complex animation and have all the objects in the animation contained in their own layers
inside a folder.
www.zshareall.com
Please purchase PDF Split-Merge on www.verypdf.com to remove this watermark.
LEARNING THE FLASH CS5 PROFESSIONAL INTERFACE
33
Layers stack on top of each other. For example, you can have a layer with a box in it and another
with a ball in it. If the ball layer is above the box layer, the ball will appear to be above the box.
Name your layers. This is another standard industry practice that makes finding content in the
movie very easy.
Screen real estate is always at a premium. If you need to see more of the stage, double-
click the Timeline tab to collapse the layers. Double-click the Timeline tab again,
and the layers are brought back.
Layer properties
Layers can also be put to very specific uses, and this is accomplished by assigning one of five layer
properties, as shown in Figure 1-32, to a layer. Though they are called properties, they really should be
regarded more as layer modes than anything else. We will be covering these in great depth in Chapter 3
and Chapters 7 and 8, which focus on animation, but this is a good place to start learning where they are
and what they do. The modes, accessed by right-clicking (Windows) or Control+clicking (Mac) a layer
name and clicking Properties, are as follows:
Normal layer: This is the layer you have been working with to this point in the book. Objects on
these layers are always visible, and motion is more or less governed by the Motion Editor.
You can always identify a normal layer; its icon looks like a folded sheet of paper.
Mask layer: The shape of an object on a masking layer is used to hide anything outside the
shape and reveals only whatever is under the object. For example, place an image on the stage
and add a box in the layer above it. If that layer is a masking layer, only the pixels of the part of
the image directly under the box will be seen. The icon for a mask layer is a square with an oval
in the middle of it.
Masked layer: If you have a mask layer, you will also have one of these. Like Siamese twins,
mask layers and masked layers—any layer under a mask—are joined together. The icon for a
masked layer looks like a folded sheet of paper facing the opposite direction as the icon for a
normal layer. In addition, the layer name for a masked layer is indented.
Folder layer: The best way of thinking of this mode is as a folder containing layers. They also
provide quick access to layer groupings you may create. The icon for a folder layer is a file folder
with a twirlie. Click the twirlie, and the layers in the folder are revealed. Click the twirlie again, and
the layers collapse.
www.zshareall.com
Please purchase PDF Split-Merge on www.verypdf.com to remove this watermark.
CHAPTER 1
34
Guide layer: A guide layer contains shapes, symbols, images, and so on, that you can use to
align elements on other layers in a movie. These things are really handy if you have a complex
design and want a standard reference for the entire movie. What makes guide layers so important
is that they aren’t rendered when you publish the SWF. This means, for example, that you could
create a comprehensive design (or comp) of the Flash stage in either Fireworks CS5 or
Photoshop CS5, place that image in a guide layer, and not have to worry about an overly large
SWF being published and bloating the SWF with unnecessary file size and download time. The
icon for a guide layer is a T-square.
Figure 1-32. The Library panel
Flash Professional CS5, by default, omits layers that are hidden—we get into hiding
layers in a couple of minutes—when the SWF is eventually published. The result is a
reduction in the size of the SWF.
Creating layers
Let’s start using layers. Here’s how:
1.
Open the Layers.fla document. When it opens, you will see the garden and a couple of
butterflies, as shown in Figure 1- 33. If you look at the timeline, you could logically assume this is
a simple photograph sitting on a single layer named Garden.
2.
Open the Library. You will notice that there is an object named Butterfly contained in the
Library. That object is a movie clip. We’ll get into movie clips in a big way in Chapter 3.
www.zshareall.com
Please purchase PDF Split-Merge on www.verypdf.com to remove this watermark.
LEARNING THE FLASH CS5 PROFESSIONAL INTERFACE
35
Figure 1-33. We start with what appears to be a photograph of flowers and butterflies.
3.
Click the keyframe in the Garden layer. Three objects—the two Monarch butterflies and the
image—are selected. What you have just learned is how to select everything on a layer. Click the
pasteboard to deselect the objects.
4.
Each object should be placed on its own layer. Click the New Layer button—it looks like a page
with a turned-up corner—directly under the Garden layer strip. A new layer, named Layer1, is
added to the timeline.
5.
Select the Garden layer by clicking it, and add a new layer. Notice how the new
layer is placed between Garden and Layer 1. This should tell you that all new layers added to
the timeline are added directly above the currently selected layer. Obviously, Layer 2 is out of
position. Let’s fix that.
6.
Drag Layer 2 above Layer 1, and release the mouse. Now you know how to reorder layers
and move them around in the timeline. Layers can be dragged above or below each other.
7.
Add a new layer, Layer 3. Hold on—we have four layers and three objects. The math doesn’t
work. That new layer has to go.
8.
Select Layer 3, and click the Trash Can icon under the Garden strip. Layer 3 will now be
deleted, and now you know how to get rid of an extra layer.
www.zshareall.com
Please purchase PDF Split-Merge on www.verypdf.com to remove this watermark.
CHAPTER 1
36
9.
Double-click the Layer 1 layer name to select it. Rename the layer Butterfly. Now that you
know how to rename a layer, select File
➤
Revert to revert the file to its original state. It’s now
time to learn how to put content on layers.
Adding content to layers
Content can be added to layers in one of two ways:
Directly to the layer by moving an object from the Library to the layer
From one layer to another layer
Let’s explore how to use the two methods to place content into layers:
1.
Create a new layer, name it Butterfly01, and drag the Butterfly movie clip from the
Library to cover the flower, as shown in Figure 1-34, in the bottom-right corner of the stage.
The hollow dot in the layer will change to a solid dot to indicate that there is content in the frame.
When moving objects from the Library to the stage, be sure to select the layer, sometimes
called a target layer, before you drag and drop. This way, you can prevent the content from
going in the wrong layer. Let’s now turn our attention to getting the two other butterflies into their
own layers.
Figure 1-34. Objects can be dragged directly from the Library and added to specific layers.
www.zshareall.com
Please purchase PDF Split-Merge on www.verypdf.com to remove this watermark.
LEARNING THE FLASH CS5 PROFESSIONAL INTERFACE
37
2.
With the Shift key held down, click the two butterflies in the center and upper-left corner of the
stage. This will select them, and the blue box around each one indicates they are movie clips.
3.
Select Modify
➤
Timeline
➤
Distribute to Layers, or press Ctrl+Shift+D (Windows) or
Cmd+Shift+D (Mac). The butterflies will appear in the new Butterfly layers that appear under
the Garden layer. Rename these layers Butterfly02 and Butterfly03, and move them, as
shown in Figure 1-35, above the Butterly01 layer.
Figure 1-35. Multiple selections can be placed in their own layers using the Distribute to Layers
command.
The next technique is one that addresses a very common issue encountered by Flash designers: taking
content from one layer and placing it in the exact same position in another layer. This is an issue because
you can’t drag content from one layer to another.
1.
Click the Butterfly movie clip in the center of the stage, and press Ctrl+X (Windows) or
Cmd+X (Mac) to cut the selection out of the layer.
2.
With the layer still selected in the timeline, select Edit
➤
Paste in Place (see Figure 1-36). A
copy of the butterfly will appear in the precise location at which you cut it.
www.zshareall.com
Please purchase PDF Split-Merge on www.verypdf.com to remove this watermark.
CHAPTER 1
38
Figure 1-36. Paste in Place pastes objects in the precise location of the original object that was either
cut or copied to the clipboard.
Whatever happened to a simple paste command in the Edit menu? The Paste in
Center command replaces it. It has always been a fact of Flash life that any content on
the clipboard is pasted into the center of the stage. The name simply acknowledges this.
Showing/hiding and locking layers
We are sure the three icons—an eyeball, a lock, and a hollow square (shown in Figure 1-37)—above the
layers caught your attention. Let’s see what they do.
Figure 1-37. The Layer Visibility, Lock, and Show All Layers As Outlines icons. Note the
Pencil icon in the Butterfly02 layer, which tells you that you can add content to that layer.
www.zshareall.com
Please purchase PDF Split-Merge on www.verypdf.com to remove this watermark.
LEARNING THE FLASH CS5 PROFESSIONAL INTERFACE
39
Click the eyeball icon. Notice that everything on the stage disappears, and the dots under the eyeball in
each layer change to a red x. This eyeball is the Layer Visibility icon, and clicking it turns off the
visibility of all the content in the layers. Click the icon again, and everything reappears. This time, select
the Butterfly02 layer, and click the dot under the eyeball. Just the butterfly in the center of the stage
disappears. What this tells you is that you can turn off the visibility for a specific layer by clicking the dot in
the visibility column.
When you click a layer, you may notice that a pencil icon appears on the layer strip. This tells you that you
can add content to the layer. Click the Butterfly02 layer, and you’ll see the pencil icon. Now, click the
dot under the lock in the Butterfly02 layer. The lock icon will replace the dot. When you lock a layer,
you can’t draw on it or add content to it. You can see this because the pencil has a stroke through it. If you
try to drag the Butterfly movie clip from the Library to the Butterfly02 layer, you will also see that
the layer has been locked because the mouse pointer changes from a tan arrow to a circle with a line
through it. Also, if you try to click the butterfly on the stage, you won’t be able to select it. This is handy to
know in situations where precision is paramount and you don’t want to accidentally move something or,
god forbid, delete something from the stage.
OK, we sort of “stretched the truth” there by telling you that content can’t be added to a
locked layer. ActionScript is the only thing that can be added to a locked layer. This
explains why many Flash designers and developers create an ActionScript-only layer—
usually named scripts or actions—and then lock the layer. This prevents anything
other than code from being placed in the layer.
The final icon is the Show All Layers As Outlines icon. Click it, and the content on the stage turns
into outlines. This is somewhat akin to the wireframe display mode available in many 3D modeling
applications. In Flash, it can be useful in cases where dozens of objects overlap and you simply want a
quick “X-ray view” of how your content is arranged. With animation, in particular, it can be helpful to
evaluate the motion of objects without having to consider the distraction of color and shading. Like visibility
and locking, the outlines icon is also available on a per-layer basis.
You can change the color used for the outline in a layer by double-clicking the color chip
in the layer strip. This will open the Layer Properties dialog box. Double-click the
color chip in dialog box to open the Color Picker; then click a color, and that color will be
used.
www.zshareall.com
Please purchase PDF Split-Merge on www.verypdf.com to remove this watermark.
CHAPTER 1
40
Grouping layers
You can also group layers using folders. Here’s how:
1.
Click the Folder icon in the Layers panel. A new unnamed folder—Folder 1—will appear on
the timeline. You can rename a folder by double-clicking its name and entering a new name.
2.
Drag the three Butterfly layers into the folder. As each one is placed in the folder, notice how
the name indents. This tells you that the layer is in a folder.
3.
Next, remove the layers from the folder. To do so, simply drag the layer above the folder on the
timeline. You can also drag it to the left to unindent it.
4.
To delete a folder, select it, and click the Trash Can icon.
Step away from the mouse, and put your hands where we can see them. Don’t think you
can simply select a folder and click the Trash Can icon to remove it. Make sure that
the folder is empty. If you delete a folder that contains layers, those layers will also be
deleted. If this happens to you, Adobe has sent a life raft in your direction. An alert box
telling you that you will also be deleting the layers in the folder will appear. Click Cancel
instead of OK.
Where to get help
In the early days of desktop computing, software was a major purchase, and nothing made you feel more
comfortable than the manuals that were tucked into the box. If you had a problem, you opened the manual
and searched for the solution. Those days have long passed. This is especially true with Flash, because
as its complexity has grown, the size of the manuals that would need to be packaged with the application
would also need to have grown. In this version of Flash, the user manuals are found in the Help menu.
Here’s how to access Help:
1.
Select Help
➤
Flash Help, or press the F1 key. The Help panel that opens (see Figure 1-38)
is one of the most comprehensive sources of Flash knowledge on the planet; best of all, it’s free.
The Help panel is driven by an Adobe AIR application—Adobe Help—that is installed when you
install the CS5 applications. The Help menu is more generically known as Adobe Community
Help.
The panel is divided into two areas. On the left side you can enter your criteria for very specific
topics and choose to have the result drawn from Adobe Help on your computer—Local—or from
a variety of web sources, Online. The right side of the window allows you to choose a more
general topic.
This book was purchased by
www.zshareall.com
Please purchase PDF Split-Merge on www.verypdf.com to remove this watermark.
LEARNING THE FLASH CS5 PROFESSIONAL INTERFACE
41
Figure 1-38. The Flash Help panel is extensive.
2.
Click the What’s new in Adobe Flash professional link to open it. As you can see,
the Help topics are actually collections of individual documents designed to help you learn what
you need to know, along with practical examples of specific techniques.
3.
To go to a specific topic, just type the word into the text input box at the top of the interface, and
click the Search button. For example, enter video into this area, and press the Return (Enter)
key. The results are presented directly under your search criteria.
4.
Click the first link, Create video for use in Flash, and the right pane will fill with the
selected page (as shown in Figure 1-39).
www.zshareall.com
Please purchase PDF Split-Merge on www.verypdf.com to remove this watermark.
CHAPTER 1
42
Figure 1-39. Searching a term in the Flash Help documents
So much for the walkabout. It is time for you to put into practice what you have learned.
Your turn: building a Flash movie
In this exercise, you are going to expand on your knowledge. We have shown you where many of the
interface features can be found and how they can be used, so we are now going to give you the
opportunity to see how all these features combine to create a Flash movie.
You will be undertaking such tasks as the following:
Using the Properties panel to precisely position and resize objects on the stage
Creating layers and adding content from the Library to the layers
Using the drawing tools to create a shape
Creating a simple animation through the use of a tween
Saving a Flash movie
Testing a Flash movie
www.zshareall.com
Please purchase PDF Split-Merge on www.verypdf.com to remove this watermark.
LEARNING THE FLASH CS5 PROFESSIONAL INTERFACE
43
By the end of this exercise, you will have a fairly good understanding of how a Flash movie is assembled
and the workflow involved in the process.
1.
Open the Garden.fla file.
2.
When the file opens, if it isn’t already open, open the Library by selecting Window
➤
Library
or pressing Ctrl+L (Windows) or Cmd+L (Mac). As you can see in Figure 1-40, you are starting
with a background image and a few movie clips.
Figure 1-40. The assets are in place. It is your job to turn them into a movie.
3.
The Library is still a bit messy. Let’s do a little tidying. Click the New Folder icon—it looks like
a file folder—at the bottom of the Library panel. A new, untitled folder will appear in the
Library. Double-click the folder name, not the icon, to select the name. Change the folder’s
name to MovieClips.
4.
Drag all the movie clips—the blue files with the “gear” in the upper-right corner of the icon—into
the new folder. A movie clip is an animation with its own timeline. We get into that topic in
Chapter 3.
5.
Create a new folder, and name it Audio.
www.zshareall.com
Please purchase PDF Split-Merge on www.verypdf.com to remove this watermark.
CHAPTER 1
44
6.
Let’s bring the audio file for this movie into the Library. To start, select File
➤
Import
➤
Import to Library. Navigate to this chapter’s Exercise folder, and select the
FliesBuzzing.mp3 file, as shown in Figure 1-41. Click the Import to Library button, and
when the file appears in the Library, move it to the Audio folder.
Figure 1-41. Importing a file to the Library
Though you are given the choice of importing content into the timeline or the Library,
it is considered a best practice in Flash to import everything directly into the Library.
The only file without the option of importing its content to the stage is an audio file.
With the assets in place, we can now turn our attention to the project.
The plan is to have a fly merrily buzz through the flowers and around the butterflies in the garden. The key
words are buzz and through. “Buzz” indicates there is an audio file, and you have brought that into the
Library. You will be adding that file to the project near the end of the process.
The “through” part may at first appear to be a no-brainer. Of course, a fly is going to buzz through the
flowers in the image. No, it isn’t. As the movie is currently set up, the fly will buzz above the flat image of
the flowers on the stage. It won’t go behind the flowers and butterflies because it can’t. What this should
tell you is that we are going to create the illusion of depth by using the layers in the Flash timeline and
creating a butterfly and some flowers for the fly to fly behind.
www.zshareall.com
Please purchase PDF Split-Merge on www.verypdf.com to remove this watermark.
LEARNING THE FLASH CS5 PROFESSIONAL INTERFACE
45
To accomplish this, we need to first create the butterfly by using movie clips inside a movie clip to create
an object. That, of course, was a mouthful, and there is a term for it: nesting. Here’s how to create a
nested movie clip.
Nesting movie clips
Before we start, it is important for you to know we are not going to get into a long discussion on the subject
of movie clips, animation, and so on. We are saving those discussions for Chapters 3 and 7. What we
want to do here is to get you used to working with the interface, so to start, let’s build a butterfly.
1.
With the Library panel open, click the New Symbol button—the turned-up piece of paper—at
the bottom of the Library panel. The Create New Symbol dialog box shown in Figure 1-42
will open.
2.
Select the text in the Name area, and enter the word Butterfly. Select Movie Clip from the
Type drop-down menu. Click OK. The dialog box will close, and what looks like a blank stage will
open.
Figure 1-42. Creating a new Flash symbol
The blank stage you are looking at is called the Symbol Editor. If you look at the top-left corner of the
interface, you will see buttons for Scene 1 and Butterfly. The last symbol you see is the one currently
open. In many respects, these are breadcrumbs that enable you to follow your path back to the main
timeline, which is always Scene 1. The + sign you see in the center of the stage is actually the upper-left
corner of the main stage in your Flash movie.
3.
Select Layer 1, and add two more layers. Starting with the bottom layer, name the layers
Body, RightWing, and Leftwing.
4.
Select the LeftWing layer, open the MovieClips folder in the Library, and drag the WingL
movie clip to the selected layer.
5.
Select the RightWing layer, and drag the WingR movie clip to the stage. These last two steps
did exactly the same thing; they put something on the stage in a specific layer. Use whichever
technique works for you.
6.
Select the Body layer, and drag the Body movie clip to the stage. You have just placed (nested)
three movie clips by placing them on separate layers (Figure 1-43) inside a single movie clip.
Let’s get the Butterfly assembled.
www.zshareall.com
Please purchase PDF Split-Merge on www.verypdf.com to remove this watermark.
CHAPTER 1
46
Figure 1-43. Nesting is the practice of placing symbols within other symbols.
7.
Select the WingL movie clip on the stage, and open the Properties panel. Twirl down the
Position and Size strip, and set the X and Y positions for the selection to 0,0, as shown in
Figure 1-44.
Figure 1-44. Use the hot text feature to accurately position selections on the stage.
www.zshareall.com
Please purchase PDF Split-Merge on www.verypdf.com to remove this watermark.
LEARNING THE FLASH CS5 PROFESSIONAL INTERFACE
47
8.
Click the Body movie clip, and drag it into position against the right edge of the left wing. Drag the
right wing to the right edge of the Body movie clip, as shown in Figure 1-45.
9.
Click the Scene 1 link to save the Butterfly movie clip and to return to the main timeline.
Here’s a little “teacher trick” you might find useful. Use the Magnifying Glass tool to
zoom in on an object like the butterfly, as shown in Figure 1-45. Then select an object,
and use the arrow keys on your keyboard to nudge the selected object into place.
Figure 1-45. The butterfly you will be using in the movie has been assembled.
Drawing the fly
Having discovered how to create a movie clip using existing objects, let’s now create one from “scratch.”
We need a fly to buzz through the garden, and if you poke through the MovieClips folder in the Library,
you will notice the fly is missing.
Before we start, we aren’t going to ask you to draw a fly or create a cartoon version of one. Instead, you
are going to create a shape that is somewhat “flylike” and have it buzz through the flowers. Follow these
steps to create the fly:
1.
Select Insert
➤
New Symbol, or press the Ctrl+F8 (Windows) or Cmd+F8 (Mac) keys to open
the Create New Symbol dialog box. In the previous exercise, you used the New Symbol
button in the Library to create a new symbol. This is another method of creating a symbol.
Which is best? Who cares? Use what works for you.
2.
Name the symbol Fly, and select Movie Clip as its Type. Click OK to open the Symbol
Editor.
3.
When the Symbol Editor opens, select 400% from the Zoom drop-down menu. This lets you
create a rather small object but still be able to see what you are doing.
4.
Select the Pencil tool, and in the Stroke color area of the Tools, select Black as the stroke
color. Draw a shape that looks somewhat flylike.
www.zshareall.com
Please purchase PDF Split-Merge on www.verypdf.com to remove this watermark.
CHAPTER 1
48
5.
In the tools, set Fill Color to Black. Select the Paint Bucket tool, and click once inside
your shape to fill it (Figure 1-46) with black.
6.
Click the Scene 1 link to return to the main timeline. When the main timeline appears, put your
Fly movie clip into the MovieClips folder in the Library.
Figure 1-46. The fly shape is filled with a color using the Paint Bucket tool.
Creating the illusion of depth with Flash
If you spend any time creating Flash movies, you will inevitably be asked, “How did you do that?” Though
you can give a long explanation of how you created the movie to develop the technique, the short answer
is always, “Magic!”
In this exercise, the “magic” involves manipulating a flat space in such a way that the “illusion” of depth is
created. This illusion can be created in a few ways:
Use layers to your advantage: Objects in layers are either above or below the objects contained
in the layers above them or below them.
A Blur filter can be used to show depth: Use blurs to provide depth of field much like you do
with your camera.
The z-axis can be used as the depth axis: Objects on the Flash stage can be moved or
positioned either up and down (y-axis), to the left or right (x-axis), or closer or farther away (z-
axis).
Tweens are great for creating depth: Resizing objects over time can create the illusion of
objects receding into the distance or moving toward the viewer.
In this part of the exercise, we are going to use all four methods to create depth. Let’s start this process by
using the first one: layers. Here’s how:
www.zshareall.com
Please purchase PDF Split-Merge on www.verypdf.com to remove this watermark.

