Microsoft Office 2010 Product Guide part 4
Bạn đang xem bản rút gọn của tài liệu. Xem và tải ngay bản đầy đủ của tài liệu tại đây (800.99 KB, 10 trang )
Page 33 of 188
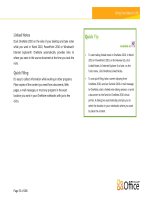
Linked Notes
Dock OneNote 2010 on the side of your desktop and take notes
while you work in Word 2010, PowerPoint 2010 or Windows®
Internet Explorer®. OneNote automatically provides links to
where you were in the source document at the time you took the
note.
Quick Filing
It’s easy to collect information while working in other programs.
Place copies of the content you need from documents, Web
pages, e-mail messages, or most any program in the exact
location you want in your OneNote notebooks with just a few
clicks.
Available in:
To start taking linked notes in OneNote 2010, in Word
2010 or PowerPoint 2010, on the Review tab, click
Linked Notes. In Internet Explorer 6 or later, on the
Tools menu, click OneNote Linked Notes.
To use quick filing, take a screen clipping from
OneNote 2010, send an Outlook 2010 e-mail message
to OneNote, start a linked note-taking session, or print
a document to the Send to OneNote 2010 virtual
printer. A dialog box automatically prompts you to
select the location in your notebooks where you want
to place the content.
Page 34 of 188
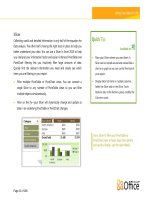
Stay on top of your document content—more easily than ever.
Long documents come in many forms—from annual reports to
legal briefs, term papers, and personal manuscripts. But, all of
these documents have one important thing in common: you
need quick and easy ways to access and manage your content.
Fortunately, the improved Navigation Pane in Word 2010
(formerly called the Document Map) integrates enhanced Find
tools and seamlessly transforms the experience of navigating and
organizing your document.
Browse headings to quickly find the place you need within a
document and then click to instantly move to that location.
Available in:
Using the search tools in the centralized Navigation
Pane, you can also browse the document by object
type—including graphics, tables, equations, footnotes,
endnotes, and comments. Or, access the familiar Find
dialog box for more advanced searches or Find and
Replace tasks. Click the arrow in the Search box for all
of these options and more.
Page 35 of 188
Drag and drop headings in the improved Navigation Pane to quickly rearrange document content.
Page 36 of 188
Get a quick preview of all search matches in the new results view of the Navigation Pane. Click any result preview to jump to that
point in the document.
See automatic highlighting of all search hits in the document. Headings are also highlighted in the Navigation Pane wherever
search results occur.
The improved Find tools,
integrated into the
Navigation pane, include
the new search results
pane.
Page 37 of 188
Work without the worry of wasted time.
Nothing is more frustrating than losing the work that you put
so much time and effort into creating. But we’ve all done it.
You work for a while, get the content just right, and then
close the document without saving. Maybe you missed the
prompt or you were distracted while closing the file.
Regardless, the result is the same—your work and the time
you spent to create it have been lost. Well, not anymore!
Expanding on the AutoRecover capabilities that you may
know from earlier versions of Microsoft Office, you can now
recover versions of files that you close without saving.
Access up to the last five autosave versions of your
previously saved active document. If you save and close
your document, all autosave versions are automatically
deleted. If you close a previously saved document without
saving, your last autosave version is kept until your next
editing session.
Available in:
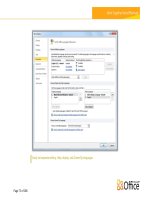
Access these features from Backstage view. Recover unsaved
files on the Info tab, under the Manage Versions button.
Available autosave versions of previously saved documents
appear automatically on the Info tab, under the Versions
heading.
Recovering available unsaved documents and autosave
versions requires that you elect to save AutoRecover
information. To keep an autosave version until your next
editing session you must also elect to keep the last
autosaved version when you close without saving. To access
these options, in Backstage view click Options and then click
Save.
Recover unsaved versions of files that were never previously saved. Unsaved files are saved for four days before they are
automatically deleted.