Tài liệu Natural First Aid ppt
Bạn đang xem bản rút gọn của tài liệu. Xem và tải ngay bản đầy đủ của tài liệu tại đây (798.54 KB, 171 trang )
Page i
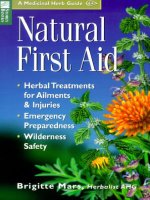
Natural First Aid
• Herbal Treatments for Ailments & Injuries
• Emergency Preparedness
• Wilderness Safety
A Medicinal Herb Guide
Brigitte Mars, Herbalist AHG
Page ii
The mission of Storey Communications is to serve our customers by publishing practical information that encourages
personal independence in harmony with the environment.
This book is intended to educate and expand one's concepts of how to deal
with a crisis. It is not intended to take the place of courses in first aid or to
replace medical care when needed.
Edited by Deborah Balmuth and Nancy Ringer
Cover design by Meredith Maker
Cover art production and text design by Betty Kodela
Text production by Susan Bernier
Illustrations by Alison Kolesar, except on pages iv, vi, 1, 3, and 20 by Sarah Brill; pages 93 and 117 by Beverly
Duncan; page 128 by Mallory Lake; and page 131 by Charles Joslin
Indexed by Susan Olason, Indexes & Knowledge Maps
Professional assistance by Roseanna Rich
Copyright © 1999 by Brigitte Mars
All rights reserved. No part of this book may be reproduced without written permission from the publisher, except by
a reviewer who may quote brief passages or reproduce illustrations in a review with appropriate credits; nor may any
part of this book be reproduced, stored in a retrieval system, or transmitted in any form or by any means — electronic,
mechanical, photocopying, recording, or other — without written permission from the publisher.
The information in this book is true and complete to the best of our knowledge. All recommendations are made
without guarantee on the part of the author or Storey Books. The author and publisher disclaim any liability in
connection with the use of this information. For additional information please contact Storey Books, Schoolhouse
Road, Pownal, Vermont 05261.
Storey Books are available for special premium and promotional uses and for customized editions. For further
information, please call Storey's Custom Publishing Department at 1-800-793-9396.
Printed in the United States by R.R. Donnelley
10 9 8 7 6 5 4 3 2 1
Library of Congress Cataloging-in-Publication Data
Mars, Brigitte.
Natural first aid / Brigitte Mars.
p. cm.—(A medicinal herb guide)
Includes index.
ISBN 1-58017-147-8 (pbk. : alk. paper)
1. First aid in illness and injury Handbooks, manuals, etc. 2. Herbs — Therapeutic use
Handbooks, manuals, etc. 3. Naturopathy Handbooks, manuals, etc. I. Title. II. Series.
RC86.8 .M3875 1999
616.02´52—dc21 99-32307
CIP
Page iii
EMERGENCY NUMBERS
Fire _________________________________________
Gas Company/Public Service _____________________
Phone Company _______________________________
Police _______________________________________
Poison Control ________________________________
Your Address and Phone Number
____________________________________________
____________________________________________
____________________________________________
____________________________________________
Page iv
Dedicated to my parents,
Rita and Morton Smookler
Page v
Contents
Acknowledgments vi
Introduction 1
1
First-Aid Techniques Everyone Should Know: A Step-by-Step
Illustrated Guide
3
CPR 3
The Heimlich Maneuver 11
Bandaging Limbs 16
Immobilization: Applying Splints and Slings 16
The Recovery Position 18
Moving the Injured 18
Using Homeopathic Medicines 19
2
An A–Z Guide to Ailments and Injuries
20
3
Surviving Nature's Challenges: Tips and Techniques for Emergencies
93
4
Stocking a First-Aid Kit
117
5
How to Make and Use Herbal Medicines
128
Index 132
Page vi
Acknowledgments
A special thank you to Dr. Charles Tawa of Boulder Family Practice for his extensive knowledge of emergency
medical and health care; Lorene Wapotich, herbalist, for her expertise as a wilderness emergency technician; Flame
Dineen, registered midwife, for sharing her expertise; and Matthew Becker, herbalist extraordinaire.
Page 1
Introduction
Stay calm. Move quickly. Know what to do. Those three rules are the foundation of natural first aid. They can mean
the difference between life and death, injury and disability, a night in the hospital and a life in a nursing home.
Unfortunately, even though most of us can generally manage to stay calm and move fast during a crisis, few of us
really know what to do in an emergency or when an accident occurs. Even fewer know when and how to use the
herbs and other home remedies that can heal.
That's why this book was written. It contains all the techniques you need to render emergency first aid, specific
instructions for over 75 injuries and conditions, and clear indications for when medical help is needed. There is also a
complete list of the ingredients you'll need to stock three different first-aid kits: an herbal kit to stay at home, a
survival kit to keep in your car, and a traveling kit to tuck in your handbag or briefcase as you go about your life.
With this book, you'll always be prepared. Memorize its lifesaving techniques. Learn its commonsense healing. Then
supplement this knowledge by taking a first-aid and CPR course at your local Red Cross. And remember: This book is
intended not as a replacement for competent medical care when it is needed, but as a guide for appropriate action until
help can be obtained.
Page 2
In an emergency, call for help as soon as possible. Ask the injured person if he or she has any allergies, is on any
medication, or suffers from any medical conditions so that you can relay this information to medical personnel should
the victim lose consciousness. If the victim is unconscious, check for medical alert bracelets. Never give food or water
to an unconscious person as they may choke. And never move a person with serious injuries, especially those
affecting the neck or spine. Your efforts, well meaning though they may be, could cause serious damage.
One final note: Preventing accidents and injuries is always easier than responding to them. That's why I not only keep
medicines out of children's reach and in-line skates off the stairs, but also why I often visualize surrounding myself
and my loved ones with an aura of light as we go off into the busy world. It's a form of prayer and my way of
acknowledging and asking for divine protection. I firmly believe it has helped save my family from danger—and I
urge you to use it, too.
Many blessings!
Page 3
1—
First-Aid Techniques Everyone Should Know:
A Step-by-Step Illustrated Guide
While learning first aid might seem a daunting task, there are really only a handful of simple techniques that everyone
should be familiar with. These techniques form the basis of almost all first-aid treatments and will prove invaluable if
you're someday faced with an emergency situation. Although a book is a good place to start, it's always best to get
instruction from a qualified health care provider before trying any of these techniques. In addition, always remember
the the most important rule of medicine: First, do no harm.
The following sections on CPR and the Heimlich maneuver come straight from the American Heart Association
(AHA). I strongly recommend that you contact your local chapter of the AHA to find out more about training and
certification in these lifesaving techniques in your area.
Cardiopulmonary Resuscitation (CPR)
CPR is performed when someone's breathing or pulse (or both) stops. When both stop, sudden death has occurred.
Sudden death has many possible causes—poisoning, drowning, choking, suffocation, electrocution, smoke inhalation
—but the most common is heart attack.
Everyone should know the signals of heart attack and the actions for survival. They should also have a plan for
emergency action.
Page 4
Warning Signs
The warning signs of a heart attack are:
• Uncomfortable pressure, fullness, squeezing, or pain in the center of the chest that lasts more than a few minutes.
• Pain spreading to the shoulders, neck, or arms.
• Chest discomfort with lightheadedness, fainting, sweating, nausea, or shortness of breath.
Not all these signs occur in every heart attack. If some start to occur, don't wait. Get help fast.
Actions for Survival
• Recognize the signals.
• Stop whatever you're doing and sit or lie down.
• If the signals last more than a few minutes, call the local emergency number. (Usually it's 911.) If that's not possible,
take the victim to the nearest hospital emergency room with emergency cardiac care.
Since incorrect chest compressions can cause internal injuries, CPR should be performed only by someone who has
taken a professional course. CPR requires training, practice, and skill. This information is presented for the purpose of
review for one who is trained. Keep in mind that anyone who performs CPR should pull on a pair of latex gloves if
they're available.
To determine if a person is breathing, place your ear against their mouth or nose: Can you hear them exhale? Place
your head or hand on their chest: Does the chest rise and fall?
Caution
Never practice CPR on a healthy person—it can
be harmful.
Seek immediate medical attention if:
• the victim is not breathing
• breathing is noisy
• froth appears around the lips or nose
• a bluish color appears around the lips and ears
Text on CPR © American Heart Association. Reproduced with permission. American Heart Association World Wide Web, 1999:
www.americanheart.org
.
Page 5
The ABC's of CPR
CPR is a procedure that's as simple as Airway, Breathing, and Circulation. First, assess the victim. Try to get a
response from the person. Shake them gently, while calling, ''Are you okay?" If the person isn't responsive, activate
the emergency medical system (911 or local number). Then begin the ABC's: Airway, Breathing, and Circulation.
Continue CPR without stopping until advanced life support is available.
Assessment and Activation
If you find an adult who has collapsed, find out if he or she is unresponsive by gently
shaking a shoulder and shouting "Are you all right?" If the person doesn't respond,
shout for help. If a helper is available, send that person to call your emergency medical
service (911 or other local number). If no help is available, make the call yourself.
Airway
To open the airway, gently lift the chin with one hand while pushing down on the forehead with your other hand. You
want to tilt the head back. Once the airway is open, lean over and put your ear close to the victim's mouth.
• Look at the chest for movement.
• Listen for the sound of breathing.
• Feel for breath on your cheek.
If the victim is breathing, roll the person onto his or her side as a unit (the recovery position—see page 18). If none of
these signs is present, the person isn't breathing. If opening the airway doesn't cause the person to spontaneously start
breathing, you'll have to provide rescue breathing.
Airway: Open the airway and check for breathing.
Text on CPR © American Heart Association. Reproduced with permission. American Heart Association World Wide Web, 1999:
www.americanheart.org
.
Page 6
Breathing
The best way to give rescue breathing is by using the mouth-to-mouth technique:
1. Using the thumb and forefinger of your hand that's on the victim's forehead, pinch the person's nose shut. Be sure to
keep the heel of your hand in place so the person's head remains tilted. Keep your other hand under the person's chin,
lifting up.
2. As you keep an air-tight seal with your mouth on the victim's mouth, immediately give two full breaths.
Breathing: Give mouth-to-mouth rescue breathing.
Circulation
After giving two full breaths, find the person's carotid artery pulse to see if the heart is still beating. To find the carotid
artery pulse, take your hand that's lifting the chin and find the person's Adam's apple (voice box). Slide the tips of
your fingers down the groove beside the Adam's apple and feel for the pulse.
If you can't find the pulse, in addition to rescue breathing, you'll have to provide artificial circulation.
Circulation: Check for signs of a pulse.
Text on CPR © American Heart Association. Reproduced with permission. American Heart Association World Wide Web, 1999:
www.americanheart.org
.
Page 7
External Chest Compression
External chest compressions provide artificial circulation. When you apply rhythmic pressure on the lower half of the
victim's breastbone, you force the heart to pump blood.
To do external chest compression properly, kneel beside the victim's chest. With the middle and index fingers of your
hand nearest the person's legs, find the notch where the bottom rims of the two halves of the rib cages meet in the
middle of the chest. Now put the heel of one hand on the sternum (breastbone) next to the fingers that found the
notch. Put your other hand on top of the hand that's in position. Be sure to keep your fingers up off the chest wall. It
may be easier to do this if you interlock your fingers.
Bring your shoulders directly over the victim's sternum and press down, keeping your arms straight. If the victim is an
adult, depress the sternum about 1 1/2 to 2 inches (3.8 to 5 cm). Then completely relax the pressure on the sternum.
Don't remove your hands from the victim's sternum, but do let the chest rise to its normal position between
compressions. Relaxation and compression should take equal amounts of time.
If the individual shows no signs of breathing or a pulse,
begin external chest compressions.
Text on CPR © American Heart Association. Reproduced with permission. American Heart Association World Wide Web, 1999:
www.americanheart.org
.
Page 8
If you must give both rescue breathing and external chest compressions, the proper rate is 15 chest compressions to 2
breaths. You must compress at a rate of 80 to 100 times per minute.
If You Suspect a Neck Injury
If you suspect that the victim may have a neck injury (such as might occur in a diving or automobile accident, for
example), you must open the airway differently, using a chin-lift without tilting the head. If the airway stays blocked,
tilt the head slowly and gently until the airway is open.
If you suspect a neck injury, try to open
the airway without tilting the head.
CPR for Infants and Children
Cardiopulmonary resuscitation for infants (birth to 1 year) and children (1 to 8 years) is similar to that for adults, but
there are a few important differences. They're given below.
Airway
Be careful when handling an infant. Don't tilt the head back too far. An infant's neck bends so easily that if the head is
tilted back too far, the breathing passages may be blocked instead of opened.
Breathing
If an infant isn't breathing, don't try to pinch the nose shut. Cover both the mouth and nose with your mouth and
breathe slowly (1.0 to 1.5 seconds per breath). Use enough volume and pressure to make the chest rise.
With a small child, pinch the nose, cover the mouth, and breathe the same as for an infant.
Text on CPR © American Heart Association. Reproduced with permission. American Heart Association World Wide Web, 1999:
www.americanheart.org
.
Page 9
Circulation
Check pulse. In an infant, check for a pulse by feeling on the inside of the upper arm midway between the elbow and
the shoulder. Check for the pulse in a small child the same way you would in an adult.
Assessment and Activation
If you don't get a response from an infant or child, send someone to call your local
emergency medical service (usually 911) and begin CPR. If you're alone, do one
minute of CPR before leaving to call 911. Return to the victim and continue CPR until
help (EMS) anives.
Chest compressions. In infants and small children, use only one hand for compression. You can slip your other hand
under the back of an infant to give firm support.
For infants, use only the tips of the middle and ring fingers to compress the chest at the sternum. A summary of
information is given in the table below. Depress the sternum between 1/2 to 1 inch at a rate of at least 100 times a
minute.
For small children, use only the heel of one hand (see table for position). Depress the sternum between 1 and 1 1/2
inches, depending on the child's size. The rate should be 80 to 100 times a minute.
In the case of both infants and small children, give breaths during a pause after every fifth chest compression.
CPR for children over 8 years old is the same as for adults.
CPR FOR CHILDREN
AGE PART OF HAND HAND POSITION DEPRESS
STERNUM
RATE OF
COMPRESSION
Infant (birth to
1 year)
Tips of middle and
ring fingers
One finger's width
below line between
nipples (be sure not
to depress the tip of
the sternum)
1/2 to 1 inch (1.3 to
2.5 cm)
5 compressions to 1
full breath; at least
100 compressions per
minute
Child (1 to 8
years)
Heel of hand Sternum (same as
adults)
1 to 1/2 inches (2.5
to 3.8 cm)
5 compressions to 1
full breath; 80 to 100
compressions per
minute
Text on CPR © American Heart Association. Reproduced with permission. American Heart Association World Wide Web, 1999:
www.americanheart.org
.
Page 10
Remember
Airway: Is the victim unresponsive? If so, shout for help, position the child, and open the airway.
Breathing: Check for breathing. If there's no breathing, give 2 full breaths. Look for chest rise, listen for sounds of
breathing, feel for breath on your cheek
Circulation: If the victim still isn't breathing, attempt to check the carotid pulse for a few seconds. If there's no pulse
or you can't locate the pulse and the child is still unresponsive, begin 1 minute of CPR. Then leave to activate the
local EMS system or send someone else to activate the local emergency number while you perform CPR. Continue to
do CPR until help (EMS) arrives.
Alternate compressions and rescue breathing at the proper ratio.
• For adults and children over 8 years old the ratio is 15 compressions to 2 full breaths at a rate of 80 to 100
compressions per minute.
• For children 1 to 8 years old the proper ratio is 5 compressions to 1 full breath at a rate of 80 to 100 compressions
per minute.
• For infants the proper ratio is 5 compressions to 1 full breath at a rate of at least 100 compressions per minute.
Periodic practice in CPR is essential to keep your skills at the level they need to be. Someone's life may depend on
how well you remember—and apply—the steps in CPR. Have your CPR skills and knowledge tested at least once a
year. It could enable you to save a life.
Waiting for Help
If an individual doesn't regain consciousness, keep CPR going for at least an hour
whether it's a child or an adult. In a group, take turns. Don't stop until medical help
arrives.
Text on CPR © American Heart Association. Reproduced with permission. American Heart Association World Wide Web, 1999:
www.americanheart.org
.
Page 11
The Heimlich Maneuver
The Heimlich maneuver is used to aid an individual who is choking. In effect, the under-the-diaphragm series of
thrusts forces enough air from the lungs to artificially create a cough, which is intended to move or expel a foreign
object that is obstructing the victim's breathing. After performing the Heimlich maneuver, have the victim examined
by a medical professional.
The technique should only be performed when the victim's airway is completely obstructed by a foreign object. The
Heimlich maneuver is not recommended if he or she can cough or speak. So before beginning, encourage the person
who is choking to cough. Besides, this may be enough to dislodge any blockage.
Tip
The universal sign for choking is clutching the
throat.
If the victim is having trouble coughing or breathing, however, ask if he is choking:
• If he can cough or speak, let him try to expel the blockage on his own.
• If he can't cough but is breathing, his airway is only partially obstructed. Arrange for immediate transport to an
emergency medical facility to remove the blockage.
• If he cannot speak or cough, his airway is obstructed. Get someone to call for medical help while you perform the
lifesaving Heimlich maneuver.
An Illustrated Guide to the Heimlich Maneuver
If the victim is conscious:
1. Ask, "Are you choking?" If the victim can speak, cough, or breathe, do not interfere.
Text on Heimlich maneuver © American Heart Association. Reproduced with permission. American Heart Association World Wide
Web, 1999: www.americanheart.org
.
Page 12
2. If the victim cannot speak, cough, or breathe, give abdominal thrusts (the Heimlich maneuver) until the foreign
object is expelled or the victim becomes unconscious.
Note: If the victim is extremely obese or in the late stages of pregnancy, give chest thrusts.
Abdominal thrusts
Chest thrusts
3. Be persistent. Continue uninterrupted until the obstruction is relieved or advanced life support is available. In either
case the victim should be examined by a physician as soon as possible.
If the victim becomes unconscious:
4. Activate the emergency medical system (911 or local number).
5. Perform a tongue-jaw lift followed by a finger sweep to try to remove the foreign object.
Tongue-jaw lift
Finger sweep
Text on Heimlich maneuver © American Heart Association. Reproduced with permission. American Heart Association World Wide
Web, 1999: www.americanheart.org
.
Page 13
6. Open the airway and try to give 2 slow rescue breaths. If unsuccessful, reposition the head and try again.
Rescue breathing
7. If unsuccessful, give up to 5 abdominal thrusts (the Heimlich maneuver).
Abdominal thrusts
8. Repeat steps 5 through 7 until effective. If the victim resumes effective breathing, place in the recovery position.
Text on Heimlich maneuver © American Heart Association. Reproduced with permission. American Heart Association World Wide
Web, 1999: www.americanheart.org
.
Page 14
9. After the obstruction is removed, begin the ABC's of CPR if necessary (see page 5).
10. Be persistent. Continue uninterrupted until the obstruction is relieved or advanced life support is available. When
successful, have the victim examined by a physician as soon as possible.
The Heimlich Maneuver for Infants and Children
When there are signs of choking in an infant (birth to 1 year) or child (1 to 8 years):
• If the infant or child is breathing and continues to be able to speak or cough, do not interfere, but take to an
advanced life support facility.
• If the infant or child has a fever or history of illness, the air passages may be swollen. Take to an emergency care
facility.
• If the infant or child has ineffective coughing and high-pitched inspirations and is unable to speak or cry, then
immediately begin the obstructed airway sequence described below.
If an infant is conscious:
1. Support the infant's head and neck with one hand firmly holding the jaw. Place the infant face-down on your
forearm, keeping the head lower than the trunk.
2. With the heel of your free hand, deliver up to 5 back blows forcefully between the infant's shoulder blades.
Forceful back blows
Text on Heimlich maneuver © American Heart Association. Reproduced with permission. American Heart Association World Wide
Web, 1999: www.americanheart.org
.
Page 15
3. Supporting the head, sandwich the infant between your hands and arms and turn the infant on his or her back,
keeping the head lower than the trunk. Using two fingers, deliver up to 5 thrusts over the lower half of the breastbone
(sternum).
Two-finger chest thrusts
If the infant becomes unconscious:
1. Call for help. If someone comes, that person should activate the emergency medical system (911 or local number).
2. Open the airway (head tilt and chin lift) and try to give 2 slow rescue breaths. If the airway is still obstructed,
reposition the head and try again to give rescue breaths.
3. Give up to 5 back blows, then up to 5 chest thrusts.
4. Perform a tongue-jaw lift, and if you see the obstructing object, perform a finger sweep to remove it.
5. If the foreign body is not removed, repeat steps 2 through 4 until successful. If the infant resumes effective
breathing, place in the recovery position.
6. If the airway obstruction is not relieved after 1 minute, activate the emergency medical system (usually 911).
7. If the foreign body is removed and the victim is not breathing, begin the ABC's of CPR for infants.
Text on Heimlich maneuver © American Heart Association. Reproduced with permission. American Heart Association World Wide
Web, 1999: www.americanheart.org
.
Page 16
8. When successful, have the infant examined by a health-care professional as soon as possible.
If a child is conscious, perform the Heimlich maneuver as described for adults.
If the child becomes unconscious:
Continue as for an adult, but do not perform blind finger sweeps. Instead, perform a tongue-jaw lift and try to remove
the foreign object only if you see it.
Bandaging Limbs
Bandages should be long enough to encircle the limb, and at least an inch wider than the wound. Keep them loose
enough to avoid impairing circulation, and bandage a limb in the position in which it will remain during the transport
or while the wound heals.
1. Begin by placing the end of the bandage on the limb.
2. Make a firm turn around the limb to hold the bandage's end in place. Secure the bandage with first-aid tape, a
safety pin, or by cutting the end of the bandage in two, putting one end on each side of the limb, and then tying the
ends into a knot.
Immobilization: Applying Splints and Slings
Splints are support devices used to immobilize a potentially fractured bone or injured joint when medical attention is not immediately
available. Slings are used to immobilize the splinted limb. Unless you are in a situation where medical attention is unavailable, they
should only be applied by those who are trained to do so. However, if you are the only one available in an emergency situation, here are
the basics.RD>Text on Heimlich maneuver © American Heart Association. Reproduced with permission. American Heart Association
World Wide Web, 1999: www.americanheart.org
.
Page 17
A splint can be fashioned from rolled-up newspapers, rolled blankets, pillows, boards, and so forth. Ideally, a splint
should be long enough to extend past either end of a suspected fracture and past the nearest joints. It is important to
splint an injury in the position you found it. Do not attempt to move or straighten an injured limb.
To hold a splint in place, use bandannas, neckties, or strips of cloth as a sling. Tie the splint above and below the
injury. Secure the joints above and below the injury. The splint should provide firm support for the injury while
allowing for good circulation. Indications that circulation is impeded include blue or pale fingers or toes on the
splinted limb. Have all the knots on the same side, and do not allow them to press into the injury. Here's how to apply
splints and/or slings on specific areas:
Wrist or lower arm: Put the injured arm across the patient's torso with the elbow at a right angle. The palm should
be in, the thumb up. Splint each side of the arm from the elbow to beyond the wrist, leaving the fingers visible. Check
the fingers frequently to see if circulation is impeded by tight bandages.
In emergency situations, splints and slings can be improvised. In this case,
rolled sturdy paper or cardboard makes an adequate splint, and a long-sleeved
shirt has been tied as a sling.
Finger and toe: Tape the injured finger or toe to the one next to it with cotton or other soft material between the two.
Foot and ankle: Remove the shoe from the injured appendage. Tie padding, such as towels, blankets, or spare
clothing, around the shin and foot, leaving the toes exposed. Check the toes frequently to see that circulation is not
impeded by tight bandages.