Tài liệu Making a Portfolio pdf
Bạn đang xem bản rút gọn của tài liệu. Xem và tải ngay bản đầy đủ của tài liệu tại đây (557.59 KB, 6 trang )
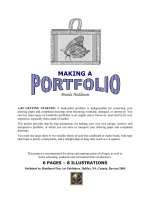
MAKING A
Brenda Hoddinott
A-05 GETTING STARTED: A hard-sided portfolio is indispensable for protecting your
drawing paper and completed drawings from becoming wrinkled, damaged, or destroyed. You
can buy many types of wonderful portfolios in art supply stores. However, most tend to be very
expensive, especially those made of leather.
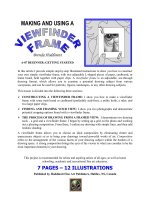
This project provides step-by-step instructions for making your very own unique, creative, and
inexpensive portfolio, in which you can store or transport your drawing paper and completed
drawings.
You need one large sheet or two smaller sheets of acid-free cardboard or matte board, wide tape
(duct tape is great), a sharp knife, and a straight edge or long ruler (such as a T-square).
This project is recommended for artists and aspiring artists of all ages, as well as
home schooling, academic and recreational fine art educators.
6 PAGES – 8 ILLUSTRATIONS
Published by Hoddinott Fine Art Publishers, Halifax, NS, Canada, Revised 2005
Copyright to all articles, images, text, projects, lessons and exercises within this drawing class belong to Brenda Hoddinott and
may not be reproduced or used for any commercial purposes whatsoever without the written permission of Brenda Hoddinott.
Web site or
- 2 -
GATHERING SUPPLIES AND GETTING STARTED
You may have to go shopping for some of the following items, but others may be available
around your home. You need:
Ü A roll of wide tape (duct tape is great and comes in various colors)
Ü A sharp knife (such as an inexpensive wallpaper or utility knife with snap-off blades)
Ü A straight edge or long ruler (such as a T-square)
Ü Strong string, thin rope, or fancy shoelaces (for the handles)
Ü Acid-free cardboard or matt board (usually offered in a wide selection of colors)
Acid-free cardboard or matt board is generally available at framing or art supply stores. Acid-free
refers to a high-quality, long-lasting, and PH-balanced paper or board that has had the acid
removed from the pulp in the paper-making process.
Drawings can be ruined when papers and boards with acid,
deteriorate and turn yellow.
1) Cut out a large, rectangular piece of matt board or cardboard.
When choosing a size, take into account that you’ll need to fold the cardboard in half for a
smaller portfolio. In other words, the finished portfolio will be half the size of your
cardboard. For a large portfolio you may need to buy two pieces of board, one for each
side. Suggested portfolio sizes include:
Ü 16 by 20 inches for small drawings (one piece of board at least 32 by 20 inches
unfolded).
Ü 20 by 30 inches for larger drawings (one sheet of board at least 40 by 30 inches or two
large pieces at least 20 by 30 inches each).
ILLUSTRATION 04-01
20 (or 30)
inches high
32 (or 40) inches long
Copyright to all articles, images, text, projects, lessons and exercises within this drawing class belong to Brenda Hoddinott and
may not be reproduced or used for any commercial purposes whatsoever without the written permission of Brenda Hoddinott.
Web site or
- 3 -
CUTTING, SCORING, AND CONSTRUCTING
If you are working with two smaller pieces of board, rather than one large piece, skip over the
next two steps (2 and 3).
2) Use a ruler to measure the halfway points, and then draw a straight line parallel to
the shorter ends.
3) With your knife and a straight edge, cut very slightly into the board (sometimes
referred to as scoring) along the straight line.
ILLUSTRATION 04-02
20 (or 30)
inches high
32 (or 40) inches long
4) Reinforce both short ends of the board with wide tape.
ILLUSTRATION 04-03
When the ends are
taped, the large
sheet of cardboard
(or matt board) is
ready to be folded
along the scored
line.
If you have two
sheets of board
instead of one,
simply reinforce
one of the longer
sides of each with
the wide tape.
Copyright to all articles, images, text, projects, lessons and exercises within this drawing class belong to Brenda Hoddinott and
may not be reproduced or used for any commercial purposes whatsoever without the written permission of Brenda Hoddinott.
Web site or
- 4 -
ILLUSTRATION 04-04
5) Fold your board along the
scored line toward the side not
scored.
If you have two sheets of board
instead of one, simply lay one on
top of the other with the taped
ends up (the taped ends identify
the opening of the case).
ILLUSTRATION 04-05
6) Tape both short sides of your
portfolio together, leaving the
opening along the top.
7) Reinforce the bottom edge (the
long side with the fold) with
tape.
ILLUSTRATION 04-06
8) Add creative handles, such
as brightly colored
shoelaces, to your portfolio.
1) To add handles, make
two holes in the center
section of each open side.
2) Thread the ends of string
or thin rope (or another
creative option) through
the two holes on each
side.
3) Tie the ends of each piece
of the handle together on
the inside of each side.
Copyright to all articles, images, text, projects, lessons and exercises within this drawing class belong to Brenda Hoddinott and
may not be reproduced or used for any commercial purposes whatsoever without the written permission of Brenda Hoddinott.
Web site or
- 5 -
ADDING A SPIFFY DESIGN
You can add something simple such as a couple of stripes, or render a design or drawing of your
choice. If your design is not drawn with a durable medium such as permanent markers or acrylic
paint, you need to protect it. Check out your local art supply store and pick up a can of spray
fixative designed to protect the medium you used.
ILLUSTRATION 04-07
9) Decorate your portfolio however you wish!
You are a unique and innately artistic being.
Nurture your creativity!
A drawing of a butterfly personalizes the
side of this portfolio case. You can probably
think of oodles of other great ideas to
decorate your portfolio.
ILLUSTRATION 04-08
Don’t store
your
drawings,
with either
clear tape or
corrugated
cardboard,
touching
them.
Either of
these items
can discolor
your
drawings,
and do
permanent
damage after
only a few
weeks.