Tài liệu Pro CSS Techniques- P2 doc
Bạn đang xem bản rút gọn của tài liệu. Xem và tải ngay bản đầy đủ của tài liệu tại đây (780.03 KB, 50 trang )
Partial Attribute Values
For attributes that accept a space-separated list of words (notably, the class attribute), it is
possible to select based on the presence of a word within the list, rather than the exact match
earlier. Remember our multiple-class example:
<p class="warning help">Every 108 minutes, the button ➥
must be pushed. Do not attempt to use the computer ➥
for anything other than pushing the button.</p>
To select this paragraph with the exact match selector earlier, you’d need to write:
p[ class="warning help"]. Neither p[class="warning"] nor p[class="help"] would match.
However, by using the tilde-equal (~=) indicator, you can select based on the presence of
a word within the space-separated list, like so:
p[class~="help"] {
color: red;
}
Note that this is functionally equivalent to the class selector (p.warning or p.help) we
introduced earlier, and the class selector is far more widely supported. However, the partial
attribute selector also works for attributes other than class.
Particular Attribute Selector
Perhaps better named the “equal to or starts with” attribute selector, the partial attribute
selector—with its pipe-equal (|=) syntax—matches attribute values that either match exactly
or begin with the given text. For example:
img[src|="vacation"] {
float: left;
}
would target any image whose src value begins with vacation. It would match vacation/photo1.jpg
and vacation1.jpg, but not /vacation/photo1.jpg.
Attribute selectors, like adjacent sibling selectors, would be more valuable if Internet
Explorer 6 and lower supported them (again, they are supported in IE 7). Since it doesn’t,
many web developers are forced to admire them from afar.
Pseudo-Classes and Pseudo-Elements
And now for something completely different. OK, not completely—but close. Pseudo-class
and pseudo-element selectors allow you to apply styles to elements that don’t actually exist
in your (X)HTML document. These are structures that you may have explicitly added to your
(X)HTML document if you’d been able to predict them—but you can’t. For example, it’s often
helpful to style the first line of a paragraph differently than the rest. But, given the vast array of
devices, browsers, and screen sizes your site will be rendered on, there’s simply no way to pre-
dict and define ahead of time what text encapsulates the first line.
CHAPTER 2
■
THE LANGUAGE OF STYLE SHEETS22
732Xch02FINAL.qxd 11/1/06 1:44 PM Page 22
Please purchase PDF Split-Merge on www.verypdf.com to remove this watermark.
Pseudo-Classes
Pseudo-classes are best understood by way of the anchor element, typically used for links
between (X)HTML documents. It is commonplace for links to documents a user has visited in
the past to be displayed differently than ones they haven’t visited. But there’s simply no way
for you, as the web developer, to predefine this, because you haven’t a clue what documents
your visitor may have already hit.
To compensate for this, CSS 2.1 defines two pseudo-classes specifically for hyperlinks.
Pseudo-classes are indicated by use of a colon (:). The two link-specific (with link defined as
an anchor element with an href attribute) pseudo-classes are
• :link, which refers to links that point to documents that have not been visited. Some
browsers interpret this incorrectly and apply it to all links, visited or not.
• :visited, which refers to hyperlinks to an address that has already been visited.
Using these pseudo-classes, you can make unvisited links blue and visited ones purple like so:
a:link {
color: blue;
}
a:visited {
color purple;
}
A couple of other common pseudo-classes are :hover and :focus. These are activated
based on the current state an element is in with regard to the user’s interaction with it. The
hover state is activated when a user hovers on an element. Most typically, the hovering behavior
is rolling over the element with a mouse. However, it’s important to note that users on alternate
devices may hover in a different manner. The focus state is activated when a user gives a par-
ticular element (especially a form field) focus by selecting it. In the typical desktop browser
environment, this is done by tabbing to the element, or by clicking in a form field. Using these
two pseudo-classes, you can easily change the display of an element only when these states
are activated. For example:
a:hover {
color: red;
}
tr:hover {
background-color: #dfdfdf ;
}
input:focus {
background-color: #dfdfdf ;
}
■
Note
Microsoft Internet Explorer 6 and below supports pseudo-classes only on links (anchor elements
with an
href
attribute). It does not allow for
:hover
,
:focus
, and so forth on arbitrary elements.
CHAPTER 2
■
THE LANGUAGE OF STYLE SHEETS 23
732Xch02FINAL.qxd 11/1/06 1:44 PM Page 23
Please purchase PDF Split-Merge on www.verypdf.com to remove this watermark.
There are a handful of other pseudo-classes, all of which are covered in detail in Appendix A of
this book.
Pseudo-Elements
As mentioned earlier, it is sometimes useful to style the first line of a paragraph or first letter of
a header. These are examples of pseudo-elements. These work in a fashion similar to pseudo-
classes:
p:first-line {
font-weight: bold;
}
h1:first-letter {
font-size: 2em;
}
In addition to first-line and first-letter, CSS offers :before and :after pseudo-elements,
which let you generate content to be displayed just before or just after a particular element. For
example, you may want to insert a comma (,) after every <li> element. Pseudo-elements are
a topic of their own (and aren’t very well supported across browsers); we cover them in detail
in Appendix A.
Daisy-Chaining Selectors
It’s important to note that all types of selectors can be combined and chained together. For
example, take this style rule:
#primary-content div {
color: orange
}
This code would make for orange-colored text in any div elements that are inside the element
with an id value of primary-content. This next rule is a bit more complex:
#primary-content div.story h1 {
font-style: italic
}
This code would italicize the contents of any h1 elements within divs with the class value story
inside any elements with an id value of primary-content. Finally, let’s look at an over-the-top
example, to show you just how complicated selectors can get:
#primary-content div.story h1 + ul > li a[href|=""] em {
font-weight: bold;
}
This code would boldface all em elements contained in anchors whose href attribute begins
with and are descendants of an li element that is a child of a ul element
that is an adjacent sibling of an h1 element that is a descendant of a div with the class named
story assigned to it inside any element with an id value of primary-content. Seriously. Read it
again, and follow along, right to left.
CHAPTER 2
■
THE LANGUAGE OF STYLE SHEETS24
732Xch02FINAL.qxd 11/1/06 1:44 PM Page 24
Please purchase PDF Split-Merge on www.verypdf.com to remove this watermark.
Grouping Selectors
You can also group selectors together to avoid writing the same declaration block over and
over again. For example, if all your headers are going to be bold and orange, you could do this:
h1 {
color: orange; font-weight: bold;
}
h2 {
color: orange; font-weight: bold;
}
h3 {
color: orange; font-weight: bold;
}
h4 {
color: orange; font-weight: bold;
}
h5 {
color: orange; font-weight: bold;
}
h6 {
color: orange; font-weight: bold;
}
Or, for more efficiency, you could comma-separate your selectors and attach them all to a single
declaration block, like this:
h1, h2, h3, h4, h5, h6 {
color: orange; font-weight: bold;
}
Obviously this is much more efficient to write, and easier to manage later, if you decide you
want all your headers green instead of orange.
Summary
CSS selectors range from simple to complex, and can be incredibly powerful when you begin
to understand them fully. The key to writing efficient CSS is taking advantage of the hierarchi-
cal structure of (X)HTML documents. This involves getting especially friendly with descendant
selectors. If you never become comfortable with the more advanced selectors, you’ll find you
write the same style rules over and over again, and that you add way more classes and IDs to
your markup than is really necessary.
Another key concept of CSS is that of specificity and the cascade. We’ll cover that topic in
our next chapter.
CHAPTER 2
■
THE LANGUAGE OF STYLE SHEETS 25
732Xch02FINAL.qxd 11/1/06 1:44 PM Page 25
Please purchase PDF Split-Merge on www.verypdf.com to remove this watermark.
732Xch02FINAL.qxd 11/1/06 1:44 PM Page 26
Please purchase PDF Split-Merge on www.verypdf.com to remove this watermark.
Specificity and the Cascade
I
n the first two chapters, we reviewed the basics of writing proper (X)HTML and gave you
a general overview of CSS. You learned how to attach style sheets to your documents, but now
it’s time to put on your work clothes, head to the garage, and rip apart the engine to find out
exactly how the darn thing runs. In this chapter, we’ll take a quick look at CSS selectors and
then dive into the guts of specificity (determining which selector overrides another, and how
to take advantage of this knowledge) and the cascade (the method used by browsers to calcu-
late and assign importance to each rule in your style sheet).
CSS 2 AND IE/WIN
It’s worth noting here that the most widely used browser on the planet as of this writing (IE 6) doesn’t support
some of the cooler selectors in the CSS 2.1 specification, which are used throughout this book. The situation
improves with IE 7 (see Appendix C for more details; there are also numerous mentions of IE 7 support through-
out this book—look to the index for specifics), but you’re better off having the latest version of Firefox, Safari,
or Opera available to view all the examples in this chapter. And don’t worry, if you absolutely
must
provide
a high level of support for IE/Win versions 6 and earlier, Chapter 6 provides the CSS therapy you crave.
Selectors
You already know what a selector is from reading Chapter 2, so rather than giving you a detailed
description of every possible selector, we’re going to provide an overview of selector types, and
then move on to the examples.
Selectors: Simple and Combined
Officially, there are two categories of selectors: simple and combined (also known as contextual).
The W3C (www.w3.org/TR/CSS21/selector.html#q2) provides a rather wordy description of
a simple selector:
A simple selector is either a type selector or universal selector followed immediately by
zero or more attribute selectors, ID selectors, or pseudo-classes, in any order. The simple
selector matches if all of its components match.
27
CHAPTER 3
■ ■ ■
732Xch03FINAL.qxd 11/1/06 1:47 PM Page 27
Please purchase PDF Split-Merge on www.verypdf.com to remove this watermark.
If your head hurts after reading even small portions of W3C recommendations, you’re not
alone. Let’s make things easier by looking at some basic examples.
Simple Selectors
The following is easy enough, and probably familiar territory for you, but as you will see later
on, even simple selectors can become complex under the right circumstances:
body {...} matches <body>...</body>.
h2.first {...} matches <h2 class="first">...</h2>.
div#logo {...} matches <div id="logo">...</div>.
a:visited {...} matches <a href="link.html">link</a> in its visited state.
The members of the W3C aren’t prone to underachievement, so they follow the descrip-
tion of simple selectors with information about the creatively named “selectors” (many
developers prefer combined or contextual):
A selector is a chain of one or more simple selectors separated by combinators. Combi-
nators are: whitespace, ">", and "+".Whitespace may appear between a combinator and
the simple selectors around it.
Once again, examples make the heart grow fonder.
Combined Selectors
As you can see, various combinations of simple or combined selectors and combinators target
specific elements within your (X)HTML document:
body p {...} matches <body><p>text</p></body>.
h2.first > span {...} matches <h2 class="first"><span>text</span></h2>.
div#logo + h3 {...} matches <div id="logo"></div><h3>text</h3>.
div > ul + p em {...} matches <div><ul></ul><p><em>text</em></p></div>.
■
Note
Whitespace surrounding the
child
and
adjacent sibling
combinators (
>
and
+
) is optional, but keep
in mind that removing the whitespace may make your selectors more difficult to read. The benefits of clarity
can outweigh the minor optimization gained by removing the whitespace.
Now let’s take a quick look at the specific types of selectors available (attribute and
pseudo-class selectors are covered in detail in Chapter 2). If you are used to coding by hand
using a text editor, and you know your selectors after reading Chapter 2, you can skip this part
and head straight to the section titled “The Cascade: Calculating Specificity,” later in this
chapter. However, those of you who have been relying on visual development tools (such as
CHAPTER 3
■
SPECIFICITY AND THE CASCADE28
732Xch03FINAL.qxd 11/1/06 1:47 PM Page 28
Please purchase PDF Split-Merge on www.verypdf.com to remove this watermark.
Adobe’s Dreamweaver or GoLive products) and who wish to learn more about the nuts and
bolts of CSS in order to free yourself from your programmatic shackles, read on.
■
Tip
Have you ever been reviewing someone else’s style sheet and found yourself wondering what that strange,
long selector actually does? Paste the selector into the SelectORacle (
/>selectoracle/
) and in return you’ll receive a plain-text translation in English or Spanish.
Universal “Star” Selector
Something many developers are not aware of is the universal (or “star”) selector, otherwise known
as the asterisk (*). This selector will match any single element in your (X)HTML document.
■
Note
If you’ve been using CSS for a while and you’ve taken advantage of some of the IE/Win hacks on
the Web, it’s likely you’ve seen this selector before in the Star HTML hack, covered in Chapter 6. But that use
is purely a side effect of a bug in the IE rendering engine, and this selector has practical uses beyond fooling
IE/Win.
A popular technique that uses the universal selector is setting global, default styles at the
beginning of your style sheet. To set margins and padding on all elements to zero (an approach
used by many developers when starting a project to cut down on browser-rendering weirdness),
simply use the following:
* {
margin:0;
padding:0;
}
This is certainly a handy trick to have up your sleeve. But what about some more creative
uses? Well, the universal selector allows you to target all items within a certain element:
div#header * {...}
This code selects any element contained by <div id="header">. If you prefer, you can even
target the grandchildren of a particular element:
div#header * p {...}
This will style any p (the grandchild) contained within any element (the child) that is con-
tained by <div id="header"> (the parent). This trick can be quite useful for targeting groups of
elements that have only their level of ancestry in common. And because the universal selector
can also be used more than once in a combined selector, its uses are fairly limitless. One great
example of this is Eric Meyer’s Universal Child Replacement technique, which you can read
about at www.meyerweb.com/eric/thoughts/2005/05/31/universal-child-replacement/.
CHAPTER 3
■
SPECIFICITY AND THE CASCADE 29
732Xch03FINAL.qxd 11/1/06 1:47 PM Page 29
Please purchase PDF Split-Merge on www.verypdf.com to remove this watermark.
Element Selectors
If you’ve ever written even a single rule in a style sheet, you’ve used an element selector (listed
as type selectors in the W3C spec, and sometimes called tag selectors), which simply describes
any element name used as a selector. For example, h1, p, strong, ul, and div are all element
selectors. It’s probably safe to assume you don’t need a specific example, so let’s move along to
the more interesting selectors.
Descendant, Child, and Adjacent Sibling Selectors
Specific levels of ancestry and the relationships between elements are the cornerstones of
CSS. But when it comes to selectors, the family connection between elements can be strong.
These selector types allow you to take advantage of those relationships, just like that aunt of
yours who’s always spreading rumors at family cookouts. Again, this stuff has been covered in
Chapter 2 to a large extent, but we’re giving you a recap here that will prove useful when we
explain inheritance and the cascade.
Descendants
Perhaps the most common family relationship is the more generic descendant selector. These
selectors consist of two or more elements separated by whitespace (which is technically a CSS
combinator, according to the W3C). Descendants are any elements contained at any level
below another element, like so:
div h2 {...}
This selector will style any h2 contained within any div. Any h2s just sitting within the body or
any other container will not be styled by this rule.
Children
Again, as we saw in Chapter 2, the child selector consists of two or more elements separated
by a greater-than character (>). The child selector allows you to cast a smaller net: only style
elements that are descendants of another element without any other elements in between the
parent and child. For instance, where the descendant selector targets any level beneath the
specified parent element:
div h3 {...}
which will style any of these h3s:
<div>
<h3>Heading</h3>
</div>
<div>
<ul>
<li>
<h3>Heading</h3>
</li>
</ul>
</div>
CHAPTER 3
■
SPECIFICITY AND THE CASCADE30
732Xch03FINAL.qxd 11/1/06 1:47 PM Page 30
Please purchase PDF Split-Merge on www.verypdf.com to remove this watermark.
the child selector is much more particular about its lineage:
div > h3 {...}
and will only target h3s that are children (the first descendant of their parent), like so:
<div>
<h3>Heading</h3>
</div>
Siblings
The adjacent sibling selector type works similarly to the child selector, but instead of targeting
a direct descendant, it allows you to style elements that are next to each other in the document
flow and that share the same parent element by joining two simple selectors with a plus sign (+).
This type comes in quite handy when, for example, you need to give the first p immedi-
ately following an h2 a smaller margin than all other paragraphs:
<h2>Heading</h2>
<p>some text</p>
<p>some more text</p>
Without the adjacent sibling selector, you would have to assign a class or ID to the first para-
graph, but thankfully this selector does the job for us:
h2 + p { margin-top: .25em; }
Pseudo-Class Selectors
Although both Chapter 2 and Appendix A contain details on pseudo-classes, there’s one aspect
worth mentioning here that deals with specificity—ordering link rules within your style sheet.
Link and Dynamic Pseudo-Classes: A LoVe/HAte Relationship
Styling links is fairly straightforward, but it’s helpful to know the correct order to place the var-
ious pseudo-classes within your style sheet in order to see the correct behavior in the browser.
The correct order is :link, :visited, :hover, and :active (or LoVe/HAte), like so:
a:link {
color:blue;
}
a:visited {
color:purple;
}
a:hover {
background-color:black;color:white;text-decoration:none;
}
a:active {
background-color:red;color:white;text-decoration:none;
}
CHAPTER 3
■
SPECIFICITY AND THE CASCADE 31
732Xch03FINAL.qxd 11/1/06 1:47 PM Page 31
Please purchase PDF Split-Merge on www.verypdf.com to remove this watermark.
Using this order ensures that your :hover styles will work whether a link has been visited or
not, and that your :active styles will be used even when a user is hovering over a link.
For more on link specificity, check out Eric Meyer’s write-up on the subject (which also
includes some great points about calculating specificity in general): www.meyerweb.com/eric/
css/link-specificity.html.
Pseudo-Elements
In what is one of the shortest (but still confusing) descriptions in the CSS specification, the W3C
has this to say about pseudo-elements (www.w3.org/TR/CSS21/selector.html#pseudo-elements):
Pseudo-elements create abstractions about the document tree beyond those specified by
the document language.
Well, now, that sums it up nicely, don’t you think?
Pseudo-elements can be powerful weapons in your CSS arsenal, and include the follow-
ing four gems:
• :first-line
• :first-letter
• :before
• :after
Their use is similar to that of pseudo-classes; however, pseudo-elements may only be
attached to the last simple selector in a combined selector (the element is targeted by the
selector, referred to by the W3C as the “subject”).
■
Caution
The
:first-line
and
:first-letter
pseudo-elements are supported by IE 6 (
:before
and
:after
are still not supported by
any
version of IE/Win including IE 7 as of this writing), but there are some
pitfalls. For an up-to-date list (including IE 7 issues), visit Ingo Chao’s site at
www.satzansatz.de/cssd/
pseudocss.html
.
:first-line
As you might guess, the :first-line pseudo-element targets the first line of the element to
which it is attached, and that element must be defined or styled as block-level, inline-block,
table-caption, or table-cell. There is also a restricted list of properties that may be used:
• font properties
• color
• background properties
• word-spacing
CHAPTER 3
■
SPECIFICITY AND THE CASCADE32
732Xch03FINAL.qxd 11/1/06 1:47 PM Page 32
Please purchase PDF Split-Merge on www.verypdf.com to remove this watermark.
• letter-spacing
• text-decoration
• vertical-align
• text-transform
• line-height
These properties can be useful when you’re styling opening paragraphs—for instance,
the code
p:first-line {
text-transform:uppercase;
}
makes the first formatted line (meaning the first line as it is rendered by the browser, based on
the layout, font size, and other variables, rather than how the line breaks in your markup) all
uppercase. Simple, yes?
In addition, the :first-line pseudo-element is intelligent and will style the text of an
element nested within the target element, as long as both are block-level and the nested ele-
ment is not positioned or floated. For example, this means that the following rule:
div:first-line { font-weight:bold; }
will style the text within this markup, even though the p element isn’t targeted:
<div><p>Some line of text</p></div>
Since the text is still the first line, it matches the selector.
:first-letter
Similar to the :first-line pseudo-element, :first-letter selects the first alphanumeric
character of the targeted element, as long as there is no other content (such as an image) pre-
ceding it. The target element must also be defined or styled as block-level, inline-block,
list-item, table-caption, or table-cell.
The main purpose of this pseudo-element is to allow you to style drop caps and initial
caps; as with :first-line, there is also a restricted set of properties that you can use:
• font-properties
• text-decoration
• text-transform
• letter-spacing
• word-spacing
• line-height
• float
• vertical-align (when not floated)
CHAPTER 3
■
SPECIFICITY AND THE CASCADE 33
732Xch03FINAL.qxd 11/1/06 1:47 PM Page 33
Please purchase PDF Split-Merge on www.verypdf.com to remove this watermark.
• margin properties
• padding properties
• border properties
• color
• background properties
Let’s say we want to create a two-line drop cap for the following paragraph:
<p>Gorillas don’t always eat bananas, all cows eat grass, good boys do fine➥
always, and fat cops get donuts after every bust.</p>
To style the paragraph and the G accordingly, all we need is this:
p {
font-size:100%;
}
p:first-letter {
font-size:300%;
font-weight:bold;
float:left;
}
This gives us the result shown in Figure 3-1.
Figure 3-1. Our drop cap, as rendered by Firefox
If we decide we’d rather style the G as a larger initial cap, we only have to adjust the
p:first-letter rule by removing the float declaration and increasing the font-size (as seen
in Figure 3-2):
p:first-letter {
font-size:400%;
font-weight:bold;
}
CHAPTER 3
■
SPECIFICITY AND THE CASCADE34
732Xch03FINAL.qxd 11/1/06 1:47 PM Page 34
Please purchase PDF Split-Merge on www.verypdf.com to remove this watermark.
Figure 3-2. Our initial cap displayed in Firefox
It’s worth noting that Safari does some strange things with our very straightforward exam-
ples (see Figure 3-3); your mileage may vary when using this pseudo-element, so remember to
test and adjust the font-size as needed.
Figure 3-3. Surfin’ Safari, Batman! Browsers interpret the specifications differently, so you may
have to try different font sizes and line heights in order to get the same result.
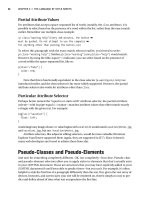
:before and :after
These final pseudo-elements, :before and :after, allow you to insert generated content before
or after the element they are attached to, as opposed to simply altering the display of the element’s
content. The content property is the key to their success.
Let’s start with a simple example using both :before and :after. Say you want to enclose
all paragraphs assigned class="note" within square brackets, in addition to changing the text
size and color, but you want to keep the brackets out of your markup. First, we add the class to
our paragraph:
<p class="note">Gorillas don't always eat bananas, all cows eat grass, good➥
boys do fine always, and fat cops get donuts after every bust.</p>
Next, we add styles for the .note class (to set the font-size and color properties), then
the pseudo-element rules to generate our square brackets:
p {
font-size:85%;
color:#666;
}
CHAPTER 3
■
SPECIFICITY AND THE CASCADE 35
732Xch03FINAL.qxd 11/1/06 1:47 PM Page 35
Please purchase PDF Split-Merge on www.verypdf.com to remove this watermark.
p.note:before {
content:"[";
}
p.note:after {
content:"]";
}
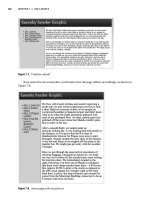
The result (Figure 3-4) is a smaller, lighter, bracketed block of text, without those silly
brackets sitting in our markup. The content property simply contains the character(s) we want
to display before and after the p element. The sky is essentially the limit for what can be gener-
ated (to explore the possibilities, check out the W3C’s reference on generated content: www.w3.org/
TR/CSS21/generate.html).
Figure 3-4. Safari’s rendition of our generated brackets
One popular (and more complex) use of the :after pseudo-element is to display the URI
for all external links when a page is printed, following the actual link text. This can be accom-
plished by placing the following rule (which combines the :after pseudo-element with an
attribute selector) in your print style sheet:
a[href^='http://']:after {
content:" [" attr(href) "]";font-size:90%;
}
In cooperation with the attribute selector, this rule tells the browser, “If the href attribute
of an a element includes http://, place the content of the href attribute after the a element
and reduce its font size to 90 percent.” This selector shows how combining different selectors
gives you a greater amount of control while keeping your markup uncluttered.
The :before pseudo-element works the same way, but inserts the generated content
before the attached element. This can come in handy when, for instance, you want to display
an alternate character (in this example, a right arrow, →) instead of the default bullets on
unordered list items (Figure 3-5):
ul li {
list-style:none;margin:0;text-indent:-1em;
}
ul li:before {
content:"\2192 \0020";
}
The first rule disables the default bullets, and then we assign our generated version. The content
property requires escaped hex equivalents for special characters like this, so we use \2192 to
generate the right arrow (\0020 inserts a space). For a complete list of ASCII codes, check out
www.ascii.cl.
CHAPTER 3
■
SPECIFICITY AND THE CASCADE36
732Xch03FINAL.qxd 11/1/06 1:47 PM Page 36
Please purchase PDF Split-Merge on www.verypdf.com to remove this watermark.
Figure 3-5. On the left, Safari’s default list rendering; on the right, our generated replacement
The Cascade: Calculating Specificity
Now that we’re all on the same page regarding selectors, let’s explore the laws of specificity and
the cascade. Basically, in CSS every rule is assigned a specificity value based on the composi-
tion of its selector, its location within a style sheet, and the location of that style sheet relative
to other style sheets. Specificity is how rules interact with each other, and which rules have
more importance than others (and therefore, override them). In other words, specificity is
what helps the browser determine whether p#description carries more weight than
p.description, or if a rule with the selector ul#nav li a:hover should override another rule
with ul li a:hover. Understanding how this works is key to mastering CSS.
There is a fairly straightforward system that governs the order of priority of one selector
over another, but the trick is understanding the way the browsers assign importance to selec-
tors—and that’s what we’re going to discuss next.
How the CSS 2.1 Specification Describes the Cascade
The key to comprehending the cascade lies (almost surprisingly) within the actual W3C speci-
fication (www.w3.org/TR/CSS21/cascade.html#cascading-order). The description of the
cascading order is perhaps the most clearly written part of the entire specification, which is
good news for us all, since it might otherwise be quite difficult to understand:
6.4.1 Cascading order
To find the value for an element/property combination, user agents must apply the fol-
lowing sorting order:
1. Find all declarations that apply to the element and property in question, for the target
media type. Declarations apply if the associated selector matches the element in question.
2. Sort according to importance (normal or important) and origin (author, user, or user
agent). In ascending order of precedence:
1. user agent declarations
2. user normal declarations
3. author normal declarations
4. author important declarations
5. user important declarations
CHAPTER 3
■
SPECIFICITY AND THE CASCADE 37
732Xch03FINAL.qxd 11/1/06 1:47 PM Page 37
Please purchase PDF Split-Merge on www.verypdf.com to remove this watermark.
3. Sort rules with the same importance and origin by specificity of selector: more specific
selectors will override more general ones. Pseudo-elements and pseudo-classes are
counted as normal elements and classes, respectively.
4. Finally, sort by order specified: if two declarations have the same weight, origin and
specificity, the latter specified wins. Declarations in imported style sheets are considered
to be before any declarations in the style sheet itself.
Translating the Spec
While the W3C’s cascading order is fairly straightforward, let’s further simplify their list, trans-
lating item by item (our numbers coincide with the quoted specification):
1. Find the matching target element(s), and apply the styles.
2. The browser (or user agent) should apply its own default styles first, then apply rules
from a user-specified style sheet (if one exists), followed by author style sheets (apply-
ing !important declarations last), and finally !important rules from a user-specified
style sheet (again, if it exists).
3. Rules with more specific selectors override less specific selectors (the part about
pseudo-elements and pseudo-classes applies to Table 3-1 later in this chapter).
4. If two or more selectors match the same target element and have the exact same score,
whichever comes later in the style sheet gets the girl (or guy), and any rules within style
sheets imported into other style sheets are sorted earlier.
@IMPORT AND THE CASCADE
The @import rule exists to allow users to import style sheets from within other style sheets. Although this
rule is widely used to hide style sheets from older browsers (see Chapter 6), it can also be used to help man-
age multiple CSS files (as noted in Chapter 5). Because the Cascade assigns a lower importance to rules
within imported style sheets, it’s worth understanding how it will affect your styles should you use @import
in your projects.
For example, let’s say you have a default style sheet (base.css) that imports a second style sheet for
your typography. The following @import statement would be located at the top of your default style sheet,
prior to any rules:
@import url("typography.css");
If within typography.css you have a rule setting the font-size for all h3 elements to 12px, but if
somewhere in base.css you happen to have a rule targeting h3s and assigning them font-size:14px;
the latter rule will override the rule set in your imported typography style sheet.
The cascade assigns importance to rules within imported style sheets based on the order they are
imported (style sheets imported earlier have lower importance)—something to be aware of if you import
multiple style sheets (or if you import style sheets recursively).
CHAPTER 3
■
SPECIFICITY AND THE CASCADE38
732Xch03FINAL.qxd 11/1/06 1:47 PM Page 38
Please purchase PDF Split-Merge on www.verypdf.com to remove this watermark.
Keeping Score
The specificity of a rule is based on a “score” assigned to each part of its selector. This score is
in turn based on the importance of each type of selector (see Chapter 2 or the beginning of
this chapter for selector types), in the following order, from least important to most important:
1. Element selectors (including pseudo-element selectors)
2. Class selectors (including attribute and pseudo-class selectors)
3. ID selectors
4. Inline styles
Dizzy yet? Don’t worry, it gets easier, and we’ll take it slow. It’s less difficult to understand how
browsers calculate specificity when you can see the results, so let’s step through a few basic
examples showing progressively more specific rules (a commented version can be found in
ch3_specificity_basic.html in the Source Code/Download section for this book at the Apress
web site), and then we’ll compare the specificity and score of each selector side by side.
A Series of Basic Examples
Our guinea pigs for this process will be a pair of poor, unassuming h1 and p elements:
<h1>Page Title</h1>
<p>Lorem ipsum dolor sit amet, consectetur adipisicing elit, sed do eiusmod➥
tempor incididunt ut labore et dolore magna aliqua.</p>
Figure 3-6 shows the standard but boring result with Safari’s default styles.
Figure 3-6. h1 and p using Safari’s default styles
Let’s start with some basic styles, using element selectors to assign colors to our text:
h1 {
color:#000;
}
p {
color:#000;
}
We’ve now styled our elements using the selectors with the lowest specificity—element
selectors—which also means they cast the widest net; any h1 or p elements in our markup will
use these styles. Figure 3-7 shows the result, which doesn’t look any different from the default
rendering because we’ve used the same color as the browser default.
CHAPTER 3
■
SPECIFICITY AND THE CASCADE 39
732Xch03FINAL.qxd 11/1/06 1:47 PM Page 39
Please purchase PDF Split-Merge on www.verypdf.com to remove this watermark.
Figure 3-7. Our example styled with element selectors
Next, let’s duplicate our guinea pigs and wrap them in a div, allowing us to use a more
specific selector to style only the new pair (without the added rule in the CSS, the second set
of elements would look the same as the first). Our document and style sheet now contain the
following (the addition is shown in bold):
Markup
<h1>Page Title</h1>
<p>Lorem ipsum dolor sit amet, consectetur adipisicing elit, sed do eiusmod➥
tempor incididunt ut labore et dolore magna aliqua.</p>
<div>
<h1>Page Title</h1>
<p>Lorem ipsum dolor sit amet, consectetur adipisicing elit, sed do eiusmod➥
tempor incididunt ut labore et dolore magna aliqua.</p>
</div>
CSS
h1 {
color:#000;
}
p {
color:#000;
}
div h1 {
color:#333;
}
div p {
color:#333;
}
The new selectors are more specific, and thus apply only to the second set in our markup
(Figure 3-8).
CHAPTER 3
■
SPECIFICITY AND THE CASCADE40
732Xch03FINAL.qxd 11/1/06 1:47 PM Page 40
Please purchase PDF Split-Merge on www.verypdf.com to remove this watermark.
Figure 3-8. The more specific selector only affects the tags wrapped in a div.
Now let’s create a third instance of our h1 and p, this time assigning a class to the div and
adding a new, more specific rule to our CSS. Even though our third pair is contained within
a div, the addition of a class to the selector increases its specificity.
Markup
<h1>Page Title</h1>
<p>Lorem ipsum dolor sit amet, consectetur adipisicing elit, sed do eiusmod➥
tempor incididunt ut labore et dolore magna aliqua.</p>
<div>
<h1>Page Title</h1>
<p>Lorem ipsum dolor sit amet, consectetur adipisicing elit, sed do eiusmod➥
tempor incididunt ut labore et dolore magna aliqua.</p>
</div>
<div class="module">
<h1>Page Title</h1>
<p>Lorem ipsum dolor sit amet, consectetur adipisicing elit, sed do eiusmod➥
tempor incididunt ut labore et dolore magna aliqua.</p>
</div>
CSS
h1 {
color:#000;
}
p {
color:#000;
}
div h1 {
color:#333;
}
div p {
color:#333;
}
CHAPTER 3
■
SPECIFICITY AND THE CASCADE 41
732Xch03FINAL.qxd 11/1/06 1:47 PM Page 41
Please purchase PDF Split-Merge on www.verypdf.com to remove this watermark.