Tài liệu Foundation Flash CS5 For Designers- P8 pdf
Bạn đang xem bản rút gọn của tài liệu. Xem và tải ngay bản đầy đủ của tài liệu tại đây (1.25 MB, 50 trang )
TEXT
329
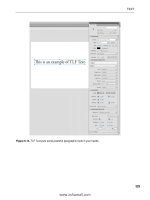
Figure 6-14. TLF Text puts some powerful typographic tools in your hands.
www.zshareall.com
Please purchase PDF Split-Merge on www.verypdf.com to remove this watermark.
CHAPTER 6
330
Figure 6-15. Classic Text is how text was formatted in previous versions of Flash.
Now that you are able to distinguish between the two methods of text handling, you can turn your attention
to the three types of text that both work with. Once you understand this concept, then you can start playing
with text.
Types of text
If you select Classic Text in the Properties panel and open the Text Types drop-down, you will be
presented with three ways to classify text on the stage: Static, Dynamic, and Input. Select TLF Text
and do the same thing, and your choices are Read Only, Selectable, and Editable. In a sense,
Dynamic, Input, Selectable, and Editable are actually the same thing, but that only matters in
terms of ActionScript. In relation to the Properties panel, static and read-only text fields contain text that
won’t be edited after the SWF is published, dynamic text fields contain text that will (or can), and input text
fields contain text that is entered by the user. Each classification carries its own characteristics, much of
which is shared among all three. Let’s get to our penmanship!
From this point onward in this chapter, we are going to work with the TLF feature rather
than Classic Text. This is not because TLF is so “cool.” It is strictly because TLF is so
new that dealing with both Classic and TLF text would require more than one chapter in
the book.
This book was purchased by
www.zshareall.com
Please purchase PDF Split-Merge on www.verypdf.com to remove this watermark.
TEXT
331
Read-only text properties
Read-only text is the least powerful sort of text in Flash, but don’t let its humble nature fool you. If you’re
into racing, it’s also true that horses run slower than cheetahs, but why split hairs?
As with most other tools in the Tools panel, the Properties panel, shown in Figure 6-16, controls text
field properties in a big way, so let’s take a look at each configurable item outside of the already familiar
Position and Size properties.
Figure 6-16. The Properties panel and read-only text
www.zshareall.com
Please purchase PDF Split-Merge on www.verypdf.com to remove this watermark.
CHAPTER 6
332
Character properties
The following properties are in the Character category:
Family: This lets you select from the list of fonts installed on your computer. With static text, in
most cases, font outlines are included with the SWF. For that reason, it doesn’t matter whether
your audience has the same font installed. The only exception is when you use the first three
device fonts (the ones with the underscores). This setting marks the first of many that may be
applied more than once, and in various ways, in the same text field.
TLF Text does not support PostScript Type 1 fonts. It only supports TrueType and
OpenType fonts. If you choose a PostScript font, Flash will substitute the PostScript font
for a device font such as _sans.
Style: Most typefaces contain Regular, Bold, Italic, and other variants. To apply a style to the
whole text field, choose the Selection tool, click the text field, and then make your selection. To
apply a style to individual words or characters, use the Text tool to select the text field, highlight
the desired glyphs, and then select the desired variant. Bold and italic versions of the chosen font
must exist on your computer for this styling to occur.
The Style drop-down menu replaces the B and I buttons traditionally used to specify
bold or italic variants. It also groups the font families. Prior to this release, each font was
its own entry in the Font drop-down list. If you are a font junkie, this resulted in a font list
that seemed to stretch for meters. Now the variations of the font, such as the Italic
shown in Figure 6-16, are in one neat, tidy package.
Size: This sets the selected font’s size, in points. Multiple font sizes are allowed within the same
text field. The scrubber ranges from 8 points to 96 points, but you may type in other values
directly, anywhere from 0 (invisible) to 2,500 (jaw-droppingly way huge). This includes noninteger
values, such as 12.75. In cases between 1,800 points and 2,000 points, the glyphs of most fonts
“jump outside” the bounding box of their text fields, but this doesn’t seem to affect text rendering;
it merely makes the text field harder to select.
Leading: This determines the uniform distribution of space between lines of text. The higher the
number, the wider apart the lines, and vice versa. You get to choose between specifying leading
as a percentage of the type size or as points. For example, you can choose to add 2 points or 20
percent leading to 10-point text. Be careful with this because the values between the two option
scan be different.
Color: Want fuchsia text? Here’s where to make that statement. Multiple colors are allowed
within the same text field.
Highlight Color: Think of this as being able to choose the color of a highlighter pen.
www.zshareall.com
Please purchase PDF Split-Merge on www.verypdf.com to remove this watermark.
TEXT
333
Tracking: Also known as letter spacing, this value determines the uniform distribution of space
between glyphs. The higher the number, the wider apart the characters, and vice versa. If you
want, you can even squish letters together by using a negative number. Typographers have a
term for this: crashing text. Multiple Letter Spacing settings may be applied to the same text
field.
Auto kern: This check box toggles auto-kerning. What is kerning? This is in the same ballpark
as letter spacing, except kerning refers to individualized spacing between pairs of glyphs.
Consider the capital letters A and V: the bottom of the A’s right side extends out, which fits neatly
under the “pulled-in” bottom of the V. Kerning reduces the space between these and other glyphs
that “fit together” in this way, which tends to provide greater visual balance.
Anti-alias: Flash Player 8 introduced a number of new visual effects, and one of those was
improved text rendering. This enhancement lives on in Flash Player 10, the player that
corresponds to the default publish settings for Flash CS5. You have three anti-aliasing choices for
font rendering:
Use device fonts: This relies on the user having your chosen font installed. Unlike the
three device fonts mentioned earlier (_sans, _serif, and _typewriter), this setting uses
exactly the font you specify—provided it is available on the computer playing the SWF file. If
not, Flash makes the choice.
Readability: New since Flash 8, this format improves readability of small- and regular-
sized fonts. Text animates smoothly because alignment and anti-aliasing are not applied
while the text animates (it is reapplied when animation stops). This advanced anti-aliasing is
not supported in Flash Player 7 or earlier SWFs, in skewed or flipped text (rotated is OK), in
printed text, or in text exported as PNG. Under these circumstances, the normal anti-aliasing
(Anti-alias for animation) is applied.
Animation: This provides normal text anti-aliasing. Glyphs appear smooth (no jaggies) and
may be applied to text fields in older versions of Flash Player.
Rotation: You get three choices: Auto, 0, and 270. This feature is not exactly what you would
assume it is used for. It is to be used where there is a combination of Roman and Asian text
where characters must be rotated to display properly in a vertical layout. Referred to as tate-chu-
yoko (also called kumimoji and renmoji), this feature makes it easier to read half-width
characters such as numbers, dates, and short foreign words in vertical text.
Underline, Strikethrough, Superscript, and Subscript: Select a word or glyph, and
click one of these buttons to apply these styles.
To see a Read Only text field in action, start a new Flash document, select the Text tool, choose TLF as
the Text type in the Properties panel, and click somewhere on the stage. Type your name. Select
the second letter of your name by dragging the mouse from one side of the letter to the other. Change the
font. Select the third letter, and change the font again.
Not
ice that the text field automatically widens as you type. The indicator for this is the little white circle in
the bottom-right corner of the text field, as you can see in Figure 6-17. If you keep typing, the text field will
www.zshareall.com
Please purchase PDF Split-Merge on www.verypdf.com to remove this watermark.
CHAPTER 6
334
eventually extend past the stage and off into the wild blue yonder. To set a specific width, which causes
text to wrap, hover over that white circle until you see the double-headed arrow cursor. Click and drag to
the desired width. The white circle turns into a white square. To switch back to auto-widen mode, double-
click that square.
Figure 6-17. A white dot tells you the text field will widen as you type.
Advanced character properties
These choices, with one exception, are new to Flash CS5. Here’s what they do:
Link and Target: These settings, which have been around for a very long time, allow you to
create hyperlinks inside text fields. Either select the whole text or use the mouse to select
individual glyphs or words, and then type a URL into the Link field (such as
Entering anything at all into the Link field activates the Target
field below it, which gives you the same four choices available to HTML anchor tags (<a>):
_blank: Opens the URL in a new browser window.
_parent: Opens the URL in the parent frameset of an HTML frameset (this assumes the
SWF is embedded in an HTML page that appears in multiple framesets).
_self: Opens the URL in the same window or frame as the current HTML document that
holds this SWF. This is the default behavior.
_top: Opens the URL in the topmost window of a frameset, replacing the frameset with the
new URL.
Hyperlinks in the Link field do not change the appearance of the text in any way, even though a dashed
line appears under hyperlinked text during authoring. This differs from HTML hyperlinks, which are
traditionally differentiated by an underline and a change in color. Flash hyperlinks are primarily meant for
www.zshareall.com
Please purchase PDF Split-Merge on www.verypdf.com to remove this watermark.
TEXT
335
loading HTML documents, which may or may not contain additional Flash content. As a general rule, this
is not the place to load external SWFs into the current movie.
Case, Digit Case, Digit Width: These three choices allow you to format numbers. When
used with OpenType fonts (the ones with an O in the Family drop-down) that offer both lining
and oldstyle numbers, you choose the style to apply in the Case drop-down and whether to use
proportional or tabular numerals using the Digit Case and Digit Width options in their
respective drop-down menus. So, how does all of this work?
Oldstyle figures, shown in Figure 6-18, are a type of numeral, which approximates lowercase letterforms
by having an x-height and varying lengths in their ascenders and descenders. They are considerably
different from the more common “lining” (or “aligning”) figures shown in Figure 6-18 that are all-cap height
and typically monospaced in text faces so that they line up vertically on charts. Oldstyle figures have what
is considered to be a traditional, classic, almost calligraphic look. They are available only for certain
typefaces, sometimes as the regular numerals in a font, but more often within a supplementary or expert
font. The figures are proportionately spaced, eliminating the white spaces that result from monospaced
lining figures, especially around the numeral one.
Figure 6-18. The fundamental differences between oldstyle and lining numerals are evident in the
numbers 4 and 7.
Ligatures: This moves into the realm of advanced typography for people new to the subject.
Ligatures are typographic replacement characters for certain letter pairs, such as fi and fl,
when they are available in a given OpenType font. With OpenType fonts, when you choose
Common from the Ligatures drop-down menu, you will see the standard ligatures built into the
font, as determined by the font designer. However, some fonts, such as Hypatia Pro, shown in
Figure 6-19, include more ornate, optional ligatures, which can be produced when you choose the
Minimum, Uncommon, or Exotic Ligatures options. As you can see from Figure 6-19, the
ligature style chosen tends to tighten up or appear to condense a line of text.
www.zshareall.com
Please purchase PDF Split-Merge on www.verypdf.com to remove this watermark.
CHAPTER 6
336
Figure 6-19. A selection of ligatures and how the various Ligature options affect the ligatures
Break: You can prevent words from breaking at the end of lines—for example, proper names or
words that could be misread when hyphenated. You can also keep multiple words or groups of
words together—for example, clusters of initials and a last name. To use the options in the drop-
down menu, select the word or group of words you don’t want to break and select an option.
Be very careful with this option. If you apply the No Break choice to too many adjacent
characters, the text may wrap in the middle of a word.
Baseline Shift: Select a range of letters or an entire line of text, and by changing the value,
the selection moves above or below the baseline. The drop-down menu allows you to choose
points or a percentage for the amount as well as to treat the selection as superscript or subscript
text.
Locale: This has absolutely nothing to do with spelling or localization. The language chosen will
set the typographic rules that apply to the language chosen.
Paragraph properties
These are the Paragraph properties:
Align Left, Align Center, Align Right, Align Justify: These buttons in the Format
area only make practical sense when applied to fixed-width text fields. In cases where your words
wrap, this determines how they do it. Align Left means the left edge of your lines of text will
be even. Align Center means your lines will be centered inside the text field. Align Right
means the right edge will be even. Align Justify means both the left and right edges will be
even. The four justification buttons to the right let you determine how the last line or word of a
paragraph will be justified. Different alignments may be applied to each line of text in a text field.
Margins: Scrub across these values, and you can add space to the right and the left of a text
block.
www.zshareall.com
Please purchase PDF Split-Merge on www.verypdf.com to remove this watermark.
TEXT
337
Indent: Select the first line of a text block and scrub across the indent value, and the selection
will move inward (positive values) or outward (negative values).
Spacing: Scrub across the spacing values to add spacing between paragraphs to the top or
bottom line of the paragraph. This adds space between paragraphs to make the text look less
cramped.
Text Justify: Your two choices are word and letter spacing if text is to be justified. Letter
spacing spreads all the letters out across the text block. Word spacing adds the space between
the words. Both are dangerous choices, and our advice is to apply text justification with care and
to keep the added spacing between words or letters to a minimum.
Container and flow
If any one aspect of text management in Flash hits the proverbial “sweet spot,” this just may be it. This
feature of the Text Layout Framework allows you to create multicolumn text and flow text between the
columns. The really neat thing is you can create your own columns or break a single text box into multiple
columns. Here’s how:
1.
Open the Containers.fla document in your Chapter 6 Exercise folder. When it opens, you
will see a text block containing the first three paragraphs that opened this chapter.
2.
Select the Selection tool, click the text block to select it, and, in the Properties panel, twirl
down the Container and Flow options, as shown in Figure 6-20.
Figure 6-20. A single block of text is about to become a single block of multicolumn text.
www.zshareall.com
Please purchase PDF Split-Merge on www.verypdf.com to remove this watermark.
CHAPTER 6
338
3.
Open the Behavior drop-down. The three choices—Single Line, Multiline, and
Multiline no break—determine how the text will flow within the text box. Select each one,
and see what it does. When you finish, make sure you have Multiline selected.
4.
Double-click the hot text in the Columns category, and enter 2. Press the Enter key, and the
text is now in two columns. Notice, too, that the Gutter Width now sports a value of 20 pixels.
This value is the space between the columns.
5.
Click the Link icon in the Padding area to apply the changes uniformly. Scrub across the Left
padding hot text to see how padding affects the flow of the text in the columns.
6.
Click the Stroke and Fill color chips, and select different colors. A stroke color is added to the
edge of the text box, and you can scrub across the hot text to make the stroke thicker or thinner.
The fill choice fills the text box or container. Set both the Stroke and Fill colors to None.
7.
The final area is 1st Line Offset, and the drop-down menu offers you a variety of choices
ranging from manually setting a value to letting the software handle the duties for you. If you
select pt from the drop-down menu and scrub across the hot text, you will see the top line of
each column move down. This should tell you this feature lets you set the distance between the
top edge of the container and the text. When you finish, select Auto from the drop-down.
8.
Select File
➤
Revert to revert to the original one-column version of this file.
Now that you have had a chance to try this new feature, let’s explore another, even cooler aspect of
working with columns in Flash.
If you are familiar with InDesign or even QuarkXPress, you are quite aware of how multicolumn text is
created. You draw out the text boxes, add some text, and then link them together. When you do this, all of
the text in that first column flows into the other linked columns. This is exactly how it now works in Flash.
Let’s give it a try:
9.
You should have the Containers.fla file open. Click the Selection tool, and click the text
box. The text box or container sports those familiar handles.
10.
Click the bottom-center handle of the text box, and drag it up to a point just under Robert
Bringhurst in the text block. When you release the mouse a red box, the Flow icon shown in
Figure 6-21, appears on the left edge of the text box. This tells you that there is more text in this
text block than you see.
Figure 6-21. The location of that red Flow icon tells you there is more text below the last line.
www.zshareall.com
Please purchase PDF Split-Merge on www.verypdf.com to remove this watermark.
TEXT
339
11.
Click the Flow icon. Your cursor will change from the pointer to what looks like a text box. Click
the stage just under the text box. That new icon told you the text was “loaded,” and when you
clicked the mouse, another text box appears. Inside that new box is the loaded text, and an
arrow, shown in Figure 2-22, appears, which shows you the text is flowing from the top container
to the new one.
To remove a link, double-click the Flow icon on either side of the connecting line.
Figure 6-22. An arrow indicates how the text flows from one container to another.
12.
Click the new text box, and in the Container and Flow options choose 2 columns. You now
have the quote in a single text box and the paragraphs after it spanning two columns. Let’s make
the quote in the top text container a little prettier.
13.
Select the quote (including the quotation marks), twirl down the Character properties, and
choose Italic from the Style drop-down. Change the size to 14 points, and set Leading to
120%.
If text moves between linked containers, expand or contract the containers by clicking
and dragging one of the resize handles. The text that shifted will move back into its
proper location.
14.
Twirl down the Paragraph settings, and set the Indent value to 3 pixels and the Space after
paragraph value to 4.5.
15.
Twirl down Container and Flow. Click the Lock icon in the padding area, and change the
Left value to 10 pixels. Set the 1st Line Offset value to 10 points.
www.zshareall.com
Please purchase PDF Split-Merge on www.verypdf.com to remove this watermark.
CHAPTER 6
340
16.
Select the words Robert Bringhurst, and in the Character area, choose Bold Italic
from the Style drop-down. The entire text block shown in Figure 6-23 is a lot more inviting than
the one we started with in Figure 6-22.
Figure 6-23. The Text Layout Framework drops some amazingly powerful tools into your hands.
Selectable and editable text
What makes selectable text and editable text different from their read-only counterpart? From the point of
view of the Properties panel, not a whole lot. Change the text type setting to Dynamic Text, and
nothing really changes. Change it to Editable, and the Link and Target areas of the Advanced
Character properties area of the Properties panel disappears.
The major difference is not when you create the text; it becomes evident at runtime when the SWF is
playing. Selectable text lets your user select the text in the container and copy it to the clipboard. All of
the formatting applied in the Properties panel is in play when you run the SWF, but it is lost when the
text is copied from the container to the clipboard. Use selectable text when you want the user to be able to
grab text from your SWF and use it elsewhere. A good example would be tutorial sites where you can copy
the code presented, paste it into a text document, and get back to it later.
Editable text is text that can be edited in the SWF. The best way of thinking of this type is as an input box
in a form. This means you can enter text, change words, and so on, while the SWF is running. That’s the
good news. The bad news is changes are hardwired into the SWF, which means you can’t choose Undo or
use Ctrl+Z (Windows) or Cmd+Z (Mac) if you make a mistake.
This book was purchased by
www.zshareall.com
Please purchase PDF Split-Merge on www.verypdf.com to remove this watermark.
TEXT
341
TLF and ActionScript
A lot has changed between how text was handled in Flash CS4 and Flash CS5. We think now is a good
time to pull up a stool, sit down, and review, in very broad terms, what one needs to know before “wiring
up” an exercise or project using ActionScript.
As you have seen, text is found in these things called containers. They either can be physically drawn on
the stage using the Text tool and given an instance name or, as is more common, can be created at
runtime. You also know that the text can be formatted and manipulated using the Properties panel. The
neat thing here is the word properties. If there is a property in the panel, its counterpart is found in
ActionScript. The bad news is, ActionScript is stone, cold stupid. It doesn’t have a clue, for example, what
a container is until you tell it to create one. It won’t format text until you tell it what to do. It won’t even put
the text on the stage until it is told to do so.
Most projects will start with you telling Flash to create a Configuration() object, which is used to tell
Flash there is a container on the stage and how to manage the Text Layout Framework for the stuff in the
container. The actual appearance is handled by the TextFlow() class, which takes its orders, so to
speak, from the Configuration() object.
Naturally, being stupid, the Configuration() object needs to be told exactly how to manage the text in
the container. The default format is set through a property of the Configuration class called
textFlowInitialFormat. To change it, you simply use the TextlayoutFormat () class to set the fonts,
colors, alignment, and so on, and then tell the boss—Configuration ()—that its
textFlowInitialFormat has changed to the ones you set using TextLayoutFormat().The boss will get
that, but he isn’t terribly bright, so you next need to tell him to hand the actual work to another member of
the management team, the TextFlow() class. This class has overall responsibility for any words in a
container. Being just as dim as the boss, TextFlow() needs to be told what a paragraph is
(ParagraphElement), how wide the paragraph is (SpanElement), whether any graphics are embedded in
the paragraph (InLineGraphicElement), whether any of the text contains links (Link Element), and so
on. Not only that, but it needs to be told what text is being added to the container so it can handle the line
length and to add any children (addChild) that contain that formatting so the user can actually see it.
The TextFlow() class, again not being too terribly bright, will then hand the job over to another member
of the management team, the IFlowComposer() class, whose only job is to manage the layout and
display of the text flow within or among the containers. The flow composer finishes the process by deciding
how much text goes into a container and then adds the lines of text to the sprite. This is accomplished
through the use of the addController() method, which creates a ContainerController() object
whose parameters identify the container and its properties.
The usual last step is to tell the FlowComposer to update the controllers and put the text on the stage
according to how the other members of the team have told the Configuration() object how their piece of
the project is to be managed.
With this information in hand, let’s move on to working with TLF in ActionScript.
www.zshareall.com
Please purchase PDF Split-Merge on www.verypdf.com to remove this watermark.
CHAPTER 6
342
Creating a column of text with ActionScript
To create a column of text with ActionScript, follow these steps:
1.
Open a new Flash ActionScript 3.0 document, rename Layer 1 to actions, select the first
frame of the actions layer, and open the Actions panel.
2.
Click once in the Script pane, and enter the following:
var myDummyText:String = "The introduction of the Adobe CS5 product line puts some
powerful typographic tools in your hands—notably, a new API (Application Programming
Interface) called Type Layout Framework (TLF)—and with as more tools in the Adobe
line up nudge closer to a confluence point with Flash, the field of typographic
motion graphics on the Web is about to move into territory that has yet to be
explored. To start that exploration, you need understand what type is in Flash and,
just as importantly, what you can do with it to honor the communication messengers
of your content.";
You need some text to add to the stage. This string is the third paragraph of this chapter.
3.
Now that you have the text to go into the container, you need to load the class that will manage it.
Press the Enter (Windows) or Return (Mac) key, and add the following line of code:
var config:Configuration = new Configuration();
As you may have noticed, as soon as you created the Configuration() object, Flash imported the
class—flashx.textLayout.elements.Configuration—whose primary task is to control how TLF
behaves. The next code block tells TLF how the text will appear on the stage.
4.
Press the Enter (Windows) or Return (Mac) key twice, and enter the following:
var charFormat:TextLayoutFormat = new TextLayoutFormat();
charFormat.fontFamily = "Arial, Helvetica, _sans";
charFormat.fontSize = 14;
charFormat.color = 0x000000;
charFormat.textAlign = TextAlign.LEFT;
charFormat.paddingLeft =100;
charFormat.paddingTop = 100;
The TextLayoutFormat class, as we said earlier, is how the text in a container is formatted. The
properties in this class affect the format and style of the text in a container, a paragraph, or even a single
line of text. In this case, we are telling Flash which fonts to use, the size, the color, how it is to be aligned
(note the uppercase used for the alignment), and the padding that moves it off the edges of the container.
www.zshareall.com
Please purchase PDF Split-Merge on www.verypdf.com to remove this watermark.
TEXT
343
Before you move on, you need you to do something. There is a coding issue. Scroll up
to the import statements. If you see this line—
import flashx.textLayout.elements.
TextAlign;
—proceed to the next code block. If you don’t, delete this line in the code
block just entered:
charFormat.textAlign = TextAlign.LEFT;
. Reenter
charFormat.textAlign =
. Type in the first two letters of the class (
Te
), press
Ctrl+spacebar, and the code hint should appear. Find
TextAlign
, and double-click it.
This should add the missing
import
statement. To preserve your sanity, we will be
providing a list of the
import
statements that should appear at the end of each exercise.
We strongly suggest that you compare your list of
import
statements against the list
presented and, if you are missing any, add them into your code.
5.
Now that you know how the text will be formatted, you need to tell the Configuration() object
to use the formatting. If you don’t, it will apply whatever default setting it chooses. Press the Enter
(Windows) or Return (Mac) key twice, and enter the following:
config.textFlowInitialFormat = charFormat;
6.
Press the Enter (Windows) or Return (Mac) key, and enter the following code block:
var textFlow:TextFlow = new TextFlow( config );
var p:ParagraphElement = new ParagraphElement();
var span:SpanElement = new SpanElement();
span.text = myDummyText;
p.addChild( span );
textFlow.addChild( p );
The TextFlow () object needs to be here because its job is to manage all the text in the container. The
constructor—TextFlow (config)—lets TLF know that it is to use the config object created earlier so it
now knows how to format the contents of the container and even the container itself.
The next constructor—ParagraphElement()—essentially tells Flash how a paragraph is to be handled.
There is only one here, so it really doesn’t need a parameter.
7.
The final step is to get all the formatting and layout into the container on the stage. Press the
Enter (Windows) or Return (Mac) key, and add these final two lines:
textFlow.flowComposer.addController( new ContainerController( this, 500, 350 ) );
textFlow.flowComposer.updateAllControllers();
The first line adds the ContainerController and tells Flash the container being managed is the current
DisplayObject (this), which currently is the stage, and to set its dimensions to 500 pixels wide by 350
pixels high.
8.
Save the project, and test the movie. The text, as shown in Figure 6-24, appears using the
formatting instructions you set.
www.zshareall.com
Please purchase PDF Split-Merge on www.verypdf.com to remove this watermark.
CHAPTER 6
344
Import statements for this exercise
These are the import statements for this exercise:
import flashx.textLayout.elements.Configuration;
import flashx.textLayout.formats.TextLayoutFormat;
import flashx.textLayout.formats.TextAlign;
import flashx.textLayout.elements.TextFlow;
import flashx.textLayout.elements.ParagraphElement;
import flashx.textLayout.elements.SpanElement;
import flashx.textLayout.container.ContainerController;
Figure 6-24. Using ActionScript to create and format the container and its text
The completed file for this exercise—
TLF_simple_AS.fla
—can be found in the
Complete
folder in this Chapter’s
Exercise
folder.
Though this coding task may, at first, appear to be a rather convoluted process, we can assure it isn’t; it
will become almost second nature as you start using ActionScript to play with text in the containers.
With the introduction of the Text Layout Format, your ability to create text, format text, put it in columns,
and generally manipulate it using ActionScript has greatly expanded your creative possibilities. Before you
get all excited about this, you need to know that the word Framework is there for a reason.
www.zshareall.com
Please purchase PDF Split-Merge on www.verypdf.com to remove this watermark.
TEXT
345
Any TLF text objects you create will rely on a specific TLF ActionScript library, also called a runtime
shared library (RSL). When you work on the stage in the Flash interface, Flash provides the library. This
is not the case when you publish the SWF and place it in a web page. It needs to be available, much like
Flash Player, on the user’s machine. When the SWF loads, it is going to hunt for the Library in three
places:
The local computer: Flash Player looks for a copy of the library on the local machine it is playing
on. If it is not there, it heads for Adobe.com.
Adobe.com: If no local copy is available, Flash Player will query Adobe’s servers for a copy of
the library. The library, like the Flash Player plug-in, has to download only once per computer.
After that, all subsequent SWF files that play on the same computer will use the previously
downloaded copy of the library. If, for some reason, it can’t grab it there, it will look in the folder
containing the SWF.
In the folder containing the SWF: If Adobe’s servers are not available for some reason, Flash
Player looks for the library in the web server directory where the SWF file resides. To provide this
extra level of backup, manually upload the library file to the web server along with your SWF file.
We provide more information around how to do this in Chapter 15.
When you publish a SWF file that uses TLF text, Flash creates an additional file named
textLayout_X.X.X.XXX.swz (where the Xs are replaced by the version number) next to your SWF file. You
can optionally choose to upload this file to your web server along with your SWF file. This allows for the rare
case where Adobe’s servers are not available for some reason. If you open the file where you saved this
exercise, you will see both the SWF and, as shown in Figure 6-25, the SWZ file.
Figure 6-25. The .swz file contains the Text Layout Framework.
Using TLF text as a button
It should come as no surprise that you can use TLF text as a button to kick off an event in your movie. For
example, you could have a text block on the stage that talks about a visit to Times Square in New York,
and when the user clicks the phrase Times Square, a photo appears on the stage. In this example, you
are going to click some text, and a yellow star you will create on the stage starts spinning. Here’s how:
1.
Open a new Flash ActionScript 3.0 document, and save it to your Chapter 6 Exercise folder as
TLF_eventLink_AS.fla. Change the name of Layer 1 to Star, and add a new layer named
actions.
www.zshareall.com
Please purchase PDF Split-Merge on www.verypdf.com to remove this watermark.
CHAPTER 6
346
2.
Click once in the first frame of the Star layer. Click and hold on the Rectangle tool on your
toolbar, and select the Polystar tool.
3.
In the Properties panel, twirl down the Fill and Stroke properties and set the Stroke
value to None and the Fill value to Yellow (#FFFF00).
4.
Twirl down the Tool Settings, and click the Options button to open the Tool Settings
dialog box shown in Figure 6-26. Select Star from the Style drop-down, and enter 5 for the
Number of Sides. Click OK to close the dialog box.
Figure 6-26. Use the PolyStar tool to create stars.
5.
Draw a star somewhere in the bottom half of the stage, convert it to a movie clip named Star,
set its registration point to Center, and in the Properties panel give the Star movie clip the
Instance name of starMC.
6.
Click the first frame of the actions layers, and open the Actions panel. When the panel
opens, click once in the Script pane, and enter the following code block:
var containerSprite:Sprite = new Sprite();
this.addChild( containerSprite );
containerSprite.x = 25
containerSprite.y = 50;
As we pointed out in Chapter 4, a Sprite is a virtual movie clip with no timeline. We start by creating a
Sprite named containerSprite, which will be used to hold the text. The reason we need this is
because there is going to be some interactivity involved. This Sprite is placed 25 pixels from the left edge
of the stage and 50 pixels from the top.
7.
Press the Enter (Windows) or Return (Mac) key twice, and enter the following code:
var container :ContainerController = new ContainerController( containerSprite, 400,
300);
var config :Configuration = new Configuration();
var charFormat:TextLayoutFormat= new TextLayoutFormat();
www.zshareall.com
Please purchase PDF Split-Merge on www.verypdf.com to remove this watermark.
TEXT
347
charFormat.fontFamily= "Arial, Helvetica,_sans";
charFormat.fontSize = 14;
charFormat.color = 0X000000;
charFormat.textAlign = TextAlign.LEFT;
config.textFlowInitialFormat = charFormat;
Nothing new here. The container for the text is created along with the Configuration() object, and the
formatting for the text to be placed in the container is created.
8.
Press the Enter (Windows) or Return (Mac) key twice, and enter the following:
var textFlow :TextFlow = new TextFlow();
var p :ParagraphElement = new ParagraphElement();
p.linkHoverFormat = { color:0XFF0000 };
p.linkNormalFormat = { color:0x0000FF,textDecoration:TextDecoration.NONE };
The last two lines are new, and their purpose is to let you change the color of a word or group of words
when the user rolls over them. The linkHoverFormat property belongs to the TextFormat class and is
used to tell Flash what color the text identified as a link will be when the mouse rolls over it. In this case,
the color will change to Red.
As you may have guessed, the second line tells Flash what color the link is to be when the mouse rolls off.
In this case, it will be blue. Naturally, links are traditionally underlined. The way the underline is removed is
to use the NONE constant, which is part of the TextDecoration class. If you want the underline, it would
be TextDecoration.UNDERLINE.
9.
The next step in the process is to tell Flash what to do when the colored text is clicked. Press the
Enter (Windows) or Return (Mac) key twice, and enter the following:
var link:LinkElement = new LinkElement();
link.addEventListener(FlowElementMouseEvent.CLICK, linkClicked);
10.
There is, of course, nothing to click. Let’s deal with that issue. Press the Enter (Windows) or
Return (Mac) key a couple of times, and add the following:
var linkSpan:SpanElement = new SpanElement();
linkSpan.text = "Click here" ;
link.addChild(linkSpan);
var span:SpanElement = new SpanElement();
span.text = " to see your star spin on the stage";
p.addChild(link);
p.addChild(span);
www.zshareall.com
Please purchase PDF Split-Merge on www.verypdf.com to remove this watermark.
CHAPTER 6
348
11.
The next step is to get the text flowing into the container. Press the Enter (Windows) or Return
(Mac) key, and add the following:
textFlow.addChild(p);
textFlow.flowComposer.addController(container);
textFlow.flowComposer.updateAllControllers();
12.
The final code bit is the function that gets the star spinning when the text is clicked. Enter the
following:
function linkClicked(evt:FlowElementMouseEvent) :void{
evt.preventDefault();
var tween :Tween = new Tween( starMC, "rotation", Elastic.easeOut, 0, 180, 2,
true);
}
The first line of code tells Flash to ignore any default settings there might be in regards to the mouse and
the text in the container.
The magic happens in that second line. The parameters tell the Tween class to work with the rotation
property of the star (starMC) and to apply an easeOut to the star when it finishes rotating. Naturally, Flash,
being stupid, needs to be told that the rotation starts with the star at 0 degrees and to rotate across 180
degrees. It does this two times and uses seconds as the measure of time.
13.
Click the Check Syntax button as your first skim through the code looking for errors. If there are
none, your computer will ding. If errors are found, they will be shown in the Compiler panel. The
most common error will be spelling or a missing import statement.
Here’s a quick tip. If a class doesn’t show up as an
import
, the Compiler panel will tell
you the property is undefined. Select the class in the code where it appears, and
delete the text. Type in the first two letters of the class, and press Ctrl+spacebar. The
class will appear in the resulting code hint. Double-click the class to add it back into the
code. This also creates the missing
import
statement.
14.
Save and test the movie. The text, as shown in Figure 6-27, is colored. When you click the
mouse, the star spins. A completed version of this file—TLF_eventlink_AS.fla—can be found
in the Complete folder located in your Chapter 6 Exercise folder.
www.zshareall.com
Please purchase PDF Split-Merge on www.verypdf.com to remove this watermark.
