Tài liệu Foundation Flash CS5 For Designers- P9 ppt
Bạn đang xem bản rút gọn của tài liệu. Xem và tải ngay bản đầy đủ của tài liệu tại đây (1.46 MB, 50 trang )
ANIMATION, PART 1
379
Classic tweening
When we left that hapless hot pepper hanging, it had been hoping to rotate. It didn’t and instead found its
molecules tumbling in a frenzied jumble. We told you there was a much easier way to handle that rotation,
and classic tweening is one of them. Shape tweens are for rearranging anchor points and animating
gradients. Classic tweens and motion tweens are for everything else, from enlivening text and imported
photos to animating vector artwork drawn directly in Flash or imported from another application like
Illustrator CS5 or Fireworks CS5. As we’ve said, we’ll cover motion tweening in Chapter 8. Here, we’ll
continue with classic tweens only, but keep in mind that you’ll have additional choices.
In contrast to shape tweens, classic tweens require self-contained entities. These include symbols,
primitives, drawing objects, and grouped elements, which many designers find easier to work with than
raw shapes. Open PepperSymbol.fla in this chapter’s Exercise folder, for example, and you’ll see that
it’s easier to select the whole pepper without accidentally omitting the cap.
Be aware that primitives and drawing objects blur the lines somewhat between what
constitutes a shape and what constitutes a symbol. It is possible to apply both shape
tweens and motion tweens to primitives and drawing objects. However, many properties,
such as color, alpha, and the like—and in primitives, shape—are properly animated only
with shape tweens. These “gotchas” tend to steer the authors toward a path of least
resistance: use shapes for shape tweens and symbols for classic tweens. Within those
symbols, use whatever elements you like.
One fundamental point: when it comes to classic tweens, always put each tweened
symbol on its own layer. If you apply a classic tween to keyframes that contain more
than one symbol, Flash will try to oblige—but will fail. It’s a simple rule, so abide by it,
and you’ll be happy.
Rotation
Let’s pick up with that rotation, shall we?
1.
Open the PepperSymbol.fla file in this chapter’s Exercise folder. You’ll see a pepper symbol in
the Library (the shapes from the earlier PepperShape.fla example have been placed inside a
graphic symbol).
2.
Add a keyframe in frame 10. Then select the Free Transform tool, and rotate the artwork 90
degrees in either direction in that keyframe you just added in frame 10. Sounds familiar, right?
Here comes the difference.
3.
Right-click (Windows) or Control+click (Mac), and select Create Classic Tween from the
context menu. There it is!
www.zshareall.com
Please purchase PDF Split-Merge on www.verypdf.com to remove this watermark.
CHAPTER 7
380
4.
Drag the playhead back and forth to see a nice, clean rotation of the pepper. As you saw with shape
tweens, the span of frames between the two keyframes changes color (to purple this time), and a
solid arrow appears within the span to indicate a successful tween, as shown in Figure 7-18.
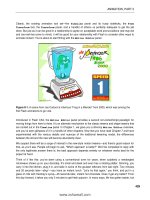
Figure 7-18. Classic tweens, indicated by purple and an arrow between the keyframes, make rotations a
snap.
Now, let’s think about real rotation: topsy-turvy—a full 360-degree spin. How would you do it? (Hint: This is
something of a trick question.) In a full spin, the pepper ends up in the same position at frame 10 as it
starts with in frame 1, so there’s not really a transformation to tween, is there?
Rotation is set through the Rotate drop-down menu in the Tweening area of the Properties panel.
Notice that the Rotate drop-down is currently set to Auto, as shown in Figure 7-19. This is because you
have already rotated the pepper somewhat by hand. The choices are CW (clockwise) and CCW
(counterclockwise). The hot text immediately to the right of the drop-down menu specifies how many times
to perform the rotation.
This book was purchased by
www.zshareall.com
Please purchase PDF Split-Merge on www.verypdf.com to remove this watermark.
ANIMATION, PART 1
381
Figure 7-19. The Rotate property makes quick work of rotations.
5.
Click the pepper in frame 10, and select Modify
➤
Transform
➤
Remove Transform to reset
the symbol’s rotation.
6.
Click once in frame 1. In the Rotate drop-down menu, change the setting to CW (clockwise), and
drag the playhead back and forth. Pretty neat!
Classic tween properties
While we’re looking at the Tweening area of the Properties panel, let’s go through the other settings.
Here’s a quick overview of classic tween properties:
Ease and Edit: These settings apply a range of easing to the tween. The Edit button (a pencil
icon) allows for advanced, custom easing. More on this in the “Easing” section of this chapter.
www.zshareall.com
Please purchase PDF Split-Merge on www.verypdf.com to remove this watermark.
CHAPTER 7
382
Rotate and [number]: These settings control the type of rotation and the number of times the
rotation occurs. Only CW and CCW support the
[number] setting.
Snap: This Snap check box helps position a symbol along its motion guide (discussed in the
“Motion guides” section later in this chapter).
Orient to path: This check box applies only to tweens along a motion guide. It determines
whether a symbol points toward the direction in which it moves.
Scale: If a check mark is present, tweening for the current span of frames will include a
transformation in scale (size), if such a transformation exists. If you haven’t scaled anything, it
doesn’t matter what state the check mark is in. If scaling and other transformations are combined
in a given classic tween, only the other transformations will show if the check mark is deselected.
Sync: In our experience, most people don’t even realize this property exists, but it can be a real
time-saver when you’re dealing with graphic symbols. Unlike movie clips, which have their own
independent timelines, graphic symbols are synchronized with the timeline in which they reside.
Even so, there is a bit of flexibility: graphics can be looped, played through once, or instructed to
rest on a specified frame of their own timeline. If a particular graphic symbol has been tweened
numerous times in a layer, the presence of the Sync check mark means you can update these
timeline options for all keyframes in that layer simply by making changes to the first graphic
symbol in the sequence. In addition, Sync allows you to swap one graphic symbol for another
and have that change ripple through all the synced keyframes in that layer. More on this feature
in the “Editing multiple frames” section of this chapter.
Scaling, stretching, and deforming
We visited this topic in the “Shape tweening” section, and honestly, there’s not a whole lot different for
classic tweens. The key thing to realize is that scaling, stretching, and deforming a symbol is like doing the
same to a T-shirt with artwork printed on it. Even if the artwork looks different after all the tugging and
twisting, it hasn’t actually changed. Shake it out, and it’s still the same picture. Shape tweening, in
contrast, is like rearranging the tiles in a mosaic. For this reason, the Free Transform tool disables the
Distort and Envelope options for symbols. These transformations can’t be performed on symbols and
therefore can’t be classic tweened.
Symbol distortion can be performed with the 3D tools (Chapter 9) and can even be
animated, but the animation requires motion tweens (Chapter 8), not classic tweens.
Let’s take a quick look at the other transform options:
1.
Return to the PepperSymbol.fla file, select frame 1, and set the Rotation setting for the
tween to None.
2.
Use the Free Transform tool to perform a shear transformation at frame 10.
www.zshareall.com
Please purchase PDF Split-Merge on www.verypdf.com to remove this watermark.
ANIMATION, PART 1
383
Shear? What’s that? Something you do with sheep, right? Well, yes, but in Flash, shearing is also called
skewing, which can be described as tilting.
3.
With the Free Transform tool active, click the Rotate and Skew option at the bottom of the
Tools panel, and then hover over one of the side transform handles (not the corners) until the
cursor becomes an opposing double-arrow icon. Click and drag to transform the pepper (see
Figure 7-20).
Figure 7-20. Classic tweening a symbol transformation. The “shear” cursor is just under the transformation
point.
The live preview gives you an idea what the symbol will look like before you let go of the mouse. Note that
the skew occurs in relation to the transformation point, indicated by the small white circle.
4.
Drag the white circle around inside or even outside the bounding box of the pepper, and then
skew the pepper again to see how its placement affects the transformation. Hold down Alt
(Windows) or Option (Mac) while skewing to temporarily ignore the transformation point and skew
in relation to the symbol’s opposite edge.
We’ve been using the Free Transform tool quite a bit, so let’s try something different.
5.
Open the Transform panel (Window
➤
Transform) and note its current settings. You’ll see the
skew summarized near the bottom and, interestingly, the change in scale summarized near the
top (see Figure 7-21). From this, it becomes clear that skewing affects scale when applied with
the Free Transform tool.
6.
To see the difference, select Modify
➤
Transform
➤
Remove Transform or click the Remove
Transform button in Figure 7-21 at the bottom right of the Transform panel to reset the
symbol. The scale area of the Transform panel returns to 100 percent horizontal and 100
percent vertical.
www.zshareall.com
Please purchase PDF Split-Merge on www.verypdf.com to remove this watermark.
CHAPTER 7
384
Figure 7-21. The Transform panel provides access to precision measurements.
7.
Click the Skew radio button, and scrub the hot text of either skew value to 38. Notice that the
scaling stays at 100 percent, which subtly changes how the skew looks.
8.
Enter 200 into the scale input fields at the top. (The Constrain check mark means you need to
enter this number into only one of them.) Slide the playhead back and forth to see two
transformations tweened at once.
Easing
Here’s where classic tweening begins to pull ahead of shape tweening. Easing is much more powerful for
classic tweens, thanks to the Custom Ease In/Ease Out editor. Before we delve into that, though, let’s
look at a sample use of the standard easing controls for a classic tween, so you can see how much easier
things are with the custom variety.
1.
Open the MalletNoEasing.fla file in this chapter’s Exercise folder. You’ll see a hammer
graphic symbol in the Library and an instance of that symbol on the stage. Select the hammer,
and note that the transformation point—the white dot in the handle—is located in the center of the
symbol.
2.
We’re going to make this hammer swing to the left, so select the Free Transform tool.
Selecting this tool makes the transformation point selectable. Click and drag that point to the
bottom center of the mallet (see Figure 7-22).
www.zshareall.com
Please purchase PDF Split-Merge on www.verypdf.com to remove this watermark.
ANIMATION, PART 1
385
Figure 7-22. You’ll need to move that transformation point to make the movement realistic.
3.
Insert a keyframe at frame 10 (Insert
➤
Timeline
➤
Keyframe), and rotate the mallet at
frame 10 to the left by 90 degrees.
4.
Apply a classic tween to the span of frames between 1 and 10, and scrub the timeline to see the
effect. That’s not bad but not especially realistic. How about some easing and bounce-back?
5.
In the Tweening area of the Properties panel, scrub the Ease hot text all the way to the left
to specify a full ease in. The number should be –100. This causes the hammer to fall slowly as it
begins to tip and increase speed as it continues to fall (see Figure 7-23).
Figure 7-23. Ease in (right) vs. no easing (left). On the right, the hammer falls in a more natural manner.
www.zshareall.com
Please purchase PDF Split-Merge on www.verypdf.com to remove this watermark.
CHAPTER 7
386
This is a good start. To push the realism further, let’s embellish the animation. We’re going to provide
some tweening that makes the hammer rebound on impact and bounce a few times.
6.
Add new keyframes at frames 15, 20, 23, and 25. At frame 15, use the Free Transform tool or
the Transform panel to rotate the hammer to approximately northwest; in the Transform
panel, this could be something like –55 in the Rotate area. At frame 23, set the rotation to
roughly west-northwest (something like –80 in the Rotation area). A storyboard version of the
sequence might look like Figure 7-24.
Figure 7-24. Using several keyframes to make the hammer bounce
The fading image trails—visual echoes of the mallet—are the result of something called
onion skinning, which is very helpful in animation work. It’s used here for illustrative
purposes and is covered later in the chapter.
7.
Now that the mallet has been positioned, it just needs to be tweened and eased. You can click
separately into each span of frames and apply a classic tween, or you can click and drag across
as many spans as you need (as shown in Figure 7-25). That way, you can apply the tweens all in
one swoop.
Figure 7-25. Tweens can be applied to more than one frame span at a time.
www.zshareall.com
Please purchase PDF Split-Merge on www.verypdf.com to remove this watermark.
ANIMATION, PART 1
387
8.
Click into each span of frames to apply easing, for the final touch. Remember that span 1 through
10 already has –100. Apply the following easing to the remaining spans:
Span 10 to 15: 100 (full ease out)
Span 15 to 20: –100 (full ease in)
Span 20 to 23: 100
Span 23 to 25: –100
9.
Drag the playhead back and forth to preview the action, and then test the movie to see the final
presentation. If you like, compare your work with MalletNormalEase.fla in the Complete
folder.
This exercise wasn’t especially arduous, but wouldn’t it be even cooler if you could perform all the
preceding steps with a single classic tween?
Custom easing
Introduced in Flash 8, the Custom Ease In/Ease Out dialog box unleashes considerably more power
than traditional easing. Not only does it provide a combined ease in/out—where animation gradually
speeds up and gradually slows down, or vice versa—but it also supports multiple varied settings for
various kinds of easing, all within the same classic tween. Let’s take a look.
To perform custom easing, select a span of motion-tweened frames, and then click the Edit button (a
pencil icon) in the Tweening area of the Properties panel. You’ll see the Custom Ease In/Ease
Out dialog box, as shown in Figure 7-26. This dialog box contains a graph with time along the horizontal
axis, represented in frames, and percentage of change along the vertical axis.
Figure 7-26. The Custom Ease In/Ease Out dialog box
www.zshareall.com
Please purchase PDF Split-Merge on www.verypdf.com to remove this watermark.
CHAPTER 7
388
Here’s a quick rundown of the various areas of the dialog box:
Property: By default, this is disabled until you deselect the check mark next to it. If the check
mark is present, custom easing—as specified by you on the grid—applies to all aspects of the
tween symbol. If the check mark is absent, this drop-down menu lets you distinguish among
Position, Rotation, Scale, Color, and Filters.
Use one setting for all properties: When selected, this allows multiple properties to
be eased individually.
Grid: The Bezier curves on this grid determine the visual result of the custom easing applied.
Preview: Click the two buttons in this area to play and stop a preview of the custom easing.
OK, Cancel, and Reset: The OK and Cancel buttons apply and discard any custom easing.
Reset reverts the Bezier curves to a straight line (no easing) between the grid’s opposite
corners.
So, how does the grid work? Let’s look at a traditional ease in to see how the Custom Ease In/Ease
Out dialog box interprets it.
1.
Open the CustomEasingComparison.fla file in the Chapter 7 Exercise folder, and set the
Ease property to –100 (a normal full ease in) for the tween in the top layer.
2.
Scrub the timeline to confirm that the upper symbol starts its tween more slowly than the lower
one but speeds up near the end. The lower symbol, in contrast, should advance the same
distance each frame (see Figure 7-27).
Figure 7-27. An ease in causes the upper symbol to start slower and speed up (artwork by Steve
Napiersk).
3.
Click the Edit button in the Tweening area of the Properties panel to see what an ease out
looks like on the grid. The curve climbs the vertical axis (percentage of change) rather slowly and
then speeds its ascent near the end of the horizontal axis (time in frames). Hey, that makes
sense!
www.zshareall.com
Please purchase PDF Split-Merge on www.verypdf.com to remove this watermark.
ANIMATION, PART 1
389
4.
Click Cancel, apply a full ease out (100), and then click the Edit button to check the grid again.
Bingo—the opposite curve.
It follows that a combination of these would produce either a custom ease in/out (slow, fast, slow) or a
custom ease out/in (fast, slow, fast). Let’s do the first of those two.
5.
Click the upper-right black square in the grid to make its control handle appear. Drag it up to the
top of the grid and about two-thirds across to the left, as shown in Figure 7-28.
Figure 7-28. Dragging a control handle to create a custom ease
6.
Click the bottom-left black square, and drag its control handle two-thirds across to the right. The
resulting curve—vaguely an S shape—effectively combines the curves you saw for ease in and
ease out (see Figure 7-29).
7.
Click OK to accept this setting, and scrub the timeline or test the movie to see the results.
8.
Let’s inverse this easing for the lower symbol. Select the lower span of frames, and click the
Edit button. This time, drag the lower-left control handle two-thirds up the left side. Drag the
upper-right control handle two-thirds down the right side to create the inverted S curve shown in
Figure 7-30. Click OK, and compare the two tweens.
www.zshareall.com
Please purchase PDF Split-Merge on www.verypdf.com to remove this watermark.
CHAPTER 7
390
Figure 7-29. An S shape produces an ease in/out (slow-fast-slow) tween.
Figure 7-30. An inverted S shape produces an ease out/in (fast-slow-fast) tween.
Think this is cool? We’re just getting started!
This book was purchased by
www.zshareall.com
Please purchase PDF Split-Merge on www.verypdf.com to remove this watermark.
ANIMATION, PART 1
391
Adding anchor points
By clicking anywhere along the Bezier curve, you can add new anchor points. This is where you can
actually save yourself a bit of work.
1.
Open the MalletNoEasing.fla file in this chapter’s Exercise folder again. If you saved your
work earlier, remove the tween, and delete all frames except for frame 1. To do this, click and
drag from frame 2 to the right until you’ve selected all the frames, and then use Edit
➤
Timeline
➤
Remove Frames.
2.
Confirm that the mallet’s transformation point is positioned at the bottom center of its wooden
handle. Now add a new keyframe at frame 25, and apply a classic tween to the span of frames
between 1 and 25.
3.
Using the Free Transform tool at frame 25, rotate the mallet 90 degrees to the left. Because a
tween is already applied, you can preview the falling mallet by scrubbing the timeline.
This may seem like déjà vu, but things are about to change. You’re going to emulate the same bounce-
back tween you did earlier, but this time, you’ll do it all in one custom ease.
4.
Click in frame 1—or anywhere inside the tween span—and click the Edit button in the
Tweening area of the Properties panel.
5.
In the Custom Ease In/Ease Out dialog box, click the Bezier curve near the middle, and
you’ll see a new anchor point with control handles. Click that new anchor point and press the
Delete key—it disappears. Add it again and straighten the control handles so that they’re
horizontal, as shown in Figure 7-31.
Figure 7-31. Starting a more complex custom ease
www.zshareall.com
Please purchase PDF Split-Merge on www.verypdf.com to remove this watermark.
CHAPTER 7
392
6.
Repeat this process three more times, up the hill, as shown in Figure 7-32. This prepares the way
for the sawtooth shape you’ll create in the next step.
Figure 7-32. Continuing to add anchor points for a sawtooth curve
7.
Leave the corner anchor points where they are. Position the four new anchor points as follows:
100%, 10
60%, 15
100%, 20
85%, 23
You’ll notice that the anchor points gently snap to the grid while you drag. To temporarily
suppress this snapping, hold down the X key.
8.
You’ve probably heard of certain procedures described as more of an art than a science. Well,
we’ve come to that point in this step. Here’s the basic idea, but it’s up to you to tweak these
settings until they feel right to you. To achieve the sawtooth curve we’re after—it looks very much
like the series of shark fins shown in Figure 7-33—click each anchor point in turn and perform the
following adjustment:
If it has a left control handle, drag that handle in toward the anchor point.
If it has a right control handle, drag that handle out a couple of squares to the right.
You should get something like the shape shown in Figure 7-33.
www.zshareall.com
Please purchase PDF Split-Merge on www.verypdf.com to remove this watermark.
ANIMATION, PART 1
393
Figure 7-33. Shark fins produce a bounce-back effect.
9.
Click the Preview play button to test your custom ease. It should look similar to the original
series of mallet bounce-back tweens, but this time you saved yourself a handful of keyframes.
How does this work? As depicted in the grid and following the horizontal axis, you have an ease-in curve
from frames 0 to 10, an ease-out curve from 10 to 15, an ease-in curve from 15 to 20, and so on—just like
your series of keyframes from earlier in the chapter. The mallet moves from its upright position to its
leaned-over position in the very first curve. From frames 10 to 15, the vertical axis goes from 100 percent
down to 60 percent, which means that the mallet actually rotates clockwise again toward its original
orientation, but not all the way. With each new curve, the hammer falls again to the left, and then raises
again, but never as high. Compare your work with MalletCustomEasing.fla in this chapter’s Complete
folder.
Easing multiple properties
On the final leg of our custom easing expedition, let’s pull out all the stops and examine a tween that
updates multiple symbol properties at once. You’ll be familiar with most of what you’re about to see, and
the new parts will be easy to pick up.
1.
Open the CustomEasingMultiple.fla file in this chapter’s Exercise folder. Select frame 1,
and note that a movie clip symbol of an apple shape appears in the upper-left corner of the stage.
It is solid green. Scrub across to frame 55, and note the changes to the starting state of the apple
that occur as you move the playhead.
www.zshareall.com
Please purchase PDF Split-Merge on www.verypdf.com to remove this watermark.
CHAPTER 7
394
At this point, frame 55, the apple is positioned in the center of the stage, is much larger and more naturally
colored, and has a drop shadow (see Figure 7-34). From this, you can surmise that color and filters are
tweenable—that’s the new part.
Figure 7-34. You are about to discover that it isn’t only rotation that can be tweened.
2.
In frame 1, select the apple symbol to see that a Tint has been applied in the Properties
panel, which is replaced by None in the other keyframe. Next, twirl down the Filters at frame
55, and click the apple to see that a drop shadow has been applied that is not present in frame 1.
The Filters properties are no different from Position and Scale as far as tweens are
concerned.
3.
Click into the span of tweened frames, and note that a CW (clockwise) rotation has been specified
for Rotation and Scale is enabled (without it, the apple wouldn’t gradually increase in size).
The Ease property reads ---, which means custom easing has been applied. That’s what we’re
after. Click the Edit button.
4.
Thanks to the empty Use one setting for all properties check box, the Property
drop-down menu is now available. Use the drop-down menu to look at the grid curve for each of
five properties, all of which are depicted in the tween: Position, Rotation, Scale, Color,
and Filters. Each property has its own distinct curve, which translates into five individual
custom ease settings for their respective properties (see Figure 7-35).
www.zshareall.com
Please purchase PDF Split-Merge on www.verypdf.com to remove this watermark.
ANIMATION, PART 1
395
Figure 7-35. The Custom Ease In/Ease Out dialog box lets you specify distinct easing for five
different tweenable properties.
5.
Click the Use one setting for all properties check box to disable the drop-down
menu.
Ack! Have you lost your custom settings? Thankfully, no. Flash remembers them for you, even though
they’re hiding.
6.
Click the Preview play button to preview the tween with no easing (the default lower-left to
upper-right curve).
7.
Click the check box again to see that the custom ease settings are still intact. Preview the tween
again, if you like.
Using animation
So far, we’ve shown you a hefty animation toolbox. We’ve opened it up and pulled out a number of
powerful tools to show you how they work. In doing so, we’ve covered quite a bit of ground, but there are
still a handful of useful animation features and general workflow practices to help bring it all together. Let’s
roll up our sleeves, then, shall we?
A closer look at the Timeline panel
Whether you use shape, classic, or motion tweens, the Timeline panel gives you a pint-sized but
important dashboard (see Figure 7-36). Don’t let its small size fool you. This strip along the bottom of the
timeline helps you quickly find your bearings, gives you at-a-glance detail on where you are, and even lets
you time travel into both the past and the future, to see where you’ve been and where you’re going.
www.zshareall.com
Please purchase PDF Split-Merge on www.verypdf.com to remove this watermark.
CHAPTER 7
396
Figure 7-36. The bottom edge of the timeline provides a collection of useful tools.
Let’s take an inventory of this useful, if small, real estate.
Center Frame: In timelines that are long enough to scroll, this button centers the timeline on the
playhead.
Onion Skin and Onion Skin Outlines: These buttons toggle two different kinds of onion
skinning, which give you a view of your work as a series of stills.
Edit Multiple Frames: This button allows you to select more than one keyframe at the same
time, in order to edit many frames in one swoop.
Modify Onion Markers: Click this button to see a drop-down menu that controls the
functionality of the onion skin buttons.
Current Frame: This indicates the current location of the playhead. Scrub or enter a value to
move the playhead to that frame.
Frame Rate: This indicates the movie’s frame rate. Scrub or enter a value to change it.
Elapsed Time: Given the current frame and the movie’s frame rate, this indicates the duration
in seconds of the playhead’s position. For example, in a movie with a frame rate of 24 fps, this
area will say 1.0s at frame 24. Scrub or enter a value to move the playhead to the frame that
closely matches your specified elapsed time.
www.zshareall.com
Please purchase PDF Split-Merge on www.verypdf.com to remove this watermark.
ANIMATION, PART 1
397
Onion skinning
Traditional animators—those wonderful people who brought us Mickey Mouse and Bugs Bunny—often
drew the motion of their characters on very thin paper over illuminated surfaces called light boxes. This
paper, called onion skin, allowed the artist to see through the current drawing to what had occurred in the
previous drawings or frames. In this way, animators could control the motion of someone’s head or the
speed and shape of the anvil about to land on a coyote’s head.
Flash offers you this same capability with a lot more flexibility than flipping through sheets of paper. In
Flash, you can choose to see through as many frames as you want, moving backward and forward looking
at solids or outlines. Let’s take a look at how you do this:
1.
Open the CuriousRabbit.fla file in this chapter’s Exercise folder. Pay particular attention to
the movie’s frame rate of 30 fps.
2.
All of the animation happens in the Rabbit movie clip found in the Library. Double-click this
movie clip in the Library to open its timeline. Drag the playhead to frame 60 where the rabbit
begins to move its head closer to you. Take a look at the Elapsed Time indicator at the bottom
of the panel. It should, as shown in Figure 7-37, read about 2.0 seconds. This makes sense:
60/30 = 2.0.
Figure 7-37. Now you know why it is called a timeline.
www.zshareall.com
Please purchase PDF Split-Merge on www.verypdf.com to remove this watermark.
CHAPTER 7
398
3.
Change the movie’s fps to 60, and note the Elapsed Time changes, as expected, to 1 second.
Now change the frame rate to 15 fps. The fps shows 4.1 seconds. What’s with the discrepancy?
Shouldn’t it be 4 seconds? We aren’t sure, but it is close enough to the expected value to satisfy
us. Change the time back to the original 30 fps.
4.
Place the playhead at frame 60, and, using the bar at the bottom of the timeline, scroll all the way
to the left until you see frame 1 and the playhead is hidden. This is a common issue faced by
Flash designers. You have a long timeline, and it suddenly hits you: where’s the playhead? Click
the Center Frame button (shown in Figure 7-36), and you will pop right over to frame 60. This is
a great “you are here” panic button that’s really shines with especially long timelines.
5.
Position the playhead at frame 70, and click the Modify Onion Markers button. Choose
Onion 5 from the drop-down menu. This puts two markers on frames 65 and 75 on either side of
the playhead, as shown in Figure 7-38. If you aren’t seeing them, return to the Modify Onion
Markers menu, and select Always Show Markers.
Figure 7-38. Onion skinning adds markers to either side of the playhead.
These markers extend five frames back from and ahead of the current position, which explains the name
of the Onion 5 setting. What they show are semitransparent views of those frames fading as they get
farther from the playhead—just like artwork on thin paper! Not only do they let you see back in time at
previous frames, but they also show artwork on future frames, which provides practical sequential context
for any moment in time.
6.
To actually see these onion skins, click the Onion Skin button. In this case, you’re seeing 11
“sheets,” including the one under the playhead (which is the darkest) and then five ahead and
behind.
7.
Click Modify Onion Markers again, and choose Onion 2, as shown in Figure 7-39. This
reduces your view to five “sheets,” as opposed to the previous 11. Drag the playhead slowly to
frame 65 and back. Notice that the onion markers move with you.
www.zshareall.com
Please purchase PDF Split-Merge on www.verypdf.com to remove this watermark.

